

Guangzhou Panyu Juda Car Audio Equipment SBAR21F20, SBAR21F20S User Manual
NS-SBAR21F20_19-0079_MAN_V1_ENG.fm Page 1 Monday, June 17, 2019 12:48 PM
Final Trim Size: 5.512 x 8.268 in. (140 x 210 mm)
V1
FINAL
FOR PRINT
2.1 Channel
Soundbar System
NS-SBAR21F20
USER GUIDE
Before using your new product, please read these instructions to prevent any damage.

NS-SBAR21F20_19-0079_MAN_V1_ENG.fm Page 2 Monday, June 17, 2019 12:48 PM
Contents
Introduction . . . . . . . . . . . . . . . . . . . . . . . . . . . . . . . . . . . . . . . . . . . . . . . . . . . . . . . . . . . .2
Getting started . . . . . . . . . . . . . . . . . . . . . . . . . . . . . . . . . . . . . . . . . . . . . . . . . . . . . . . . . .3
Important safety instructions . . . . . . . . . . . . . . . . . . . . . . . . . . . . . . . . . . . . . . . . . . . . 5
Package contents . . . . . . . . . . . . . . . . . . . . . . . . . . . . . . . . . . . . . . . . . . . . . . . . . . . . . . .7
Features . . . . . . . . . . . . . . . . . . . . . . . . . . . . . . . . . . . . . . . . . . . . . . . . . . . . . . . . . . . . . . . .7
Front view . . . . . . . . . . . . . . . . . . . . . . . . . . . . . . . . . . . . . . . . . . . . . . . . . . . . . . . . . .7
Side view . . . . . . . . . . . . . . . . . . . . . . . . . . . . . . . . . . . . . . . . . . . . . . . . . . . . . . . . . . .8
Back view . . . . . . . . . . . . . . . . . . . . . . . . . . . . . . . . . . . . . . . . . . . . . . . . . . . . . . . . . . . 8
Subwoofer. . . . . . . . . . . . . . . . . . . . . . . . . . . . . . . . . . . . . . . . . . . . . . . . . . . . . . . . . .9
Remote control . . . . . . . . . . . . . . . . . . . . . . . . . . . . . . . . . . . . . . . . . . . . . . . . . . . .10
Using the remote control . . . . . . . . . . . . . . . . . . . . . . . . . . . . . . . . . . . . . . . . . . . . . . .11
Installing the remote control batteries . . . . . . . . . . . . . . . . . . . . . . . . . . . . . .11
Setting up your soundbar . . . . . . . . . . . . . . . . . . . . . . . . . . . . . . . . . . . . . . . . . . . . . .12
Choosing your sound source . . . . . . . . . . . . . . . . . . . . . . . . . . . . . . . . . . . . . . .12
Connecting your soundbar . . . . . . . . . . . . . . . . . . . . . . . . . . . . . . . . . . . . . . . . .13
Connecting the AC power . . . . . . . . . . . . . . . . . . . . . . . . . . . . . . . . . . . . . . . . . .16
Connecting the subwoofer . . . . . . . . . . . . . . . . . . . . . . . . . . . . . . . . . . . . . . . . .17
Pairing the subwoofer with the soundbar if they are disconnected. . .18
Positioning the soundbar. . . . . . . . . . . . . . . . . . . . . . . . . . . . . . . . . . . . . . . . . . .18
Positioning the subwoofer . . . . . . . . . . . . . . . . . . . . . . . . . . . . . . . . . . . . . . . . .19
Mounting your soundbar on a wall (optional) . . . . . . . . . . . . . . . . . . . . . . .19
Using your soundbar . . . . . . . . . . . . . . . . . . . . . . . . . . . . . . . . . . . . . . . . . . . . . . . . . . .20
Maintaining your soundbar . . . . . . . . . . . . . . . . . . . . . . . . . . . . . . . . . . . . . . . . . . . . .21
Cleaning your soundbar and subwoofer . . . . . . . . . . . . . . . . . . . . . . . . . . . .21
Troubleshooting . . . . . . . . . . . . . . . . . . . . . . . . . . . . . . . . . . . . . . . . . . . . . . . . . . . . . . .21
Specifications . . . . . . . . . . . . . . . . . . . . . . . . . . . . . . . . . . . . . . . . . . . . . . . . . . . . . . . . . .24
Legal notices . . . . . . . . . . . . . . . . . . . . . . . . . . . . . . . . . . . . . . . . . . . . . . . . . . . . . . . . . . .24
ONE-YEAR LIMITED WARRANTY . . . . . . . . . . . . . . . . . . . . . . . . . . . . . . . . . . . . . . . . .26
Introduction
Congratulations on your purchase of an Insignia 2.1 Channel Soundbar
System. The soundbar is designed to be used with today’s flat panel TVs. It
features a variety of connections, including Bluetooth, and it can either be
mounted on the wall or placed on a TV stand.
This user guide explains how to correctly install, operate, and get the best
performance from your soundbar. Read this user guide carefully before
installing your system, and then keep it handy for quick reference.
2
www.insigniaproducts.com

RCA AUX IN jacks
Digital
Optical jack
USB port
AC in j ack
Back of the soundbar
NS-SBAR21F20_19-0079_MAN_V1_ENG.fm Page 3 Monday, June 17, 2019 12:48 PM
2.1 Channel Soundbar System
Getting started
To help you get started quickly, here are the basic steps to setting up your
soundbar. For more detailed information, follow the page numbers listed
below:
Connecting your sound source
Choose a sound source, such as a TV, DVD/Blu-ray player, or smartphone
to connect to your soundbar. The device you select will provide the sound
for the soundbar to play. For more detail, See Choosing your sound source
on page 12.
Connecting your soundbar
Connect your sound source to your soundbar. You may need to find or
purchase the correct cable, depending on the connection. For more
detail, see Connecting your soundbar
www.insigniaproducts.com
on page 13.
3
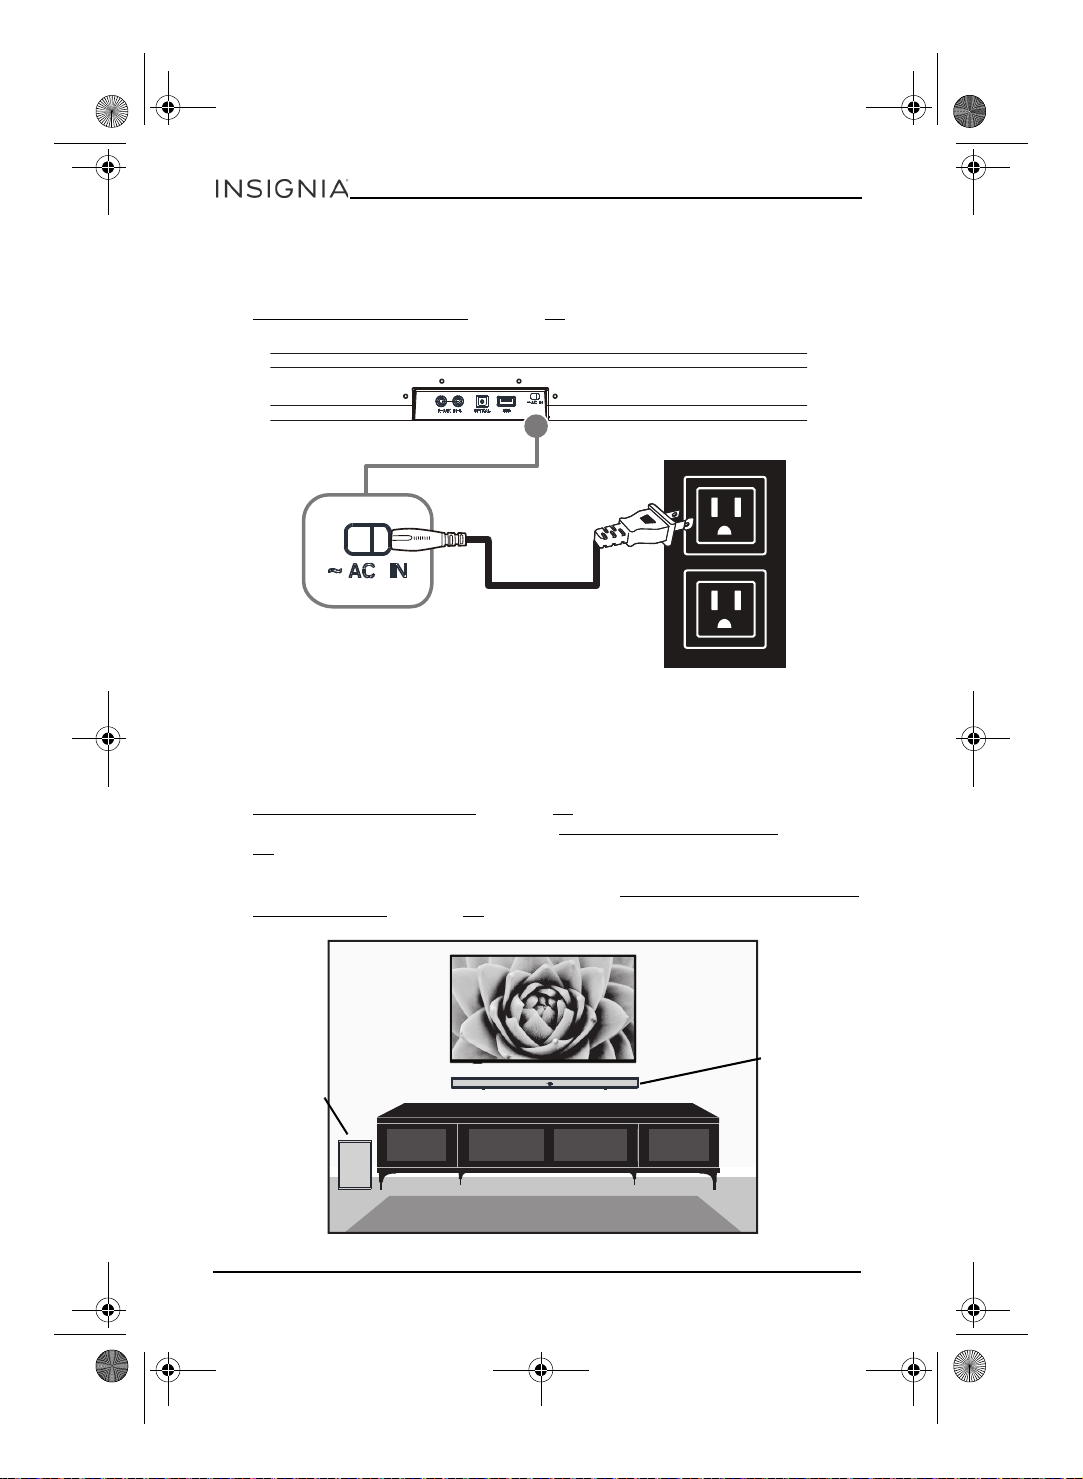
Back of the soundbar
You can set your
soundbar on a flat
surface or mount
it on a wall.
Place the subwoofer
against a wall or in a
corner of the room.
NS-SBAR21F20_19-0079_MAN_V1_ENG.fm Page 4 Monday, June 17, 2019 12:48 PM
Connecting the AC power
Plug your soundbar into an AC power outlet. For more detail, see
Connecting the AC power on page 16.
NS-SBAR21F20
Connecting and positioning your subwoofer and positioning
your soundbar
(Optional) To enhance the low frequency sounds from your sound source,
connect the included subwoofer using Bluetooth. For more detail, see
Connecting the subwoofer
best enjoyment. For more detail, see Positioning the subwoofer
19
.
You can either place the soundbar on a cabinet or mount it on the wall
(optional) under the TV. For more detail, see Mounting your soundbar on
a wall (optional) on page 19.
4
on page 17. Then position your subwoofer for
on page
www.insigniaproducts.com
NS-SBAR21F20_19-0079_MAN_V1_ENG.fm Page 5 Monday, June 17, 2019 12:48 PM
2.1 Channel Soundbar System
Important safety instructions
1 Read these instructions.
2 Keep these instructions.
3 Heed all warnings.
4 Follow all instructions.
5 Do not use this apparatus near water.
6 Clean only with a dry cloth.
7 Do not block any ventilation openings. Install in accordance with the
manufacturer's instructions.
8 Do not install near any heat sources such as radiators, heat registers,
stoves, or other apparatus (including amplifiers) that produce heat.
9 Do not defeat the safety purpose of the polarized or grounding-type
plug. A polarized plug has two blades with one wider than the other.
A grounding type plug has two blades and a third grounding prong.
The wide blade or the third prong are provided for your safety. If the
provided plug does not fit into your outlet, consult an electrician for
replacement of the obsolete outlet.
10 Protect the power cord from being walked on or pinched particularly
at plugs, outlets, and the point where they exit from the apparatus.
11 Only use attachments/accessories specified by the manufacturer.
12 Use only with the cart, stand, tripod, bracket, or table
specified by the manufacturer, or sold with the
apparatus. When a cart is used, use caution when
moving the cart/apparatus combination to avoid injury
from tip-over.
13 Unplug this apparatus during lightning storms or when unused for
long periods of time.
14 Refer all servicing to qualified service personnel. Servicing is required
when the apparatus has been damaged in any way, such as when the
power-supply cord or plug is damaged, liquid has been spilled or
objects have fallen into the apparatus, the apparatus has been
exposed to rain or moisture, does not operate normally, or has been
dropped.
15 To reduce the risk of fire or electric shock, do not expose this device to
rain, moisture, dripping, or splashing, and no objects filled with
liquids, such as vases, shall be placed on it.
16 An apparatus with a three-prong, grounding-type plug is a Class I
apparatus, which needs to be grounded to prevent possible electric
shock. Make sure that you connect any Class I device to a
grounding-type, three-prong outlet.
17 DO NOT overload wall outlets or extension cords beyond their rated
capacity as this can cause electric shock or fire.
18 The wall plug is the disconnecting device. The plug must remain
readily operable.
www.insigniaproducts.com
5
NS-SBAR21F20_19-0079_MAN_V1_ENG.fm Page 6 Monday, June 17, 2019 12:48 PM
19 No naked flame sources, such as lighted candles, should be placed on
the apparatus.
20 The ventilation should not be impeded by covering the ventilation
openings with items, such as newspapers, tablecloths, curtains, etc.
21 Batteries should not be exposed to excessive heat such as sunshine,
fire, or the like.
WAR NIN G: Danger of explosion if the remote control batteries are incorrectly
replaced. Replace only with the same or equivalent type.
22 Keep new and used batteries away from children.
23 If the battery compartment does not close securely, stop using the
product and keep it away from children.
24 If you think batteries might have been swallowed or placed inside any
part of the body, seek immediate medical attention.
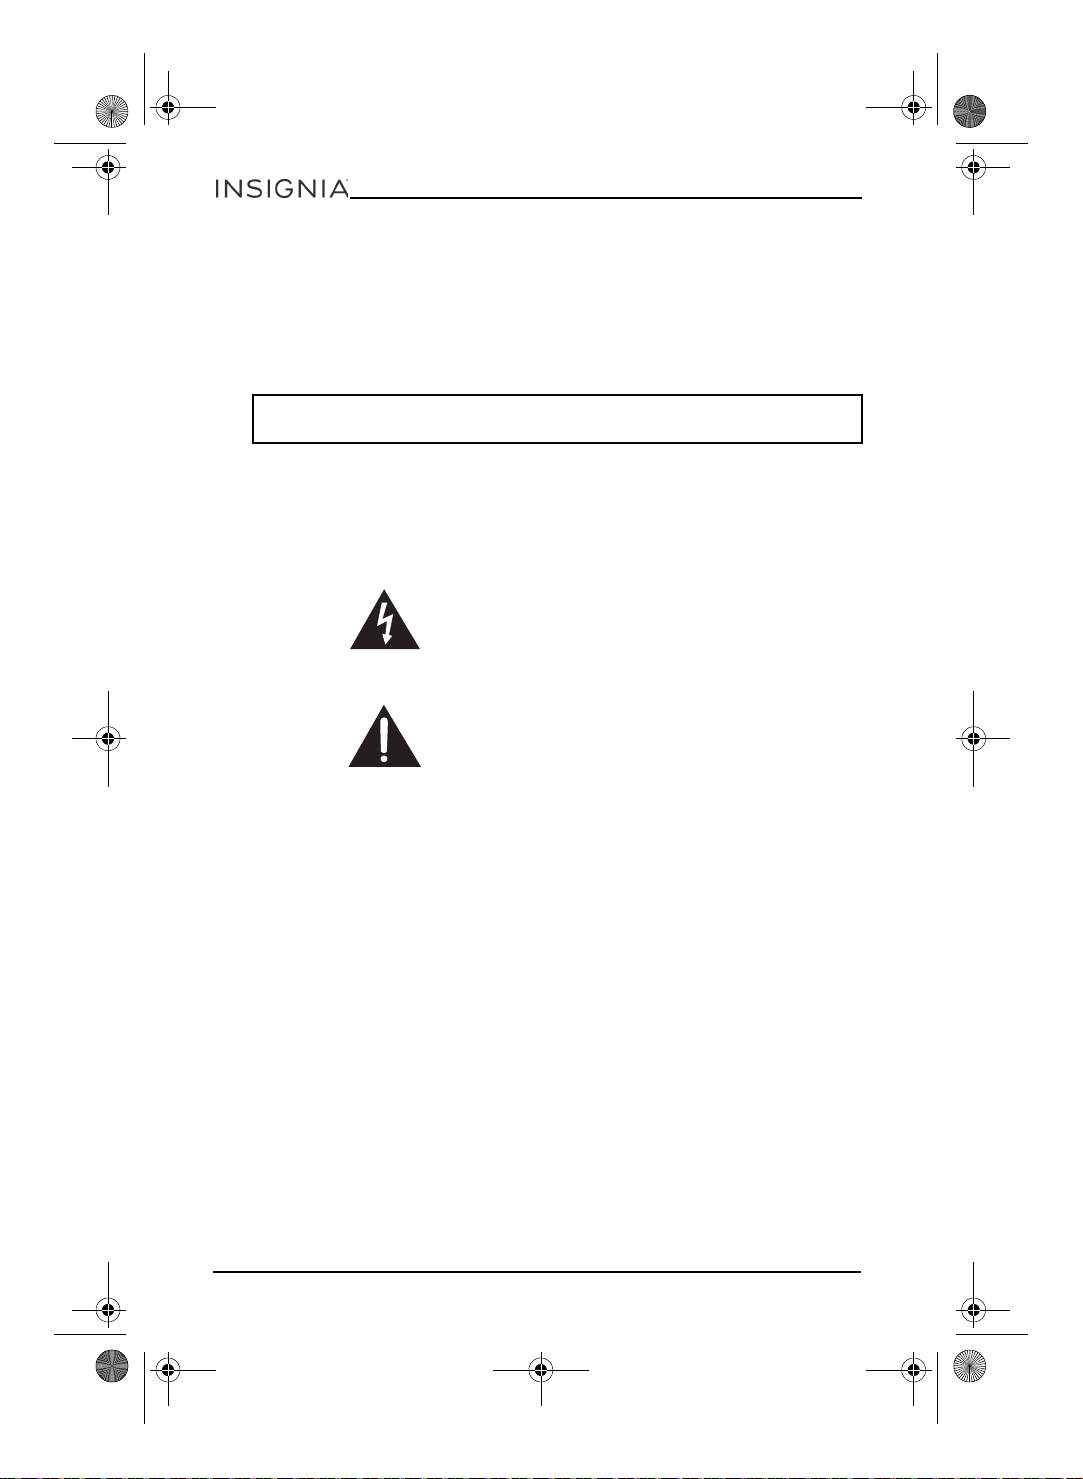
The lightning flash with arrowhead symbol within an
equilateral triangle is intended to alert the user to the
presence of uninsulated “dangerous voltage” within the
product’s enclosure that may be of sufficient magnitude
to constitute a risk of electrical shock to persons.
NS-SBAR21F20
The exclamation point, within an equilateral triangle, is
intended to alert the user to the presence of important
operating and maintenance (servicing) instructions in
the literature accompanying the product.
Placement
• The soundbar cabinet is made out of plastic and is therefore sensitive
to extreme temperatures and humidity. Do not put it in locations
subject to direct sunlight or in humid places, such as near an air
conditioner, humidifier, bathroom, or kitchen.
• Do not put water or other liquids close to the soundbar. If liquid is
spilled on top of the soundbar, it may be damaged.
• The soundbar should be placed on a sturdy, flat surface that is free
from vibration, or mounted on a wall. Do not put the soundbar on an
uneven or unstable surface, where it may fall and cause damage.
6
www.insigniaproducts.com

Soundbar
Remote Control
AC Power Cord (for subwoofer)
RCA Audio Cable
Subwoofer
Batteries (2-AAA)
Mounting Screws and
Wall Anc hors
Mounting Template
3.5mm to RCA Cable adapter
Before using your new product, please read these instructions to prevent any damage.
USER GUIDE
2.1 Channel
Soundbar System
NS-SBAR21F20
User Guide
NS-SBAR21F20_19-0079_MAN_V1_ENG.fm Page 7 Monday, June 17, 2019 12:48 PM
2.1 Channel Soundbar System
Package contents
Features
Front view
# ITEM DESCRIPTION
1 Status
indicator
2 Remote
control
sensor
Different color LEDs indicate the following:
• Red - Standby mode
• Green - On in digital optical mode
• Yellow - On in AUX IN mode
• Blue - On in Bluetooth mode (blinks while pairing)
• Purple - On in USB mode
Detects signals from the remote control.
www.insigniaproducts.com
7

NS-SBAR21F20_19-0079_MAN_V1_ENG.fm Page 8 Monday, June 17, 2019 12:48 PM
Side view
# ITEM DESCRIPTION
1 (Power)
button
2 + (volume up)
button
3 - (volume down)
button
4 (sound
source selector)
Press to turn on the soundbar. The status indicator turns green,
yellow, blue, or purple to indicate that the soundbar is on and
what input is selected.
Press again to return the soundbar to standby mode. The status
indicator turns red.
Press to increase the volume of the soundbar.
Press to decrease the volume of the soundbar.
Press to cycle through the available sound sources:
• Green - Digital optical
• Yellow - AUX IN
•Blue - Bluetooth
•Purple - USB
Press and hold for three seconds to pair the soundbar with the
subwoofer if they are disconnected.
NS-SBAR21F20
Back view
# ITEM DESCRIPTION
1 AUX IN jacks Connect an RCA audio cable to these jacks, red to red
2 DIGITAL OPTICAL
jack
8
and white to white.
If your TV (or other audio source device) has an Optical
OUT jack, connect a digital optical cable (not included)
to your source device and this jack. Make sure that the
sound output from the source is set to PCM format.
www.insigniaproducts.com
NS-SBAR21F20_19-0079_MAN_V1_ENG.fm Page 9 Monday, June 17, 2019 12:48 PM
2.1 Channel Soundbar System
# ITEM DESCRIPTION
3 USB port You can play WAV files from a USB source and charge the
4 AC IN jack Connect the AC power cord to this jack to power the
USB device with the 0.5 A connection output.
soundbar.
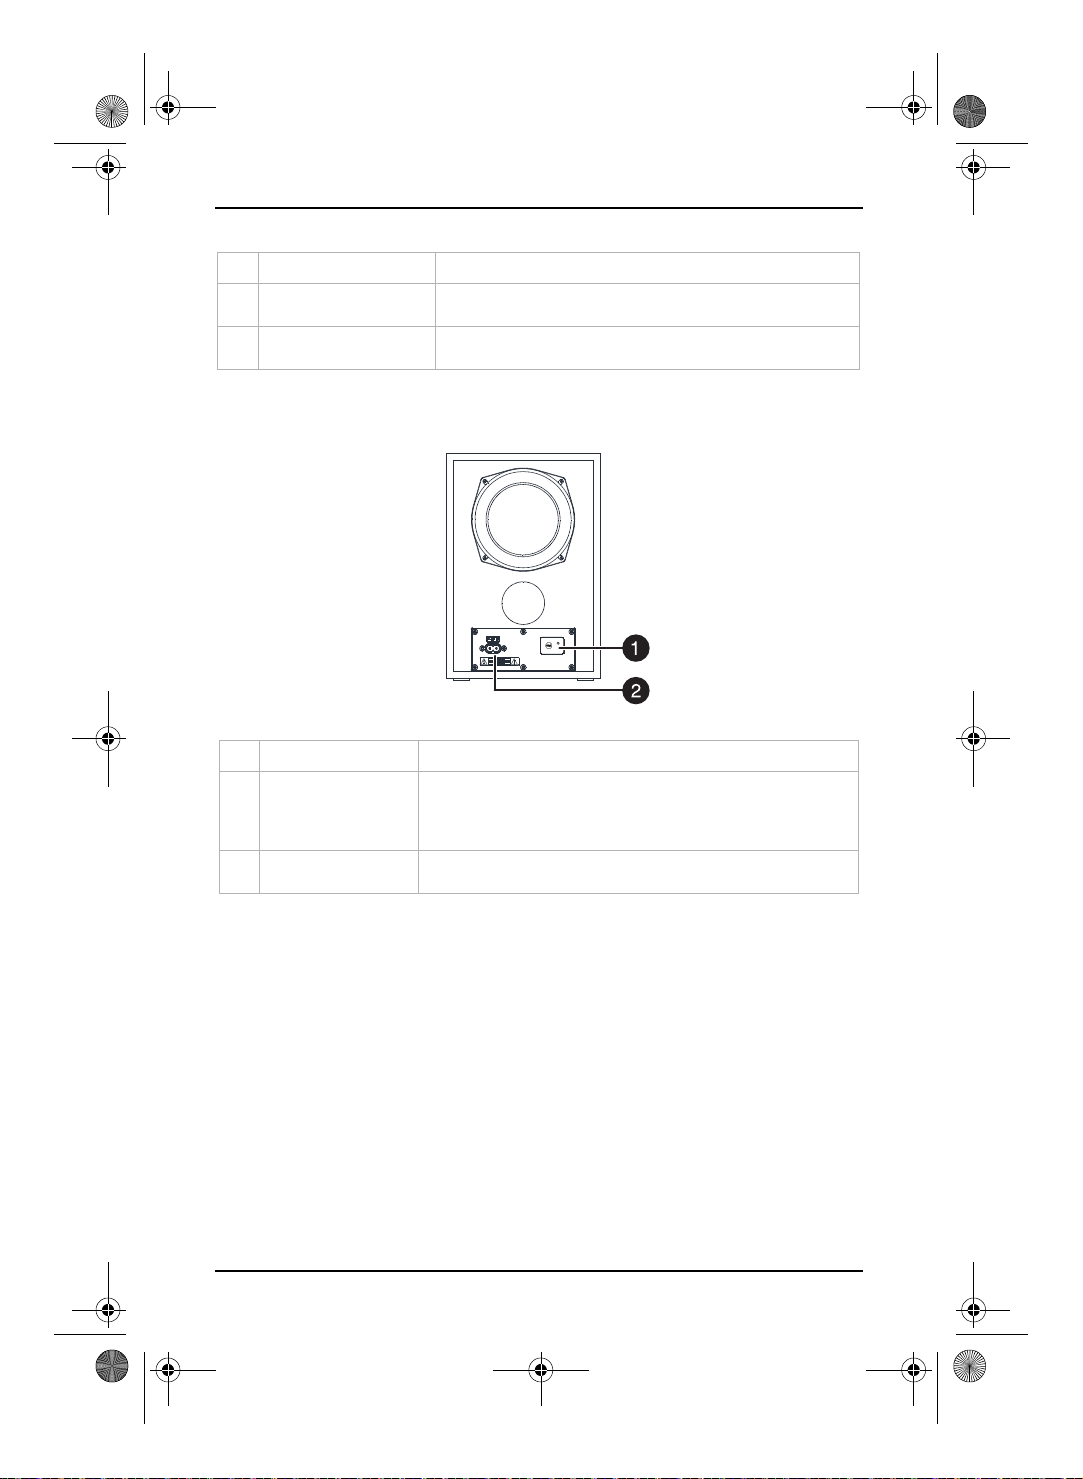
Subwoofer
# ITEM DESCRIPTION
1 PA IR button and
indicator LED
2 AC IN jack Connect the AC power cord to this jack to power the
Press and hold for three seconds to disconnect or
re-connect with the soundbar. The indicator LED blinks
turquoise in pairing mode and is solid turquoise when
paired.
subwoofer.
www.insigniaproducts.com
9
 Loading...