

GT-Vision GXCAM Quick Start Manual
GT-Vision
GXCAM Quick Start
Guide
European HQ:
GT Vision Ltd.
Hazel Stub Depot
Camps Road
Haverhill
Suffolk
CB9 9AF
UK
Tel: +44 (0)1440 714737
Fax: +44 (0)1440 709421
e-mail: eurosales@gt-vision.com
Web: www.gt-vision.com
www.gxoptical.com
www.gxmicroscopes.com
N America HQ:
10205 Easterday Court
Hagerstown
MD 21742
USA
Tel: +1 240 235 4118
Fax: +1 240 235 4120
e-mail: americasales@gt-vision.com
Web: www.gt-vision.com
www.gxmicroscopes.com
1
Getting Started
Introduction
This manual describes the most important aspects of the GXCAM camera and software installation procedure in the
simplest form.
Please take a few moments to read through this manual before you begin using the camera and programs,
because it should answer some questions that you may have. Please contact GT Vision should you encounter
difficulty at any time, or if you have any questions.
System Requirements
To use the camera and camera control programs, you need:
• A Intel Pentium 4 2.6GHz or higher processor for use with Microsoft Windows XP
• GXCAM Camera
• A fully powered USB2 port
• 512MB RAM
• High quality, modern Graphics Card
• Windows XP or 2000 or Vista
• HDD 1G unused
• Display memory 32MB
• Large, good quality monitor (we recommend 17” minimum LCD)
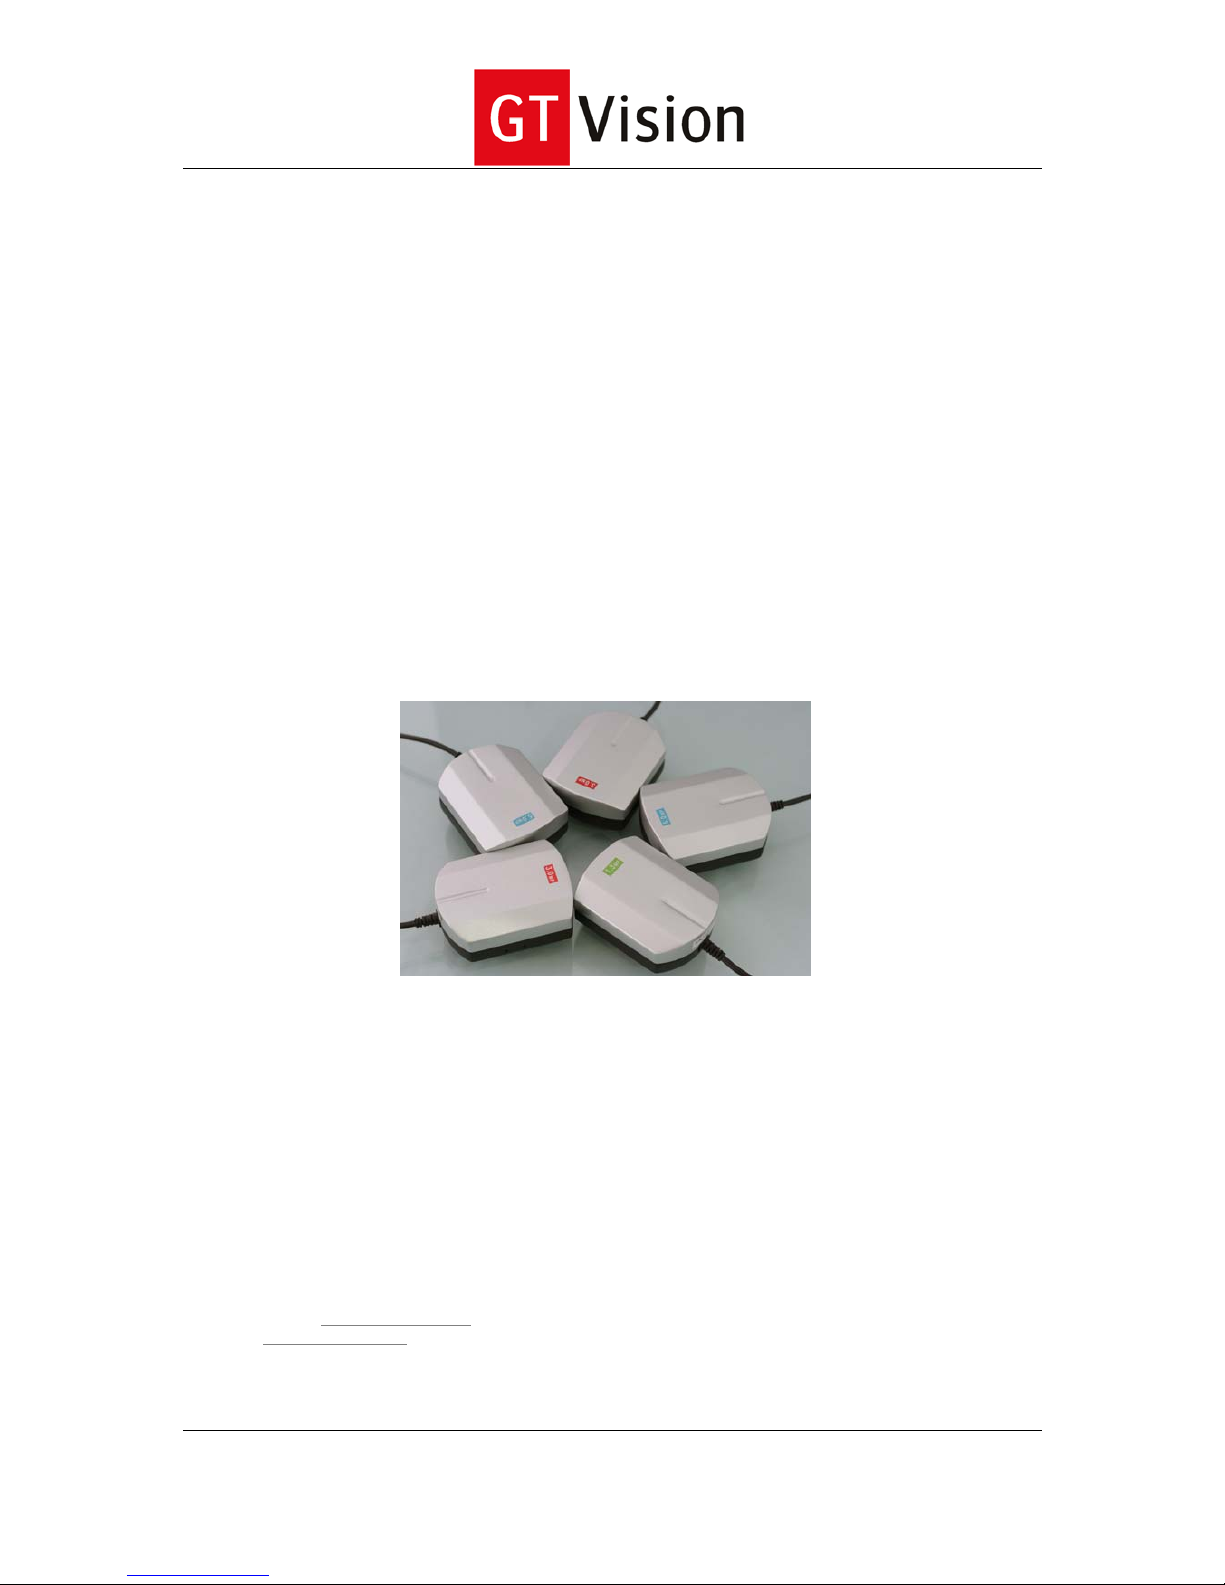
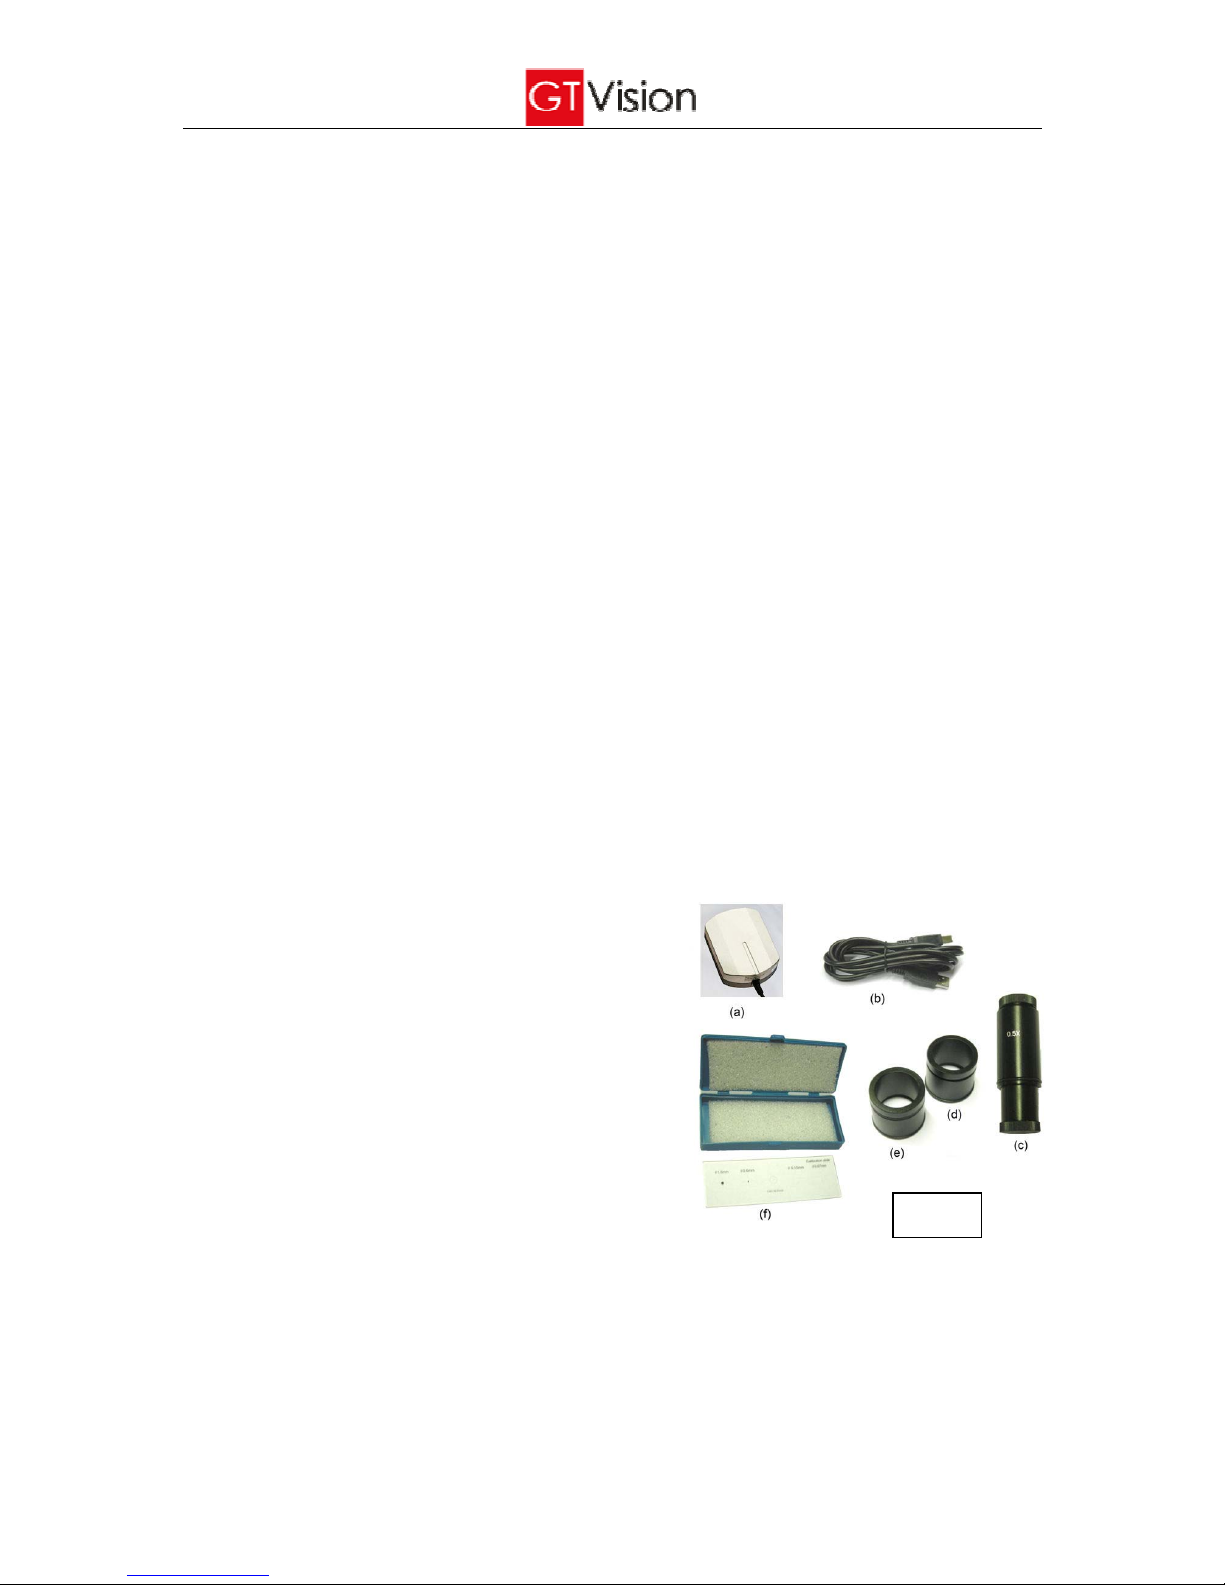
Accessories Included (Figure 1)
• GXCAM camera (a)
• Camera Driver and software CD for the control of camera
on a PC
• USB cable (b) for connection of PC and GXCAM camera
• 0.5X C-mount adaptor (c) for mounting the camera to an
eyepiece (Diameter 23.2mm, normally for biological
upright microscopes)
• Eyepiece adaptors (d) and (e) for stereo microscopes
(Diameter 30mm and 30.5mm respectively, used together
with the 0.5X C-mount adaptor)
• Graticule (f), for measurement calibration
• Quick Start Guide
Fig 1

2
Installation Procedure
PLEASE NOTE Underneath the black screw-on cover on the front/bottom of your camera you may find a film of
protective plastic over the camera sensor. With the sensor pointing down remove this film by pulling the tag.
Installing your GXCAM camera and associated software programs should only take a few minutes. Please follow
the steps below:
• Installing the camera onto your microscope or lens and the software for your camera into your PC
1. Before you attach the camera always follow these basic rules when handling your camera. When you
unscrew the camera cover or when you attach a camera adapter to the camera or when you are
generally manipulating the camera ALWAYS
hold the face of the camera (ie the hole with the chip inside)
pointing vertically downwards, no matter how uncomfortable or awkward it may feel. If you do not do this,
tiny particles of dust or swarf from threaded fittings will definitely land on the chip surface and, especially in
microscopes, these will be permanently visible in your images. They can be extremely difficult to remove.
We recommend that you become obsessive about the cleanliness of your camera, it certainly pays off!
Always place a cap on the camera when not in use and unattached.
2. Attach the camera to your microscope, telescope or lens using the appropriate adapter. Do not
connect the camera to your PC yet.
3. Insert the disk which contains the GXCAM camera driver and GXCAPTURE software
4. Connect the camera to a convenient USB2 port, make a note as to which port you are using (changing
ports requires re-installation of the driver). It is important that the USB port has sufficient power. The
GXCAM draws power from the USB2 port and draws less than the standard amount of power specified for
a USB2 port. However we have found, very occasionally, that some ports have insufficient power usually
resulting in a black image in the GXCAPTRE application. Disconnecting other USB devices sometimes
increases the power available to a port.
3
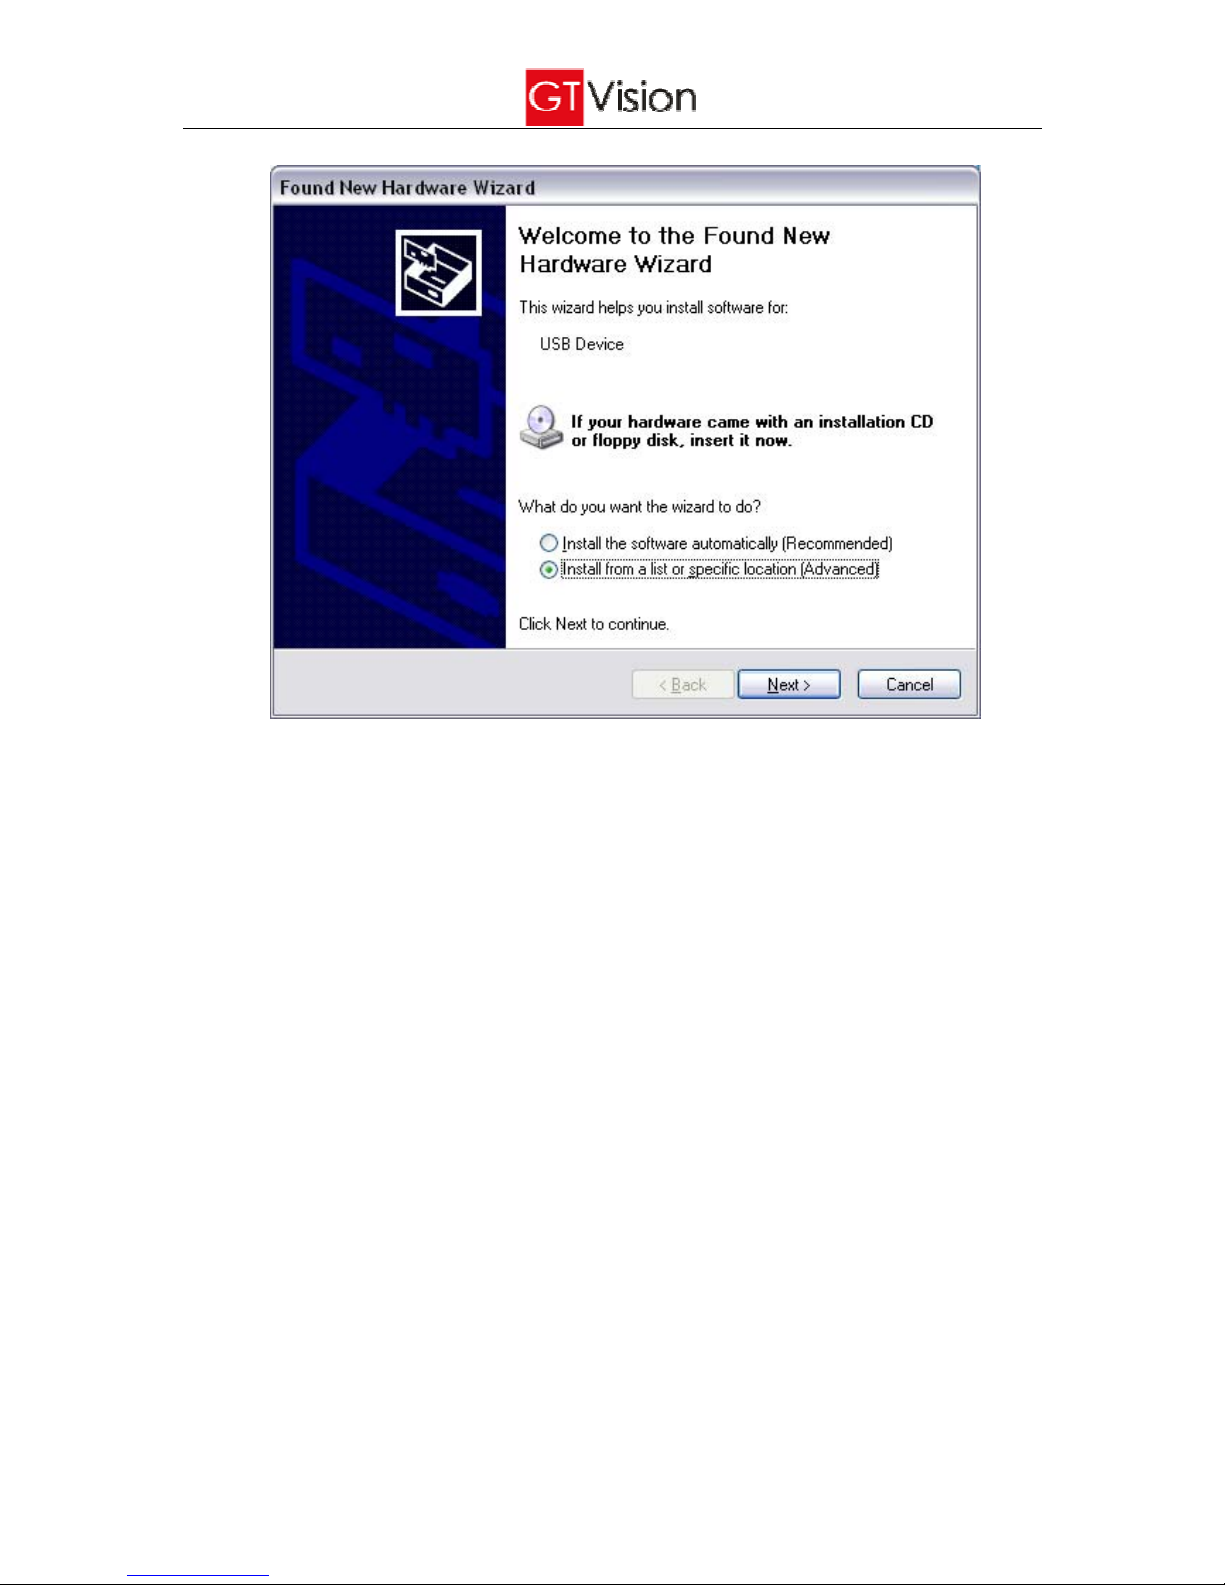
5. The Operating System should automatically detect the camera.
6. In the driver installation window, it is best to select the location of the driver yourself and point the driver
installation to your CD drive and then to the ‘Drivers’ folder on the CD (have disk).
4
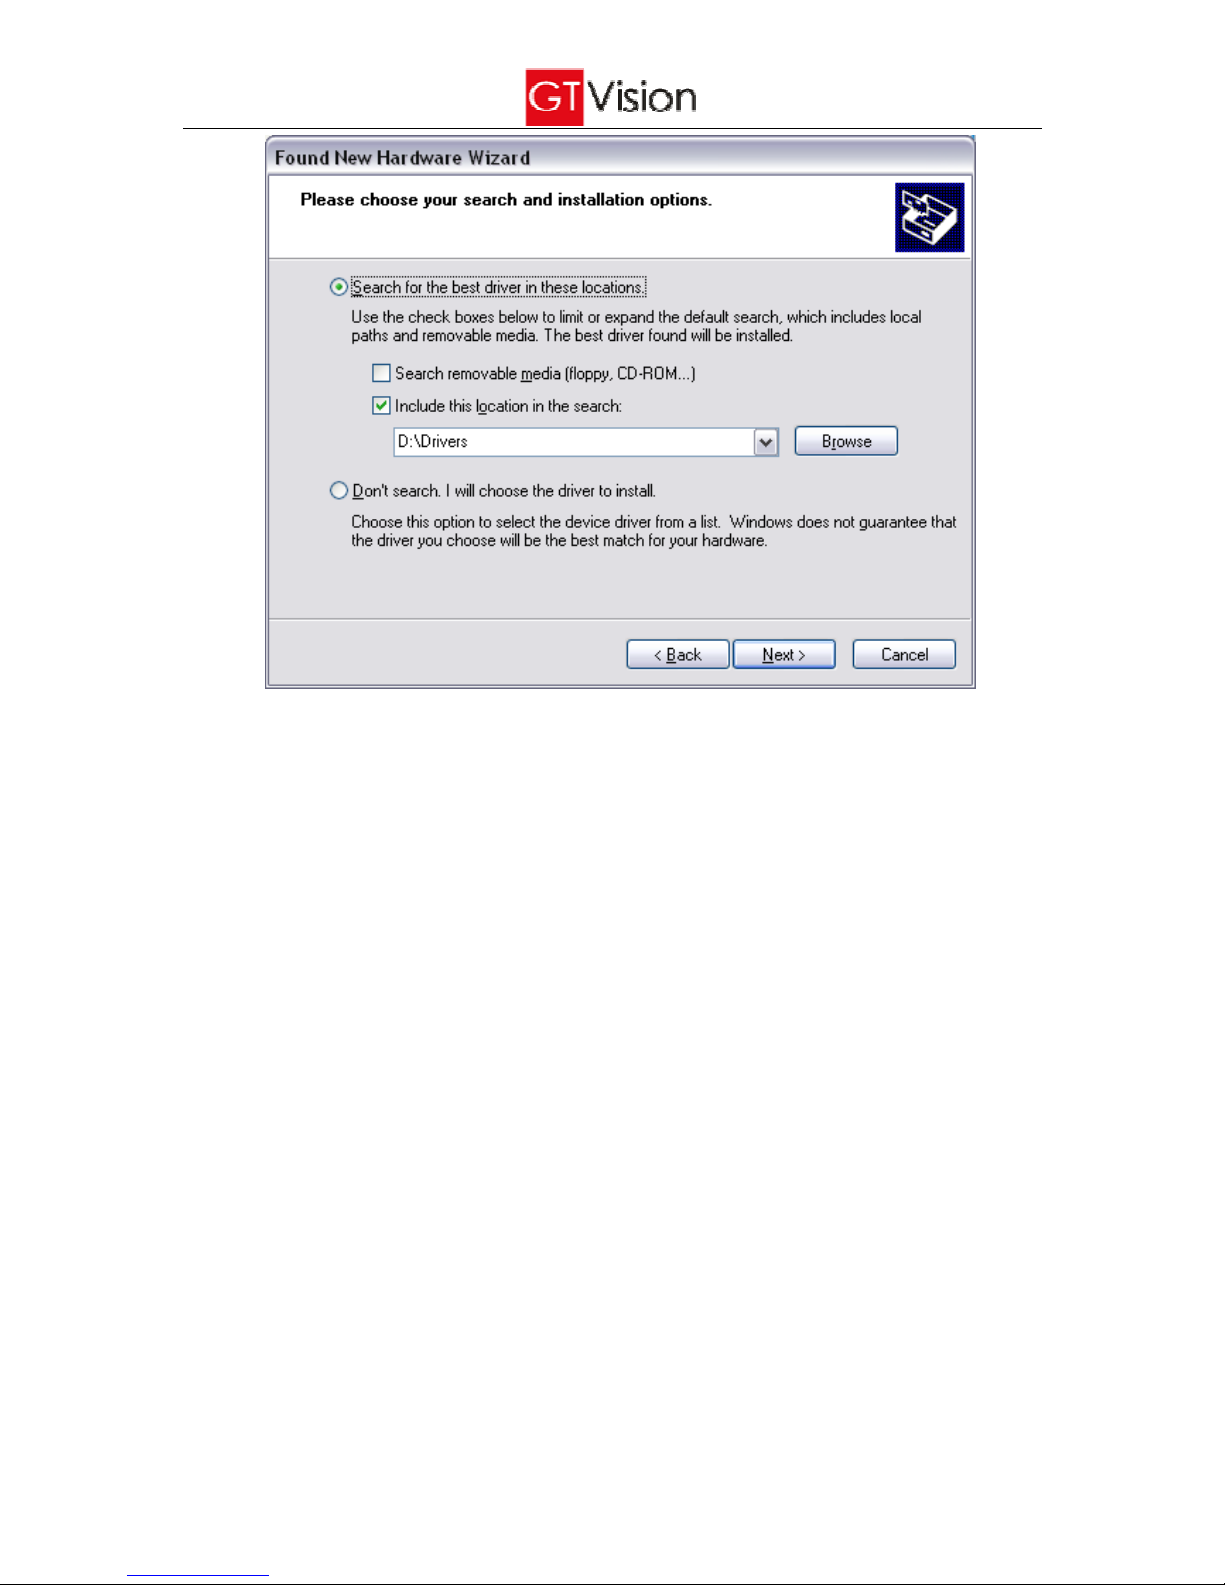
7. (Automatic installation can be used but it may go wrong if you already have previously installed an
imaging device, in which case it may automatically find the wrong driver resulting in a range of effects
when trying to use the camera, this is the source of nearly all support calls regarding USB camera
installations.)
8. Ignore the warning message and ‘continue anyway’. When the installation is completed, click ‘Finish’.
9. If the Operating System cannot detect the camera automatically, open the ‘Device manager’ from the
Windows ‘Control Panel’, in the ‘Universal Serial Bus controllers’ term find ‘USB2.0 Camera’ and right click it.
10. From the right-click menu, select the first option ‘Update driver’.
11. In the driver installation window, select the location of the drivers to be installed (see 6) and click ‘Next’.
12. Ignore the warning message and ‘continue anyway’. When the installation is completed, click ‘Finish’.
13. Restart your computer (recommended).
Note:, Reinstallation of driver may be needed when the camera is attached to a different USB port.
 Loading...