


Manual
G-kit Bonanza 0,35m2
___________________________________________________________________
Installation instructions
www.g-tools.nl
Versie: Eng 2020-4
Manual
G-kit Bonanza 0,35m2:
Specifications:
Material: aluminium extrusion profiles
patented plastic g-tools corner connectors
moist and fire resistant PVC/XPS sandwich panels
Dimensions: external (h x w x d): 176 X 61,5 X 61,5cm
internal (h x w x d) : 161 X 58,5 X 58,5cm
Items below are only delivered when you’ve bought a complete version:
Timer Legrand Omnirex
minimum switch on period 15 min.
230V, 50Hz, 16A
maximum capacity 3680W
Ventilator Winflex 125 VKO in line axial ventilator, 185m3 / hour build inside silencer
Lighting Lucilux 250 Watt, Roadrunner reflector, Sunkraft 250 Watt,
G-bars or G-leds led grow light
Filter maximum air flow: 240 m3/hour
optimal air flow: 160 m3/hour
height: 250mm
diameter filter: 190mm
diameter flange: 125mm
weight: 1,5kg
Warranty procedure:
G-tools offers a 2 years warranty on all components of the Bonanza except bulbs and filters. Please contact your
G-tools rep to explain the problem as there might be an easy fix without having to replace a part.
Maintenance and safety regulations:
The G-Kit Bonanza is a maintenance free object. Never the less there are a few factors to take into account.
- Only use grounded wall outlets to plug the Bonanza in.
- Do not plug the Bonanza into the wall outlet untill the machine is fully assembled and you have read the
instructions.
- Avoid contact of water with all electrical equipment
- When changing the light bulb always unplug the Bonanza from the wall outlet.
- Make sure the light bulb has had plenty of time to cool of before touching it.
- After screwing in the HPS bulb wipe finger prints of the bulb with a clean dry cloth to ensure its full life.
- Wait 20 minutes after the light has turned of before turning it on again.
- It’s recommended that no more than 1 G-Kit Bonanza goes on a single 15A breaker. We also recommend the
Bonanza is plugged into a surge protector. This will protect the machine from any power spikes due to storms,
power outages, etc.
www.g-tools.nl

Manual
G-kit Bonanza 0,35m2:
Box A: top + bottom panel–box 62 x 62 x 30cm
Amount Description Length (mm) Width
1 roof panel in alu frame( with timer, 615 615
fan, filter, silencer and light*)
1 bottom panel in alu frame 615 615
4 aluminium flat profile middle 534
4 aluminium angle profile 505
4 adjustable feet 80
4 connector piece 4-way
1 handle with screws and washers
3 air inlet
1 plug*
3 locks
1 cable through entry
1 flange 125mm
Box B: panels – box 120 x 73 x 5cm
Amount Description Length (mm) Width
2 side panels top left and right 1028 563
1 back panel top with: 1028 563
-1 x hole 121mm for the air exit
-3 x hole 76mm for the air inlets
-1 x hole 21mm for the cable through
1 door top with sealing strip with: 1028 563
-2 x hole 19mm for the locks
-2 x hole for the door handle
-4 x hole for mounting the hinges
1 door bottom with sealing strip with: 533 563
-1 x hole 22mm for the lock
-4 x hole for mounting hinges
4 aluminium angle profile 1000
Total packing 2 boxes (without box or pallet)
Items marked with a * are only part of a complete version.
www.g-tools.nl
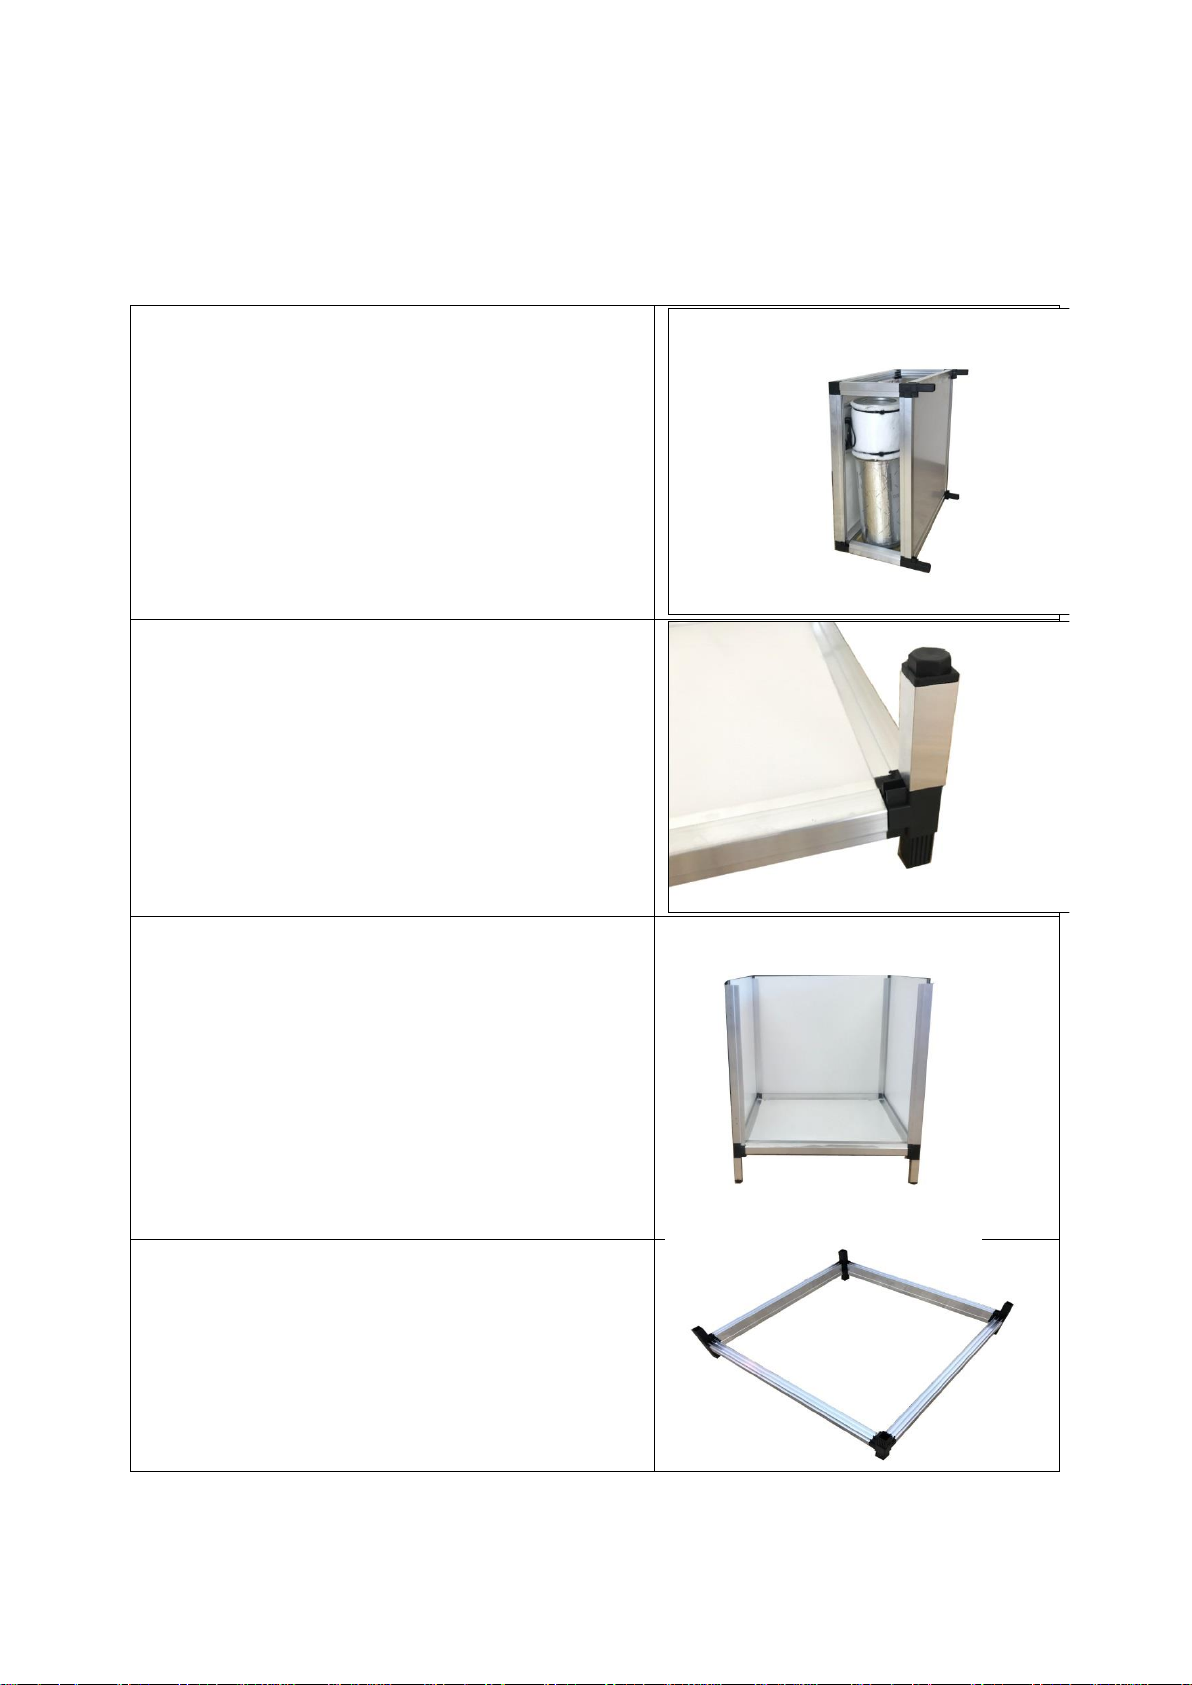
Manual
To prevent transport damage the bottom and roof of the
cabinet are connected with 4 aluminium profiles.
These profiles serve no further purpose and can be thrown
away.
Push the 4 aluminium adjustable feet on the plastic insert
connectors underneath the bottom panel.
Place the 4 aluminium angle profiles (50,5cm) on the 4
connecters and place the side and back panels. The angle
profile on the right front side should have it’s double lips
on the front side. The latch of the lock falls behind the
double lips.
Make a ring with the 4 flat profiles (53,4cm) and the 4-way
connectors.
G-kit Bonanza installation instructions:
1. General:
www.g-tools.nl

Manual
Place the ring on top of the 4 profiles and push tight.
Place the 4 aluminium angle profiles (100 cm) on the
connecters and place the side panels and the back panel
with the holes. The angle profile on the right front side
should have its double lips on the front side. The latch of
the lock falls behind the double lips.
Place the roof panel (with the filter, light and timer) on top
of the angle profiles and push tight.
Mount the 3 G-tools air inlets (see chapter 2)
Pull the electricity cord through the cable through entry.
(only when you’ve bought the complete version)
www.g-tools.nl

Manual
Mount the cable through entry in the 21mm hole in the
back panel of the cabinet and mount the supplied plug.
Push the flange through the hole in the back panel in to
the silencer.
From outside to within.
Hang the lamp, set the timer (chapter 3) and place the
doors (chapter 3 and 4)
www.g-tools.nl

Manual
Overview installation components:
2. The air inlets
Each air inlet consists of 2 parts.
Push part 1 inwards through the hole in the back.
Push part 2 on part 1 and twist & lock.
3. Setting the timer
a. Set the switch on the right side of the timer at the clock symbol.
b. Set the current time by turning the dial of the timer.
c. The pins in the outer ring mean:
Positioned outside – OFF
Positioned inside – ON
Set the timer for lights ON by pushing the pins inward
www.g-tools.nl

Manual
4. Installing the locks
Before the doors can be installed the locks have to be mounted. The locks are pushed through the 19 mm holes
on the sides of the doors first. The top door has two locks and the bottom door one. The side with the black
sealing strip is the inside of the door. The side of the lock with the keyhole should be on the outside of the door.
On the inside of the door the locks are fixed with the supplied nut.The latch should be fixd horizontally, pointing
outward when the lock is in it’s locked position. So when the key can be pulled from the lock.
The front side and back side of the doors
5. Installing the doors
At the left side of each door are 4 holes of 1 mm. This is where the hinges should be fixed with the 10 mm
screws. Before mounting the doors the cabinet should first be leveled using the adjustable feet. Hold the doors in
their position and screw the hinges in the aluminium profiles with a cordless drill and the supplied self tapping
screws .This can best be done with the help of a second person that holds the door in it’s position while the other
person tightens the screws.
www.g-tools.nl

Manual
6. Connecting the wall socket
The wire of the wall socket mounted at the ceiling of the cabinet has no plug yet. Before it can be mounted the
cable through (picture 7) first has to be installed in the 22mm hole in the back panel of the cabinet. Now the
cable can be pulled through and the plug mounted.
picture 7
Frequently asked questions (F.A.Q.)
How much will my electricity-bill go up?
For a G-kit Bonanza 0,35m2 model with 250 W HPS:
When the lights are on for an average of 14/hours /day: approx.. €25,-/ month
For a G-kit Bonanza 0,35m2 model with G-bars 100W:
When the lights are on for an average of 14/hours /day: approx.. €9,-/ month
Won't the cabinets get too warm?
Normally it gets 5 to 6 degrees warmer inside the cabinet than outside.
It's best to have it in a room where you can leave a window open.
If you have more than one G-Kit in a room make sure that the light of one switches on when the light of the
other switches off (the lights are on 12 hours a day).
The humidity is too low, what to do?
Especially in the beginning it is important the plant get enough water. To spray them with water in the first two
weeks is the best.
Is it possible to put a G-kit in a barn or garage?
No problem, make sure there is enough fresh air and keep it warm in the winter.
Do I get warranty?
There's a one year warranty on all electrical equipment except for the light-bulb and filter. New parts shall be
send to you after the broken parts have been received at the distribution center.
Contact:
For all your questions visit our website www.g-tools.nl or send an e-mail to: info@g-tools.nl
WEEE registration number: DE 68161470
www.g-tools.nl

Manual
The symbol of the crossed-out wheelie bin on electrical and electronic equipment means that it mustn’t be
removed in household waste. There are free collection points for the return of WEEE available nearby. Please
inquire at your city or municipality about the addresses. You can also contact us regarding other options to return
old equipment. By separate collection of WEEE, the reuse and recycling of old equipment are made possible and
any negative impact on the environment and human health due to hazardous substances in old equipment is
eliminated. You are responsible for the erasure of any private data which could still be stored on old equipment.
Further information can be found on www.elektrogesetz.de.
—— DEUTSCH ——
Das Symbol des durchgestrichenen Mülleimers auf einem Elektro- oder Elektronikgerät besagt, dass dieses am
Ende seiner Lebensdauer nicht im Hausmüll entsorgt werden darf. Zur kostenfreien Rückgabe stehen in Ihrer
Nähe Sammelstellen für Elektro- und Elektronikaltgeräte zur Verfügung. Die Adressen erhalten Sie von Ihrer
Stadt- bzw. Kommunalverwaltung. Sie können sich auch an uns wenden, um sich über weitere, von uns
geschaffene Rückgabemöglichkeiten zu informieren. Durch die getrennte Sammlung von Elektro- und
Elektronikaltgeräten soll die Wiederverwendung, die stoffliche Verwertung bzw. andere Formen der Verwertung
von Altgeräten ermöglicht sowie negative Folgen bei der Entsorgung der in den Geräten möglicherweise
enthaltenen gefährlichen Stoffe auf die Umwelt und die menschliche Gesundheit vermieden werden. Sie sind
verantwortlich für die Löschung von möglicherweise auf den zu entsorgenden Altgeräten vorhandenen
personenbezogenen Daten. Weitere Informationen finden Sie auch auf www.elektrogesetz.de.
www.g-tools.nl
 Loading...