

Page 1
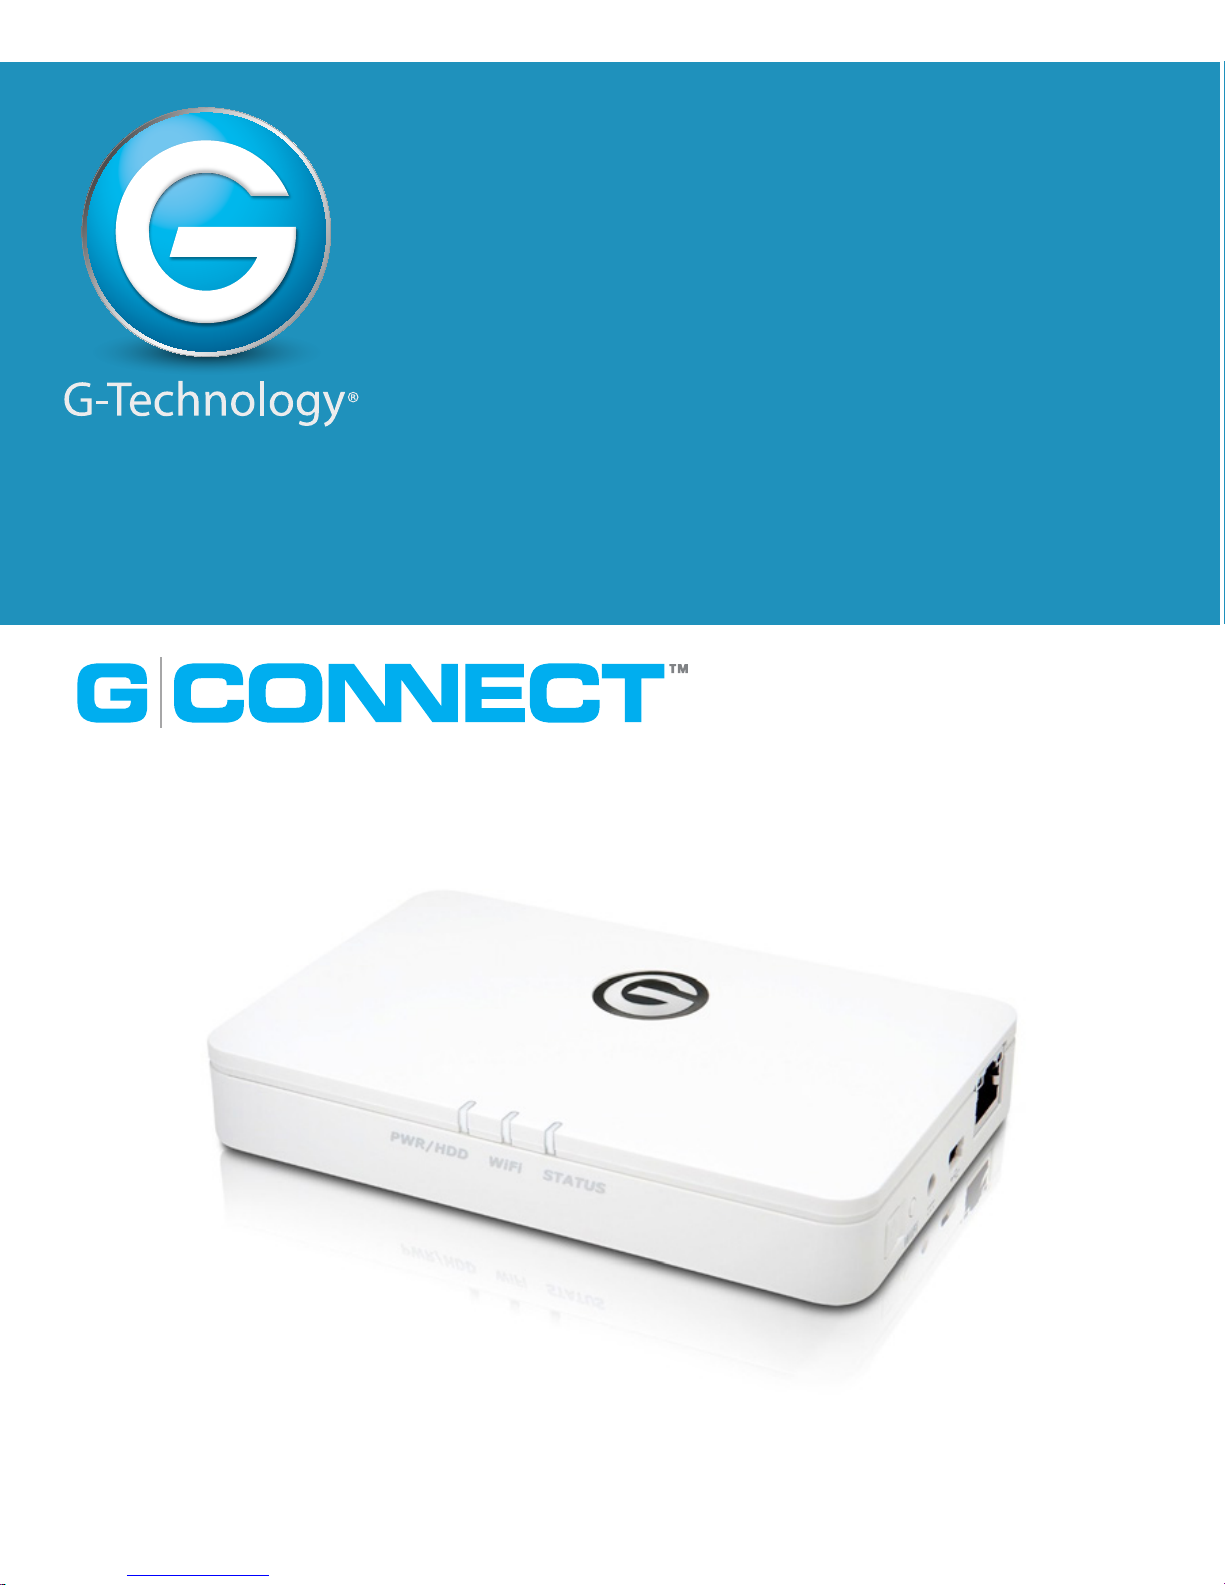
Wireless Storage for your iPad® or iPhone®
PRODUCT MANUAL
g-technology.com
Page 2

p.2
Table of Contents
Safety & General Use ..........................................3
Safety Precautions ...........................................................4
FCC Statement...................................................................5
Removing the Battery for Recycling .......................... 7
Welcome to G-CONNECT ................................... 8
Introduction ....................................................................... 9
System Requirements .................................................. 10
Hardware Specications ............................................ 11
Setting Up G-CONNECT ...................................13
STEP 1: Turn on G-CONNECT .................................... 14
STEP 2: Connect to Wireless Network .................... 14
STEP 3: Setup Your Device .......................................... 16
Add Content to G-CONNECT ..................................... 19
Copy Content in USB Mode ....................................... 20
Copy Content as a Network Drive (Mac
®
) .............. 21
Copy Content as a Network Drive (Win) ............... 22
Upload Files with Web Application ......................... 24
Overview of Web Application ........................25
Sign into Web Application ......................................... 26
Admin and Guest Users .............................................. 26
Getting Started .............................................................. 27
User Interface ................................................................. 28
Navigation Bar ................................................................ 29
Header Bar ....................................................................... 30
Main User Interface (UI) Screen ................................ 31
File Browser ..................................................................... 33
Media Browser ................................................................ 34
Overview of iPad®/iPhone® App ......................35
Launch the iPad App .................................................... 36
Getting Started .............................................................. 39
Navigation Bar ................................................................ 40
Preferences: iPad App .................................................. 41
Main User Interface (UI) .............................................. 42
Header Bar ....................................................................... 43
Oine Mode ................................................................... 44
Unique G-CONNECT Features ........................45
Stream Content to Other Devices ........................... 46
Create a Wi-Fi
®
Hotspot ................................................ 46
Private and Public Content ........................................ 47
Provide Guest Access ................................................... 47
Oine Mode for iPad .................................................. 48
Additional Resources .......................................49
Connecting to the Internet ........................................ 50
Web Application Preferences ................................... 50
How to View Files: Web Application ....................... 55
How to View Files: iPad App ...................................... 56
Sharing Files .................................................................... 57
Uploading Files: Web Application ........................... 57
Downloading Files ........................................................ 58
Frequently Asked Questions ..........................59
Supported iPad Video Formats ................................ 60
Enable Gigabit Ethernet Connection ..................... 60
Factory Reset/Reset Your Device ............................. 61
Problems with Connectivity ...................................... 62
Use with Apple Time Machine
®
................................. 62
Drive Formatting ........................................................... 62
Links to Support Page ................................................ 62
Support & Warranty .........................................63
Technical Support ......................................................... 64
Limited Warranty ........................................................... 65
Copyright ......................................................................... 67
Page 3

Safety & General Use
•
Safety Precautions .......................................................... p.4
•
FCC Statement .................................................................. p.5
•
Removing the Battery for Recycling ......................... p.7
Page 4

p.4
Safety & General Use
Safety Precautions
The G-CONNECT device’s Limited Warranty may be void as a result of the failure to respect the
precautions listed here. If you detect a problem with your drive, please contact our Technical
Support department at
g-technology.com/support/g-connect/.
If the G-CONNECT product is returned with damage caused by improper handling, the Limited
Warranty will be void and liability will rest with the user. Please read our
Limited Warranty
section
of this document.
• Servicing: Your G-CONNECT device contains no user-serviceable parts. If it appears to be
malfunctioning, have it inspected by a qualied Technical Support representative.
• Moisture: Do not place the G-CONNECT device near moisture or liquids. To reduce the
risk of damage, do not expose this device to rain or moisture. Do not use it in damp or wet
conditions. Never place objects containing liquids on the device as they may spill into its
openings.
•
Ventilation: Place the G-CONNECT device in a ventilated area. The device should never be
placed near or over a radiator or heat source.
• Temperature: Do not expose the G-CONNECT device to temperatures outside the range of
5°C to 35°C (41°F to 95°F); or to operational humidity beyond 5-80%, non-condensing, or nonoperating humidity beyond 10-90%, non-condensing. Avoid placing your device near a source
of heat, or exposing it to sunlight (even through a window), or in
an environment that is too cold or humid.
• Physical Damage: Do not place heavy objects on the G-CONNECT. Never use excessive force
on your G-CONNECT.
Backing Up Your Data
The G-CONNECT is a delicate electronic device and is susceptible to damage due to excessive
physical shock. Under no circumstances will HGST be held liable for the recovery or restoration
of lost data.
Any loss, corruption or destruction of data while using the G-CONNECT is the sole responsibility
of the user.
Page 5

p.5
Safety & General Use
Multiple Backups
To help prevent the loss of your data, we highly recommend that you keep TWO copies of your
data in separate storage locations. Keep one copy on your G-CONNECT device. Keep a second
copy on your internal hard drive, another HGST device, or a form of removable storage media.
FCC Statement
NOTE: This equipment has been tested and found to comply with the limits for a Class B digital
device, pursuant to Part 15 of the FCC Rules. These limits are designed to provide reasonable
protection against harmful interference in a residential installation. This equipment generates
uses and can radiate radio frequency energy and, if not installed and used in accordance with
the instructions, may cause harmful interference to radio communications. However, there
is no guarantee that interference will not occur in a particular installation. If this equipment
does cause harmful interference to radio or television reception, which can be determined by
turning the equipment o and on, the user is encouraged to try and correct the interference
by one or more of the following measures:
• Reorient or relocate the receiving antenna.
• Increase the separation between the equipment and receiver.
• Connect the equipment into an outlet on a circuit dierent from that to which
the receiver is connected.
• Consult the dealer or an experienced radio/TV technician for help.
FCC Caution: Any changes or modications not expressly approved by the party responsible
for compliance could void the user’s authority to operate this equipment.
This device complies with Part 15 of the FCC Rules. Operation is subject to the following two
conditions: (1) This device may not cause harmful interference, and (2) this device must accept
any interference received, including interference that may cause undesired operation.
Page 6

p.6
Safety & General Use
IMPORTANT NOTE: Radiation Exposure Statement
This equipment complies with FCC radiation exposure limits set forth for an uncontrolled
environment. This equipment should be installed and operated with minimum distance 20 cm
between the radiator & your body.
This transmitter must not be co-located or operating in conjunction with any other antenna or
transmitter.
The availability of some specic channels and/or operational frequency bands are country
dependent and are rmware programmed at the factory to match the intended destination.
The rmware setting is not accessible by the end user.
Industry Canada
This device complies with RSS-210 of the Industry Canada Rules. Operation is subject to the
following two conditions: (1) This device may not cause harmful interference, and (2) this
device must accept any interference received, including interference that may cause undesired
operation.
IMPORTANT NOTE: (For mobile device use)
Radiation Exposure Statement
This equipment complies with IC radiation exposure limits set forth for an uncontrolled
environment. This equipment should be installed and operated with minimum distance 20cm
between the radiator & your body.
Page 7

p.7
Safety & General Use
Removing the Battery for Recycling
The battery located in the G-CONNECT device is a Silver Oxide battery and is not userserviceable. The battery may be recycled after product end of useful life. You may return the
entire G-CONNECT device to HGST for warranty replacement or disposal using the HGST
Warranty Return System at
g-technology.com/support/g-connect.
Do not dispose of this product in your household trash. Please return the G-CONNECT device
to HGST or recycle in accordance with local regulations. For more information, go to the HGST
support page at
g-technology.com/support/g-connect.
Removing Battery
The G-CONNECT device’s Silver Oxide batter is located in main compartment of the
device. This battery can be easily removed using the following steps:
1. Make sure the device is disconnected from its power adapter and USB cable.
2. Separate the top cover from the rest of the device using a screwdriver or small knife. Note:
There are multiple plastic latches around the edge of the device. These will likely break as
you separate the cover.
3. Remove the electronics assembly from the case. This is held together by four rubber
bumpers and will lift out straight upwards from the case.
4. Disconnect the two Wi-Fi
®
antenna cables and then remove the four rubber bumpers and
the screws underneath those bumpers.
5. Slide the G-CONNECT hard drive and rubber sleeve away from the connector end of the
circuit board to remove the hard drive.
6. Remove the three screws that hold the circuit board to the metal frame.
7. Invert the electronics assembly and remove the two screws holding the Wi-Fi circuit board.
Remove it from the main circuit board.
8. Invert the device again and remove the circuit board from the metal frame.
9. Separate the battery from the battery retainer on the circuit board. The battery is now ready
for recycling. Visit
call2recycle.org/ for recycling the battery once it has been separated.
Page 8

Welcome to G-CONNECT
•
Introduction ..................................................................... p.9
•
System Requirements ................................................. p.10
•
Hardware Specications ............................................ p.11
Page 9

p.9
Welcome to G-CONNECT
Introduction
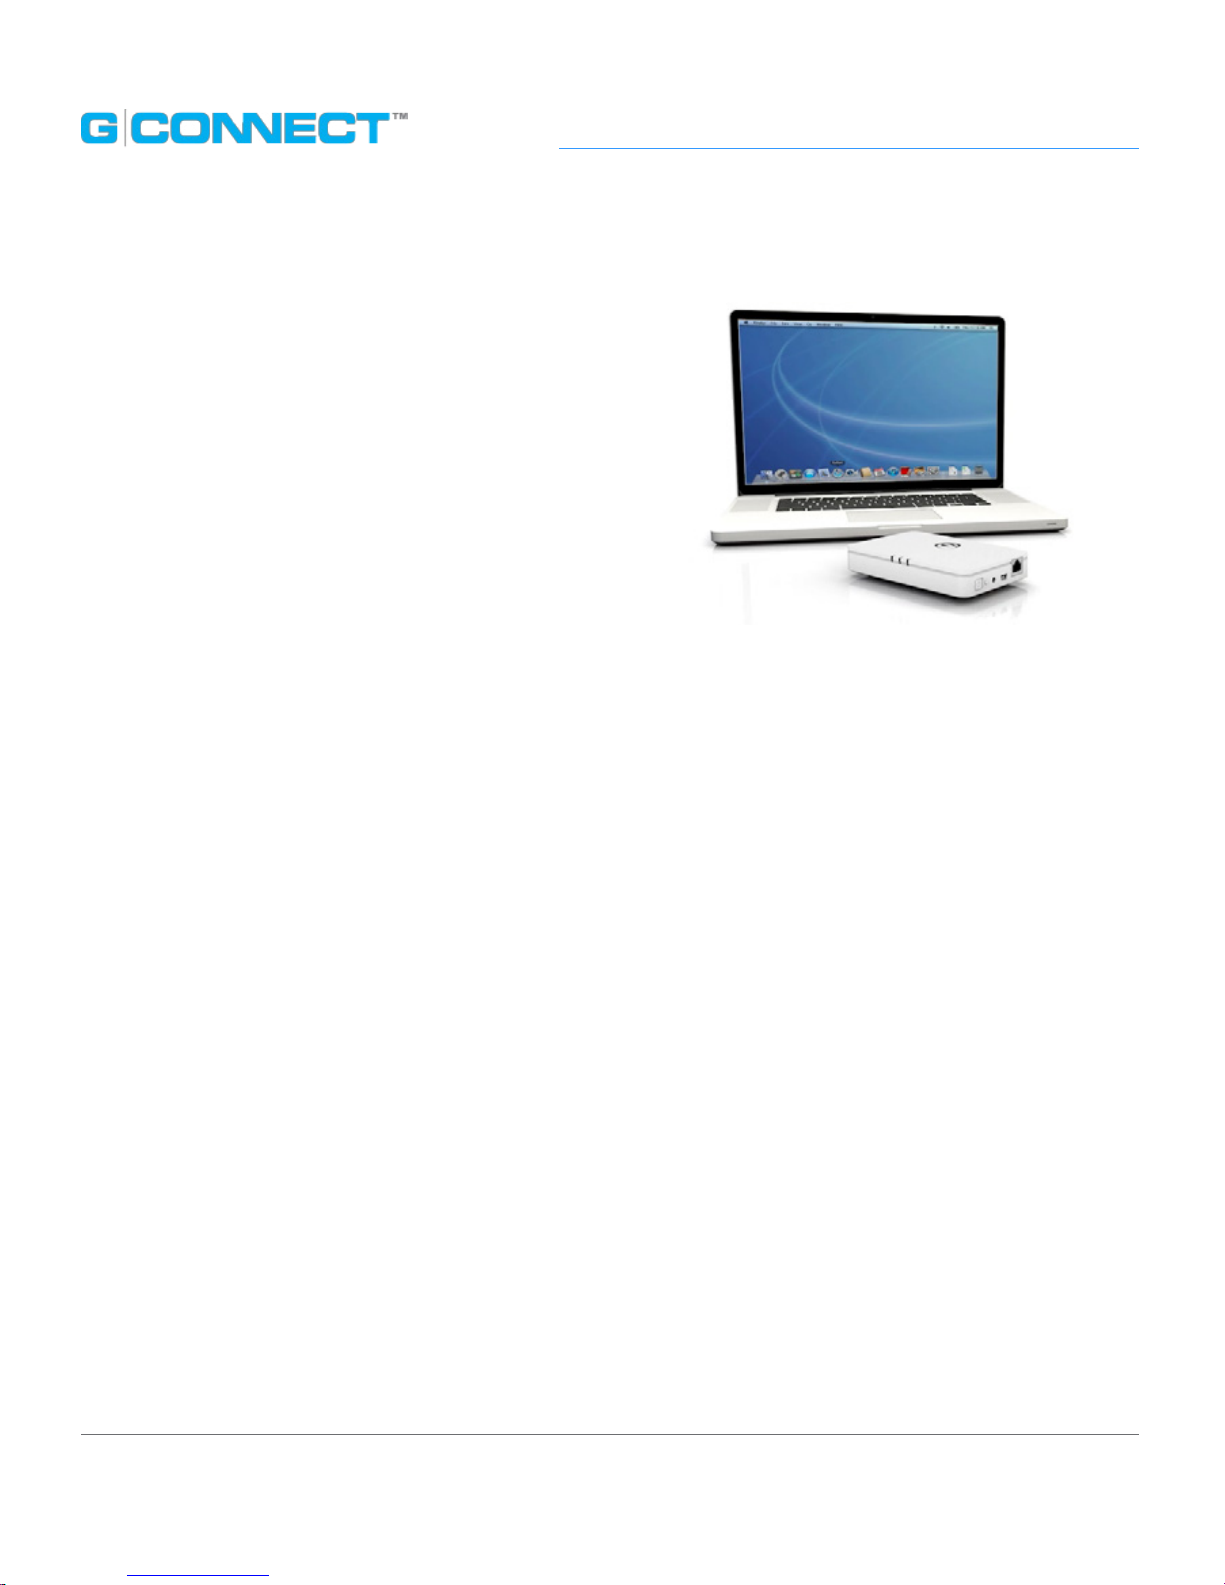
Welcome to the G-CONNECT™ Wireless iPad® Storage from G-Technology®. The
G-CONNECT oers wireless access to your personal content anytime and anywhere.
The unique and simplistic design highlights portability and style. Designed to partner
with numerous mobile platforms, G-CONNECT allows you on-the-go access in addition
to expanding your storage capabilities.
The G-CONNECT is accessible via user-friendly web and mobile applications. Both
applications share a similar user interface so that your experience is complementary.
Using these applications allows you to easily access personal content such as photos,
music, videos and documents stored on the G-CONNECT.
With G-CONNECT, you can create a private Wi-Fi hotspot to access the Internet and share
it with others. You can also share specic content stored on G-CONNECT with friends and
family by giving them ‘Guest’ access.
G-CONNECT can also be used
to wirelessly stream content to
multiple devices. Users can connect
to and access the G-CONNECT
simultaneously to explore and share
the content. The G-CONNECT is a
perfect solution for the dorm room,
oce, home or while traveling.
Enjoy discovering the ways you’ll use
G-CONNECT!
Page 10

p.10
Welcome to G-CONNECT
System Requirements
The G-CONNECT device has support for the following Operating Systems. The
device is ready for use with Apple
®
Mac® OS X® and Microsoft® Windows® systems and
comes formatted as FAT-32, which is ideal for cross-platform use.
Operating Systems
• Mac OS X 10.5.8 or higher (Intel processor-based Mac)
• Windows XP,
®
Windows Vista® or Windows 7
• iPhone
®
and iPad® iOS operating systems 4.35+
Web Browser Support
• Microsoft Internet Explorer
®
8.0+
• Mac Safari
®
5.0+
• Mozilla Firefox
®
4.0+
• Google Chrome
™
10.0 +
Minimum System Requirements
• Windows users: Computer systems running Windows XP, Windows Vista,
or Windows 7 and available USB 2.0 port
• Mac users: Computer systems running with Mac OS 10.5.8 or later and available USB
2.0 port. Intel
®
processor-based Macs only
• iPhone and iPad: iOS operating systems 4.35+
Page 11

p.11
Welcome to G-CONNECT
Hardware Specications
The following items are included in your G-CONNECT box:
Product Features & Diagram
The following diagram will help you become familiar with your new G-CONNECT device.
Page 12
p.12
Welcome to G-CONNECT
A
Power Button
Press the Power button on the device to turn the G-CONNECT ‘On’ or ‘O’. The Power
HDD light will begin to ash and the Wi-Fi
®
light and Status light will blink when the
device is turned on. The Power/HDD light will blink periodically through your
work session.
When turning the device ‘O’ you will see the Power/HDD light brighten and then the
Status light will blink rapidly, followed by all lights shutting o.
B
Wi-Fi Button
The Wi-Fi button is used to enable/disable Wi-Fi and the device.
If you need to perform a factory reset on your G-CONNECT, press and hold the Wi-Fi
button until the Status LED on the front of the device begins to ash. See
details in the FAQ’s: Factory Reset section of this manual.
Power Port
Connect the device to the power adapter to enable wireless access.
USB Port
On the rear of the device is a USB 2.0 port and Ethernet port. Use the USB port when
you connect the device to a laptop or desktop computer.
E
Ethernet Port
Use the Ethernet port to connect G-CONNECT to your local Internet router, and use
the device as a private Wi-Fi hotspot for wireless devices.
C
D
Page 13
Setting Up G-CONNECT
•
STEP 1: Turn on G-CONNECT ..................................... p.14
•
STEP 2: Connect to Wireless Network ..................... p.14
•
STEP 3: Setup Your Device .......................................... p.16
•
Add Content to G-CONNECT ..................................... p.19
•
Copy Content in USB Mode ....................................... p.20
•
Copy Content as a Network Drive (Mac) ............... p.21
•
Copy Content as a Network Drive (Win) ................ p.22
•
Upload Files with Web Application ......................... p.24
Page 14
p.14
Setting Up G-CONNECT
Setting Up G-CONNECT
To get started, you will need your G-CONNECT and
a personal computer with a web browser installed.
Please review the System Requirements section to
make sure you have a supported operating system
and web browser.
STEP 1: Turn on G-CONNECT
Plug in the included power adapter to the G-CONNECT and a wall outlet. Next, turn
on the G-CONNECT by pressing and holding down the Power button for one second.
The Status and PWR/HDD status indicators will begin to illuminate. The Status light will
continue to ash for a few moments indicating that your device is powering on.
Note: To turn the device ‘O’, press and hold down the Power button again for
approximately one second. The Power/HDD light will brighten and then the Status light
will blink rapidly until all lights turn o.
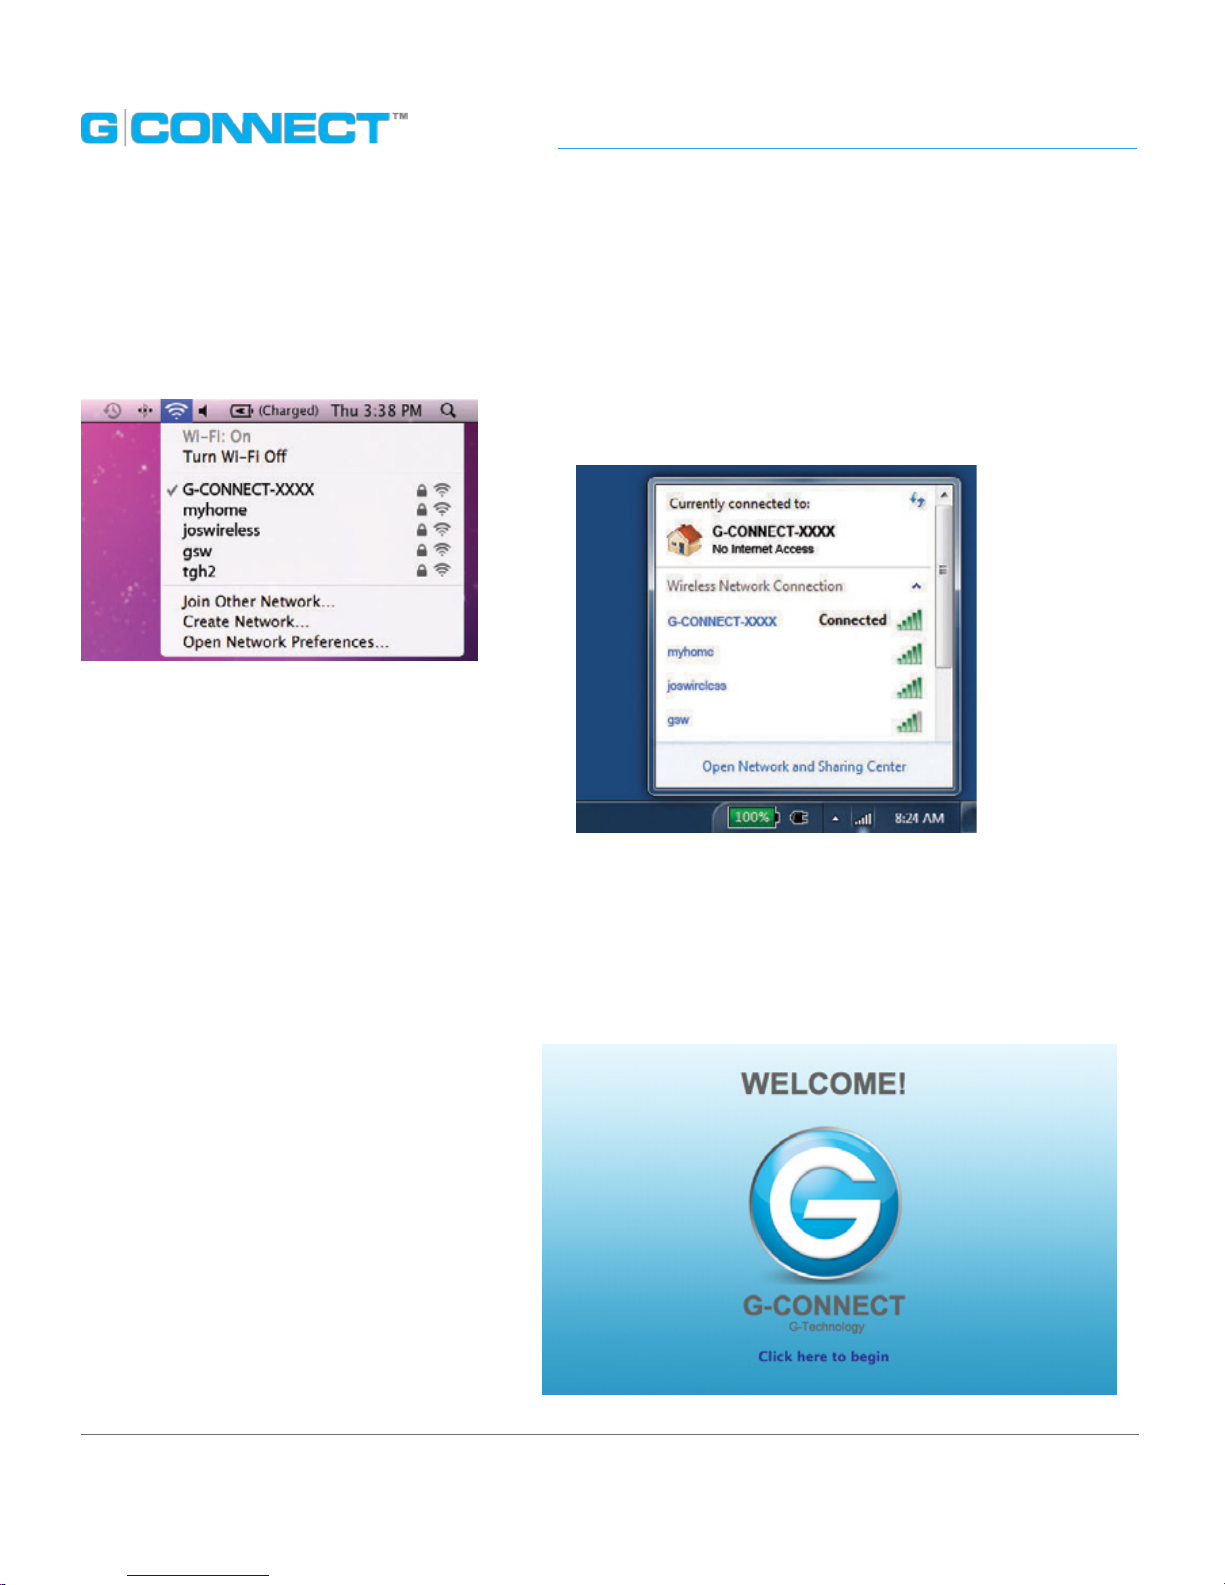
STEP 2: Connect to Wireless Network
Next, go to the Wireless Network Connection icon on your personal computer and view
your available Wireless Networks.
Page 15
p.15
Setting Up G-CONNECT
Find the wireless network named ‘G-CONNECT-XXXX’ and connect to it.
Note: The last four characters after the name G-CONNECT are the last four digits of your device’s internal
product key, which is a unique number assigned to each device.
Once you are connected to the
‘G-CONNECT-XXXX’ wireless
network, open a new browser
window and type ‘http://www.
gtech-connect.com’ to go to the
G-CONNECT Welcome page.
Select the ‘Click here to begin’ link to
start the Setup process.
Windows® PC: If you are using Windows PC, go
to your bottom taskbar and double-click to open
the ‘Wireless Network Connection Status’ icon.
Click on the ‘View Wireless Networks’ button to
choose a wireless network.
Mac
®
: If you are using a Mac, go to the
top taskbar and click on the wireless
network icon.
Page 16
p.16
Setting Up G-CONNECT
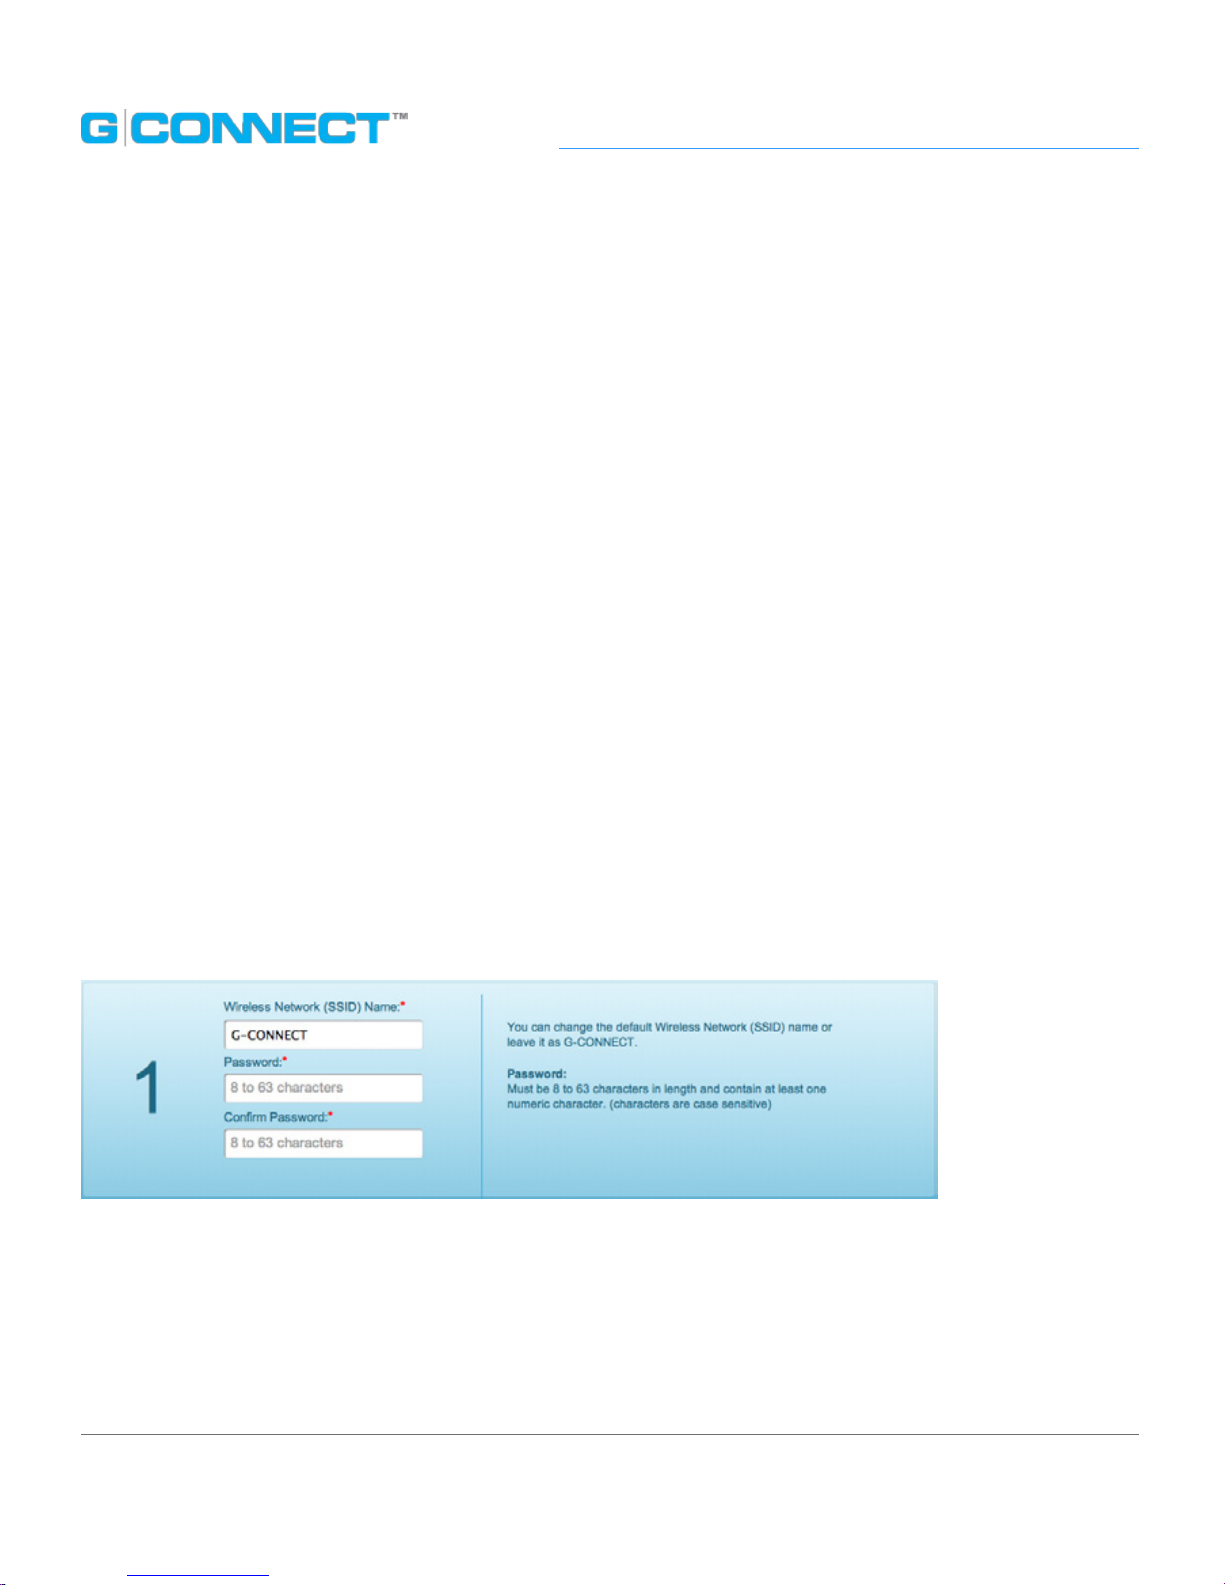
STEP 3: Setup Your Device
The G-CONNECT Setup page contains two main sections with checkboxes at
the bottom. The information that you enter on this page is used to operate your
G-CONNECT device.
1. Wireless Network (SSID) name
The Wireless Network (SSID) name displays the default name of the G-CONNECT
wireless network. You can leave this as the default or change it to something more
meaningful to you.
Next, create a password. The password must be at least eight characters in length and
include at least one numeric character.
Retype your password in the Conrm Password eld and make certain to write down
this information in a safe place for later use.
If you have chosen to change the Wireless Network (SSID) name, please read the
section Changing the Wireless Network (SSID) name below.
Page 17
p.17
Setting Up G-CONNECT
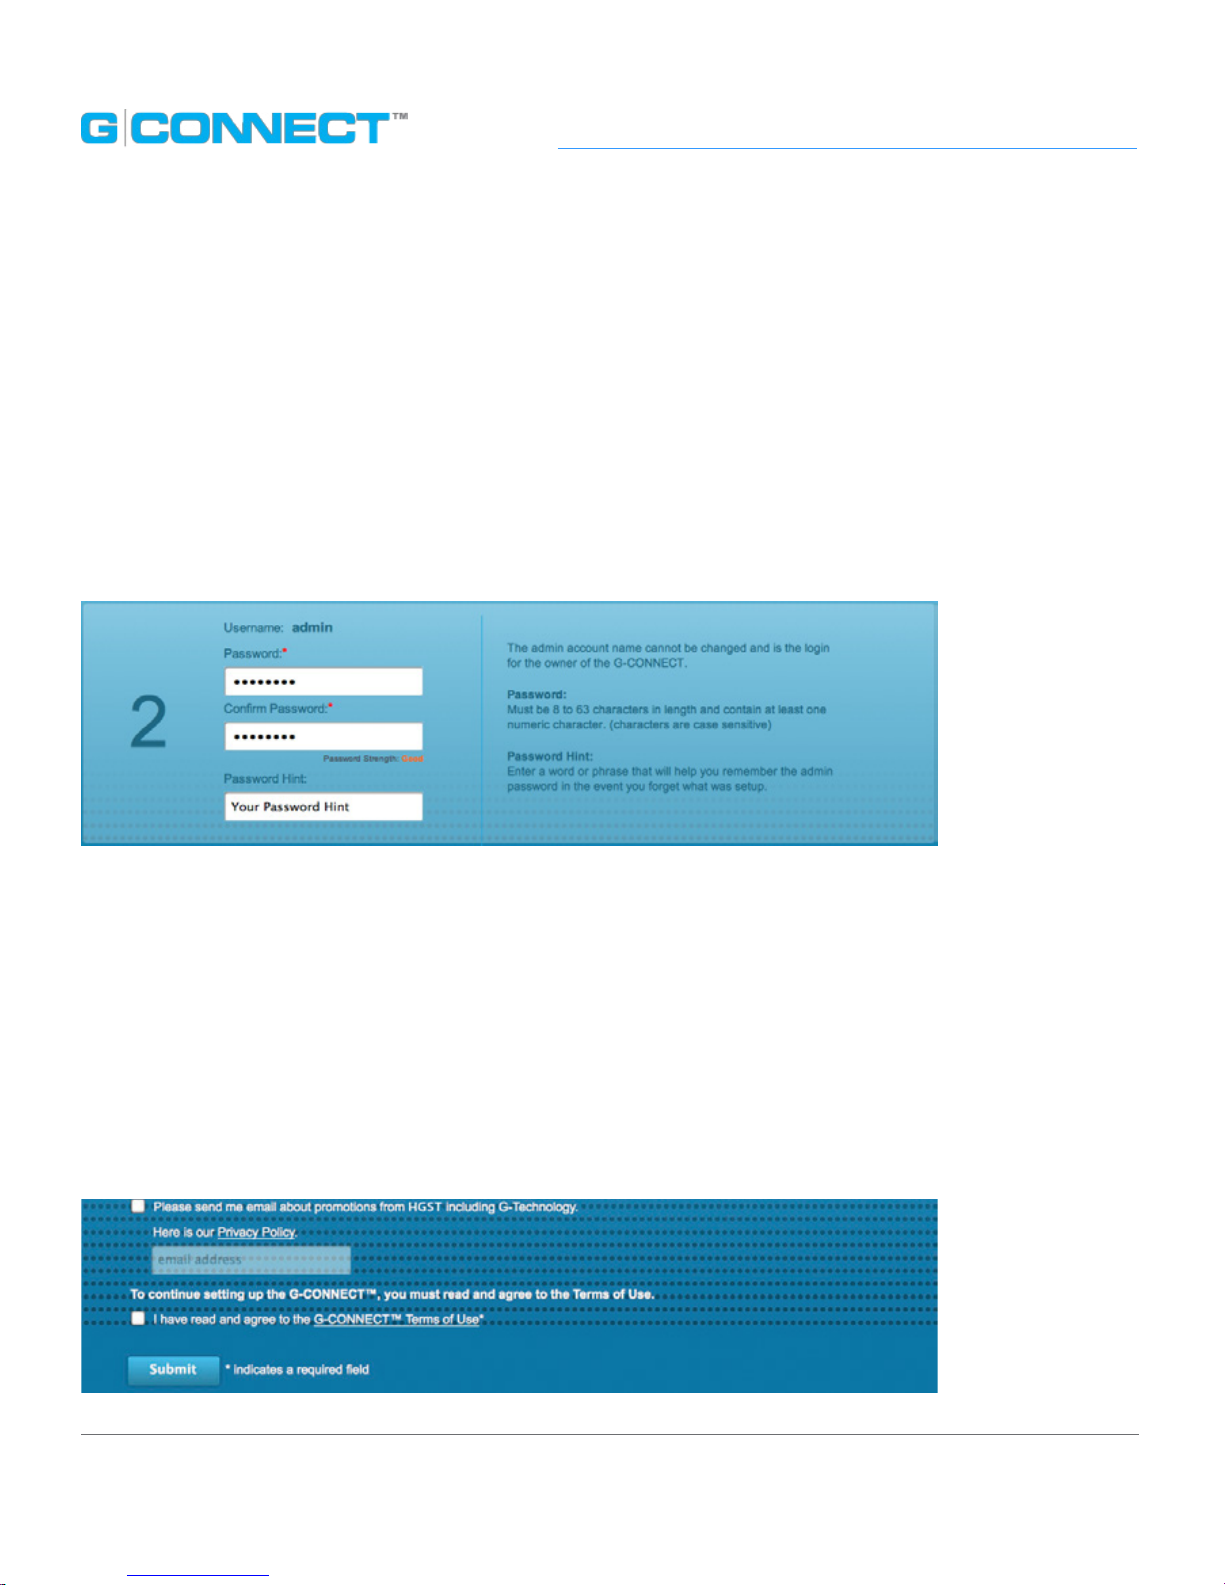
2. Admin Account
The Admin is typically the owner of the G-CONNECT device and can manage all of the
content. The default username is ‘admin’ and cannot be changed.
Create a password for the Admin account. The password must be at least eight
characters in length and include at least one numeric character.
Enter a Password Hint. The Password Hint is not required, but is helpful if you lose or
forget your Admin password.
3. Checkboxes
There are two checkboxes at the bottom of the Setup page. The rst checkbox will let you
enter a valid email address to receive HGST updates and promotional information. If you
would like to participate, please enter
a valid email address that you would like this information sent to.
The second checkbox is the G-CONNECT Terms of Use. It is required that you read and
agree to the Terms of Use before completing the Setup process.
Page 18
p.18
Setting Up G-CONNECT
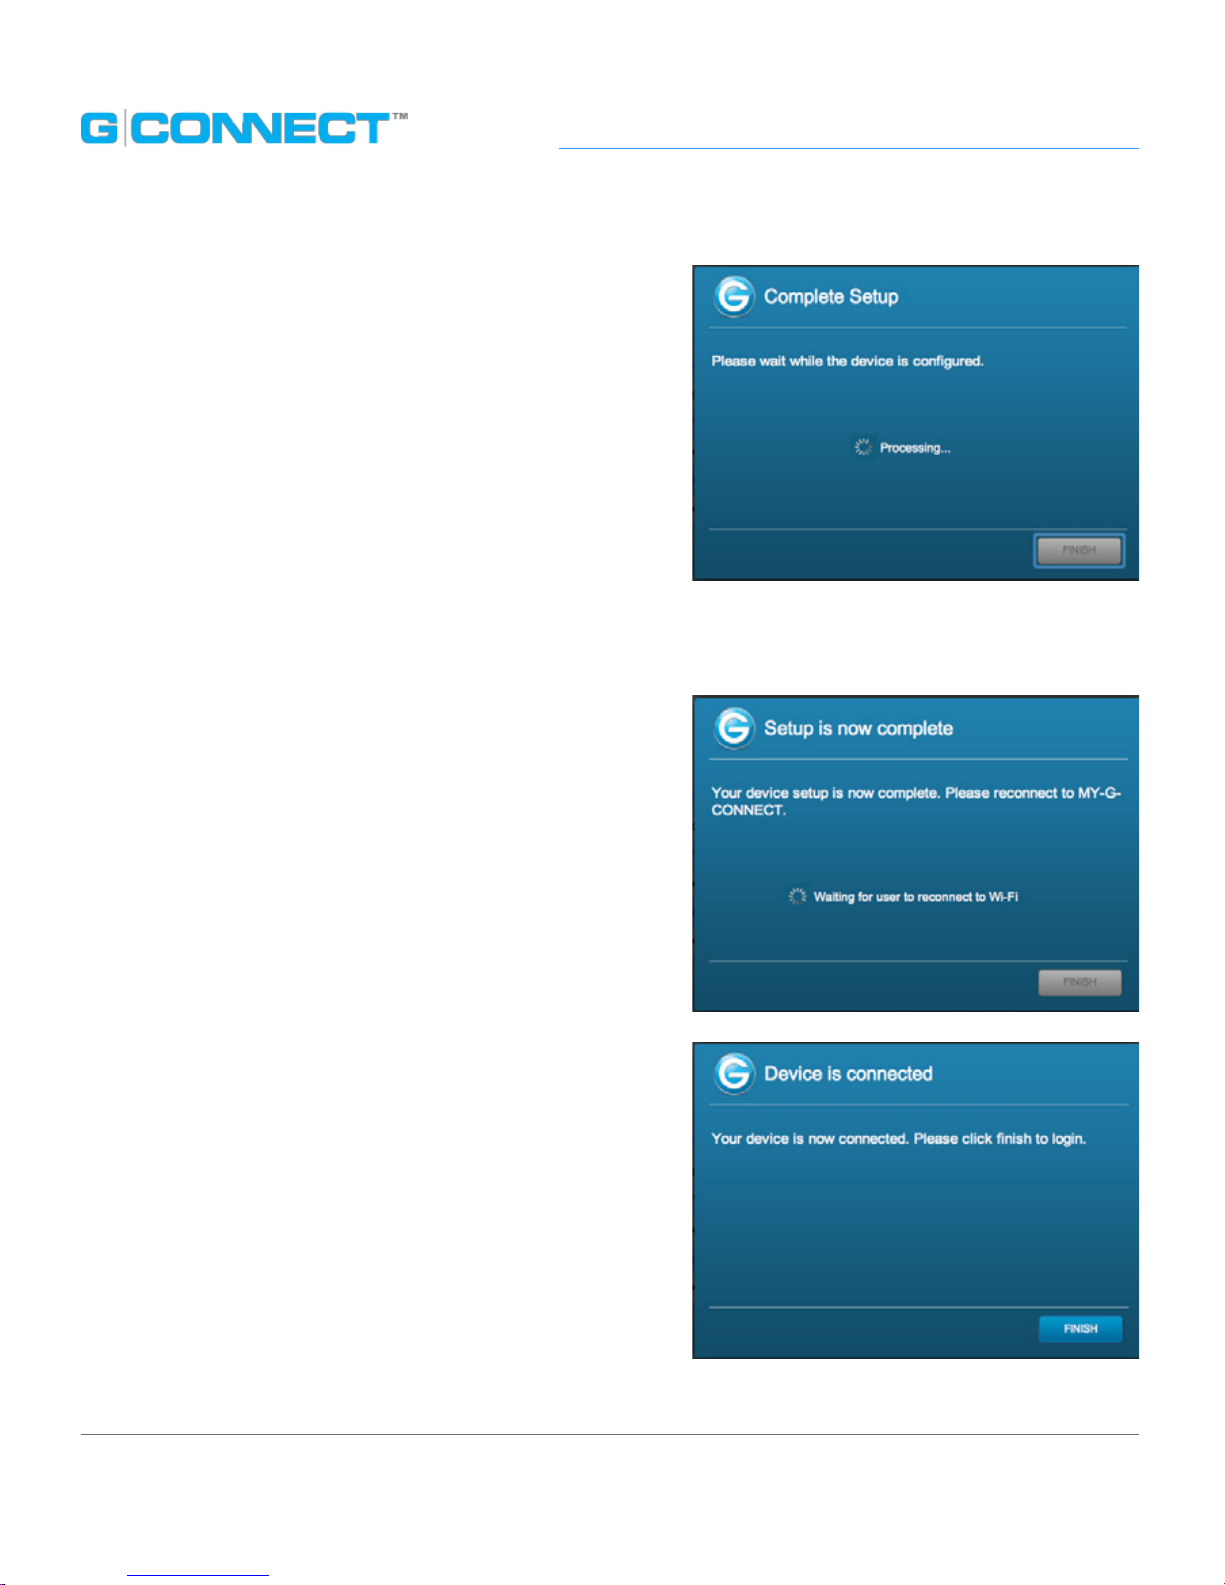
4. Finishing Setup
Once you’ve entered your information click on the
Submit button to complete setup. A dialog box
will appear notifying you that the device is being
congured.
5. Changing the Wireless Network (SSID) Name
If you decided to change the default Wireless
Network (SSID) name during the Setup process,
once you click on the Submit button your current
G-CONNECT-XXXX Wi-Fi network will be dropped.
You will receive a dialog box message asking you to
re-connect to the new network name.
Connect to the new network name in your View
Wireless Networks screen.
Once you are connected to the new Wireless
Network (SSID) Name, the dialog box will display a
corresponding message and ask you to click Finish
to log into the device.
Page 19
p.19
Setting Up G-CONNECT
Add Content to G-CONNECT
Once your G-CONNECT device is set up, you will be ready to transfer content onto it for
your viewing pleasure.
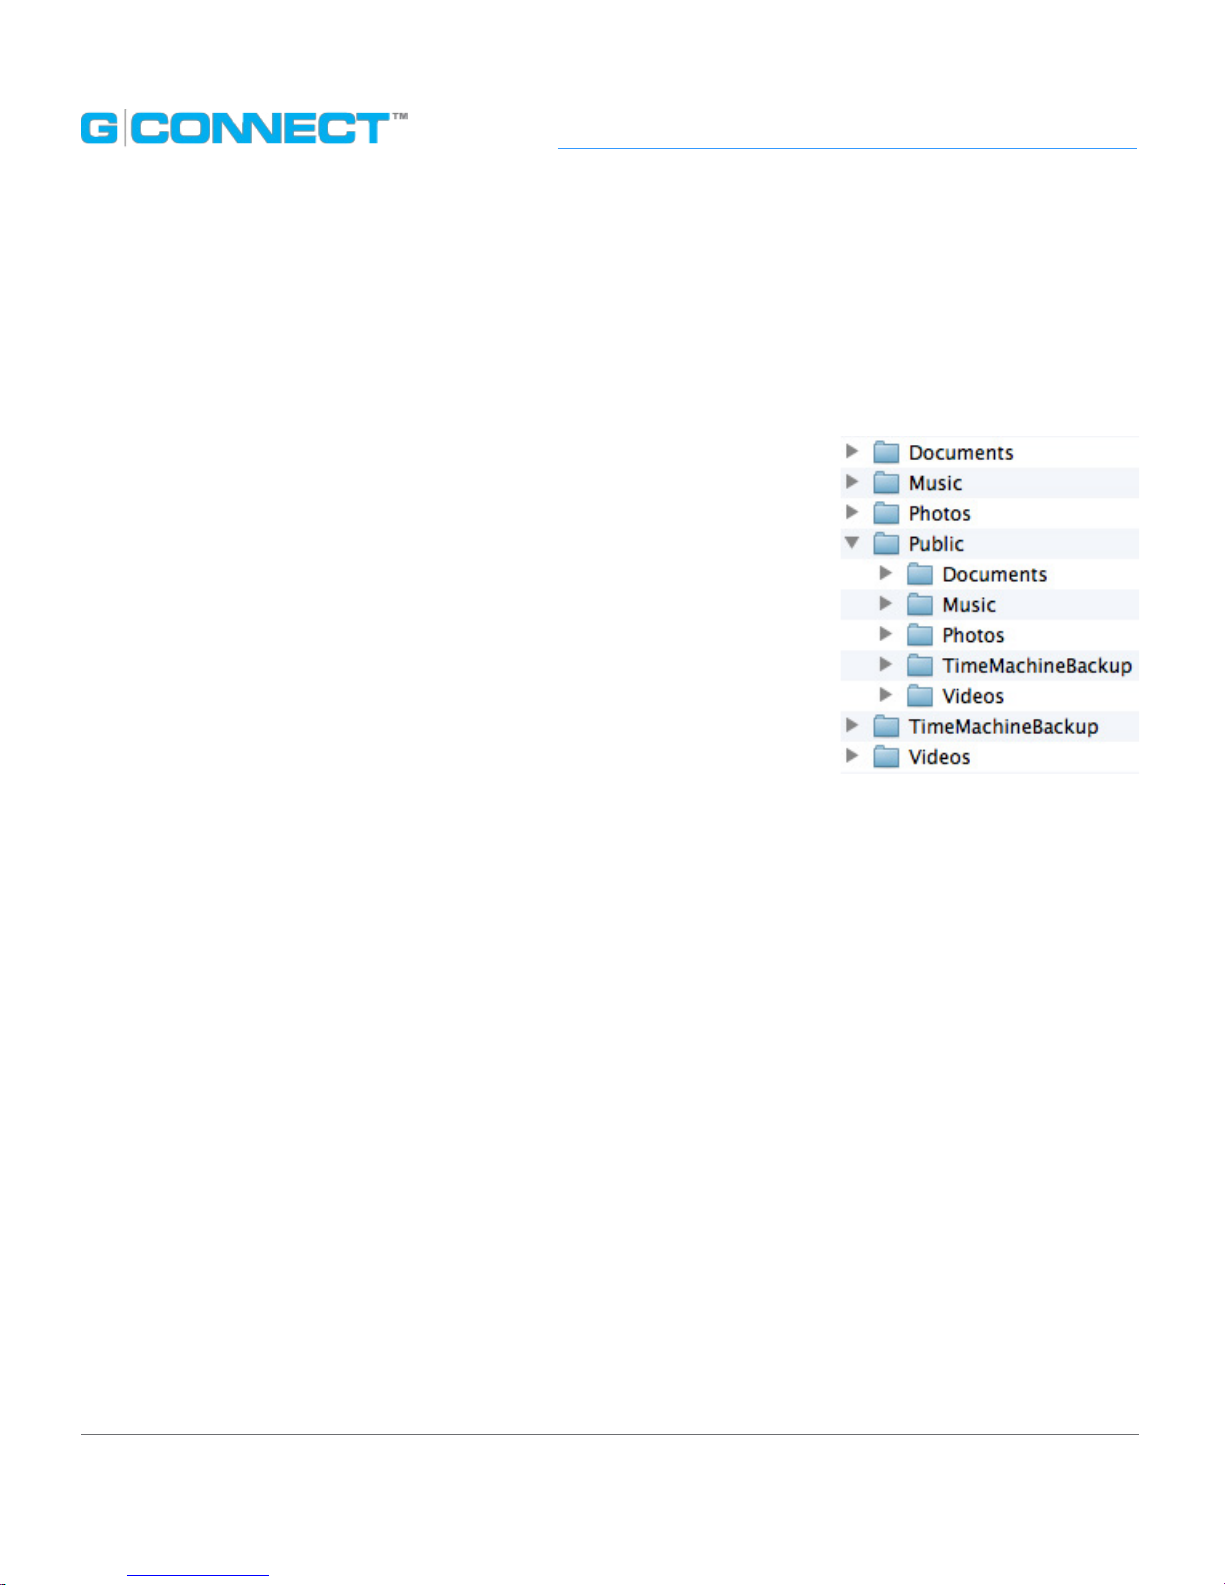
The device has been pre-loaded with the following category
folders, which is the recommended way to organize your les
when you add content.
• Documents: You can store dierent types of document les in
this folder, such as .DOC or .PDF.
• Music: You can store dierent types of music les in this folder,
such as .MP3 or .M4A.
• Photos: You can store dierent types of image les in this
folder, such as .JPG or .TIFF.
• Public: The Public folder is a way for the Admin user to share content stored on his
G-CONNECT with Guest users. This folder is viewable by both the Admin and Guest
users. It also contains another set of sub-folders, which includes Documents, Music,
Photos, Apple Time Machine
®
Backup and Videos, which can be used to organize this
public content.
• Apple Time Machine
®
Backup: If you are using a Mac® computer, you will see this
folder, which contains les from incremental backups that can be restored
at a later date.
• Videos: You can store dierent types of video les in this folder such as .M4V or .MOV.
Page 20
p.20
Setting Up G-CONNECT
Copy Content in USB Mode
Now that your G-CONNECT device has been setup, you are ready to add content to
the device. There are many ways to add your les to the G-CONNECT.
The recommended way in which you can add content quickly to the device is via your
personal computer using the included USB Y-Cable.
1. First, you will need to power o the G-CONNECT by pressing the power button
found on the device until the LED’s begin ashing.
2. When the LED’s turn o, it is safe to disconnect the power adapter. Plug the two
identical ends of the Y-Cable into your personal computer and the third into your
G-CONNECT.
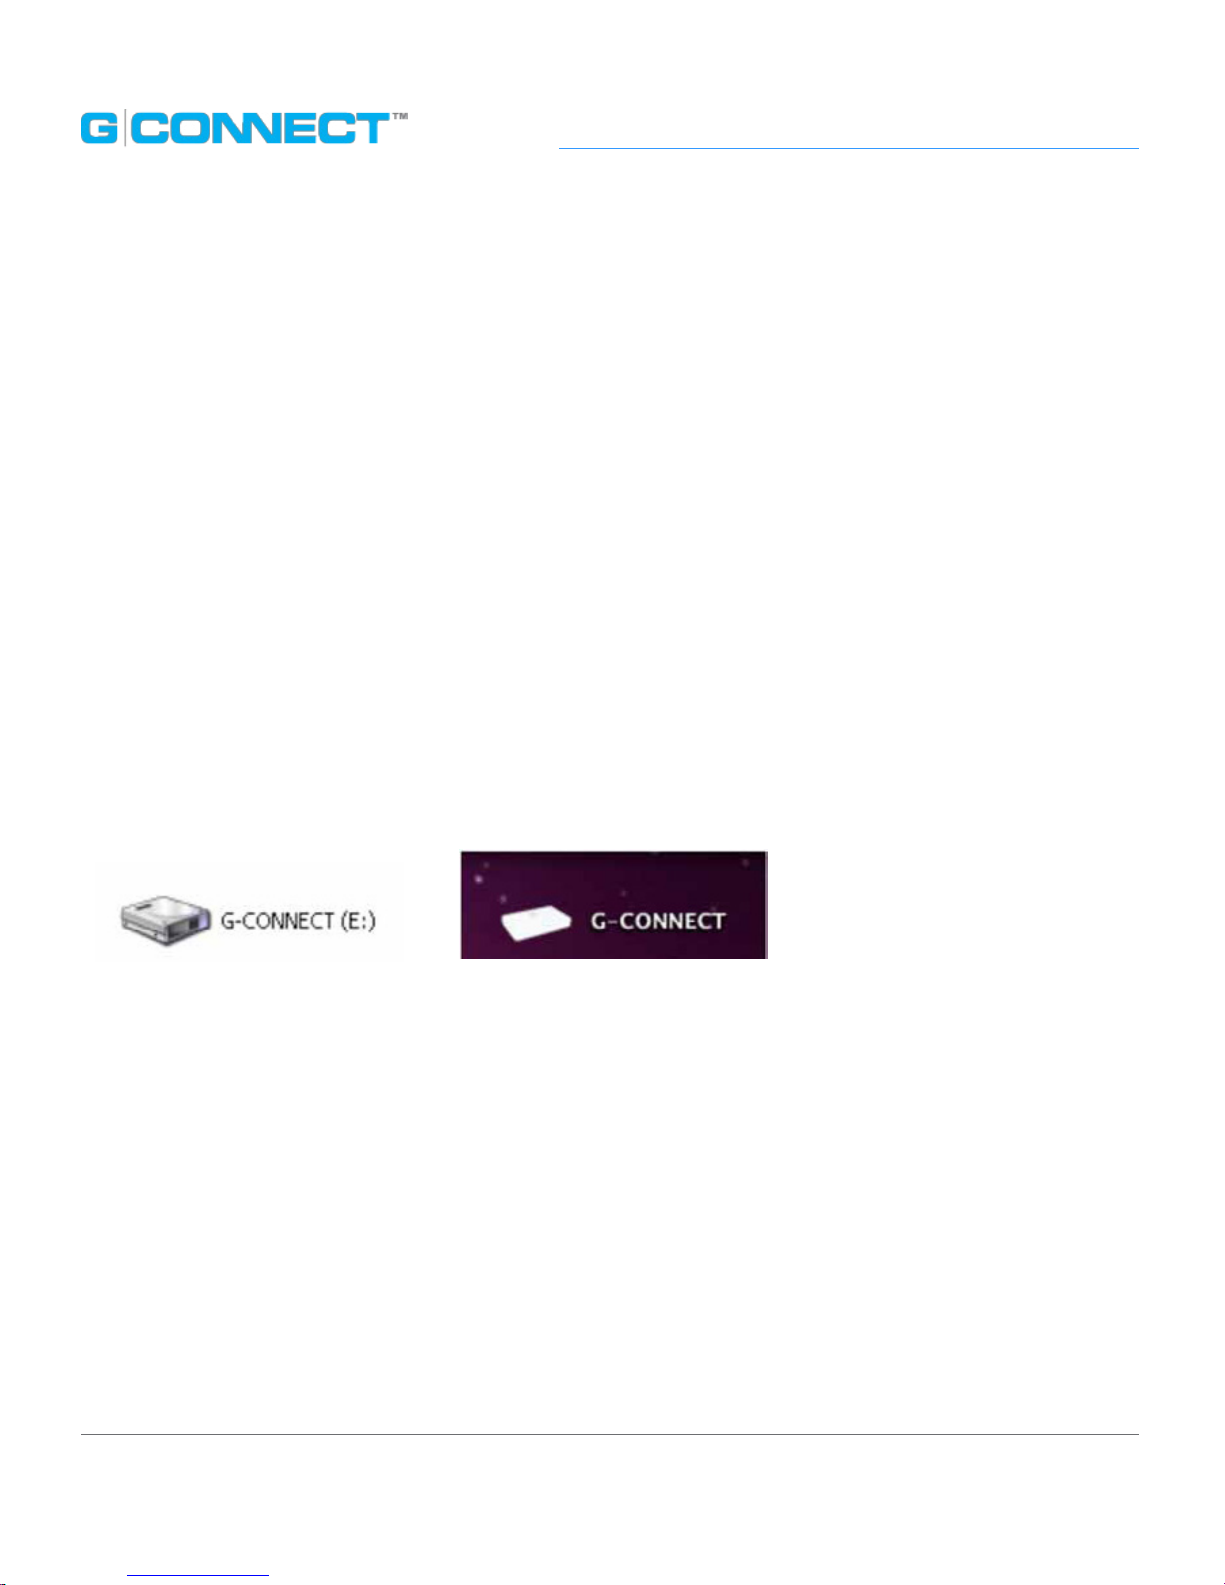
3. Your G-CONNECT should now appear as a drive on your desktop if using a Mac
®
and
in ‘Computer’ if using a Windows
®
PC.
4. Drag and drop les from your personal computer into the default folder types on
the G-CONNECT. It is recommended, but not required, that you use these folders to
organize your les.
As an Admin user, les can be placed in the top-level folders that are private and only
visible by users who sign in using the Admin account. Files can also be placed into the
Public folder which is accessible by both the Admin and any Guest that logs into the
G-CONNECT.
Note: The Wi-Fi
®
password is used as both the password to the Wireless Network and
the password to the ‘Guest’ account.
Page 21
p.21
Setting Up G-CONNECT
Copy Content as a Network Drive (Mac®)
An alternate way to add content quickly to G-CONNECT is by treating the device as a
network drive. Here are the steps on a Mac computer.
1. First, select your G-CONNECT Wireless Network (SSID) through your Wireless Network
Manager.
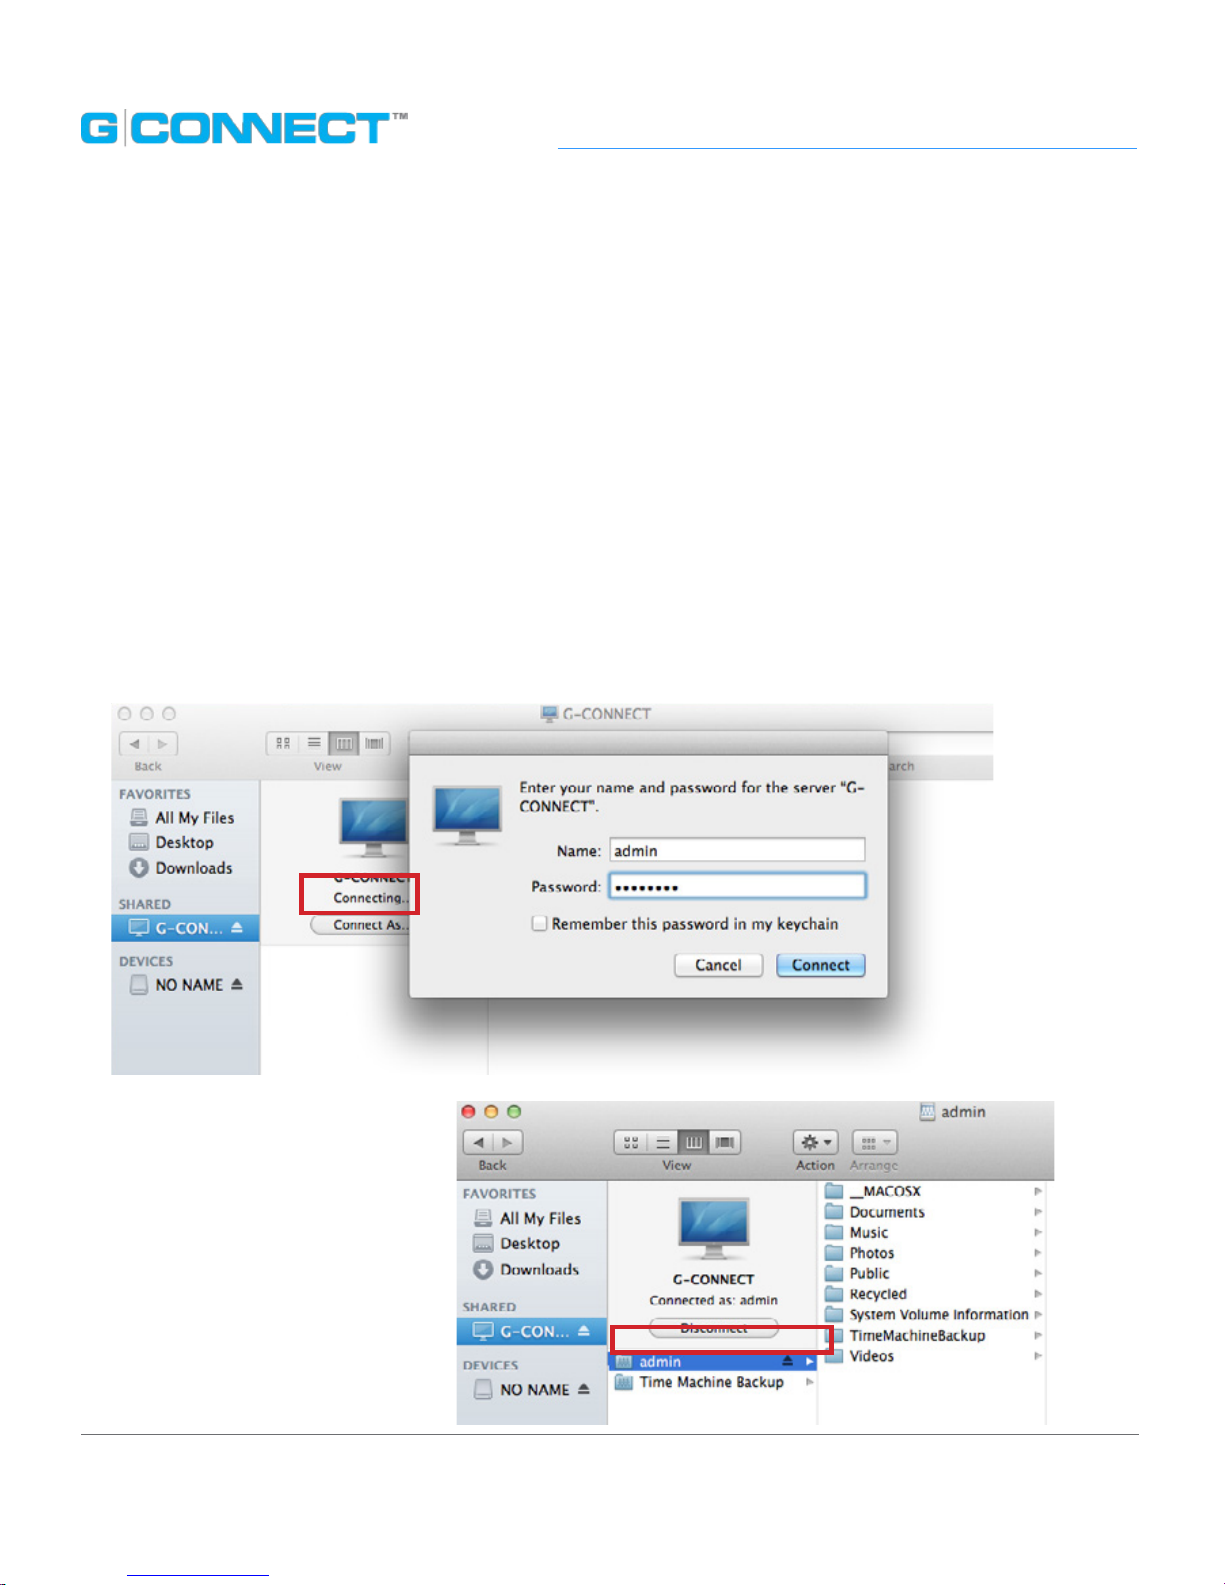
2. Next, open a Finder window. You will see G-CONNECT listed under ‘Shared’
in the left pane. Select G-CONNECT from the list and click Connect As...
3. Enter the G-CONNECT Username (Admin or Guest) and Password that you use for the
iPad
®
/iPhone® App or Web Application, then click Connect.
4. The G-CONNECT appears on
your Mac Desktop. You can
now transfer les to and from
the device like any directly
attached drive.
Page 22

p.22
Setting Up G-CONNECT
Copy Content as a Network Drive (Win)
As already mentioned, you can alternately add les to G-CONNECT by treating the
device as a network drive. Here are the steps on a Windows
®
machine.
1. First, select your G-CONNECT Wireless Network (SSID) through your Wireless
Network Manager.
2. Next, click the Computer icon, then click on Map Network Drive.
3. You will be prompted to enter a server to connect to. Enter the same address you
would use to connect through the Web Application: \\172.16.0.1\admin
Page 23

p.23
Setting Up G-CONNECT
4. After clicking Finish, you will be prompted to log into the server. Enter the
G-CONNECT Username (Admin or Guest) and Password that you use for the iPad
®
/
iPhone
®
App or Web Application.
5. After clicking Ok, the G-CONNECT drive will appear in Computer as a drive.
You can now transfer les to and from the device like any directly attached drive.
Page 24

p.24
Setting Up G-CONNECT
Upload Files with Web Application
You may also upload les directly to the device by
using the G-CONNECT Web Application Upload
feature. We recommend this if you have an
individual le or small groups of les.
This is a perfect option for users who are on-the-go.
Instructions for the Web Application are in the next
section of this manual.
Page 25

Overview of Web Application
•
Sign into Web Application ......................................... p.26
•
Admin and Guest Users .............................................. p.26
•
Getting Started .............................................................. p.27
•
User Interface ................................................................. p.28
•
Navigation Bar ............................................................... p.29
•
Header Bar ....................................................................... p.30
•
Main User Interface (UI) Screen ................................ p.31
•
File Browser ..................................................................... p.33
•
Media Browser ............................................................... p.34
Page 26

p.26
Overview of Web Application
Overview of Web Application
The G-CONNECT allows you to utilize two dierent applications when viewing your
content: the Web Application and the iPad
®
/iPhone® App. Both have a similar user
interface and features so you can easily switch between them.
Sign into Web Application
You can use the Web Application to view and manage the les on G-CONNECT from a
variety of devices, including your personal computer and other mobile devices. In your
preferred browser, go to gtech-connect.com to go to the G-CONNECT Sign in page.
Admin and Guest Users
In the Username eld, choose whether you will be signing in as Admin or Guest. The
Admin user is the owner of the G-CONNECT device. The Admin user may give friends
and family access to his G-CONNECT by sharing the Guest password with them. Guest
users will be able to view content located in the Public folder.
Note: The Wi-Fi
®
password is used both as the password to the Wireless Network and the
password to the ‘Guest’ account.
If Guest Access is not enabled, then only the Admin option will appear in the drop-down
eld. Enter your password and click on the Sign In button.
If you have forgotten your Admin password, click on the Forgot Password link. Your
Password Hint will be displayed on the screen. If you are unable to remember your
password, then you will need to reset your G-CONNECT device and go through the
Setup process again.
See details in the FAQ’s: Factory Reset section of this manual.
Page 27

p.27
Overview of Web Application
Getting Started
When you sign into the Web Application, the Welcome to G-CONNECT page will
appear providing you links to your content by category type. For rst time users,
we recommend visiting the Getting Started section.
The icons on this page provide you with additional information about using the
G-CONNECT. Visit our ‘Quick Tips’ for helpful hints to get the most out of your
G-CONNECT experience.
For additional online resources, please visit the following links.
• Video Tutorials: Click this icon to view informational videos, tips and tricks for the
G-CONNECT device. The URL to this page is g-technology.com/support/g-connect.
• iPhone
®
/
iPad
®
App: Click on this icon to take you to the Apple iTunes® page to
download the iPad and iPhone application. This app is free and can be downloaded
from the Apple
®
App Store directly to your iPad or iPhone by searching ‘G-CONNECT’
or by using the following URL: g-technology.com/support/g-connect/ios.
• Technical Support: Click this icon to explore the G-CONNECT online support page.
The URL to the page is g-technology.com/support/g-connect.
Page 28

p.28
Overview of Web Application
User Interface
The G-CONNECT Web Application oers an intuitive User Interface (UI) allowing you
to browse, play and manage your content. There are three main areas of the interface:
Navigation Bar, Header Bar and the Main UI.
Page 29

p.29
Overview of Web Application
Navigation Bar
The left side Navigation Bar contains quick links to dierent browsing views. As you drill
down into most of these links, the content will update in the Main UI window.
The following links are available on the left side Navigation Bar.
• G-CONNECT icon: This G-CONNECT icon displays the
total capacity available on your device, and takes you
to the ‘Welcome to G-CONNECT’ page.
• File Browser: Use File Browser to nd and manage
content on your device, based on a folder structure.
• Photos: Filters the photo media types on your device,
such as .JPEG, .PNG and .TIF le types, and displays
thumbnails of the photos.
• Music: Filters the music media types on your device, such
as .MP3 and .M4A les.
• Videos: Filters the video media types on your device,
such as .MOV and .MP4 le types.
• Documents: Filters the document media types on your device, such as .PDF, .DOC, .PPT
and .XLS le types.
• Getting Started: Provides information and tips to help you get the most out of your
G-CONNECT.
Page 30

p.30
Overview of Web Application
Header Bar
Horizontally across the top of the screen is the Header Bar, which contains helpful
features such as the Search box and links for Preferences, Help and Sign Out.
• Search eld: Enter keywords in this eld to search for les on your G-CONNECT. Click
on the magnify glass or hit the <ENTER> on your keyboard to execute the search.
• Preferences: Admin users can access the Preferences link to update device settings
such as their passwords.
• Help: Navigates you to the G-CONNECT Support page for more detailed support
information.
• Sign Out: Allows you to sign out of the Web Application.
Page 31

p.31
Overview of Web Application
Main User Interface (UI) Screen
The Main User Interface (UI) is where you view and interact with the content on their
G-CONNECT device. When you click a link in the Navigation Bar, the Main UI will display
the related content in a browsing view. The default view upon signing into the Web
Application is the Welcome to G-CONNECT section.
The Main UI has two viewing modes: Thumbnail Viewing mode and List
Viewing mode. You can switch back and forth between the two using the
buttons on the screen.
Page 32

p.32
Overview of Web Application
Thumbnail Viewing Mode
Thumbnail Viewing mode displays small pictorial images of les on G-CONNECT along
with the le name underneath. The image that is displayed represents the media type,
such as a .JPEG or .PDF document. Folders and subfolders that you create will also be
displayed here.
List Viewing Mode
List Viewing mode displays media les in a row and column format. Each row contains
a small thumbnail image alongside the le name, le date and le size. Each column
heading allows you to sort the content in this view only.
The Main UI contains functions that allow you to sort content, view content in
dierent ltered modes as well as delete les. Some of the functions will be
dierent depending on if you are in the File Browser or within the ltered views
of Photos, Music, Videos or Documents.
Page 33

p.33
Overview of Web Application
File Browser
The following functionality is available in the File Browser for the Web Application, to
view and manage content.
Breadcrumb Path
The breadcrumb path displays the folder levels that a le is stored within. The
breadcrumb path is clickable and Admin users can drag and drop les from one
location to another by dropping the les onto the breadcrumb path link.
Select All Checkbox
Clicking on the Select All checkbox will select all les within your view. This is available
in both the Thumbnail and List Viewing modes.
Create New Folder
Use this button to create a new folder. Click on the CREATE button to create the folder.
Note: If you are at the top level of the File Browser, a new folder is created at the root level.
Upload Files
Use this button to open a dialog box to upload les from your computer to your
G-CONNECT device. The Browse button allows you to nd a le(s) on your computer
to upload. Then click the Upload button to add those les. Once a le is in the Upload
box, you can remove it by clicking the ‘X’ icon. To cancel out of the Upload process,
click on the Cancel button.
Delete
Use this button to delete a selected le.
Page 34

p.34
Overview of Web Application
Media Browser
The following functionality is available in the Media Browser of the Web Application, to
view and manage content.
Filter: Select Years
This lter option is available in the List Viewing mode for Photos, Videos and
Documents only. This dropdown list will display a list of years in which the content
on the device was taken or modied.
Filter: Select Months
This lter option is available in the List Viewing mode for Photos, Videos and
Documents only. This dropdown list will display a list of all months in the calendar year.
Display of Selected Items
Text information showing the amount of les selected, if any.
Filter: Albums, Artists and Songs
This lter option is available in the List Viewing mode for Music only. This dropdown
list will display lter options for nding content by Album, Artist or Song.
Page 35

Overview of iPad/iPhone App
•
Launch the iPad App .................................................... p.36
•
Getting Started ............................................................. p.39
•
Navigation Bar ................................................................ p.40
•
Preferences: iPad App .................................................. p.41
•
Main User Interface (UI) ............................................... p.42
•
Header Bar ...................................................................... p.43
•
Oine Mode ................................................................... p.44
Page 36

p.36
Overview of iPad®/iPhone® App
Overview of iPad®/iPhone® App
The G-CONNECT iPad/iPhone App is a great way to access your G-CONNECT content
while traveling, or when you don’t have your personal computer with you. These apps
are free and can be downloaded from the Apple App Store on your device or personal
computer through iTunes®.
In this chapter, we refer to working in the iPad App, but the operation of the iPhone App
is similar.
Launch the iPad App
Locate the G-CONNECT icon on your iPad and tap to begin.
Page 37

p.37
Overview of iPad®/iPhone® App
Once you tap the G-CONNECT iPad App icon, the rst screen you will come to
is the iPad Welcome to G-CONNECT page. On the bottom left of the screen you
will nd an iPad icon and a G-CONNECT icon.
Select the G-CONNECT icon and the ‘Connect to’ screen will be displayed. This screen will
display a list of devices that are connected to your G-CONNECT Wireless Network. You
should see your device listed here.
Note: If there are multiple G-CONNECT devices within range that are connected to the
G-CONNECT Wireless Network, they will be displayed in a list format.
Note: If you do not see your G-CONNECT device listed, you may not be connected
to the wireless network. Go to the Settings icon on your iPad and verify that you are
connected to the G-CONNECT Wireless Network. If you still do not see your G-CONNECT
device on this list, see the FAQ’s: Problems with Connectivity section of this document.
Page 38

p.38
Overview of iPad®/iPhone® App
In the Username eld, choose whether you are signing in as Admin or Guest.
The Admin user is the owner of the G-CONNECT device. The Admin user may give
friends and family access to their G-CONNECT by sharing with them the Guest
password. Guest users may view content specied as public by the Admin.
Note: The Wi-Fi password is used both as the password to the Wireless Network and
the password to the ‘Guest’ account. See the Provide Guest Access section for more
information.
If Guest Access is not enabled, then only the Admin option will appear in the dropdown eld. Enter your password and click on the Sign In button.
If you have forgotten your Admin password, click on the Forgot Password link. Your
Password Hint will be displayed on the screen.
If you are unable to remember your password, then you will need to reset your
G-CONNECT device and go through the Setup process again. See the FAQ’s: Factory
Reset section.
Page 39

p.39
Overview of iPad®/iPhone® App
Getting Started
When you launch the iPad App, the Main UI window will display the Welcome to
G-CONNECT screen. The screen contains four large icons for Photos, Music, Videos
and Documents. Clicking on these icons is a quick way to view content in each of
these categories.
The iPad App is similar to the Web Application interface as it also has a left-side
Navigation Bar, a Header Bar and a Main UI.
Page 40

p.40
Overview of iPad®/iPhone® App
Navigation Bar
The left-side Navigation Bar is where you can select options and drill down into folders in order
to nd their media. This organization is similar to a le directory structure.
The top of the Navigation Bar will always show where you are as you drill down, like in a
breadcrumb path. This Navigation Bar will display ‘G-CONNECT’ when you log in and will
change as you drill down into dierent folders.
• Search eld: Allows you to enter keywords in this eld to search
for les on your G-CONNECT. Click on the magnify glass or hit
<ENTER> to perform the search.
• Breadcrumb path: This path displays the folder levels that
a le is stored within.
• File Browser: Use File Browser to nd and manage content on
your device, based on a folder structure.
• Photos: Filters the photo media types on your device, such
as .JPG, .PNG and .TIF les.
• Music: Filters the music media types on your device, such
as .MP3 les.
• Videos: Filters the video media types on your device, such
as .MOV and .MP4 les.
• Documents: Filters the document media types on your device, such as PDF, .DOC and .XLS les.
• Getting Started: This allows you to learn more about the G-CONNECT iPad App and some
common functionality.
• Delete: Use the native iPad swipe on a le in the List Viewing mode to reveal the red Delete
button. Tap on the button to delete the le.
• Sign Out: Located at the top of the Navigation Bar. This option allows you to sign out of the
iPad App.
Page 41

p.41
Overview of iPad®/iPhone® App
Preferences: iPad App
Located at the top of the Navigation Bar, this option is available only to Admin
users to update their device preferences and passwords.
• SSID Hotspot: Wireless Network (SSID) name entered during setup. You may change this
information here. Remember to re-connect to the new network upon saving.
• Wi-Fi
®
Password: Enter a new Wireless Network (SSID) password.
• Conrm Password: Conrm the new Wireless Network (SSID) password.
• Guest Access: Allows the admin user to turn o guest access. This option is turned ‘on’ by
default.
• DLNA Streaming: Turns o streaming to other DLNA compliant devices from your iPad
app. This option is turned ‘on’ by default.
• Software Version: Displays the current iPad app software version.
• Support: Links to the G-CONNECT Support Page. *Requires an Internet connection.
Page 42

p.42
Overview of iPad®/iPhone® App
Main User Interface (UI)
The Main User Interface (UI) is where you view and interact with the content on your
G-CONNECT device. When you click on a link in the Navigation Bar, the Main UI will
display the related content in a browsing view.
The Main UI has two viewing modes that present content in dierent layouts:
Thumbnail Viewing mode and List Viewing mode. Users can switch back and forth
between the two using the buttons on the screen. The default view upon signing into
the iPad App is the Welcome to G-CONNECT screen.
Page 43

p.43
Overview of iPad®/iPhone® App
Header Bar
Horizontally across the top of the screen is the Header Bar, which contains features
such as the Thumbnail View, List View and Sort.
Thumbnail Viewing Mode Button
Thumbnail Viewing mode displays small pictorial images of les on G-CONNECT along
with the le name underneath. The image that is displayed represents the media type,
such as a .JPG or .PDF document.
Folders such as the Public folder and any sub folders the user may create will also be
listed here. The Thumbnail Viewing mode does not have the ability to sort content.
This is only available in the List Viewing mode.
List Viewing Mode Button
List Viewing mode displays media les in a row and column format. Each row contains
a small thumbnail image alongside the le name, le date and le size. Each column
heading allows you to sort the content in this view.
The Main User Interface (UI) contains functions that allow you to sort content, view
content in dierent ltered modes as well as delete les. Some of the functions will
be dierent depending on if you are in the File Browser or within the ltered views of
Photos, Music, Videos or Documents.
Sort
Ability to sort content on the G-CONNECT device by File Name, Date Modied, File Size
and File Type.
Page 44

p.44
Overview of iPad®/iPhone® App
Oine Mode
In the Navigation Bar, select the iPad icon. This is used to view content that has been
locally saved to the iPad device.
When you tap this option, you will be taken into an oine version (not connected) of
the G-CONNECT iPad application.
You will come to the Welcome Screen that has four large icons for Photos, Music, Videos
and Documents.
You can tap on any of the icon links to be taken directly to the specied media les
stored on the iPad. The left side of the screen has text links that you can tap on as well,
to be taken directly to the specied media les stored the iPad.
Page 45

Unique G-CONNECT Features
•
Stream Content to Other Devices ........................... p.46
•
Create a Wi-Fi
®
Hotspot ................................................ p.46
•
Private and Public Content ........................................ p.47
•
Provide Guest Access ................................................... p.47
•
Oine Mode for iPad ................................................... p.48
Page 46

p.46
Unique G-CONNECT Features
Unique G-CONNECT Features
G-CONNECT oers many simple and unique features that allow you to view and
manage your content while in your home, dorm room, oce or on-the-go.
Stream Content to Other Devices
For a terric entertainment option, use G-CONNECT to wirelessly stream content from
the device to iTunes, iPad, personal computers and other DLNA compliant devices.
Using the File Browser in the Web Application, Admin users can select a folder and click
on the ‘Streaming Share’ button to share the contents within this folder with iTunes and
other DLNA compliant devices.
To remove the folder from being shared in the future, the Admin can go to the
Streaming Folders tab of the Preferences page. This page will display a list of folders that
are shared to iTunes and other DLNA compliant devices. Hover over each folder to see a
‘Remove’ button to un-share the folder.
You can completely disable streaming
by un-checking the ‘Enable DLNA/iTunes
streaming on the Ethernet port’. DLNA
streaming is always turned on for Wi-Fi. See
the Streaming Folders Tab section
for more information.
Create a Wi-Fi Hotspot
To create a Wi-Fi hotspot, plug in a network connection from your router to the
G-CONNECT Ethernet port. Point your wireless devices, such as your personal computer
or iPad, to the G-CONNECT network. You will be able to access both
G-CONNECT’s content and the Internet simultaneously.
Page 47

p.47
Overview of Web Application
Private and Public Content
Admin and Guest users can access content located on the G-CONNECT device via the
File Browser. The device comes with two ways to secure content either by placing them
in a Private area or a Public Folder.
Admin users have access to all content on the G-CONNECT
device. They may place specic content into the Public folder
in the File Browser. Any content that the Admin places in
this Public folder is viewable by Guest users as well. All other
content that is not placed in this Public folder is only viewable
by the Admin user and is deemed Private.
Within the Public folder is a set of four default category folders:
Photos, Music, Videos, and Documents, which is a good system
for organizing content.
Provide Guest Access
As an Admin user, you can give friends and family access to your G-CONNECT as a
‘Guest’ user. Any content you place in the ‘Public’ folder on your G-CONNECT will be
accessible by Guest users.
By default, Guest access is enabled. The password that Guests will use to log into the
G-CONNECT is the same password used to access the wireless network (SSID).
In the Wireless Settings tab of the Preferences page, there is a checkbox to ‘Enable guest
folder access’. If you would like to disable Guest access, you will need to uncheck this
option.
Note: If Guest access is disabled, you will not see the ‘Guest’ option in the dropdown box
when logging in.
Page 48

p.48
Unique G-CONNECT Features
Oine Mode for iPad
You do not need to connect to the device in order to access your les, since they are
directly stored on your iPad.
To save les for viewing in Oine Mode, you must select a le and view the Actions
Menu for that le. Within the Actions Menu is an option for ‘Save to G-CONNECT app’ in
the mobile G-CONNECT application.
In order to view these les, you will access the iPad icon. Any content saved to the
mobile G-CONNECT app is viewable when you do not have a connection to your
G-CONNECT.
Page 49

Additional Resources
•
Connecting to the Internet ....................................... p.50
•
Web Application Preferences ................................... p.50
•
How to View Files: Web Application ....................... p.55
•
How to View Files: iPad
®
App ..................................... p.56
•
Sharing Files ................................................................... p.57
•
Uploading Files: Web Application ........................... p.57
•
Downloading Files ........................................................ p.58
Page 50

p.50
Additional Resources
Connecting to the Internet
You can use your G-CONNECT device as a Wi-Fi hotspot to browse the Internet. Just
plug the Ethernet cable from your home router into the G-CONNECT device and open
a browser to begin surng the web.
Web Application Preferences
You may update your System Preferences in both the Web and Mobile applications by
clicking on the Preferences link.
The Preferences page in the web application is viewable only to the Admin user and
allows them to update user and device preferences for the G-CONNECT.
The Preferences page is organized into ve tabs with SAVE and CANCEL buttons on
each tab. The Save button will apply the change while the Cancel button will take the
Admin user out of the Preferences and back to media browsing.
Note: There is a
subset of the list
of Preferences from
the Web Application,
within the mobile
application. The
information on this
page is carried over
during the setup
process, but can also
be updated here.
Page 51

p.51
Additional Resources
Wireless Settings Tab
The Wireless Settings tab gives options for
changing the current Wireless Network (SSID)
Name as well as the Wireless & Guest Password
information.
Wireless Network (SSID) Name
This eld displays the current name of your
G-CONNECT wireless network.
You can rename your network by entering a
new name in this eld. The new name is not
case sensitive, and must be 1 to 32 characters.
Click the Save button to save the new name.
Note: If you change the Wireless Network (SSID)
Name, you will need to reconnect to the network upon saving your changes.
Change Your Wireless & Guest Password
This eld displays the current password for your G-CONNECT Wireless network.
To change the password, enter a new password in the Password eld, and then retype
it in the Conrm Password eld. Click the Save button to save your new password.
Passwords must be 8 to 63 characters long and include at least one numeric character.
Enable Guest Access Checkbox
The Admin user can share content on the G-CONNECT with friends and family by
giving them Guest access. This checkbox activates or deactivates Guest access, which
is turned on by default.
Page 52

p.52
Additional Resources
Admin Settings Tab
The Admin Settings tab is where the Admin user can update their password and
password hint information.
The Admin username is always ‘admin’ and not editable, but the Admin password can
be changed. Passwords must be 8 to 63 characters and contain at least one numeric
character.
The Admin’s current Password Hint will appear in the Password Hint eld. To update this,
delete the text in the eld and enter a new hint. Save to apply all changes.
Options Tab
The Options tab displays the current date and time information, which is already set. You
can also update your current time zone here.
This tab also includes a checkbox option to opt-in to HGST updates and receive emails
for future promotions.
Page 53

p.53
Additional Resources
Streaming Folders Tab
The Streaming Folders tab displays a list of folders that are being streamed to DLNA and
iTunes Streaming devices.
To un-share a folder in this list, hover over a folder and click on the red REMOVE button.
Folders are added to this Streaming list with the ‘Streaming Share’ button in the File
Browser.
Enable DLNA/iTunes Streaming on the Ethernet Port checkbox
This checkbox is turned on by default and allows DLNA and iTunes streaming from the
G-CONNECT over the Ethernet port. DLNA and iTunes streaming is always turned on for
Wi-Fi connections.
Un-check the checkbox to turn o DLNA/iTunes streaming through the Ethernet port.
Page 54

p.54
Additional Resources
About Tab
The About tab displays information regarding the technical specications of the
G-CONNECT software such as the Software version, API version and links to the Terms of
Use and Privacy Policy.
Capacity Gauge
Each tab of the Preferences pages shows a Capacity Gauge. This is a horizontal bar
displaying the total storage capacity of your G-CONNECT device and a breakdown of
the media types currently stored.
Page 55

p.55
Additional Resources
How to View Files: Web Application
In the Web Application, you can easily view and play les located on G-CONNECT from
either the File Manager or Media Browsing views. Both of these options display your
content in Thumbnail and List Viewing modes so you can easily nd the le that you
want.
In the Thumbnail Viewing mode, you can click on the le itself to launch.
• Single clicking on a photo thumbnail will launch the photo in a zoomed view, where
you will have options to rotate, download the photo or close out of the zoomed view.
• Single clicking on a music thumbnail will launch the G-CONNECT Music Player, where
you will have easy to use functions such as Pause/Play, Repeat and Volume Control.
• Single clicking on a video thumbnail will launch the video.
• Single clicking on a document thumbnail will ask you to open it in a corresponding
application or to save the le.
In the List Viewing mode, there is an Actions column that contains the actions you can
take against each le type.
• Actions available for Photos are download, zoom-in and delete le.
• Actions available for Music les are download, play and delete le.
• Actions available for Videos are download, play and delete.
• Actions available for Documents are download and delete.
Page 56

p.56
Additional Resources
How to View Files: iPad® App
In the iPad App, in both Thumbnail and List Viewing modes, you can click on the le
itself to launch.
• Single clicking on a Photo thumbnail will launch the photo in a zoomed view, where
you will have options to begin a slideshow, move forward and backwards and rotate
the photo. The following set of Actions are available on the photo:
• Email Photo: Email the photo using your default email program on your iPad.
• Share to Facebook: Share the photo to your Facebook account.
• Export to iPad Photo app: Save the photo to your iPad’s Photo Library for
later viewing.
• Save to G-CONNECT app: Saves the photo to the ‘Oine Mode’ library, where you
can access the le for later use.
• Add to My Favorites: Saves a copy of the photo to the Photos – My Favorites
folder on your G-CONNECT.
• Single clicking on a Music thumbnail will launch the G-CONNECT Music Player, where
you will have easy-to-use functions such as Play, Pause and Time length of the song.
• Single clicking on a Video thumbnail will launch the video in the G-CONNECT video
player, if the le is supported.
• Single clicking on a Document thumbnail will open a preview version of the
document. The following set of Actions are available on the document:
• Open in: Allows you to open the le in another app that is already downloaded on
your iPad.
• Print: Allows you to send the document to a printer.
Page 57

p.57
Additional Resources
Sharing Files
Sharing les on the G-CONNECT is easy with Guest access. The Admin user can give
Guest access to an unlimited amount of friends and place content to share in the
Public Folder. Admin users may also share les such as Photos or Documents by
emailing them from the G-CONNECT device, and using their default email program on
their device.
Uploading Files: Web Application
Once your G-CONNECT has been successfully setup, you can add content in a variety
of ways. The recommended way to quickly add content to the device is by using the
included USB-Y cable.
Power o the G-CONNECT device and disconnect the power adapter. Plug the two
identical ends of the USB-Y cable into your personal computer and the third end of
the cable into your G-CONNECT device.
Note: Files added into the top level folders are Private and visible by the Admin user
only. Files added under the Public folders are accessible both Admin and Guest users.
Open the Finder on your Mac
®
or Windows Explorer® on your PC, and nd the
G-CONNECT icon. Drag and drop les easily from your personal computer into the
default folders provided for you on the G-CONNECT. It is not required that you utilize
these folders.
Note: Files added into the top level folders are Private and visibile by Admin
users only. Files added under the Public folders are accessible by both Admin and
Guest users.
Page 58

p.58
Additional Resources
Downloading Files
You can download les from your G-CONNECT directly to your personal computer
using the G-CONNECT Web Application or to your iPad
®
/iPhone® device using the
mobile applications.
Downloading Files: Web Application
Using the Web Application, locate the le type that you want to download. You
can easily download les from the G-CONNECT in either the File Manager or Media
Browsing views in both the Thumbnail and List Viewing modes.
To download a photo, music le, video and/or a document, click on the blue hover
‘Download’ button that appears on the Thumbnail image itself when in Thumbnail
Viewing mode and in the Actions column when in List Viewing mode. The le will
automatically begin to download when you select the button. You may save the le
directly to your hard drive or other portable storage.
Downloading: iPad App
Using the iPad App, locate the le type on the G-CONNECT that you would like to
download. You can easily download les from the G-CONNECT in either the File
Manager or Media Browsing views in both the Thumbnail and the List Viewing modes.
To download a photo, music le, video or document in List Viewing mode, click on the
blue advance arrow which will display the Actions Menu. Choose the action ‘Save to
G-CONNECT app’ which will download a copy of the le for viewing when in Oine
Mode.
To download a photo in Thumbnail Viewing mode, click on the photo image to zoom
in. The bottom right hand corner will display an arrow to open the Actions Menu.
Choose the action ‘Save to G-CONNECT app’ which will download a copy of the le
type for viewing when in Oine Mode. Music, Video and Document les can only be
downloaded in the List Viewing mode and not the Thumbnail Viewing mode.
Page 59

Frequently Asked Questions
•
Supported iPad
®
Video Formats ............................... p.60
•
Enable Gigabit Ethernet Connection ..................... p.60
•
Factory Reset/Reset Your Device ............................. p.61
•
Problems with Connectivity ...................................... p.62
•
Use with Apple Time Machine
®
................................. p.62
•
Drive Formatting ........................................................... p.62
•
Links to Support Page ................................................. p.62
Page 60

p.60
Frequently Asked Questions
Supported iPad® Video Formats
The following table represents supported video playback requirements for the
G-CONNECT iPad App.
Due to the well-documented complexity in video formatting, there may be unique
combinations of encoding, settings and le formats which may not play via the
G-CONNECT iPad App.
Enable Gigabit Ethernet Connection
The G-CONNECT by default has the Wi-Fi® enabled with the Ethernet port connection
as 10/100. To enable the Gigabit Ethernet port, you will need to turn o the Wi-Fi on
your device.
To disable the Wi-Fi, you will need to press and hold the Wi-Fi button on the
G-CONNECT for 1-2 seconds. The Wi-Fi indicator will turn o.
To re-enable the Wi-FI, just press the button and the Wi-Fi will turn on and the
indicator will light up.
Page 61

p.61
Frequently Asked Questions
Factory Reset/Reset Your Device
If you need to reset your device back to the Factory Settings make sure the device is
powered on and following the steps below:
1. Once the device is powered on, plug an Ethernet cord into the Ethernet port.
2. Press and hold the Wi-Fi
®
button for at least 10 seconds, until you see the Status light
begin to blink. Then let go of the button.
3. The reset process takes approximately two (2) minutes and will be done
automatically by the device. You will know the reset is nished when the Status light
stops blinking.
4. In a new browser window, go to the Setup page at gtech-connect.com.
Note: When you reset your device, certain information that had been entered
during setup and use will not be saved. You will need to run through the Web
Application Setup process and enter this information again. Any saved Photo
image orientations, Favorites and all Preference Settings will not remain ‘saved’.
Page 62

p.62
Frequently Asked Questions
Problems with Connectivity
iPad® App
If you do not see your G-CONNECT device in listed on the Device Selection page of the
iPad App, make sure that the G-CONNECT is powered on and that you are connected
to the G-CONNECT Wi-Fi
®
network and within range of the G-CONNECT device. You can
check your Wi-Fi Settings on the ‘Settings – Wi-Fi’ icon on your iPad.
Web Application
Verify that you are actually connected to the device under Wireless Networks on your
Mac
®
or Windows® personal computer. You may have lost connection to the device, which
would produce a 404 Error page.
Use with Apple Time Machine
®
You can use your G-CONNECT to perform Apple Time Machine Backups. Please go to the
following link for more information on Apple Time Machine:
g-technology.com/support/g-connect.
Drive Formatting
Out of the box, the G-CONNECT device is ready for use with Mac OS X® and Windows
systems and comes formatted as FAT-32, which is ideal for cross-platform use.
Links to Support Page
For more information, please visit our online technical support page for videos, FAQ’s and
other supporting documentation at g-technology.com/support/g-connect.
Page 63

Support & Warranty
•
Technical Support ......................................................... p.64
•
Limited Warranty ........................................................... p.65
•
Copyright ........................................................................ p.67
Page 64

p.64
Support & Warranty
Technical Support
If you have any comments or questions about this manual or the product, please let
us know! G-Technology appreciates and values its customers, striving to give you the
nest service and support. If you encounter any diculties while installing or the
G-CONNECT device, please contact G-Technology Technical Support at
g-technology.com/support/contact_support.
When contacting Technical Support, it’s best to be in front of your computer and have
the following information available:
• Serial number (on bottom of unit) of your G-CONNECT device
• Operating System and version
• Computer model
• List of other devices attached to your computer
Page 65

p.65
Support & Warranty
Limited Warranty
HGST, a Western Digital Company (“HGST”)
Including G-Technology for External Hard Disk Drives
What does this limited warranty cover?
This Limited Warranty applies to new HGST products purchased from an authorized HGST
dealer by the original purchaser for normal use and not for resale. HGST warrants that a covered
product is free from defects in materials and workmanship, with the exceptions stated below.
How long does limited warranty coverage last?
This limited warranty lasts for 1 year, 2 years, 3 years or 5 years, or a xed period from date
of purchase, depending on when and where it was originally purchased. To determine the
warranty specically for your product, visit
g-technology.com. A valid proof of purchase may
be required to prove eligibility. If you do not have a valid proof of purchase, the limited warranty
period will be measured from the date of sale from HGST to the authorized distributor.
What does this limited warranty not cover?
The limited warranty does not cover damage resulting from commercial use, misuse,
accident, modication or alteration to hardware or software, tampering, unsuitable physical
or operating environment beyond product specications, improper maintenance, or failure
caused by a product for which HGST is not responsible.
There is no warranty of uninterrupted or error-free operation. There is no warranty for loss
of data—you must regularly back up the data stored on your product to a separate storage
product. There is no warranty for product with removed or altered identication labels.
HGST DOES NOT PROVIDE ANY OTHER WARRANTIES OF ANY KIND, INCLUDING, BUT NOT
LIMITED TO, THE IMPLIED WARRANTIES OR CONDITIONS OF MERCHANTABILITY AND FITNESS
FOR A PARTICULAR PURPOSE. SOME JURISDICTIONS DO NOT ALLOW THE LIMITATION OF
IMPLIED WARRANTIES, SO THIS LIMITATION MAY NOT APPLY TO YOU. HGST is not responsible
for returning to you product which is not covered by this limited warranty.
Page 66

p.66
Support & Warranty
What must you do?
If you are having trouble with a product, before seeking limited warranty service, rst follow the
troubleshooting procedures that HGST or your reseller provides.
To obtain limited warranty service, you must rst obtain a Return Materials Authorization (RMA)
and ship-to address by contacting G-Technology at
g-technology.com/support. Please follow
the instructions found on the website. You must return the covered hard disk drive using approved
packaging to our logistics center. You must pay any associated transportation charges, duties and
insurance in shipping the drive to our logistics center. You should remove all personal information
from the product prior to its return.
What will HGST do?
HGST will replace the drive with a functionally equivalent replacement product, transportation
prepaid. HGST may replace your product with a product that was previously used, repaired and tested
to meet HGST specications. You receive tile to the replaced product at delivery to carrier at HGST
shipping point. You are responsible for importation of the replaced product, if applicable. HGST will
not return the original drive to consumers; therefore, the consumer is responsible for moving data to
another media before returning. Data Recovery is not covered under this warranty and is not part of
the warranty returns process. HGST warrants that the replaced products are covered for the remainder
of the original product warranty or 90 days, whichever is greater.
How is our liability limited?
HGST AND ITS AFFILIATES, SUPPLIERS, DISTRIBUTORS, AND RESELLERS ARE NOT LIABLE FOR ANY
OF THE FOLLOWING: 1) THIRD-PARTY CLAIMS AGAINST YOU FOR DAMAGES (OTHER THAN BODILY
INJURY INCLUDING DEATH AND TANGIBLE PERSONAL PROPERTY; 2) LOSS OF, OR DAMAGE TO, YOUR
DATA; OR 3) SPECIAL, INCIDENTAL, OR INDIRECT DAMAGES OR FOR ANY ECONOMIC CONSEQUENTIAL
DAMAGES (INCLUDING LOST PROFITS OR SAVINGS), EVEN IF INFORMED OF THE POSSIBILITY.
SOME JURISDICTIONS DO NOT ALLOW LIMITATION OF LIABILITY, INCIDENTAL DAMAGES, OR
CONSEQUENTIAL DAMAGES, SO THE ABOVE LIMITATIONS MAY NOT APPLY TO YOU.
How do local laws apply?
THIS LIMITED WARRANTY GIVES YOU SPECIFIC LEGAL RIGHTS, AND YOU MAY ALSO HAVE OTHER
RIGHTS WHICH VARY FROM JURISDICTION TO JURISDICTION.
Page 67

p.67
Support & Warranty
CAPACITY DEFINITION AND DISCLAIMER
For G-Technology products 1TB or greater: “One gigabyte (GB) is equal to one billion bytes
and one terabyte (TB) equals 1,000 GB (one trillion bytes). Accessible capacity will vary from
the stated capacity due to formatting and partitioning of the hard drive, the computer’s
operating system, and other factors”
For G-Technology products less than 1TB: “One gigabyte (GB) is equal to one billion
bytes when referring to hard drive capacity. Accessible capacity will vary depending on the
operating environment and formatting.”
Copyright
One gigabyte (GB) is equal to one billion bytes when referring to hard drive capacity.
Accessible capacity will vary depending on the operating environment and formatting.
Design by G-Technology in California. G-CONNECT and G-Technology are registered
trademarks of HGST, Inc. and its aliates in the U.S. and other countries. Apple, Mac, FireWire,
MacBook Pro, Time Machine, iPhone, iPad and the Mac logo are trademarks of Apple, Inc.
Microsoft, Windows, Windows Vista and Windows XP are trademarks or registered trademarks
of Microsoft Corporation in the US and/or other countries. Other trademarks are the property
of their respective owners.
©2013 G-Technology, a division of HGST, Inc. All rights reserved. R2 08/13
 Loading...