

Page 1
GTECH GTSIM101
Desktop Wireless Phone
USER GUIDE
Page 2

Table of Contents
General Information 1-4
Getting To Know Your Phone 5-6
Installation and Connection 7-8
Using the Phone 9-29
Page 3

IMPORTANT INFORMATION ON SAFE AND EFFICIENT OPERATION,
READ THIS INFORMATION BEFORE USING YOUR PHONE.
Safety
Exposure to Radio Frequency (RF) Energy
Your phone contains a transmitter and a receiver. When it in ON, it
receives and transmits RF energy. When you communicate with your
phone, the system handling your call controls the power level at
which your phone transmits.
RF Energy Interference/Compatibility
Nearly every electronic device is susceptible to RF energy
interference from external sources if inadequately shielded, designed,
or otherwise configured for RF energy compatibility. In some
instances your phone may cause interference.
Facilities
Turn off your phone in any facility where posted notices instruct
you to do so. These facilities may include hospitals or health care
facilities that may be using equipment that is sensitive to external
RF energy.
Medical Devices
Radio signal transmitted from the unit may cause interference to
hearing aids.
It is recommended that if you have a pacemaker fitted you check
with a medical expert before using this product.
1
Other
Radio signal transmitted from the unit may cause interference to
electrical equipment, such as TV’s, Microwave, Computers etc.
It is recommended that the unit be placed at least one meter away
from such appliances.
Cleaning
Make sure the unit is off and the charger is not plugged in before
cleaning the unit.
Use a damp cloth or anti-static wipe to clean. Never use
household polish as this may damage the product.
Environmental
Only use the power supply suitable for the GTEC range. Using
an unauthorized power supply will invalidate your warranty and
may damage the telephone.
Do not expose unit to direct sunlight.
Do not expose the unit to fire, explosive or other hazardous
conditions.
Declaration of Conformity
We declare under our sole responsibility that the product detailed in
this manual, and in combination with our accessories, conform with
the essential requirements and other relevant provisions of
Directive 1999/5/EC. Notified body mark for GSM module approval
is CE1177.
2
General Information
General Information (Cont…)
Page 4
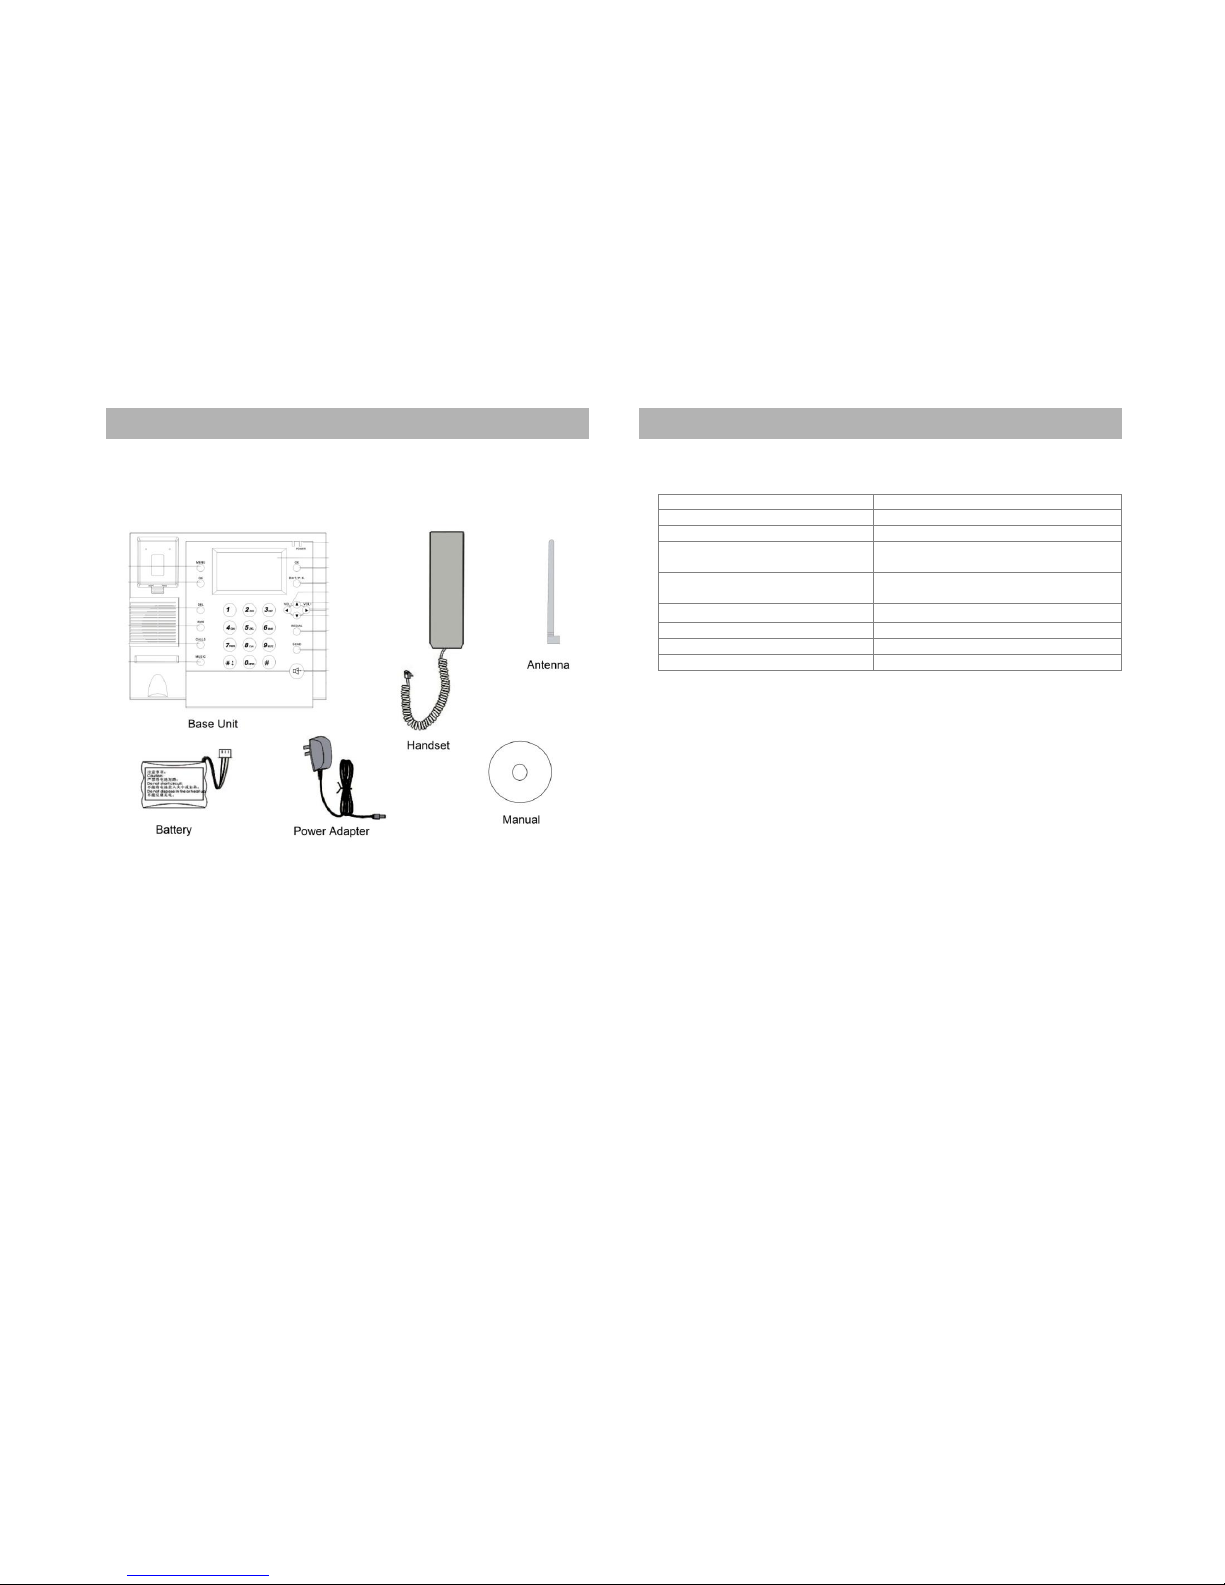
Packing List
Included in the box is the following.
Base Unit
Handset and curly cord
Power Adapter
Backup Battery
Antenna
User Manual.
3
Technical Information
4
Dimensions (W x D x H)
200mm x 175mm x 65mrn
Weight
Less than l.0kg
Mounting Mode
Horizontal
Input Voltage
AC: 220V , 50Hz
DC:5V l000mA
Battery
Type: Li-ion
Voltage:3.7V Capacity :1000mAh
Ambient Temperature
- l0"c-55'c
Storage Temperature
-20"c-70.c
Relative Humidity
10%-95%
Working Frequency
GSM 900/1800 Mhz
General Information (Cont…)
General Information (Cont…)
Page 5

1. POWER LIGHT INDICATOR
2. LCD Display
3. OK Key
In standby mode, press to access the Phone Book. In Menu
Mode press to go to the next screen
4. Exit/P.B. Key:
In standby mode, press to access the Phone List. In Menu Mode
press to go to the previous screen.
5. ◄(VOL -)
In standby mode, press to access the Tone Setup. In Operational
Mode press to adjust the volume down.
5
6. ▲(Up)
In standby mode, press to access the Alarms. In Menu Mode
press to scroll up.
7. ► (VOL +)
In standby mode, press to access the Tones. In Operational Mode
press to adjust the volume up.
8. ▼ (Down)
In standby mode, press to access the Write Messages screen. In
Menu Mode press to scroll down..
9. REDIAL
In standby mode/Operational Mode, press to redial the last
number.
10. SEND
In standby mode, press to access the Dialed Calls. In Menu
Mode press to dial a number.
11. Speaker
In standby mode, press to receive or make calls
12. MENU
In standby mode, press to access the Menu
13. OK
In standby mode, press to access the Phone Book. In Menu
Mode press to go to the next screen.
14. DEL
In standby mode, press to access the Phone List. In Menu Mode,
press to delete one character at a time.
15. SMS
In standby mode, press to access the Messages.
16. CALLS
In standby mode, press to access the Call History.
17. MUSIC
In standby mode, press to access the Ring Tones.
6
Getting to Know your Phone
Getting to Know your Phone
Page 6

1. Power port
2. On/Off Switch
3. Data Port
Handset Connection
Connect the handset to the 616 port on the left hand side of
the phone.
SIM Card Installation
Make sure you turn off the phone before installing the SIM.
Turn the phone over to locate the SIM card slot.
Insert the SIM into the SIM card slot.
7
External Power Adapter and Antenna Installation
Screw on the antenna into the antenna socket on the right
hand side of the phone.
Insert the power adapter into the power port labeled DC 5V,
and plug it into a power source.
Turning the phone On and Off
Turn the switch to the ON position, the display lights up, and
the phone begins to search for the appropriate network.
Turn the switch to the OFF position, the display goes off,
and the phone is now off.
8
Installation and Connection
Installation and Connection (Cont…)
Page 7

Basic Operations
Making a Call
Pick up the handset, and dial the number. Press SEND, or wait 3
seconds for the call to connect.
End a Call
Press the EXIT/P.B button to abort the call, or just hang up the
handset.
Receiving a Call
When you receive a call, the phone rings, and the display shows the
incoming call number. Pick up the handset or press the Speaker
button twice to receive the call.
Handset Receiver Volume
During a call, you can adjust the volume of the handset receiver by
pressing◄(-) to reduce the volume or (+)► to increase it.
Handsfree
Handsfree lets you talk to a caller without holding the handset. It also
enables other people to participate in the conversation.
Make a call using handsfree
To make a call using hands free, press the speaker button, the
speaker icon is displayed, and you hear your call over the
loudspeaker.
Receive a call using handsfree
To receive a call using hands free, press the speaker button twice.
The call is then transferred to the loudspeaker.
9
Switch to handsfree during a call
During a call press the speaker button, the speaker icon is displayed,
and you hear your call over the loudspeaker. To switch the handsfree
off, and return to the handset at anytime, just pick up the handset, or
press the speaker button again to end the call.
Redial
Pick up the handset and press the REDIAL button, the last number
dialed will be redialed
Placing a Call on Hold
During a call, you have the option to do the following. Press OK and
scroll to choose from.
Hold
End
Mute
Hold
1. Press OK to place the call on hold, the display shows Call Held,
and the call is placed on hold. Press OK again and select
Retrieve to take the call off hold.
End
1. Press OK to end the call, the display shows Call Ended and the
call is disconnected.
Mute
1. Press OK to mute the microphone. Press OK again to take it off
mute.
10
Using the Phone
Using the Phone (Cont…)
Page 8

Menu Operations
1. Phone Book
You can store up to 100 names and numbers in the Phonebook,
names can be up to 16 characters long and numbers up to 30 digits.
Search Entry
2. Press MENU and then 1 to proceed to the Search Entry option
in the Phone Book screen.
3. Press OK to proceed.
4. To search for an entry in the Phone Book, you can input a name
and press OK. If more than one entry appears, you can use the
▲▼ buttons to traverse through the entries to find the one you
want.
5. Press OK to get into the submenus. You have the following
options to choose from.
View
Edit
Delete
Copy
Move
Send Message
View (Check details of an entry)
1. Press OK to display the details of the entry selected.
Edit (Edit entry details)
1. Press OK to display the details of the entry.
2. Use the ▲▼ buttons to select the entry you wish to edit and
press OK to make the change
11
Delete (Delete an Entry)
1. Press OK to delete the entry selected, the display shows Delete?
2. Press OK (Yes) to proceed or Exit/P.B. (No) to abort.
Copy (Copy an Entry from SIM to Phone or Phone to SIM)
1. Press OK to copy the entry selected, the display shows Copy?
2. Press OK (Yes) to proceed or Exit/P.B. (No) to abort.
Move (Move an Entry from SIM to Phone or Phone to SIM)
1. Press OK to move the entry selected, the display shows Move?
2. Press OK (Yes) to proceed or Exit/P.B. (No) to abort.
Send Messages
1. Press OK to send a message to the entry selected. Enter a
message of up to 512 characters and press OK. You are then
presented with the following options. 1. Send Only 2. Save and
Send 3. Save.
2. Use the ▲▼buttons to select the appropriate option, and press
OK to send the message.
Add New Entry
1. Select the Add New Entry option in the Phone Book screen, and
press OK to proceed.
2. Choose from the To SIM or To Phone option and press OK.
3. Select the <Name> option and press OK to enter a name.
4. Type in the name and press OK, scroll to <Number> and press
OK to enter a number.
5. Press Exit/P.B. to save details, the display shows Save? Press
OK (Yes) to proceed or Exit/P.B. (No) to abort.
Follow the same procedure to save the corresponding number entry.
12
Using the Phone (Cont…)
Using the Phone (Cont…)
Page 9

Delete All
1. Press OK to delete all entries.
2. Choose from the From SIM or From Phone option and press
OK.
3. Delete Phone? or Delete SIM? is displayed, depending on the
option selected previously.
4. Press OK (Yes) to proceed or Exit/P.B. (No) to abort.
Copy All
1. Press OK to copy all entries.
2. Choose from the From SIM or From Phone option and press
OK.
3. Copy Phone? or Copy SIM? is displayed, depending on the
option selected previously.
4. Press OK (Yes) to proceed or Exit/P.B. (No) to abort.
Memory Status
This displays the number of entries on the SIM and on the phone.
13
2. Messages
You can save and receive up to 100 messages on the phone.
Received messages are stored in the INBOX, and the Save and
Send, and Save messages are stored in the OUTBOX.
Write Message
1. Press MENU and then 2 to proceed to the Write Message
option in the Messages screen.
2. Press OK to proceed.
3. Compose a message, of up to 612 characters and press OK. You
are then presented with the following options. 1. Send Only 2.
Save and Send 3. Save 4. Send To Many.
4. Use the ▲▼buttons to select the appropriate option, and press
OK to proceed.
5. Enter the number or search for the recipient in the phone book,
and press OK to send.
Inbox
Use the ▲▼buttons to select the message to read and Press OK.
You will be presented with the following options.
Forward
Reply
Delete
Edit
Use Number
14
Using the Phone (Cont…)
Using the Phone (Cont…)
Page 10

Forward (Send message to others)
1. Press OK to forward the message, you will be presented with the
following options. 1. Send Only 2. Save and Send 3. Save.
2. Use the ▲▼buttons to select the appropriate option, and press
OK to proceed.
3. Enter the number or search for the recipient in the phone book,
and press OK to send.
Reply (Reply to a message)
1. Press OK to compose a reply.
2. Press OK again, Reply? is displayed
3. Press OK (Yes) to proceed or Exit/P.B. (No) to abort.
Delete (Delete a message)
1. Press OK to delete the entry selected, the display shows Delete?
2. Press OK (Yes) to proceed or Exit/P.B. (No) to abort.
Edit (Update message to send)
1. Press OK to edit an existing message.
2. Press OK again, and you will be presented with the following
options. 1. Send Only 2. Save and Send 3. Save.
3. Use the ▲▼buttons to select the appropriate option, and press
OK to proceed.
4. Enter the number or search for the recipient in the phone book,
and press OK to send.
Use Number (Dial or Save the number)
1. Press OK to dial or save the number.
2. Choose from the Dial or Save option. Dial will call the number,
Save allows you to choose form the following options, To SIM
or To Phone.
3. Select the Name option and press OK to enter a name.
4. Type in the name and press OK, press Exit/P.B., Save? is
displayed
.15
5. Press OK (Yes) to proceed or Exit/P.B. (No) to abort.
Outbox
Use the ▲▼buttons to select the message to read and Press OK.
You will be presented with the following options.
Send
Edit
Delete
Use Number
Send (Send a message)
1. Press OK to send a message and you will be presented with the
following options. 1. Send Only 2. Send to Many.
2. Use the ▲▼buttons to select the appropriate option, and press
OK to proceed.
3. Press OK (Yes) to proceed or Exit/P.B. (No) to abort.
Edit (Update message to send)
1. Press OK to edit an existing message.
2. Press OK again, and you will be presented with the following
options. 1. Send Only 2. Save and Send 3. Save.
3. Use the ▲▼buttons to select the appropriate option, and press
OK to proceed.
4. Enter the number or search for the recipient in the phone book,
and press OK to send.
Delete (Delete a message)
1. Press OK to delete the entry selected, the display shows Delete?
2. Press OK (Yes) to proceed or Exit/P.B. (No) to abort.
16
Using the Phone (Cont…)
Using the Phone (Cont…)
Page 11

Use Number (Dial or Save the number)
1. Press OK to dial or save the number.
2. Choose from the Dial or Save option. Dial will call the number,
Save allows you to choose form the following options, To SIM
or To Phone.
3. Select the Name option and press OK to enter a name.
4. Type in the name and press OK, press Exit/P.B., and Save? is
displayed.
Delete
Use the ▲▼buttons to select the Delete option and Press OK. You
will be presented with the following options.
Delete Inbox
Delete Outbox
Delete All
Delete Inbox (Delete all inbox messages)
1. Press OK to delete all inbox entries, the display shows Delete
All Inbox?
2. Press OK (Yes) to proceed or Exit/P.B. (No) to abort.
Delete Outbox (Delete all outbox messages)
1. Press OK to delete all outbox entries, the display shows Delete
all Outbox?
2. Press OK (Yes) to proceed or Exit/P.B. (No) to abort.
Delete All (Delete all messages)
1. Press OK to delete all outbox entries, the display shows Delete
all Messages?
2. Press OK (Yes) to proceed or Exit/P.B. (No) to abort.
17
Message Settings
Use the ▲▼buttons to select the Message Settings option and Press
OK. You will be presented with the following options.
Profile Setting
Common Setting
Memory Status
This displays the number of message entries on the SIM and on the
phone.
18
Using the Phone (Cont…)
Using the Phone (Cont…)
Page 12

3. Call History
The call history holds up to 10 Missed Calls, 10 Dialed Numbers
and 10 Received Calls. Calls are all stored in the order they were
received or dialed.
Missed Calls
1. Press MENU and then 3 to proceed to the Missed Calls option
in the Call History screen.
2. Press OK to display the list of Missed Calls.
3. Use the ▲▼buttons to select the call from the list, and press
OK. Details of the missed call are displayed. Press OK again and
you will be presented with the following options.
Delete
Save
Dial
Edit
Delete (Delete an entry from missed calls)
1. Press OK to delete the entry selected, the display shows Delete?
2. Press OK (Yes) to proceed or Exit/P.B. (No) to abort.
Save (Save an entry from missed calls)
1. Press OK to save the number, you can choose from the following
options, To SIM or To Phone, select the appropriate option and
press OK
2. Select the Name option and press OK to enter a name.
3. Type in the name and press OK, press Exit/P.B., Save? is
displayed.
4. Press OK (Yes) to proceed or Exit/P.B. (No) to abort.
19
Dial (Dial a number in the list)
1. Press OK to dial.
Edit (Update message to send)
1. Press OK to edit the existing number.
2. Choose from the To SIM or To Phone option and press OK.
3. Select the Name option and press OK to enter a name.
4. Type in the name and press OK, press Exit/P.B., and Save? is
displayed.
5. Press OK (Yes) to proceed or Exit/P.B. (No) to abort.
Dialed Calls
1. Use the ▲▼buttons to select the Dialed Calls option in the Call
History screen and press OK, this will display the list of Dialed
Calls.
2. Use the ▲▼buttons to select the call from the list, and press
OK. Details of the dialed call are displayed. Press OK again and
you will be presented with the following options.
Delete
Save
Dial
Edit
Delete (Delete an entry from dialed calls)
1. Press OK to delete the entry selected, the display shows Delete?
2. Press OK (Yes) to proceed or Exit/P.B. (No) to abort.
20
Using the Phone (Cont…)
Using the Phone (Cont…)
Page 13

Save (Save an entry from dialed calls)
1. Press OK to save the number, you can choose from the following
options, To SIM or To Phone, select the appropriate option and
press OK
2. Select the Name option and press OK to enter a name.
3. Type in the name and press OK, press Exit/P.B., Save? is
displayed.
4. Press OK (Yes) to proceed or Exit/P.B. (No) to abort.
Dial (Dial a number in the list)
1. Press OK to dial.
Edit (Update message to send)
1. Press OK to edit the existing number.
2. Choose from the To SIM or To Phone option and press OK.
3. Select the Name option and press OK to enter a name.
4. Type in the name and press OK, press Exit/P.B., and Save? is
displayed.
5. Press OK (Yes) to proceed or Exit/P.B. (No) to abort.
Received Calls
1. Use the ▲▼buttons to select the Received Calls option in the
Call History screen and press OK, this will display the list of
Received Calls.
2. Use the ▲▼buttons to select the call from the list, and press
OK. Details of the received call are displayed. Press OK again
and you will be presented with the following options.
Delete
Save
Dial
Edit
21
Delete (Delete an entry from received calls)
1. Press OK to delete the entry selected, the display shows Delete?
2. Press OK (Yes) to proceed or Exit/P.B. (No) to abort.
Save (Save an entry from received calls)
1. Press OK to save the number, you can choose from the following
options, To SIM or To Phone, select the appropriate option and
press OK
2. Select the Name option and press OK to enter a name.
3. Type in the name and press OK, press Exit/P.B., Save? is
displayed.
4. Press OK (Yes) to proceed or Exit/P.B. (No) to abort.
Dial (Dial a number in the list)
1. Press OK to dial.
Edit (Update message to send)
1. Press OK to edit the existing number.
2. Choose from the To SIM or To Phone option and press OK.
3. Select the Name option and press OK to enter a name.
4. Type in the name and press OK, press Exit/P.B., and Save? is
displayed.
5. Press OK (Yes) to proceed or Exit/P.B. (No) to abort.
Delete Call Log
Use the ▲▼buttons to select the Delete Call Log option and Press
OK. You will be presented with the following options.
Missed Calls
Dialed Calls
Received Calls
Delete All
22
Using the Phone (Cont…)
Using the Phone (Cont…)
Page 14

Missed Calls (Delete all missed calls)
1. Press OK to delete all missed call entries, the display shows
Delete?
2. Press OK (Yes) to proceed or Exit/P.B. (No) to abort.
Dialed Calls (Delete all dialed calls)
1. Press OK to delete all dialed call entries, the display shows
Delete?
2. Press OK (Yes) to proceed or Exit/P.B. (No) to abort.
Received Calls (Delete all received calls)
1. Press OK to delete all received call entries, the display shows
Delete?
2. Press OK (Yes) to proceed or Exit/P.B. (No) to abort.
Delete All (Delete all calls)
1. Press OK to delete all call entries, the display shows Delete?
2. Press OK (Yes) to proceed or Exit/P.B. (No) to abort.
Call Time
Use the ▲▼buttons to select the Call Time option and Press OK.
You will be presented with the following options.
Last Call Time
Total Sent
Total Received
Reset All Time
Last Call Time
1. Press OK to display details of the last call time.
23
Total Sent
1. Press OK to display details of the total calls made.
Total Received
1. Press OK to display details of the total calls received.
Reset All Time
1. Press OK to delete all call entries, the display shows Delete?
2. Press OK (Yes) to proceed or Exit/P.B. (No) to abort.
.
4. Settings
Allows you to set the Date/Time, Alarms, Phone Setup, Owner
Information etc.
Alarm
1. Press MENU and then 4 to proceed to the Alarm option in the
Settings screen.
2. Press OK to proceed with setting the alarm.
3. Use the ▲▼buttons to select any of the 4 alarm options and
Press OK.
4. Press OK to select the frequency of the alarm, Off, Once or
Every Day.
5. Use the ▲▼buttons to select the time field and press OK to
change.
6. Set the time and press Exit/P.B to save settings, the display
shows Save?
7. Press OK (Yes) to proceed or Exit/P.B. (No) to abort.
24
Using the Phone (Cont…)
Using the Phone (Cont…)
Page 15

Set Time/Date
1. Press OK to proceed with setting the Time and Date.
2. Use the ▲▼buttons to select the Time or Date option and press
OK.
3. Set the Time or Date and press OK, press Exit/P.B. to save
settings, the display shows Save?
4. Press OK (Yes) to proceed or Exit/P.B. (No) to abort.
Phone Setup
The phone setup allows you to setup the following.
Language
Volume
Tone Setup
Greeting Text
LCD Backlight
Restore Factory Set
Contrast
Language
1. Press OK to choose from English or Chinese.
2. Use the ▲▼buttons to select the appropriate language and press
OK to set the language.
Volume
1. Press OK to choose from Ring Tone or Key Tone volume.
2. Use the ▲▼buttons to select the appropriate option and press
the ◄(-) to reduce the volume or (+)► to increase it, and press
OK. The volume is now set.
25
Tone Setup
1. Press OK to choose from the following.
Incoming
Alarm
Power On
Power Off
Message Tone
Keypad Tone
2. Use the ▲▼buttons to select from any of the above options and
press OK.
3. Use the ▲▼buttons to select from any of the 12 tones and press
OK. The tone is now set.
Greeting Text
1. Press OK to enter a welcome text.
2. Press OK to save.
LCD Backlight
1. Press OK to set the backlight fade.
2. Use the ▲▼buttons to select the appropriate time delay and
press OK to set the delay.
Restore Factory Set
1. Press OK to reset the device back to factory defaults.
2. Enter the following password “1122” when prompted and press
“OK” to proceed.
Contrast
1. Press OK to change the contrast.
26
Using the Phone (Cont…)
Using the Phone (Cont…)
Page 16

2. Use the ◄(-) to reduce the contrast or (+)► to increase it, and
press OK. The contrast is now set.
Owner Number
1. Press OK to set the owner number, this will appear as the Call
ID on the receivers phone.
Auto Call
1. Press OK to set the auto call delay, choose from 3 to 12 seconds
and press OK to set the delay time.
Speed Dial
1. Press OK to set the speed dials for up to 9 numbers. You will be
presented with the following options.
Enable Speed Dial
Set Number
2. Press OK to toggle between On and Off for the Enable Speed
Dial option.
3. Select Set Number, and Press OK, select an Empty field and
press OK to edit. Press OK again and type in or search for a
number from the Phone Book.
4. Press OK to set the speed dial number.
Security Setup
1. Press OK to set the SIM Lock or Change Pwd.
2. Press OK to toggle between On and Off for the SIM Lock.
27
3. Call Service
The Call Service allows you to set the following.
Network Selection
Band Selection
Call Divert
Call Waiting
Network Selection
1. Press MENU and then 5 to proceed to the Network Selection
option in the Call Service screen.
2. Press Ok to choose between Automatic and Manual Network
Selection.
3. Manual allows you to choose from available networks, it is
suggested that you leave the setting to Automatic
Band Selection
1. Press OK to choose from the following.
850
900
1800
1900
Auto Band
2. Use the ▲▼buttons to select from any of the above options and
press OK to save the band selection.
28
Using the Phone (Cont…)
Using the Phone (Cont…)
Page 17

Call Divert
1. Press OK to choose from the following Call Diversion options.
All Voice Calls
If Unreachable
If No Answer
If Busy
All Data Calls
Cancel All Divert
To set any of the above Call Diversions, follow the following steps.
1. Press OK to choose from Activate, Deactivate or Query Status.
2. To Activate press OK, and enter or search the number you wish
to divert to.
3. Select the number and press OK. Press OK again to confirm the
diversion.
4. To Deactivate, select Deactivate and press OK to confirm the
deactivation.
Call Waiting
1. Press OK to choose from Activate, Deactivate or Query Status.
2. To Activate Call Waiting, press OK, the display shows Call
Waiting Activated for All Teleservices
3. To Deactivate, select Deactivate and press OK to confirm the
deactivation, the display shows Call Waiting Deactivated for
All Teleservices
4. Query Status shows you if Call Waiting is Activated or
Deactivated.
29
Using the Phone (Cont…)
 Loading...