

Page 1
Page 2
Wireless Fabric Keyboard | User Guide
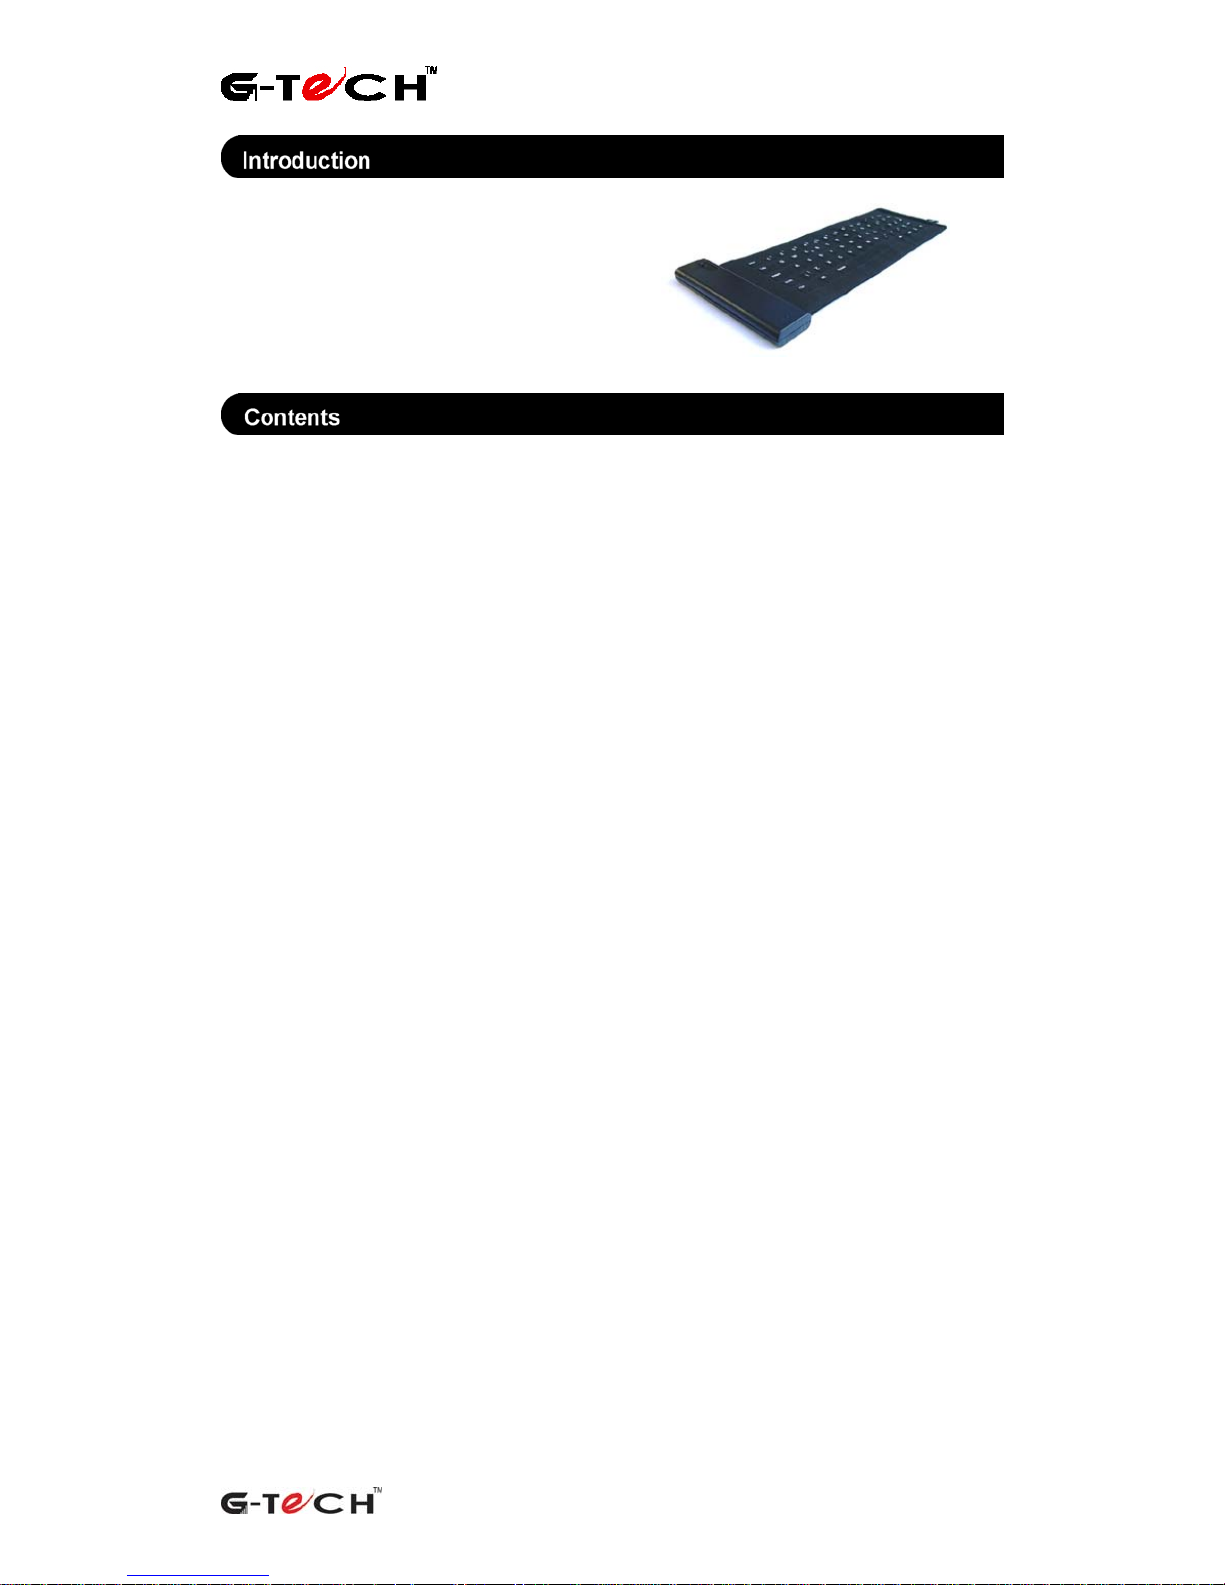
The Wireless Fabric Keyboard
for Smartphones and Handheld Computers
redefines mobile working.
This User Guide will show you how to get the
most from your Fabric Keyboard.
• Introduction page 02
• Getting to know your Keyboard page 03
• Insert the batteries page 03
• Battery status page 04
• Calibration page 04
• Stuff sack page 04
• Device stand page 04
• Using your Keyboard page 05
• Typing on the keyboard page 05
• Alphabet and number keys page 06
• Navigation keys page 06
• Special characters page 06
• ‘Hot Tips’ page 07
• Turning the keyboard ON/OFF page 08
• Loading the driver page 08
• Connect/disconnect page 08
• Useful indicators page 08
• Settings and Preferences page 08
• Languages page 08
• Sensitivity page 09
• Key repeat rate page 09
• Key repeat delay page 09
• Keyclicks page 10
• Timeout page 10
• Power Management page 10
• Accidental power ON protection page 10
• Auto shutdown page 11
• Care Guide page 11
• About ElekTex® page 11
Wireless Fabric Keyboard | User Guide (version 1.0) 2
Page 3
Wireless Fabric Keyboard | User Guide
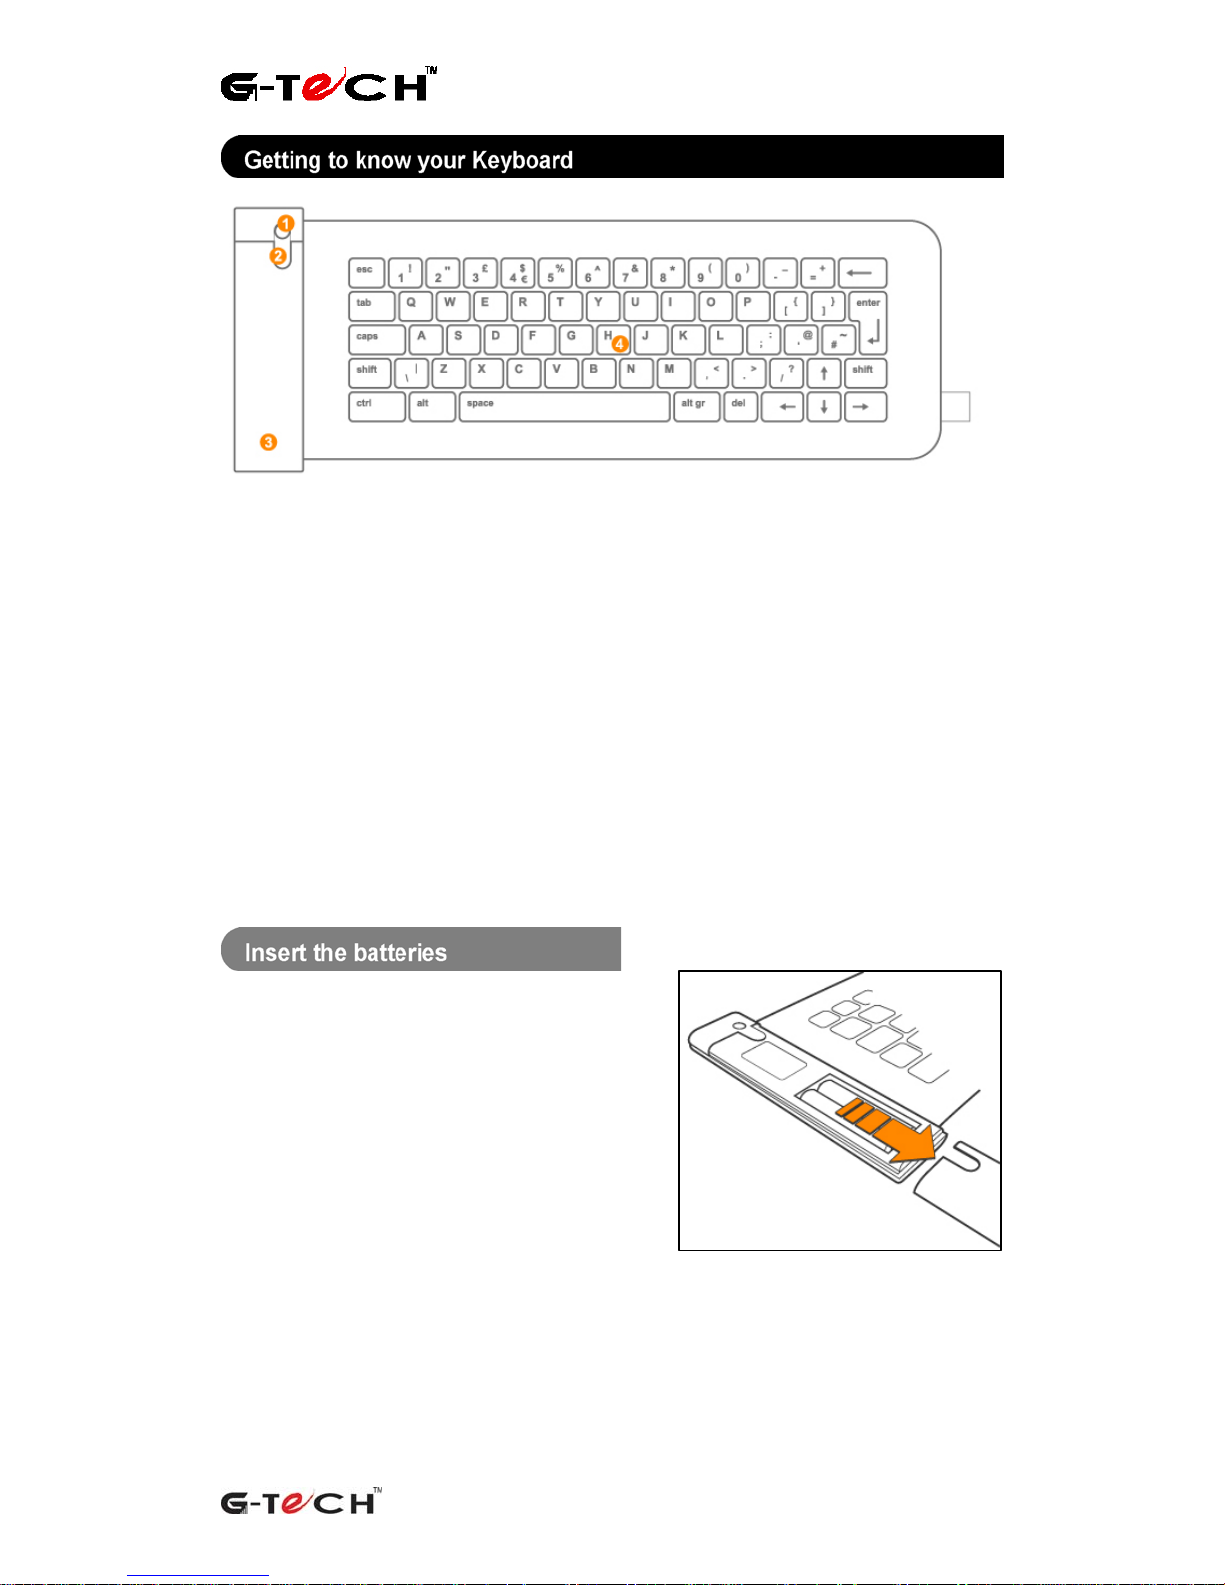
1. ON/OFF button 3. Slide on battery cover
2. Green LED indicator 4. Fabric keyboard
Your lightweight, portable Wireless Fabric Keyboard has the following features:
• 63-key QWERTY format with full size cursor keys
• Shortcut key combination functions
• Supplied with unique patented universal device stand
• Dimensions (open): 306 x 124mm (12 x 4.5”)
• Dimensions (stowed): 124 x 48 x 32mm (5 x 2 x 1.2”)
• Weight: 68g (2.4oz)
• Materials: Sensor – Nylon/PU, Plastic Casing – ABS
• Power: 2 x AAA batteries, no power feed required from target device
• Typical battery life: 10 hours continuous typing
• Wireless connectivity: Bluetooth™
• Operating temperature: 0 to 45ºC
Your keyboard requires 2 x AAA batteries.
It will operate using both rechargeable and
non-rechargeable batteries.
To insert or replace batteries:
1. Remove slide-on battery cover
2. Insert 2 x AAA batteries into the battery
compartment (in correct orientation)
3. Replace slide-on battery cover
Battery handling:
• Use only AAA high-capacity, super
alkaline or lithium disposable batteries
• Never mix old and new batteries or use
different types of batteries together
• Do not expose batteries to direct heat
or dispose of them by burning
• Batteries must be disposed of according
to local laws and regulations
Wireless Fabric Keyboard | User Guide (version 1.0) 3
Page 4
• Remove batteries from the keyboard if
it will not be used for an extended
period of time
• Remove dead batteries from the
keyboard, if they are not removed they
may leak and cause damage
The battery status for the Fabric Keyboard can
Note: the battery level displayed is
be viewed within the ‘Fabric Keyboard’
application, under the ‘Options’ menu.
This feature optimises typing performance by
aligning the key positions on the keyboard. It is
highly recommended that Calibration be carried
out when the Fabric Keyboard is connected for
the first time.
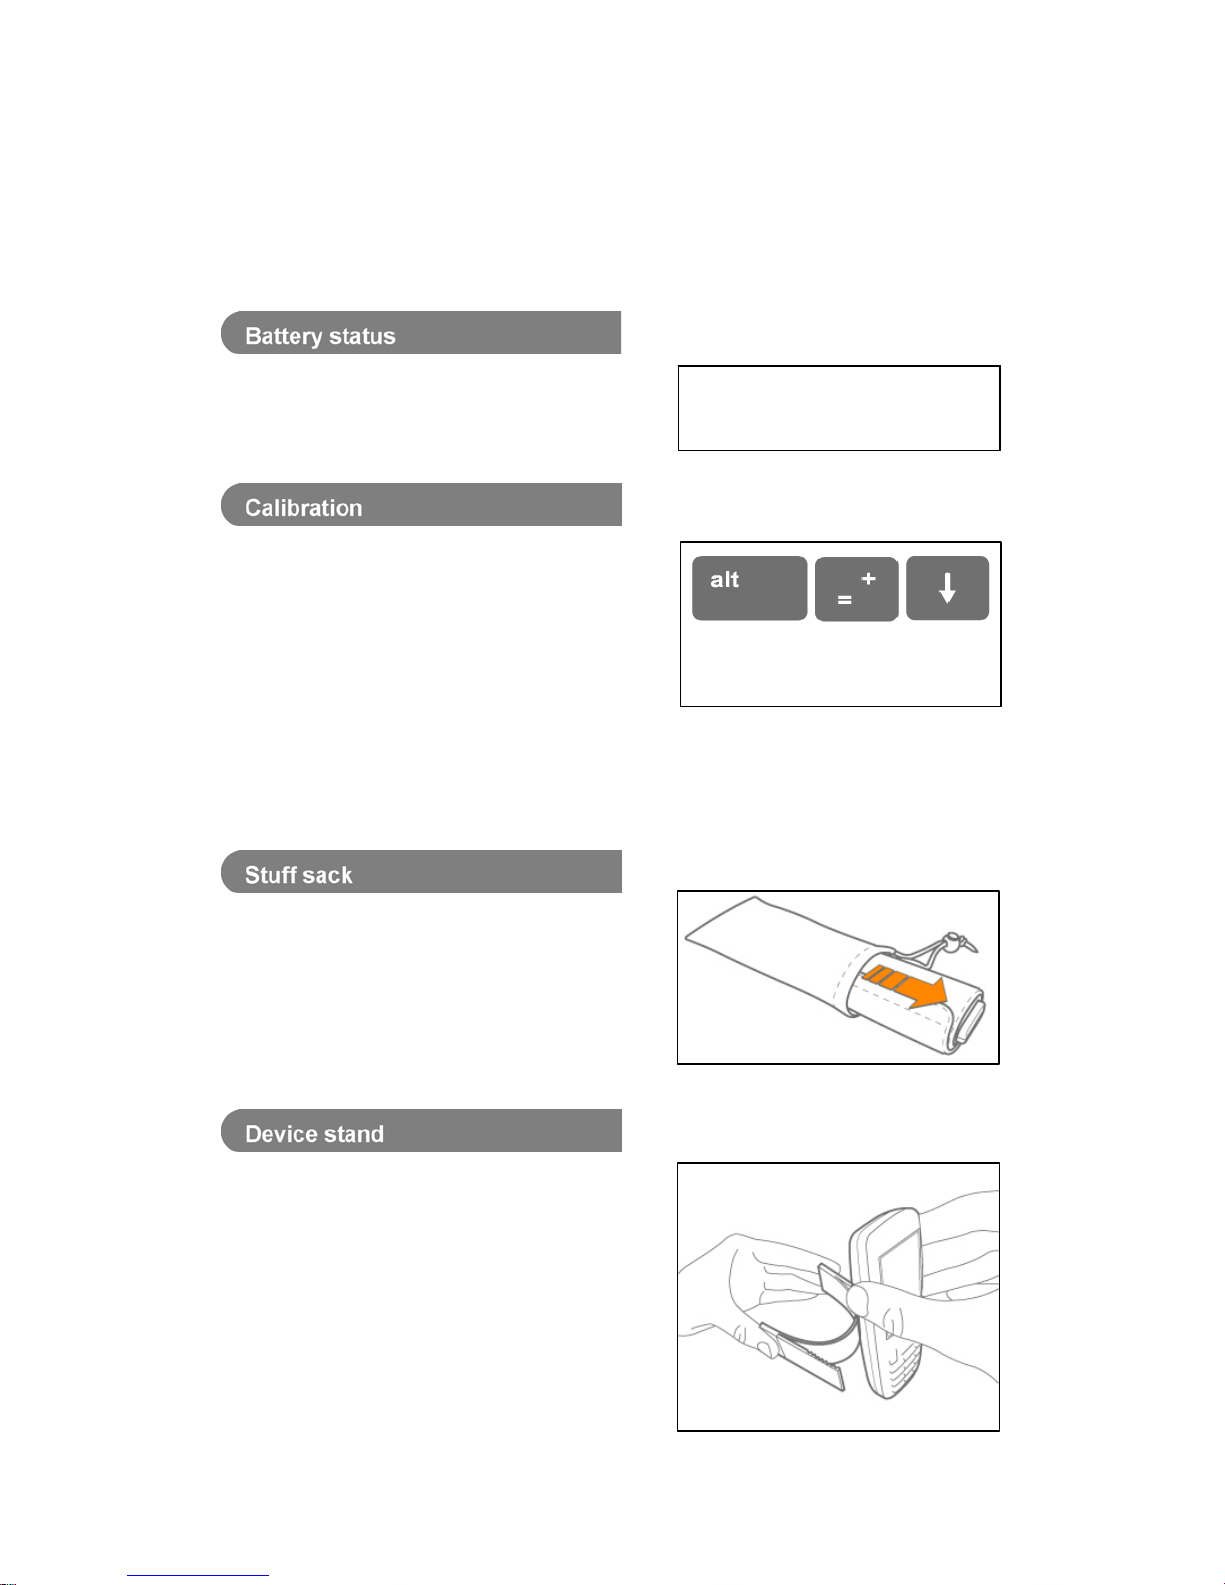
To calibrate your keyboard:
Follow the calibration sequence,
pressing the keys centrally and
in order as prompted
1. Connect the keyboard to your device
2. Select ‘Options’ > ‘Calibration’ from
the opening screen of the ‘Fabric To abort Calibration select ‘Cancel’
Keyboard’ application To use the Default Calibration settings
3. Follow the onscreen instructions select ‘Default’
A fabric stuff sack is provided for stowing your
Fabric Keyboard away when it is not in use.
The stuff sack offers a handy way to carry your
keyboard.
It will also carry the supplied device stand.
indicates the status for nonrechargeable batteries only.
A universal device stand is supplied with your
Fabric Keyboard to hold your Smartphone or
PDA at your preferred angle for typing.
1. Flex the stand until the arms stick out
2. Insert your Smartphone or PDA
3. Ensure the device lies flat against the
back of the stand
Page 5

Wireless Fabric Keyboard | User Guide
4. You can adjust the angle of the device
by sliding the arms of the stand up/down
the device until you achieve your
preferred viewing angle
• The keys on your keyboard are pressure
sensitive. This means that although you
may not need to press hard on each key
you will need to apply some pressure in
order to generate a character.
• Instead of pressing two keys at once
(as on a desktop keyboard), you should
press the keys sequentially. For
example, instead of pressing and
holding ‘shift’ and ‘7’ to get ‘&’ you
would press ‘shift’ then ‘7’ to get ‘&’.
• Most keys contain a number of useful
characters or symbols that become
active by using the ‘altgr’ key.
• Once you have pressed ‘altgr’, press
the character key repeatedly to browse
through the available characters for
that key (a list of special characters is
provided in the following section).
• After pressing ‘altgr’, it remains active
until you either press it again or press
a different character key.
• Press ‘caps’ to switch to upper case.
Press ‘caps’ again to return to lower
case typing.
• Press ‘shift’ followed by a letter if you
want only that letter in upper case.
Press ‘shift’ followed by a number or
punctuation mark if you want the
second character on the key.
Disclaimer: extended periods of
typing can cause stress and
should be avoided. Take a break
periodically. If you experience any
discomfort whilst typing, seek the
advice of a qualified medical
practitioner.
Wireless Fabric Keyboard | User Guide (version 1.0) 5
Page 6

Wireless Fabric Keyboard | User Guide
When using a key such as ‘shift’, ‘ctrl’,
’alt’ or ‘altgr’ you should always press it first,
then the letter key. You cannot press two keys
at the same time.
These keys can be used to navigate through
the menus on your portable device.
A range of special characters are available for
use in typing by using the ‘altgr’ key followed by
a designated key. A table of these keys for the
International English keyboard is shown below:
key
1
4
6 ¼ ¼
7
8
= ÷ ÷
a
b
c
d ∂ ÷ · ∂ ÷ ·
e
h
I
l ø Ø
m
n
o
p £ ¶ ± £ ¶ ±
q
r
s
t
u
y
z
\
/
[
]
# ¬ ¬
‘altgr’ ‘altgr’ and ‘shift’
¡ ¡
€ €
½ ½
¾ ¾
¥ ¥
à á â ã ä å æ À Á Â Ã Ä Å Æ
ß ß
ç © ¢ Ç © ¢
è é ê ë Є È É Ê Ë Є
½ ½
ì í î ï ð ì í î ï Đ
µ µ
ñ Ñ
ò ó ô õ ö ø Ò Ó Ô Õ Ö Ø
¼ ¼
® ®
ß § ß §
Þ ¾ Þ ¾
ù ú û ü Ù Ú Û Ü
ý ¥ Ý ¥
æ Æ
¦ ¦
¿ ¿
« «
» »
Wireless Fabric Keyboard | User Guide (version 1.0) 6
Page 7

Wireless Fabric Keyboard | User Guide
Hot Tips are useful shortcuts. They vary
depending upon your device, please see the
table below for your specific device platform:
Symbian UIQ Hot Tip shortcuts
‘alt’ and ‘M’ Menu
‘alt’ and UP arrow Menu
‘alt’ and ‘K’ Fabric Keyboard application main page
‘shift’ and arrows Select text
‘ctrl’ and ’C’ Copy selected text
‘ctrl’ and ’V’ Paste selected text
‘ctrl’ and ’X’ Cut selected text
Symbian Series60 Hot Tip shortcuts
‘alt’ and ‘M’ Menu
‘alt’ and UP arrow Menu
‘alt’ and ‘K’ Fabric Keyboard application main page
‘alt’ and LEFT arrow Simulates LEFT soft key on phone
‘alt’ and RIGHT arrow Simulates RIGHT soft key on phone
‘alt’ and ‘O’ Options
‘shift’ and arrows Select text
‘ctrl’ and ’C’ Copy selected text
‘ctrl’ and ’V’ Paste selected text
‘ctrl’ and ’X’ Cut selected text
Windows CE PDA Hot Tip shortcuts
‘alt’ and ‘esc’ Access ‘Hot Tips’ menu
‘alt’ and UP arrow Start Menu
‘alt’ and ‘H’ Help
‘alt’ and ‘K’ Fabric Keyboard application main page
‘shift’ and arrows Select text
‘ctrl’ and ’C’ Copy selected text
‘ctrl’ and ’V’ Paste selected text
‘ctrl’ and ’X’ Cut selected text
Windows Smartphone Hot Tip shortcuts
‘alt’ and UP arrow Start
‘alt’ and DOWN arrow Back
‘alt’ and LEFT arrow Simulates LEFT soft key on phone
‘alt’ and RIGHT arrow Simulates RIGHT soft key on phone
‘alt’ and ‘+’ Volume UP
‘alt’ and ‘-’ Volume DOWN
‘alt’ and ‘K’ Fabric Keyboard application main page
‘shift’ and arrows Select text
‘ctrl’ and ’C’ Copy selected text
‘ctrl’ and ’V’ Paste selected text
‘ctrl’ and ’X’ Cut selected text
Wireless Fabric Keyboard | User Guide (version 1.0) 7
Page 8

Wireless Fabric Keyboard | User Guide
To turn the keyboard ON:
Press and hold the ON/OFF button until the
green LED comes ON
To turn the keyboard OFF:
Press and hold the ON/OFF button until the
green LED turns OFF or disconnect the
keyboard using the Fabric Keyboard application.
In order to use your keyboard with a compatible
device, you will need to load the correct driver
(see the relevant Quick Start Guide).
Once paired for the first time, the keyboard can
be easily connected and disconnected from your
device by selecting ‘Connect’ or ‘Disconnect’
from the ‘Fabric Keyboard’ application.
The green LED on the keyboard will indicate
what mode the keyboard is in:
Pairing mode: Green LED on constantly.
Typing mode: Green LED flashing (approx.
every 2 sec) or whenever the key is pressed.
Battery Low, Auto Shutdown: Green LED
flashing rapidly then OFF.
The Fabric Keyboard can be configured to suit
your own individual typing style and to optimise
your typing performance.
The language setting of the keyboard can be
selected from the list of supported languages
within the ‘Fabric Keyboard’ application (under
the ‘Options’ menu).
Wireless Fabric Keyboard | User Guide (version 1.0) 8
Page 9

Wireless Fabric Keyboard | User Guide
The sensitivity setting adjusts how hard you
need to press the keys on the keyboard.
To adjust the Sensitivity of your keyboard:
1. Connect the keyboard to your device
2. Select ‘Options’ > ‘Settings’ or
’Preferences’ from the opening screen
of the ‘Fabr ic Keyboard’ application
3. Scroll left/right to the ‘Sensitivity’ tab
4. Test different Sensitivity levels in the
typing space provided
5. Select your preferred setting
Select ‘Done’ or ‘OK’ when you have finished.
Select ‘Cancel’ to leave settings unchanged.
The Key Repeat Rate setting adjusts how fast
keys will repeat if a key on the keyboard is
held down.
To adjust the key Repeat Rate:
1. Connect the keyboard to your device
2. Select ‘Options’ > ‘Settings’ or
’Preferences’ from the opening screen
of the ‘Fabr ic Keyboard’ application
3. Scroll to the ‘Repeat Rate’ tab
4. Test different Repeat Rate levels in the
typing space provided
5. Select your preferred setting
Select ‘Done’ or ‘OK’ when you have finished.
Select ‘Cancel’ to leave settings unchanged.
The Key Repeat Delay setting adjusts the
length of time that a key needs to be held down
before it repeats.
To adjust the key Repeat Delay:
1. Connect the keyboard to your device
2. Select ‘Options’ > ‘Settings’ or
’Preferences’ from the opening screen
of the ‘Fabr ic Keyboard’ application
3. Scroll to the ‘Repeat Delay’ tab
4. Test different Repeat Delay levels in
the typing space provided
5. Select your preferred setting
Select ‘Done’ or ‘OK’ when you have finished.
Select ‘Cancel’ to leave settings unchanged.
Wireless Fabric Keyboard | User Guide (version 1.0) 9
Page 10

Wireless Fabric Keyboard | User Guide
An audio feedback feature provides an audible
‘click’ when a key is pressed. This feature can
be turned ON/OFF under ‘Options’ or ‘Settings’
within the ‘Fabric Keyboard’ application.
The Timeout feature varies depending upon your
device, please see the table below for your
specific device platform:
Symbian Series60 and UIQ
‘Try to connect for’ – adjusts the period of time that your device will continue to look for a
Bluetooth connection to the keyboard.
‘Disconnect after’– adjusts the length of time for which the connection between the device
and the keyboard will be maintained after the last key has been pressed. The keyboard will
then turn itself OFF.
To adjust, select ‘Options’ > ‘Preferences’ or ‘Settings’ and scroll to the ‘Timeout’ tab
Windows Smartphones and PDAs
‘Connection Timeout’ – adjusts the length of time for which the connection will be
maintained after the last key has been pressed.
To adjust, select ‘Options’ > ‘Connection Timeout’
Your Fabric Keyboard has a number of power
saving features to help conserve battery life.
A protective feature is incorporated in your
keyboard to prevent it being turned on whilst it
is stowed away or not in use. If the keyboard is
rolled up or if a key is being pressed when the
keyboard is turned ON, then the keyboard will
not turn ON.
Note: make sure that nothing is
pressing on the fabric of the
keyboard when turning it ON.
Wireless Fabric Keyboard | User Guide (version 1.0) 10
Page 11

Wireless Fabric Keyboard | User Guide
®
There are certain situations when your keyboard
will turn itself OFF to conserve battery life:
1. In Pairing mode, if Pairing is not
completed within 2 minutes
2. If the battery level is low
3. If the keyboard has not been typed on
for the period of time as set by the
‘Connection Timeout’ setting
Your Fabric Keyboard has a stain resistant
finish. For heavy soiling, simply wipe the
keyboard with a damp cloth.
• Don’t use or place sharp objects on the
fabric of the keyboard as this might
damage it.
• Blot any spills immediately, do not use
cleaning products as these may cause
severe staining or damage.
• If the keyboard gets wet allow it to dry
naturally, do not force it dry or place on
or near radiators or other heat sources.
Note: Using Bluetooth
, in certain
circumstances the use of a
Bluetooth device may not be
permitted (e.g. during aircraft
flight). Please ensure that this
keyboard is used in line with local
regulations and/or practices.
ElekTex
®
is the revolutionary fabric technology that brings your Wireless
Fabric Keyboard to life.
Durable, flexible and lightweight, ElekTex offers a new and exciting touchresponsive interface for portable devices.
Disclaimer: G-Tech warrants its product to be free from defects in material and workmanship for a period of six
months from the date of purchase. For warranty service, buyer must provide a copy of the original receipt
showing the date of purchase. Warranty applies to original purchaser only and is non-transferable.
If a defect occurs, G-Tech will, at its sole discretion, repair or replace the defective unit. If warranty service
involves the exchange of a product, or a part of that product, the item replaced becomes the property of G-Tech.
G-Tech reserves the right to use reconditioned parts that are equivalent or superior to original factory
specifications. Replacement parts are warranted to be free from defects in material or workmanship for a period
of thirty days from the date of repair, or for the remainder of the original period of limited warranty for the
product, whichever is longer.
If the customer authorizes G-Tech to perform any services excluded under this limited warranty, the customer is
responsible for standard repair fees for such work.
This warranty covers only the normal use for which the product is designed. This warranty does not cover any
third party parts, components, or peripheral devices added to G-Tech product, or damage related to accidents,
misuse, improper installation, negligence or shipping.
For warranty service, please contact G-Tech for a Return Authorization Number (RAN) and return the product,
along with dated proof of purchase and RAN to G-Tech at the following address: 5911 Schaefer Ave., Chino,
CA 91710. Please allow approximately 30 days from the date G-Tech receives the product for warranty service
repairs.
FCC: This device complies with Part 15 of the FCC Rules. Operation is subject to the following conditions: 1) this
device may not cause harmful interference, and 2) this device must accept any interference received, including
interference that may cause undesired operation. Changes or modifications not expressly approved by the party
responsible for compliance could void the user’s authority to operate the equipment.
Wireless Fabric Keyboard | User Guide (version 1.0) 11
 Loading...