

Page 1
DrawingBoard V digitizing tablet
Transducer (corded or cordless pen,
4-button or 16-button cursor)
Computer interface cable with 9-pin
connector for RS-232
USB cable
Power supply
CD-ROM with Windows Drivers and
user’s manual
Registration card
Accessory tray*
Mounting brackets*
Two feet*
*For Large Format Digitizer Only
Contents
Verify that your DrawingBoard V package includes the following:
NOTE: Some digitizing applications (typically, non-Windows CAD applications where the
tablet is used solely as a digitizer with no mouse functions) may not require the use of the
TabletWorks software. To configure DrawingBoard V for use with a third-party application,
please refer to the installation instructions in the DrawingBoard V User’s Guide, or the
DrawingBoard V Help file.
NOTE: If your digitizing tablet came with a TabletWorks CD, install the software FIRST, and
then setup the hardware connections for USB or serial, following the instructions below.
Software Configuration
Software drivers provide the communication bridge between your software application and
DrawingBoard V. The GTCO CalComp by Turning Technologies-supplied TabletWorks CD
supports reduced functionality Wintab and TabCon-compatible applications. If you are not
sure about your application’s driver requirements, please contact your application vendor.
Installing the Driver
Insert the CD into the CD-ROM drive on your computer and follow the onscreen prompts to
complete the driver installation. If the CD does not autorun, click the Start button on the
Windows Task Bar and select Run from the menu. Type X:\setup.exe (X represents the CD
drive letter).
Page 2
Hardware Configuration
Installing DrawingBoard V
NOTE: Connect ONLY USB or serial – not both.
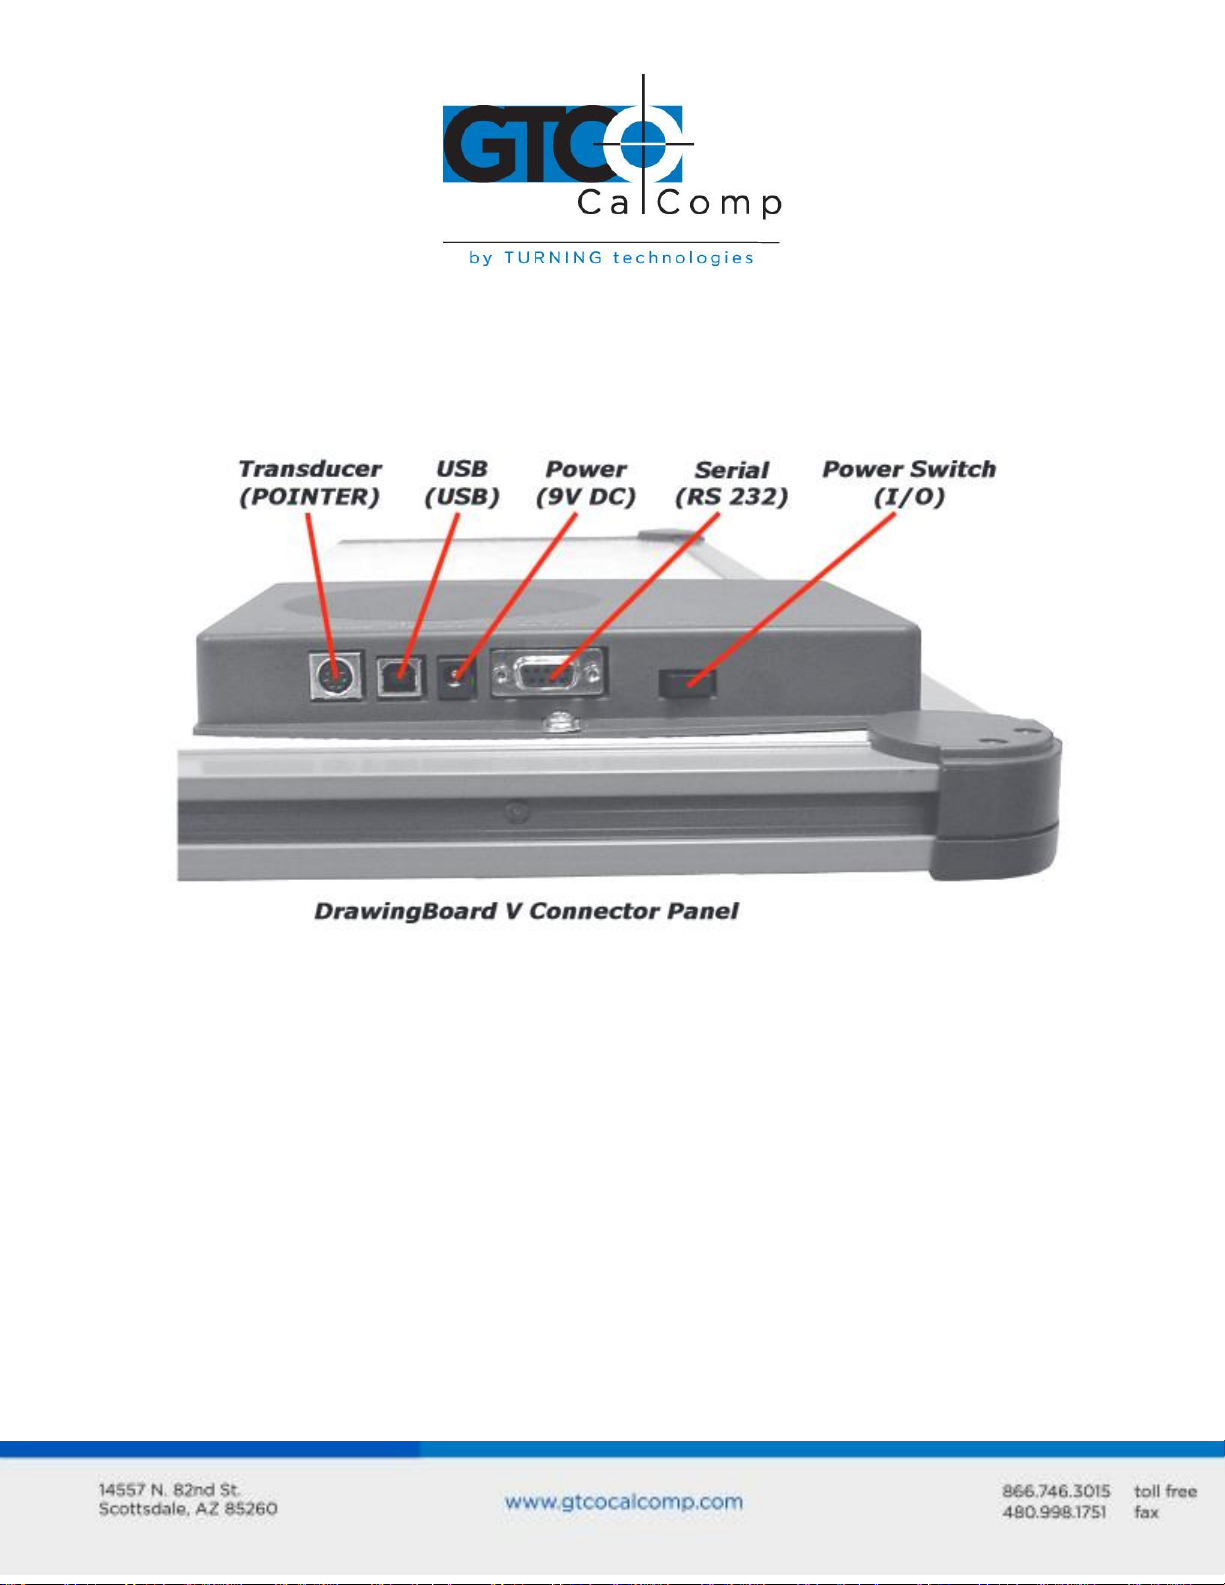
RS-232 Serial Connection
1. Connect the corded transducer – cursor or pen – to the appropriate jack on the
digitizer’s Connector Panel. The connector is keyed and will fit only the correct jack.
Do not force it.
2. Attach the RS-232 serial cable to the serial jack on the Connector Panel. The
connector is keyed and will fit only the correct jack. Do not force it. Join the 9-pin
connector of the serial cable to the serial port on your computer.
3. Plug the power supply into an AC outlet. Connect the power supply to the
appropriate jack on the Connector Panel. Turn the power switch on. The digitizer
will beep once, indicating it has power.
4. Restart your computer.
Page 3

USB Connection – With TabletWorks CD Only –
1. Connect the corded transducer – cursor or pen – to the appropriate jack on the
digitizer’s Connector Panel. The connector is keyed and will fit only the correct jack.
Do not force it.
2. Attach the USB interface cable to the USB jack on the DrawingBoard V Connector
Panel. The connector is keyed and will fit only the correct jack. Do not force it.
3. Join the other end of the USB cable to any one of the USB ports on your
computer or USB hub. Turn the power switch on. The digitizer will beep once,
indicating it has power.
NOTE: Power is supplied through the USB port. No additional power source is needed for
a USB installation, unless you are using DrawingBoard V with a corded high-accuracy
cursor. For that configuration only, connect the power supply before making the USB
connection.
4. If Windows displays the Found New Hardware prompt, follow the onscreen
instructions to finish the Found New Hardware process.
 Loading...