

Montageanleitung
Montageanleitung
Assembly Instructions
Assembly Instructions
Deutsch
English
A
A
CLASS
CLASS
KLASSE
KLASSE
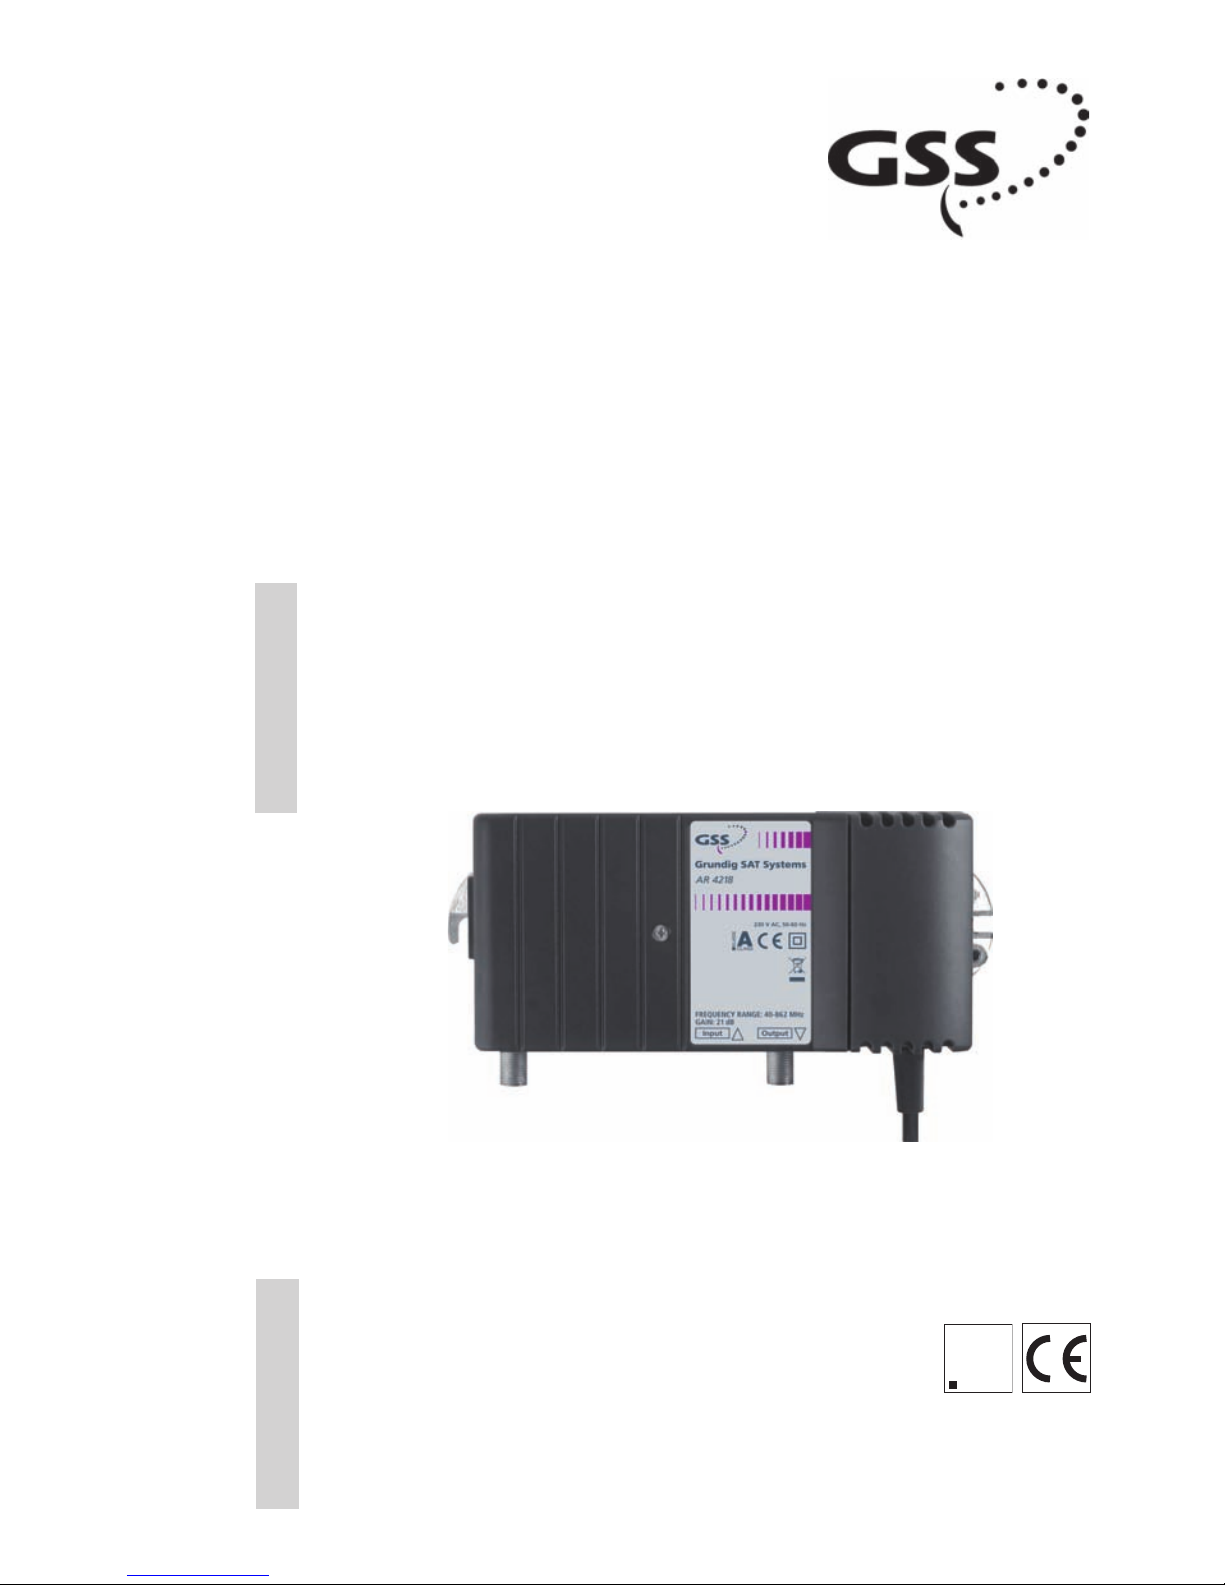
AR 4218
AR 4298
Hausanschluss-Verstärker
Distribution Amplifi ers
GSS
Grundig SAT Systems GmbH
Beuthener Straße 43
D-90471 Nuernberg
Phone: +49 (0) 911 / 703 8877
Fax: +49 (0) 911 / 703 9210
Email: info@gss.tv
Internet: http://www.gss.tv
Grundig SAT SystEms

- 2 -
- 2 -
1 Wichtige Hinweise
• Montieren Sie den Verstärker …
- auf schwer entfl ammbarem Untergrund,
- geschützt gegen Feuchtigkeit und Nässe,
- an einem, gegen direkte Sonneneinstrah lung geschützten Ort,
- nicht in unmittelbarer Nähe von Wärme quellen,
- unter Berücksichtigung der maximal
zulässigen Betriebstemperatur.
• Führen Sie die Installation oder Servicearbeiten nicht bei Gewittern durch.
• Prüfen Sie vor der Inbetriebnahme die Koa
xial-Kabel auf Kurzschlüsse und b
eseitigen
Sie diese gegebenenfalls!
• Schäden durch fehlerhaften Anschluss und /
oder unsachgemäße Handhabung sind von
jeglicher Haftung ausgeschlossen.
• Beachten Sie alle relevanten Normen, Vorschriften und Richtlinien (EN50083-1).
• Erden Sie die Anlage über die Potenzialausgleichsschiene.
• Öffnen Sie die Netzteil-Abdeckung nur, wenn
der Verstärker vom Netz getrennt ist.
• Entsorgen Sie das Produkt nach seiner
Verwendung gemäß den gültigen Entsorgungsvorschriften als Elektronikschrott.
2 Technische Beschreibung
Die in ein Druckgussgehäuse eingebauten breitbandigen Hausanschluss-Verstärker dienen zur
Versorgung von kleinen Gebäudeeinheiten und
sind für die Verstärkung von analogen und digitalen TV-Signalen ausgelegt. Das Eingangssignal ist über einen Pegelsteller von 0 … -20 dB
einstellbar. Das Netzteil ist in das Verstärkergehäuse integriert und über eine verschraubte
Kunststoff-Abdeckung zugänglich.
3 Montage
Achtung:
Montieren Sie den AR 42… so, …
- dass die Konvektionskühlung durch die vertikalen Kühlrippen an der Gehäuserückseite nicht behindert wird,
1 Important information
• Mount the amplifi er ...
- on a non-fl ammable surface (wall),
- protected from moisture and water
(rain or splashing water),
- at a place protected from direct sunlight,
- away from the immediate vicinity of heat
sources,
- taking the maximum permissible operat-
ing temperature into account.
• Do not perform installation and service
work during thunderstorms.
• Check the coaxial cables for short circuits
before starting. Eliminate any.
• No liability is accepted for any damage
caused by a faulty connections and / or
inexpert handling.
• Observe all applicable standards, guidelines and directives (EN50083-1).
• Earth the system via the equipotential bonding connector.
• Only open the cover on the mains adapter
if the amplifi er is disconnected from the
mains.
• Dispose of the product after use as electronic waste in compliance with the applicable disposal regulations.
2 Technical description
The broadband distribution amplifi ers built
into a die-cast housing are for supplying
small building units. They were designed for
the amplifi cation of analogue and digital TV
signals. The input signal can be adjusted
from 0 ... -20 dB with a level regulator. The
mains adapter is integrated in the amplifi er
housing. It can be accessed via a screwed-on
plastic cover.
3 Assembly
Note:
Mount the AR 42... in such a way ...
- that the convection cooler is not obstructed
by the vertical cooling fi ns on the back of
the housing,

- 3 -
- 3 -
- dass die zulässige Umgebungstemperatur
eingehalten wird (gemessen im Luftstrom
unter dem Gehäuse).
• Hausanschluss-Verstärker gemäß Bemaßung
in nachfolgender Abbildung an die Wand
schrauben (Schrauben: Ø ≤ 4,8 mm).
• Erdungsleitung (Cu ≥ 4 mm2) am Erdungsanschluss A sicher befestigen.
• HF-Eingang und HF-Ausgang anschließen.
4 Einstellungen
• Schraube B herausdrehen (Abb. 1).
• Gehäusedeckel entfernen.
• Mit Dämpfungsregler
C
erforderlichen HF-
Pegel einstellen (Abb. 2).
(Werkseinstellung – Rechtsanschlag = 0 dB,
Linksanschlag = -20 dB).
• Gehäusedeckel schließen:
Gehäusedeckel auf das Gehäuse aufsetzen
und andrücken, dass die Blechlamellen im
158 mm
HF-Ausgang
HF output
HF-Eingang
HF input
158 mm
HF-Ausgang
HF output
HF-Eingang
HF input
Abb. 1 / Fig. 1Abb. 1 / Fig. 1
-20 dB 0 dB
-20 dB 0 dB
Abb. 2 / Fig. 2Abb. 2 / Fig. 2
- that the permissible ambient temperature
is maintained (measured in the airstream
below the housing).
•
Screw the distribution amplifi er onto the
wall according to the dimensions in the following illustration (screws:
Ø
≤ 4.8 mm).
•
Fasten the earthing line (Cu ≥ 4 mm2) to the
earthing connection
A securely.
•
Connect HF input and HF output.
4 Adjustment
• Remove screw B (Fig. 1).
• Remove the housing cover.
• Use the attenuation controller
C to set the
required HF level (Fig. 2).
(factory setting – right-hand stop = 0 dB,
left-hand stop = -20 dB).
•
Close the housing cover:
Put the housing cover onto the housing
and press it on so that the metal fi ns press

against the housing from the inside in
closed state.
• Use screw
B to fasten the housing cover
(Fig. 1).
5 Specifi cations
The distribution amplifi ers fulfi l the directives EN 50083-1, EN 50083-2/class A,
EN 50083-3/quality class 2, EN 60065 and
the guidelines and standards for CE labelling.
Unless otherwise stated, these specifi cations
are typical values which in practice may be
higher or lower inside the tolerance range
usual for the branch.
geschlossenen Zustand von innen an das
Gehäuse drücken.
• Mit Schraube B Gehäusedeckel befestigen (Abb. 1).
5 Technische Daten
Die Hausanschluss-Verstärker erfüllen die Normen EN 50083-1, EN 50083-2/Klasse A,
EN 50083-3/Güteklasse 2, EN 60065,
sowie die Normen und Vorschriften zur
CE-Kennzeichnung.
Sofern nicht anders angegeben, entsprechen
diese Angaben typischen Werten, die branchenüblich in der Praxis nach oben und unten abweichen können.
Alterations reserved. Technical data E. & O.E.
Änderungen vorbehalten. Technische Angaben ohne Gewähr © by GSS GmbH 03072006
AR 4218 AR 4298
Frequenzbereich / Frequency range
MHz 40 … 862
Verstärkung / Gain
dB 21 29
Dämpfungssteller / Level adjuster
dB 0 … -20
Rauschmaß / Noise fi gure
dB 6
Rückfl ussdämpfung / Return loss
dB 16 (min. Kat. C / min. cat. C)
Impedanz / Impedance
Ω
75
Ausgangspegel / Output level (IMA = 60 dB)
IMA 2 gem. / acc. to EN 50083-3
IMA 3 gem. / acc. to EN 50083-3
IMA 3 gem. / acc. to EN 50083-5
CSO Cenelec 42 Kanal / Channel 862 MHz
CTB Cenelec 42 Kanal / Channel 862 MHz
Max. Betriebspegel / Max. operating level (EMV)
dBµV
dBµV
dBµV
dBµV
dBµV
dBµV
100
107
113
97
100
105
105
109
115
101
100
105
Elektrische Anschlusswerte / Connected loads
Versorgungsspannung / Supply voltage (50 … 60 Hz)
Leistungsaufnahme / Power consumption
V~
W
230
3
230
5
Umgebungsbedingungen gem. EN 60065 /
Ambient conditions acc. to EN 60065
Betriebstemperaturbereich /
Operating temperature range
Schutzart / Degree of protection
Schutzklasse / Protection class
°C -25 … +55
II, schutzisoliert / II, totally insulated
IP 20
Gehäuse / Housing
Gewicht / Weight
Abmessungen (B x H x T) / Dimensions (W x H x D)
Schirmdämpfung gem. EN 0083-2, Klasse A /
Screening attenuation acc. to EN 0083-2, class A
HF-Anschlüsse / HF connections
kg
mm
dB
ca. / approx. 0.65
150 x 80 x 50
75 min.
F-Buchsen / F connectors
 Loading...