

GSMK CRYPTOPHONE G10i User Manual

CRYPTOPHONE
GSMK CRYPTOPHONE G10i
2
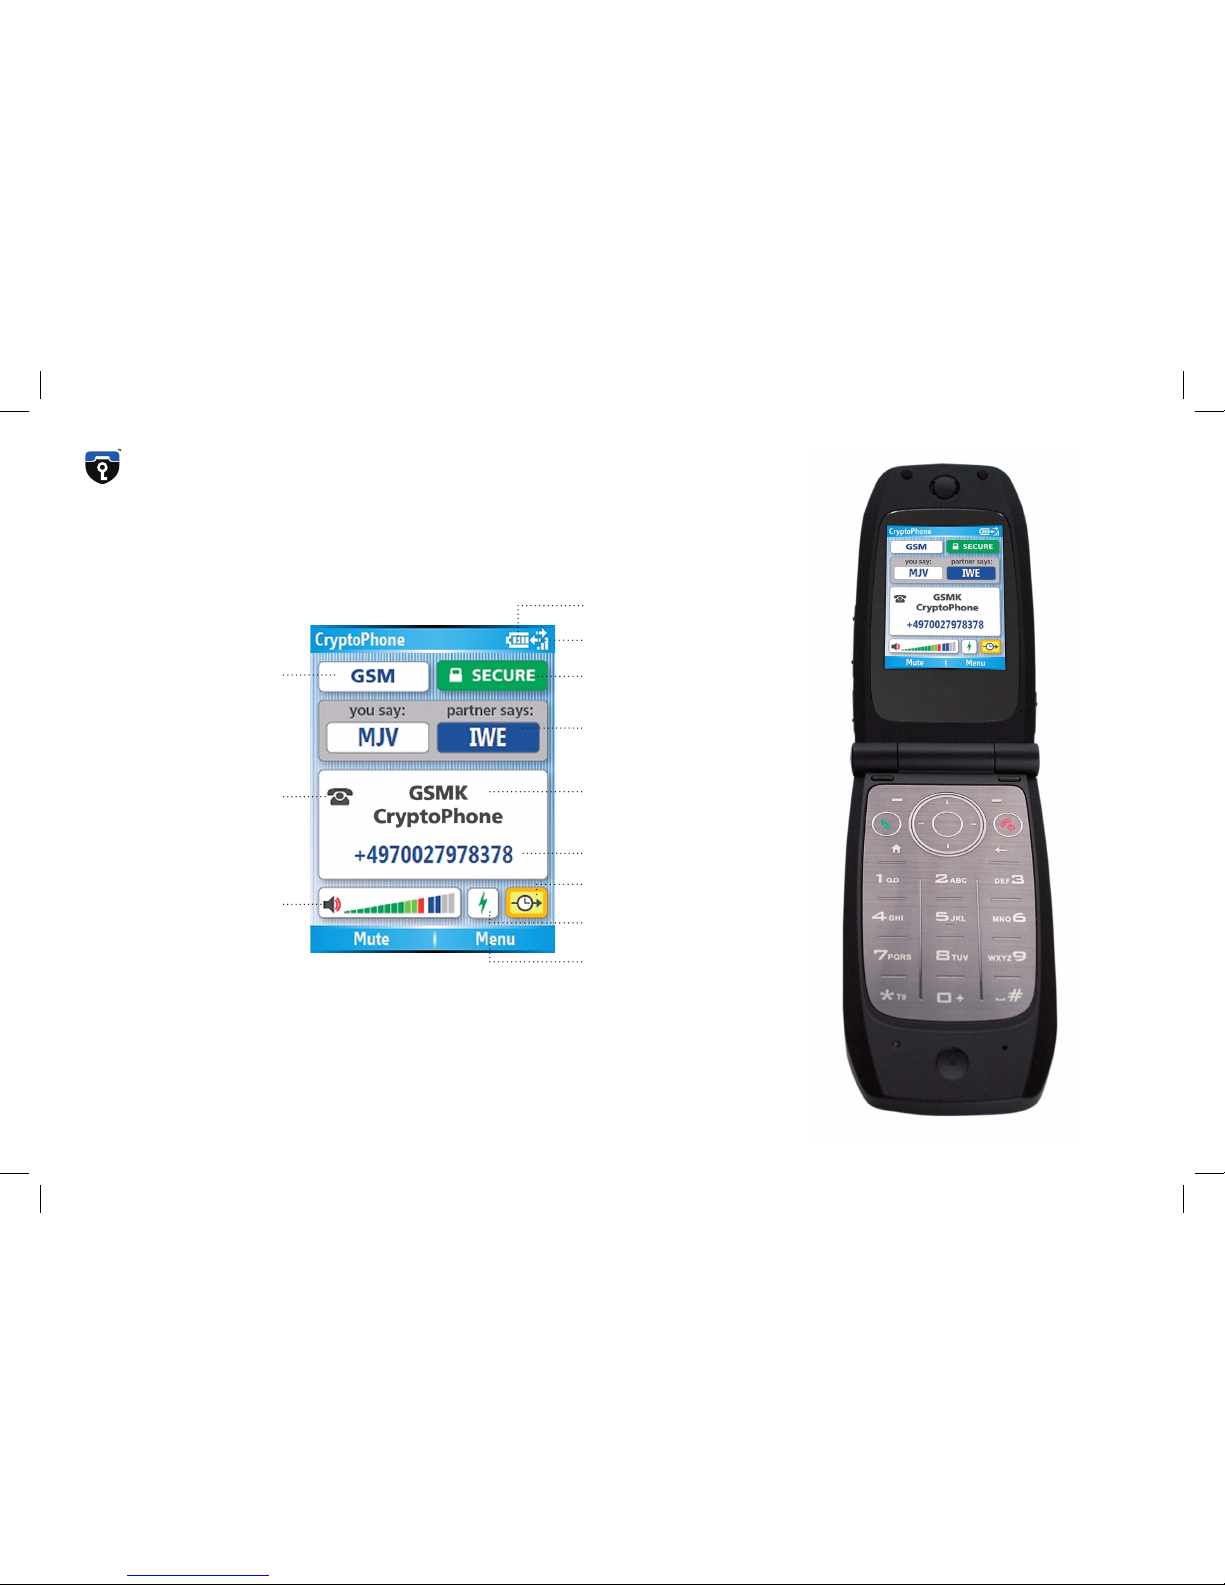
network type
signal strength
encryption indicator
key verification code
caller id
delay indicator
caller number
fast / robust indicator
volume indicator
settings menu
line type indicator
battery status

3
General 4
Inserting SIM card & switching the phone on 5
Security Profile Manager 6
Security Profile Choices 7
Enter your PIN 11
Charging 11
Standby 13
Switching on/off 13
Placing an Encrypted Call 14
Key Verification 15
Redialing 16
Calling from the Contacts list 16
Call Quality during Secure Calls 16
Secure Calls while moving 18
Switching the Call Type 19
Switching the Linetype 20
Problems with setting up a Secure Call 21
Changing the volume 24
Mute during call 24
General Mobile Phone Security Advice 25
Power down 25
Cold Boot & Emergency Erase 26
Security Advice regarding Flash Storage 27
Using the headset 28
Bluetooth headset 28
Sync Contacts and Appointments 29
Troubleshooting 30
Security Updates 30
Security Advice 32
Storage and Handling 33
Repairs 33
Accessories 34
3rd Party Software 35

4
General
Your CryptoPhone G10i is based on generic quadband (850 / 900 / 1800 /
1900) GSM Smartphone hardware that is sold under different brand
names. The phone’s firmware and operating system have been modified to accommodate the CryptoPhone functionality and provide added security, so a number of things that you might know from other
Smartphones are not available on the GSMK CryptoPhone for security
reasons. We supply the original Smartphone manuals, license sticker
and CD with the GSMK CryptoPhone G10i, but you need to be aware
that some functionality has been disabled by us for security reasons
and some functions have been changed to better integrate the CryptoPhone functionality.
Note: Do not try to use Microsoft operating system updates
as this may destroy the CryptoPhone firmware and void your
warranty. Certified CryptoPhone Updates are only provided by
GSMK to you in a cryptographically secure manner.
5
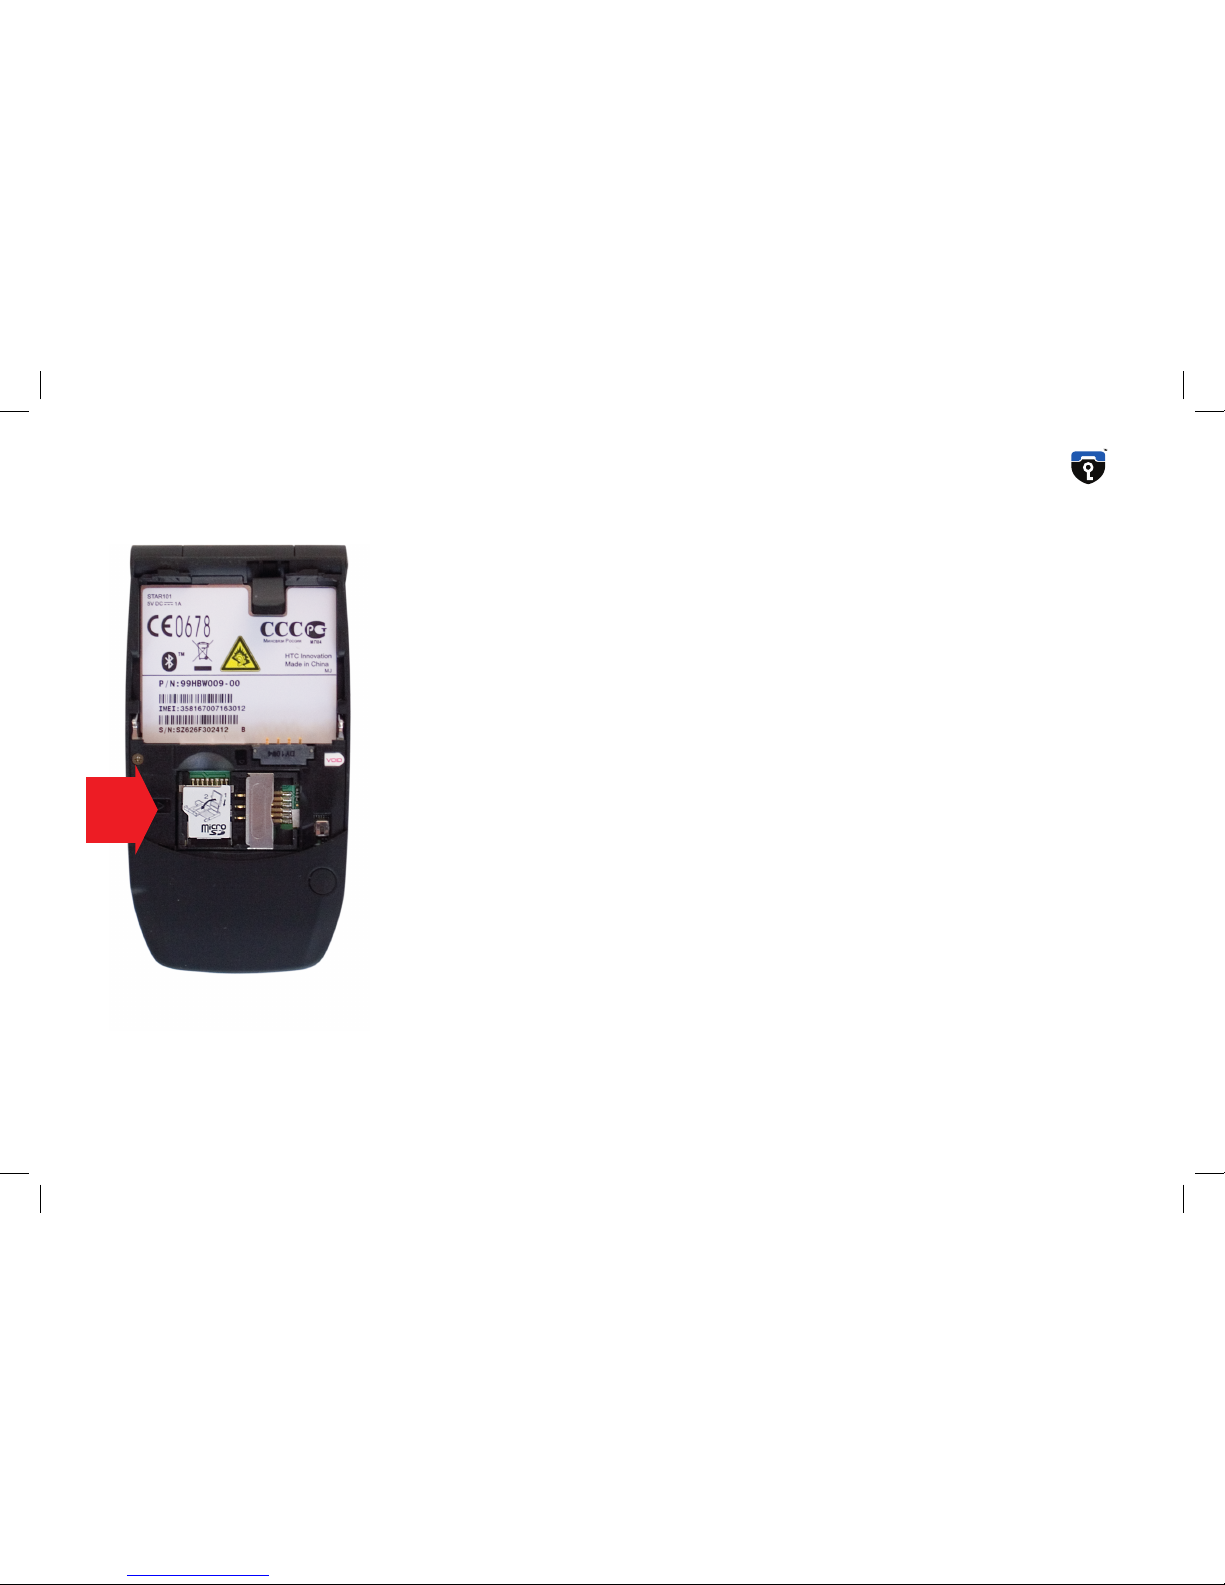
Inserting SIM card & switching the phone on
You need to insert a valid GSM card (SIM) into the GSMK CryptoPhone
G10i in order to place calls. To insert the SIM, remove the back cover of
the device by sliding the back cover downwards. You will see the SIM
card slot in the lower middle of the device. Insert the SIM card with the
gold-plated contact area facing down. Now insert the battery (which is
stored stored separately in the shipping box). Replace the back cover
by sliding it gently upwards onto the device. Now oben the lid and
push the power/hangup button. The screen will light up and the GSMK
CryptoPhone G10i begins its firmware initialization. This may take up
to two minutes.
6
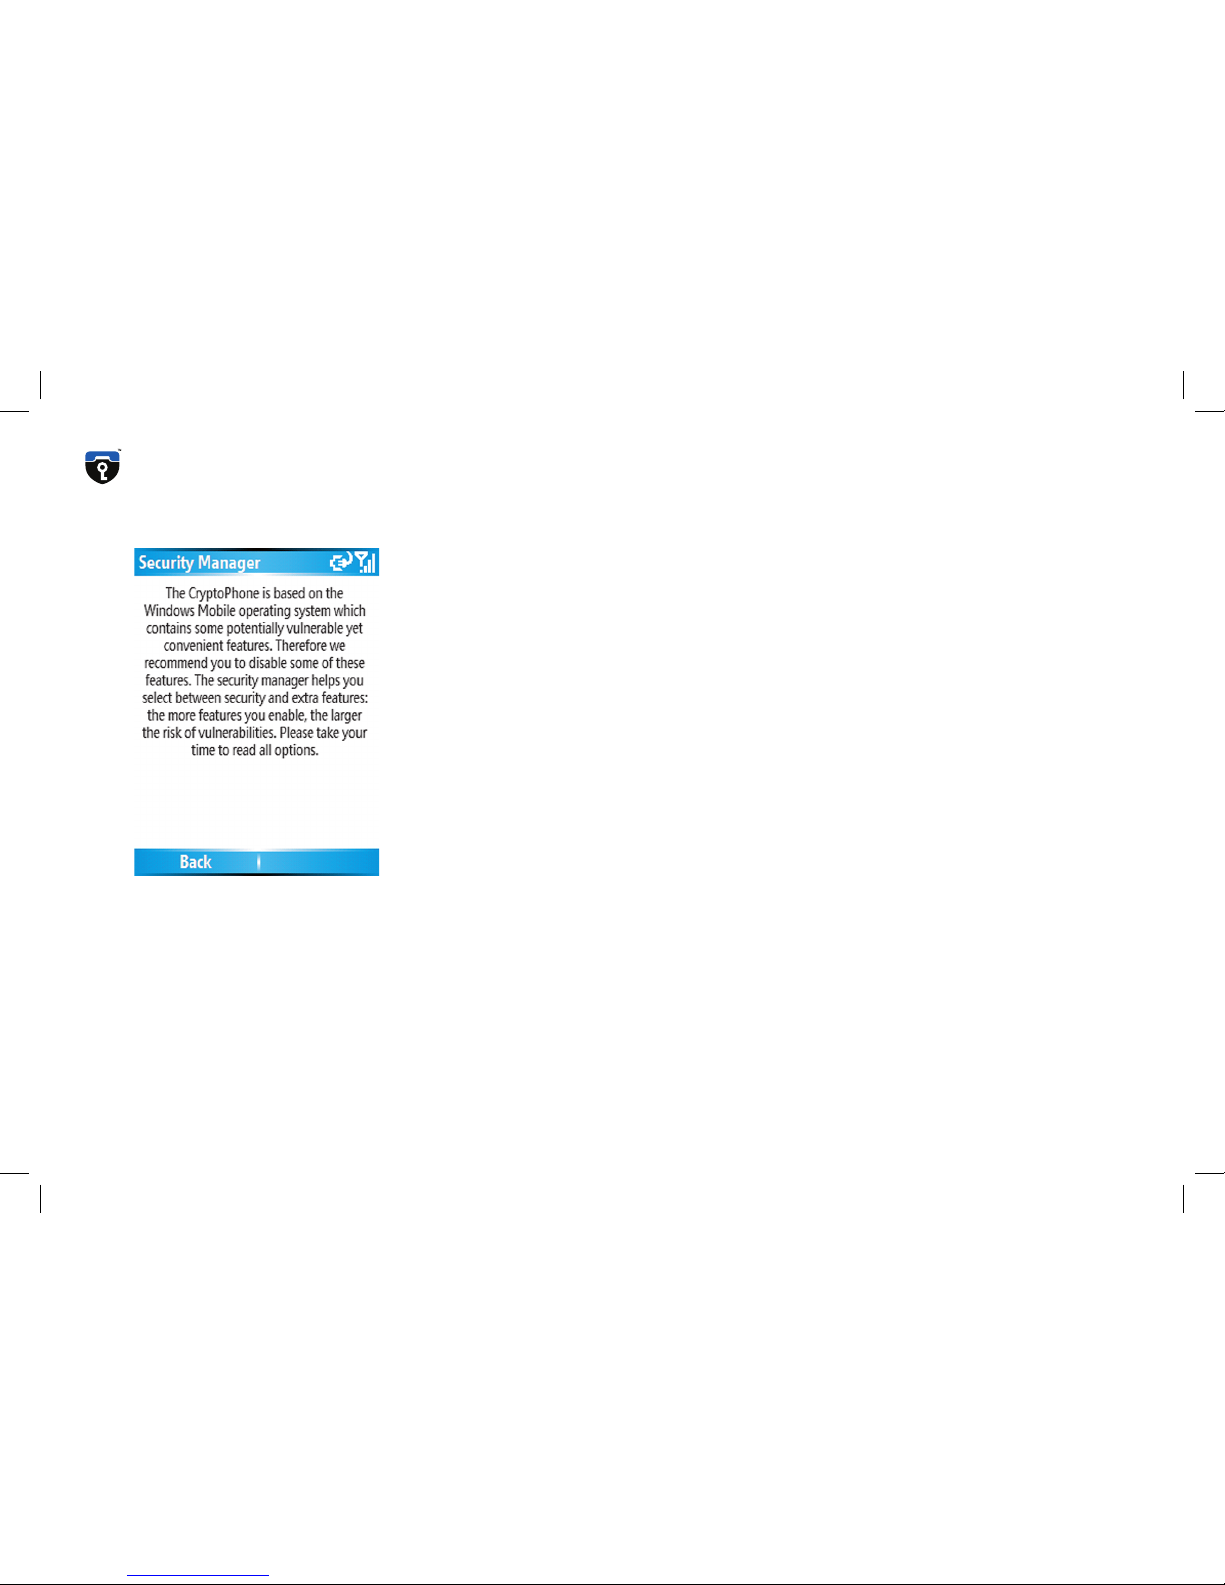
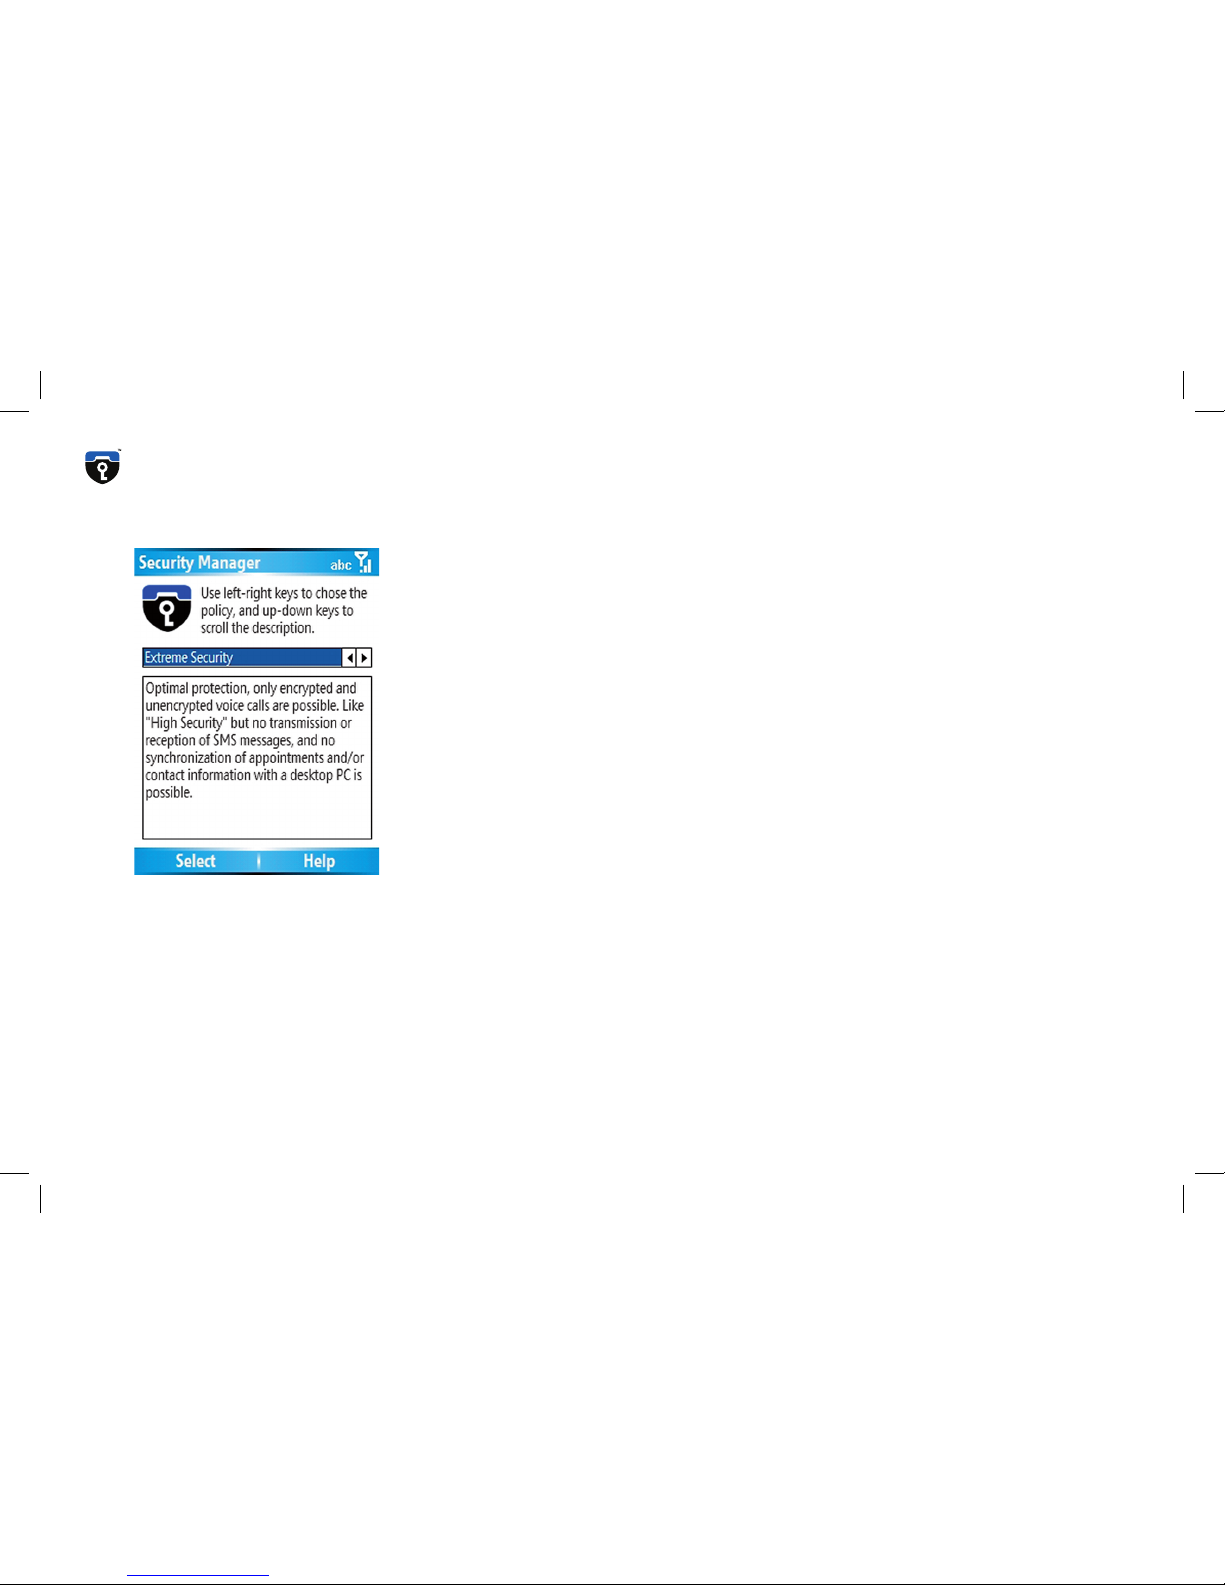
Security Profile Manager
The CryptoPhone is based on the Windows Mobile 2005 operating
system which contains some potentially vulnerable, yet convenient
features and applications. To reduce the risk of attacks against your
CryptoPhone’s integrity, we recommend to disable some of these features. The Security Profile Manager helps you to select between security and extra features: the more features you enable, the larger the risk
of vulnerabilities. In the following section the different settings of the
Security Profile Manager are explained in detail. Please take your time
to read all the options to make an informed decision. After you have
selected a Security Profile, click the OK button on the screen. Now the
phone will install the operating system components according to the
profile you selected.
The default setting is “Medium Security” which provides a good balance of convenience and security for most users.
Note: You can always change the Security Profile setting by performing a Cold Boot (see page 26). After each Cold Boot you
will be asked for your choice of Security Settings.

7
Security Profile choices:
No Added Security
This setting leaves the CryptoPhone with very little protection against
potential attacks on the operating system. Some mechanisms to prevent
really stupid attacks are activated, but this creates only a base layer of
protection that is not sufficient against a skilled adversary. New threats
(against any operating system) are discovered from time to time, and
we feel selecting “No Added Security” exposes the CryptoPhone to unneccessary risk. Choose this setting only if you really need one of the
services that would otherwise be disabled in the “Medium security”
setting and if doing so matches your risk profile.

8
Medium Security
At this level of security, the CryptoPhone disables a number of functions
which are likely vulnerable to attacks, but are not essential for most users.
Once you select Medium Security, the following functionality is disabled:
Picture Caller ID and Picture Contacts
.NET compact framework
Javascript
MIDP and all other Java framework
MS scripting
VBscript
MS terminal services client
MS Messenger client
SIM Toolkit
Remote OS updates
Downloadable Ringtones
some media playback features
WAP and WAP push
MMS and Video-MMS
9
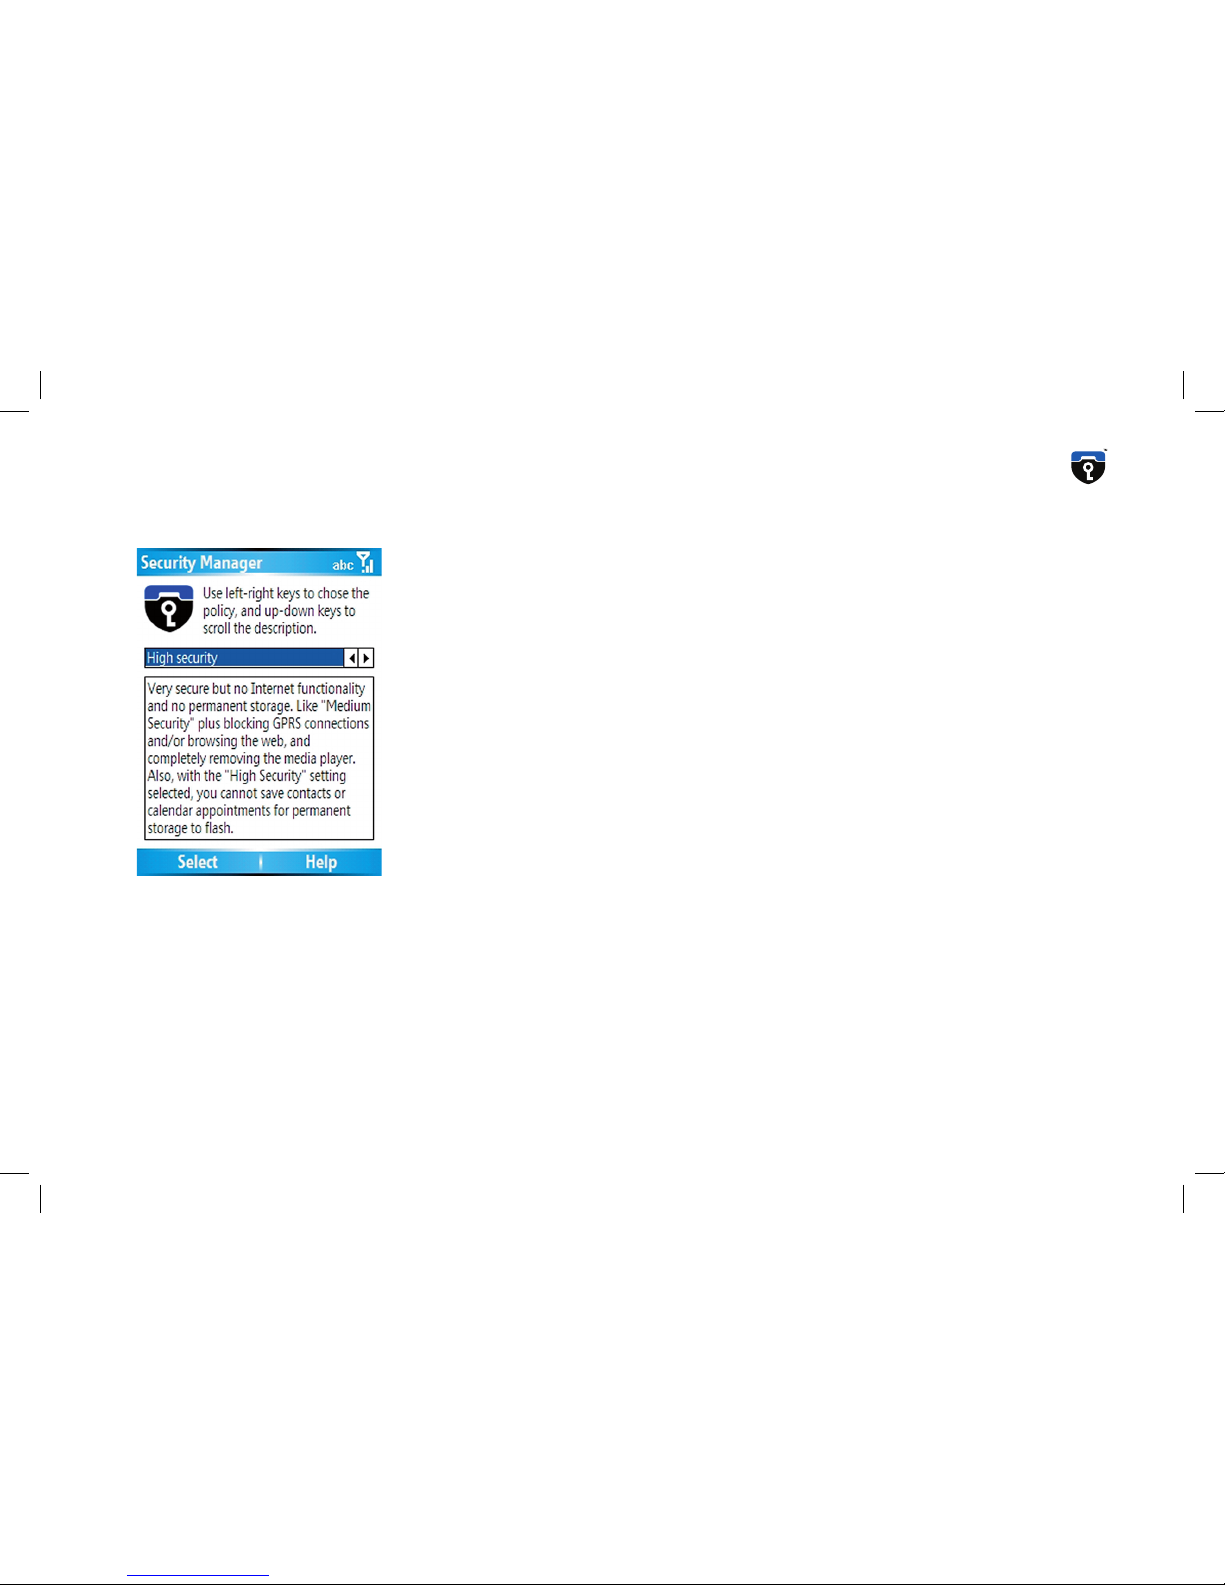
High Security
In High Security mode, internet functionality is no longer avaialble.
GPRS, PPP data calls, the Internet Explorer and the Windows Media
Player are disabled, in addition to the measures taken in Medium Securty setting. The following functionallity is disabled in High Security
mode:
Bluetooth
OBEX
WLAN
GPRS
all TCP/IP functionality
MediaPlayer
Internet Explorer
Video Telephony
email functionality
ActiveSync
Infrared
SD-card functionality
10
Extreme Security
This setting is intended for customers who only use the CryptoPhone
and normal unsecure call functionality, but wish to have all other means
of communication disabled. This security level offers protection against
attacks that potentially could be performed using SMS messages or the
synchronization with a desktop PC. PocketOutlook, SMS sending and
receiving, Active Sync and the Inbox are disabled in this setting, in addition to the measures taken in High Security mode. We recommend
this setting for situations where a highly skilled adversary has to be assumed.
Note: Depending on how you obtained your CryptoPhone, not
all Security Profiles might be available or the described choices
might be different in detail. GSMK provides customized Security Profile configurations as part of volume purchases for larger companies
and organizations. So if you received your CryptoPhone from your
organization, please consult with the appropriate corporate security
manager regarding the choice of Security Profiles available to you.
Also, GSMK may, without notice, remove certain components from
the default installation, if we receive information that indicate a
higher than originally assumed vulnerability of this component.
11
Enter your PIN
Most GSM SIM cards require you to enter a PIN number. After you have
switched on the CryptoPhone, you will be asked to enter your PIN. After you entered the PIN, press the “Done” button. The CryptoPhone will
finish initialization and present the secure telephony mode interface. If
your GSM SIM does not require a PIN, the secure telephony mode will
be presented right away.
Note: We recommend that a PIN number is used, as it makes the
extraction of information stored on the SIM more difficult for
an attacker and prevents you from incurring charges to your account if the phone is stolen.
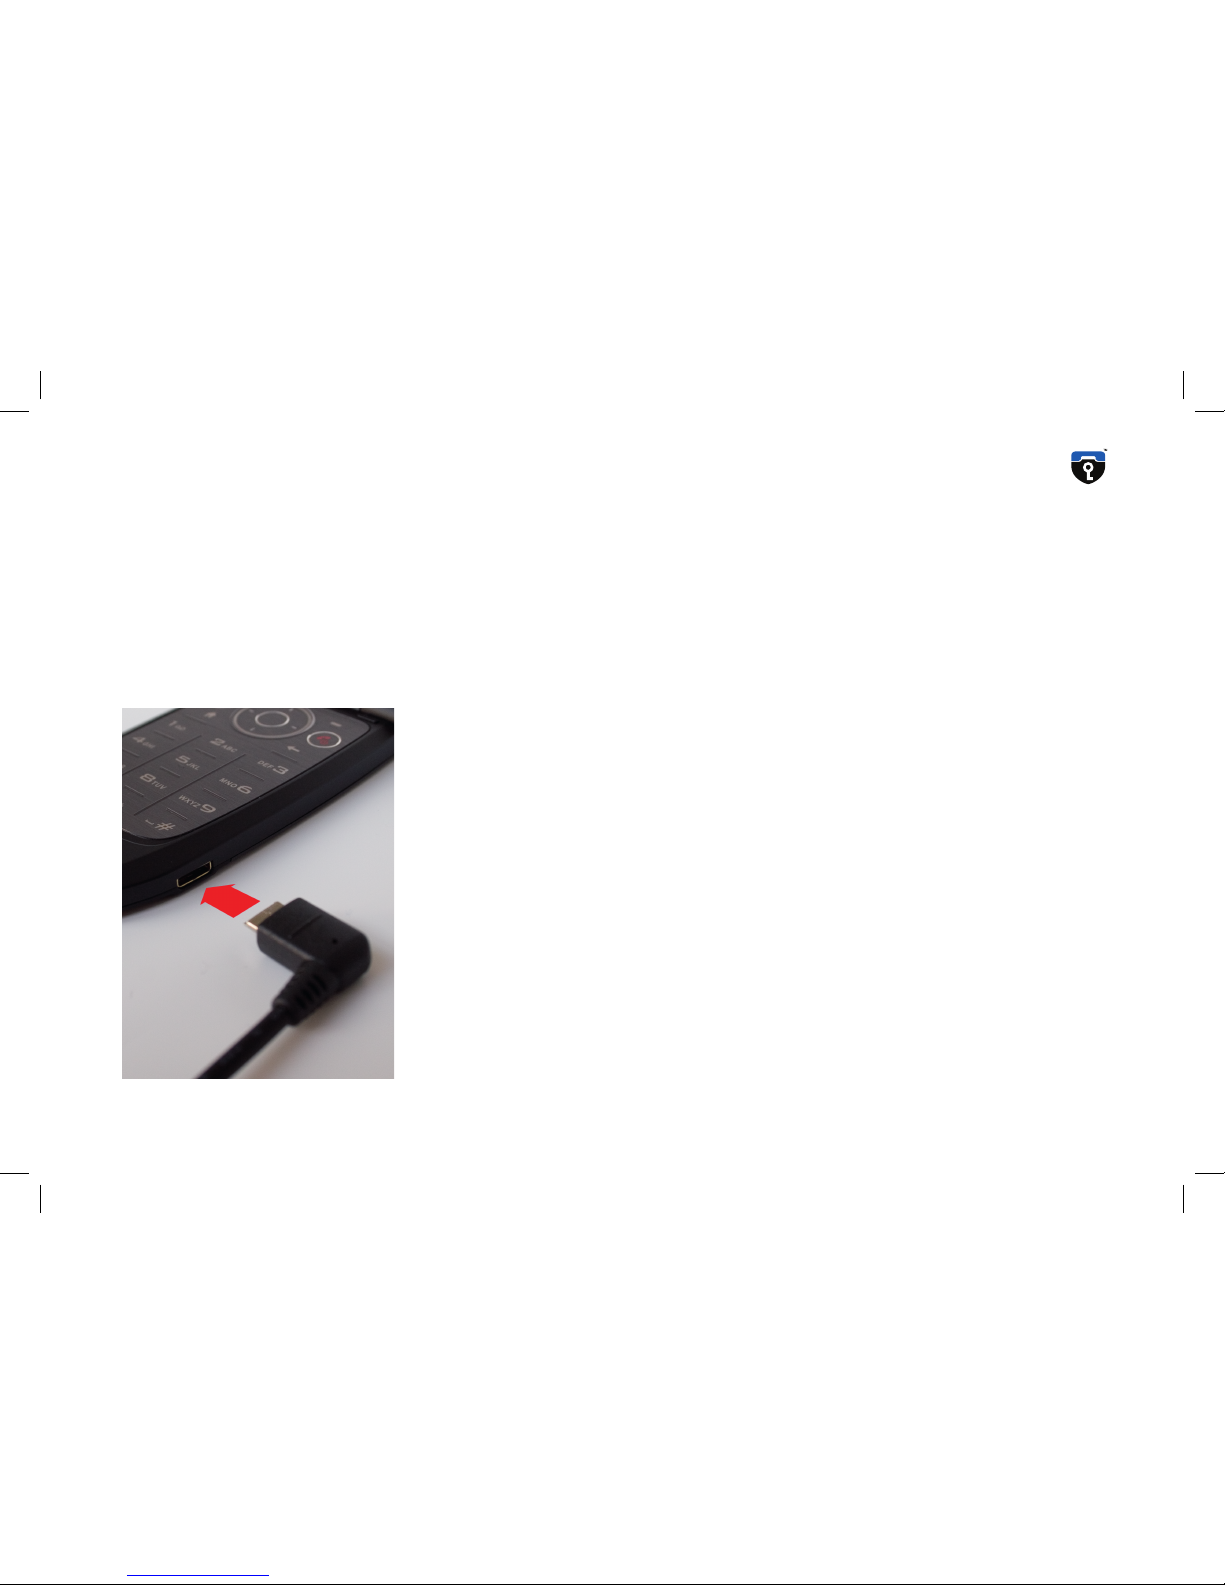
Charging
Before using your CryptoPhone, we recommend that you fully charge
the battery. In order to do this, you must connect the power supply to
the CryptoPhone. Depending on your location, you may need a plug
adaptor to use the power supply if the plug does not fit in your outlet. The power supply is rated 100-240V, which means it will accept
your line voltage without conversion as long as it lies within this range.
The status LED will change color to yellow while the device is being
charged, and to green when fully charged. You can either charge the
 Loading...