

Page 1

USER MANUAL
In-Roof Configurator v3.2
GSE Intégration - Engineering
Created on : 11/06/2020
Page 2

GSE Intégration - Engineering 2
Introducing the tab
Page 3
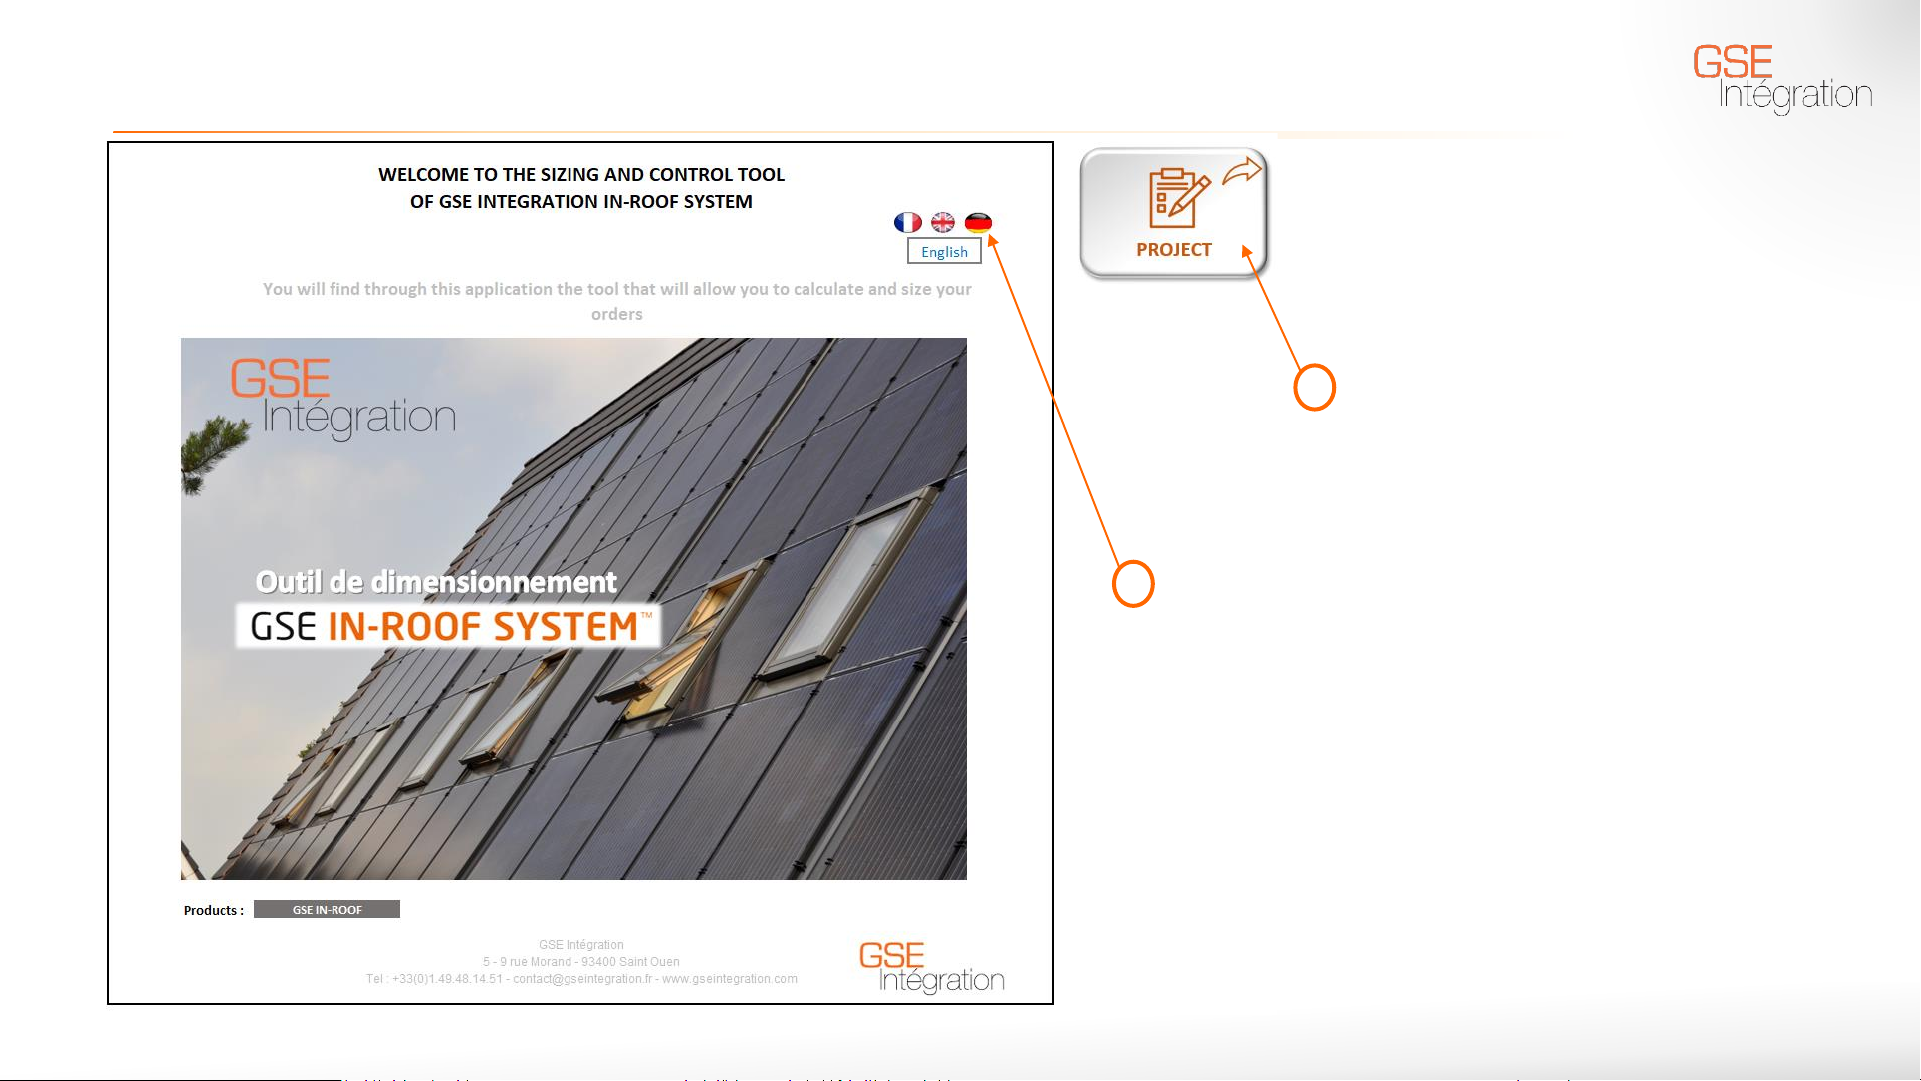
Home
GSE Intégration - Engineering 3
Select the language of your choice
Go to the next tab by clicking on
« Project »
1
2
Page 4

GSE Intégration - Engineering 4
Introducing the tab
Page 5
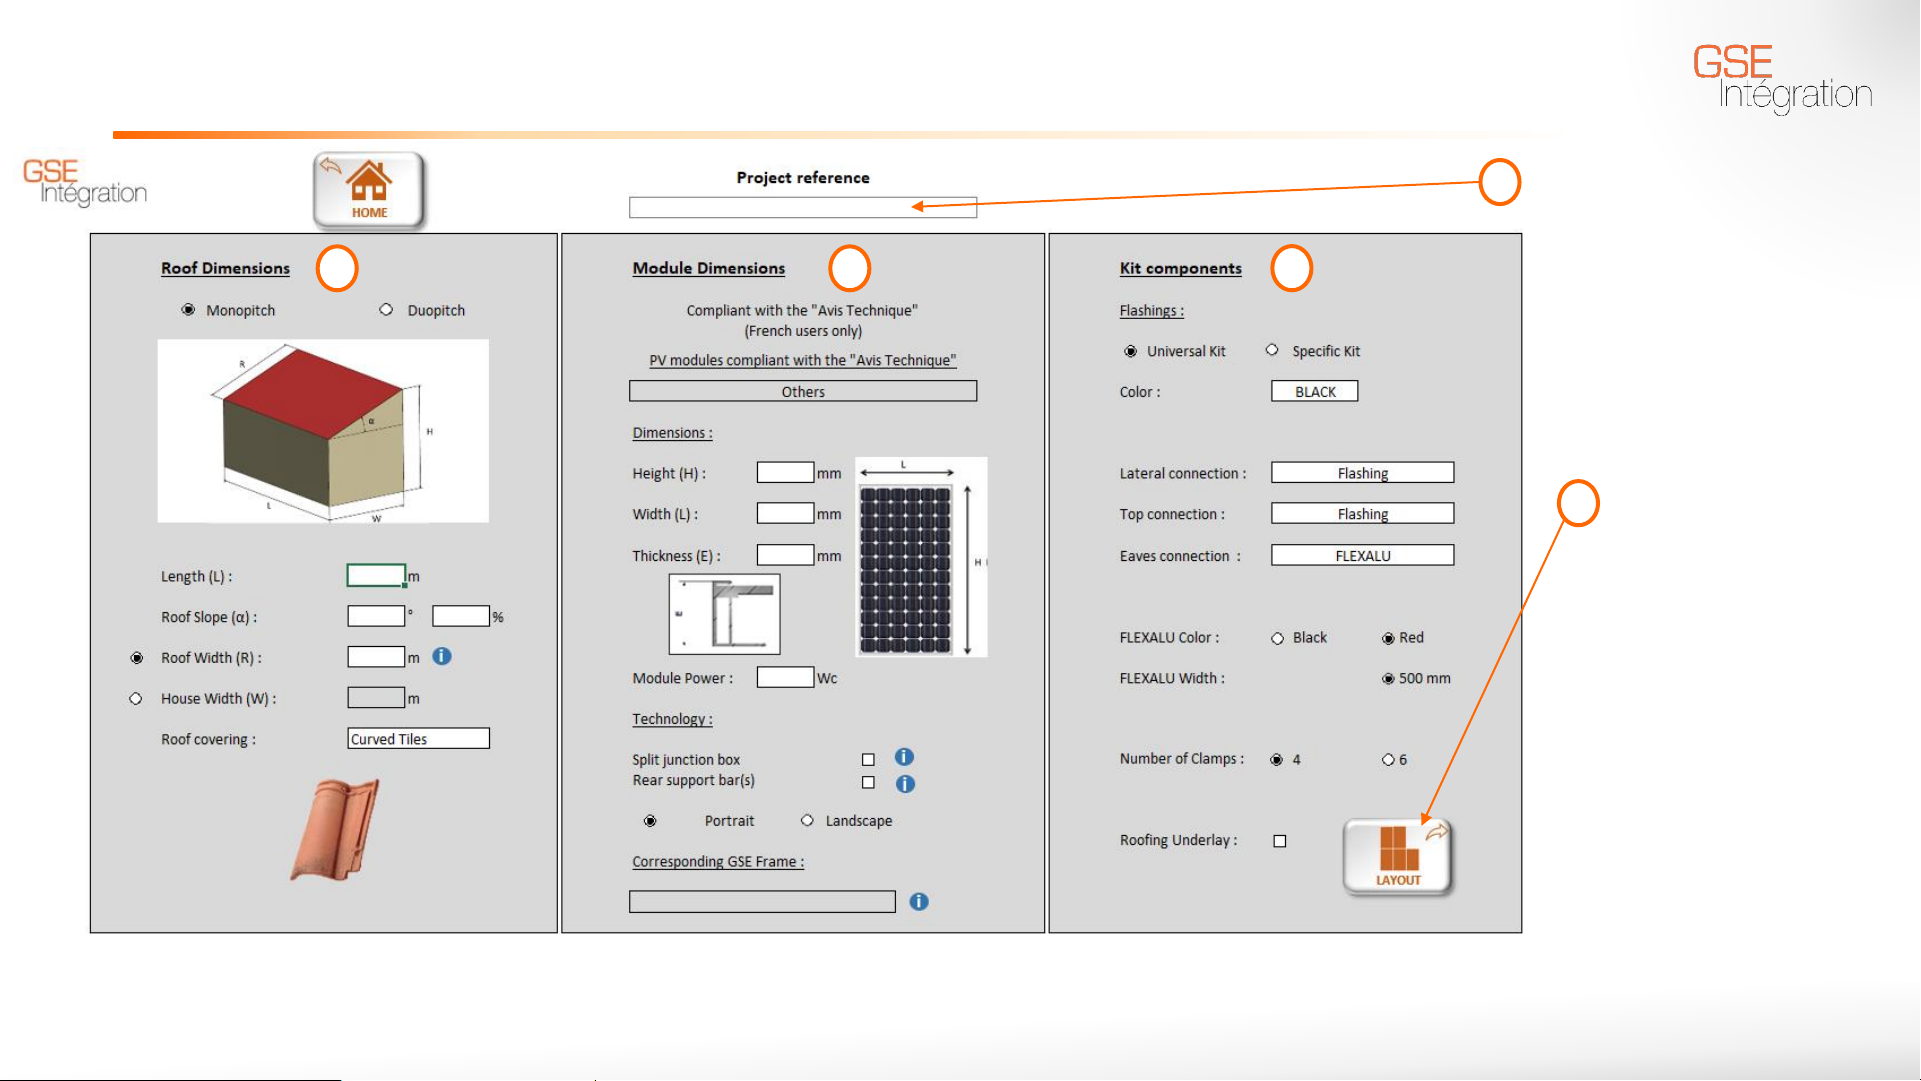
Project
GSE Intégration - Engineering 5
Fill in the Project
reference to show it in
the quote (optional)
Go to the next tab
by clicking on
« Layout ».
It’s obligatory to fill
in the information
Length(L), Width
(R), the PV module
dimensions and to
have chosen the
GSE frame to go to
the next tab
1
2 3
4
5
*
: Mandatory Field
*
*
*
*
*
*
➢ Go to the last tab by clicking on the « Home » button
Page 6
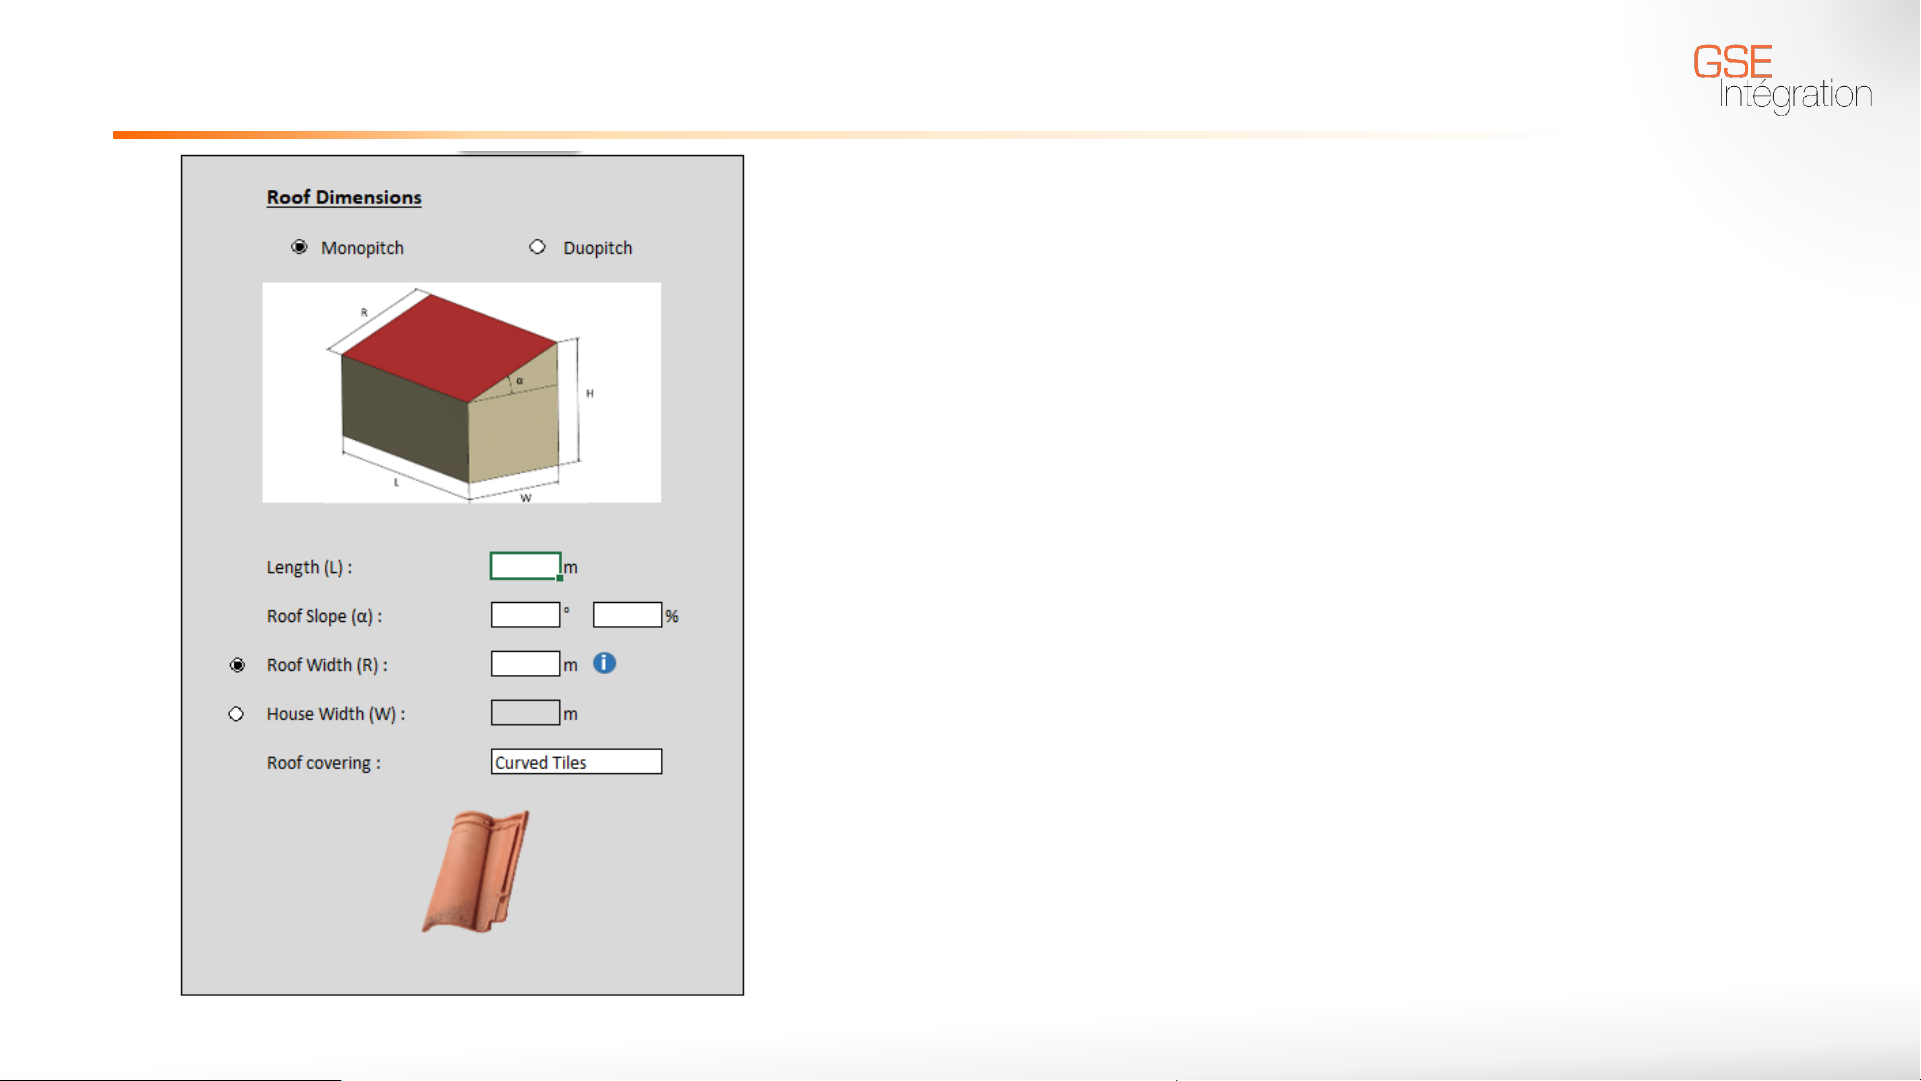
Project : Roof Caracteristics
➢ Inform Monopitch or Duopitch
➢ Fill in the Length (L)
➢ If you know the width, click on the button Roof
Width (R) and fill it in
➢ If you don’t know the Roof Width, click on the
selection button House Width (W) and fill in the
Roof Slope (α) and the House width (W)
➢ Choose the roof covering with the drop-down menu
GSE Intégration - Engineering 6
*
*
*
: Mandatory fields
Page 7

Project : PV module Caracteristics
➢ The first section dealing about « Avis Technique » is only for French
users.
➢ Enter directly the features of the module you want to use:
• Height (H)
• Width (L)
• Thickness (E)
• Module Power (optional)
➢ If the module used has split junction boxes or reinforcement bars,
check the appropriate boxes
➢ Choose the configuration: Portrait or Landscape
➢ Finally, select the GSE Frame of your choice. If only one frame
matches your request is automatically selected
➢ If you see the message "No frames found," you can contact us at
the following email address: contact@gseintegration.com
GSE Intégration - Engineering 7
*
*
*
*
*
: Champ à remplir obligatoirement
Page 8

Project : Kit components
➢ Choose the flashings kit wanted for your installation
• The Universal kit allows a simple installation on all roof covering
types
• The Specific Kits are dedicated to each type of coverage and rely on
more technical implementation to address more restrictive areas of
employment (e.g., placing hooks on slate or flat tiles)
➢ Then select the color of the flashings for your installation:
black or alu
➢ Select the type of lateral connection: Lateral flashings or none
if you want to make your own connections
➢ Select the type of top connection: Top Flashings, Flexalu or
none
➢ Select the type of eaves connection : Flexalu or none
GSE Intégration - Engineering 8
Page 9

Project: Kit components
➢ Select the color of Flexalu desired : black or red
➢ Select the width of Flexalu desired :
• Black 330mm or 500mm
• Red 500mm
➢ Select the number of clamps : 4 or 6
➢ If you want to include an under-roof screen in your
installation check the corresponding box
➢ Go to the next tab by clicking on the “Layout" button
GSE Intégration - Engineering 9
Page 10

GSE Intégration - Engineering 10
Introducing the tab
Page 11

Layout
GSE Intégration - Engineering 11
➢ Return to the home page by clicking on the "Home" button
➢ Go back to the previous tab by clicking on the "Project" button
➢ Go to the next tab by clicking on the "Roof" button
➢ Go directly to the quote by clicking on the “Cost" button
1
2
4
5
3
Page 12

Layout : Draw the desired PV field
➢ Either automatically by entering the number of lines
and columns wanted then by clicking on insert
➢ Either manually by clicking directly on the grey rectangles.
Especially useful for drawing PV fields with "exotic"
configurations
➢ It’s also possible to mix these two ways by first inserting a
rectangular PV field and then adding and/or removing
modules manually.
GSE Intégration - Engineering 12
1
2
3
Page 13

Layout
GSE Intégration - Engineering 13
➢ View the list of material necessary by clicking on « Calculate parts »
➢ If a change is applied to the PV field, it’s essential to re-click on the “Calculate parts" button to update the list.
➢ Go to the next tab by clicking on the "Roof" button
4
5
Page 14

Introducing the tab
GSE Intégration - Engineering 14
Page 15

Roof
GSE Intégration - Engineering 15
➢ Go back to the previous tab by clicking on the “Layout" button
➢ Go to the next tab by clicking on the “Cost" button
Page 16

Roof: Roof move button
GSE Intégration - Engineering 16
➢ You can move the PV field on the roof where you want with the
directional button arrows:
• Single arrow : 100mm move
• Double arrow : 1000mm move
• Move to the chosen end
1
2
3
1
2
3
1
3
2
1
2
3
1
2
3
Page 17

Roof: Item
GSE Intégration - Engineering 17
➢ The “Item" button is used to insert an object (e.g. chimney) to make sure it doesn't
conflict with the PV field. The following dialog box appears. Checking the conflict
between an item and the PV field is only visual, there’ll be no alert in case of an
overlap.
➢ Enter :
• Height of the item
• Width of the item
• Position X of the item according to the axis of
abscisses
• Position Y of the item according to the axis of
the ordered
Page 18

Roof: Add new layout
GSE Intégration - Engineering 18
➢ The "add new layout" button is used to insert a new PV field if necessary. The
calculator goes back to the layout tab, you must draw the new field (see slide 11)
and click on the "Roof" button and then be able to place it as desired.
➢ NB: Only the last added PV
field can be moved. Be sure
to position the previous
one before adding a new
one!
Page 19

Introducing the tab
GSE Intégration - Engineering 19
Page 20

Quote
GSE Intégration - Engineering 20
➢ Go back to the previous tab by clicking the “Layout" button
➢ Edit your purchase order in PDF format by clicking on the "PDF" button
1
2
3
Page 21

Quote
GSE Intégration - Engineering 21
➢ Click on the "Discount" button and enter the percentage of your discount in the open dialog box for this purpose
➢ The date is generated automatically
➢ Enter the information that you want: address, contact, desired delivery date and comments
➢ You can also hide prices on the quote to be edited or for other reasons click on the "Hide Prices" button
1
2
3
NB : The Project reference
you noticed in the Project
tab will be displayed here
(cf. diapo 3)
Page 22

Cost
GSE Intégration - Engineering 22
➢ The list of materials as well as the quantity and prices appear here, followed by the layout of the roof previously drawn.
➢ They’ll be carried back into the PDF when the quote is published via the “PDF” button
Page 23

GSE Intégration - Engineering
Florent PRUDHOMME
Product Manager – Solar mounting systems
Mobile : +33(0)6.98.04.06.26 - Tel : +33(0)1.70.32.08.00
Email : florent.prudhomme@gseintegration.fr
Julien MANRIC
Project Engineer – Development & Certification
Mobile : +33(0)6.68.87.06.26 - Tel : +33(0)1.70.32.08.00
Email : julien.manric@gseintegration.fr
Thank you for your attention
Oliver BAXTER
International Sales Director
Mobile : +33 6.58.54.44.43
Email : oliver.baxter@segroup.fr
 Loading...