

GSC TMRPG-1 User Manual

Phone: 417.347.7431
Fax: 417.374.7442
service@gosciencecrazy.com
1747 North Deffer Drive
Nixa, Missouri 65714
Timer with Photogates
#TMRPG-1
Warning:
• Not a toy; use only
in a laboratory or
educational setting.
• California Proposition
65 Warning: This product
may contain chemicals
known to the State of California to cause cancer
and birth defects or other reproductive harm.
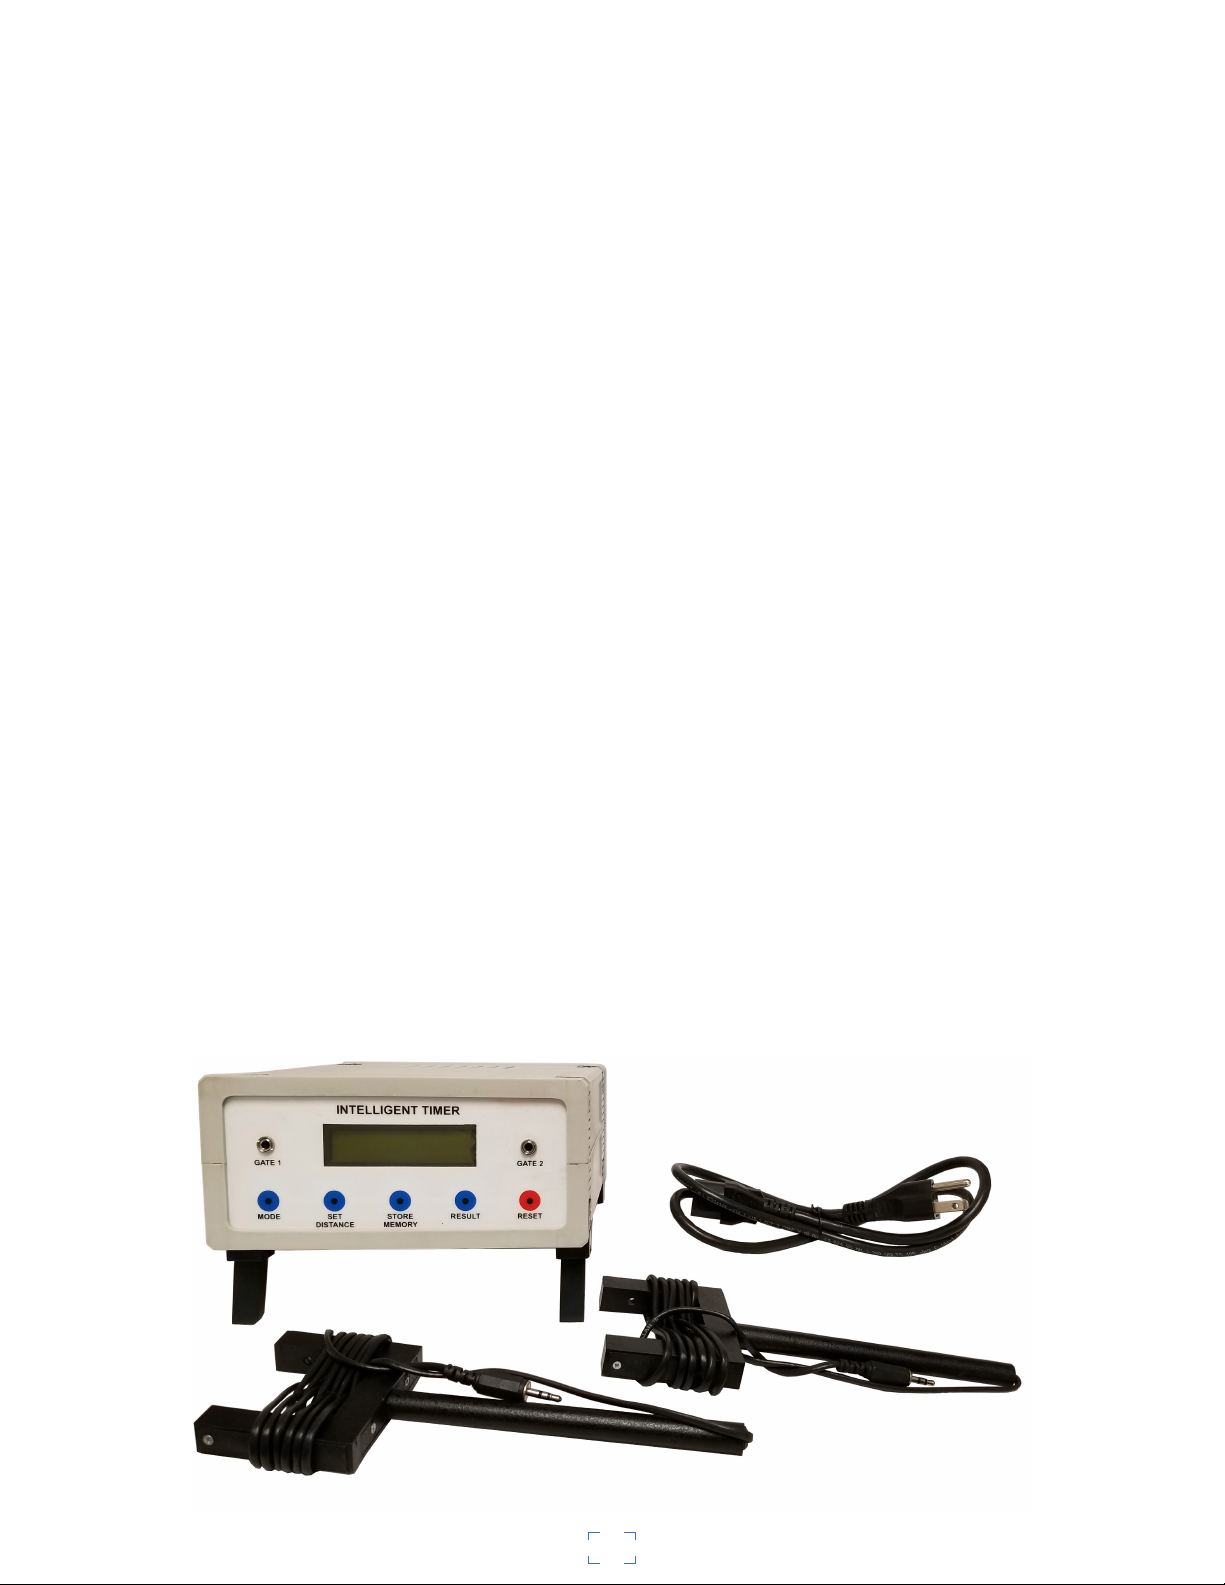
1. Port for Photogate 1
2. Display
3. Port for Photogate 2
4. Mode Button
5. Set Distance Button
Introduction
Accurate timers are essential in the lab. This timer uses photogates
to measure the time it takes for an object to pass through the gates,
the object’s speed, and the object’s acceleration. It can store up to 10
sets of results. Just set the distance between your photogates and start
experimenting!
Parts and Buttons
6. Store Memory Button
7. Result Button
8. Reset Button
9. Power Switch
10. Fuse Box
11. Port for Power Cord
12. Power Cord
13. Two Photogates
1 2 3
4 5 6 7
8
9
11
10
12
13
1
How to Use
1. Plug your photogates and power cord into the timer. Flip its power switch to the ON position.
2. Press MODE once. From here you will be able to set the distance between your photogates. Using 100mm
increments, you can choose distances anywhere from 100mm to 9900mm.
3. Press MODE again. The display should now read “TIME=000.00s.”
4. Perform whatever measurement you are intending to take. Make sure the item that you are timing passes
through the photogate plugged into GATE 1 rst. The timer will continue counting the seconds until your item
passes through the photogate plugged into GATE 2.
5. Press MODE again. The timer will now calculate your object’s speed. Speed is calculated by dividing the
distance you set by the time it took your object to pass through the gates.
6. Press MODE again. The timer will now calculate your object’s acceleration. Acceleration is calculated by
dividing the speed found in the previous step by the time it took your object to pass through the photogates.
7. From the ACCELERATION screen, press STORE MEMORY. The timer will now store your object’s time,
speed, and acceleration.
8. Press RESTART to return to the timer’s start screen.
9. Repeat steps 2 through 7 to gather more data.
10. To view your stored memory, press RESULT. This timer can store up to 10 sets of data.
11. To clear your stored memory, press and hold STORE MEMORY until the screen reads “DELETING...” The
screen will read “MEMORY DELETED!!” once it has been cleared. Press RESET to return to the start screen.
Tips and Maintenence
• This timer can store results even when it is turned off and unplugged. You may want to clear your stored
memory (Step 11) each time you begin a new experimenting session with your timer.
• If you press STORE MEMORY before cycling through with the MODE button to calculate your object’s
speed and acceleration, you will only collect the time that was measured. You must hit MODE twice after each
measurement of time if you wish to save a full set of data.
• The memory system of this timer does not record the distance that was used to take your measurements. We
suggest keeping the same distance setting for each stored set of data. If you do choose to alter your distance
setting between sets of data, we suggest keeping track of that information in a table by hand.
• There is a small 0.5A fuse on the back panel of this timer between the port for the power cord and the power
switch. Replace this if it blows.
2
 Loading...