

Page 1
Gryphon
Wet-Belt Sander
Instructions
Important Precautions
• Wear eye protection and protective clothing
• Keep ngers away from belt and other moving parts when
using the sander
• Use only belts designed for this tool
• Always use water in the base when grinding hard materials
(glass, stone, etc.) Refresh water as required. Only sand
without water when sanding soft material such as wood.
Page 2
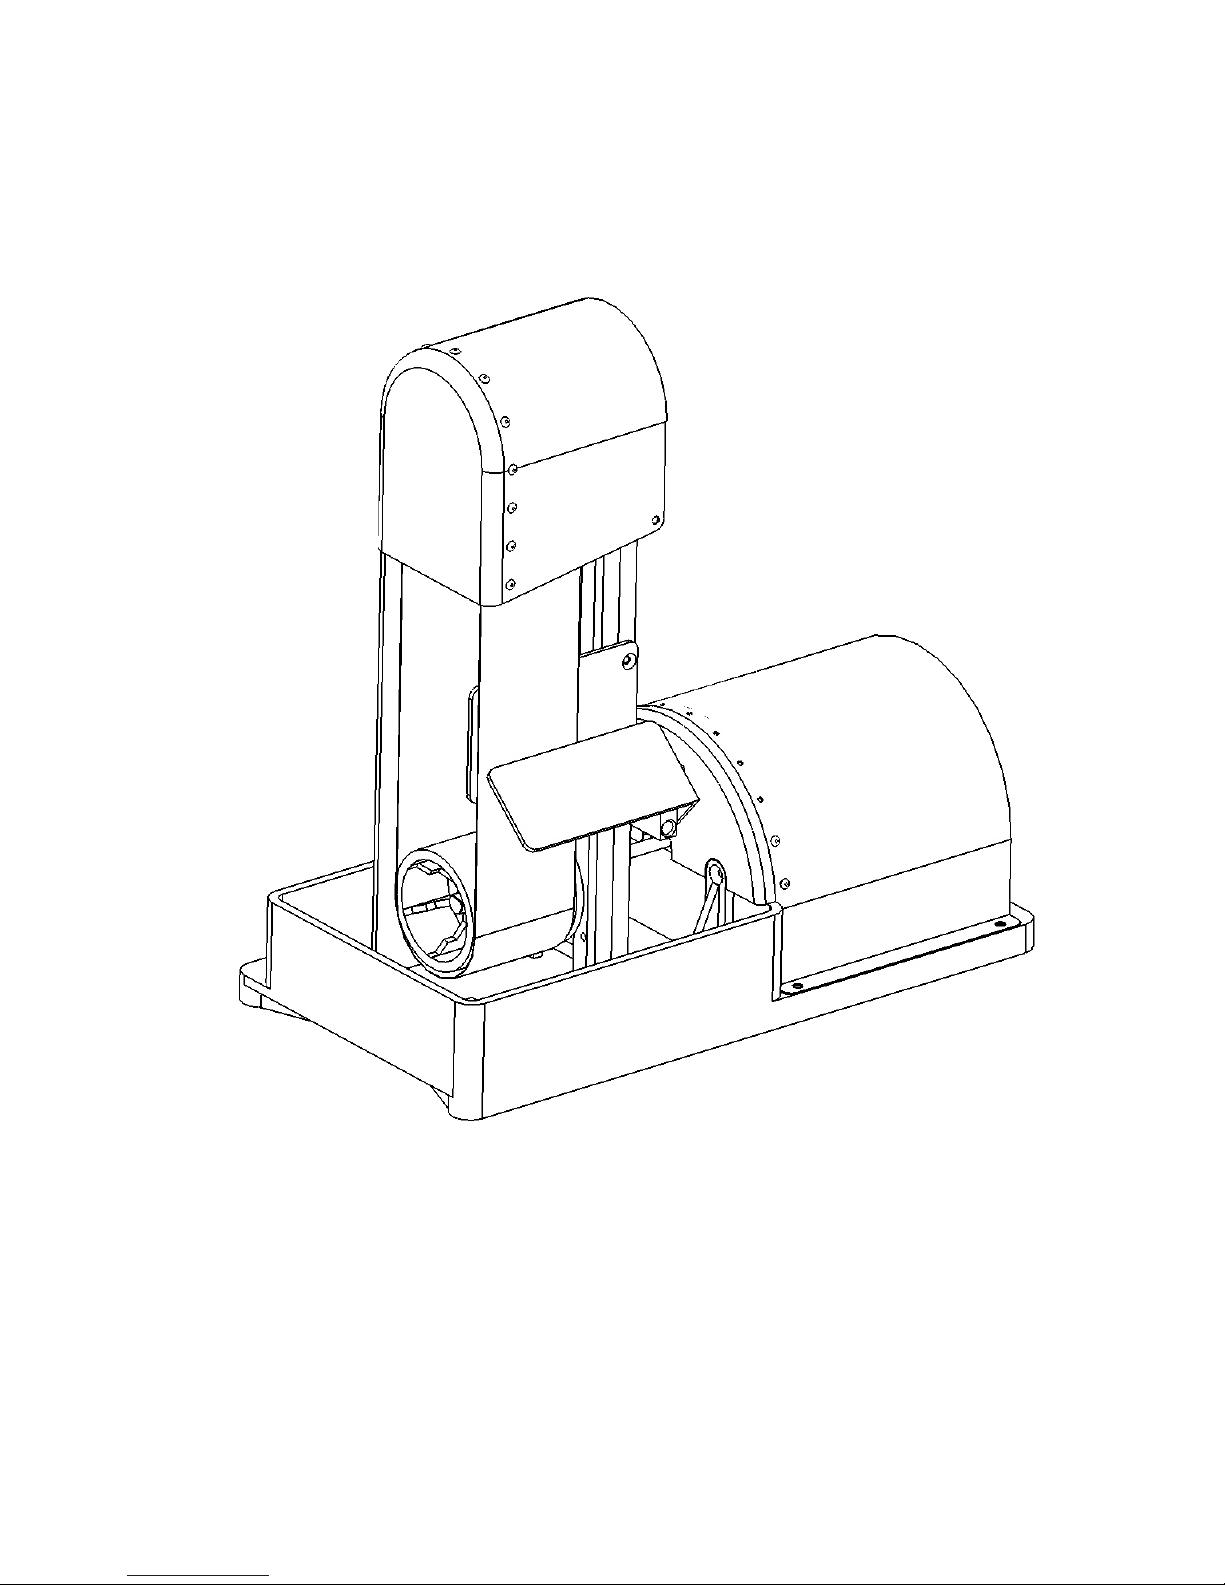
Setup
Your new belt sander comes assembled and ready for use. When choosing a
location to use the sander, remember that there will be a small amount of water
splash during use. Also, it advisable to choose a location with good lighting and
good ventilation.
If you are planing a big project that will require a lot of sanding, you may want to
consider buying a footswitch. e footswitch will provide a convenient way to turn
the sander on and o. Your dealer should be able to provide a suitable footswitch.
Belt Installation
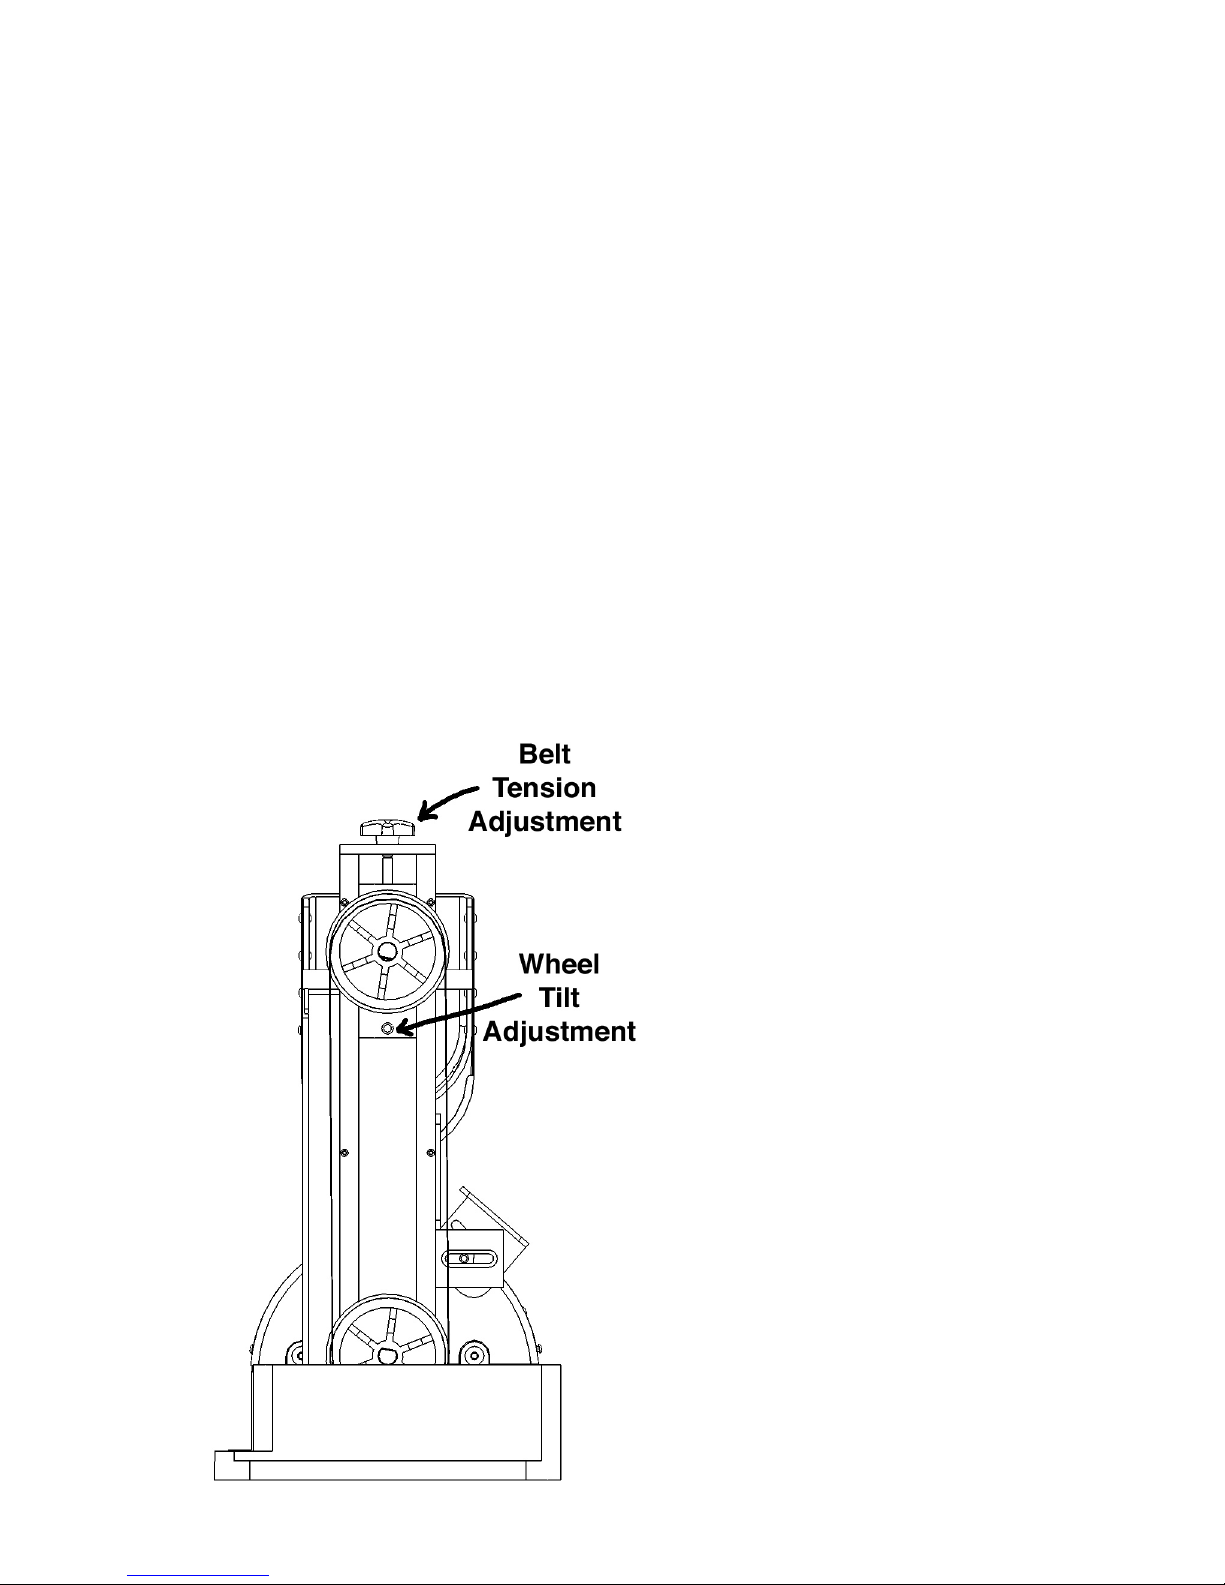
To install a new sanding belt, raise the top cover by rotating it about the pivot.
Lower the upper wheel by turning the large Belt Tension Adjustment thumbscrew
located on the upright support.
Remove the old belt, if one is
installed, by sliding it o the
upper and lower wheels.
Install a new belt by sliding it
onto the upper and lower wheels.
When the belt is centered on
both wheels, raise the top wheel
by turning the large Belt Tension
Adjustment thumbscrew. Raising
the wheel will tighten the belt.
e belt should be tightened to
the point that it runs smoothly
and does not ap. Do not
overtighten the belt, as that will
cause premature failure.
Page 3

Belvel Table
A small table is provided in front of the belt
to help guide you and to provide a convenient
method of achieving a constant bevel angle.
It may be adjusted by means of the screw on
the side, or it may be
removed completely if
desired.
Cooling system
Grinding glass and rock will generate a tremendous amount of heat in the belt,
and requires some method of cooling the belt. In the Gryphon Wet Belt Sander,
the cooling is provided by a wet sponge that contacts the bottom of the belt. e
sponge remains wet because it sits in a water reservoir. It is imperative that the
water reservoir be kept full enough to keep the sponge wet at all times. e water
level should be slightly below the top of the sponge, otherwise there will be a great
deal of water splash. In addition to keeping the belt abrasive cool, the water will
capture some of the glass dust and minimize transmission of the glass dust through
the air. e only time that it is safe to use the sander without water is when you are
sanding soft material, such as wood.
e sponge ts in the water tray and is held in place by shoulders that are molded
into the water tray. e sander is designed to use a common kitchen sponge, which
is typically 3” by 5” by about 3/4” thick. Replacement sponges are readily available
from your grocer.
Page 4

About the belts
Sanding/grinding belts are available in various nishes. e belts with the largest
and coarsest particles bonded to the surface will remove material fastest, but will
leave a relatively rough surface on your work. e belts with the nest particles will
remove material much more slowly, but leave a much smoother nish. e neness
or coarseness of a belt in identi ed by its “grit”. Grit is a measure of the size of the
particles, and a larger number indicates a ner grit. By way of example, an 80 grit
belt would be very aggressive, while a 400 grit belt would be very ne.
Adjustments
Normally, the only adjustment that will be required is the tension adjustment for
the belt. at adjustment is described in the blade installation section.
If the belt fails to run in the center of the wheel, even after the tension has been
properly adjusted, then it may be necessary to adjust the tilt of the top wheel.
Refer to the illustration on the second page. In this illustration you can see a small
set screw below the wheel that is used to adjust the tilt of the wheel shaft. Turn
the screw slowly until the desired angle is obtained. e lower wheel should never
require adjustment.
Cleaning
It is advisable to clean the water reservour periodically to prevent excessive built
up of glass dust/sludge in the base of the sander. e sludge can be removed by
wiping the water tray with a paper towel, and then disposing of the paper towel in
the trash. You should not wash the sludge down your drain, as it will eventually
clog your plumbing.
®
If you have any questions regarding the setup
or use of your Wet Belt Sander, please call:
Gryphon Corporation
www.gryphoncorp.com
818-890-7770
 Loading...