

Grundig Sonoclock SC 5300, Sonoclock SC 5340 LW, Sonoclock 50, Sonoclock 50 L, SC 5300 User Manual
...Page 1

CLOCK RADIO
Sonoclock 50/50 L
ǵ
SC 5300/SC 5340 LW
Page 2

2
3 Sicherheit/Informationen 7 Einstellungen
4 Auf einen Blick 8 Betrieb
6 Stromversorgung 75 Service
10 Safety/Information 15 Settings
11 Overview 16 Operation
13 Power supply 75 Service
18 Sécurité/Informations 22 Réglages
19 Vue d’ensemble 23 Fonctionnement
21 Alimentation électrique 75 Service
25 Sicurezza/Informazioni 29 Impostazioni
26 In breve 30 Funzionamento
28 Alimentazione elettrica 75 Service
32 Segurança/Informações 36 Regulações
33 Vista geral 37 Funcionamento
35 Alimentação de corrente 75 Service
39 Seguridad/Información 43 Ajustes
40 Vista general 44 Funcionamiento
42 Alimentación eléctrica 75 Service
46 Veiligheid/informatie 50 Instellingen
47 In een oogopslag 51 Functies
49 Stroomtoevoer 75 Service
53 Sikkerhed/Informationer 57 Indstillinger
54 Kort oversigt 58 Anvendelse
56 Strømforsyning 75 Service
60 Säkerhet/information 64 Inställningar
61 En överblick 65 Användning
63 Strömförsörjning 75 Service
67 Turvallisuus/tietoja 71 Säädöt
68 Yleiskatsaus 72 Käyttö
70 Virransyöttö 75 Service
___________________________________________________________________
DEUTSCH
ENGLISH
FRANÇAIS
ITALIANO
PORTUGUÊS
ESPAÑOL
NEDERLANDS
DANSK
SVENSKA
SUOMI
Page 3
10
SAFETY, INFORMATION
_____________________
ENGLISH
SONOCLOCK 50
ǵ
ǵ
SONOCLOCK 50
S
L
E
E
P
M
I
N
T
I
M
E
ALARM
FM 88 92 96 100 104 108 MHz
MW 530 650 800 1000 1300 1600 KHz
! SERVICE !! SERVICE !
! SERVICE !
Safety
This device is designed for the playback of audio signals.
Any other use is expressly prohibited.
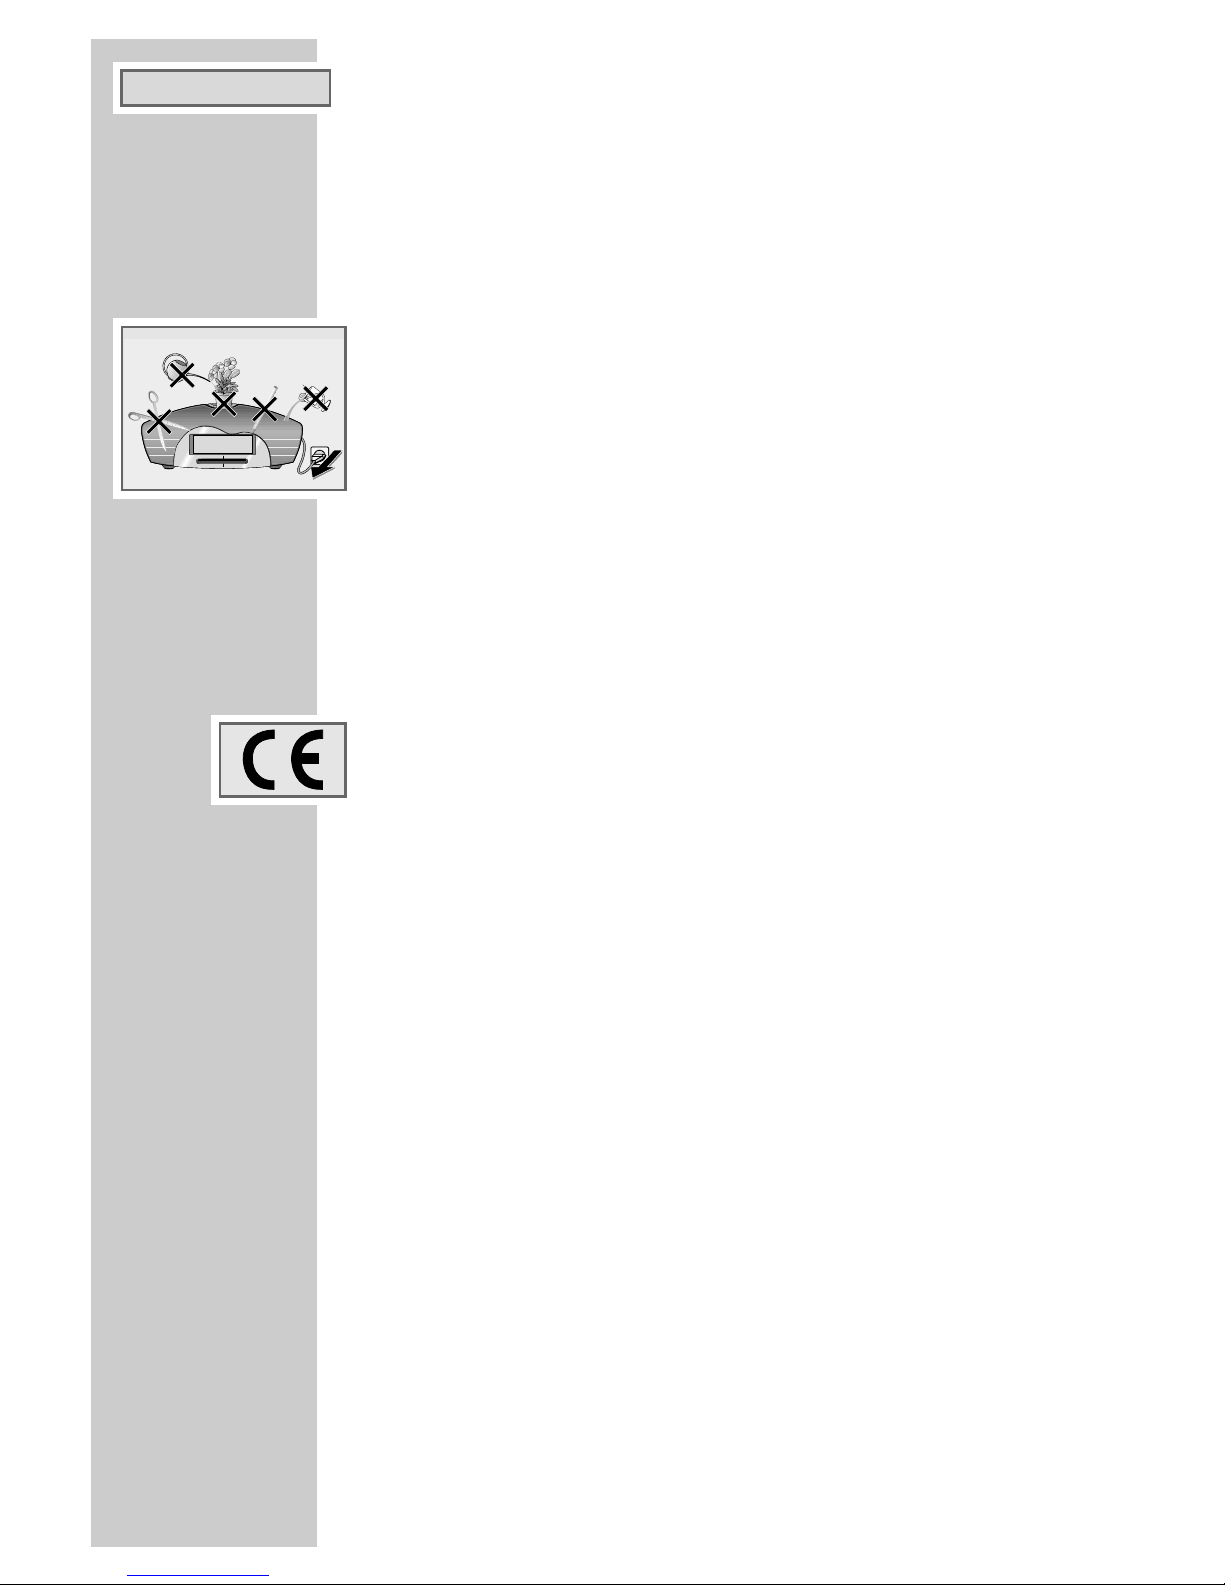
Protect the device from moisture (water drops or splashes). Do not place any
vessels such as vases on the device. These may be knocked over and spill
fluid on the electrical components, thus presenting a safety risk.
When deciding where to place the device, please note that furniture surfaces are covered by various types of varnish and plastic, most of which
contain chemical additives. These additives can corrode the device supports, leaving residues on the furniture surfaces which can be difficult or
impossible to remove.
Do not use any cleaning agent, as this may damage the casing. Clean the
device with a clean, moist leather cloth. Never open the device casing. The
manufacturer will not accept any liability for damage resulting from
improper handling.
The type plate is located on the bottom of the device.
Information
This device is noise-suppressed according to the applicable EU directives.
This product fulfils the European directives 89/336/EEC, 73/23/EEC and
93/68/EEC.
This device conforms to the safety regulation VDE 0860 and therefore the
international safety regulation IEC 65.
Technical data
Power supply: 230 V, 50 Hz
Max. power consumption: <3 W (operation), <2 W (standby)
Output: DIN 45324, 10% THD 400 mW
Frequency bands: (for SC 5300) FM 87.5 ...108.0 MHz
MW 526.5 ...1606.5 kHz
(for SC 5340 LW) FM 87.5 ... 108.0 MHz
LW 148.5 ... 283.5 kHz
Dimensions and weight: W x H x L 220 x 90 x 133 mm
Weight approx. 750 g
Environmental note
As little material as possible was used in the packaging of your device.
It consists of two separate materials: cardboard (box) and polyethylene
(bag). Please observe the local regulations for disposing of the packing
material.
Technical and design modifications reserved
Page 4
DEUTSCH
11
OVERVIEW
___________________________________________
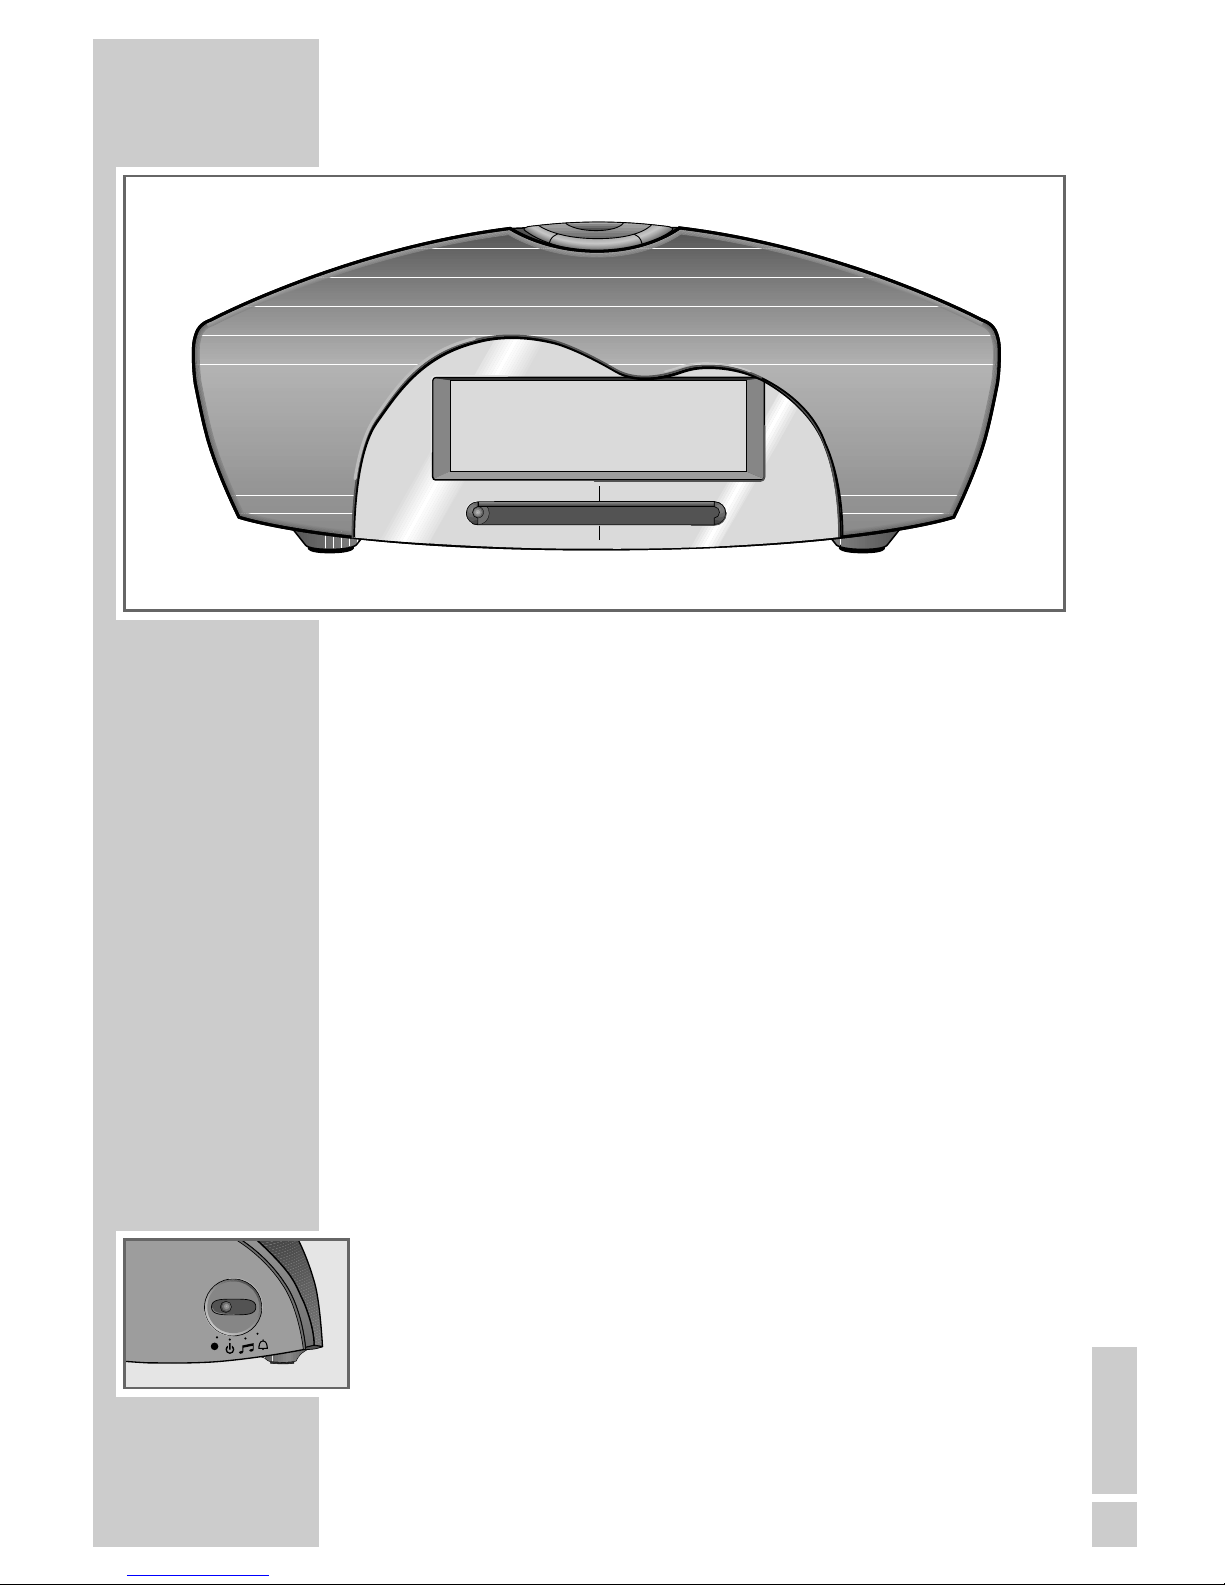
Controls on the top
SNOOZE Interrupts the alarm function. Stops the sleep timer.
TIME Press and hold down to set the clock in combination
with »HOUR« and »MIN«.
ALARM Press and hold down to set the alarm time in combi-
nation with »HOUR« and »MIN«.
Press briefly to deactivate the alarm function.
Displays the alarm time.
HOUR For setting the hours.
Press briefly to change the hour step-by-step.
Hold down to change the hour continuously.
MIN For setting the minutes.
Press briefly to change the minutes step-by-step.
Hold down to change the minutes continuously.
SLEEP Activates the sleep timer.
Controls on the sides
RADIO
•
9
The slide switch on the left side of the device switches
ɷ
e ALARM the radio on or to stand-by.
In alarm stand-by mode, it switches between the signal
tone and the radio station.
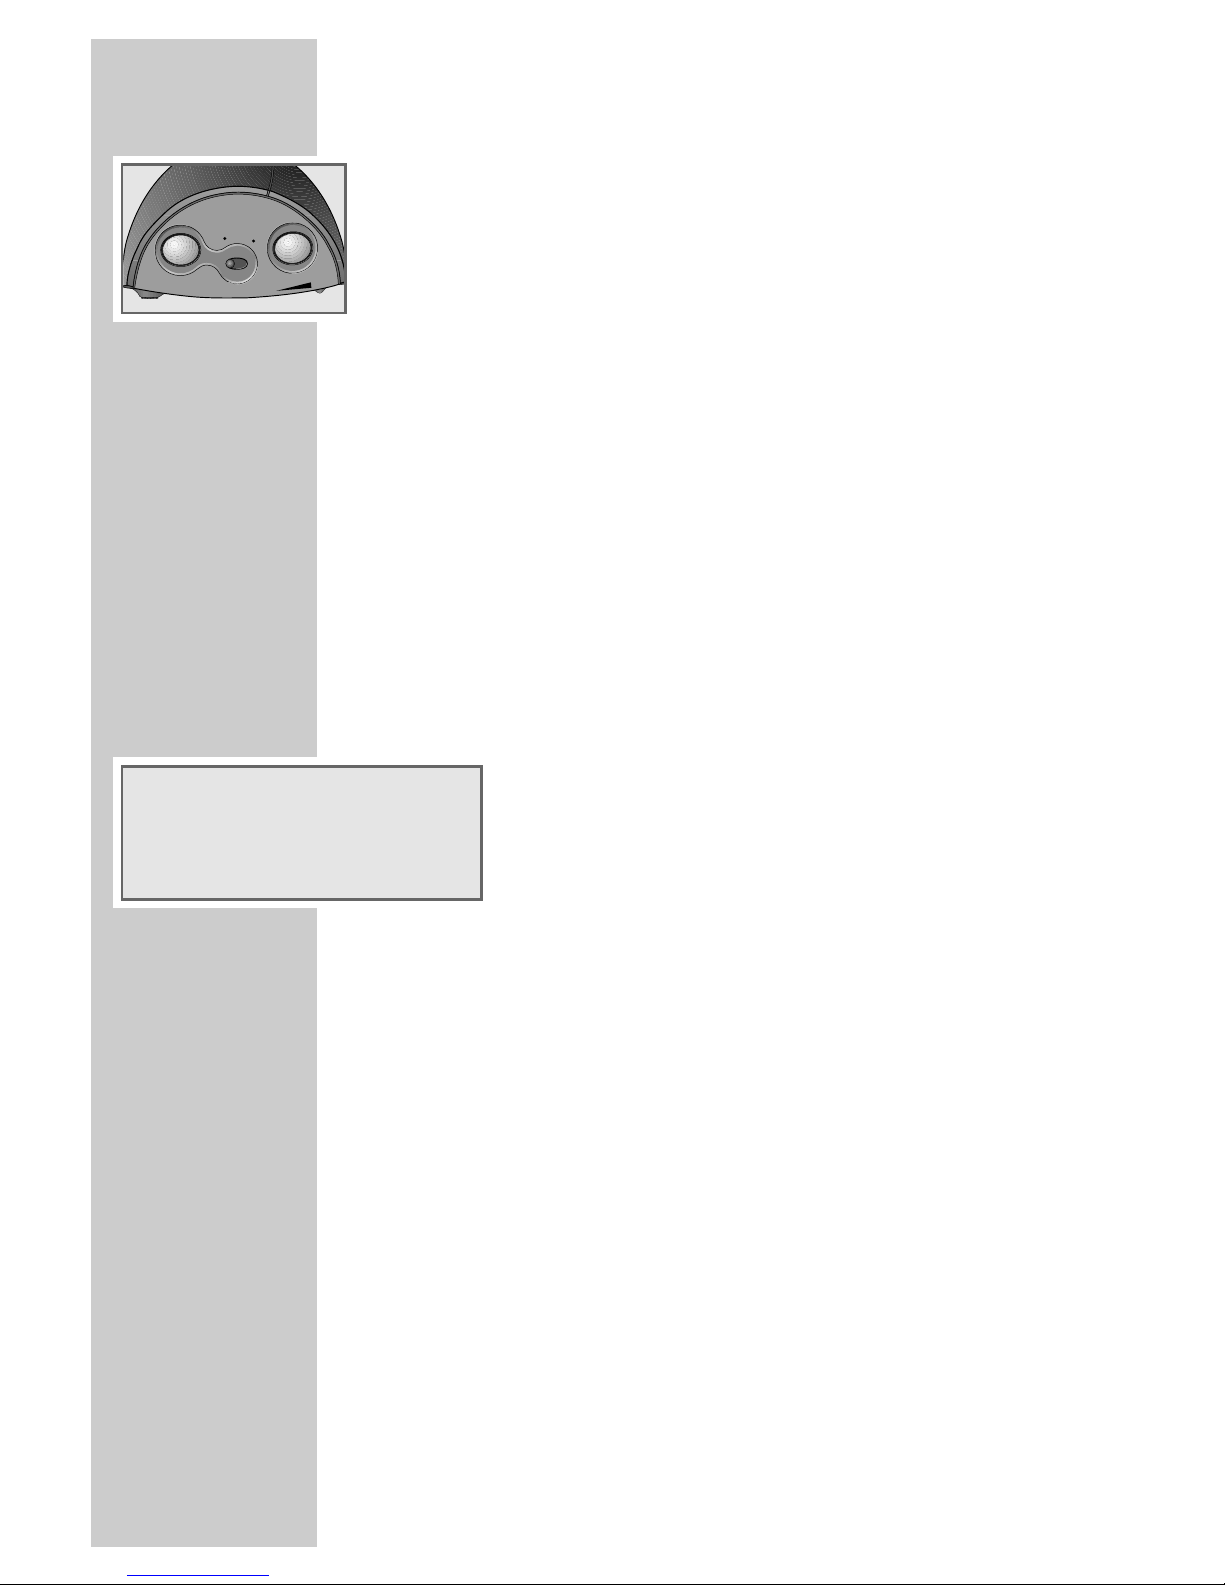
VOLUME Adjusts the volume (on the right side of the device).
|
SONOCLOCK 50
ǵ
ǵ
SONOCLOCK 50
S
L
E
E
P
M
I
N
T
I
M
E
ALARM
FM 88 92 96 100 104 108 MHz
MW 530 650 800 1000 1300 1600 KHz
R
A
D
I
O
A
L
A
R
M
Page 5
12
TUNING For tuning to radio stations (on the right side of the
device).
FM . . MW FM and MW frequency band switch (for SC 5300),
on the right side of the device.
FM . . LW FM and LW frequency band switch (for SC 5340 LW),
on the right side of the device.
Controls on the back
Ü Mains cable.
y Wire antenna for FM reception.
The device has a built-in antenna for MW reception
(SC 5300) or LW reception (SC 5340 LW). Turn the
device around to direct the antenna.
Controls on the bottom
Battery compartment for back-up battery.
The display
ALARM
•
LED. Indicates that the alarm setting is activated.
10:00 Shows the current time and the alarm time.
FM 88-108 MHz Tuning scale for the FM and
MW 530-1600 kHz MW frequency bands (with LED as frequency
indicator).
OVERVIEW
____________________________________
0
00
I
:
ALARM
•
TUN
IN
G
VO
LUM
E
FM
W
M
Page 6
DEUTSCH
13
Mains operation
Note:
Check that the mains voltage on the type plate (on the bottom of the
device) corresponds to your local mains supply. If this is not the case,
contact your specialist dealer.
1 Plug the mains cable into the socket (230V~, 50 Hz).
Note:
The only way to disconnect the device from the mains supply is to pull
out the plug.
Inserting the back-up battery
During mains operation, the back-up battery ensures that stored settings are
not lost in the case of a power failure or when the device is briefly disconnected from the mains.
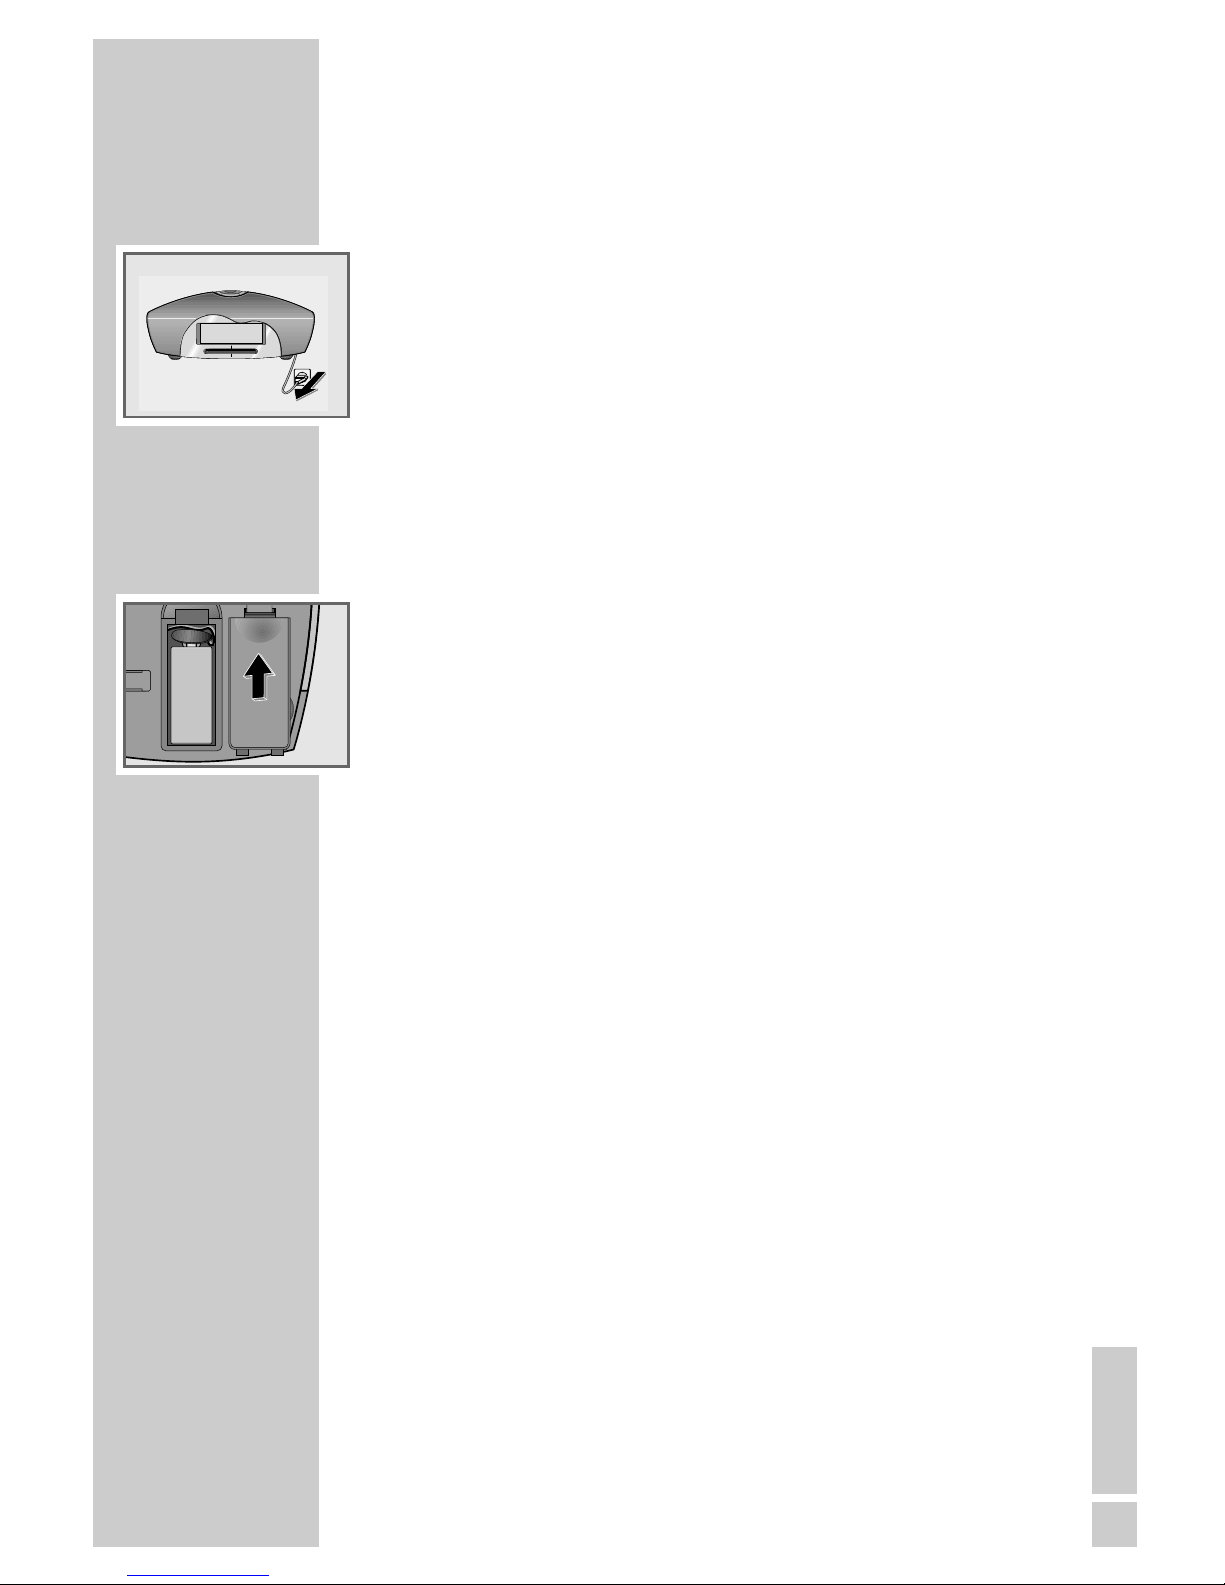
1 Open the battery compartment by pressing the area marked with an
arrow on the drawing and lifting up the cover.
2 When inserting the battery (9 V, 6LF 22), observe the polarity marked
on the base of the battery compartment.
Note:
Remove the back-up battery when it is flat or when you know that the
device will not be used for a long period of time.
Environmental note:
Batteries, including those which contain no heavy metal, may not be
disposed of with household waste. Please dispose of used batteries in
an environmentally sound manner. Find out about the legal regulations
which apply in your area.
POWER SUPPLY
___________________________________
SONOCLOCK 50
ǵ
ǵ
SONOCLOCK 50
S
L
E
E
P
M
I
N
T
I
M
E
ALARM
FM 88 92 96 100 104 108 MHz
MW 530 650 800 1000 1300 1600 KHz
Page 7

14
Additional information for units sold in the UK.
Units sold in the UK are suitable for operation from a 240V ac, 50Hz mains
supply.
The range of multi-system receivers is built to work in most European countries. However, the mains plug and socket system for the UK differs from
many European countries.
This appliance has been supplied with a fitted, non-removable, approved
converter plug for use in the UK. This converter plug is fitted with a 5A rated
fuse.
In case this appliance is supplied with a moulded 2-pin Euro plug only,
which is unsuitable for UK operation, this must be cut off and immediately
disposed of. An approved 13A, 3-pin UK plug should then be fitted by a
qualified electrician.
Note:
The severed Euro plug must be destroyed to avoid a possible shock
hazard should it be inserted into a socket elsewhere.
If a non-rewireable 3-pin plug or a rewireable 13A (BS1363) 3-pin plug is
used, it must be fitted with a 5A ASTA or BSI approved BS1362 fuse. If any
other type of plug is used it must be protected by a 5A fuse either in the
plug, or at the distribution board. If this type of plug becomes defective,
ensure that the fuse is removed before disposal, to eliminate potential shock
hazard.
If it is necessary to change the fuse in the non-rewireable plug, the correct
type and rating (5A ASTA or BSI approved BS1362) must be used and the
fuse cover must be refitted. If the fuse cover is lost or damaged, the lead and
plug must not be used until a replacement is obtained. Replacement fuse
covers should be obtained from your dealer.
Important:
The wires in the mains lead are colour coded in accordance with the following code:
BLUE – NEUTRAL
BROWN – LIVE
As the colours of the wires in the mains lead of your appliance may not correspond with the coloured marking identifying terminals in your plug, proceed as follows:
Connect the BLUE coloured wire to plug terminal marked with the letter “N”
or coloured black.
Connect the BROWN coloured wire to the plug terminal marked with the letter “L” or coloured red.
In no circumstance must any of the wires be connected to the terminal marked with the letter “E”, earth symbol “
z”, coloured green, or green & yel-
low.
Replacement mains lead sets can be obtained from your local dealer, or by
contacting Grundig Consumer Relations (01788 570088)
Moulded 3-pin lead set, suitable for UK use:
Ref: Leadset UK 8290-991-224
Moulded 2-pin Euro lead set, not suitable for UK use:
Ref: Leadset Euro 8290-991-316
POWER SUPPLY
______________________________________
Page 8

DEUTSCH
15
ENGLISH
15
SETTINGS
__________________________
Setting the clock
When you switch on the device for the first time, the time flashes in the
display to indicate that you must set the clock. The same thing applies after
a power failure, or if the device has been unplugged and no back-up
batteries have been inserted.
1 Press and hold down »TIME«.
2 Press »HOUR« briefly to set the hours step-by-step or hold it down to
run through the hours quickly.
3 Press »
MIN
« briefly to set the minutes step-by-step or hold it down to
run through the minutes quickly.
Note:
When the minute display changes from »59« to »00«, this does not
affect the hour display.
4 Release »TIME« to conclude the setting.
– Display: the current time.
Setting the alarm time
1 Press and hold down »ALARM«.
– Display: the last alarm time set.
2 Press »HOUR« briefly to set the hours step-by-step or hold it down to
run through the hours quickly.
3 Press »
MIN
« briefly to set the minutes step-by-step or hold it down to
run through the minutes quickly.
4 Release »ALARM« to conclude the setting.
5 Use the slide switch »RADIO
•
9
ɷ
e ALARM« (on the left
side of the device) to set the alarm signal you require (»ɷ« = radio
station, »e« = signal tone).
– Display: the »ALARM •« LED lights up red, which means the
alarm setting is activated.
– The device switches on at the set alarm time with the selected alarm
signal.
Page 9

1616
OPERATION
__________________________________________
Switching on and off
1 Use »RADIO
•
9
ɷ
e ALARM« to switch the device on and
off.
Radio operation
For the best FM (VHF) reception, it is sufficient to direct the wire antenna
accordingly.
Tuning radio stations
1 Set the frequency band with »FM..MW« (SC 5300) or »FM . . LW«
(SC 5340 LW) on the right side of the device.
2 Tune to the station using »TUNING« (on the right side of the device).
Adjusting the volume
1 Adjust the volume using »
VOLUME
|
« (on the right side of
the device).
Alarm mode
Displaying the alarm time
1 Press and hold down »ALARM«.
– Display: the last alarm time set.
2 Release »ALARM«.
– Display: the current time.
Alarm with radio station
1 Press »RADIO
•
9
ɷ
e ALARM« to switch on the device.
2 Find and tune the station using the control dial (on the right side of the
device).
3 Set the alarm volume using »
VOLUME
|
«.
4 Select the radio alarm (»
ɷ
«) using »RADIO
•
9
ɷ
e
ALARM« (on the left side of the device).
– The radio switches on at the set alarm time (alarm duration 1 hour
59 minutes).
Alarm with signal tone
1 Select the signal tone (»e«) using »RADIO
•
9
ɷ
e
ALARM« (on the left side of the device).
– The signal tone switches on at the set alarm time (alarm duration 1 hour
59 minutes).
Page 10

DEUTSCH
17
ENGLISH
17
Interrupting the alarm
1 Press »SNOOZE« while the alarm is sounding.
– The alarm (signal tone or radio) stops.
– The alarm comes again at 9-minute intervals (the total alarm time is
1 hour and 59 minutes).
Cancelling the alarm for the day
1 Press »ALARM« while the alarm is sounding.
– The alarm (signal tone or radio) stops, but the alarm function remains
activated for the next day at the set time.
Cancelling/activating alarm stand-by
1 To cancel the alarm function, switch »RADIO
•
9
ɷ
e ALARM«
(on the left side of the device) to »9« (stand-by).
– Display: The »ALARM
•
« LED goes out.
– The set alarm time is saved.
2 To activate the alarm function, switch »RADIO
•
9
ɷ
e ALARM«
(on the left side of the device) from »9« (stand-by) to »ɷ« or »e«.
– Display: The »ALARM
•
« LED lights up.
Timer mode
The device possesses a sleep timer, which switches it off in radio mode at a
preset time. It is possible to set the switch-off time for between 1 minute and
1 hour 59 minutes.
Switching on the sleep timer
1 Press »SLEEP« to switch on the device.
– Display: The switch-off time » 0:59« (59 minutes).
– You will hear the selected radio station.
2 To set the switch-off time, press and hold down »SLEEP«.
3 Press »HOUR« briefly to extend the switch-off time to 1 hour 59
minutes (» 1:59«).
4 Press »
MIN
« repeatedly (step-by-step) or hold it down (continuous) to
set the minutes between » 59« and » 00«).
5 Release »SLEEP« to conclude the setting.
– After the selected switch-off time has elapsed, the device switches off
automatically.
Switching off the sleep timer
1 To switch off the sleep timer before the set time, press »SNOOZE«.
– The device switches off.
OPERATION
_______________________________________________
Page 11

75
GRUNDIG Service
______________________________
GRUNDIG BELUX N.V.
Deltapark, Weihoek 3, Unit 3G
B-1930 Zaventem
+32/2-7 16 04 00
GRUNDIG UK LTD.
Elstree Way, Borehamwood,
Herts, WD6 1RX
GB Großbritannien/
Great Britain
+44/1 81-3 24 94 00
Technical Service
Unit 35, Woodside Park,
Wood Street
Rugby, Warwickshire, CV21 2NP
Großbritannien/
Great Britain
+44/1 78-8 57 00 88
GRUNDIG IRELAND LTD.
2 Waverley Office Park,
Old Naas Road
EIR Dublin 12
+3 53/1-4 50 97 17
GRUNDIG FRANCE S.A.
5 Boulevard Marcel Pourtout
F-92563 Rueil
Malmaison Cedex
+33/1-41 39 26 26
GRUNDIG SCHWEIZ AG
Steinacker Straße 28
CH-8302 Kloten
+41/1-8 15 81 11
GRUNDIG PORTUGUESA
Comércio de Artigos
Electrónicos, Lda.
Rua Bento de Jesus Caraça 17
P-1495 Cruz Quebrada,
Lisboa
+3 51/1-4 19 75 70
GRUNDIG ESPAÑA S.A.
Solsonés, 2 planta baja B3
Edificio Muntadas (Mas Blau)
E-08820 El Prat De
Llobregat (Barcelona)
+34/93-4 79 92 00
GRUNDIG NORGE A.S.
Glynitveien 25, Postboks 234
N-1401 Ski
+47/64 87 82 00
GRUNDIG DANMARK A/S
Lejrvej 19
DK-3500 Værløse
+45/44 48 68 22
GRUNDIG OY
Luoteisrinne 5
SF-02271 Espoo
+3 58/9-8 04 39 00
GRUNDIG SVENSKA AB
Albygatan 109 d, Box 4050
S-17104 Solna
+46/8-6 29 85 30
GRUNDIG POLSKA SP.Z.O.O.
Ul. Czéstochowska 140
PL-62800 Kalisz
+48/62-7 66 77 70
GRUNDIG AUSTRIA
Ges.m.b.H.
Breitenfurter Straße 43-45
A-1120 Wien
+43/1-81 11 70
GRUNDIG NEDERLAND B.V.
Gebouw Amstelveste
Joan Muyskenweg 22
NL-1096 CJ Amsterdam
+31/20-5 68 15 68
GRUNDIG ITALIANA S.P.A.
Via G.B. Trener, 8
I-38100 Trento
+39/4 61-89 31 11
GRUNDIG Deutschland
Ihre regionale Kundendienst-Stelle in Deutschland erreichen Sie unter:
Telefon 0180/5 23 1852* • Telefax 0180/5 23 18 46*
*gebührenpflichtig
GRUNDIG Kundenberatungszentrum
Haben Sie Fragen?
Unser Kundenberatungszentrum steht Ihnen werktags
stets von 8.00 – 19.00 Uhr zur Verfügung.
Haben Sie Fragen zur Umweltverträglichkeit unserer
Geräte, wenden Sie sich an die GRUNDIG ÖkoTechnologie,
Fax: 0911/703-9213.
Grundig Kundenberatungszentrum
Montags bis Freitags
von 8.00 bis 19.00 Uhr
Deutschland: 0180 / 530 21 22*
Österreich: 0800 / 700 600*
*gebührenpflichtig
Page 12

Grundig AG • Beuthener Str. 41 • D-90471 Nürnberg • http://www.grundig.com 72011 402 4000
 Loading...