

Page 1
COLOR TELEVISION
P 37-830 Multi/ICN
Page 2

Contents
k
2
If the dealer has already installed the TV set and
made adjustments, then begin on page 7 of this
instruction manual.
❒
Safety, installation and connections
3
Safety and installation . . . . . . . . . . . . . . . . . . . . 3
Connections . . . . . . . . . . . . . . . . . . . . . . . . . . . . 3
Operating the set . . . . . . . . . . . . . . . . . . . . . . . . 3
❒
Preparation and adjustments 4-6
Inserting batteries into remote control . . . . . . . . 4
Turning set on and off, setting standby . . . . . . . 4
The DIALOG CENTER as a user guide . . . . . . . . . 4
Setting channel positions with the
Automatic Tuning System ATS . . . . . . . . . . . . . 5
Deleting channels . . . . . . . . . . . . . . . . . . . . . . . . 5
Sorting channels . . . . . . . . . . . . . . . . . . . . . . . . 5
Limiting channel position selection . . . . . . . . . . 6
Setting channels manually . . . . . . . . . . . . . . . . . 6
❒
Remote control 7
Brief description for operation the set . . . . . . . . .7
❒
Picture and sound settings 8
Picture tuning . . . . . . . . . . . . . . . . . . . . . . . . . . . 8
Selecting »Picture« menu . . . . . . . . . . . . . . . . . . 8
Contrast . . . . . . . . . . . . . . . . . . . . . . . . . . . . . . . 8
Sharpness . . . . . . . . . . . . . . . . . . . . . . . . . . . . . 8
Brightness and colour contrast . . . . . . . . . . . . . 8
Factory settings . . . . . . . . . . . . . . . . . . . . . . . . . 8
❒
Teletext operation 9-12
Brief description of teletext operation . . . . . . . . . 9
Teletext mode . . . . . . . . . . . . . . . . . . . . . . . . . . 10
TOP text or FLOF text operation . . . . . . . . . . . . 10
Normal teletext . . . . . . . . . . . . . . . . . . . . . . . . . 10
Functions for both teletext operating modes . . 10
Enlarging the teletext page . . . . . . . . . . . . . . . . 10
Page-freeze for multiple page displays . . . . . . . 11
Calling up sub-pages directly . . . . . . . . . . . . . . 11
Answer release . . . . . . . . . . . . . . . . . . . . . . . . . 11
»Page-catching« – directly select and call up
certain teletext pages . . . . . . . . . . . . . . . . . . . . 11
Avoiding waiting time . . . . . . . . . . . . . . . . . . . . 12
Language group selection . . . . . . . . . . . . . . . . 12
❒
Convenience functions 13-14
Special functions . . . . . . . . . . . . . . . . . . . . . . . 13
Switching on with ... . . . . . . . . . . . . . . . . . . . . . 13
Picture/sound settings . . . . . . . . . . . . . . . . . . . 13
Equalizing the volume . . . . . . . . . . . . . . . . . . . . 13
Decoder on/off . . . . . . . . . . . . . . . . . . . . . . . . . 13
Station name . . . . . . . . . . . . . . . . . . . . . . . . . . 13
Setting SLEEP TIMER . . . . . . . . . . . . . . . . . . . . 13
Superimposing channel number . . . . . . . . . . . . 13
Parental lock . . . . . . . . . . . . . . . . . . . . . . . . . . . 14
Parental lock on/off . . . . . . . . . . . . . . . . . . . . . .14
SERVICE functions . . . . . . . . . . . . . . . . . . . . . . 14
Decoder . . . . . . . . . . . . . . . . . . . . . . . . . . . . . . 14
Manually adjusting the colour norm . . . . . . . . . 14
Selecting a blue screen . . . . . . . . . . . . . . . . . . . 14
Selecting a black screen . . . . . . . . . . . . . . . . . . 14
Station name display on/off . . . . . . . . . . . . . . . 14
Service Code/IDP2 HP . . . . . . . . . . . . . . . . . . . 14
❒
Connecting external devices 15-16
AUDIO/VIDEO connection . . . . . . . . . . . . . . . . . 15
Camcorder connection . . . . . . . . . . . . . . . . . . . .15
VCR, satellite receiver or SET TOP
box connection . . . . . . . . . . . . . . . . . . . . . . . . . 15
Decoder connection . . . . . . . . . . . . . . . . . . . . . . 16
Headphone connection . . . . . . . . . . . . . . . . . . . 16
Adjusting headphone volume . . . . . . . . . . . . . . 16
External speaker . . . . . . . . . . . . . . . . . . . . . . . . 16
❒
Technical data 17
Technical data . . . . . . . . . . . . . . . . . . . . . . . . . 17
Service notes for the specialist . . . . . . . . . . . . . 17
❒
Customer information 17
Environmentally relevant information is marked using this symbol.
Notes on the environment by Grundig
Technology and ecology combine into a convincing overall concept with this TV set. Ecologically high-quality materials are used exclusively. The
housing contains many recyclable parts from used
plastics and is painted using water-based paints
and, in part, recycled paints. Wherever possible,
painting of individual housing parts has been omitted. Due to the optimized housing construction,
flame protection materials have been omitted. The
number of plastic types has been reduced in order
to ensure high-quality recycling
when the set is put out of use –
all larger plastic parts are marked. To optimize reusability,
this TV set has been constructed in such a way as to make
disassembly very easy.
Page 3
❒
Connection
Insert the telescopic antenna into the socket on the
rear panel.
Plug the aerial cable or telescopic antenna into the
aerial socket
of the set.
Insert the mains lead into the set’s mains socket
and connect the plug to the mains supply.
Connection of external devices is described on
pages 15 and 16.
❒
Operating the set
Switchin
g on and off with the main power
button
Press main power button ü.
Adjusting the volume
Adjust volume with the ›–V ›+buttons.
Selecting channels
Select channel with the ›
–
P ›
+
buttons.
6
3
2
1
AV1
Safety, installation and connection
k
3
Safety and installation
❒
Valued customers!
In order that you may be entertained by this highquality TV set for a long time to come, it is very
important that you observe the following points
when installing the set.
w
!
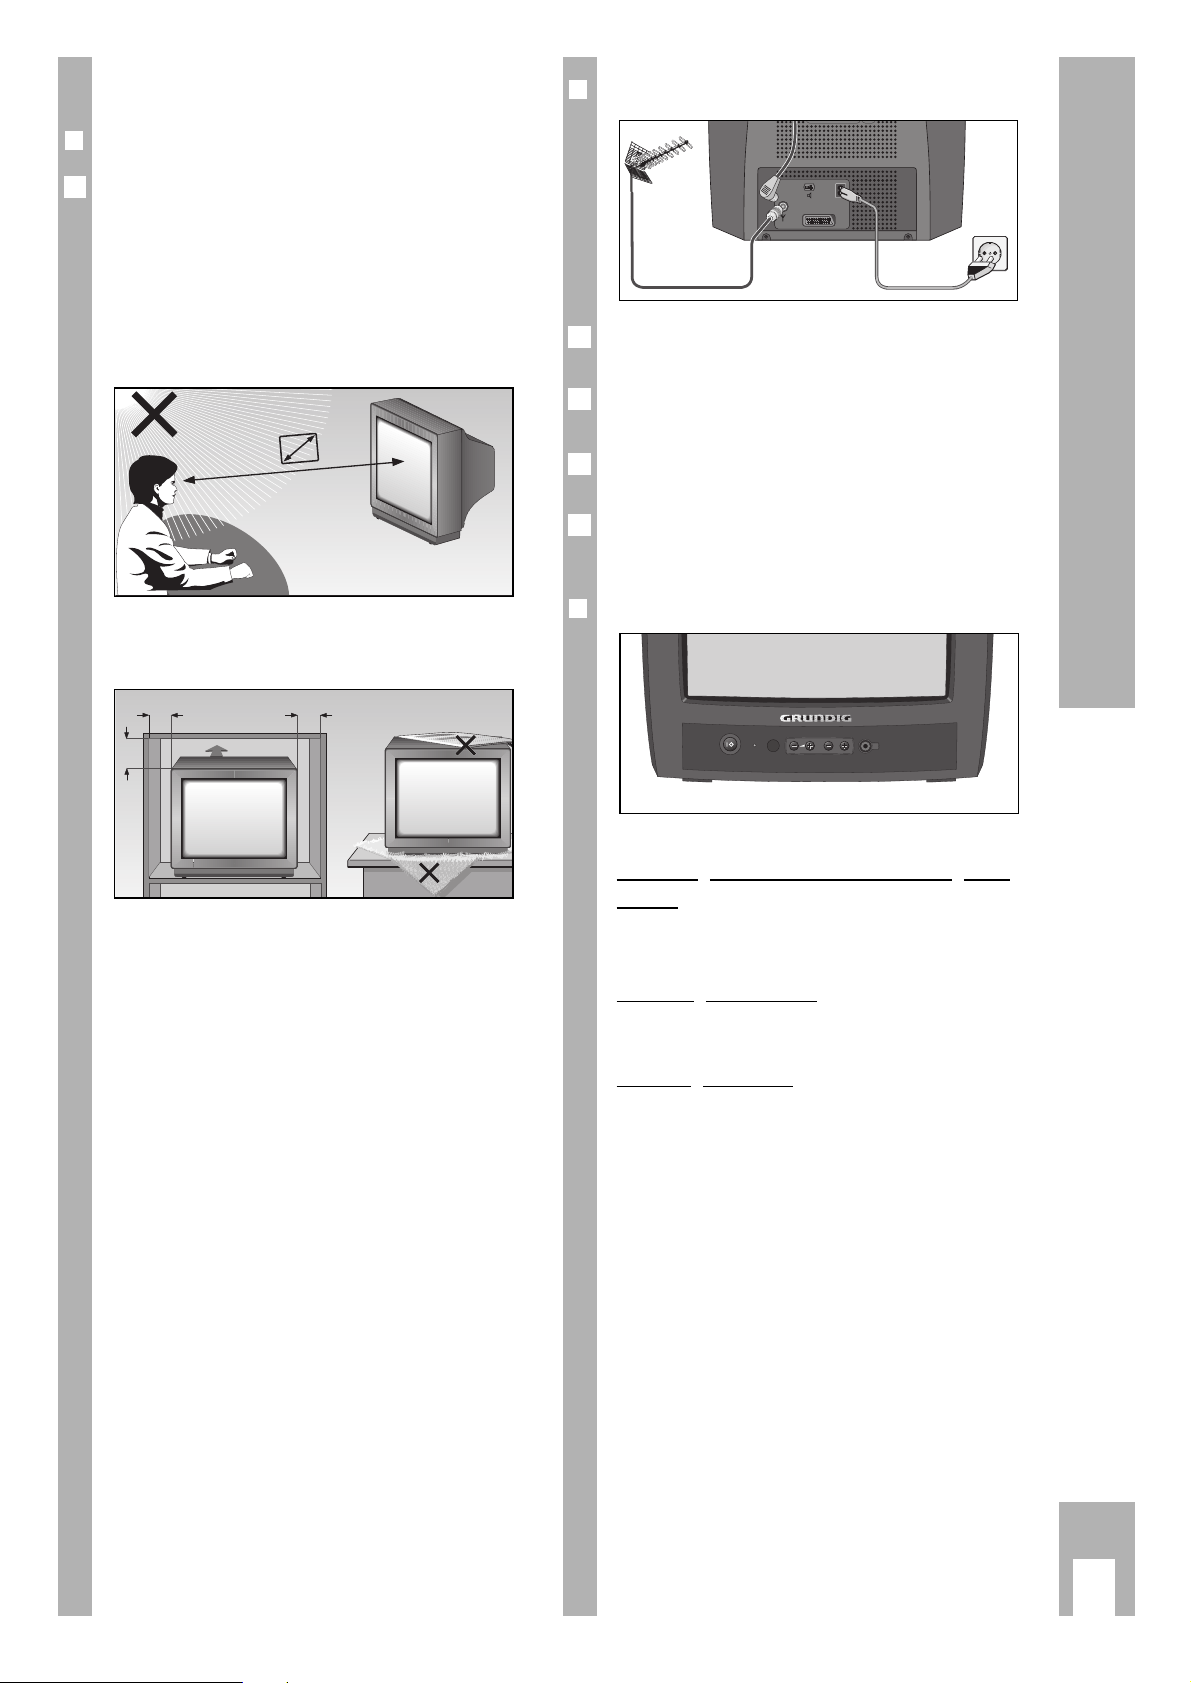
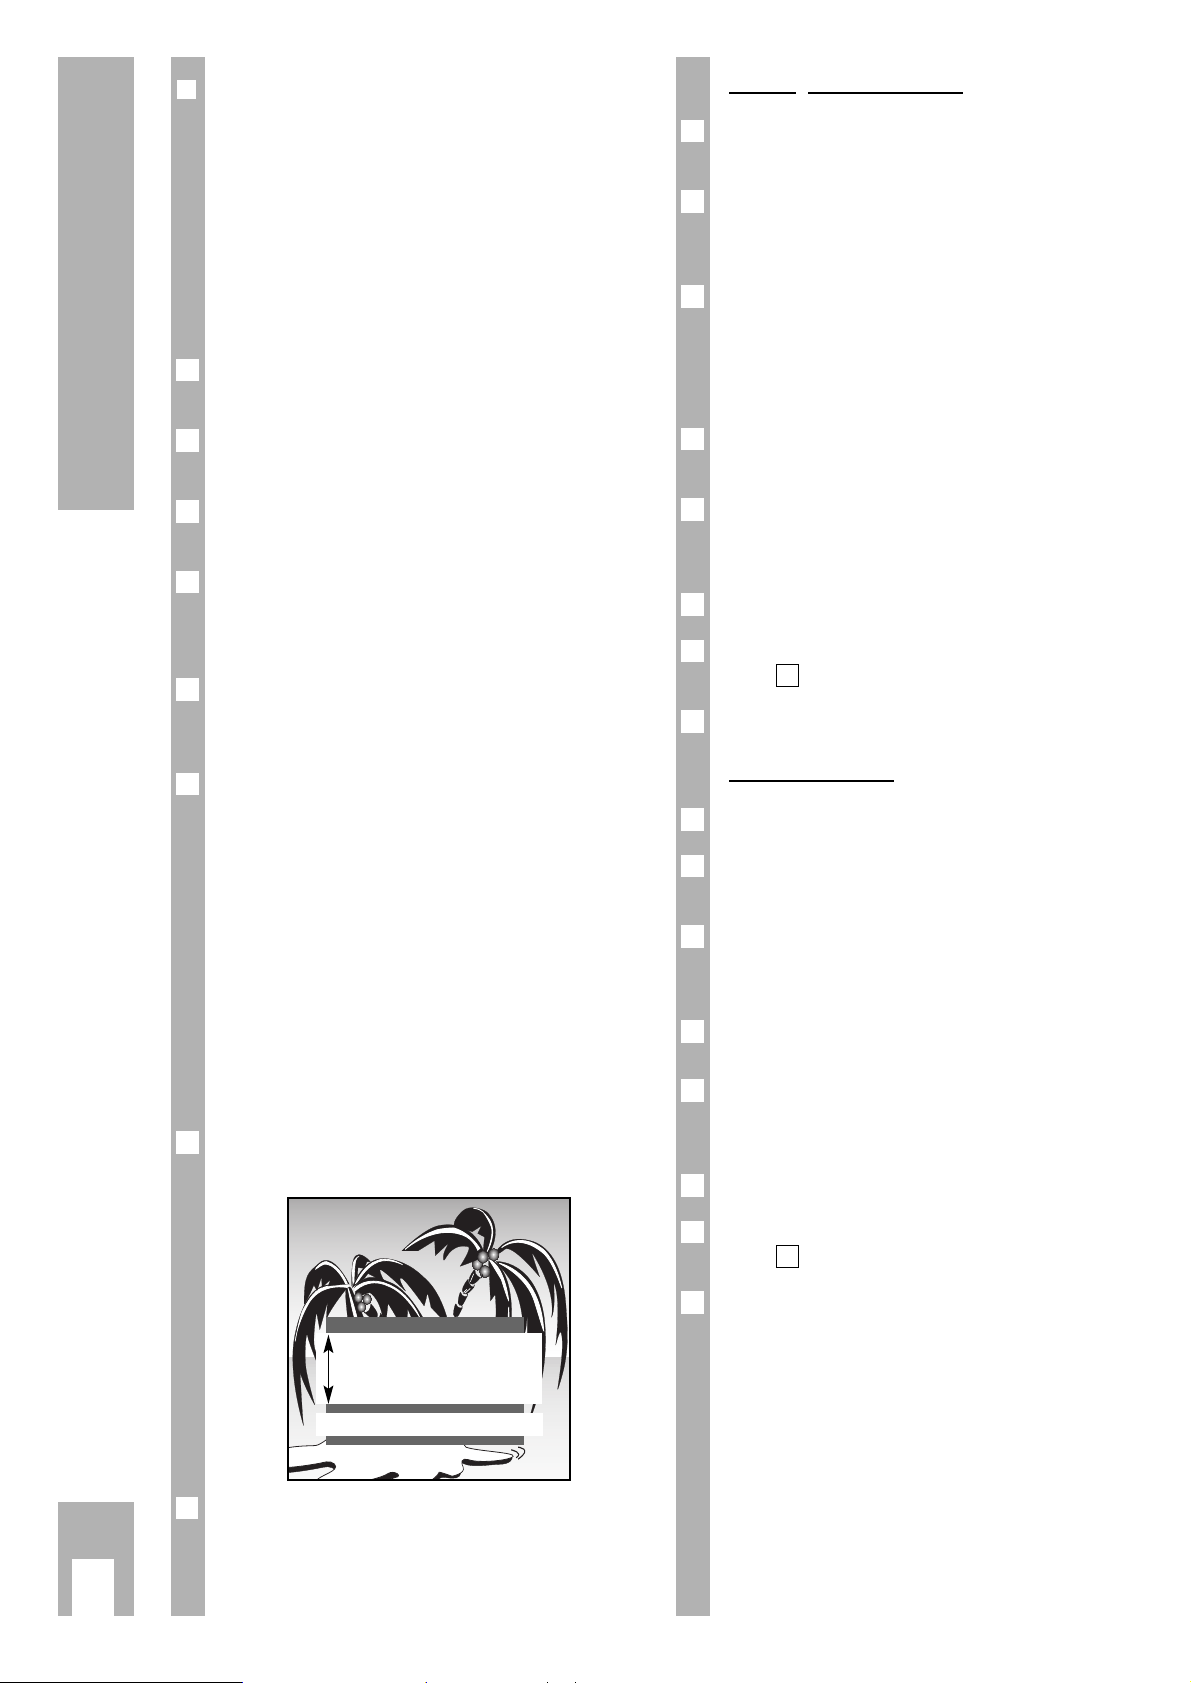
The ideal viewing distance is 5 times the diagonal
measurement of the screen.
External lights shining on the screen adversely
affect picture quality.
w
!
Insure appropriate distance from walls or within the
cabinet where the set has been placed.
w
!
Do not cover ventilation openings.
w
!
Heat can build up in the set.
Heat build-up can be dangerous. It is also detrimen-
tal to the service life of the equipment. From time to
time, have a specialist remove the particles which
have collected inside the set.
w
!
Use only the mains cable which is supplied with the
set. Do not damage the mains cable.
w
!
No magnetic fields (e.g. speakers) near the set.
w
!
Ensure that no liquids or objects enter the set
(danger of short circuit).
w
!
Clean the screen only with a soft damp cloth. Use
only water.
w
!
Avoid lightning damage by unplugging the mains
and aerial cable.
Even if the set is switched off, damage may occur
via lightning striking the mains supply/antenna
lead.
w
!
Only authorised specialists may open and service
the set.
w
!
This set has been designed for the reception and
playback of picture and sound signals.
Every other use is implicitly prohibited.
6
5 x
10
cm
20
cm
10
cm
20 cm
Krieg am Golf
P
U
Page 4
Prior to operation
❒
Inserting batteries into remote control
w
!
Take note of the polarity indicated in the battery
compartment.
The following appears on the screen when
the batteries are spent: »Battery«.
Spent batteries must be removed.
Dispose of spent batteries in an environmentally safe manner.
❒
Turning the set on
Push the ü button on the set.
Channel position 1 will automatically appear.
If the remote control has not been used for a period
of 4 hours, the set will automatically switch to
standby mode. This is a safety measure, in case
you have forgotten to turn the set off.
❒
Switching the set to standby mode
Press the button A on the remote control.
The set is not completely turned off (indicator light
glows).
The set can now be turned on with the remote
control.
❒❒
Turning off the set completely
If you are not intending to use the set for an
extended period of time (e.g. at night), turn
the set completely off.
This will save energy.
Press the ü button on the set.
1
6
6
1
6
1
6
The DIALOG CENTER as a user
guide
The DIALOG CENTER and the individual pages of
the user guide display the possible functions and
the buttons on the remote control with which these
functions may be activated.
Button symbols and dialogue lines display possible
operating steps.
The characters on the screen are symbols for
the following buttons on the remote control:
Symbol Button Function
w Pp Selecting from a list on a
given page
re FE Changing settings
6 h Calls up the DIALOG CENTER
(h and G) and returns
from a page to the DIALOG
CENTER.
OK G Confirms function.
Please remember the functions of these buttons, as
they will be used consistently throughout the
following operation steps!
6
Preparation and adjustments
k
4
DIALOG CENTER
OK TXT
LANGUAGE SELECTION
SLEEP TIMER
PARENTAL LOCK
SPECIAL FUNCTIONS
PROGRAM SORT
MANUAL TUNING
AUTOMATIC TUNING SYSTEM
SERVICE
Page 5
Settings
k
5
The »AUTOMATIC TUNING SYSTEM« page can
also be chosen directly from the »DIALOG
CENTER«.
The process can last one minute or more, depending on the number of available channels.
Following the search procedure, the TV automatically switches to channel position 1, and displays
the »SORT« page.
❒
Deleting channels
Choose the channel to be deleted using p or P.
Delete the channel using
-
.
To delete further channels, repeat the steps starting
with point .
The »AUTOMATIC TUNING SYSTEM«, »SORT«
(under »Program Sorting«) and »LANGUAGE SELECTION« pages can also be chosen directly from
the »DIALOG CENTER«.
❒
Sorting channels
Choose the channel to be repositioned within the
list by using p or P.
Mark the channel with the G button.
Choose the new channel position with the p or P
buttons.
Save this setting with the G button.
To reposition further channels, repeat the steps
starting with point .
The channel name will be displayed for stations
which transmit their teletext name.
Exit settings with the
¢
TXT
button.
5
6
1
6
4
3
2
1
6
1
6
2
1
6
6
6
Setting channel positions with the
automatic tuning system ATS
The set is equipped with the ATS feature which
does away with the need for manual setting.
If you choose, you may rearrange the order of the
channels following the automatic search procedure.
Channels which appear more than once following
automatic assignment, or those with poor reception, may be deleted from the list.
When the set is turned on, the »LANGUAGE SELECTION« page will appear.
A selection of languages can be chosen from for the
set’s dialog language. The user guide displays will
appear in the selected language.
Choose the language with p
or
P and confirm
with G.
The page »ADJUST COUNTRY« appeare. Select the
country (eg. GB Great Britan) with the p or button
P and confirm with the G button.
If your country is not in the list, select »Others « on
the second page of »ADJUST COUNTRY« (use p
or P key to scroll forward or backward) and confirm with G.
Particularity in »Others« country and »France«.
It allows you to select (press button p, P) between
»Cable (frequency sel./MHz.)« or »Cable/arial
(channel sel.)«. After having pressed the G button, the – automatic tuning system – will search for
channels or frequencies on which programmes are
received.
The page »AUTOMATIC TUNING SYSTEM« will
appear.
6
3
2
6
1
AUTOMATIC TUNING SYSTEM
■
➡
SORT
OK Sort
AUX Delete.
66
Exit
TXT
TV
P 01
P 02
P 03
P 04
P 05
P 06
P 07
P 08
P 09
P 10
LANGUAGE SELECTION
OK
CZ âe‰tina
D Deutsch
DK Dansk
E Español
F Français
FIN Suomi
GB English
H Magyar
I Italiano
N Norge
NL Nederlands
P Portugues
PL Polski
S Svenska
SI Slovenija
SK Slovensk˘
Page 6
Settings
k
6
❒
Limiting channel position selection
The ATS feature stores all channels it has found
and automatically blocks the first position to which
no program is assigned (the point of reversal).
That means when you use the p or P buttons, you
can choose only the channels that have been automatically assigned.
This feature can also be manually defined. In the
following example, every channel from position 6
onwards will be “blocked”.
Press the h and then the G button.
The page »DIALOG CENTER« will appear.
Select the »MANUAL TUNING« line using p
or
P
and confirm with G.
On the »MANUAL TUNING« page, choose channel
position 6 with the F or E buttons.
Choose the line »C/S« and use the buttons F
or
E
to choose
»Channel« (or frequency, despending on
the preselection made in the »ADJUST COUNTRY«
menu, see page 5).
Choose the »Channel« (or frequency) line and use
the digit buttons 0…9 to input two zeros »00«
(at frequency 000).
Save the setting with G and end the operation
with
¢
TXT
.
The first 5 channels can now be scrolled through in
quicker succession as the subsequent channels can
no longer be selected using the p and P buttons.
All single digit channel positions are still accessible
using the digit buttons 0 … 9.
If 11 is blocked as the channel position, all subsequent channel positions can be selected with the
digit buttons 0 … 9.
Setting channels manually
Press the h and then the G button.
The page »DIALOG CENTER« will appear.
Choose the »MANUAL TUNING« line with the p or
P buttons and confirm with G.
2
1
6
5
4
3
2
1
Entering channels directly
Select the channel position with the digit buttons
0 … 9 or with the F
or
E buttons.
Select the line »C/S« with the p or P buttons.
Using F
or E, select
»Channel« or »Special chan-
nel«.
Select the »Kanal« line using the p or P button.
Enter the desired channel number (or frequency,
despending on the preselection made in the
»ADJUST COUNTRY« menu, see page 5) using the
numbered buttons 0 … 9 or the FEbuttons.
Select the line »Standard« using p or P.
Using F
or
E select the required setting.
Fine-tune the picture. Select the »Finetun.« line
using p or P.
Adjust the fine-tuning using F
or
E.
Save setting with the G button.
To set more channels, repeat the steps starting with
point .
End setting with the
¢
TXT
button.
Automatic search
Select the »Channel« line using p or P.
Start the automatic station search with the »blue«
o button
.
Select the »Program« line using p or P. Select the
position where you would like to store the channel
with 0 … 9 (01 – 99).
The colour and sound norms will be automatically
set.
Fine-tune the picture. Select the »Finetun.« line
using p or P.
The fine-tuning with F
or
E.
Save settings with G.
To set further channels, repeat steps starting with
point .
Exit settings using the
¢
TXT
button.
6
1
6
5
4
6
3
2
1
7
1
6
6
5
4
3
2
1
MANUAL TUNING
66
OK Memorize 0 – 9 TXT
Program r 01 e
C/S
Channel
Channel C 34
Finetun. 00
Standard automatic
Page 7

k
7
➡
Remote control
Brief description for operation of
the set
This page only briefly explains remote control functions. More detailed descriptions can be found in
the corresponding chapters.
Video recorder remote control
With the remote control for this set, you can also
control a GRUNDIG VCR. Your Grundig dealer will
tell you which models can be operated.
Press and hold down VIDEO button.
This switches the remote control to video recorder
operation.
Now press the buttons corresponding to the desired function.
The following list describes which buttons may be
used for VCR functions.
0…9 Turn on set when in standby
mode;
or
select channel position.
AV
0
Selects AV mode.
h Call up »DIALOG CENTER«
(
h and G).
Channel position display on/off.
P Selects channel position step-by-
step in ascending sequence
(1, 2, 3 ...)
Turns on to last viewed channel
(in standby mode).
p Selects channel position step-by-
step in descending sequence
(3, 2, 1 ...);
or
p, P Moves cursor up or down.
FE Volume;
or
FE Moves cursor left / right.
G Switches between the last two
channels viewed.
Changes and activates various
functions.
-
Switches to »Optimum values«
(factory settings).
Press
-
and G.
8 Selects »Screen« menu.
9 Clock on/off (displaying time only
during TV programs with teletext).
VIDEO Remote control operation for
GRUNDIG video recorder (to do
this hold down VIDEO button).
3
21
654
987
0
TP 715 HOTEL
SAT/TV
P
OK
P
TXTAUX
VIDEO
VIDEO
E
F
´
A Switch set to standby mode.
¢
a Sound on/off (mute).
¢
TXT
Teletext operationÇ TV operation.
o No function.
i
No function.
∑
R
Adjust brightness.
SAT/TV Remote control for GRUNDIG
satellite receiver (Press and hold
SAT/TV button and select satellite
channel with
P or p).
∑
E
Adjust colour.
i
<
(F button) = Reverse picture search
>
u (E button) = Forward picture search
● (h button) = Start recording
■ (
AV
0
button) = Stop
e (G button) = Start playback
p = Channel –
P = Channel +
II (
¢
a button) = Pause
Page 8

Picture and sound settings
k
8
❒
Brightness and colour contrast
Press and hold » – « (Minus) or » + « (Plus) until
the desired value has been reached.
Set »Brightness« using
∑
R
.
Set »Colour contrast« (colour) using
∑
E
.
❒
Factory settings (optimum setting)
Press -button.
The page »AUX …« will be displayed.
Pressing the G button activates the optimally
preset factory set values (e.g. for brightness, colour
contrast, volume, etc.).
1
2
1
6
Picture tuning
To make specific adjustments to the picture, use
the »PICTURE« menu or the buttons on the remote
control.
❒
Calling up »PICTURE« menu
Press 8 button.
The »PICTURE« menu page appears.
Adjust setting with P or p.
To exit the following settings, use the
¢
TXT
button.
❒
Contrast
The set has been tested with maximum contrast in
order to control the reliability of all modules.
Depending on the location of the set and the light
level in the room (ambient light) it is a good idea to
reduce the contrast slightly for optimum picture
quality.
Set »Contrast« with F or E.
❒
Sharpness
Tune picture sharpness to suit your individual preferences.
Set »Sharpness« using F or E.
1
1
6
2
1
PICTURE
TXT
Contrast r ■■■■■■■■■■■ e
Sharpness ■■■■■
Page 9

k
9
➡
Teletext operation
Floftext
The colour-coded buttons activate topics in the particular line of dialogue.
Brief description of teletext
operation
1
…
AV
0
Select teletext pages.
h Calls up teletext contents
page.
p, P Page-catching. For direct
selection of teletext
pages, they are called up
with the G button.
-
Call up icon line (see
below).
8 (red) To flip back pages.
9 (green) Proceed to next page with
overrun to next chapter.
¢
TXT
Teletext operation
Ç
TV operation.
o
(blue) Proceed to next topic; pro-
ceed to next 100 th page.
i
(yellow)Proceed to next chapter with
overrun to next topic; proceed to next 10 th page.
∑
R
» + « Answer release;
» – « Page freeze.
∑
E
»+« Enlarge page;
»–« Call up sub-page directly.
Icon key
Display icon line with -button.
Select function with F or E.
Call up function with G.
Doubling character size
Switch to TV picture during waiting time
Directly call up sub-page
Reveal answer
Page freeze
Select language group
6
5
4
3
2
1
654321
G K HLIJ
VIDEO
VIDEO
21
3
654
987
0
P
OK
P
TXTAUX
E
´
F
SAT/TV
TP 715 HOTEL
Page 10

k
10
Teletext operation
❒
Normal teletext operation
Activate teletext with the
¢
TXT
button.
The table of contents page no. 100 or the teletext
page last called up appears.
Select the teletext page with the digit buttons
0 … 9, always using three digits.
After a brief waiting period, the page appears.
With the red 8 button or the green 9 button, teletext pages can be turned forward or back.
The yellow button turns the teletext pages forward
by increments of 10.
The blue button o turns the teletext pages forward
by increments of 100.
The h button turns back to the contents page
no. 100.
Deactivate teletext with the
¢
TXT
button.
❒
Functions for both teletext modes
These functions can be called up directly using the
remote control buttons or using the dialogue on the
teletext page.
Activate teletext with the
¢
TXT
button.
Enlarging the teletext page
Press the » + « (Plus) button several times.
or
Press -button and the icon line will be displayed
at the bottom of the screen.
Using F or E select the symbol G and confirm
with G.
Continue pressing G for the following effect:
double size letters in the top screen half;
double size letters in the bottom screen half;
normal picture.
3
2
G K HLIJ
1
1
1
7
6
5
4
3
2
1
Teletext …
… consists of a large selection of text pages, for
example news from sports and politics, stock market prices, weather reports, and all kinds of other
information.
The option of Teletext, as well as the organization
and structure of individual pages, varies from
broadcaster to broadcaster.
❒
TOP text (Table Of Pages) or
FLOF text operation
Various topics, chapters and individual pages may
be called up from the contents page at the push of a
button.
Activate teletext with the
¢
TXT
button.
The table of contents page no. 100 or the teletext
page last called up appears.
An info line consisting of a red, green, yellow and
blue lettering field is located at the bottom of the
screen.
The remote control has corresponding colourcoded buttons.
Choose the desired topic with the blue o button.
The blue info line displays the next topic.
Choose the desired chapter with the yellow button
(runs over into the next topic).
The yellow info line displays the next chapter of the
selected topic.
Should the chosen chapter contain more than one
page, the pages can be called up as follows: Page
forward to the next page with the green button
(runs over into next chapter).
Use the red 8 button to page back.
Teletext pages can also be called up directly with
the digit buttons 0 … 9.
The h button turns back to the contents page
no. 100.
Deactivate teletext with the
¢
TXT
button.
7
6
5
4
3
2
6
1
➡
Page 11

k
11
Page-freeze on multi-page displays
A multi-page display can contain several sub-pages
which are automatically “paged forward” within a
certain time cycle by the broadcasting station.
Multiple pages are specially marked. 3/6 indicates,
for example, that you are currently viewing page 3
of a total of 6 sub-pages.
If you wish to view a sub-page for longer, then the
page may be “frozen”.
Press the »
– « (Minus) of the
∑
R
button,
or
Press -button and the line of symbols will be dis-
played at the bottom of the screen.
Using F or E select the symbol G and confirm
with G.
The page displayed is now »frozen«, is no longer
updated, and switching over to other sub-pages no
longer takes place.
Deactivate the function with G.
Directly calling up sub-pages
Press the » –« (Minus) of the
∑
R button,
Select the »Sub-page« with the digit buttons
0 … 9, always using four digits.
After a brief waiting period, the page appears.
Deactivate the »Sub-page« with the » – « (Minus)
of the
∑
E
button; the current sub-page will
appear.
or
Press -button and the line of symbols will be displayed at the bottom of the screen.
Using F or E select the symbol H and confirm
with G.
The selected teletext page number, e.g. 155/0001
appears in the line of symbols.
Select »Sub-page« with the digit buttons 0 … 9,
always using four digits.
After a brief waiting period, the page appears.
Deactivate »Sub-page« with G; the current subpage will appear.
4
3
2
1
3
2
1
3
2
1
1
Reveal answer
It is possible to display “hidden” answers or information (reveal) located in certain teletext pages e.g.
for solutions to puzzles
or
in order to check VPS times for video recorder pro-
gramming.
Press the »
+ « (Plus) of the
∑
R
button
or
Press the -button and the icon symbols will be
displayed at the bottom of the screen.
Using F or E select the symbol L and confirm
with G. The “hidden” information will be displayed on the teletext page.
Deactivate »Reveal answer« with the G button.
“Page-catching” (selecting and calling up
particular teletext pages directly)
Many contents pages contain three-digit page numbers which may be selected directly. This eliminates
the need to enter the page number.
Activate »Page-catching« using the p or P buttons.
At the top of the screen, »Page-catching ➝ OK« will
appear.
A bright rectangle blinks behind the first page number of the contents page.
Using p or P, select the three-digit page number
and confirm with G. After a brief waiting period,
the page will appear.
The h button turns back to the contents page
no. 100.
3
2
1
3
2
1
1
Teletext operation
Page 12

Avoiding waiting time
You may use this function to avoid waiting during
the time it takes for your teletext decoder to search
for a page.
Assuming you would like to watch TV while you
wait, first select the relevant page – e.g. page 143 –
and then press:
Press the
-
button and the icon line will be dis-
played at the bottom of the screen.
Using F or E select the symbol K and confirm
with G.
You will see the TV picture with the teletext symbol
k
at the top edge of the screen. Later, instead of
the teletext symbol kthe number 143 appears,
indicating that the page has been found.
Call up the page by pressing G.
Deactivate the function by pressing
¢
TXT
..
4
3
2
1
6
Language group selection
Three language groups may be selected for the dialogue with the teletext.
The individual countries are stored in three European language groups:
Western Europe, Eastern Europe and Europe +
Turkey.
Most European countries are contained in the
Western European language group.
If you wish to call up teletext from broadcasting
stations in Poland, the Czech Republic, Romania or
from Yugoslavia, then select Eastern Europe
(EAST).
If you wish to call up teletext from broadcasting
stations from Turkey, then select the language
group Europe + Turkey.
Select the desired TV programme and call up teletext with
1
TXT
.
Press the
1
AUX
button. The icon line will appear at the
bottom of the screen.
Using F or E select the symbol J and confirm
with G.
Select »Language gr.« and desired “Region”.
Deactivate the function by pressing
1
TXT
.
5
4
3
2
1
Teletext operation
k
12
Page 13

Convenience functions
k
13
Special functions
The following settings are adjusted with the
»DIALOG CENTER«.
Call up the »DIALOG CENTER« with the h and
G buttons.
To exit the following settings, use the
¢
TXT
button.
❒
Switch on with ...
When you frequently use the set as an AV monitor
(e.g. together with a camera as a monitoring
system or with a satellite receiver), this function
can give priority to the channel position.
When switching on the set with the main power
button, instead of automatically showing the »P 1«
channel position, »AV« is shown.
Select the line »SPECIAL FUNCTIONS« from the
»DIALOG CENTER« with the p or P button and
confirm with G.
Select the »TV on with« line and use F or E to
designate the desired channel position (»Prog 1« or
»AV«).
❒
Picture and sound settings
Scales appear on the screen for the adjustment of
volume, brightness and colour contrast. The display of on-screen scales can also be averted:
Select the »SPECIAL FUNCTIONS« line from the
»DIALOG CENTER« with the p or P button and
confirm with G.
Select the line »Pic./sound opt.« and, using F or
E, select »off«.
❒
Equalizing the volume
The volume of normal TV broadcasts and commercials may be different. You may equalize this volume fluctuation.
Select the »SPECIAL FUNCTIONS« line from the
»DIALOG CENTER« with the p or P button and
confirm with G.
Select the line »Volume Limiter« and, using F or
E, select »on«.
❒
Decoder on/off
If a decoder (descrambler) has been connected to
receive a particular channel, the indication for
»Decoder« must be turned »on« for each corresponding channel position.
For setting operation with decoder,
see page 16.
1
2
1
2
1
2
1
6
6
❒
Station name (SERVICE function)
Some broadcasting stations broadcast their station
name. This is briefly displayed when changing the
channel position. You may switch this display off.
Select the line »SERVICE« from the »DIALOG
CENTER« with the p or P button and confirm with
G.
Select the line »Station name« and, using F or E,
select »off«.
Now when changing channel position, only the
channel position number is displayed.
❒
Setting Sleep Timer
With the »SLEEP TIMER« menu, you can input a
switch-off time for your set. The set switches to
standby after the set time has elapsed.
Select the »SLEEP TIMER« line from the »DIALOG
CENTER« with the p or P button and confirm with
G.
The menu »SLEEP TIMER« will appear.
Using the digit buttons 0…9 input the desired
switch-off time with two digits (from 01 to 99 min).
With the
-
button, the set switch-off time can be
deleted.
To exit, use the
¢
TXT
button.
Superimposing channel number
w
!
You always can always display the channel position
number.
Press h and wait until the »OK DIALOGCENTER«
display disappears.
The channel position number will now be shown
continuously.
To deactivate this function, press h twice.
2
1
5
4
3
2
1
2
1
SLEEP TIMER
66
0 – 9 TXT
´
– –
´
min.
Page 14

Convenience functions
k
14
Parental lock
Using this function, you may enter a secret code
number which blocks all functions.
❒
Activating parental lock
Call up »DIALOG CENTER« with the buttons h and
G.
Select and call up the line »PARENTAL LOCK«.
Always enter the secret code number with four
digits using the digit buttons 0 … 9 (e.g. 1111).
Save setting with the G button.
The key symbol appears in “red”. Exit the
»PARENTAL LOCK« screen by pressing
¢
TXT
..
After switching off the set and switching on again,
the »PARENTAL LOCK« page appears. All functions
are locked.
Don’t forget your secret code number!
If you forget the code, a number combination on
the last page of this instruction manual will assist
you. If you press these buttons in sequence on the
remote control, the “lock” will be canceled.
❒
Switching off parental lock
Switch on the set.
Enter the four-digit secret code number with the
digit buttons 0 … 9. (e.g. 1111).
The set switches to the TV picture.
When the set has been switched off and then on,
the lock reactivates.
To completely deactivate this function, select and
call up the line »PARENTAL LOCK« page from the
»DIALOG CENTER«. Enter the four-digit secret code
number and then press
¢
AUX.
6
2
1
6
6
4
3
2
1
SERVICE functions
Call up »DIALOG CENTER« with h and G.
Select the line »SERVICE« with P or p and call up
with G.
Select desired functions (decoder, colour, blue screen, black screen, station name, service code/IDP
2HP) using P or p.
Adjust using F or E.
To exit settings, push
¢
TXT
..
❒
Decoder (on, off or manual)
The decoder can be turned »off« or »on« for all
channel positions.
w
!
If the decoder has been set for specific channels,
the »manual« setting will automatically be chosen.
See »Setting for operation with decoder« (page 16).
❒
Colour (manually set colour norm)
The colour norms are automatically assigned when
allocating the channel position with channel search.
It is not necessary to adjust this setting if the colour
has been properly configured on the different channels.
Otherwise, select the desired colour norm.
❒
Selecting a blue screen
With this setting, an image suffering from interference can be switched to a blue image.
❒
Selecting a black screen
With this setting it is possible to avoid distracting
flickering of channels whilst switching channel
position.
❒
Station name display on/off
Switching station name display on or off (see
page 13 »Station name«).
❒
Service Code/IDP 2 HP
The functions of this line are reserved for authorised dealers.
6
1
6
4
3
2
1
PARENTAL LOCK
66
0 – 9 TXT
Ò
❚
- - - -
Page 15

Connecting external devices
k
15
V
ideo playback via the aerial socket
The video recorder can also be connected to the
aerial socket of the set. The aerial must then be
connected to the aerial socket on the video recorder.
In order to view playback from the video recorder, a
channel position must be assigned. See settings in
chapter on setting channels manually on page 6
under »Direct channel input« (see the operating
instructions of the video recorder also).
The video channel position must be one of the two
last positions before the point of reversal (see
page 6 “Limiting channel position selection”).
6
❒
Using an AV-Euroconnector to connect a
video recorder, satellite receiver, SET
TOP box or camcorder
Connect the »EURO-AV« socket of the TV to the
desired video recorder, satellite receiver, SET TOP
box or camcorder with a EURO/AV (scart) cable.
To connect a camcorder, use the appropriate adapter cable.
Operation
Press AV 0 and »AV 1« will be shown.
Start playback on the video recorder or camcorder
or switch on the satellite receiver.
– The recorder playback or the satellite receiver
channel will appear on the screen.
Setting video standard (VHS or SVHS)
This setting depends on the connected video
recorder.
Call up »DIALOG CENTER« with the buttons h and
G.
Select the line »SPECIAL FUNCTIONS« line.
Select and call up the »Video« line and use F or
E to select »VHS« or »SVHS«.
Playback
Switch on video recorder or SET TOP box and
choose the desired function.
You will let you see and hear the picture and sound
information from the external device on the TV set.
1
3
2
1
1
6
1
AV1
EURO-AV
AUDIO
➡
Page 16

Connecting external devices
k
16
❒
Headphones
Connection
Insert the headphone jack (3.5 mm ø jack) in the
headphone socket U at the front of the set.
– This switches off the speaker on the set.
Adjusting the headphone volume
Adjust volume using F or E
.
❒
External speaker
Connection
Connect speaker (nominal impedance min. 8 Ohm)
to the speaker socket at the rear of the set.
Adjust volume using F or E
.
2
1
AV1
1
1
P
U
❒
Connecting decoder to »AV 1« socket
Some stations – whose channels are transmitted
via cable unit or satellite receiver – code their transmissions. Picture and audio are thus indistinguishable. You can decode such channels with a decoder.
Connection
Connect the »EURO-AV1« socket of the TV to the
socket of the decoder with a EURO/AV (scart) cable.
Setting for operation with decoder
Select the channel with the scrambled programme.
The TV set switches automatically to channel position »AV1«.
Call up »DIALOG CENTER« with the buttons h and
G.
Select and call up the »SPECIAL FUNCTIONS« line.
Select the »Decoder P ..« line. In this line the
channel position which was previously selected is
displayed.
Using F or E, select »on« (if no decoder is
connected, select »off«).
This setting can also be activated for all channel
positions (P1 – 99) from the page »SERVICE«.
Exit the page with
¢
TXT
.
Operation
Select channel position for the scrambled programme.
1
6
6
5
4
3
2
1
1
AV1
Page 17

Technical datan/Customer information
k
17
❒
Power supply voltage:
220 – 240 V, 50/60 Hz
(Power supply control range 165 … 265 V)
»The appliance may be operated only using the
mains cable set supplied. It prevents mains interference and is an integral part of the device
approval«.
For replacement purposes please order from an
approved service specialist only the mains cable
set with the description »part number
8290.991-220«.
❒
Power consumption during recording:
approx. 38 W, 8 W in standby
❒
Reception area:
Channels C01 … C99, special channels S01 … S41
❒
Additional components:
The set has been prepared for retrofitting with a
communications card for hotel/hospital use. Consult your authorised dealer.
❒
Final sound stage:
6 W music signal power (3 W sinus)
❒
Contact assignment for the Euro-AV socket
If you intend to connect auxiliary appliances to the
TV set (e. g. computer, amplifier system), then your
service specialist will be able to make a connection
compatible with official standards by following the
connection table below:
Pin Signal
11 = Audio output right
12 = Audio input right
13 = Audio output left
14 = Audio ground
15 = Blue ground
16 = Audio input left
17 = RGB blue input
18 = Switching voltage
19 = Green ground
10 = Data cable
11 = RGB green input
12 = –
13 = Red ground
14 = Ground
15 = RGB red input (chroma; S-Video)
16 = RGB switching voltage
17 = Video ground
18 = RGB switching voltage ground
19 = Video output
20 = Video input
21 = Shielding/ground
❒
Service notes for authorised dealers:
The product fulfills the requirements of
the following EU guidelines:
73/23/EEC guideline on electrical equipment for use
with certain voltage limits. 89/336/EEC guideline on
electromagnetic compatibility.
The set complies with the standards:
EN 60065, EN 55013, EN 55020
The appliance conforms to VDE safety regulations
and Deutsche Bundespost regulations (approval
mark, see type-ID sticker on back of set), furthermore to the regulation on protection from harm by
X-rays. The x-ray emission – caused by the tube – is
sufficiently shielded and is therefore completely safe.
Accelerating voltage 25 kV/mean electron flow 0.8 mA.
Tampering, in particular adjusting the high voltage
or installation of a different tube type can lead to the
x-ray emission substantially increasing. Sets which
have been modified in such a way no longer correspond with this approval and may not be operated.
❒
GRUNDIG customer service centre
If you have any questions on the environmental impact of our TV sets, please contact
GRUNDIG Öko-Technologie,
Fax: 0911/703-9213.
Subject to alteration and correction!
Additional Information for Units sold in Great Britain
Units sold in GB are suitable for operation from a 240 V
AC, 50 Hz mains supply.
In case this appliance is supplied with a Safet
y Standard
Approved mains lead fitted with a non-rewireable 13 Amp
mains plug which, if unsuitable for your socket, should be
cut off and an appropriate plug fitted by a qualified electrician. The fuse and fuse holder must be removed from the
plug as accidental insertion of the redundant plug into a 13
Amp socket is likely to cause an electrical hazard.
Note: The severed plug must be destroyed to avoid a pos-
sible shock hazard should it be inserted into a 13
Amp socket elsewhere.
If it is necessary to change the fuse in the non-rewireable
plug, the correct type and rating (5 Amp ASTA or BSI
approved BS 1362) must be used and the fuse cover must
be refitted. If the fuse cover is lost or damaged the lead and
plug must not be used until a replacement is obtained.
Replacement fuse covers should be obtained from your
dealer.
If a non-rewireable plug or a rewireable 13 Amp (BS 1363)
plug is used, it must be fitted with a 5 Amp ASTA or BSI
approved BS 1362 fuse. If any othe type of plug is used it
must be protected by a 5 Amp fuse either in the plug or at
the distribution board.
Important:
The wires in the mains lead are coloured in accordance
with the following code:
BLUE – NEUTRAL
BROWN – LIVE
As the colours of the wires in the mains lead of your appliance may not correspond with the coloured marking identifying the terminals in your plug, proceed as follows:
Connect the BLUE coloured wire to plug terminal marked
with the letter "N" or coloured black.
Connect the BROWN coloured wire to the plug terminal
marked with a letter "L" or coloured red.
In no circumstance must any of the wires be connected to
the terminal marked with a letter "E", earth symbol ,
coloured green or green and yellow.
Replacement mains lead can be obtained from your dealer.
220
21
119
Page 18

GRUNDIG AG •D-90762 FÜRTH Printed in Austria 9/98
21776-941.0101
✁
GRUNDIG
+
P
+
P
-
✁
GRUNDIG
+
P
+
P
-
7 0 3 8
j
l
k
y
 Loading...