

Page 1
COLOR TELEVISION
MW 82-50/8
Page 2

Contents
k
2
If the authorised dealer has already set up and adjusted the unit, begin on Page 5 of this
operating manual.
❒
Safety, Setting up and Connection 3
Safety notes . . . . . . . . . . . . . . . . . . . . . . . . . . . . 3
Connection example . . . . . . . . . . . . . . . . . . . . . . 3
The GRUNDIG MEGALOGIC System . . . . . . . . . . 3
❒
Preparing and Assigning Channel
Positions 4
Inserting the battery in the remote control . . . . . 4
Switching set on/off . . . . . . . . . . . . . . . . . . . . . . 4
An energy saving tip . . . . . . . . . . . . . . . . . . . . . . 4
Selecting channel positions with ATS euro plus . . 4
Selecting dialogue language . . . . . . . . . . . . . . . . 4
Setting unit location (country) . . . . . . . . . . . . . . 4
❒
Brief Instructions 5
❒
Assigning Channel Positions 6-7
The DIALOGUE CENTRE . . . . . . . . . . . . . . . . . . . 6
The TV-STATION TABLE . . . . . . . . . . . . . . . . . . . 6
Changing or reentering station names . . . . . . . . 6
Entering a “new” channel number – fine tuning . 7
Activating decoder (descrambler) . . . . . . . . . . . . 7
Scanning for “new” television channels . . . . . . . 7
Setting the Norm . . . . . . . . . . . . . . . . . . . . . . . . .7
❒
Using the Remote Control
While Watching TV 8
Remote control buttons . . . . . . . . . . . . . . . . . . . 8
Remote control for video recorder . . . . . . . . . . . 8
❒
Adjusting the sound 9
Entering personal selection data . . . . . . . . . . . . . 9
Stereo range . . . . . . . . . . . . . . . . . . . . . . . . . . . . 9
Audio (stereo/two-channel, mono) . . . . . . . . . . . 9
Headphones . . . . . . . . . . . . . . . . . . . . . . . . . . . . 9
Treble, bass, balance . . . . . . . . . . . . . . . . . . . . . 9
Adapting the volume to a channel position . . . . . 9
❒
Changing the Picture 10
Setting personal selection data . . . . . . . . . . . . . 10
Adjusting the contrast, picture definition,
white balance, perfect clear and noise reduction 10
Adjusting brightness and colour contrast . . . . . 10
Correcting colour registration . . . . . . . . . . . . . . 10
❒
Switching the picture format to 16:9 11
Switching picture format .................................... 11
❒
Special Functions 12
Selecting the dialogue language . . . . . . . . . . . . 12
Environmental mains switch . . . . . . . . . . . . . . . 12
Switching on with… . . . . . . . . . . . . . . . . . . . . . 12
Picture/audio scale . . . . . . . . . . . . . . . . . . . . . . 12
❒
Convenience Functions 12-13
The child proof lock . . . . . . . . . . . . . . . . . . . . . 12
Entering secret number . . . . . . . . . . . . . . . . . . 12
Blocking programmes unfit for children . . . . . . 13
Blocking all channels . . . . . . . . . . . . . . . . . . . . 13
Freeze frame . . . . . . . . . . . . . . . . . . . . . . . . . . . 13
Television programmes » Current TV
programme « . . . . . . . . . . . . . . . . . . . . . . . . . . 14
Service . . . . . . . . . . . . . . . . . . . . . . . . . . . . . . . .14
❒
Teletext Mode 15-18
Operating teletext with remote control, short
instructions . . . . . . . . . . . . . . . . . . . . . . . . . . . 15
Normal teletext mode . . . . . . . . . . . . . . . . . . . . 16
TOP-FLOF text mode . . . . . . . . . . . . . . . . . . . . . 16
Enlarging the teletext page . . . . . . . . . . . . . . . . 17
Page stop with multiple pages . . . . . . . . . . . . . . 17
Calling up subpages directly . . . . . . . . . . . . . . . 17
Answer release . . . . . . . . . . . . . . . . . . . . . . . . . 17
“Page Catching” – selecting and calling
up certain teletext pages . . . . . . . . . . . . . . . . . . 17
Selecting a language group . . . . . . . . . . . . . . . 18
Updating a teletext page . . . . . . . . . . . . . . . . . . 18
❒
Connection Options and Operation 19-21
The AUDIO/VIDEO connections . . . . . . . . . . . . . 19
Connecting a camcorder . . . . . . . . . . . . . . . . . . . 19
Connecting one or two video recorders . . . . . . 20
The GRUNDIG MEGALOGIC System . . . . . . . . . 20
Connecting a satellite receiver or
a SET-TOP box . . . . . . . . . . . . . . . . . . . . . . . . .20
Connecting a decoder
(
descrambler) . . . . . . . . . 21
Copying video recordings using the TV set . . . 21
❒
Technical Specifications 22
Technical specifications . . . . . . . . . . . . . . . . . . 22
Service notes for authorised dealers . . . . . . . . . 22
Page 3
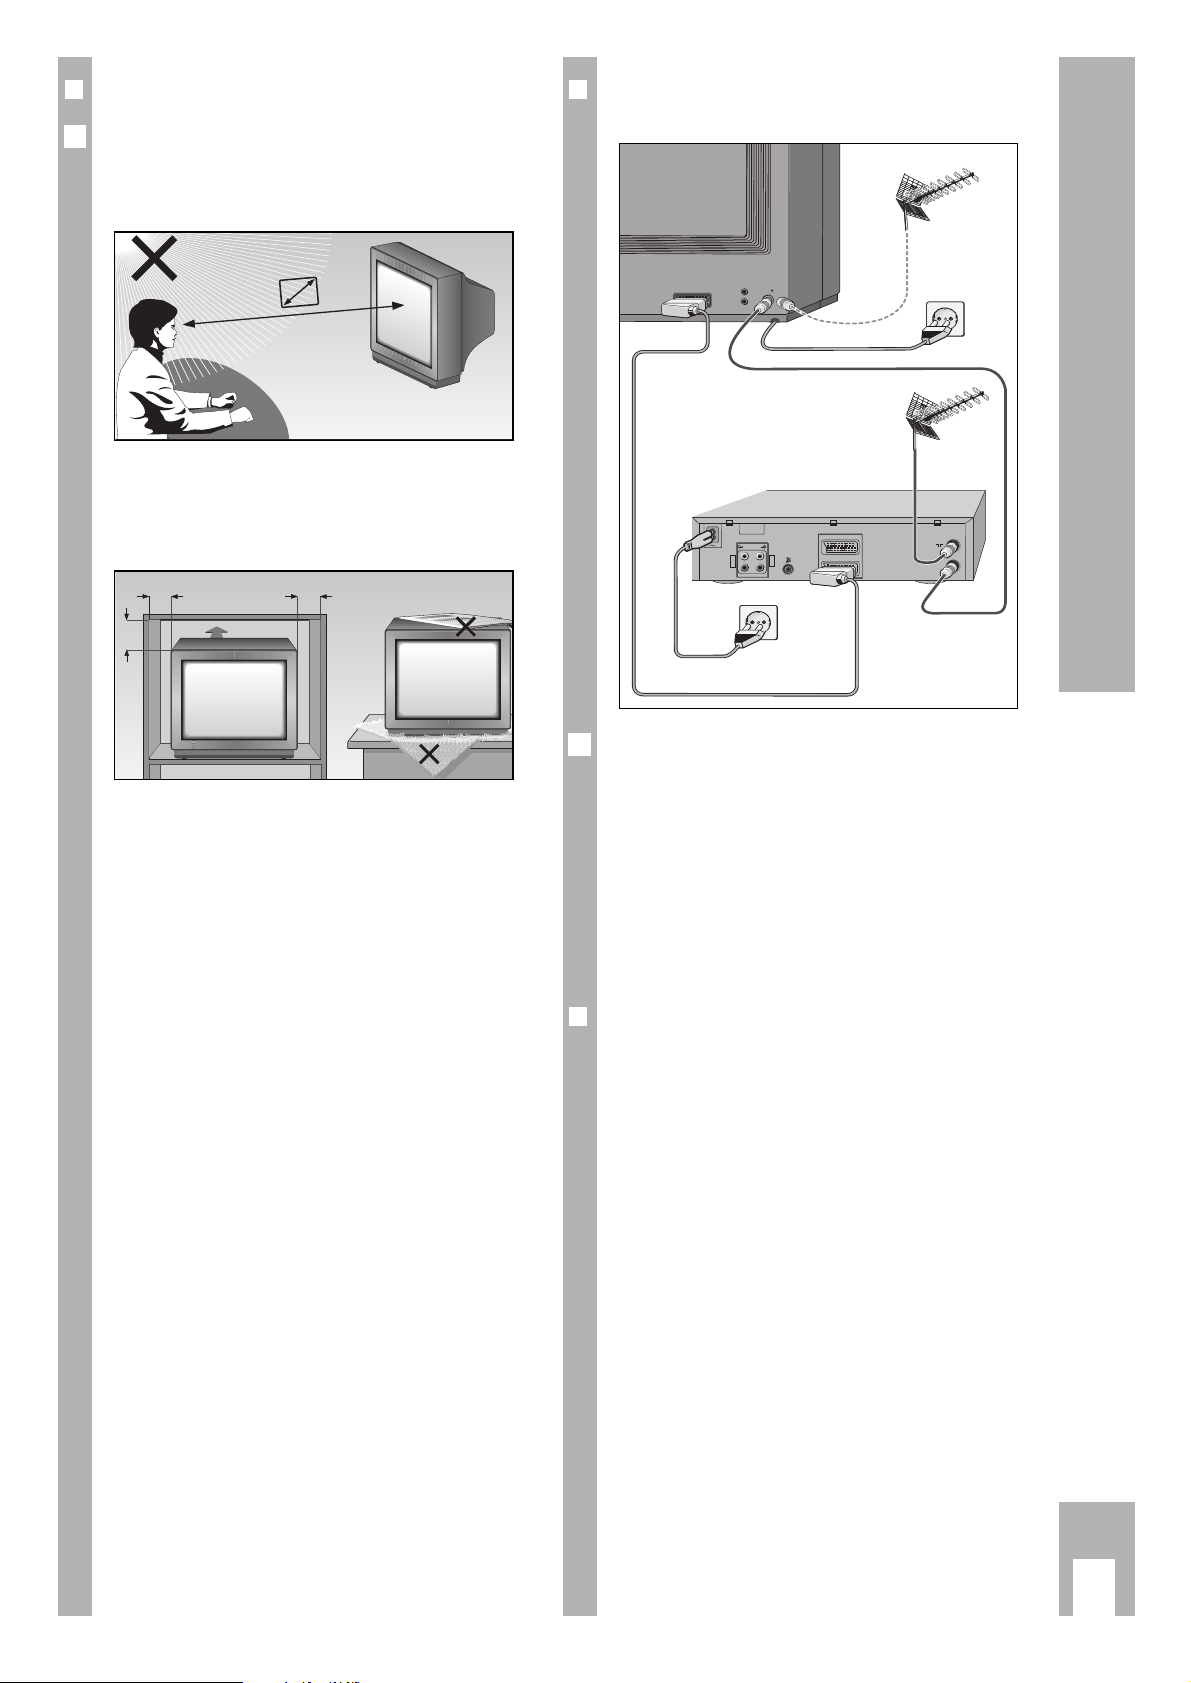
❒
Connection example
(TV set and Video recorder)
This highly digitalised TV set offers you optimum
picture and sound quality.
w
!
The essential prerequisites for this are:
An aerial system and aerial connection cable in perfect working order with a high degree of shielding
(85dB) as a connection between the TV set and
aerial socket or between the TV set and video
recorder.
w
!
Avoid wear to the cable near the set.
❒
The GRUNDIG MEGALOGIC System
The TV set is equipped MEGALOGIC System.
If you connect a GRUNDIG video recorder to the
MEGALOGIC System using the supplied MegalogicEURO/AV (Scart) cable, terrestrial TV channels (and
all channel position related information) are automatically transferred to the video recorder (VCR)
with each “Reprogramming of the TV channel”.
“Setting the TV channel on the video recorder” is no
longer necessary.
Exactly how this works can be found on Page 19,
“the GRUNDIG MEGALOGIC System”.
6
x
R
L
AUDIO
R
L
I
N
O
U
T
EURO - AV 2
AV 1
EURO -
AV 1
AV1
AV1
Safety, Setting up and Connection
k
3
❒
Dear Customer!
In order for this high-quality convenient TV set to
bring you viewing pleasure for many years, it is
necessary that you observe the following points
when setting it up.
w
!
Ideal viewing distance is 5x the length of the TV
screen diagonal
Light from external sources falling on the TV the
screen will impair the picture quality.
w
!
There must be sufficient clearance from the cabinet
walls at the appropriate location.
w
!
Do not cover the ventilation openings.
w
!
Heat build-ups may occur in the set.
– Heat build-ups are a source of danger and may
shorten the life span of the set.
For safety reasons, have an expert remove
deposits from the set occasionally.
w
!
Do not damage the mains cable.
w
!
Do not place any magnetic field sources in the vicinity of the set (speaker boxes for example).
w
!
Do not place flower vases or flower pots on top of
the set.
w
!
Ensure that liquids or other objects are not allowed
to enter the set (danger of short circuits).
w
!
Clean the TV screen with a moist, soft towel using
pure water only.
w
!
Avoid damage from lightning strikes by disconnecting the mains and aerial cables.
– Even if the set is switched off, damage may result
from a power surge due to lightning in the mains
or in the aerial cable.
w
!
The set may be opened and maintained by authorised experts only.
w
!
This TV set is to be used for the reception and
reproduction of picture and audio signals. Any
other use is excluded.
6
5 x
10
cm
20
cm
20 cm
10
cm
Krieg am Golf
Page 4
❒
Inserting the battery in the remote
control
w
!
Pay attention to the polarity indicated in the battery
compartment.
When the battery is dead, the message
”Telepilot Battery” appears on the picture screen.
❒
Switching set on/off
Press the ü button on the set.
If the display then illuminates, the set is already on
standby.
The set can be completely switched on, by pressing
the
1– 0
buttons or the P button on the remote
control.
❒
Switching set to standby
Press the A button on the remote control. The set
is not completely switched off.
The set can be switched on with the remote control.
❒❒
Switching the set off completely
Press button ü on the set,
or
press the A button on the remote control twice.
(The eco mains switch must be activated.)
Switch on again with the ü button on the set only.
❒
An energy saving tip
The unit is equipped with an eco mains switch.
It switches the unit off completely from stand-by
mode. This will save energy. The switch off time
has been set to an hour at works. It can be set to 1
– 4 hours. (See page 11, »SPECIAL FUNCTIONS«
menu, »Eco mains switch« menu item).
❒
Selecting channel positions with
ATS euro plus
The set is equipped with the automatic programme
scan function ATS euro plus which saves you
having to select a channel position.
After switching on the set, the Page » Adjust language on screen « appears.
If the Page » Adjust language on screen « does not
appear, press the
.
button and following this
O
button.
The » DIALOG CENTER « is displayed.
Select the » AUTOMATIC PROGRAMMING « line
with the
p or the P button and confirm with the
O
button.
Select the » Complete reprogramming (when changing address) « line with the
p or the P button
and confirm with the Obutton.
6
6
6
1
1
6
1
Selecting dialogue language
You can select several languages for the dialogue
between you and your TV set. The user instructions
are displayed in the selected language.
Confirm » Adjust language on screen « with the
O
button or select another language with the p
or the P button and confirm with the Obutton.
Setting unit location (country)
Select » Adjust country« with the p or the P button and confirm with the Obutton.
If you do not find your country in the list, then select »Others « and confirm with the
O
button.
The automatic channel search procedure begins.
The following indication shows this.
w
!
Depending on how many TV channels are being
received this function can take up to one minute or
longer.
6
2
1
6
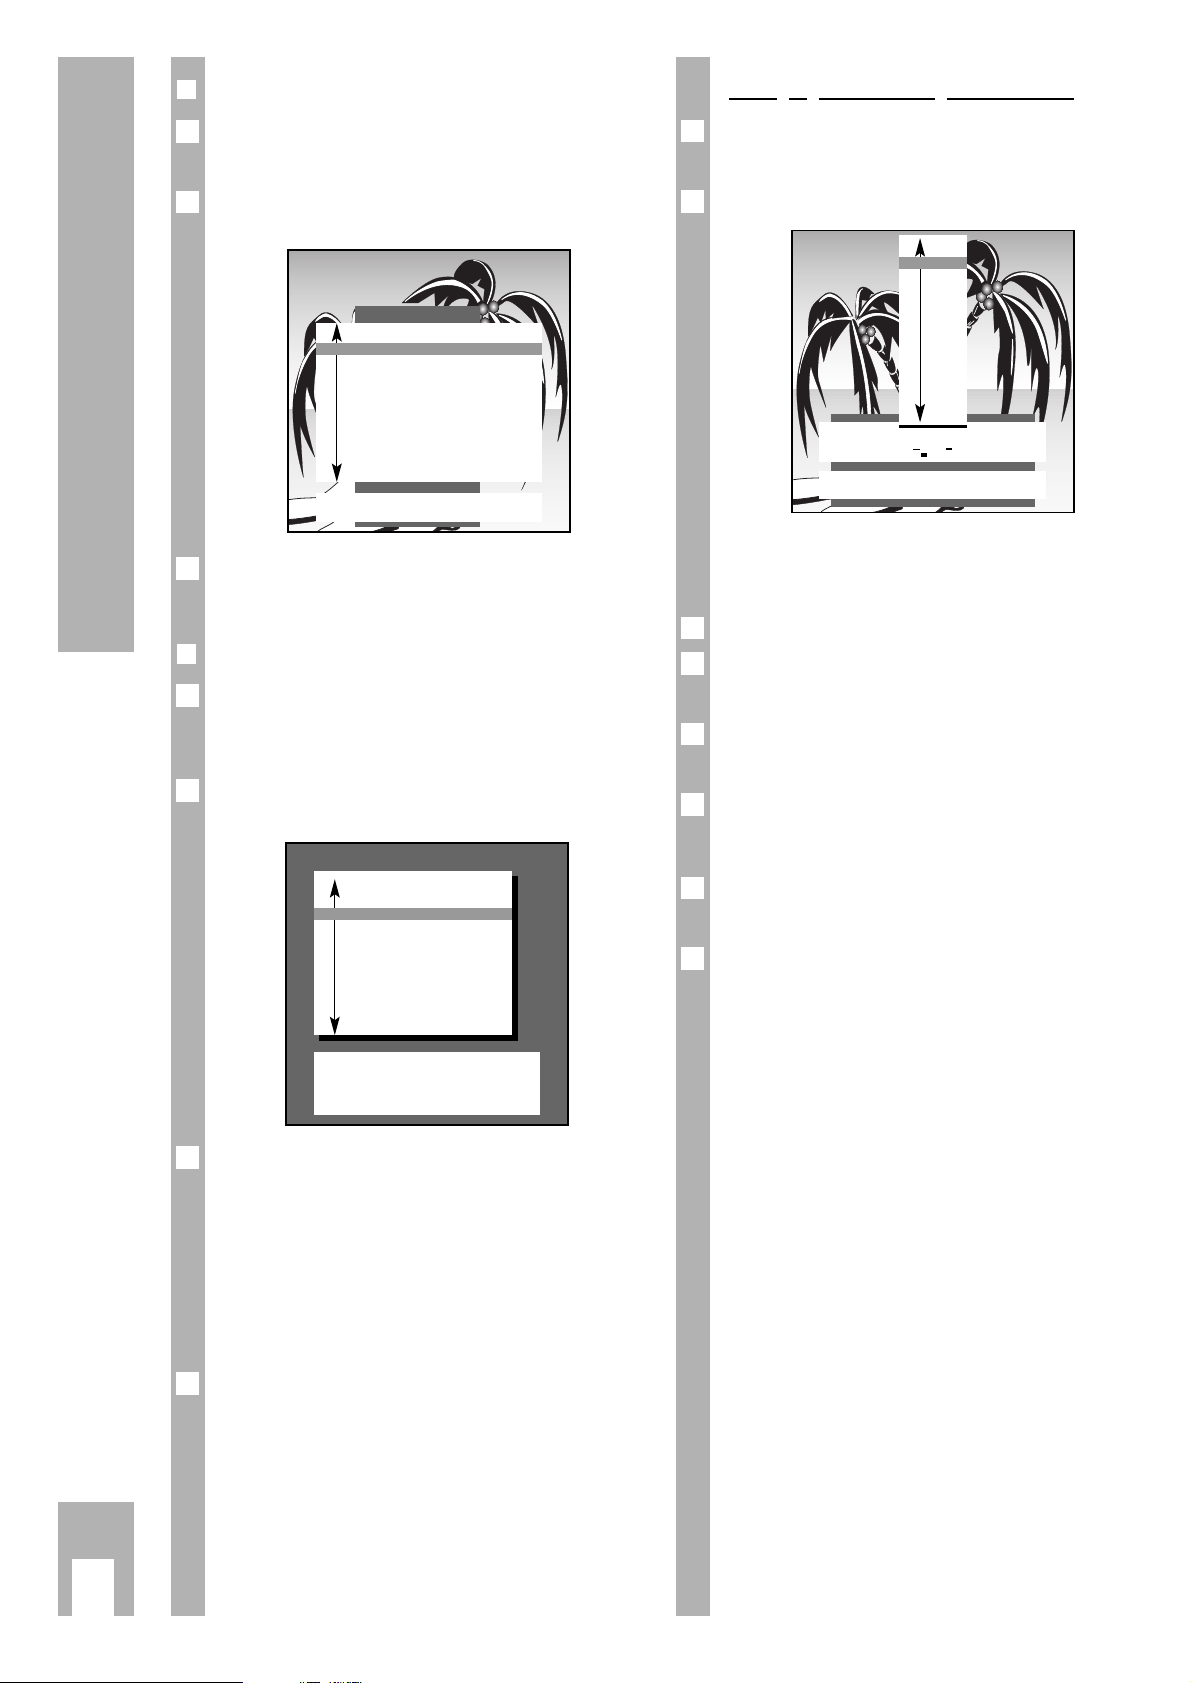
Preparating and Assigning Channel Positions
k
4
Adjust language on screen
OK
Confirm
TXT
TV-picture
D Deutsch
DK Dansk
E Espanol
F Francais
■
GB English
I Italiano
N Norge
NL Niederlanden
P Portugues
S Svenska
SF Suomi
Select with P- button and
confirm with OK
Adjust country
OK
Confirm
TXT
TV-picture
A Austria
B Belgium
CH Switzerland
D Germany
DK Denmark
E Spain
F France
■
GB Great Britain
I Italy
N Norway
NL Netherlands
P Portugal
S Sweden
SF Finland
* Others
Please wait
–
–
All receivable stations are
automatically searched and
stored in the TV programme
chart.
Page 5
p
o
Step-by-steb programme selection:
move cursor up or down
OK
Confirmation of the selected function.
FE Setting of values.
66
Call up Dialog Center.
TXT
Return to TV screen.
z
Switching sound on/off.
•
Button k(red) picture adjustment
•
Button g (blue) sound adjustment
w
!
Please commit these buttons to memory as they
will be repeatedly used in the following function
steps!
To exit the function press the
1
TXT
button.
❒
You can watch TV immediately!
With some TV programmes it is necessary to
change the basic adjustment of the volume,
brightness and the colour contrast (colour).
Press the » – « (Minus) or » + « (Plus) button until
the desired result is achieved.
Change the » Volume « with the F or the E
button.
Change the » Brightness« with the
®
button.
Change the » Colour « with the
™
button.
This quality TV set is equipped with many convenience functions.
The » DIALOG CENTER « informs you which other
functions the TV set offers you. Please turn over.
6
3
2
1
6
6
1
6
Brief instruction
k
5
w
!
After the search procedure, the set switches to
channel position 1 and the Page » Brief instructions« is displayed. If a Grundig videorecorder with
Megalogic system is plugged in, the channels are
automatically transferred to the videorecorder before the brief directions are displayed.
The short instructions can be called up by pressing
the
¢
D
button.
❒
Brief instruction – the guide for
dialogue between you and your set
Some remote control buttons are explained on the
Page » Brief instructions «.
It shows you with which buttons you can select and
call up certain functions.
With most of the displays, the dialogue signs and
lines are presented on the lower border of the
screen. They are guides for dialogue between you –
using the remote control – and the set.
You will be guided simply and in understandable
language through the next steps and optional
functions.
6
6
6
Brief instructions
TXT
TV-picture
p
o
Programme change
OK
Programme selection list
FE Volume
66
Call up Dialog Center
TXT
Teletext on/off
z
Sound on/off
•
Picture settings
•
Sound settings
OK Confirm TXT TV-picture
P
OK
P
TXT
Page 6
k
6
Assigning Channel Positions
❒
The DIALOGUE CENTRE
The » DIALOG CENTER « is the control centre of the
TV set.
You can call it up by pressing the h and
O
buttons.
Select the required function from the contents of
the » DIALOG CENTER « or continue reading here.
❒
The TV-STATION TABLE
You can obtain an overview of the assignment of
channel positions on the Page » TV-PROGRAMMECHART«.
Call up the » DIALOG CENTER « with the h and
O
buttons.
Selecting and calling up the » TV-PROGRAMMECHART «.
w
!
For further settings observe the information in the
dialogue line.
Check to see which “Stations” are occupying the
channel positions.
You can make changes in the assignment of channel positions (the station name, the sequence etc.).
Select the channel position “to be changed”. Press
the corresponding coloured button on the remote
control for the required function, for example.
“Change name” = blue button
g
“Move” = yellow button j,
“Change channel” = green button h,
“Delete” = red button k.
3
2
1
6
6
1
6
TV-PROGRAMME-CHART
● Change name
● Move
66
Return
● Change channel
● Delete
TXT
TV-picture
AUX
Decoder
Prog Name Chan. Decoder
AV
■
1 ARD C 06
2 ZDF C 34
3 BR 3 C 59
4 RTL C 36
5 SAT1 C 40
6 PRO7 C 21
7 RTL2 C 53
8 PREM C 12 On
9 –––– C 00
DIALOG CENTER
OK
Call up
TXT
TV-picture
■
PARENTALLOCK
TV-PROGRAMME-CHART
AUTOMATIC PROGRAMMING
(ATS/ACI/MEGALOGIC)
AUDIO/VIDEO INPUTS
SPECIAL FUNCTIONS
SERVICE
Changing or reentering station name
You can select, change or reenter a new station
name (abbreviation) from an existing list.
Select “Change name” with the
g
button.
w
!
For further settings use the information in the dialogue line.
Select » Station name « and confirm.
If there is no appropriate station name in the list
you can enter your own station name.
Press the E button once and select the required
letters/numbers with the p or P button.
Select the next position with the E button and select the required letter/number with the p or P
button.
Repeat the entry until you have obtained the required
station name.
Confirm the selection. The Page »TV-PROGRAMME-CHART « appears on the screen.
5
6
4
3
6
2
1
6
PROG 01 – ZDF
F
■■■■■
E
OK
Confirm
TXT
Stop / cancel
■
ZDF
ARTE
ANT3
BBC
BBC1
BBC2
BRT1
BRT2
CAN+
CAN5
CART
CH4
Page 7
Once all the changes have been carried out, exit the
function with the
1
TXT
button.
❒
Scanning for “new” TV channels
If you want to know if “new” TV-channels can be
received at your current location, select the » Search
for new TV stations« function.
Previously stored TVchannels are retained, the
“new” ones are added.
If you move home, we recommend selecting the
function » Complete reprogramming (when changing address) «.
All channel position data is completely erased, the
channel positions are “reassigned”.
Call up the » DIALOG CENTER « with the h and
O
buttons.
Select and call up » AUTOMATIC PROGRAMMING «.
w
!
For further settings, use the information shown in
the dialogue line.
Select » Search for new TV stations «,
or
» Complete reprogramming (when changing
address) «.
w
!
If a video recorder with MEGALOGIC functions is
connected to the TV set, there is an additional indicator » Data transfer of TV programme chart TV
→
VCR« in the menu.
w
!
Wait until all TV programmes have been transferred. This can take a minute or longer.
Following the search procedure, the set switches to
channel position 1 and the indication »Brief instructions« appears.
Exit the function with the
1
TXT
button.
4
3
2
1
6
2
k
7
Entering a “new” channel number – Fine
tuning
Select function » Change channel « with the h
button. Channel position ten is highlighted in red.
w
!
For further settings, observe the information in the
dialogue line.
If you want to select a special channel, press
the F button and then the p or P button.
Indication C (for channel) changes to S (for special
channel).
Press the E button and enter the channel number
using two digits with the
0…9
buttons.
If you want to enter a certain progamme but do not
know its channel number then press the g button (blue) repeatedly until the required channel
appears on the screen.
Fine tuning
The set adjusts automatically to give you the best
picture and sound quality.
Given difficult reception conditions it may be necessary to optimize the picture and sound quality with
the fine tuning.
Changing the » Fine tuning «.
The values can vary between » + 63 « and » – 64 «
Make note of when you achieve the best picture and
sound quality.
Setting the norm
Press the F button repeatedly until the list of
norms appears.
Select the required norm with the p or P button.
Confirm the settings. The Page » TV PROGRAMMECHART« appears on the screen.
Activating the decoder (descrambler)
If a decoder (scrambler) is required for a programme and is connected, it is also necessary to press
the
¢
AUX button » on «- as in the » TV PROGRAM-
ME-CHART « under the » Decoder « indication for
the corresponding channel position.
1
3
2
1
1
6
3
2
1
Assigning Channel Positions
AUTOMATIC PROGRAMMING
OK
Call up
TXT
TV-picture
■
Search for new TV stations
Complete reprogramming
(when changing address)
Data transfer of
TV programme chart TV →VCR
PROG 01 – C34 00
F
■■■■■
E
OK
Confirm
TXT
Stop / cancel
0–9
Channel entry
● Search mode
Fine tuning
Page 8

k
8
Using the Remote Control While Watching TV
On this page the buttons on the remote control are
briefly explained. For more detailed information
please refer to the corresponding chapter.
ik (Button – E) = Picture search backward
ju (Button E +) = Picture search forward
● (Button h) = Record start
■ (Button F ) = Stop
ii (Button –
R
) = Rewind
uu (Button
R
+) = Fast forward
ll ll (Button
¢
D
) = Pause
e (Button E) = Playback start
P = Channel position +
p = Channel position –
Remote control for video recorder
You can use the remote control to operate the
GRUNDIG video recorders with the remote control
of this TV set. Your authorised dealer will tell you
which are suitable.
Keep pressing the
¢
VIDEO button.
This is how you switch the remote control to video
recorder operation
Then press the required button.
You can determine which buttons activate which
recorder functions from the list opposite.
1…9
Channel position selection
AV
0
Changing AV position
P Sequential programme selection
forwards (1, 2, 3 ...)
p Sequential programme selection
reverse (... 3, 2, 1)
or
P p Moving cursor up/down
xc
Volume
or
xc
Moving cursor left/right.
O
Changing and activating various
functions. Displaying and deleting
the programme selection bar.
h » DIALOG CENTER «
(with the
h and G buttons).
h
Time on/off.
k
Picture adjustment
Preselect to access the » Picture
settings « menu.
j
Freeze frame
™
Change colour intensity.
SAT GRUNDIG satellite receiver remo-
te control (keep SAT button pressed down and select satellite
channel).
VIDEO GRUNDIG video recorder remote
control (Keep VIDEO button
pressed down).
b
Press button once: Switches set to
standby.
Press button twice
: Switches set
off completely (provided that the
eco mains is activated, see
Page 11).
¢
a
Audio on/off (mute).
¢
TXT
Teletext mode Ç TV mode.
¢
D
Call up »Brief instruction«
g
Audio adjustment
Preselect to enter » Sound
settings « menu.
®
Changing brightness.
E
Switching picture format
4:3 Ç 16:9.
AUX
Preselection button for various
functions,
¢
AUX and
j
button
is channel scan function.
C
Info about the current programme
(“Current TV programme”
for example)!
PIP without function
321
SAT PIP
VIDEO
0
P
OK
TP 800
P
TXT
654
987
AUX
Page 9

k
9
❒
Adjusting the sound
You can carry out four different sound settings
consecutively.
With the blue g button you can select » Language«, » Music «, »Supersound « and »Sound settings
Personal «. » Language «, » Music « and » Supersound « are » permanent « sound settings which cannot be changed. Select the appropriate sound setting adjustment for a given TV programme.
❒
Entering personal selection data
If you want to make individual sound settings you
must select and call up the » Sound settings Personal« with the blue g button.
The indication » Sound settings « appears.
❒
Stereo range
Widens the acoustic pattern for stereo programmes
and improves it for mono programmes.
Select and change » Stereo exp. «.
❒
Audio (stereo /two-channel, mono)
If the set receives two-channel programmes – a
film in original on sound channel B (indication:
mono B) and the synchonized version on sound
channel A (indication: mono A) for example – you
can select your preferred sound channel.
If the set receives stereo programmes it switches
automatically to stereo sound playback (indication:
stereo).
In case of poor stereo-sound reception quality, we
recommend switching the sound to » Mono «.
Select »Sound« and » Mono « or » Stereo«.
If the audio of a certain programme is to be
constantly in » mono «, enter » ,MO « after the third
character as the station name. See page 6, » Changing and Re-entering Station Names «.
2
1
6
6
1
1
❒
Headphones
Insert the headphone plug (3.5 mm Ø jack) into the
headphone socket at the front of the set.
You can set the headphone volume individually.
Select » Headphones « and select the appropriate
sound » Mono « or » Stereo « and with two-channel
broadcasts » Mono A « or » Mono B«.
Changing the volume: Press the
¢
AUX key and then
change the volume of the headphones with the F
and E keys.
The new volume level is displayed on a scale.
❒
Treble, bass, balance
The sound settings can be corrected as you wish.
Select and adjust »Treble «, » Bass « or »Balance «.
❒
Adapting the volume to a channel
position
If a channel is too loud or too quiet compared with
the others, it can be adjusted.
Example:
Select and change » Volume P1 «.
Only the volume of the current selected channel is
changed (in the example » P1 «). This adjustment is
also possible for the » AV « channel positions.
Exit the function with the
1
TXT
button.
2
6
1
1
2
1
VIDEO L AUDIO R
I
P
P
Adjusting the sound
Sound settings
TXT
TV-picture
■
Stereo exp. F
+..
F
Sound Mono
Headphones Mono
Treble
Bass
Balance
Volume P 1
Page 10

k
10
Changing the Picture
❒
The picture settings
You can carry out four different picture settings
consecutively.
You can select the four picture settings k »
During the day «, » In the evening «, » Soft « and »
Picture settings Personal « with the red button.
» During the day «, » In the evening « and » Soft «
are “permanent” picture settings which cannot be
changed. Select the appropriate picture setting
according to the time of day or picture appearance.
❒
Setting personal selection data
If you want to make an individual picture setting
you must select and call up the » Picture settings
Personal« with the red k button.
The indication » Picture settings « appears.
The picture settings can be corrected as required.
Select and change » Contrast «, » Sharpness «,
»White bal. «, »Perfect Clear « or »Noise reduct. «.
Contrast
The set has been tested with a maximum contrast
in order to check the reliability of all components.
Regardless of the location of the set or the brightness of the room (ambient light), it is a good idea to
reduce the contrast somewhat, in order to obtain
the subjectively best picture.
Sharpness
You can set the picture definition as you wish.
White bal.
You can give the colour a slight red or blue tone.
Perfect Clear
Enlargens the contrast range. The contrast is
increased in the darker areas of the picture, depth
and definition of the picture are improved.
Noise reduct.
The snow reduction improves the picture quality in
case of poor TV/video signal sources .
Furthermore, colour disturbances caused by external systems (cross-colour) are reduced which
occur on fine black & white vertical lines.
2
1
Only the picture quality of the presently selected
programme is changed. See the chapter, » Comfort
Functions – Service «, for how to change the noise
reduction for all programmes.
You can choose between three entries:
Off/Weak = with good picture quality
Autom. = with slightly snowy picture
Exit the function with the
1
TXT
button.
❒
Adjusting brightness and colour contrast
Press the appropriate » – « (Minus) or » + « (Plus)
button until the required value has been set.
Change the »Brightness« with the
®
button.
Change the »Colour« with the
™
button.
With video recorder playback in NTSC recording
mode, in addition to the colour contrast the colour
tone (tint) can be corrected Select » Tintkorrektur «
with the
¢
AUX button and then reset with the
™
button.
❒
Correcting colour registration
You can correct the colour if it does not match the
picture
Call up the » DIALOG CENTER« with the h and the
O
buttons.
Select and call up » SERVICE «.
Call up and change » Colour match «.
Only the colour registration of the currently
selected channel will be changed.
Exit the function with the
1
TXT
button.
4
3
2
1
6
3
2
1
6
1
6
Colour match
Colour match P 8 F
[
■
–
–
]
E
66
Return
TXT
TV-picture
Picture settings
TXT
TV-picture
■
Contrast F ■■■■■■■■
–
–
E
Sharpness
■■■■■■■■■■
White bal.
Perfect Clear Off
Noise reduct. P 1 Auto
Page 11

k
11
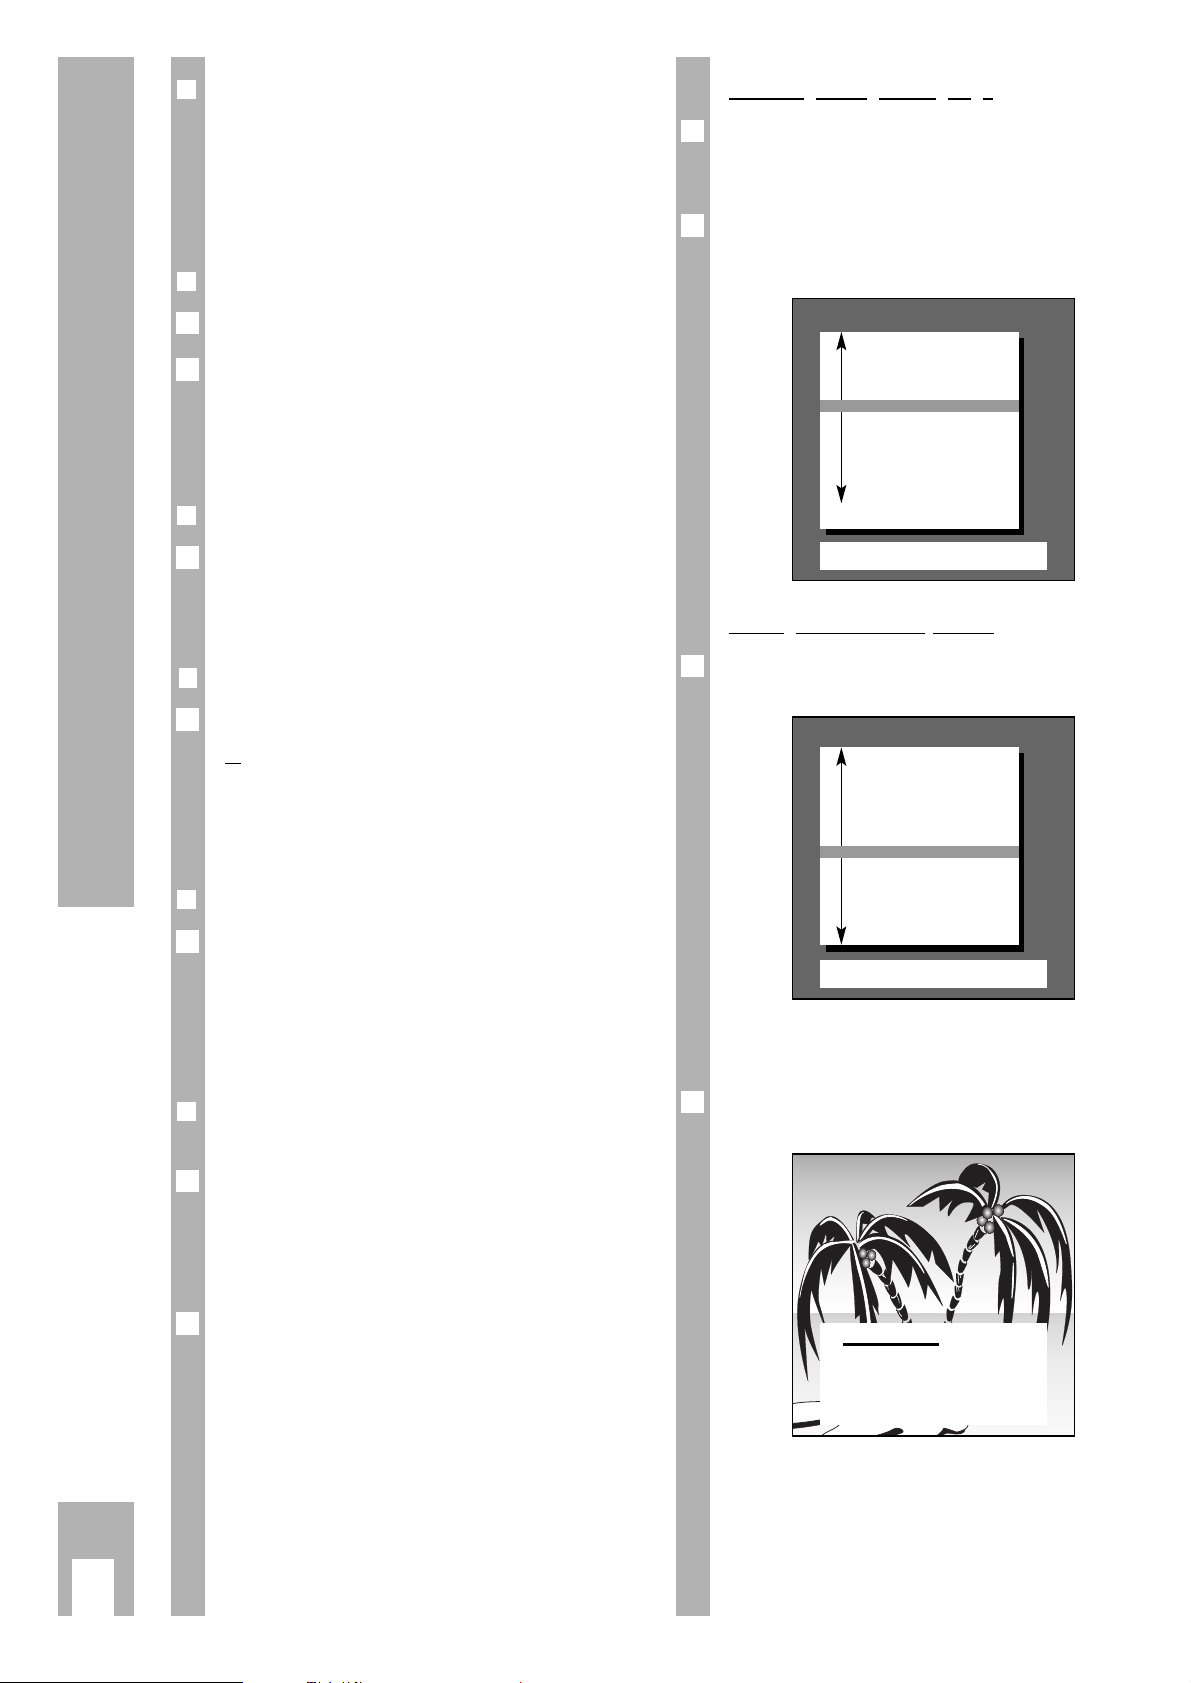
Switching the picture format to 16:9
❒
Switching picture formats
PALplus is the compatible further developement of
the PAL color television which has proved itself
over decades in a new 16:9 picture format which
has been developed by European broadcasting corporations and entertainment electronics corporations.
PALplus transmissions in 16:9 format are noted
specially in relevant magazines and in videotext
(ARD, ZDF).
The unit switches automatically to the 16:9 format
during PALplus transmissions.
Under bad reception conditions, it is possible for
the picture format to switch between 16:9 and 4:3.
In this case, the automatic picture format switching
function can be turned off. Read page 14 in the
chapter «Service» for information on this topic.
With the
¢
E
button, you can choose between
the picture formats: » Automatic format «,
» Format 16:9 «, » CINEMA «, » Format 4:3 « and
» PANORAMA «.
Automatic format
During 16:9 transmissions, the unit switches automatically to the »16:9« picture format.
During 4:3 transmissions, the picture is always displayed so as to fill the entire screen.
This setting is possible only if the the picture switching format in the »Service« menu is set to
»manual« (see page 14)
16:9 picture format
During 4:3 transmissions– with the » 16:9 picture
format « function selected – the picture appears
spread out horizontally.
The picture geometry is stretched out in the horizontal direction.
With actual 16:9 signal sources – fed in from a
separate decoder (for example a digital television
system » set-on-top « decoder) via the Euro AV
socket – the picture is completely filled and the picture geometry is correct.
6
1
6
6
CINEMA ZOOM
This operating mode is designed primarily for
transmissions in the 16:9 format.
The black stripes one normally sees above and
below the picture are overwritten.
The Cinema operating mode displays 4:3 pictures
so that they fill the entire screen.
The transmitted pictures are enlarged, which means
that some picture content on the top and bottom of
the screen is lost. Howevere the picture geometry is
maintained.
PANORAMA ZOOM
This operating mode is designed for cinema films transmitted by broadcasters – with extreme
width/height ratios.
For 4:3 transmissions – with the »Panorama Zoom «
function selected– the picture appears spead out
horizontally.
The picture geometry is stretched out in the horizontal direction.
As long as the » Panorama Zoom« operating mode
is displayed as a guide to the user on the lower
edge of the screen, the picture height can be adjusted by pressing the
|
or ]key, so that any
black stripes remaining on the uppper or lower
edge of the screen disappear.
Page 12

k
12
Special and Convenience Functions
❒
Using the special functions!
Call up the » DIALOG CENTER « with the h and
O
buttons.
Select and call up the » SPECIAL FUNCTIONS «.
Adjust language on screen
See Page 4, » Adjust language on screen «.
❒
Environmental mains switch
With this the set can be preset so that, after a certain time (selection from 1 to 4 hours), it switches
off completely from standby, saving energy.
Select » Mains economy sw. « and enter required
switch off time.
Switch on with…
If you frequently use the set as an AV monitor - with
a camera as monitoring system or when operating
a satellite receiver for example - this function gives
priority to the channel position » AV «.
This means that after the power button is pushed,
the programme position » AV « appears instead of
programme position » P1 «.
Select and enter » Switch on with« and select the
required channel position » Prog « or » AV«.
❒
Picture/audio scale
You can decide to display or remove the scale for
volume, brightness, colour contrast.
Select » Pic./sound options « and enter » On « or
» Off «.
❒
Megalogic Info
The » Megalogic Info « line only appears when a
Grungid videorecorder with Megalogic is plugged
in. With Megalogic Info, information from each
videorecorder mode can be displayed (e.g. play,
record, fast forward, etc.).
6
1
6
1
6
1
6
2
1
SPECIAL FUNCTIONS
66
Return
OK
Call up
TXT
TV-picture
■
Adjust language on screen
Mains economy sw. 1h
Switch on with Prog
Pic./sound options on
Mecalogic Info off
❒
Using the convenience functions!
❒
The child proof lock
With this function you can enter a secret number
with which you can either
– block programmes unfit for children, or
– block all channels,
– block all channels after a certain time of day.
Proceed as follows:
Call up » DIALOG CENTER « with the h and
O
button.
Select and call up » PARENTAL LOCK «.
❒
Entering secret number
Always enter four digit numbers with the 0…
9
digit buttons (1111 for example).
Store the secret number with the
O
button.
Please remember the stored secret number.
In case you forget it a button combination on the
last page of this instruction manual will help you. If
you press these buttons on the remote control
consecutively, the “lock” will be released.
w
!
If » Programmes unfit for children « have been
blocked, a programme position which has not been
blocked must be selected before entering this key
combination.
Then call up the » Child-proof lock « page. Lift the
block with the key combination from the last page
of these operating instructions.
Please turn over!
6
6
2
1
2
1
6
DIALOG CENTER
OK
Call up
TXT
TV-picture
■
PARENTAL LOCK
TV-PROGRAMME-CHART
AUTOMATIC PROGRAMMING
(ATS/ACI or MEGALOGIC)
AUDIO/VIDEO INPUTS
SPECIAL FUNCTIONS
SERVICE
Page 13

k
13
Convenience Functions
❒
Blocking programmes unfit for children
The signal to block programmes is not broadcast
by every station.
Enter secret number and save it.
Select » Lock program unfit for children « and enter
» yes « (or »no «).
If the function » Lock program unfit for children «
» yes « has been selected and the programmes are
being received, a page will appear with a message;
for example:
❒
Blocking all channels
Enter and save secret number.
Select »All programmes blocked « and enter » yes«
(or » no «).
Switch off set.
When the set is switched on again the page
appears:
The set can only be switched back on after entering
the previously saved secret number.
6
4
3
2
1
6
2
1
6
PARENTAL LOCK
0–9
Insert code number
Progr. select.
Code number
■
––––
RTL blocked
Lock program unfit for children
ÇÇ
PARENTAL LOCK
0–9
Insert code number
Code number
■
––––
All stations blocked
PARENTAL LOCK
66
Return
Code number
■
––––
Lock program
unfit for children
■
All programmes blocked no
from: ––:––
Enter secret number, the numbers are presented
but out of view.
The set switches to the TV screen.
Blocking all channels at a certain time
Select and store secret number.
Select »All programmes blocked « and enter » yes«
(or » no «).
Always enter the » Switch-off time « with four digits
using the
0…9
digit buttons (0845 for
8:45 hrs for example).
The set switches off autormatically after reaching
the entered switch off time and unpermitted access
is not possible.
After switching back on, the Page » PARENTAL
LOCK « appears.
The set can only be switched on after first entering
the stored secret number.
Enter the secret number, the set switches to the TV
picture.
Completely removing the child proof lock
Enter the secret number, the numbers are presented but out of view.
Select » All programmes blocked « and enter » no«.
Select » Lock program unfit for children« and enter
»no«.
Exit the function with the
1
TXT
button.
The set switches to the TV picture.
❒
Freeze frame
If you want to look at a certain picture for a longer
period of time, the picture from the » currently
running programme « can be frozen.
Press the yellow j button.
Press the button again to exit this function.
4
3
2
1
5
6
4
6
3
2
1
5
Page 14

k
14
Convenience Functions
Decoder
The decoder can be set at „off“ or „on“ for all channel positions.
Select desired setting and confirm with
O
button.
If the decoder has been set for individual channel
positions (see Chapter „Assigning Channel Positions), the „Manual“ setting will be automatically selected.
Sharpness
You can correct the sharpness for all program positions.
Change the »Sharpness« with the
x
or cbutton.
(»Manual« setting will be automatically selected).
Decoder-Sound
If you connect a decoder, the correct setting for the
decoder sound must be selected.
e.g. Premiere analog: external
digital: internal
Canal plus analog : external
digital: internal
Be sure to read your decoder operating manual
carefully. Your authorized dealer will be pleased to
give you further assistance.
Switching formats
The automatic picture format switching function
can be switched off in poor reception conditions.
Select the »Manual« setting and confirm with the
G button.
IDP2 HP/Service Code
The functions of this line are reserved for authorised dealers.
6
1
1
1
❒
Current TV programme
You have just switched on the TV set and want to
know » what’s on «.
Select the required channel, and then press the
¢
C button.
The indication » Programme search « appears on
the screen. Then the channel information appears
on the screen.
If instead the indication » Programme not available« appears then you must call up the teletext, for
the 3rd channel for example, with the
3
1
TXT
number
button.
Teletext Page 100 appears on the TV screen.
Press the
¢
AUX button. The dialogue symbol line
appears.
Move the cursor (coloured square) onto the J
symbol using the E button Cursor and press the
O
button.
In the » Programme preview « function, use the
1…0
buttons to enter the page number where
the programme preview is situated in the teletext of
the currently selected station.
Terminate the function with the
1
TXT
button.
The set switches to the TV screen.
Teletext Page 100 shows you on which page to find
the “Program preview”.
Service
Call up DIALOG CENTER:
Press h and Obuttons.
Select „Service“ with p and retrieve with
O
button.
Select „Noise reduct.,“ „Decoder,“ „Decoder-tone
analog“ or „Decoder-tone digital“ with p.
Noise Reduction
You can choose noise reduction „off“, „weak“ or
„automatic“ for all channel positions.
Select desired setting and confirm with
O
button.
If noise reduction has set for individual channel
positions (see Chapter „Change Picture), the
„Manual“ setting will be automatically selected.
1
3
2
1
6
6
5
4
3
2
6
1
6
Page 15

k
15
1…0
Select teletext pages.
]|
Page Catching.
Select teletext pages
directly and call up with
the G button.
1
TXT
Teletext mode ÇTV
mode.
j (yellow)
Scroll to the next chapter
with overrun to the next
theme.
g (blue) Scroll to the next
theme.
®
» – « Page stop
» + « Answer release
C Channel preview for the
current programme
(text preselection) in
TV mode.
Operating Teletext with Remote Control, Brief instruction
What do the symbols on this line mean?
Display with
¢
AUX button (duration of indication approx. 5 secs).
Select function with the F or E button.
Call up function with the Obutton.
Enlarge character size
Bypass waiting
time in TV mode
Call up subpages directly
Answer release
Page stop
Language groupselection
G K H L I J
h Call up teletext index
page.
k (red) Turn back page.
h (green) Continue turning to next
page with overrun to the
next chapter.
™
» – « Call up subpages
directly
» + « Enlarge page
¢
AUX Call up symbol line
(see below).
321
654
987
0
P
SAT PIP
VIDEO
OK
TP 800
P
TXT
AUX
Page 16

k
16
Teletext Mode
❒
TOP text (Table Of Pages) or
FLOF text modes
Various topics, chapters and individual pages can
be called up from the index page with the press of a
button.
Switch on the teletext with the
1
TXT
button. The index
on Page 100 or the last teletext called up appears.
On the lower border of the TV screen you will see
an info line consisting of red, green, yellow and
blue panels.
You will also find corresponding coloured buttons
on the remote control.
Select the required topic with the blue g button.
– The blue information line shows the next topic.
Select required chapter with the yellow j button
(with overrun to the next topic).
– The yellow information line shows the next chap-
ter of the selected topic.
If the selected chapter has multiple lines these can
be called up:
You can turn to the next page with green button
h (with overrun to the next chapter).
You can turn back one page with the red k button.
The teletext buttons can also be selected directly
with the
0…9
digit buttons.
You can return to the index on Page 100 with the
h button.
6
5
4
3
2
6
1
6
Teletext …
… is a service free of charge provided by the TV
stations which is delivered with the TV signal; it is
processed by the TV set and appears on the TV
screen.
Teletext consists of a large number of text pages,
news, sports, politics, the stock exchange, weather
reports and much more.
The teletext as well as the organisation and set-up
of the individual pages differs from station to
station.
For this function use the buttons on the remote
control.
Switch the TV set on.
❒
Normal teletext mode
Switch on the teletext with the
1
TXT
button. The index
page, Page 100 or the last video page called up
appears.
Select the video page always entering page numbers in three digits with the
0…9
digit buttons.
– The page appears promptly.
The teletext pages can be turned over one by one
backwards or forwards with the k or h button.
You can return to the index on Page 100 with the
h button.
4
3
2
1
1
6
Chapter
(yellow button)
Topic
(blue button)
Teletext pages
(buttons red and green)
Page 3
Page 2
Page 1
Page 1
Page 2
Page 3
Page 1
Page 2
Page 3
News
Economics
Politics
Culture
Politic news
Economics news
Culture news
VIDEO
OK
AUX
SAT PIP
TP 800
TXT
P
P
Page 17

Teletext Mode
k
17
Enlar
ging the teletext page
Press the» + « (Plus)
™
button several times,
or
Press the
¢
AUX button and the symbol line will
appear on the lower screen border.
Press the F or E buttons to select the G symbol
and confirm with the
O
button.
By repeatedly pressing the
O
button you can have:
– the upper part of the picture in double letter size;
– the lower part of the picture in double letter size;
– normal picture.
Page stop with multiple pages
By multiple pages we mean several subpages which
are automatically “turned over” by the TV station in
a certain cycle.
The multiple pages are marked by an indication, 3/6
for example, means that you are viewing the third
page of a total of six subpages.
If you want to view the subpage for a longer period
of time, the page can be “frozen”.
Press the »
– « (Minus) of the
®
button,
or
press the
¢
AUX button and on the lower border of
the screen the symbol line appears.
Select with the F or E button the symbol I and
confirm with the
O
button.
The displayed page is now “frozen”, it is no longer
updated and is no longer turned to other subpages.
Exit the function with the
O
button and the
current subpage appears.
Calling up the subpages directly
Press the » – « (Minus) of the
™
button,
or
Press the
¢
AUX button and the symbol line appears
on the lower screen border.
Press the F or E button to select the symbol H
and confirm with the
O
button.
The selected teletext page number appears in the
symbol line; 155/0001 for example.
Select the » Subpage « by always entering four digit
numbers with the
0…9
digit buttons.
– The page appears promptly.
Switch off the » Subpage « with the
O
button and
the current subpage appears.
4
3
6
2
1
4
3
2
1
6
3
2
1
Answer release
You can call up (reveal) “hidden” answers or
information on certain teletext pages to solve, for
example, a puzzle
or
to control the VPS times to program a video recorder.
Press the »
+ « (Plus) button of the
®
button,
or
press the
¢
AUX button and the symbol line appears
on the lower border of the screen.
Press the F or E button to select the L symbol
and confirm with the G button and the “hidden”
information appears on the teletext page.
Switch off » Answer release « with the
O
button.
“Page Catching” (selecting and calling up
cer
tain teletext pages directly)
You will find three-digit page numbers on many
subpages which you can directly select.
This saves you from having to enter the page number.
Switch on » Page Catching « with the p or P button.
» Page Catching ➝ OK« appears on the upper
border of the screen.
A bright square will flash behind the first or last
page number of the index page.
Using the p or P button select the required threedigit number and confirm with the
O
button and
the page will appear promptly on the screen.
Using the h button you can turn back to the index
page.
3
2
6
1
6
3
2
1
6
Page 18

Teletext Mode
k
18
Selectin
g a language group
You can choose from between three language
groups for the dialogue with the video/teletext.
The individual countries are divided among three
European language groups:
Western Europe, Eastern Europe and Europe + Turkey.
Most European countries are found in the language
group Western Europe.
If you want to call up the teletext from TV stations
from Poland, the Czech Republic, Rumania or from
former Yugoslavia then select the language group
Eastern Europe.
If you want to call up the teletext for TV stations
from Turkey, then select the language group Europe
+ Turkey.
Select the required TV channel and call up the
teletext with the
1
TXT
button.
Press the
¢
AUX button. The symbol line appears on
the lower border of the screen.
Using the F or E button select the symbol J
and confirm with the
O
button.
The page appears on the screen:
Select » Lang. group « and “Country”.
Exit the function with the
1
TXT
button.
5
4
6
3
2
1
Updating a teletext page –
bypassing the waiting time
The teletext editorial staff updates certain teletext
pages. You will thus receive the latest information on
currency rates or the most recent sports reports and
news.
If you want to watch TV and keep up on the news at
the same time, select the appropriate page first –
Page 143 for example – and then press:
Press the
¢
AUX button and the symbol line appears
on the lower screen border.
Press the F or E button to select the symbol K
and confirm with the
O
button.
You can see the TV screen and the teletext
k
sym-
bol appears.
If the indication S143 appears later in the symbol
line instead of the teletext
k
symbol, this means
the page is being updated.
Press the
O
button.
The teletext page appears with current contents.
You can also use this function to bypass the waiting
time while your teletext-decoder scans for a page.
Once the page is found, Page 143 for example,
appears in the info line.
Exit the function with the h or
1
TXT
button.
4
6
3
6
2
1
6
Text Setup for: P 1
0-9 Enter page number
•
Delete
66
Return
■
Programme preview P.■3 00
Lang. group F Europe + Turkey E
Page 19

k
19
The second page » AUDIO/VIDEO INPUTS « shows
you to which AV socket you should connect any
given unit.
❒
Connecting the camcorder to socket
»AV 3«.
Pictur
e signal
Connect the TV set socket » VIDEO IN « with the
corresponding socket of the camcorder.
Sound signal (stereo or mono)
Connect the TV set socket » L AUDIO IN R « to the
sound socket of the stereo-camcorder,
or
connect the TV set socket » L AUDIO IN « to the
sound socket of the mono-camcorder. Switch the
audio-input of the TV set to » mono «, then press
the
¢
AUX and then the
2
button.
Press the
AV
0
button until » AV3 « appears on the
screen.
Playback
Switch on camcorder, insert cassette and start
playback.
You will see and hear the picture and sound information from the camcorder on the TV set.
4
3
2
1
6
❒
The AUDIO/VIDEO INPUTS
The TV set is equipped with various sockets. Various
external units can be connected to it, e.g. a camcorder, video recorder, SAT receiver, SET-TOP box, PayTV decoder etc.
If you inform your TV exactly what kind of external
unit you wish to connect, the menu » AUDIO/
VIDEO INPUTS « lets you know to which sockets
you must connect them.
You will be guided in simple and understandable
terms through the next steps and optional functions.
Call up the » DIALOG CENTER « with the h and
O
buttons.
Select and call up »AUDIO/ VIDEO INPUTS «.
❒
If you want to connect a camcorder,
a video recorder with a MEGALOGIC
satellite receiver decoder for coded
satellite reception.
Proceed as follows:
Select » Camcorder « and enter » yes«.
Select » Video recorder « and enter » Megalogic«.
Select » Video recorder 2 « and enter » no«.
Select » External-receiver « and enter » yes«.
Select » Decoder « and enter » yes«.
Select » ext. rec. only« and enter » yes «.
Check once again if all external units you want to
connect are selected and activated.
Press the
O
button.
2
6
1
2
1
6
AUDIO/VIDEO INPUTS
OK
Connect. propos.
66
Return
TXT
TV-picture
Camcorder F yes E
Video recorder Meglog
Megalogic, VHS, SVHS, Hi8
Video recorder 2 no
VHS, SVHS, Hi8
External-receiver yes
Decoder yes
■
ext. rec. only yes
AUDIO/VIDEO INPUTS
66
Return
TXT
TV-picture
Sockets Devices
AV3 ●● ● r – e
AV2 r– er–e
AV1 r– e
MEGLOG
::::
DECOD.
EXTREC
::::
CAM
Connection Options and Operation
P
VIDEO L AUDIO R
I
Page 20

k
20
❒
Connecting video recorder to the
MEGALOGIC socket »AV 1«.
Connect the » AV 1« socket of the TV and the corresponding socket of the MEGALOGIC video recorder
using a Megalogic-compatible EURO/AV (Scart)
cable.
Ask your authorised dealer, if you have any
questions!
Press the
AV
0
button until the set displays » AV1 «.
Playback
Switch on the video recorder, insert the cassette
and begin the playback
You will see and hear the picture and sound information from the video recorder on the TV set.
❒
The GRUNDIG MEGALOGIC System
The TV set is equiped with the MEGALOGIC
System.
If you connect a GRUNDIG video recorder to the
MEGALOGIC System using the supplied
Megalogic-EURO/AV (Scart)cable, the terrestrial TV
channels (and all channel position related information) are automatically transmitted to the video
recorder (VCR) each time you use the “Reprogramming of the TV channel”.
If you later wish to connect a GRUNDIG video
recorder to the TV set using the MEGALOGIC
System proceed as follows:
The video recorder must be connected to the mains
supply.
Switch on the TV set.
Call up the » DIALOG CENTER « with the h and
O
buttons.
Select and confirm »AUTOMATIC PROGRAMMING«.
2
1
6
6
1
2
1
AV1AV2
EURO-AV
AUDIO
Select and confirm » Data transfer of TV programme
chart TV →VCR «.
The indication » Please wait – Data transfer of TV
programme chart TV →VCR « appears on the screen.
w
!
Wait until all TV channels have been transferred.
This can take a minute or longer.
The function » Setting the TV channels on the
Videorecorder « is no longer necessary.
❒
Connecting an external receiver
(SAT-Rec. or SET-TOP-Box) to the »AV 2«
Socket.
Connect the » AV 2 « socket on the TV set to
corresponding socket of the external receiver.
Press the
AV
0
button on the set until » AV2 «
appears.
Operation
Switch on external receiver.
Press the TV remote control
¢
SAT button and keep
pressed down and then enter the required channel
position of the external receiver using the 0…
9
digital buttons.
The set is ready for satellite reception. The SER 150
module has been provided for retrofitting. Ask your
authorised dealer, if you have any questions.
6
4
3
2
1
AV1AV2
EURO-AV EURO-AV
6
3
Connection Options and Operation
Page 21

k
21
Connection Options and Operation
Select » Camcorder « and enter » no«.
Select » Video recorder « and enter » Megalogic «,
» VHS «, » S-VHS« or » Hi8 «.
Select » Video recorder 2 « and enter » VHS «,
» S-VHS « or » Hi8«.
Press the
O
button.
The second page » AUDIO/VIDEO INPUTS « will
show you on which socket to connect the external
unit.
Connection (Example 1 and 2)
w
!
A camcorder must be additionally connected for
Example 3.
Operation
Select the channel position with the AV0button
(» AV1 «, » AV 2 « or » AV 3 «) to which the AV
socket of the playback recorder is connected.
Begin the playback on the playback recorder and
the record on the record on the record playback.
You will see the picture of the playback recorder on
the screen.
If you want to switch the TV set to a TV channel
during the copying function, press the
¢
AUX and
AV
0
buttons.
The indication » Copy on « appears on the screen.
Now you can select any channel on the TV set without disturbing the copying function.
After completing copying, release the copy function
using the
¢
AUX and AV
0
buttons.
The indication » Copy off « appears on the screen.
4
6
3
2
1
AV1AV2
EURO-AV
AUDIO
EURO-AV
AUDIO
6
5
4
3
❒
Connecting a decoder (descrambler) to
the »AV 2« Socket.
Some stations whose channels are carried by cable
or SAT equipment code (scramble) their programmes. A decoder can unscramble such a programme.
Connecting a decoder and a satellite
receiver
You have already connected a video recorder to the
» AV 1 « socket.
You have connected an external receiver to the
» AV 2 « socket and want to decode channels
supplied by it. In this case the decoder must be
connected to the appropriate socket of the satellite
receiver.
Connecting a decoder without a satellite
receiver
Connect the » AV 1 « socket of the TV set to the
corresponding socket of the decoder.
Operation
Switch on the decoder.
Select the channel position with the coded programme on the set.
Set the decoder with the
¢
AUX button to » on «, as
described on Page 7, » Activating decoder «, point
.
Please observe the instruction manual of the
decoder.
If all settings have been carried out, quit the function
using the
1
TXT
button.
❒
Copying video recordings using the
TV set
You can copy from:
Example 1
Video recorder from socket AV1 to
Video recorder to socket AV2.
Example 2
Video recorder from AV2 to
Video recorder to socket AV1.
Example 3
Camcorder from socket AV3
(sockets on the front side of the set) to
Video recorder to socket AV1 and/or
Video recorder to socket AV2.
Call up the » DIALOG CENTER « with the h and
O
buttons.
Select and call up » AUDIO/VIDEO INPUTS «.
2
1
4
6
1
3
2
1
6
6
Page 22

k
22
❒
Mains voltage:
220-240 V, 50/60 Hz
(Power supply range control 190 … 264 V)
»The set may only be operated supplied power cable
set. It prevents interference from the mains and is an
integral component for the set’s approv-al«.
For a replacement, consult your nearest customer
service centre and order only the power supply
cable set with the following designation » GWN
9.22/ number 8290.991-316«.
❒
Power consumption:
approx. 130 W, on standby 7 W
❒
Channel coverage:
Channels C01 … C99, Special channels S01 … S41
❒
Additional equipment:
The set has been prepared for satellite reception,
connecting a PC and PIP (Picture in Picture). With
the built-in PIP function, another TV programme or
an AV picture (e.g. from a video cassette recorder or
a video camera) can be superimposed as a small
picture. Ask your dealer.
❒
Sound output:
2 x 20 W active musicial output (2 x 10 W Sinus)
Notes on the environment by Grundig
Technology and ecology combine into a convincing
overall concept with this TV set. Ecologically highquality materials are used exclusively. The housing
contains a high amount of recyclable parts from
used plastics and the surface colours used are
water-based, partly recycled. Wherever possible,
painting of individual housing parts has been omitted. Due to the optimized housing construction,
flame protection materials have been omitted. The
number of plastic types has been reduced through
and through in order to ensure high-quality recycling when the set is put out of use – all larger
plastic parts are marked. For optimum re-use, this
TV set has been constructed in such a way as to
make dismantling very easy.
❒
Pin assignment for the EURO-AV socket
If you want to connect other devices to your television (for example, a computer or amplifier), your
dealer can provide you with a normed standard
connection by means of the following table:
Pin Signal
11 = Audio ouput, right
12 = Audio input, right
13 = Audio output, left
14 = Audio earth
15 = Blue, earth
16 = Audio input, left
17 = RGB blue input
18 = Switching voltage
19 = Green earth
10 = Data line MEGALOGIC
11 = RGB green, input
12 = –
13 = Red, earth
14 = Earth
15 = RGB red input (chrome for S VIDEO)
16 = RGB switching voltage
17 = Video earth
18 = RGB switching voltage, earth
19 = Video output
20 = Video input
21 = Shielding/earth
The product fulfils the requirements of the
following EU guidelines:
73/23/EEC Guideline concerning electrical operating
units within certain voltage limits.
89/336/EEC guideline on electro-magnetic compatibility.
The unit is accordance with the norms:
EN 60065, EN 55013, EN 55020
Technical Specifications
All rights reserved!
Additional Information for Units sold in Great Britain
Units sold in GB are suitable for operation from a 240 V AC, 50 Hz mains supply.
In case this appliance is supplied with a Safet
y Standard Approved mains lead fitted with a non-rewireable 13 Amp mains plug which, if unsuitable for your
socket, should be cut off and an appropriate plug fitted by a
qualified electrician. The fuse and fuse holder must be removed from the plug as
accidental insertion of the redundant plug into a 13 Amp socket is likely to cause
an electrical hazard.
Note: The severed plug must be destroyed to avoid a possible shock hazard
should it be inserted into a 13 Amp socket elsewhere.
If it is necessary to change the fuse in the non-rewireable plug, the correct type
and rating (5 Amp ASTA or BSI approved BS 1362) must be used and the fuse
cover must be refitted. If the fuse cover is lost or damaged the lead and plug must
not be used until a replacement is obtained. Replacement fuse covers should be
obtained from your dealer.
If a non-rewireable plug or a rewireable 13 Amp (BS 1363) plug is used, it must
be fitted with a 5 Amp ASTA or BSI approved BS 1362 fuse. If any othe type of
plug is used it must be protected by a 5 Amp fuse either in the plug or at the distribution board.
Important:
The wires in the mains lead are coloured in accordance with the follow-ing code:
BLUE – NEUTRAL
BROWN – LIVE
As the colours of the wires in the mains lead of your appliance may not correspond with the coloured marking identifying the terminals in your plug, proceed
as follows:
Connect the BLUE coloured wire to plug terminal marked with the letter "N" or
coloured black.
Connect the BROWN coloured wire to the plug terminal marked with a letter "L" or
coloured red.
In no circumstance must any of the wires be connected to the terminal marked
with a letter "E", earth symbol , coloured green or green and yellow.
Replacement mains lead can be obtained from your dealer.
220
21
119
Page 23

GRUNDIG AG •D-90762 FÜRTH Printed in Germany
0 1 2 3 4 5 6 7 8 9
k
✁
GRUNDIG
+
P
+
P
-
7 0 3 8
 Loading...