

Page 1
COLOR TELEVISION
ST 63-800/9 TOP/LOG
Page 2

If the dealer has already set up and adjusted the TV
set, begin these operating instructions from page 5.
r
Safety, Setting up and Connection 3
Safety, setting up, connection
and preparation . . . . . . . . . . . . . . . . . . . . . . . . . 3
r
Assigning Channel Positions 4-5
The station memory system ATS euro plus . . . . 4
Particularity in France . . . . . . . . . . . . . . . . . . . . . 4
ATS euro plus – search update . . . . . . . . . . . . . . 5
Assigning channel positions manually . . . . . . . . 5
TV-standard (norms) . . . . . . . . . . . . . . . . . . . . . 5
Entering station codes . . . . . . . . . . . . . . . . . . . . 5
Fine tuning . . . . . . . . . . . . . . . . . . . . . . . . . . . . . . 6
Changing channel position assignment . . . . . . . 6
The TV station table . . . . . . . . . . . . . . . . . . . . . . 6
Sequence for changing channels . . . . . . . . . . . . 6
Deleting channel position data . . . . . . . . . . . . . . 6
Changing station names, entering codes . . . . . . 7
r
The Remote Control 8
The remote control . . . . . . . . . . . . . . . . . . . . . . . 8
r
Changing the Sound … 9
with the Audio-menu . . . . . . . . . . . . . . . . . . . . . 9
Stereo width . . . . . . . . . . . . . . . . . . . . . . . . . . . . 9
Sound (stereo, two-channel, mono) . . . . . . . . . . 9
Treble, bass, balance . . . . . . . . . . . . . . . . . . . . . 9
Headphones: connection, volume . . . . . . . . . . . . 9
r
Changing the Picture 10
Changing contrast and picture definition . . . . . 10
Switching picture format . . . . . . . . . . . . . . . . . 10
Changing brightness and colour contrast . . . . . 10
r
Teletext 11-14
Teletext operation . . . . . . . . . . . . . . . . . . . . . . . 11
r
Convenience Functions 15-16
Timer functions . . . . . . . . . . . . . . . . . . . . . . . . 15
Locking programmes unfit for children . . . . . . 15
Locking all programmes . . . . . . . . . . . . . . . . . . 16
Entering switch-off times . . . . . . . . . . . . . . . . . 16
Entering switch-on times . . . . . . . . . . . . . . . . . 16
r
Special Functions 17-18
Calling up » Special functions « menu . . . . . . . 17
Calling up » Settings « menu . . . . . . . . . . . . . . . 17
Changing volume . . . . . . . . . . . . . . . . . . . . . . . 17
Changing colour match . . . . . . . . . . . . . . . . . . 17
Switching on with… . . . . . . . . . . . . . . . . . . . . . 17
Displaying/removing picture/sound scale . . . . . 17
MEGALOGIC Info . . . . . . . . . . . . . . . . . . . . . . . 17
Transmission of TV station table . . . . . . . . . . . . 18
r
Connection Options
and Operation … 19-23
… for video recorders . . . . . . . . . . . . . . . . . . . 19
… for video recorders to aerial jacks . . . . . . . . 19
… for camcorders . . . . . . . . . . . . . . . . . . . . . . 20
… for satellite receivers, descramblers . . . . . . 21
… for several sets simultaneously . . . . . . . . . . 22
… for re-recording video recordings
via the TV set . . . . . . . . . . . . . . . . . . . . . . . . 23
r
Technical Data 24
Technical data . . . . . . . . . . . . . . . . . . . . . . . . . 24
Contents
ķ
2
Page 3
Safety and setting up
r
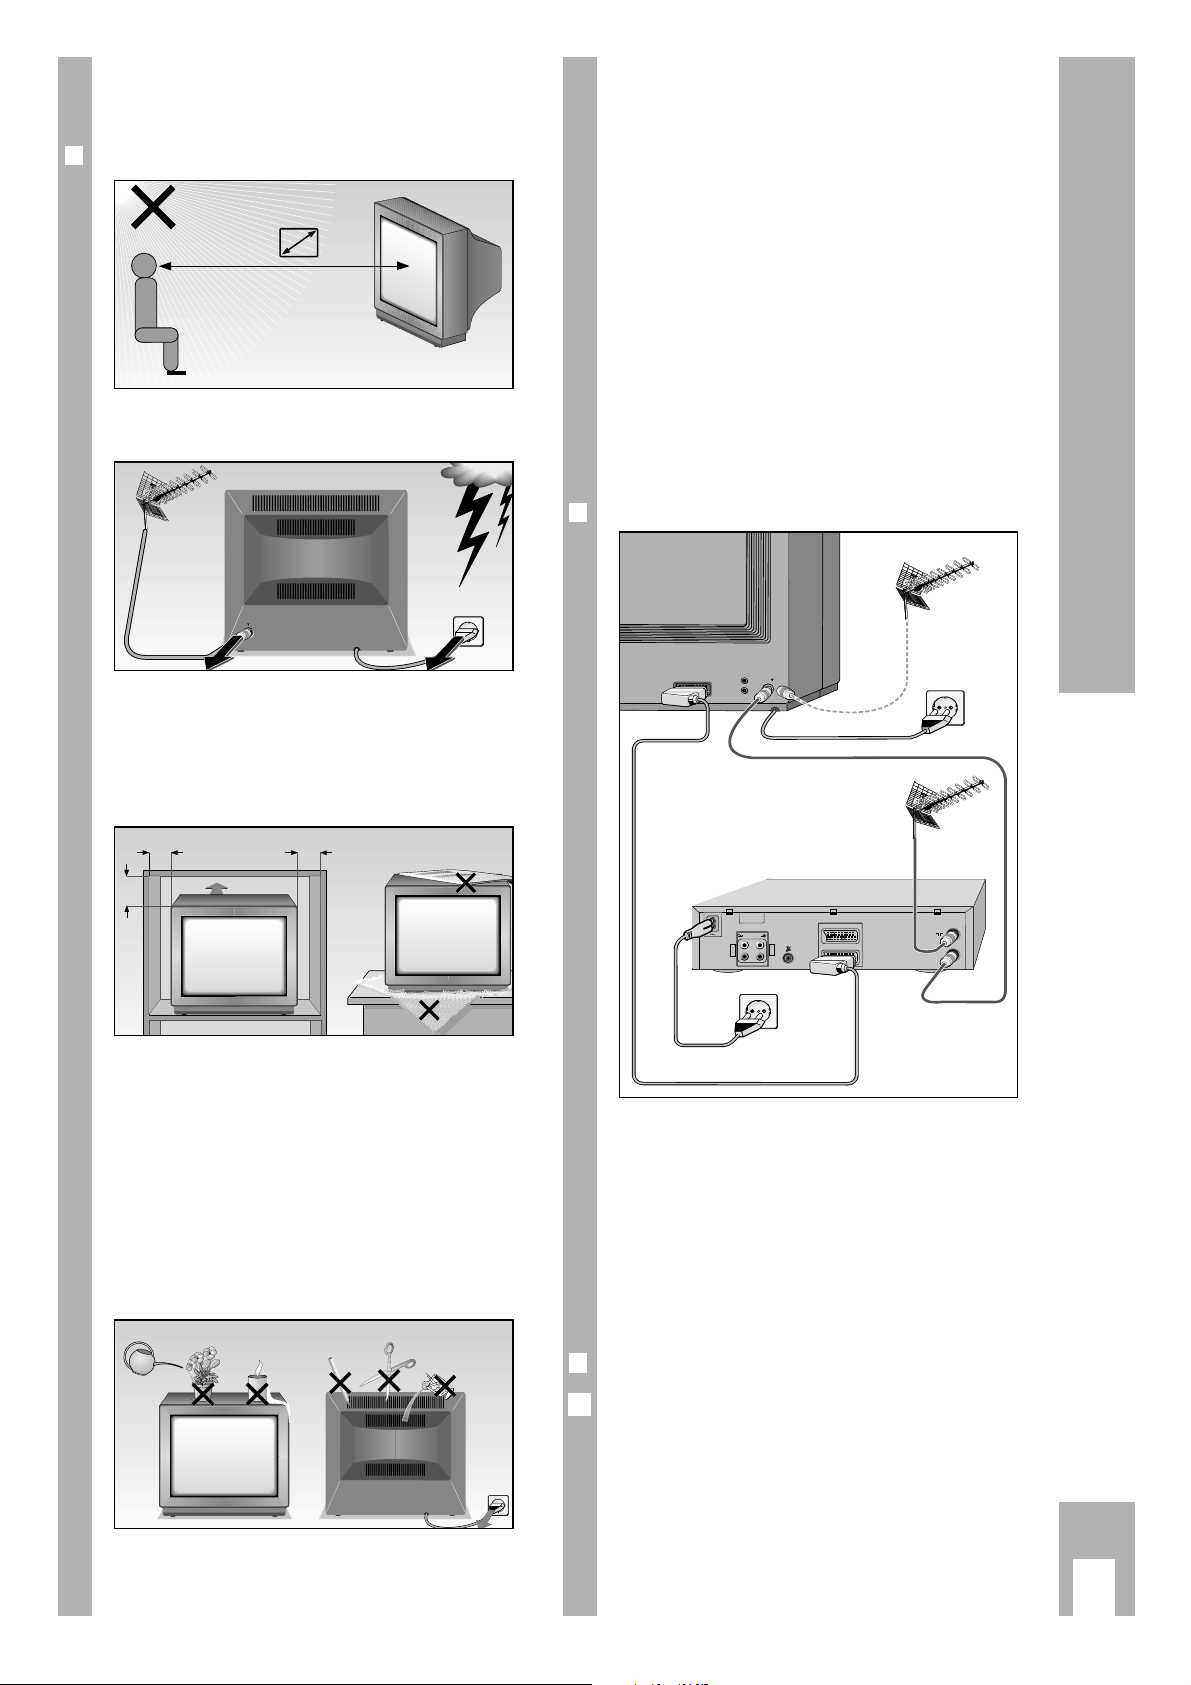
Please avoid …
Ń
!
… external light falling on the screen.
The ideal viewing distance is 5x screen diagonal.
Ń
!
… lightning damage by disconnecting the mains
and aerial cables.
Even when the set has been switched off, damage
can occur due to lighting strikes conducted by the
mains and/or the aerial cables.
Ń
!
… that the ventilation slits become obstructed.
Ń
!
… spacing too small around the cabinet walls in
respect of the surroundings.
Ń
!
… damage to mains cable.
Ń
!
… magnetic fields (loudspeaker boxes) near the set.
Ń
!
… friction and scratches on the screen.
Ń
!
Only clean the screen with a damp, soft cloth. Only
use clear, clean water.
Ń
!
Heat exchange in the set produces air circulation,
causing dust particles (carpet fibres, curtain fibres
and house dust) to be sucked up. These are deposited in the ventilation slits, narrowing them over the
years and causing heat build-ups.
Heat build-ups are potentially dangerous and reduce the service life of the set.
For safety, have the deposits removed from time to
time by a professional.
Ń
!
… Opening and adjustment of the set by non-
professionals.
Connecting the set
(example)
r
Connecting set to aerial and mains
This TV set offers optimum picture and sound quality.
Ń
!
The essential preconditions for this are:
Perfectly functioning aerial systems and aerial
connection cable with high degree of shielding
(85 dB) connecting the TV set and aerial jack or TV
set and video recorder.
Ń
!
Avoid worn cables near the set.
r
Switching set on/off
Press the ü button on the set.
Ń
!
If the set is not in use for long periods (for example
at night) use this button to switch it off, thus saving
energy.
1
Safety, Setting up and Connecting
ķ
3
5 x
AV1
AV1
10
cm
20
cm
20 cm
10
cm
Krieg am Golf
AUDIO
L
O
U
T
R
EURO - AV 2
L
I
N
R
EURO - AV 1
AV 1
ń
! SERVICE !
Page 4

r
The station memory system
»ATS euro plus«
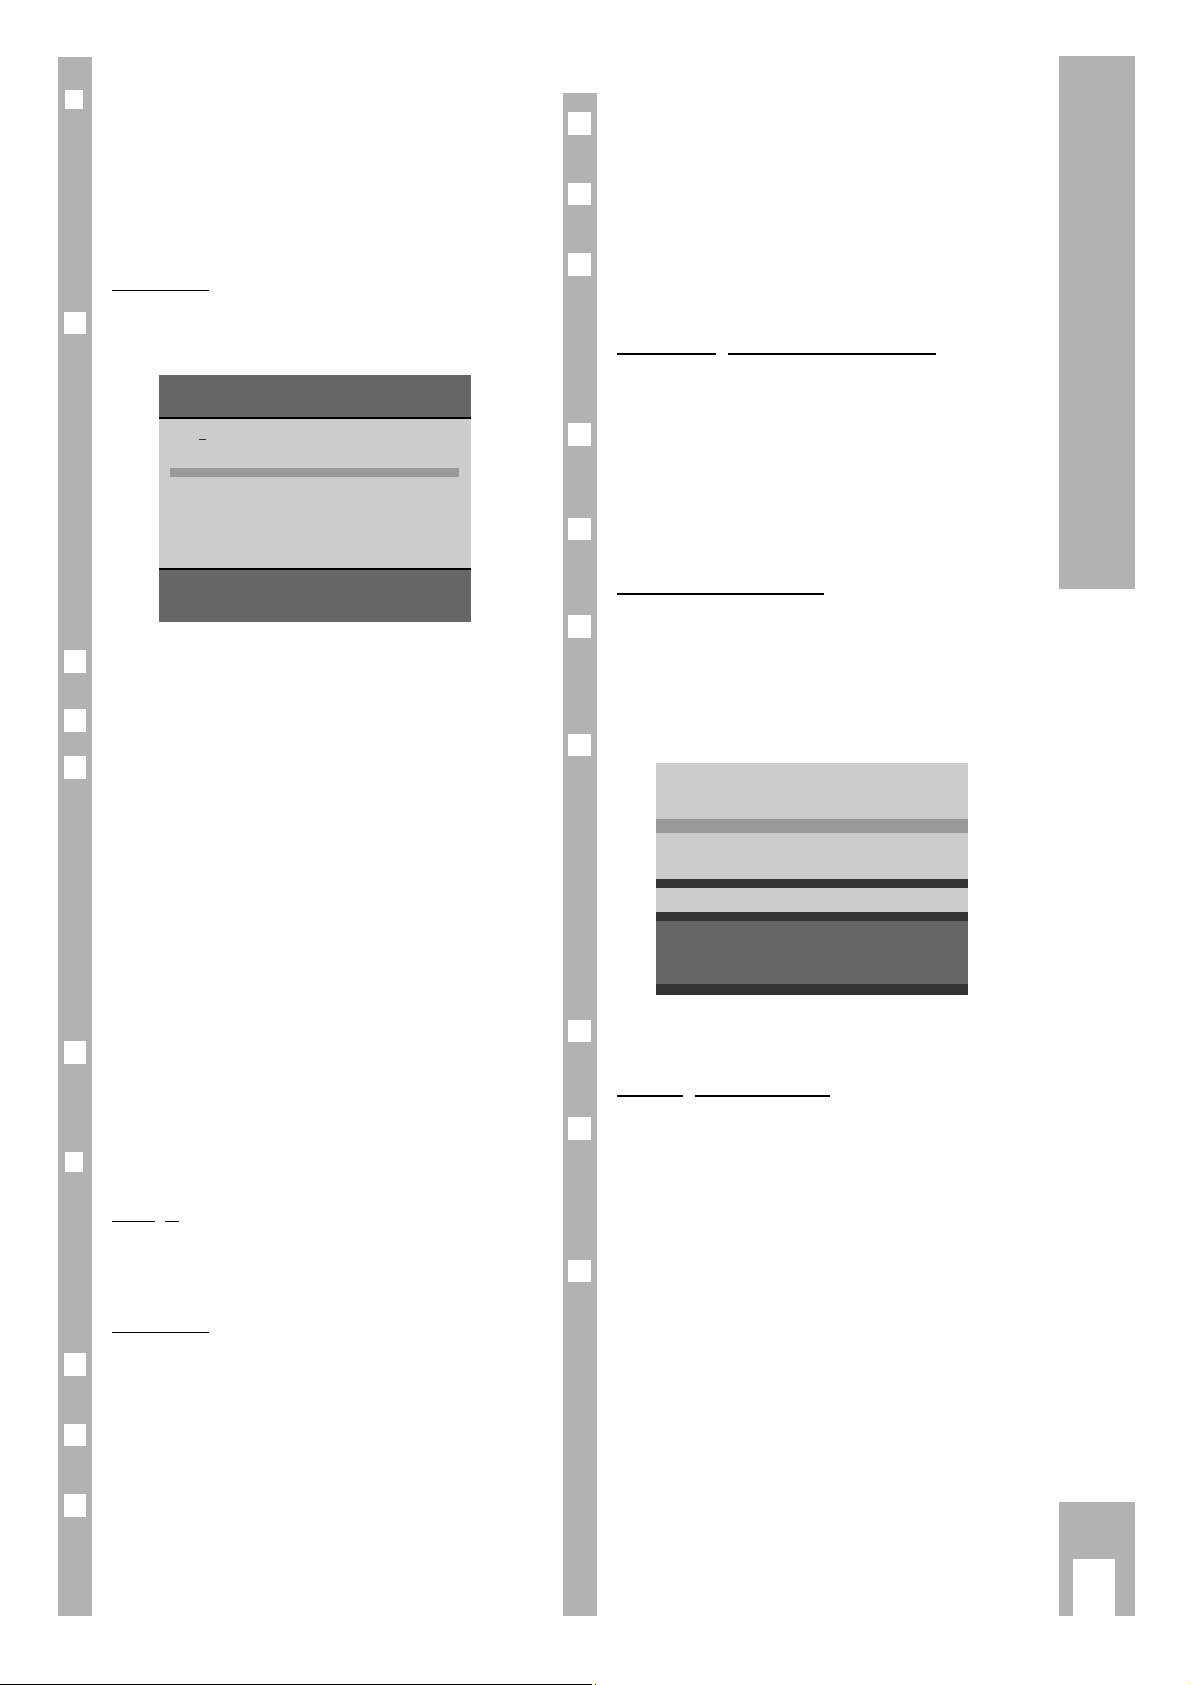
After the set has been switched on, the » ATS euro
plus « page is displayed.
If this page does not appear, hold down the
m
but-
ton until the » ATS euro plus « indication appears.
ɦ, ɼ,
ʺʺ, ɶɶ
are symbols for the following buttons on
the remote control:
ʺʺ, ɶɶ
= channel selection buttons | ,and ]
ɼ, ɦ = volume
x
and
c
OK =
O
button
In the rest of the text, the remote control buttons
are illustrated instead of the symbols for the buttons.
The line on the lower edge of the display acts as
operating guide.
The set is equipped with » ATS euro plus « (Auto
Tuning System). The special convenience feature of
the new system is the automatic channel position
assignment.
The channel memory system scans the whole reception range, stores the channels found and enters
them with the associated station name (abbreviation)
in a table.
The automatic assignment of channel positions can
be rearranged in accordance with your requirements. For example channels from stations without
identification can be allocated a station name –
from the displayed range of abbreviations.
r
Setting dialogue language
You can select any one of several languages for dialogue between you and the TV set. User guidance is
displayed in the selected language.
If the language set at the factory is the one you
require just press the
O
button.
If you want to change the language, press buttons
x
andcand then the
O
button.
GRUNDIG ATS euro plus
Language
n
D DK/N E F GB I NL P S SF
Select < >
Confirm OK
Exit
Ǻ
2
1
Ǻ
Ǻ
Ǻ
1
r
Setting location (country)
Select country with button xor
c
and confirm
with the Obutton. This starts the search.
The TV set searches for through all the channel
numbers for television channels, arranges them
and stores them.
The procedure can – depending on the number of
channels to be received – last over a minute.
After the search procedure, the first channel position is displayed.
The station table is transferred automatically to the
video recorder. (Only with Megalogic sets).
The set is equipped with the MEGALOGIC system.
This system offers especially high degree of operating convenience with a video recorder.
Channel related data (stored channels) can be
transferred from the TV set to the video recorder
(VCR).
This renders channel programming with the VCR
unnecessary – see page 20.
r
Particularity in France
If you select “F“ as country, this menu wil be displayed.
It allows you to select between
a) “Channel spacing“ and
b) “Frequency (MHz)“
for the ATS function.
Press buttons
xorc
.
Press button
O
.
Ń
!
If you are in doubt, consult your spepcialized
dealer.
2
1
Ǻ
Ǻ
1
Assigning Channel Positions
ķ
4
GRUNDIG ATS euro plus
Country
A B CH D DK E F GB I N
NL P S SF Others
Select < >
ɶ
ʺ
Confirm OK
Terminate
Ǻ
GRUNDIG ATS euro plus
Reception VIA:
Cable/aerial Channel spacing
Change < >
Confirm OK
Terminate
Ǻ
Page 5
Assigning Channel Positions
ķ
5
Press the ]button;
C changes into S (for special channel)
Press the
c
button;
the cursor jumps to channel input position.
Press buttons
0
and 8S08 is visiblein the data
line.
Channel input with manual search
Channel input can also be undertake with manual
search.
Press buttons
|
or ], the search starts and
stops at each channel that can be received at this
location.
The set automatically tunes into the best picture.
TV standards (norms)
Press the -button.
A list of TV standards (norms) which can be received and handled by the TV set is added to the
display.
Press the
|
or ]button to highlight L/L’.
Press the
-
button.
Entering station identity
The previous data line is displayed again. You now
can give the programme position a station name
(abbreviation of max. 4 characters) by pressing the
c
button, then following the on-screen user guide
(dialogue lines).
Allocating programme position 10 to special channel S 08, SECAM L/L’ norm, is now concluded.
Press the
.
button to return to the TV picture or
repeat the above steps to allocate further programme positions.
Ń
!
In difficult reception conditions it may be necessary
to improve the picture quality by manual fine
tuning.
12
11
10
B/G FM 5.5 (A2 Stereo)
B/G FM 5.5 (NICAM N, S, SF)
B/G FM 5.5 (NICAM D, DK, E)
L/L' AM 6.5 (Mono)
L/L' AM 6.5 (NICAM)
I FM 6.0 (NICAM)
D/K/K' FM 6.5 (A2 Stereo)
M FM 4.5 (Mono)
P 10 nS 08 +00 BR 3
Select
ɶɶ
ʺʺ
???????? AUX
Exil
Ǻ
9
8
Ǻ
7
6
5
4
r
ATS euro plus – search update
If you have already found and saved the channel
with »ATS euro plus « and you want to start a further search – conditional on changed reception conditions (e.g. due to new channels) – then select the
menu item » TV station update «.
Procedure
Press the h button and then the
O
button.
The » GRUNDIG Infocenter « is displayed.
Select the menu line » TV station update « with the
|
button.
Press
O
button.
The search starts with the settings (language and
country) from the last ATS search.
The newly found channels are added to the existing
ones in the station table and are marked in blue.
The channels can be transferred to other channel
positions with “Shift”.
If a restart is necessary (e.g. with a change of
address or retro cable connection), start the search
as described on page 4. The existing channel position data will be deleted.
By pressing the
.
button the storing procedure is
called up and the new channel assignment is stored
with the Obutton.
r
Assigning channel positions manually
Example
A channel that is being transmitted on special chan-
nel S08 is to be located at channel position 10.
Procedure
Select channel position 10 with buttons 1… 0or
the buttons ], |.
Press the
m
button;
Proceed as outllined in the dialogue lines.
Press the
x
button;
In the occupied line C (for channel) is highlighted.
3
2
1
4
Ǻ
3
2
GRUNDIG Infocenter
D DK/N E F GB I NL P S SF
Special functions
Picture-menu
Security/Timer
TV station table
TV station update
Select
ɶ
ʺ
Activate OK
Exit
Ǻ
1
Page 6

Assigning Channel Positions
ķ
6
r
Changing the sequence of television
channels (shifting or copying)
Select the channel position to be shifted with the
buttons |or ]and mark it by pressing the yellow ¢button.
If you want to » Copy « the channel position, press
the yellow
¢
button 2x.
Ń
!
Copying is only possible when the SAT module is
installed.
With shift only the sequence of the data for a chan-
nel position is altered.
With copy, already existing, marked channel posi-
tion data appears once more at the selected channel
position (position of the highlighted bar).
r
Deleting channel position data
Select the channel position to be deleted with the
buttons |or ].
Press the red
¢
button, thus deleting the selected
channel position.
2
1
Ǻ
GRUNDIG TV station table
Prog Channel Station
1 C 06 ARD
2 C 24 ZDF
3 C 47 BR 3
4 C 40 SAT1
5 C 21 PRO7
6 C 59 BR 3
7 C 41 – – – –
8 C 53 RTL2
9 C 31 ZDF
10 C 32 ZDF
Shift
ɶ
ʺ < >
Confirm OK
Copy
n
1
r
Fine tuning
Press the mbutton.
Press the
c
button until the cursor has reached
the 00 position in the occupied line (position for
fine tuning),
with
] button (63 steps)
and
|
button (64 steps)
Optimise picture and sound settings.
Quit with the h button.
r
Changing channel position assignment
The TV station table gives a general overview of the
channel position assignment.
This assignment can be rearranged in accordance
with your own requirements and channels from stations without identification can be allocated a station name.
Call up » GRUNDIG Infocenter « with the h button
and the
O
button.
Select the »TV STATION TABLE « with button
]
or
|
and confirm with the
O
button.
Check the assignment of the channel positions. If
this is unsatisfactory, the channel position assignment can be altered (e.g. sequence, deleting channel positions etc.).
You can quit the station table with the h button.
Your settings are stored automatically.
The operation of the various functions is described
in the following chapter.
Select according to your requirements.
Ǻ
3
GRUNDIG TV station table
Prog Channel Station
1 C 06 ARD
2 C 24 ZDF
3 C 47 BR 3
4 C 40 SAT1
5 C 21 PRO7
6 C 59 BR 3
7 C 41 – – – –
8 C 53 RTL2
9 C 31 ZDF
10 C 32 ZDF
Select channel
ɶ
ʺ < >
Change name, channel OK
Shift/Copy
n
Delete
n
Exit
Ǻ
GRUNDIG Infocenter
D
DK/N E F GB I NL P S SF
Special functions
Picture-menu
Timer/Security
TV station table
TV station update
Select
ɶ
ʺ
Activate OK
Exit
Ǻ
2
1
Ǻ
5
4
3
2
1
Page 7
r
Changing or entering station names or
entering channel numbers
With each channel position, the channel number
(C = channel, S = special channel) is manually entered and the station name (abbreviation) is altered
or extended in accordance with your own requirements.
Select the required channel positon with button
]
or |.
Press the
O
button – the channel position data
are displayed.
Input the channel number with buttons
1… 0
.
(Select with buttons ]or
|
C = channel or
S = special channel.)
Ń
!
If channel 00 is stored at a channel position, the following channel positions cannot be selected with
button ]or |(point of reversal). If the point of
reversal is at a channel position between 1 and 10,
only channels 1 to 9 can be selected with the numeric buttons (S = special channel may not be selected).
Select the entry position for the station name with
the
c
button.
Select the new station name with the buttons
]
or |from the table.
If there is no appropriate abbreviation for a station,
you can make up your own. Press the
c
button
once and select the desired letters/numbers with
the ]or |button.
Select the next position with the
c
button.
Press the h button twice, thus storing and return
to TV channel.
6
Ǻ
5
4
3
2
1
Ǻ
ķ
7
Assigning Channel Positions
C Channel
S
Special channel
P 25 nC 32 -32 – – – –
Select
ɶ
ʺ
Select position < >
Exit
Ǻ
ARD
– – – –
BRT 1
BRT 2
CAN +
CAN 1
FILM
F 2
F 3
INFO
ITB
LIVE
P 25 C 32 32
n
ARD
Select station name
ɶ
ʺ
Select position < >
Exit
Ǻ
Page 8

ķ
8
The Remote Control
The buttons on the remote control are only briefly
explained on this page. Detailed explanations can
be found in the respective chapters.
ĵķ (Numeric button 1) = Picture search rewind
ĶŁ (Numeric button 2) = Picture search forwards
l (Button – i) = Recording start
n (Button i +) = Stop
ĵĵ (Numeric button 7) = Fast rewind
ŁŁ (Numeric button 8) = Fast forward
ll ll (Button – v) = Pause
ı (Button v +) = Replay start
Ľ
(Numeric button 4) = Channel position –
Ń (Numeric button 5) = Channel position +
Video recorder remote control
You can also operate Grundig video recorders with
the set’s remote control. Your authorised dealer will
inform you which are suitable.
Keep
¢
VIDEO button pressed down.
This switches the remote control to video recorder
mode.
Then press the required button.
The list opposite shows which recorder functions
are operated by which buttons.
1…0
Channel selection and switch-
0
AV ing on the set from stand-by
or
selecting AV position
or
entering the page numbers in
teletext mode
m
Calling up channel data.
Keep the button pressed down for
4 secs:
Access to the ATS.
-
Preselection button for various
functions
.
Access to the Infocenter. Press
the
“
OK
button after message
» Menu ɮOK «
.
]
Switch through channels step-bystep (1, 2, 3 ...)
|
Switch through channels step-bystep (...3, 2, 1)
If one of the buttons
]
or |is held
down, the station identifications are displayed and run through quickly. The set
switches after the button is released to
the selected channel position or
]
Cursor upward movement,
|
downward movement
“
OK
– Changing and editing various
functions.
xc
Volume,
or
xc
Cursor movement to the left,
to the right
˲
ʀ
Sound ON/OFF (mute)
Access to » Audio-menu «
b
Switching to stand-by
and switching on at last
channel position selected
®
Brightness
™
Colour contrast
,
Teletext mode ɫ
TV mode
¢
R without function
¢
Shifting channel position data
when allocating channel position.
¢
Ȅ Time on/off
¢
Delete data when allocating
channel position
¢SAT
Satellite receiver remote control
(keep SAT button pressed down)
¢VIDEO Videorecorder remote control
(keep VIDEO button pressed
down)
1 2 3
4 5 6
7 8 9
P/C 0
ATS
AUX
AV
+
P
OK
P
ķ
+
-
R
SAT
VIDEO
TP 720
Page 9

ķ
9
r
… with the Audio-menu
Calling up the Audio-menu
Press the
˲
ʀ
button; the » Audio-menu « page is
displayed.
The » Stereo width « line is selected.
The »Audio-menu « can be displayed after each setting with the
.
button.
r
Stereo width
Widens the acoustic pattern with stereo broadcasts
and improves it with mono broadcasts.
Change with button
x
or c.
r
Sound (stereo/two-channel sound, mono)
If your television receives two-channel sound transmissions, for example, when a film is broadcast in
the original sound track and transmitted on sound
channel 2, and the synchronized version is broadcast on sound channel 1, you can
select the “Sound“ line by pressing the |or
]
button and
select the sound channel by pressing the
x
or
c
button (sound channel selection also possible when
using headphones). Your television automatically
switches to stereo if the programme is transmitted
in stereo.
If stereo reception is of insufficient quality, you can
switch to mono by pressing the
x
or cbutton.
If you wish to always receive this channel in mono,
enter “,MO“ at the fourth position of the station
identification (e.g., BBC ,MO).
See chapter “Entering a station name“, page 7.
If you can receive TV programmes in the SECAM L
NICAM colour standard, make sure that one of the
indications NICAM A, NICAM B, NICAM Stereo or
NICAM is shown in the “Sound“ line of the Audio
menu.
If this should not be the case, check whether the
SECAM L NICAM standard has been set on the
programme position concerned.
To do this, quit the Audio menu and call up the data
of the programme position to be checked by
pressing the
m
button.
If you wish to assign a different TV standard to this
programme position, follow the example given on
page 5 in the chapter “Assigning Channel Positions
Manually“.
Ǻ
2
1
Ǻ
1
Ǻ
Audio-menu
Stereo width > – o – <
Sound Mono
Headphones Mono
Treble
–I–
Bass
–I–
Balance
–I–
Select
ɶɶ
ʺʺ
Change < >
Sound off
ʀ
Exit
Ǻ
1
Indication of the sound transmission mode. Each
time the station changes the sound transmission
mode (e.g., from mono to stereo), the mode is
displayed for approx. 4 seconds.
This indication takes also place when changing the
programme, however only if the mode differs from
the mono mode.
With the
.
button, the indication can permanently
be displayed. Press .once again to remove the
display.
r
Treble, bass, balance
These functions can be reset as required.
Select the appropriate line with buttons
]
or |.
Correct with button
x
or c.
r
Headphones
With the headphones proceed with the settings in
the Audio-menu as with » Sound «.
Connection
The headphone socket and cinch AV socket are
located behind a cover. To open the cover pull out
with the finger grip.
Insert headphones plug (3.5 mm ø jack) into the
socket.
r
Changing headphones volume
Press -button, AUX-menu is displayed.
Change with buttons
x, c
.
AUX
Headphones
AV AV 1
Record Off
Format Standard 4:3
Select
ɶɶ
ʺʺ
Change < >
Activate OK Exit
Ǻ
2
1
2
1
Ǻ
Changing the Sound …
P
P
Page 10

r
Changing contrast and picture definition
Press the .button and then the Obutton.
The » GRUNDIG Info-Center « is displayed.
The line » Picture-menu « is highlighted.
Press the
O
button.
The » Picture-menu « is displayed.
Select » Contrast « or » Picture definition« or » Tint «
with buttons|or ].
Ń
!
» Tint« is displayed and can only be set with channels transmitted in the NTSC standard.
Change with buttons
x, c
.
After quitting the Picture-menu – with the
.
but-
ton – the settings are stored automatically.
Ń
!
The TV set has been tested with maximum contrast,
to test the reliability of all components.
Depending on the set’s location and the brightness
of the room (ambient light) it is however worthwhile to reduce the contrast somewhat to achieve
the best subjective screen image.
r
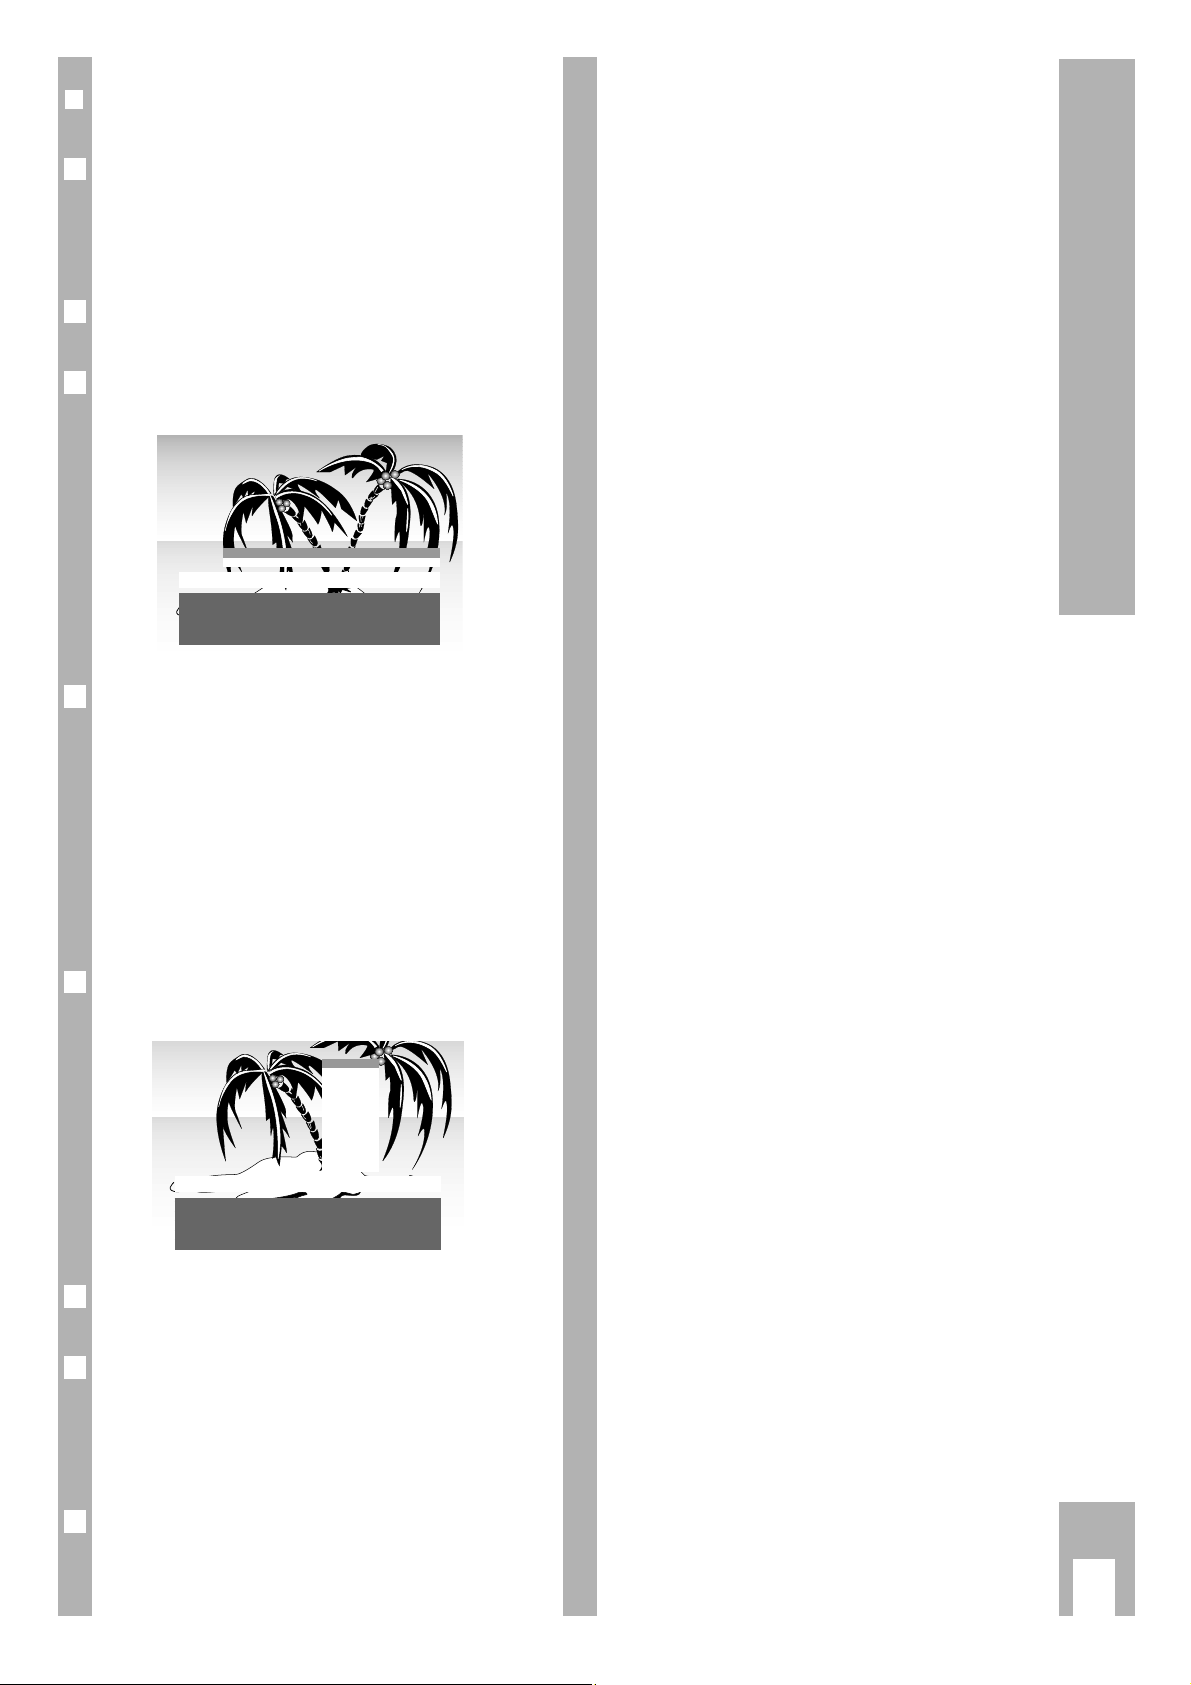
Switching picture format
If the television set with a satellite receiver is
operated with the PAL plus standard with picture
format 16:9, the conventional picture format must
be switched from 4:3 to 16:9:
Press the
-
button, the AUX-menu is displayed.
Select the menu line » Format « with buttons |, ].
Switch the format with button xor c.
Remove AUX-menu with the
.
button.
4
3
2
AUX
Headphones
AV AV 1
Record off
Format Standard 4:3
Select
ɶɶ
ʺʺ
Change < >
Activate OK Exit
Ǻ
1
Ǻ
5
4
3
Picture-menu
Contrast
–
Picture definition
–
Select
ɶɶ
ʺʺ
Change < >
Exit
Ǻ
2
1
ķ
10
Changing the Picture
r
Changing brightness and colour contrast
Press the minus (–) or plus (+) of the appropriate
rocker switch (v, i), until the required value is
reached.
Brightness with the
®
button.
Colour contrast (colour intensity) with the
™
button.
The appropriate scale is displayed on the screen.
The changed value is displayed.
The most recently set values for contrast, colour
and brightness are automatically stored by:
changing from channel position to AV channel posi-
tion;
changing from AV channel position to AV channel
position; switching to stand-by;
switching off with the mains switch.
Before being stored the values are checked.
If values have been so reduced that there is no
meaningful screen image, when the set is switched
on again the values set at the factory appear (Opti-
mum value).
Ǻ
1
Page 11

Teletext Mode
ķ
11
1…0
Select pages 100-899
Display dialogue line with the
-
button
Indication:
Increase
character
height
Bypass
waiting
period
(Current
mode)
Directly
retrieve
sub-page
Answer
release
Page
STOP
Select functions with button xorc.
Retrieve with the
“
OK
button.
ķ
ʄʄ
ķX /00 ķ? STOP
.
Retrieve contents page.
,
Teletext mode ɫ
TV mode
¢(blue) Switch to next block
¢(yellow) Switch to next group
with overrun to next
block
¢(green)
Turn to next page with
overrun to next group
¢(red) Page backwards
Flof text
The colour buttons take you
to the topics displayed in the
dialogue line
1 2 3
4 5 6
7 8 9
P/C 0
ATS
AUX
AV
ķ
R
+
P
+
OK
-
P
SAT
VIDEO
TP 720
Page 12

Teletext Mode
ķ
12
General
Teletext is additional information which is transmitted simultaneously with the television channel by
the television station.
The additional information can be displayed on the
screen with a teletext decoder integrated in your
televison set.
Teletext is transmitted in the form of text and graphical depictions or as sub-titles for television programmes.
Subtitles are useful for persons with damaged hearing.
The information pages and dialogue lines allow the
easy operation of your television set. The statements in the dialogue lines name functions and the
corresponding buttons.
r
TOP-FLOF teletext
TOP and FLOF are new procedures for simplified
and fast selection of teletext pages.
With TOP and FLOF you can select teletext pages,
without knowing the page numbers. All the teletext
pages transmitted by the station are arranged in
topic groups – also called blocks –, as in a “card
index”.
Thus for example all news reports are gathered in
the » Current affairs « block. Other topic groups
are for example the »Sport «, » Television programmes « and » Service « blocks. With TOP teletext the
blocks are further subdivided into several groups,
for example with » Current affairs « into politics,
economics, culture etc. The groups consist of normal pages.
The user guide on the screen makes operation
extremely simple and straightforward. A commentary line is displayed at the lower edge of the screen
and is colour labelled. The displayed colours are
also to be found on the remote control. With TOPmode the yellow field shows the next group in the
current block. The blue field states the next block.
Ǻ
You switch from block to block with the blue remo-
te control button, from group to group with the yel-
low, and you leaf forwards from page to page with
the green button. The red button takes you back-
wards.
With FLOF-mode a topic selection appears in
coloured script. The colour buttons of the remote
control take you to the displayed topic.
TOP and FLOF thus bring you quickly, simply and
securely to your goal – the required teletext page.
If TOP or FLOF teletext is not transmitted by the
station, a bar with four coloured fields appears.
You can retrieve the available pages with the but-
tons (red, green, yellow or blue).
If the signal from the aerial is not perfect, e.g.
fading, the teletext pages may be imperfectly transmitted. If fine tuning the TV set produces no
improvement have the aerial system tested.
r
Something worth knowing
Additional information from the station is needed
for the »TOP « teletext mode. A short delay is there-
fore necessary after switching on or after changing
channel before the TOP-decoder has read its
memory and all information is available.
With the
,
button you move from every operating
mode immediately back into normal television
mode.
Please note the user guide displayed at the lower
edge of the screen.
r
Operation
Select with the numeric buttons 1…0the televi-
sion station, whose teletext pages you would like to
retrieve.
1
Ǻ
blue
WeatherNewsSportTV Guide
yellowgreenred
- +
NEWS
next group
SPORTS
next block
Page 13

Teletext Mode
ķ
13
r
Switching teletext on/off
Press the ,button on the remote control.
Contents page 100 or the most recently viewed
page appears.
Press the
,
button, teletext is switched off.
r
TOP-mode
A red, green, yellow and a blue lettering field are
visible on the lower screen. The buttons on the
remote control are coloured correspondingly.
Page backwards with the
¢button (red).
With the
¢ button (green) you page forward to the
next available page (with overrun to the next
group).
With the
¢ button (yellow) you switch to the next
group. After the last group of the selected block you
move automatically onto the next block (overrun).
With the
¢ button (blue) you switch from block to
block.
r
Retrieving pages
Enter the number of the required page with the
numeric buttons 1…0with three digits.
– The page number is at the upper edge of the
screen and the page appears after a short delay.
With the
m
button you can select the most recently
viewed page.
r
Retrieving contents page
You can switch directly to the programme preview
block (with TOP-Text) or to the contents page of the
respective station.
Press the
.
button.
The programme preview block or the contents page
appears.
1
2
1
4
3
2
1
Ǻ
2
1
r
Multiple pages/page-stop
Several sub-pages which are automatically “paged
forward” in a fixed cycle by the station can be
under the same page number.
The sub-pages are labelled by the display under the
time e.g. 3/6 means that you are viewing the third
of six pages.
If you want to view a sub-page longer, press the
-
button.
The dialogue line is displayed.
Select the STOP symbol with button
x
or c.
Press the
O
button,
» STOP « is displayed in the upper screen. The contents of the displayed page are now “fixed”, no
longer updated, and no longer turned to other
pages.
Press the
O
button,
the » STOP « is cancelled, the current sub-page
appears.
The function can also – without calling up the dialogue line – be carried out with the
x
button.
r
Directly retrieving sub-page
Press the -button (dialogue line is displayed).
With button
x
or cselect the symbol /00.
Press the
O
button
The selected page number e.g. 155/---- appears in
the dialogue field.
Ń
!
Enter the required sub-page with the numeric buttons with four digits. E.g. for the second page,
sequence 0002. The required sub-page is searched
for and displayed.
Press the
O
button,
the function is cancelled.
The function can also – without calling up the dialogue line – be carried out with the left-hand side of
the rocker switch
™.
5
4
3
2
1
Ǻ
4
3
2
1
Page 14

r
Increasing character size
Press the -button (dialogue line is displayed).
Select the symbol
ķʄ with button
x
or c.
Continually pressing the
O
button causes:
doubled character height upper screen half,
doubled character height lower screen half,
normal picture.
The function can also – without calling up the dialogue line – be carried out with the right-hand side of
the rocker switch
™.
r
Answer-release
Releasing certain teletext pages, e.g. with solutions
of puzzles or VPS pages for programming a video
recorder.
Press the
-
button (dialogue symbol line is dis-
played).
Select the symbol
ķ? with button
x
or c.
Press the
O
button,
the hidden information is made visible.
Press the
O
button,
the » Answer « function is cancelled.
The function can also – without calling up the dialogue line – be carried out with the
c
button.
5
4
3
2
1
4
3
2
1
r
Watching television during teletext
operation (updating a page –
bypassing waiting period)
The teletext editing updates certain teletext pages.
Thus for example the exchange rates are brought
up to date, sports reports supplemented or the
latest news is reported.
If you want to watch television and at the same time
keep up to date, select the relevant page and then
press:
The
-
button (dialogue symbol line is displayed).
Select symbol
ķX with button
x
or c.
Press the
O
button.
You will see the television picture and the teletext
symbol displayed at the upper edge of the screen.
If for example S143 appears in the info line:
Press the
O
button.
The teletext page appears with current contents.
You can also use this function for bypassing waiting periods, while your teletext decoder is searching for a page. If the page has been found, S143 for
example will appear in the info line.
r
Page catching,
i.e. selecting pages without typing in the page number. You can directly select the requied teletext
page from the contents pages (pages in which the
three digit page numbers are found) with the cursor.
Press button
|
or ].
At the upper edge of the screen »Page Catching « is
displayed.
With the first or last page number from the contents a square light point flashes (the cursor).
Move the cursor to the required page number with
button
|
or ].
Press the
O
button.
The page appears on the screen.
3
2
1
4
3
2
1
Teletext Mode
ķ
14
Page 15

r
Security/timer functions
Ń
!
With these functions you can …
… enter a security code (secret number), with
which – programmes unfit for children can be
locked – or all programmes are locked;
… enter a set switch-off time followed by program-
me lock.
… enter a set switch-on time (wake-up time).
Proceed as follows:
Press buttons
.
and O.
The GRUNDIG Infocenter is displayed.
Select function » Security/timer « with the |button.
Confirm with the
O
button.
The operation of the four different Security/timerfunctions is described in the following chapter.
You can switch back to the current channel with
the
.
button.
Please note with the following chapter, the »GRUNDIG-Infocenter « must always be called up first in
the Security/timer functions.
Ǻ
Ǻ
GRUNDIG Security/Timer
Security Code – – – –
Lock programmes unfit
for children yes
Lock all programmes no
Sleep Timer – – : – –
Wake-up-time – – : – –
Wake-up-prog TV 1 ARD
Select
ɶ
ʺ
Change OK
Edit
Ǻ
3
2
GRUNDIG Infocenter
D DK /N E F GB I NL P S SF
Special functions
Picture-menu
Timer/Security
TV station table
TV station update
Select
ɶ
ʺ
Activate OK
Exit
Ǻ
1
r
Locking programmes unfit for children
The signal for this lock is not yet transmitted by all
stations.
Press the
O
button.
Enter the code number with the numeric buttons
1…0
with four digits.
Confirm with the
O
button.
Select » yes « for programme lock with button
x
or c.
If a programme unfit for children is being broadcast
the following table appears (Example RTL).
Ń
!
Please make note of the stored code number!
If you have forgotten the code number, switch to
the unlocked channel position, call up the Security/
Timer page and press the
O
button, a “Key” on
the last page (cover) helps you further.
After switching off (automatically or with
b button)
the set cannot be used without your authorisation.
Switch to television mode with the
.
button.
5
GRUNDIG Security/Timer
Security Code
n
– – – –
RTL locked !
Programmes unfit for children
Enter 0-9
Select channel positon
ɶ
ʺ
Ǻ
4
GRUNDIG Security/Timer
Security Code 1111
Lock programmes unfit
for children yes
Lock all programmes no
Sleep Timer – – : – –
Wake-up-time – – : – –
Wake-up-prog TV 1 ARD
Select
ɶ
ʺ
Change OK
Exit
Ǻ
3
2
1
Ǻ
Convenience Functions
ķ
15
Page 16

r
Locking all programmes
Press the Obutton.
Enter the four digit code number with the numeric
buttons
1…0
.
Confirm with the
O
button.
Select the function » Lock all programmes « with
button
|
or ].
Select » yes « with button
x
or cto lock all pro-
grammes.
If you want to enter a switch-off time, press the
|
button and select the line » from – –:– – «.
Confirm with the
O
button.
Enter the four digit switch-off time with numeric
buttons
1…0
(e.g. 845= 08:45).
The set switches off automatically when the switching-off time entered has been reached. On switching on again the table below appears.
It is only possible to continue to watch the television when the previously stored code number is
entered.
Switch to television mode with the
.
button.
9
GRUNDIG Security
Security Code
n
– – – –
Programme locked !
Enter 0-9
Ǻ
8
7
6
GRUNDIG Security/timer
Security Code 1111
Lock programmes unfit
for children no
Lock all programmes yes
from – – : – –
Wake-up-time – – : – –
Wake-up-prog TV 1 ARD
Select
ɶ
ʺ
Change OK
Exit
Ǻ
5
4
3
2
1
r
Entering switch-off time (Sleep Timer)
Select the function » Sleep Timer « with the
|
button.
Confirm with the
O
button.
Enter the switch-off time with the numeric buttons
1…0
.
Confirm with the
O
button.
Ń
!
The set switches to stand-by at a preset time.
Switch to television mode with the
.
button.
r
Entering switch-on time (Wake-up Timer)
Select the function » Wake-up Timer « (wake-up
time) with the |button.
Confirm with the
O
button.
Ń
!
The channel station which you want to appear
at wake-up time is preselected with the function
» Wake-up Prog « (last line in this menu).
So that the set can switch-on at the preset switchon time, it must be in stand-by mode.
Enter the switch-on time with the numeric buttons
1…0
.
Confirm with the
O
button.
Switch to television mode with the
.
button.
5
4
3
GRUNDIG Security/timer
Security Code – – – –
Lock programmes unfit
for children yes
Lock all programmes no
Sleep Timer – – : – –
Wake-up-Time – – : – –
Wake-up-Prog TV 1 ARD
Select
ɶ
ʺ
Change OK
Exit
Ǻ
2
1
5
4
3
GRUNDIG Security/timer
Security Code – – – –
Lock programmes unfit
for children yes
Lock all programmes no
Sleep Timer – – : – –
Wake-up-time – – : – –
Wake-up-prog TV 1 ARD
Select
ɶ
ʺ
Change OK
Exit
Ǻ
2
1
Convenience Functions
ķ
16
Page 17

r
Calling up » Special functions « menu
Press buttons .and O.
The GRUNDIG-Infocenter is displayed.
Press the cursor button
]
; »Special functions « is
highlighted.
Press the
O
button.
r
Calling up »Settings« menu
Press buttons .and O.
» Volume « is highlighted.
r
Volume
If one channel’s volume deviates from the others
(too loud or too quiet), you can adjust it.
Change the volume with button
x
or c. Only the
volume of the currently selected channel position
will be changed.
r
Colour match
Select the line » Colour match « with the | button.
The line is highlighted.
Change the colour match with button
x
or c.
Only the colour match of the currently selected
channel position will be changed.
Switch back to the TV channel with the
.
button.
3
2
1
1
GRUNDIG Settings
Volume P 1
–I–
Colour match P 1
–I–
Switching on with Programme 1
Pict./sound scale off
MEGALOGIC Info off
Select
ɶ
ʺ
Change < >
Exit
Ǻ
1
GRUNDIG Special functions
Settings
AV settings
IR-Data programmer
MEGALOGIC download
Transmission of TV station table
Service
Select
ɶ
ʺ
Activate OK
Exit
Ǻ
3
2
1
r
Switching on with ...
If you want to frequently use the set as an AV monitor – e.g. with a camera as monitoring system – the
AV channel position can be given priority with this
function. I.e. after switching on, the AV channel
position appears instead of channel position P1.
Select with
|
, change with xor c.
r
Picture/sound scale
Highlight » Pict./sound scale « with the |button.
Select scale displays with button
x
or c, as for
example
– required.
r
MEGALOGIC Info
Information from the respective video recorder
mode can be displayed with MEGALOGIC.
You will be informed – by a brief indication – independently of television operation, which video
recorder function is currently running.
For example: Station table data transmission, playback, recording, fast forward etc.
Highlight » MEGALOGIC Info « with the
|
button.
Choose if indications are required or not with button
x
or c.
If there is no video recorder with MEGALOGICfunctions connected, select » off «.
2
1
2
1
1
Special Functions
ķ
17
min...... ........max
Lautstärke
Page 18

r
Calling up » Special functions « menu
Press .and
O
buttons.
The GRUNDIG-Infocenter is displayed.
Press the cursor-button
]
; »Special functions « is
highlighted.
Press the
O
button.
r
AV settings
The menu section » AV settings « is described from
page 19 onwards.
r
IR data programmer/Service
The functions IR data programmer and Service are
only for use by the authorised dealer. The function
Service is protected by a code number.
GRUNDIG Special functions
Settings
AV settings
IR data programmer
MEGALOGIC download
Transmission of TV station table
Service
Select
ɶ
ʺ
Activate OK
Exit
Ǻ
3
2
1
r
Transmission of TV station table to the
video recorder (VCR)
The television is equipped with the MEGALOGIC
system.
This system offers extra operating convenience
with a video recorder.
You can transfer the channel position related
data (stored channel) from the TV set to the video
recorder (VCR).
Programming the channel at the VCR is therefore
unnecessary.
Recordings from the television set can be carried
out straight away.
For this purpose the television set (to socket AV 2)
and video recorder must be connected with a
EURO-AV cable (fully wired).
Highlight » Transmission of TV station table to
VCR « with the
]
button and press the
O
but-
ton.
The statement » Transmission of TV station table «
and channel station number and station code are
displayed.
Television mode is switched to automatically after
transmission.
Special Functions
ķ
18
Page 19

ķ
19
Connection Options and Operation …
r
… for video recorders
The television set is equipped with various sockets.
Various external units – such as video recorders,
cameras, SAT receivers, video cameras etc, – can be
connected, allowing recording, playback, re-recording etc. The respective external unit must be firstly
adjusted to the television set.
The »AUDIO-/VIDEO CONNECTIONS « menu is pro-
vided for this purpose.
It is called u
p as follows
Press the .button and O;
Indication: » Infocenter « menu.
Press the
|
button; » Special functions « is high-
lighted.
Press the
O
button; Indication: » Special func-
tions « menu.
Press the
]
button; Line » AV settings « is high-
lighted.
Press the
O
button; Indication: » AV settings «
menu.
GRUNDIG AV settings
Decoder off
AV 1 SVIDEO
AV 2
AV 3
Identification off
Select
ɶ
ʺ
Change < >
Exit
Ǻ
3
4
3
2
1
AV2
VIDEORECORDER
AV1
RECEIVER / DECODER
ʐ
INPUT-SAT
950...2050MHz
14/18V 0,35A
EURO-AV
AUDIO
Ǻ
r
Video recorder playback
Connection
Video recorder to socket AV2.
Operation
Calling up » AV settings « menu (see above).
Select » AV2 « with button
|
or ](highlighted).
Choose between » Video « and » SVIDEO « with
button
x
or c(depending on connected video
recorder).
Display menu with the
.
button.
Start video recorder.
On the screen you will see the recorder playback
and briefly the indication or
.
r
...Video recorder to aerial socket
Program the video recorder playback channel (between 30 and 40) at an unused channel position
(e.g. P16) as described in the Chapter » Manually
allocating channel positions «.
Turn the channel adjuster on the back of the video
recorder to the left or right (see video recorder
operating manual), until the picture from the video
recorder appears on the television screen.
Only use the ATS-search or the automatic search
when the video recorder playback channel is set to
mid-channel (fine tuning 0).
AV 2 SVIDEO
AV 2 VIDEO
3
2
1
Page 20

ķ
20
Connection Options and Operation …
r
… for camcorders
(VHS, Video 8)
The cinch AV sockets are located behind a cover
(opening see » Headphones « page 9).
Connecting the picture signal
Connect the VIDEO IN socket (yellow) with suitable
cable with the appropriate picture socket of the
camcorder.
Connectin
g the sound signal
Connect socket L (white) AUDIO IN R (red) with the
camcorder sound sockets. With mono playback,
the L AUDIO IN socket should be connected with
the appropriate camcorder sound socket.
Operation
Call up » AV settings « menu (see page 19).
Select AV 3 and set » auto «.
If interference occurs select » off «.
Cancel menu with the
.
button.
Start camcorder playback.
The camcorder playback can be seen on the screen.
3
GRUNDIG AV settings
Decoder off
AV 1 SVIDEO
AV 2
AV 3
Identification autom.
Select
ɶ
ʺ
Change < >
Exit
Ǻ
2
1
P
Ǻ
r
… for S-VHS video, S-VHS camera or Hi8
camcorders
Connection
Camera to socket AV 2.
Call up » AV settings « menu (see page 9).
Select AV 3 and choose » SVIDEO «.
Display menu with the
.
button.
Start camcorder playback.
You can see the camcorder playback on the screen.
2
1
AV2
VIDEORECORDER
AV1
RECEIVER / DECODER
ʐ
INPUT-SAT
950...2050MHz
14/18V 0,35A
Page 21

Connection Options and Operation …
ķ
21
r
… for satellite receivers
Connection
SAT receiver to socket AV1.
Operation
Call up channel position AV1.
Switch on SAT receiver.
Keep the
¢
SAT button pressed down and enter the
required satellite receiver channel position with the
numeric buttons 0…9.
The set is prepared for satellite reception. The
SER 6350 Module is provided for retro-fitting. Ask
your authorised dealer.
Ǻ
2
1
AV2
VIDEORECORDER
AV1
RECEIVER / DECODER
ʐ
INPUT-SAT
950...2050MHz
14/18V 0,35A
EURO-AV EURO-AV
r
… for descrambler (decoder)
Connection
Decoder at socket AV 1
O
peration
Call up » AV settings « menu (see page 19).
Select » Decoder « and » AV 1 «.
Cancel menu, if selection » Decoder « or » Sound «
is made in the » Settings « menu section, » autom «
(Automatic mode) is always preset (factory presetting).
Normally this does not need to be changed.
With external units which do not meet the technical
requirements for this set, it may be necessary to
reset the device. In this case refer to your authorised dealer.
If you have connected a video recorder to socket
AV 2, the decoder should be connected.
2
1
GRUNDIG AV settings
Decoder off
Settings P 10
Sound autom.
AV 1 SVIDEO
AV 2
AV 3
Identification autom.
Select
ɶ
ʺ
Change < >
Exit
Ǻ
AV2
VIDEORECORDER
AV1
RECEIVER / DECODER
ʐ
INPUT-SAT
950...2050MHz
14/18V 0,35A
Page 22

Connection Options and Operation …
ķ
22
r
… for video recorders,
satellite receivers,
descramblers (decoders)
r
… with several external units
If you have to connect several external units – for
example descrambler, satellite receiver, video recorder – they should be connected according to the
example above.
r
With television satellite reception
Descrambler ɮ satellite receiver ɮ television set
(socket AV 1).
Connect the video recorder to socket AV 2.
r
With television reception via cable
Descrambler ɮ video recorder ɮ television set
(socket AV 1)
Example
You want to record a satellite programme
Operation
Select the desired satellite programme.
» Video « or » S VIDEO « is to be set in line AV2
(depending on the type of video recorder)
Cancel menu.
Start recorder.
3
2
1
Ǻ
If you want to switch the TV set to stand-by or to a
television programme during the re-recording process, you must first call up the AUX-menu and
select from it
» Record on « and confirm with the Obutton.
Now you can watch any channel without interfering
with the recording or you can switch to stand-by to
save energy.
After re-recording reset with » Record off «.
Ǻ
AUX
Headphones
AV AV 1
Record AV 1 › AV2 on
Format Standard 4:3
Select
ɶɶ
ʺʺ
Change < >
Activate OK Exit
ǺǺ
Ǻ
GRUNDIG AV settings
Decoder off
Settings P 10
Sound autom.
AV 1 VCR/SAT
AV 2 SVIDEO
AV 3
Identification autom.
Select
ɶ
ʺ
Change < >
Exit
Ǻ
AV2
VIDEORECORDER
AV1
RECEIVER / DECODER
ʐ
INPUT-SAT
950...2050MHz
14/18V 0,35A
EURO-AV EURO-AV
EURO-AV
AUDIO
VIDEO RECORDER
SAT RECEIVER
DECODER
Page 23

Connection Options and Operation …
ķ
23
r
Re-recording from video recordings via
the television set
You can re-record from:
Video recorder › Video recorder;
Camera recorder › Video recorder;
S-VHS recorder
(FBAS-Signal) › VHS recorder;
From socket … to socket …:
Socket AV 1 › Socket AV2
AV 3-sockets; Front
(FBAS) › Socket AV2
Connections
(according to illustration above)
Playback recorder to socket AV 1
Recording recorder to socket AV 2
Operation
Call up » AV settings « menu (see page 19).
Choose between » Video/SVIDEO «; depending on
the type of recording and the connected set.
Cancel menu with the
.
button.
Start both recorders.
2
1
Ǻ
AV2
VIDEORECORDER
AV1
RECEIVER / DECODER
ʐ
INPUT-SAT
950...2050MHz
14/18V 0,35A
EURO-AV
AUDIO
EURO-AV
AUDIO
Ń
!
If you want to switch the television set to stand-by
or to a television channel, you must firstly call
up the AUX-menu with the
-
button and select
» Record on « from it.
Now you can watch any channel without interfering
with the recording or you can switch to stand-by to
save energy.
After re-recording reset with » Record off«.
r
Connecting for re-recording from
camcorder ɮ video recorder
Ń
!
Connections for the camcorder see fig., page 22.
Connect recorder to socket AV 2.
O
peration
Call up » AV settings « menu (see page 19).
Select » Identification « and set » autom «.
Select » AV2 « and choose » SVIDEO « or » Video «.
(Depending on the type of recording and connected
device.)
Ń
!
Continue as in the example above.
Amongst others Record AV 3 › AV 2 are in the
AUX-menu.
3
2
1
AUX
Headphones
AV AV 1
Record AV 1 › AV2 on
Format Standard 4:3
Select
ɶɶ
ʺʺ
Change < >
Activate OK Exit
ǺǺ
GRUNDIG AV settings
Decoder off
AV 1
AV 2 SVIDEO
AV 3
Identification autom.
Select
ɶ
ʺ
Change < >
Exit
Ǻ
Page 24

Technical Data
ķ
24
r
Mains voltage:
220 - 240 V, 50/60 Hz
(Control range of the power supply unit 190 … 264 V)
Ń
!
» The set may only be operated with the mains
cable set provided. It prevents interference from the
mains and is integral to the set’s approval.
Only order the mains cable set with designation
GWN 9.22/Order number 8290.991-316 for auxiliary purposes «.
r
Power consumption:
Approx. 80 W
In stand-by mode 8 W
r
Reception range:
C01 … C99
Special channels S01 … S41
Ń
!
The set is prepared for satellite reception. The
SER 6350 Module is provided for retro-fitting. Refer
to your authorised dealer.
r
Maximum sound output:
2 x 15 W music output (2 x 7.5 W sinus)
r
Service instructions for authorised
dealers:
The set complies with the VDE safety regulations
and the directives of the German Federal Post Office
(for approval mark see type label on the rear of the
set), and in addition the directive for protection
from X-ray emissions. The picture tube, which
emits X-rays, is sufficiently shielded and therefore
represents no danger. Max. accelerating potential
27 kV/mean beam current 1.5 mA.
Unauthorised alterations, particulary alterations to
the high voltage system or installation of another
tube type, can result in significant emissions of
X-rays. A set modified in this way no longer complies with their approval and must not be operated.
Subject to alterations. No liability for
errors!
r
Pin assignment of EURO-AV socket
If you want to connect additional units to the television set (e.g. computer, amplifier system), your
authorised dealer can create a standard connection
with the following connection table:
Pin Signal
11 = Audio output right
12 = Audio input right
13 = Audio output left
14 = Audio earth
15 = Blue earth
16 = Audio input left
17 = RGB blue input
18 = Switching voltage
19 = Green earth
10 = MEGALOGIC data line
11 = RGB green input
12 = –
13 = Red earth
14 = Earth
15 = RGB red input
16 = RGB switch voltage
17 = Video earth
18 = RGB switch voltage earth
19 = Video output
20 = Video input
21 = Shielding/earth
21
220
119
Page 25

GRUNDIG AG ••D-90762 FÜRTH Printed in Germany
0 1 2 3 4 5 6 7 8 9
 Loading...