

Page 1
ENGLISH
2
Detailed instruction manual
You can find the detailed
instructions at www.grundig.
de under “Service”.
2 EU directives
3 About your TV set
3 Intended use
3 Safety
4 Environmental information
5 Packing contents
6 Setting up or hanging
7 Connections
8 Control elements
9 Inserting batteries into the remote
control
9 Setting up the TV set
9 Adding new TV stations at a later
point
9 Sorting TV stations in the channel list
10 Remote control
11 Favourites lists
11 Zapping function
11 HbbTV
12 Media player
12 SMART inter@ctive TV 4.0
12 Web browser
13 Product data sheet
14 Licence
14 Cleaning the TV set
14 Abbreviations
Table of Contents
EU directives
This product complies
with the following EU
directives:
1999/5/EC, 2014/30/EC, 2014/35/
EC, 2009/125/EC, 2010/30/EU and
2011/65/EU.
TV’s wireless system can only be used in
the countries below.
AT, BE, BG, CH, CY, CZ, DE, DK, EE, ES, FI,
FR, GB, GR, HU, IE, IS, IT, LI, LT, LU, LV, MT,
NL, NO, PL, PT, RO, SE, SI, SK, TR.
This device can also be operated in the
countries outside Europe.
Page 2
3
ENGLISH
About your TV set
7
With your TV set, you can receive and
watch digital TV programmes over
DVB-S, DVB-T and DVB-C, along with
analogue TV.
7
Many features of the TV set require
an Internet connection. The TV set is
equipped with WLAN and a LAN port.
7
You can connect various data media, for
example, an external hard drive, a USB
memory stick or a digital camera to the
USB sockets. Using the file browser, you
can then select and play the file formats
you want (for example, MP4, MP3 or
JPEG data).
Intended use
7
The TV set is designed for use in dry
rooms.
7
Use the TV set with the supplied stand or
a suitable VESA bracket.
7
The TV set is primarily intended for the
playback of TV programmes, streaming
content and audio/video material from
external devices. Any other use is strictly
prohibited.
It is not intended as an information
display or for predominant use as a
computer monitor. If a still image or a
non-full-format image is displayed for
an extended period, visible traces may
remain on the screen for some time.
This is not a defect that can be used as
the basis for a warranty claim.
Safety
WARNING
Risk of electrical accident
7
Do not open the TV set. Safety risk may
arise and also the guarantee of the
product can be void if the television set is
opened.
7
The TV set can only be operated with
the power cable or the AC/DC adapter
supplied with the product.
7
Do not operate the TV set with a
damaged power cord/AC/DC adaptor
(if supplied).
7
If the plug on the TV set has an earthing
contact, only insert the plug into a socket
with an earthing contact.
7
Plug the TV set into the mains socket only
after you have connected the external
devices and the antenna.
7
Protect the TV set from moisture. Do not
place any vessels filled with water (such
as vases) on the TV.
Fire hazard
7
To prevent the spread of fire,
keep candles or other open
flames away from this product
at all times.
7
Do not cover the ventilation slots on the
TV set.
7
Always unplug the power plug and
antenna plug during a thunderstorm.
7
Keep candles or other open flames away
from the TV set.
7
Do not expose the batteries to extreme
heat such as sunshine, fire or the like.
7
Only use batteries of the same type
(brand, size, properties). Do not use used
and new batteries together.
Page 3
ENGLISH
4
WARNING
Injuries caused by falling TV set
Never place the TV set on an unstable
surface. The TV set may fall, causing
serious injury, possibly leading to death in
isolated cases.
Observe the following precautions:
7
Only use the manufacturer’s
recommended cabinets or stands.
7
Only use furniture that can safely support
the TV set.
7
Make sure that the TV set does not
protrude beyond the dimensions of the
furniture on which it is resting.
7
Do not place the TV set on tall furniture
(such as kitchen cabinets, bookshelves)
without securely anchoring the furniture
and TV set.
7
Do not place the TV set on fabric or other
materials located between the TV set and
furniture.
7
Instruct children that there is danger
associated with climbing on furniture
when the TV set is to be reached.
NOTICE
Shortened service life due to high
operating temperature
7
Do not place the TV set next to heating
units or in direct sunlight.
7
To ensure adequate ventilation, maintain
clearance of at least 10 cm around the
TV set.
Discolouration of furniture due to
rubber feet
7
Some furniture surfaces may discolour
when they come in contact with rubber.
To protect furniture, you can place a
sheet made of glass or plastic under the
stand. Do not use textile underlays or
mats such as doilies.
Electromagnetic noise
7
Devices connected to the product (satellite
receiver, DVD player, and etc.) or signal
emitting devices (router and etc.) close to
the product may cause disturbance in the
image and noise in the sound.
7
Connection cables used on the product
must be shorter than 3 m.
7
If the product cannot perform its function
due to electrostatic discharge, the user
may need to switch off and then switch
on the product.
7
A shielded, HDMI-certified and ferrite
cable must be used with the product.
Environmental information
7
Do not dispose of batteries in
the household waste. Used
batteries must be returned to
retail stores or public collection points. You
help to protect the environment in this way.
7
Be sure to dispose of packaging
materials for your product separately
according to the guidelines of local
authorities so that they can be recycled in
an environmentally safe manner.
7
If you are not using your TV set for a
while, turn it to standby mode. In standby
mode, the TV set uses very little energy
(≤ 0.5 W).
If you do not use the TV set for an
extended period, turn it off with the
power switch or unplug the power cord
from the socket. If you turn off the device
or disconnect it from the power supply,
the switch-on timer and programmed
recordings will not work.
7
Select a location for the TV set so that
no direct sunlight falls on the screen. This
allows a lower backlight to be selected,
which saves energy.
7
Do not dispose of the product
along with normal household
waste at the end of its service
life. Take it to a recycling centre for
electrical and electronic equipment.
Page 4
5
ENGLISH
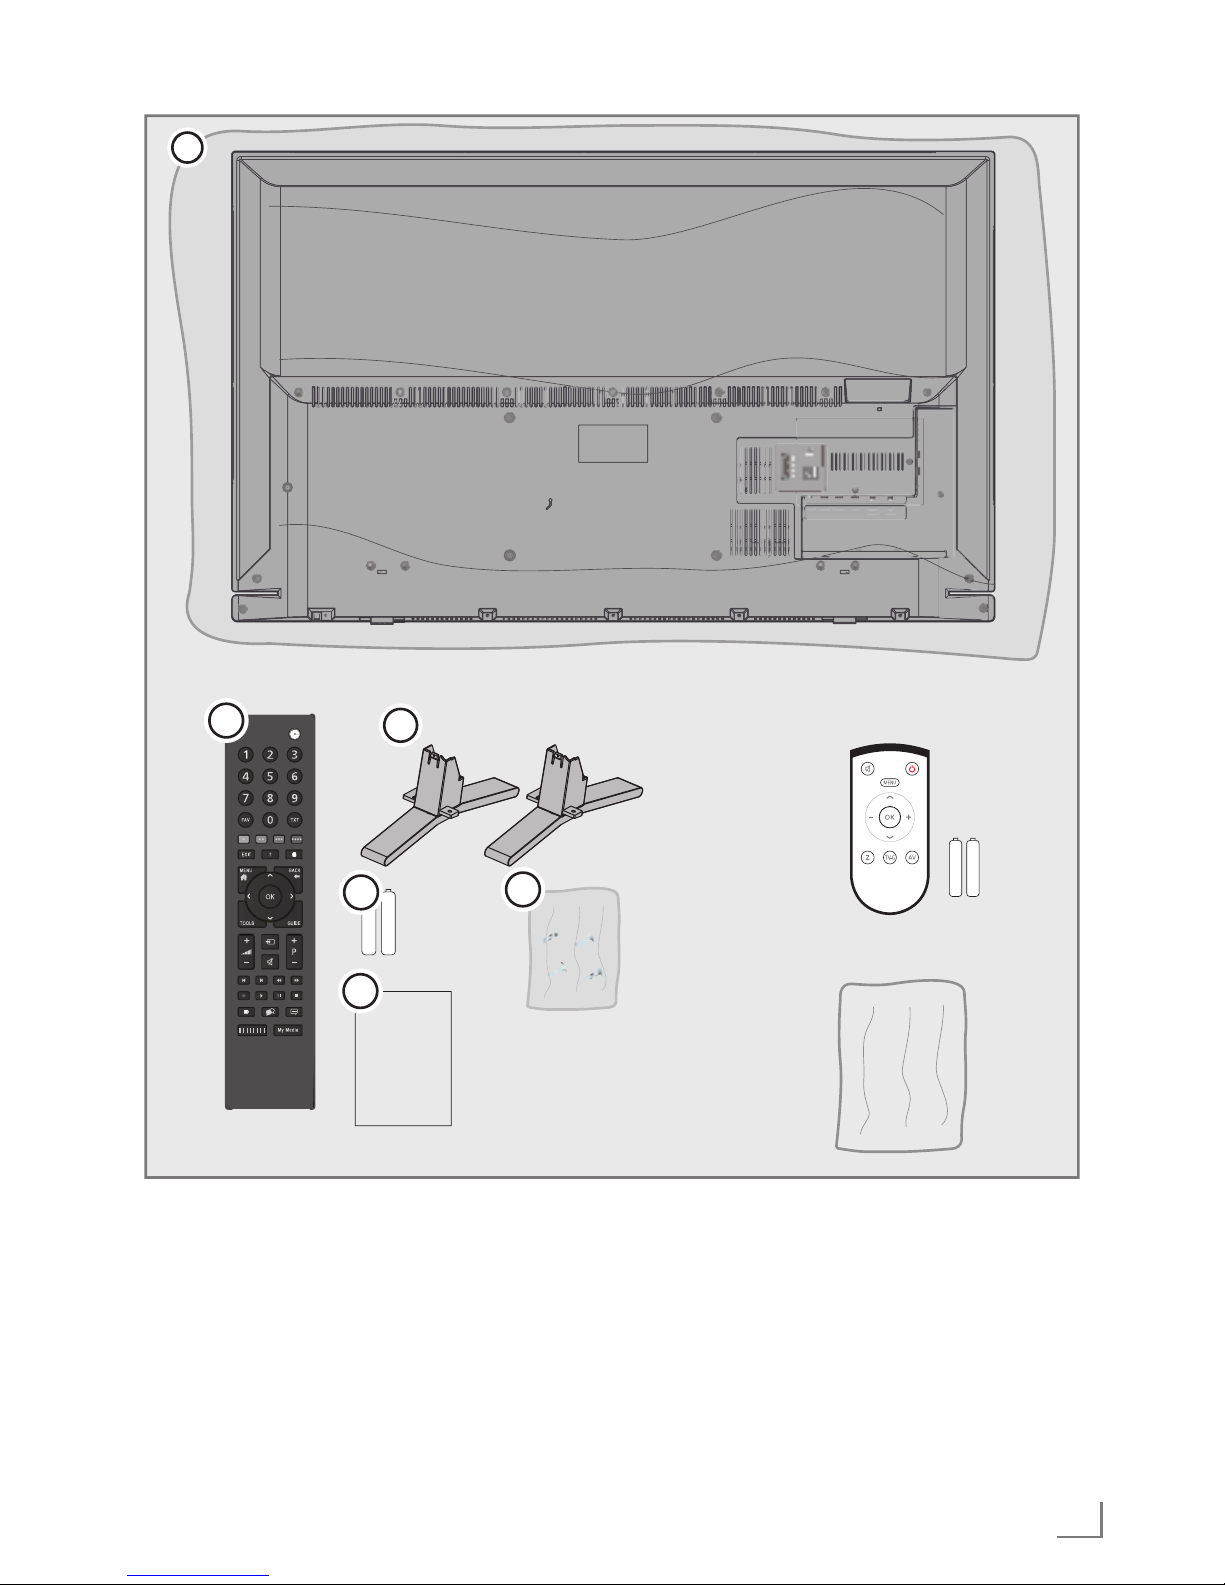
Packing contents
4
2
5
1
3
6
User
Manual
Standart accessory
1. TV
2. Stand
3. Remote control
4. Batteries for remote controls
5. Screws and mounting instructions
for stand
6. Brief Instruction
Optional accessory
Easy-Use Remote Control
Batteries for Easy-Use remote controls
Cleaning cloth
Screws for VESA bracket
Page 5
ENGLISH
6
Setting up or hanging
7
Select a location so that no direct sunlight
falls on the screen.
Setting up with stand
7
To mount the stand, refer to the
installation instructions included.
7
Place the TV set on a hard, level surface.
Preparing for mounting on
the VESA bracket
You will need:
7
A pair of scissors,
7
A crosstip screwdriver.
Follow the installation instructions for the
VESA bracket.
1. Place the TV set in the film on a smooth
surface with the screen facing down.
2. Cut open the film on the back side
using the scissors.
3. Connect the required cables to the
connectors on the TV set. See the
“Connections” section in this manual.
4. Tie the cables so they do not hang
down onto the floor.
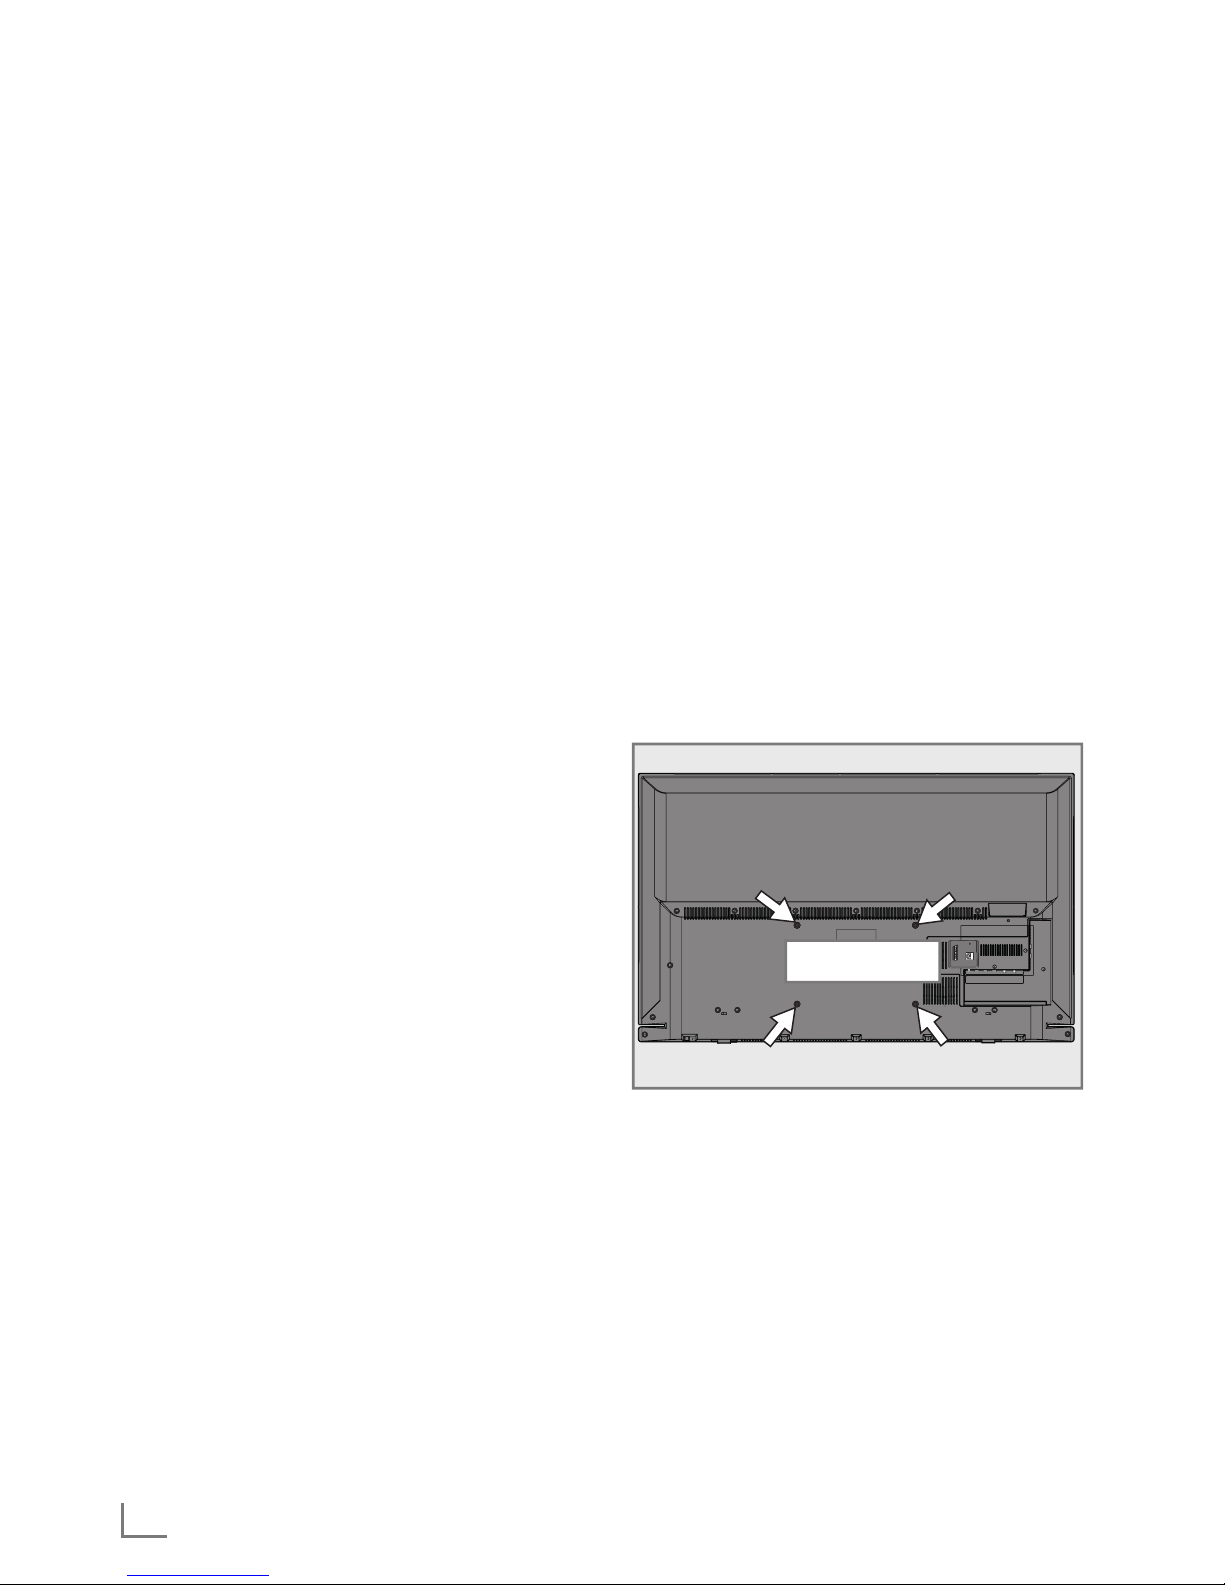
5. Screw the VESA bracket onto the TV set
and mount it according to its installation
instructions.
AV / S-VHS/COMPONENT
SERVICE
SATELLITE
13/18V
max. 500mA
ANT-IN
5V
max. 50mA
Optic Out USB(HDD)
HDMI3(ARC)
HDMI2
LAN
VESA
Page 6
7
ENGLISH
Connections
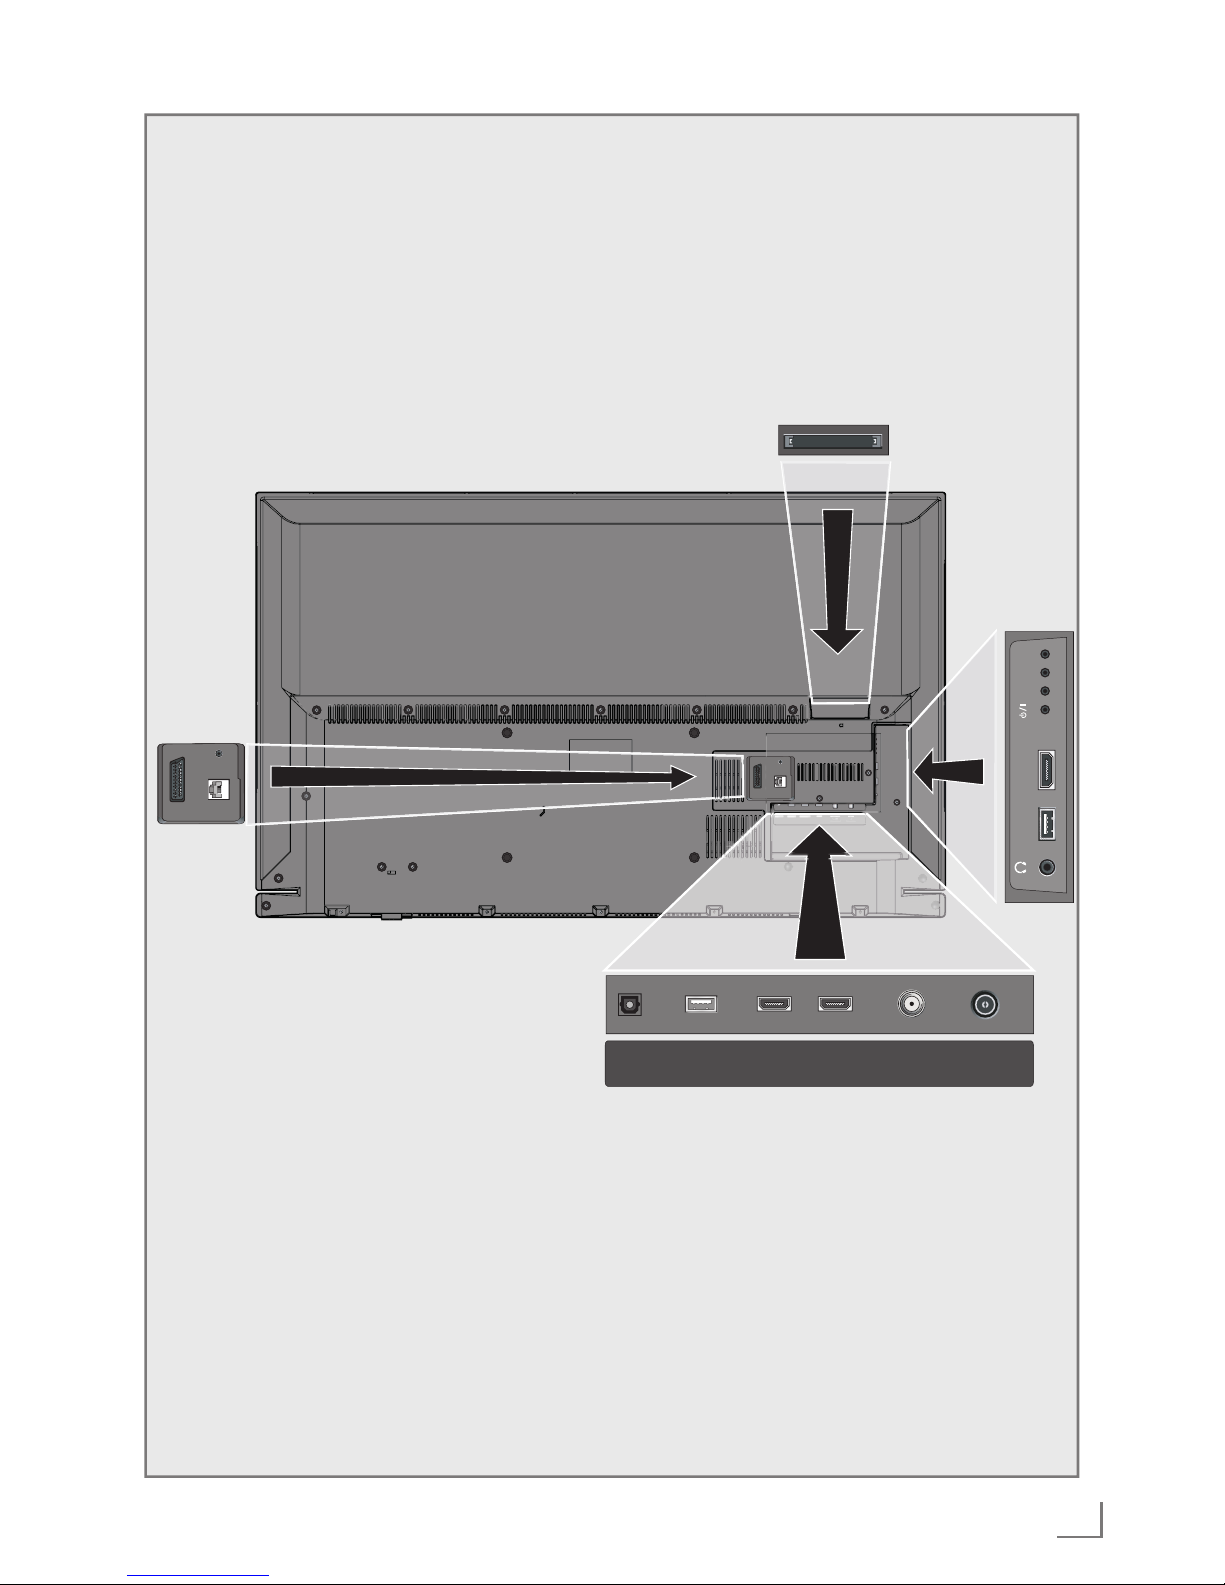
AV / S-VHS/COMPONENT
SERVICE
LAN
AV / S-VHS/COMPONENT
SERVICE
LAN
ANT-IN
5V
max.50mA
Optic Out SATELLITE
13/18V
max.500mA
HDMI2HDMI3(ARC)USB(HDD)
USB1 HDMI1 +V/P-
Page 7
ENGLISH
8
7
LAN: Network connection
7
AV / S-VHS / COMPONENT:
SCART socket, audio/video input and
output
S-VHS socket, audio/video input for
S-Video camera using a SCART-S-VHS
adapter cable.
Component socket, audio/video input
(YUV signal) using a SCART-YPbPr
adapter cable.
7
SERVICE: Service only.
7
Optic Out: optical audio output
7
USB(HDD): connect data media as an
external hard disk.
7
HDMI3 (ARC): Input for digital audio
and video data with audio return channel.
7
HDMI2: Input for digital audio and im-
age data.
7
SATELLITE: for satellite antenna.
Suitable for single-cable GSCR system.
7
ANT IN: for antenna cable (terrestrial
antenna or cable connection).
7
U: Headphone jack or line output via
adapter.
7
USB1: for data media or keyboard.
7
HDMI1: Connect input for digital audio
and video data, mobile devices with
Mobile High-Definition Link here.
7
CI: for CA modules for receiving en-
crypted stations.
Control elements
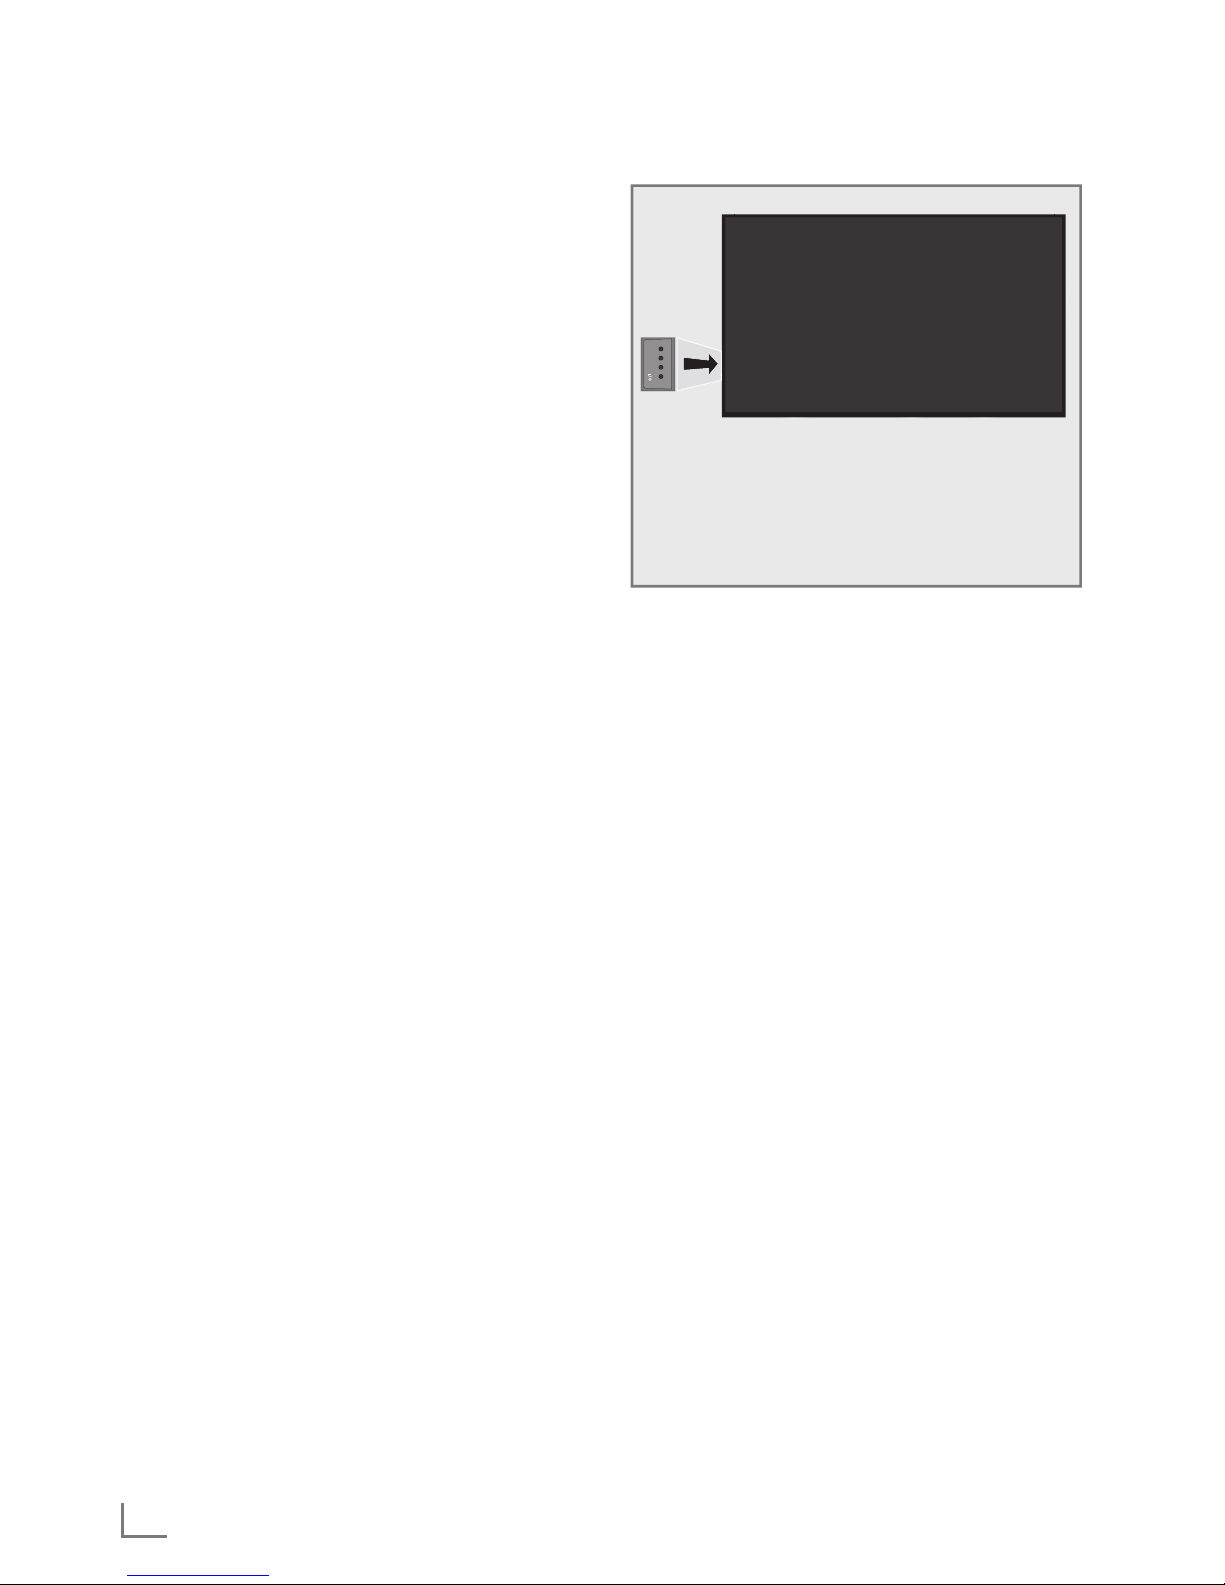
7
V/P: Multi-function switch
+V/P-
Multi-function switch
Switching on the TV
1. 8/I Switches the television on and back
into standby mode.
Turning the TV to standby
1. Press the multi-function switch.
2. Rock until “Switch to standby” is
selected.
3. Press.
Adjusting the volume or
changing the station
1. Press the multi-function switch.
2. Rock to select the required function.
3. Press.
4. Rocking now performs the selected
function.
Page 8
9
ENGLISH
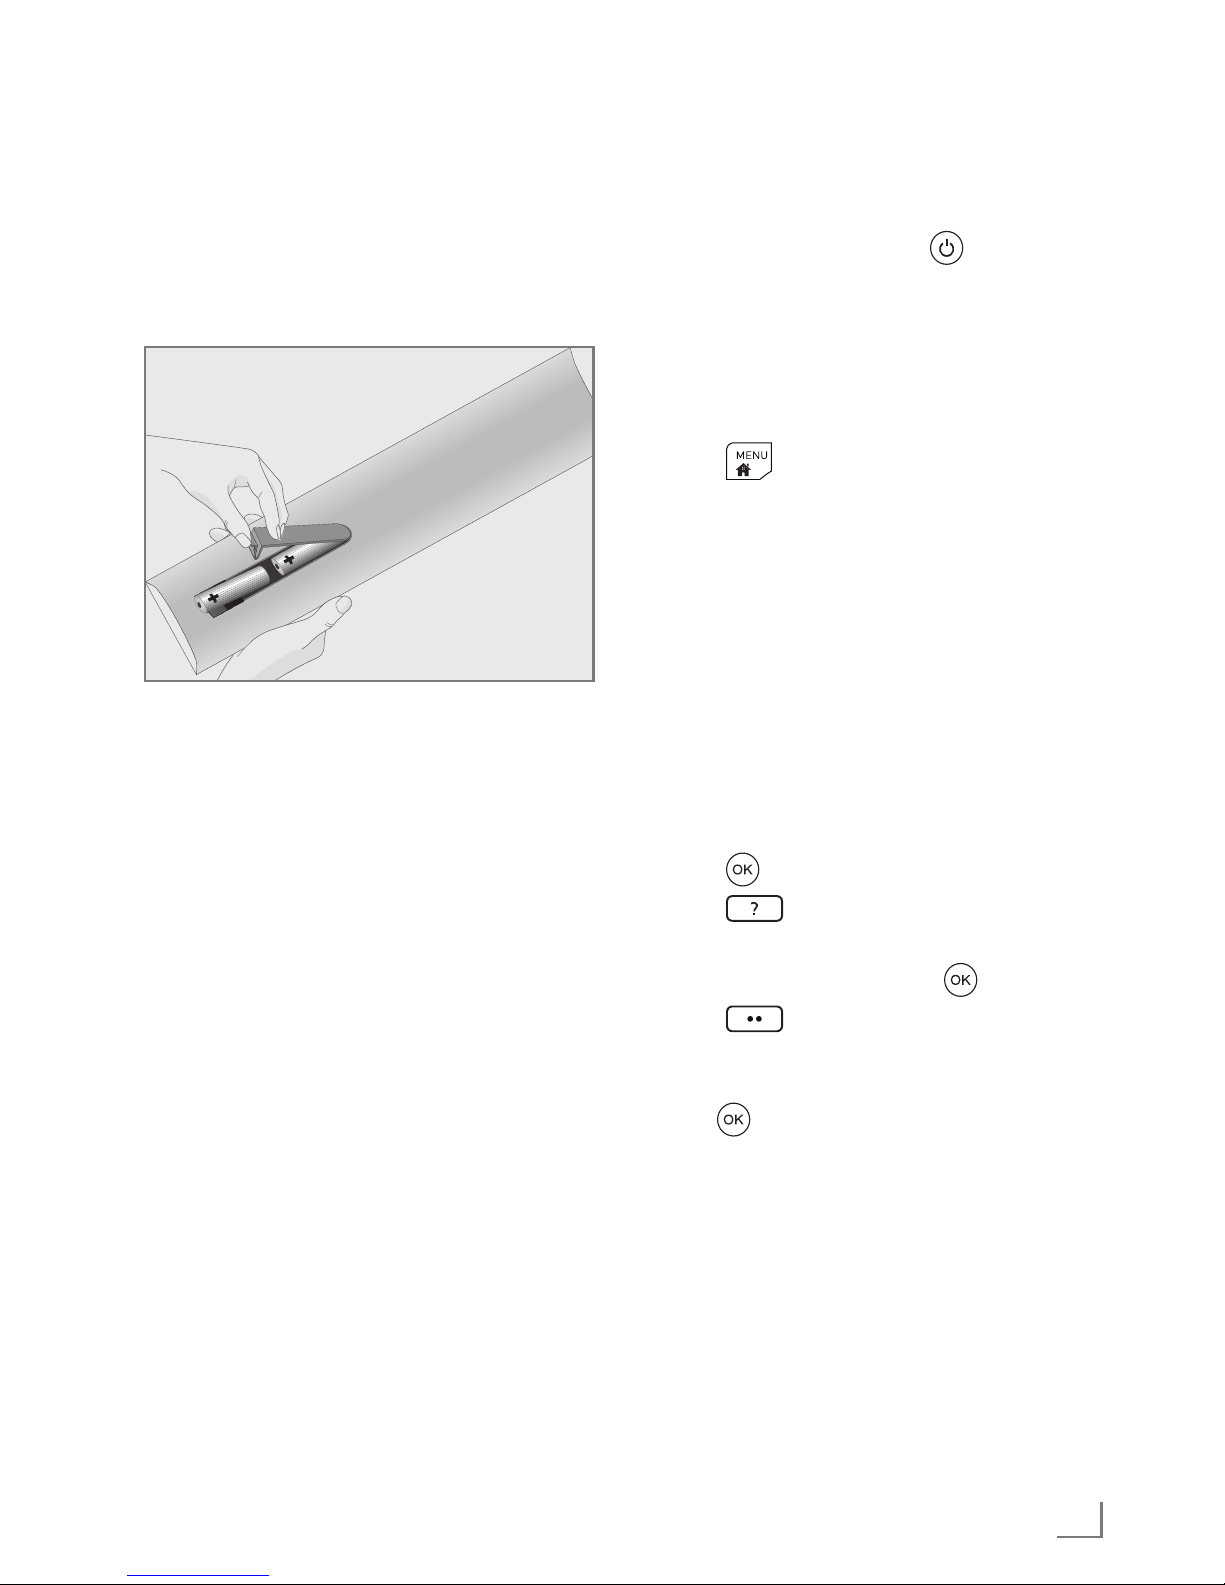
Inserting batteries into the
remote control
1. Open the battery compartment.
2. Insert batteries as marked on the
bottom of the battery compartment
(2 × Micro/R03/AAA).
3. Close the battery compartment.
Setting up the TV set
1. Connect the cables.
2. Insert the power plug into the socket.
3. Switch on the power switch.
4. Switch on the TV set with
on the
remote control.
5. Follow the setup wizard on the screen.
Adding new TV stations
at a later point
1. Press .
2. Select »Settings«.
3. Select »Source«.
4. Select »Automatic Channel Search«.
5. Select the antenna type.
6. The next procedure depends on the
selected antenna. Follow the instructions
on the screen.
Sorting TV stations in
the channel list
1. Press .
2. Press
.
3. Choose the TV station you want to
move, and highlight it with
.
4. Press
.
5. Use the navigation keys to move the TV
station to the new position and confirm
with
.
Page 9
ENGLISH
10
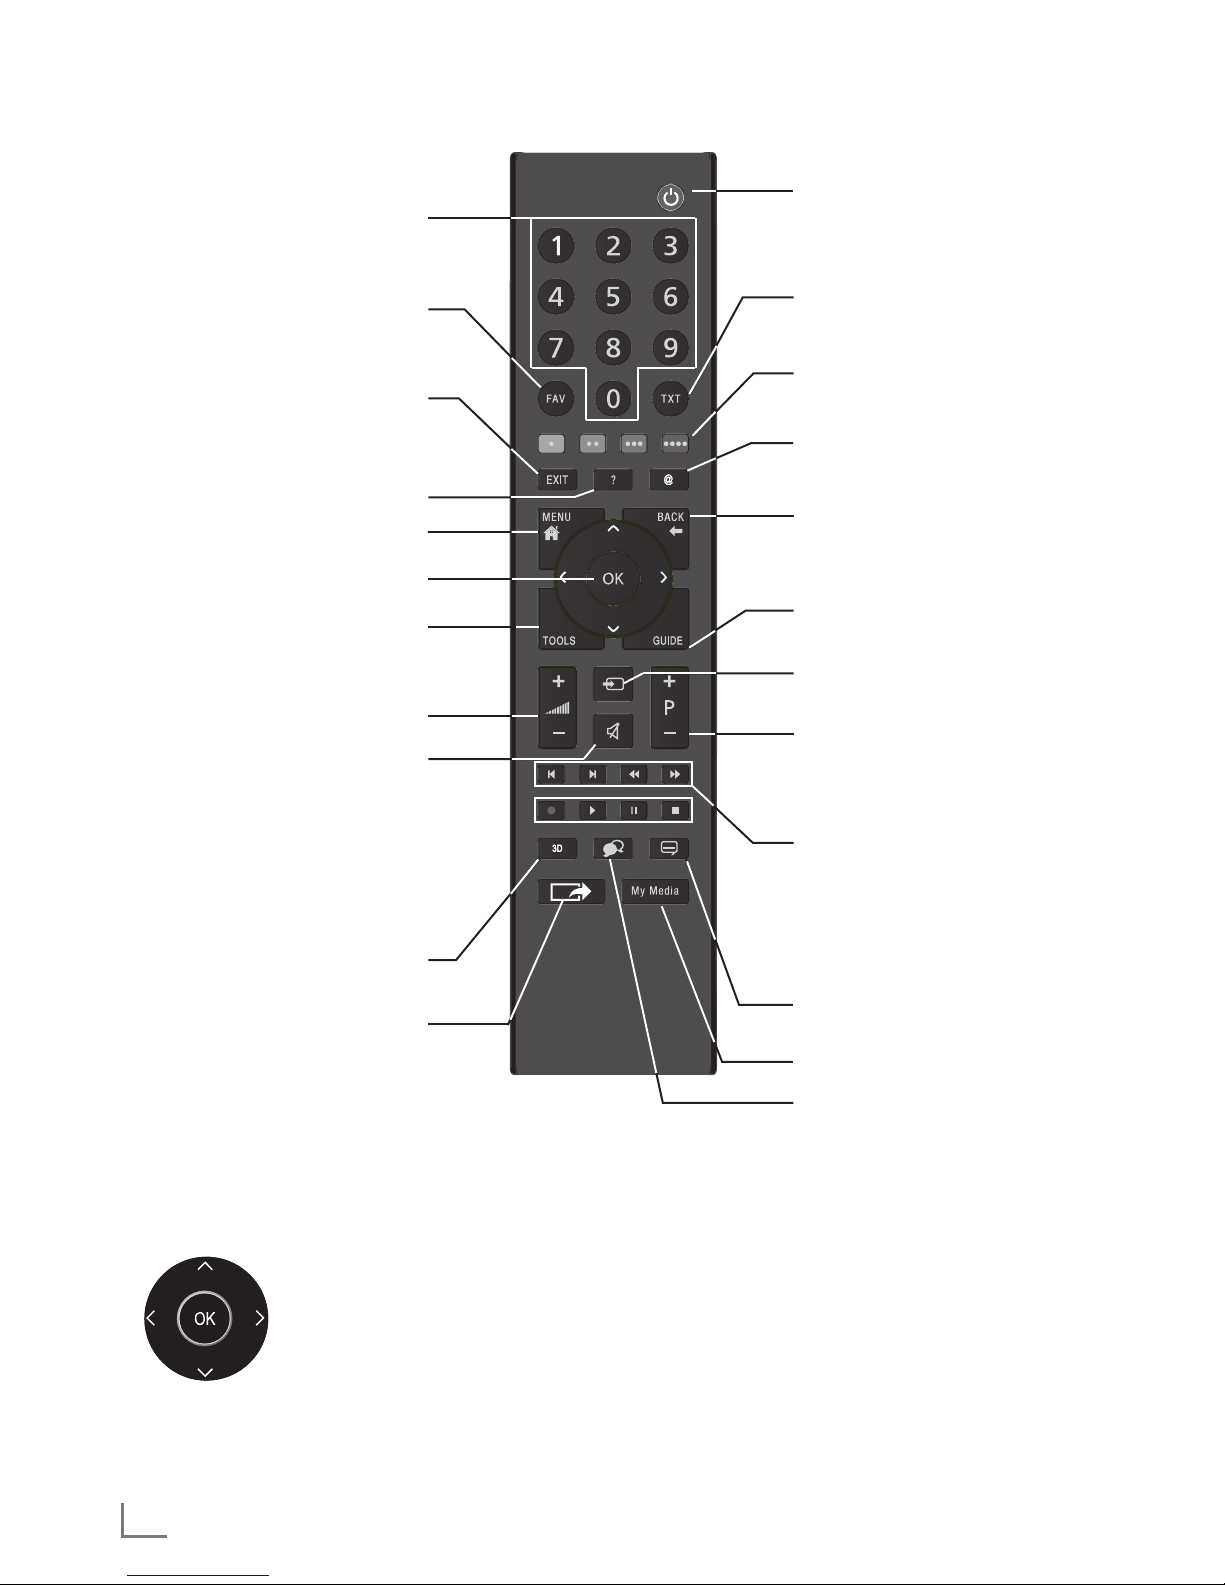
Remote control
Cursor Control
Moves the cursor up and
down in the menus.
Moves the cursor left/right in
menus.
Opens channel list;
activates various functions.
Turns on and off the
television set (stand-by)
Signal source
Turns volume on/off (mute)
Zapping function;
switches the menus back
one menu level
Opens the menu
Opens the Tools menu
Switches between teletext
and TV modes
Opens MyApps menu
Switches on from standby;
selects stations step by step
Adjusts the volume
Displays information
Exits menu and applica-
tions
Opens the channel list
Opens the electronic TV
guide
Switches on from standby
mode;
selects channels directly
Selects the channel list
(»ALL«, »FAV 1« to
»FAV 4«)
Open screen share
No function
Functions according to
the screen help, HbbTV
Opens Media Player menu
Select subtitle
Select audio channel
Next/previous image/
chapter, next/previous
track
Page 10
11
ENGLISH
HbbTV
HbbTV is the interactive successor to
teletext, with content in modern design,
high-resolution images and video
sequences.
For full functionality of HbbTV, the TV must
be connected to the Internet.
After you switch to a TV station that offers
HbbTV, a corresponding message appears.
1. Turn on HbbTV with the colour key
that appears after you switch to the
TV station.
Favourites lists
You can organise TV and radio stations in
favourites lists.
Saving a station to the
favourites list
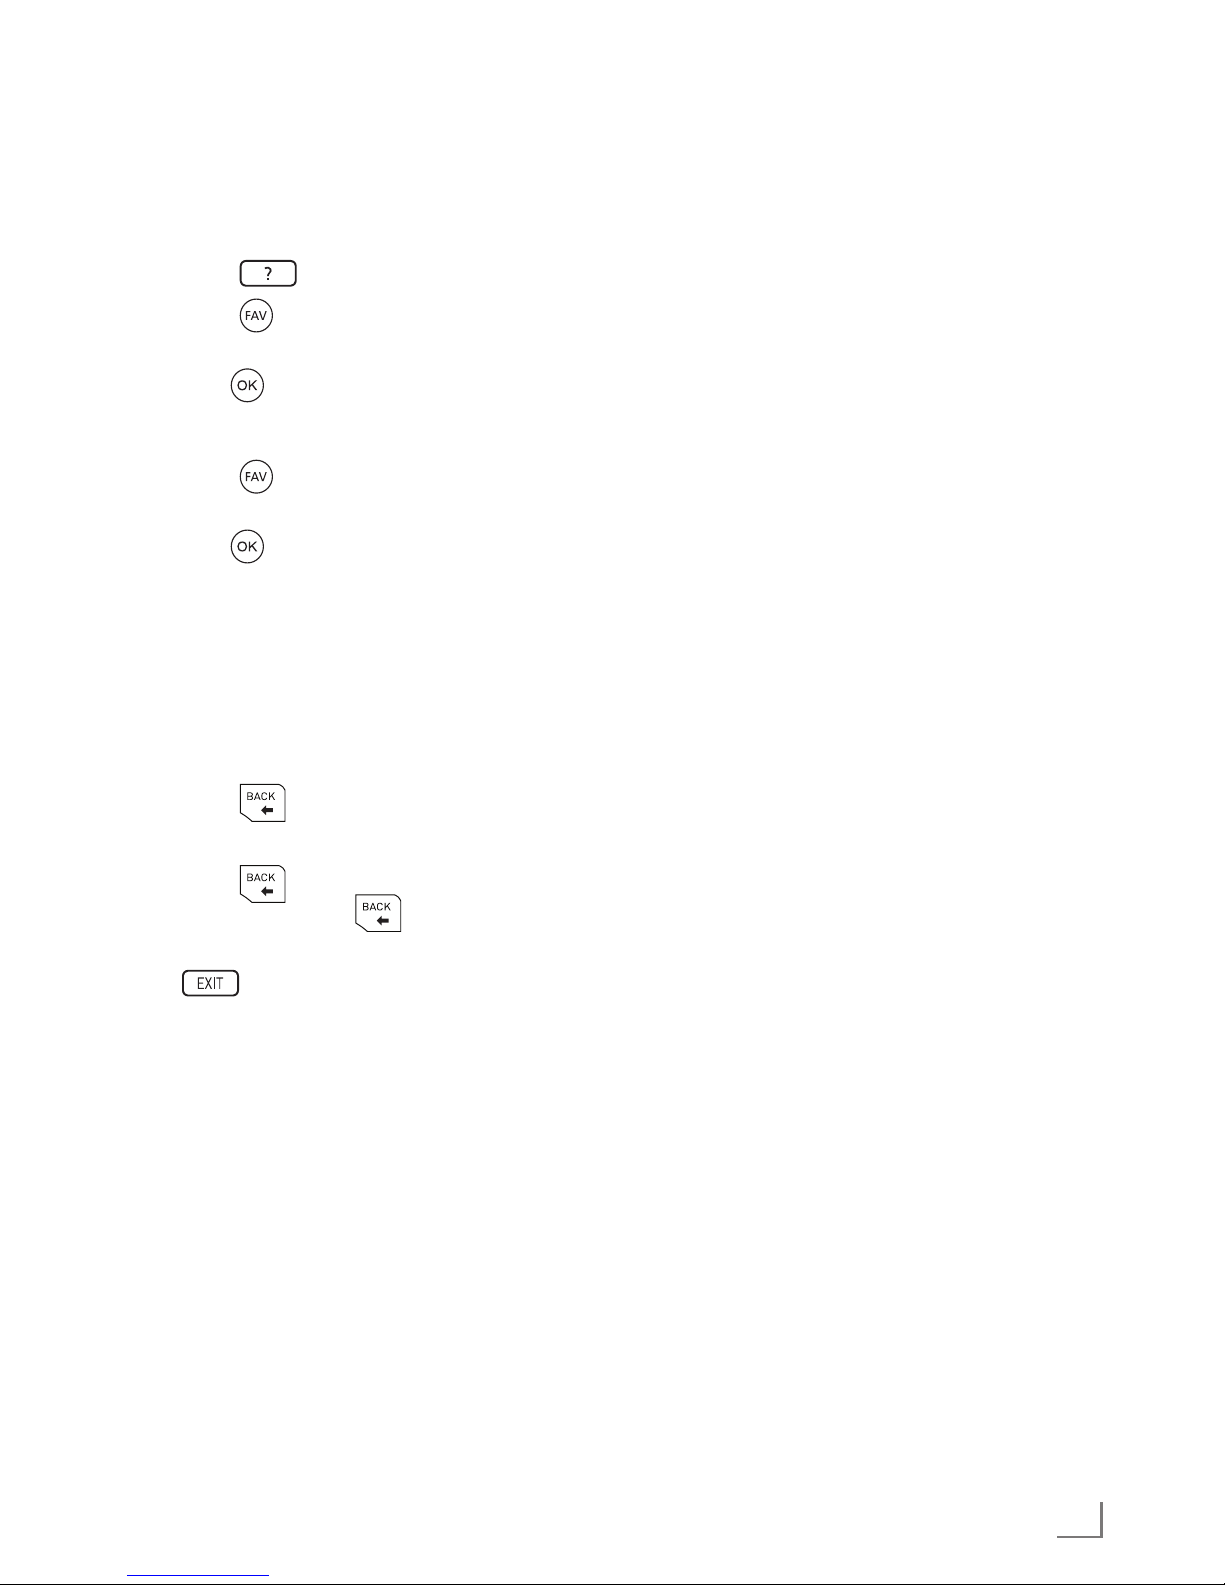
1. Press .
2. Press
.
3. Select the favourites list and confirm
with
.
Opening the favourites list
1. Press .
2. Select the favourites list and confirm
with
.
– Now only stations that are stored in the
selected favourites lists are available.
Zapping function
This function allows you to save a station to
which you want to return during frequent
changes of the station (zapping).
1. Press
to save the current station.
2. Select other stations (zapping).
3. Press
to switch to the
station on which was most recently
pressed.
4.
terminates the function.
Page 11
ENGLISH
12
SMART inter@ctive TV 4.0
SMART inter@ctive TV offers apps that
allow you to conveniently use various
Internet services. Some apps are already
installed on the TV. You can install others
from the GRUNDIG AppLICATION store.
Opening installed apps
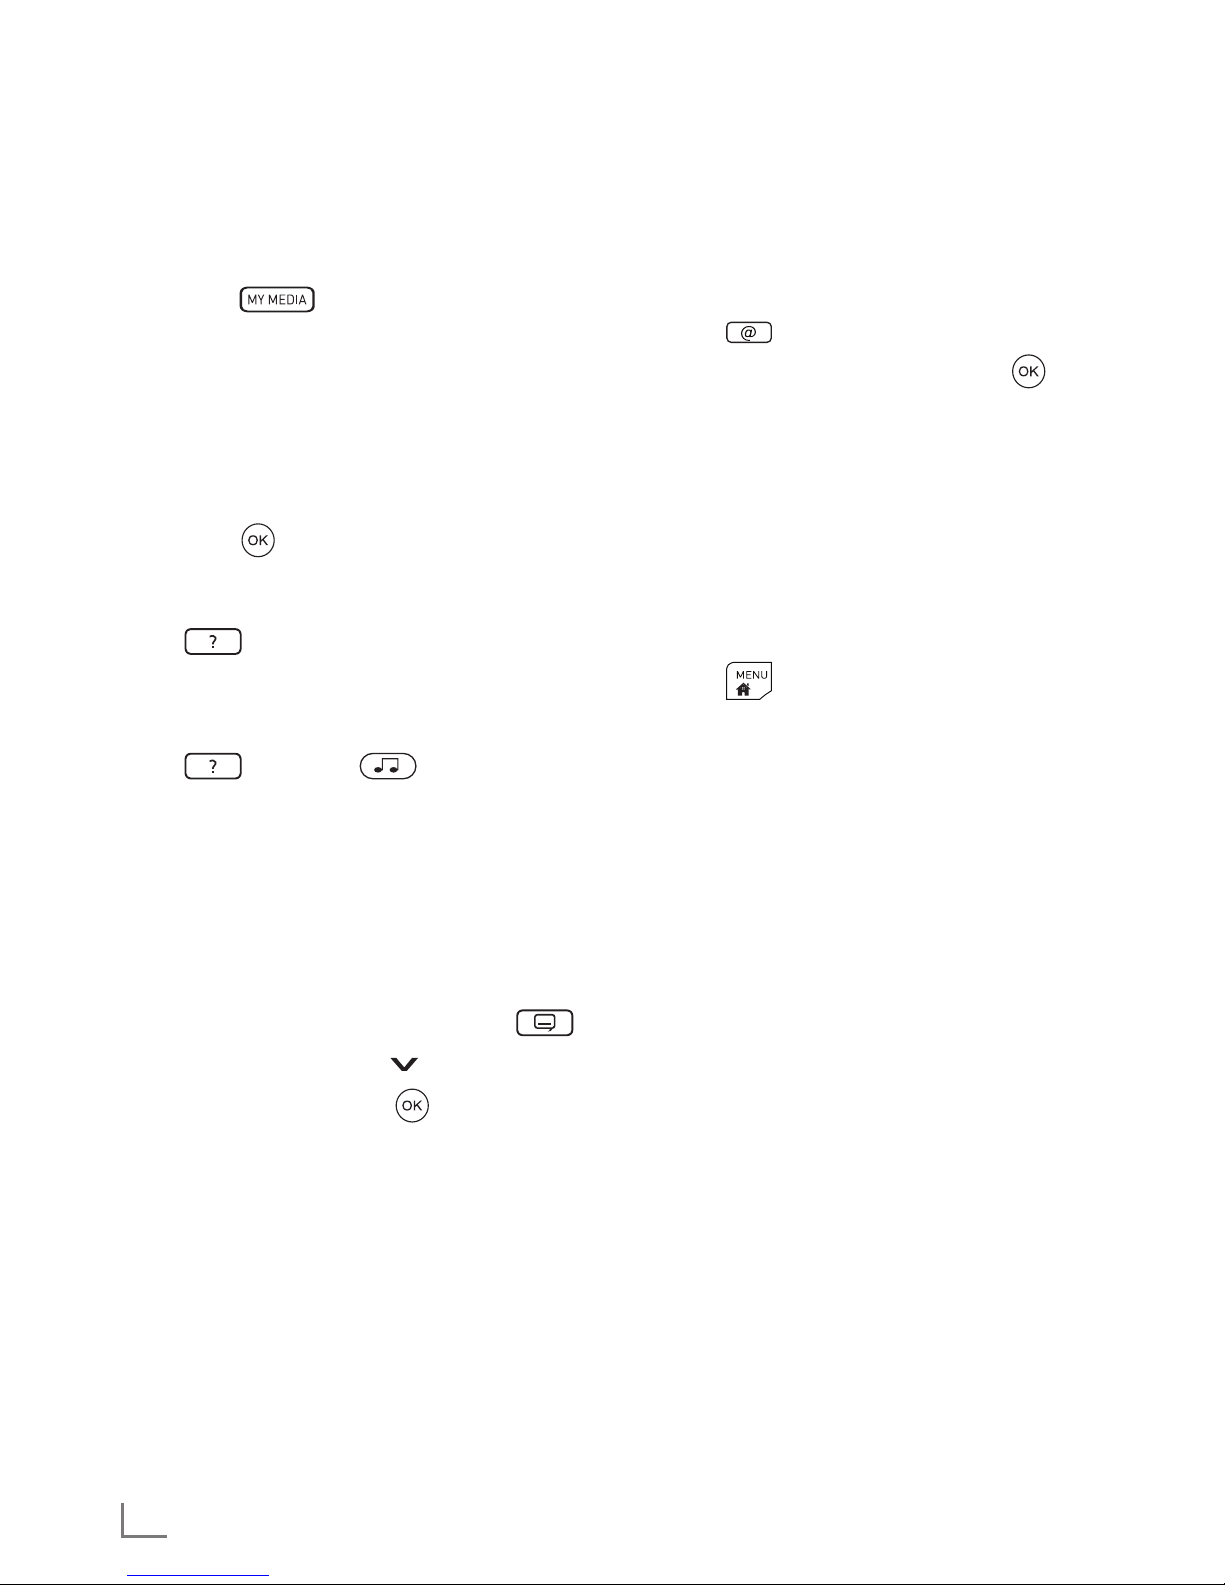
1. Press on the remote control.
2. Select the app and launch it with
.
Opening the GRUNDIG
App
LICATION store
1. In the »My Apps« menu, select the
»Online Store« option on the top right.
Web browser
Launching the web browser
1. Press .
2. On the menu bar, select the »Web
Browser« option.
Media player
The media player displays images and
films and music. Films, music and images
can be stored on a connected USB device
or be provided by a DLNA media server.
Playing media
1. Press .
2. Select media source. To play film on the
external data medium, select »USB«.
3. To display image or music files: Select
on the top left, then »All«, »Music«
or »Photos«.
4. Navigate to the file or recording and
press
.
Tips
7
When playing films and images, press
on the remote control to display
buttons.
7
Music can be played with images.
During the playback of images, press
and select .
7
Films can be played with subtitles. The
file name of the subtitle file must be
identical to the file name of the film file.
Both files must be in the same folder.
Subtitles in the format .SRT, .SUB, .ASS,
.SSA, .SMI are supported.
Turning on the display of subtitles:
1. During playback of a film, press
.
2. Select Subtitles with
.
3. Enable subtitles with
.
Page 12

13
ENGLISH
Product data sheet
Energy efficiency class
A+
Screen diagonal
108 cm/43 inch
Power consumption
Operation 53,1 W/100 W max.
Standby 0,30 W
Networked standby 2,90 W
Annual power consumption
78 kWh
Maximum resolution
1920 × 1080
Additional information
Operating voltage:
220 … 240 V~, 50 … 60 Hz
Screen (dm²)
50 dm²
RoHS limits
Pb (lead)/Hg (mercury)
Pb concentration complies with RoHS limits/
0 mg
Peak luminance ratio
65%
Audio output
2 × 20 W music power
2 × 10 W sine power + 10 W sine power of
the subwoofer
The subwoofer is optional and therefore not
available on all products.
Default satellites
20
LNB power supply
13/18 V, 14/19 V optional, maximum
500 mA
LNB switching signal
0/22 kHz 650 mV +/- 250 mVpp
DiSEqC
1.0-operation, 1.1-operation, 1.2-operation
Digital reception ranges
Satellite
Ku band: 10,700 MHz … 12,750 MHz
Modulation: DVBS QPSK, DVBS2 QPSK,
8 PSK
IF band: 950 MHz … 2150 MHz
Signal level: –25 dBm … –65 dBm
Cable
Overall band: 110 MHz … 862 MHz
Modulation: 16 QAM, 32 QAM,64 QAM,
128 QAM and 256 QAM
Symbol rate: 4.0 Msym/s … 7.2 Msym/s
Terrestrial (DVB-T)
VHF/UHF-Band, bandwidth 7 MHz and
8 MHz
FFT size: 2 k, 8 k
Modulation: 16 QAM, 64 QAM, QPSK
Guard interval: 1/4, 1/8, 1/16, 1/32
Terrestrial (DVB-T2)*
VHF/UHF-Band, bandwidth 7 MHz and
8 MHz
FFT size: 1 k, 2 k, 4 k, 8 k, 16 k, 32 k
Modulation: 16 QAM, 64 QAM,
256 QAM, QPSK
Guard interval: 1/4, 19/256, 1/8, 19/128,
1/16, 1/32, 1/128
* DVB-T2 is optional and therefore not
available on all products.
Analogue reception ranges
C02 … C80, special channels S01 … S41
Preset channels
TV/Radio 6000 (satellite – DVB-S),
1000 (cable – DVB-C)
or 99 (analogue)
1000 (terrestrial – DVB-T) or
99 (analogue)
6 AV, 2 USB
Supported media files
Image files: jpg/jpe, bmp, png
Music files: m4a, aac, mp3, wav
Video files: mov, xvid, mpg, mpe, vob,
dat, trp, ts, avi, mp4, mkv
Weight
approx. 9.6 kg
Dimensions
W × H × D 97 cm × 60,9 cm × 7,6 cm
GRUNDIG 43 GFB 6621
Technical changes and errors reserved.
Page 13
ENGLISH
14
Abbreviations
7
ARC: Audio return channel, transmits
sound from the TV via an HDMI
connection.
7
AV: Audio/video.
7
CAM: Module for receiving encrypted
TV channels.
7
CI: Slot for modules for receiving
encrypted TV channels.
7
DLNA: Organisation that develops
standards for networking home devices
and certifies devices and software.
7
GSCR: Grundig Sat Channel Router.
Technology that allows multiple TVs to be
connected to a satellite antenna using a
single-cable system.
7
HbbTV: Standard for information and
services that are offered with the TV
signal as well as by the Internet, an
additional service offered by some
broadcasting stations.
7
HD: Collective term for high-resolution
audio/video data, usually 720 or
1080 lines.
7
HDMI: Connection for high-resolution
digital audio/video data.
7
MHL: Connection for the transmission of
high-resolution audio/video data from
mobile devices.
7
LAN: local area network.
7
VESA: Organisation that has developed
a standard for the attachment of screens.
7
WLAN: wireless local area network.
Licence
For DTS patents, see http://patents.dts.
com. Manufactured under license from DTS
Licensing Limited. DTS, the Symbol, & DTS
and the Symbol together are registered
trademarks and DTS TruSurround is a
trademark of DTS, Inc. © DTS, Inc. All
Rights Reserved.
For DTS patents, see http://patents.dts.
com. Manufactured under license from DTS
Licensing Limited. DTS, the Symbol, & DTS
and the Symbol together are registered
trademarks, and DTS 2.0+Digital Out is
a trademark of DTS, Inc. © DTS, Inc. All
Rights Reserved.
Dolby, Dolby Audio, and the double-D
symbol are trademarks of Dolby
Laboratories.
Explanation of the symbols
which may be present on back
side of the television set
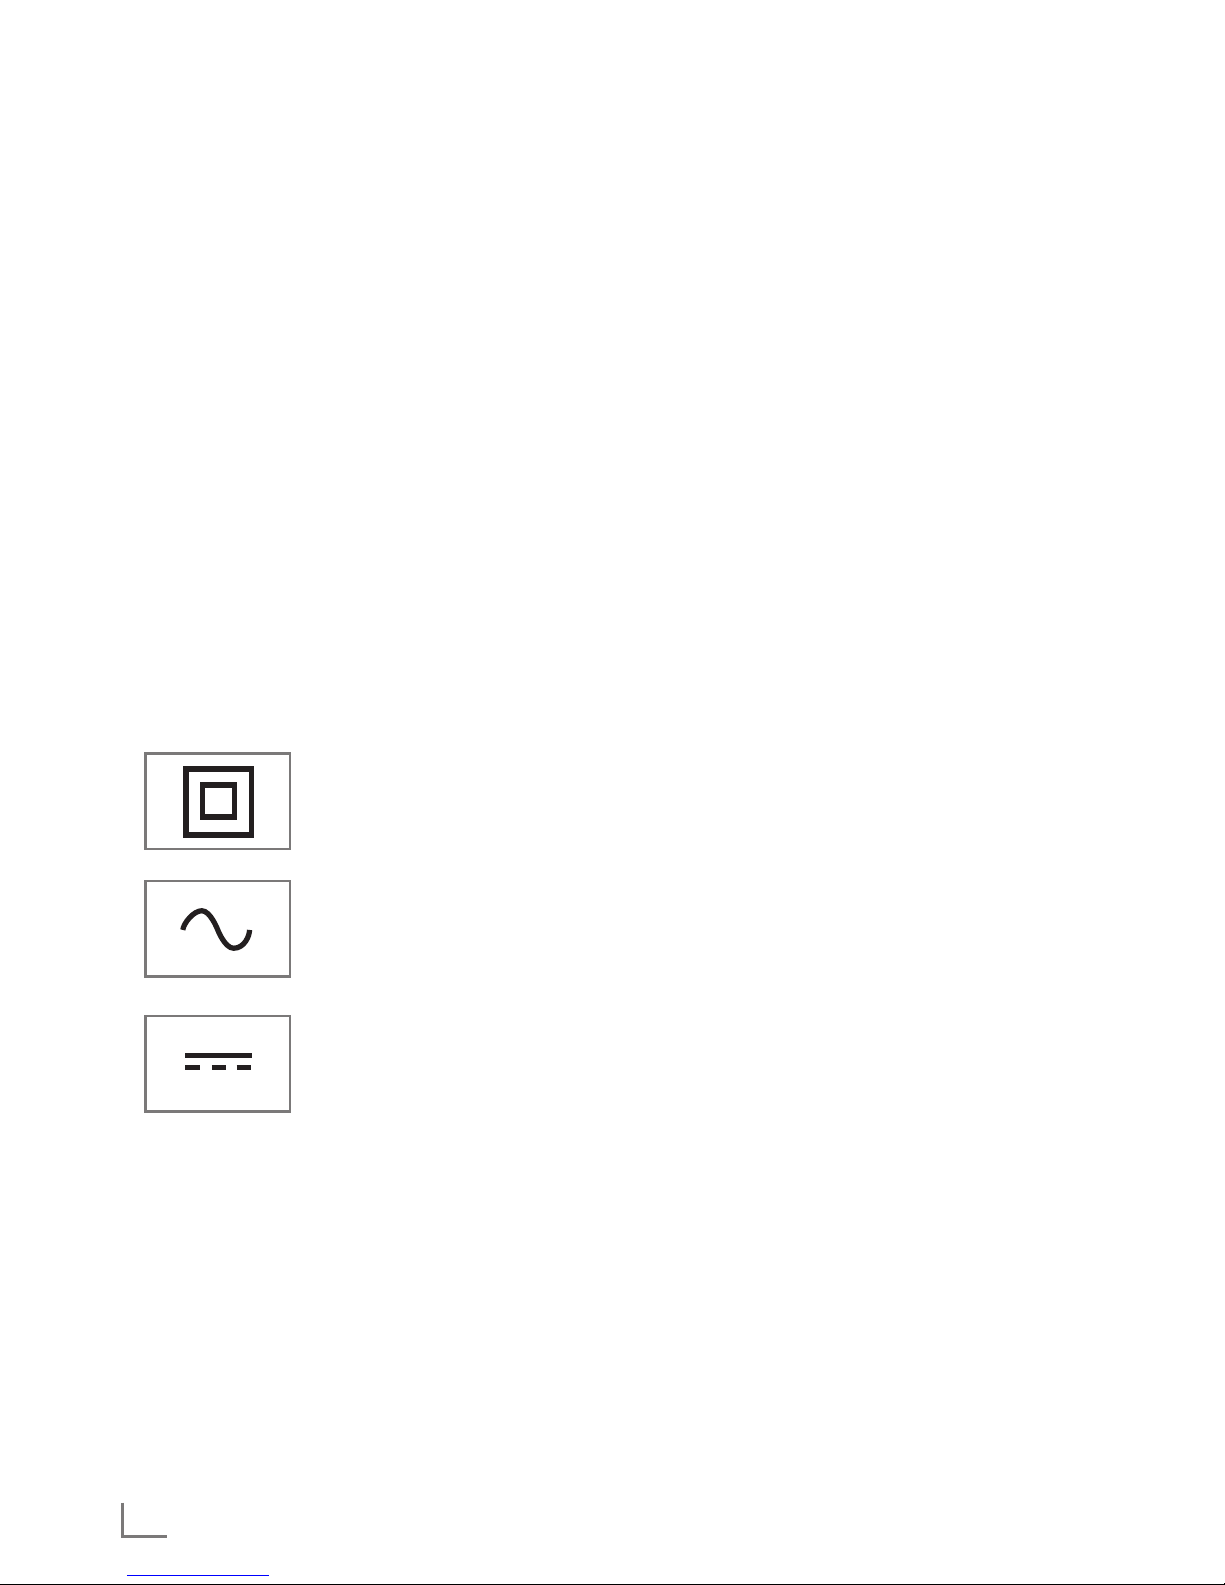
Class II or Double
insulation. Television set
doesn’t require connection
to electrical earth (ground).
Alternating current. The set
works only with AC line
voltage in your household
electricity.
Direct current. The set
works only with AC/DC
adapter.
Network interfaces
This product is intended for connection to
the ADSL network.
Cleaning the TV set
Pull the power cord out of the mains
socket. Clean the appliance with a damp
cloth and a mild detergent. Do not use
any detergents containing alcohol, spirit,
ammonia or scouring agent.
Use a damp, soft cloth to clean the screen.
Do not use water with soap or detergent.
 Loading...