

Grundig 40 LXW 102-8616, 37 LXW 94-8616 User Manual

ǵ
COLOR
TELEVISION
ELEGANCE 37
LXW 94-8616 DOLBY
ELEGANCE 40
LXW 102-8616 DOLBY
DEUTSCH
ENGLISH
FRANÇAIS
ITALIANO
NEDERLANDS
POLSKI

2
CONTENTS
____________________________________________
3-4 Set-up and safety
5-6 Connection/Preparation
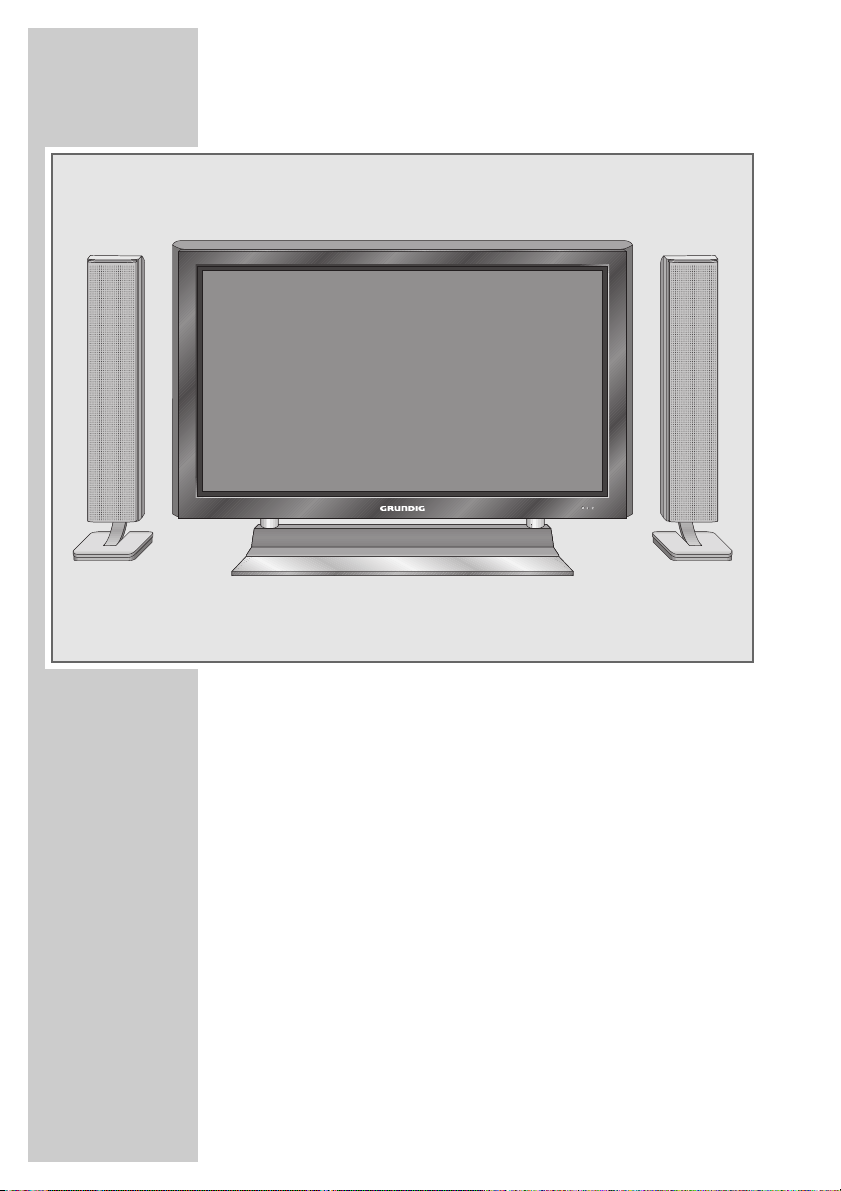
5 Mounting the table base
5 Connecting the loudspeakers
6 Connecting the antenna and the mains cable
6 Inserting batteries in the remote control
7-10 Overview
7 Connections on the television
8 Controls on the television
9-10 The remote control
11-14 Settings
11 Setting television channels automatically
11-12 Changing stored channels
12 Picture settings
13-14 Audio settings
15-19 Television operation
15-16 Basic functions
16 Zap function
17 Zoom function
18 Changing the picture format
19 PIP mode
20-21 Teletext mode
20 TOP text or FLOF text mode
20 Normal text mode
20-21 Additional functions
22 Convenience functions
22 Convenience functions with the »Features« menu
23-28 Using external devices
23-26 DVD player, DVD recorder, video recorder or set-top box
27 Decoder or satellite receiver
27 Hi-fi system/AV receiver
28 Camcorder
29 PC Monitor Mode
29 Connecting a PC
29 Selecting the channel position for the PC
29 Settings for the PC
30-32 Special settings
30-32 Setting television channels
33-35 Information
33 Technical data,
33 Service information for dealers
33 Environmental note
34 Troubleshooting
35 Additional Information for units sold in the UK.
ENGLISH
3
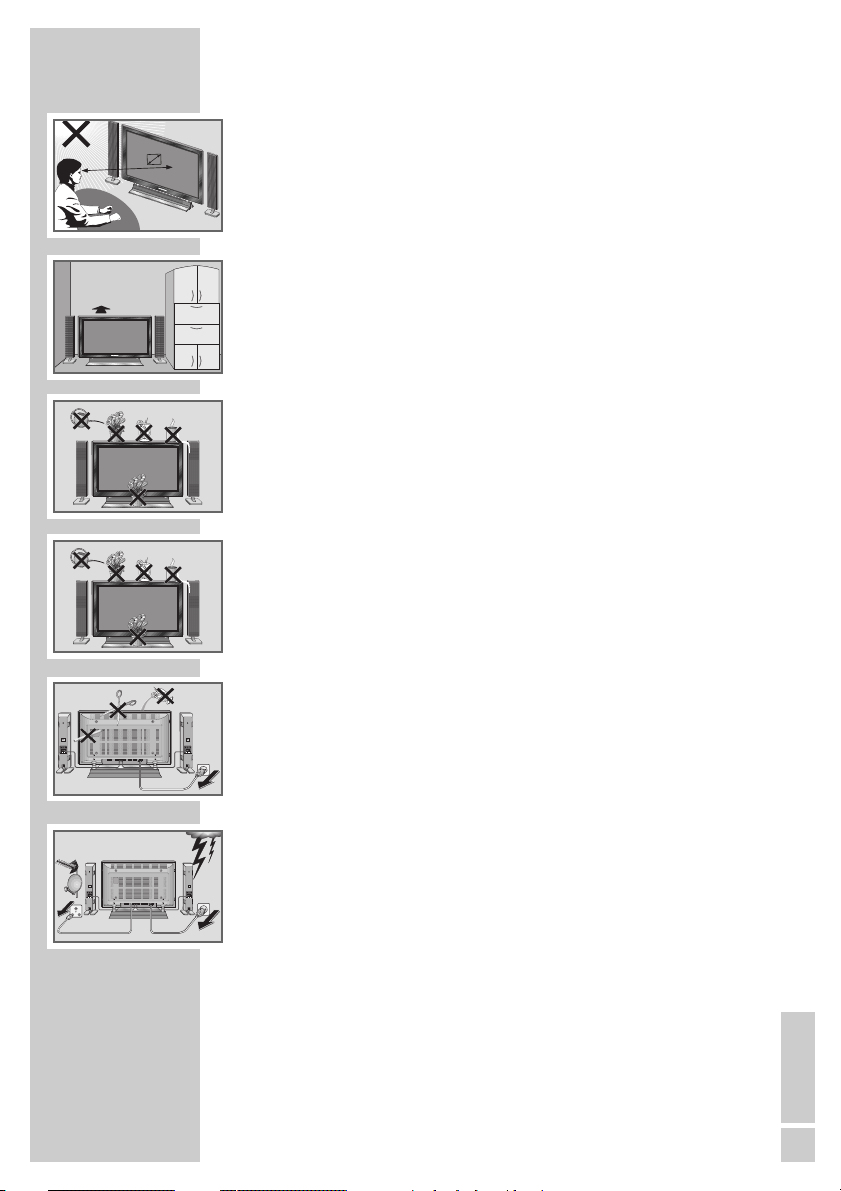
SET-UP AND SAFETY
___________________________
Please note the following information when setting up your television set.
This television set is designed to receive and display video and audio
signals.
Any other use is expressly prohibited.
The ideal viewing distance is 5 times the screen diagonal.
External light falling on the screen impairs picture quality.
To assure sufficient ventilation make sure there is enough space
around it in the wall unit.
The television set is designed for use in dry rooms. If you do use it in the
open, please ensure that it is protected from moisture, such as rain or
splashing water. Do not expose the television set to any moisture.
Do not place any vessels such as vases on the television, as they may
spill liquid, thus presenting a safety risk.
Place the television set on a solid, level surface. Do not place any
objects such as newspapers on the television set or cloth or similar items
beneath it.
Do not place the television set close to heating units or in direct sunlight,
as this will impair cooling.
Heat build-up can be dangerous and shortens the operating life of the
television set. For reasons of safety, have a specialist remove any dirt
deposits in the set from time to time.
Do not open the television set under any circumstances. Warranty
claims are excluded for damage resulting from improper handling.
Make sure the power cord or the power supply unit (if provided) are not
damaged.
The television set may only be operated with the mains cable/adapter
supplied.
Thunderstorms are a danger to all electrical devices. Even if the television set is switched off, it can be damaged by a lightning strike to the
mains or the antenna cable. Always disconnect the mains and antenna
plugs during a storm.
Clean the screen with a soft, damp cloth. Only use plain water.
Note:
Do not connect any other equipment while the device is switched on.
Switch off the other equipment as well before connecting it.
Only plug the device into the mains socket after you have connected the
external devices and the antenna.
20 cm
Elegance
7 W
! SERVICE !! SERVICE !
INPUT
! SERVICE !
7 W
INPUT
SAT
TV R
5x
E
l
e
g
a
n
c
e
Elegance
Elegance
7 W
INPUT
7 W
INPUT

4
Please note when deciding where to put the device that furniture
surfaces are covered by various types of lacquer and plastic, most
of which contain chemical additives. These may cause corrosion to
the feet of the device, thus resulting in stains on the surface of the
furniture which can be difficult or impossible to remove.
The screen of your LCD television meets the highest quality
standards and has been checked for pixel faults.
Despite the great care taken in manufacturing, technological
reasons make it impossible to completely discount the possibility that
some pixels may be faulty.
Provided they are within the thresholds specified by the DIN norm,
pixel faults of this kind cannot be regarded as a defect as defined
by the warranty.
SET-UP AND SAFETY___________________________
ENGLISH
5
Mounting the table base
Diagrams are contained in the assembly instructions enclosed with the
table base.
1 Fasten the two brackets to the table base using the hex socket
screws supplied.
2 Remove four fixing screws for each bracket from the back of the
device.
3 Place the stand on a level surface.
4 Put the device on top of the stand.
5 Fasten the stand to the device by screwing four screws to the
back of the device for each bracket.
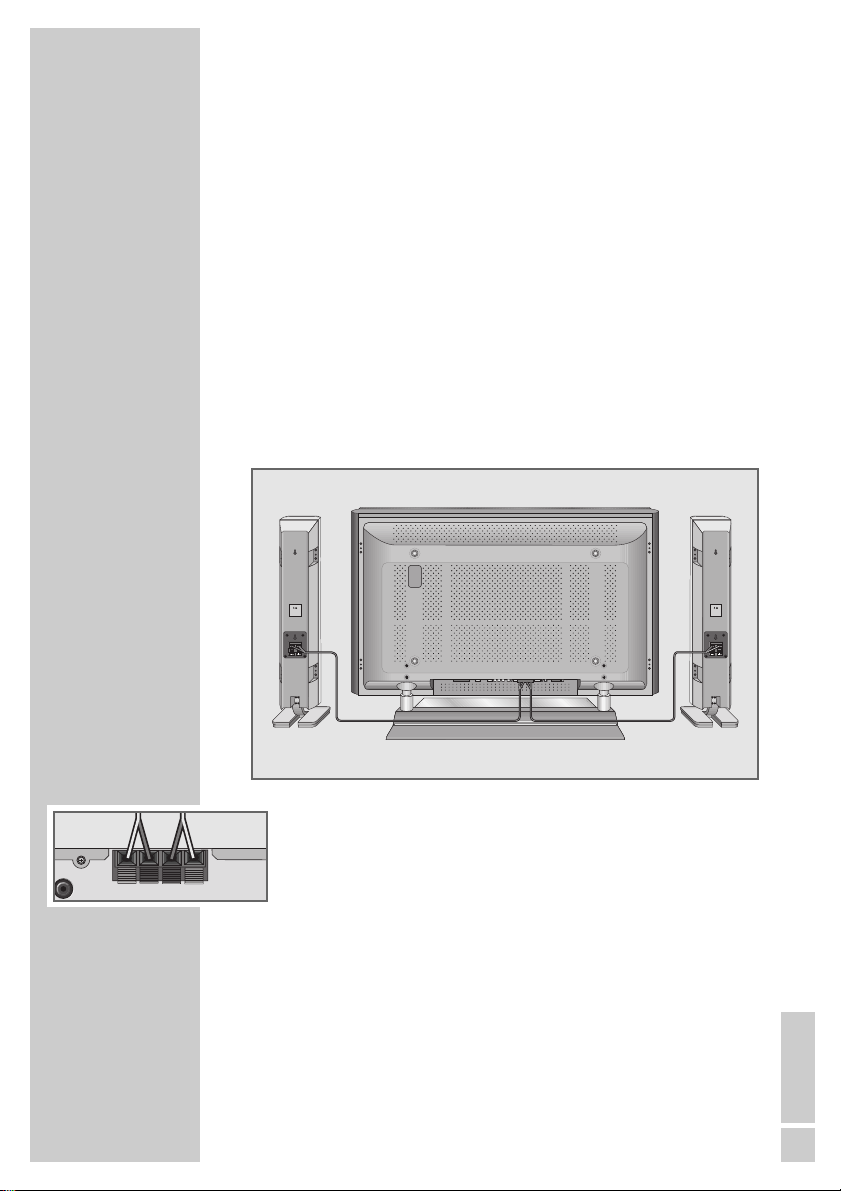
Connecting the loudspeakers
1 Use the speaker cable supplied to connect the »SPEAKER
OUT – +« terminals on the device to the »INPUT – +« termi-
nals on each speaker.
Connect the cables marked in red to the red terminal.
CONNECTION/PREPARATION
__________
T
YPbPr
udio in
DVI–D
7 W
INPUT
7 W
INPUT
R
SPEAKER OU
PC– IN
L
6
CONNECTION/PREPARATION
__________
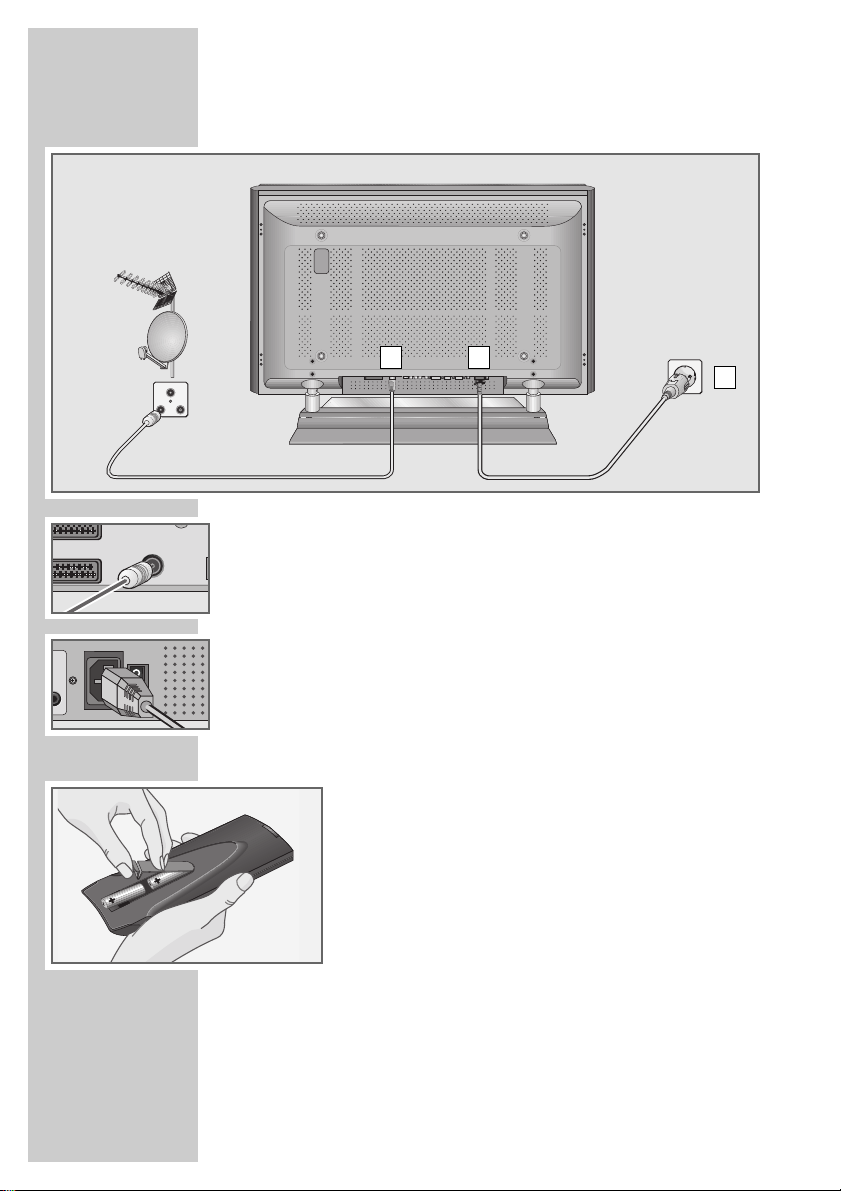
Connecting the antenna and the mains cable
1 Plug the antenna cable of the rooftop antenna into the »ANT IN« anten-
na socket on the television.
2 Plug the mains cable supplied into the »AC IN« mains socket of the tele-
vision.
3 Plug the mains cable into the wall socket.
Note:
Only plug the device into the mains socket after you have
connected the external devices and the antenna.
Inserting batteries in the remote control
1 Open the battery compartment by removing the lid.
2 Insert the batteries (Mignon type, for example UM-3 or
AA, 2x1,5V). Observe the polarity (marked on the base
of the battery compartment).
3 Close the battery compartment.
Note:
If the television no longer reacts properly to remote
control commands, the batteries may be flat. Be sure to
remove used batteries.
The manufacturer accepts no liability for damage resulting from used batteries.
Environmental note
Batteries, including those which contain no heavy metal,
may not be disposed of with household waste. Please
dispose of used batteries in an environmentally sound
manner. Find out about the legal regulations which apply
in your area.
–
TV R
21
3
SAT
2
AV–1
ANT–IN
S–VHS
DVI
io in
ENGLISH
7
OVERVIEW
____________________________________________
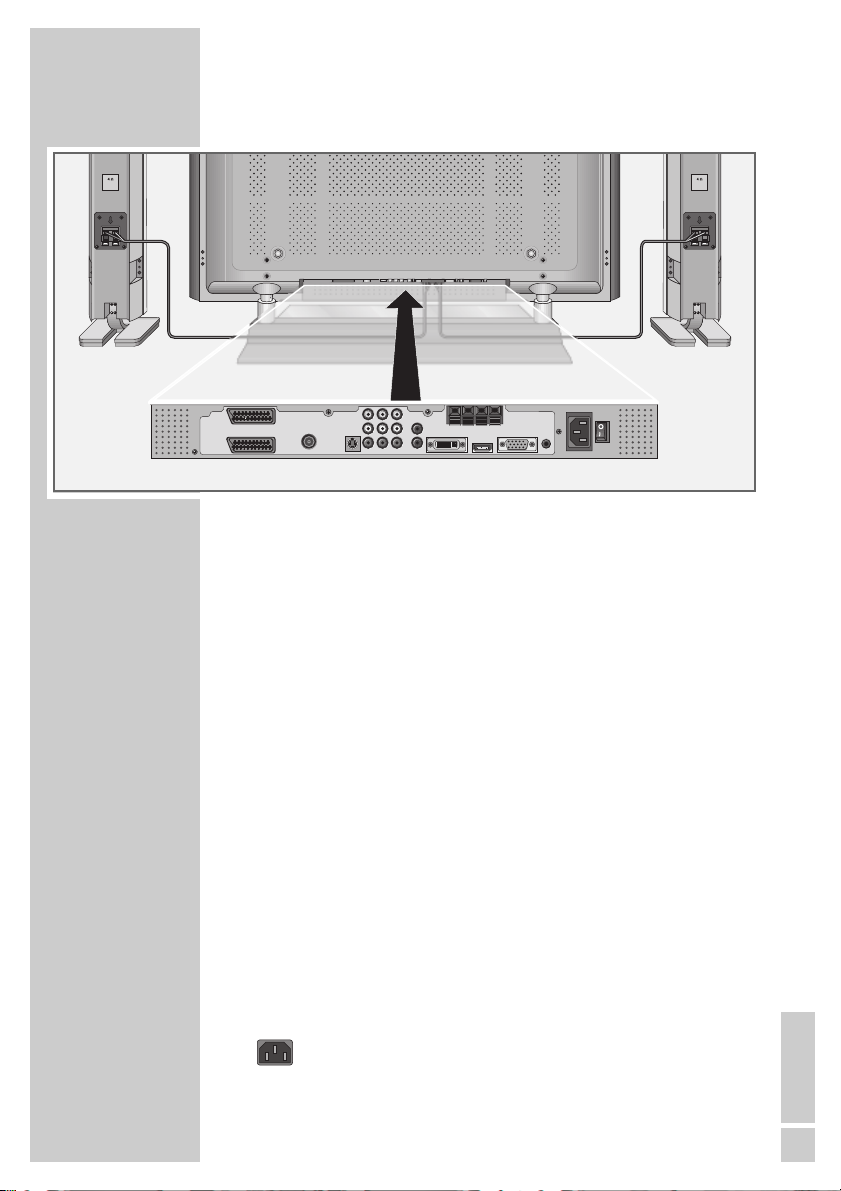
Connections on the television
AV- 2 Euro/AV socket (FBAS signal).
AV- 1 Euro/AV socket (FBAS signal, RGB signal).
ANT-IN Antenna socket.
S-VHS Video signal input for S-Video camcorder.
AV-3 Video Video signal input for camcorder.
AV-3 L R Audio signal input for camcorder.
AV-Out Video L R Audio and video output.
Y Pb/Pr Video signal input (YUV signal).
Y Pb/Pr Audio In L R Audio signal input (YUV signal).
SPEAKER OUT L R Terminals for connecting external loudspeakers
(2 x 20 W music power, 2 x 10 W sine wave,
impedance 4 Ω);
R = right channel, L = left channel.
DVI-D DVI-D socket, video signal input for PC (DVI).
HDMI HDMI socket, audio/video signal input
(HDMI).
PC-IN VGA socket, video signal input for PC.
PC-DVI Audio In Audio signal input for PC.
Socket for the mains cable.
IO Power switch, switches the device to and from
standby mode.
7 W
INPUT
Y
YPbPr
Audio in
Video
Pb
AV– 2
ANT–IN
AV–1
S–VHS
L
R
AV–3 AV–Out YPbPr
DVI–D
L
Pr
R
SPEAKER OUT
R
L
HDMI
PC–DVI
PC–IN
Audio in
7 W
INPUT
8
Controls on the television
Ǽ
•
Operation indicator
Red – standby
Blue – operation.
OVERVIEW
____________________________________________
Elegance
ENGLISH
9
OVERVIEW
____________________________________________
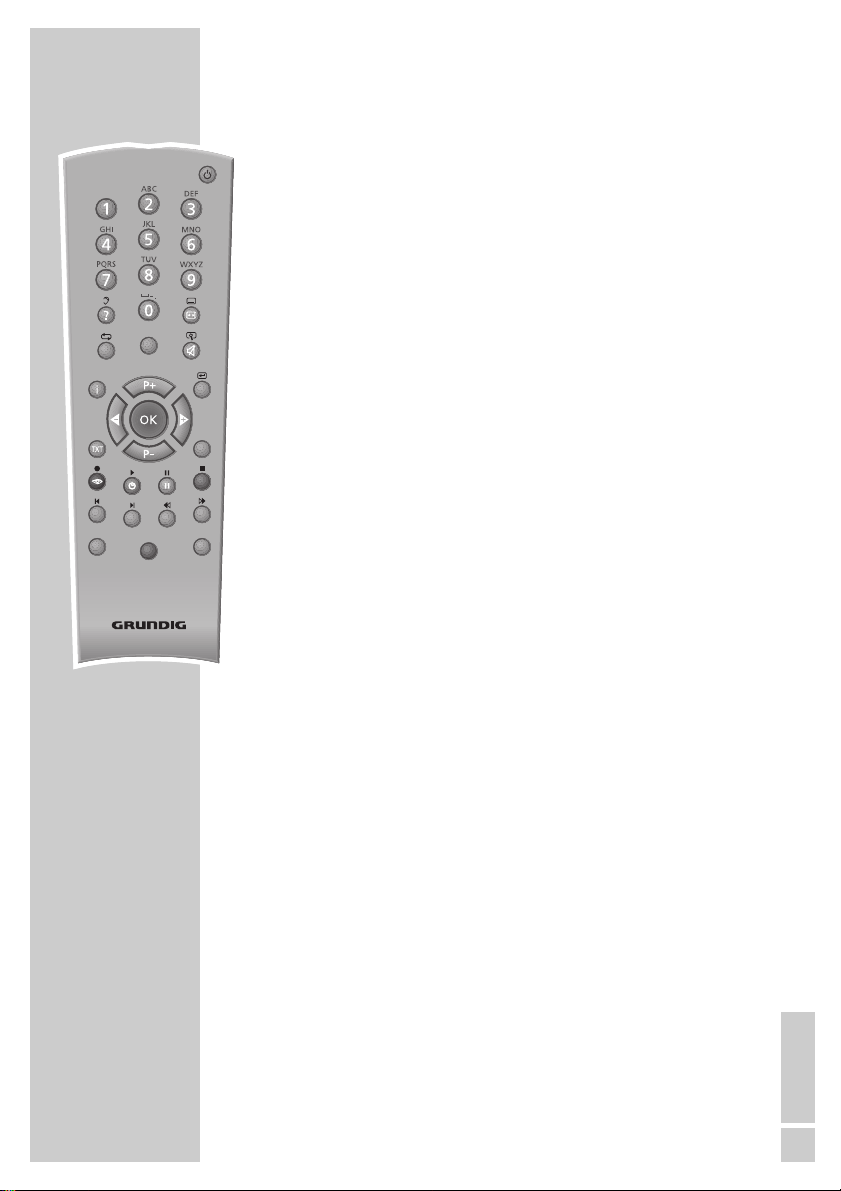
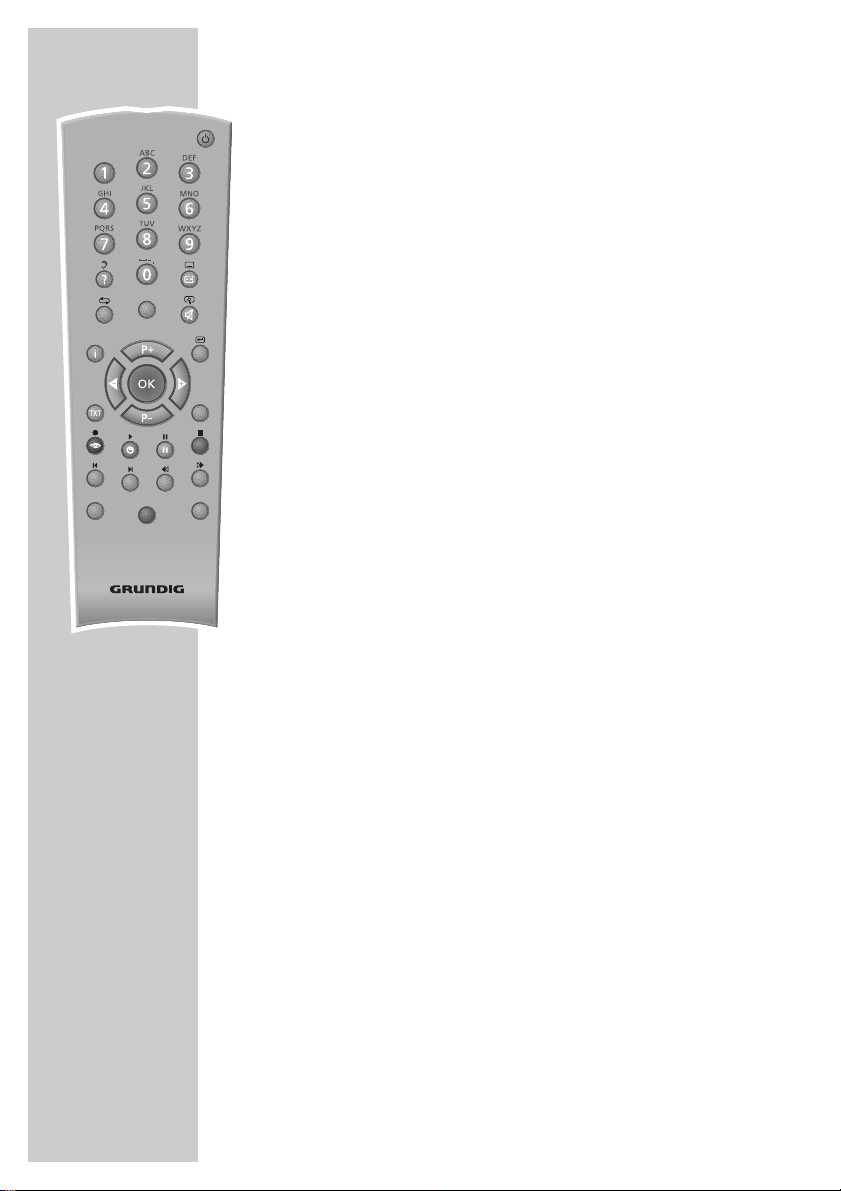
The remote control
Ǽ Switches off the television set (stand-by).
1...0 Switches the television on from standby mode
Selects channels directly.
? Displays the number and name of a station.
Switches to double character size in teletext mode.
E
Switches between picture formats.
Page stop in teletext mode.
PIP Shows an inset picture;
activates the double window function (two different
TV programmes on separate halves of the screen);
switches back to normal size.
AV Opens the pre-selection for AV channels.
Then selection with P+ or P-.
d Sound on/off (mute).
i Calls up the »Main menu«.
Z Zap function.
P+, P- Switches the television on from standby;
selects stations step by step;
moves the cursor in the menus up and down.
ǸǷ Adjusts the volume;
moves the cursor left/right.
OK Calls up the preset channels;
activates various functions.
TXT Switches between teletext and TV modes
TV-G Key has no function.
z
Selects various picture settings;
scrolls back a page in teletext mode.
Ȅ Displays the time;
selects the next page in teletext mode.
ǷǷ
Freeze-frame;
selects the desired chapter in teletext mode.
F
Selects various audio settings;
selects the desired topic in teletext mode.
dd
AV
PIP
z
TV-G
Tele Pilot 170 C
SCAN
PAT
S
P
DVD
AUX
DR
TOP
MENU
MENU
dd
AV
PIP
z
TV-G
Tele Pilot 170 C
SCAN
PAT
S
P
DVD
AUX
DR
TOP
MENU
MENU
10
OVERVIEW
____________________________________________
SCAN Reveals answers in teletext mode.
PAT Selects the Double Window function.
S Selects the sub-pages in teletext mode.
P Updates a page in teletext mode.
DR, DVD Switches to operation of a GRUNDIG digital receiver,
GRUNDIG digital receiver with hard disk (PDR),
GRUNDIG DVD player or GRUNDIG DVD recorder.
Keep the appropriate button (»DR«, »DVD«) pressed
down. Then press the appropriate button.
Note:
The »DR« button has been programmed for operating
a GRUNDIG digital receiver (remote control level 1).
The »DVD« button has been programmed for
operating a GRUNDIG DVD player.
You can change this programming, see »AUX« button.
The functions available depend on the model of the
device you are using.
Just try it out.
AUX Programming the remote control for the operation of
external devices.
Press »AUX« and hold it down and press three
numerical buttons to enter the appropriate code:
»1«, »2«, »3« for a GRUNDIG DVD player.
»4«, »5«, »6« for a GRUNDIG DVD recorder.
»1«, »4«, »7« for a GRUNDIG digital receiver
(remote control level 1).
»2«, »5«, »8« for a GRUNDIG digital receiver
(remote control level 2).
»3«, »6«, »9« for a GRUNDIG digital receiver with
hard disk (PDR).
dd
AV
PIP
z
TV-G
Tele Pilot 170 C
SCAN
PAT
S
P
DVD
AUX
DR
TOP
MENU
MENU
dd
AV
PIP
z
TV-G
Tele Pilot 170 C
SCAN
PAT
S
P
DVD
AUX
DR
TOP
MENU
MENU
ENGLISH
11
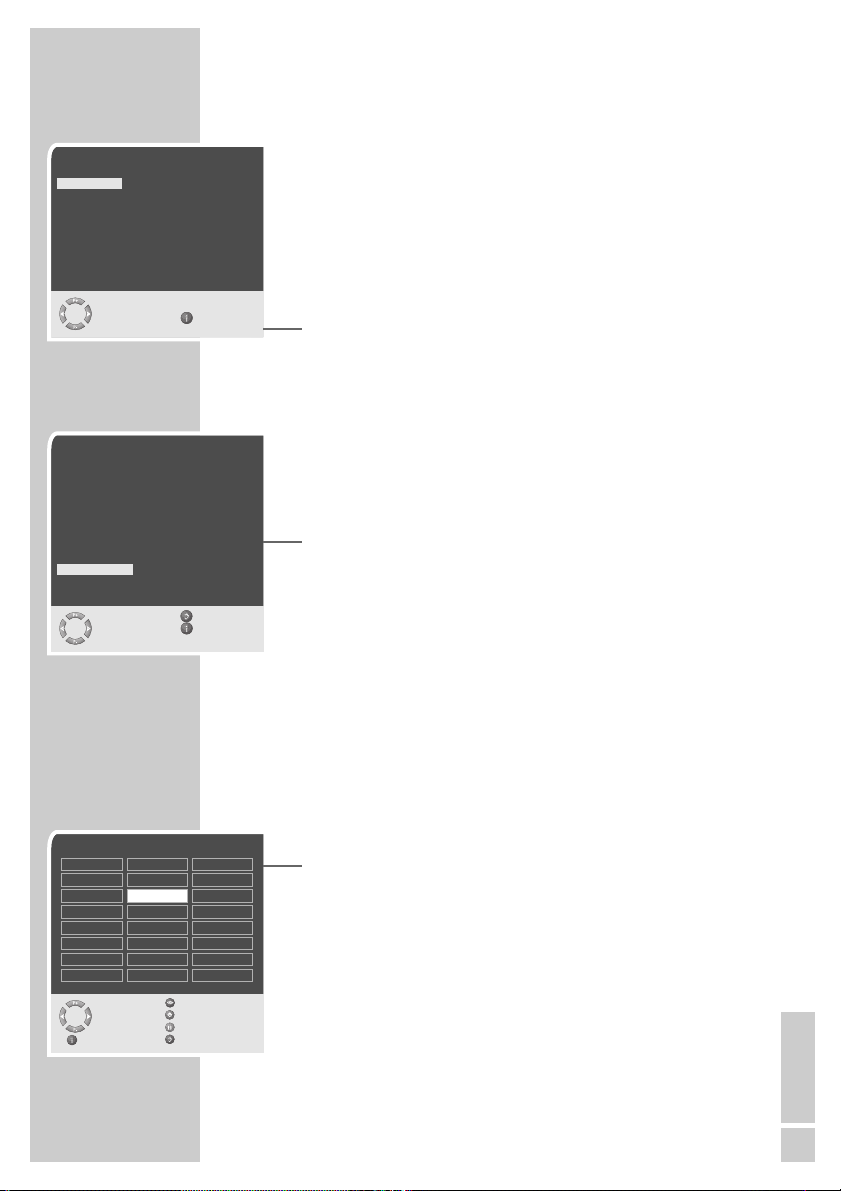
Setting television channels automatically
The television set is equipped with an automatic channel search
system.
You start the search and can then sort the television channels into
your order of preference.
99 preset positions are provided, to which you can assign television
channels from the antenna or from the cable connection.
1 Switch on the television with »IO « on the television set, then
press »P+« on the remote control.
– The »Sprache« (Menu language) menu appears when the
television is first switched on.
Hint:
If the »Sprache« (Menu language) menu does not appear on
the screen, then set it in accordance with the chapter on resetting all television channels on page 32.
2 Select language with »P+«, »P-«, »
Ǹ
« or »Ƿ« and press
»OK« to confirm.
– The »Country« menu appears.
3 Press »P+«, »P-«, »
Ǹ
« or »Ƿ« to select the country and
»OK« to confirm.
– The search begins. It may last a few minutes, depending on
the number of television stations found.
– After the search the television switches to channel position 1
and the »Program table« menu appears.
Changing stored channels
You can delete channels that have been stored more than once
during the automatic search. You can also store channels in a different preset position, change or enter the name of a channel as well
as skip channels.
Deleting channels
1 In the »Program table« menu, select the station to be deleted
with »P+«, »P-«, »Ǹ« or »Ƿ«.
2 Highlight the channel with »
ǷǷ
« (yellow).
3 Press »
ǷǷ
« (yellow) to delete the channel.
Note:
To delete other stations, repeat steps 1 and 3.
SETTINGS
______________________________________________
Program Table
Skip
Select
Move
Delete
Exit Name
01 ARD
02 ZDF
03 BR
04 RTL
05 SAT 1
06 PRO 7
07 BR
08 TEL5
09
10
11 S
12 ---- S
13 ---- S
14 ---- S
15 ---- S
16 ---- S
17 ---- S
18 ---- S
19 ---- S
20 ---- S
21 ---- S
22 ---- S
23 ---- S
24 ---- S
Sprache
Deutsch Português Türkçe
Dansk Svenska Eλληvικά
Español Suomi Hrvatski
Français âesky Pyccк
English Sloven‰cina Româna
Italiano Slovensko Cск
Norsk Magyar Блгapск
Dutch Polski
Auswählen
und bestätigen Ende
●
OK
Country
Germany Greece Romania
Austria Hungary Slovakia
Belgium Iceland Slovenia
Bulgaria Ireland Spain
Croatia Italy Sweden
Czech Luxembourg Switzerland
Denmark Netherlands Turkey
United Kingtom Norway Yugoslavia
Finland Poland
France Portugal
Select Back
and confirm Exit
●
OK
 Loading...