

Page 1
ZigBee Module
User manual
Page 2

CONTENT
User Manual Information
1
Description
2
Setting t he ZigBe e ID and Cha nnel of th e Data Log ger
3
Setting t he ZigBe e Module
4
Install ation of ZigBee Mo dule
5
FAQ
6
Technical Data
7
8
Contact
Page 3

1 User Manual Information
1.1 Copyright Statement
Copy rig ht © 2012 S hen zhe n Grow att New Energy Co ,.L td, herei naf ter re fer red to as
‘Growatt’. Al l right reserved. N o part of this do cum ent may be re produ ced , st ored in
a retrieval system, or transmitted, in any form or by any means, electro nic ,
mechani cal , phot ogr aph ic, ma gne tic or otherwis e, withou t the prior written
perm iss ion o f Growatt New Energy. All infring eme nt reserved.
Copy rig ht No. is G1.0. Grow att res erv ed the final rig ht of interpre tat ion of this
manu al. The pro duc t p ara met ers , a ppe ara nce s and packages a re su bje ct to change
with out no tic e. Rea der s a re cautioned, however, tha t G rowatt rese rve s t he right to
make cha nge s wi tho ut noti ce and shall not be resp ons ibl e fo r any damages,
incl udi ng indirec t, incidental o r co nse que nti al damages, cause d by relia nce on the
mate ria l presented.
1.2 About Manual
Dist ing uis hed use rs, thank you ver y much for you r trust in our ZigBee Modul e
product, whi ch is developed and m anu fac tured by o ur R& D department. We s inc erely
hope it can sat isf y your nee d, also, w e’re g lad to receive y our sug ges tions on
improving our prod uct . T he target of the manual is to provide the d eta ile d p roduct
info rma tio n, in sta lla tio n, op era tio n and m ain ten anc e.
1.3 Target Group
The user m anu al is app lie d for tec hni cia ns and commo n use rs t o operate and
main tai n th e ZigBee M odu le. The readers sho uld be acq uai nte d with som e computer
netw ork k now led ge an d ope rat ing s kil l.
1
Page 4

1.4 Guideline
Befo re u sin g the Zig Bee Module, ple ase rea d th e man ual carefully. In the meantime,
plea se keep it well, lest maintenance staff ma y not fin d it late r. All the content,
pict ures, logos, symbols are reserved. No part of this document may be transmitted in
any f orm wi tho ut t he pri or w rit ten pe rmi ssi on o f o ur internal st aff. The con ten t of
manu al cou ld be chang ed. Every atte mpt has bee n made to make this document
comp let e, ac cur ate and up-to-date. If there are any differen ces b etw een the
cont ent s of the ins tru cti on and the pro duc t, please rega rd th e actu al one as the
trut h. You can d own loa d the n ewe st ve rsi on from our we bsi te ww w.growatt.com .
1.5 FCC Warning
This device complies wi th Part 15 of the FCC Rul es. Ope rat ion is subj ect to the
foll owi ng tw o con dit ion s:
(1) This de vic e may n ot ca use h arm ful i nte rfe rence.
(2) Thi s device must acc ept any int erf erence received, inclu din g inte rfe re nce th at
may cause u nde sired operation.
Chan ges or mo dif ica tio ns not express ly appro ved by the party responsible for
comp lia nce c oul d voi d the u ser 's au tho rit y to op era te th e equ ipm ent .
NOTE : Thi s equ ipm ent has be en teste d and found to co mpl y with the lim its for a
Clas s B di git al device, pur sua nt to Part 15 of the FCC Rul es. Th ese li mit s are designed
to provi de reas ona ble pro tec tio n ag ain st ha rmf ul inte rfe rence in a residen tia l
inst all ati on. Thi s equipment g ene rat es, use s and c an radiate ra dio frequ enc y en erg y,
and, if no t i nst all ed and used in ac cordance with the in str uct ion s, may ca use harmful
inte rfe rence to radio comm uni cat ion s. However, there is no guar ant ee that
inte rfe rence wil l n ot occur in a pa rti cul ar installation. If th is equ ipm ent does cause
harm ful int erf erence to radio or television rece pti on, whi ch ca n be d ete rmi ned by
turni ng the eq uip men t off an d on, the u ser is en couraged to try to correct the
inte rfe rence by one or more of th e fol low ing m eas ures:
-- Reo rie nt or relocate the rec eiv ing a nte nna .
-- Inc rease the separation between the equipment and re cei ver.
-- Co nne ct the equ ipm ent into a n outlet o n a circuit d ifferent from tha t to wh ich the
receiver is connected.
-- Con sul t the d eal er or a n exp eri enc ed ra dio /TV t ech nic ian f or he lp.
RF Exp osu re Statement
To mai nta in com pli anc e w ith FCC’s RF Exp osu re guide lin es, th is equ ipm ent should be
inst all ed an d operated w ith minimum dis tan ce 20 cm betw een t he radiator and your
body : Use o nly t he su ppl ied a nte nna .
2
Page 5

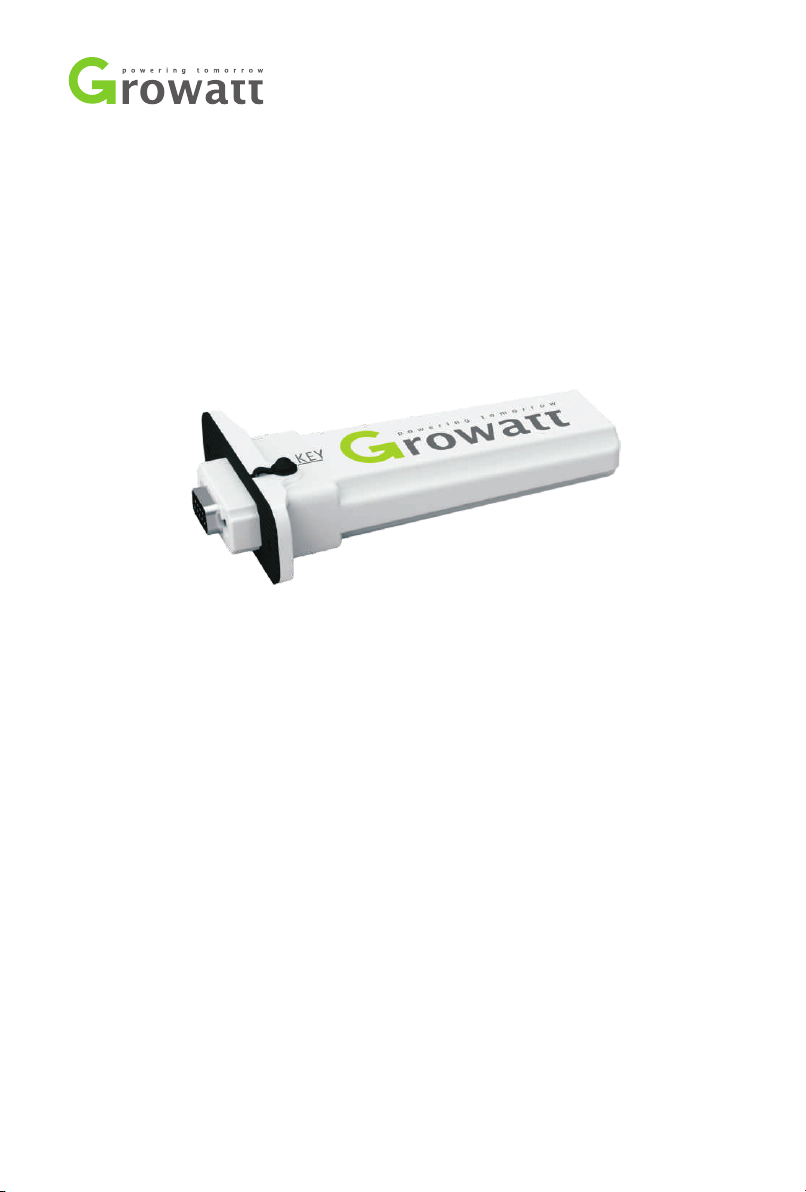
2 Description
ZigB ee Module is a wirel ess d evi ce us ed to enable the communication b etw een
inve rte r and d ata l ogg er. The Sh ine Webbox and Shine P ano s erv e as th e dat a log ger.
3
Page 6
3 Setting the ZigBee ID and Channel of
the Data Logger
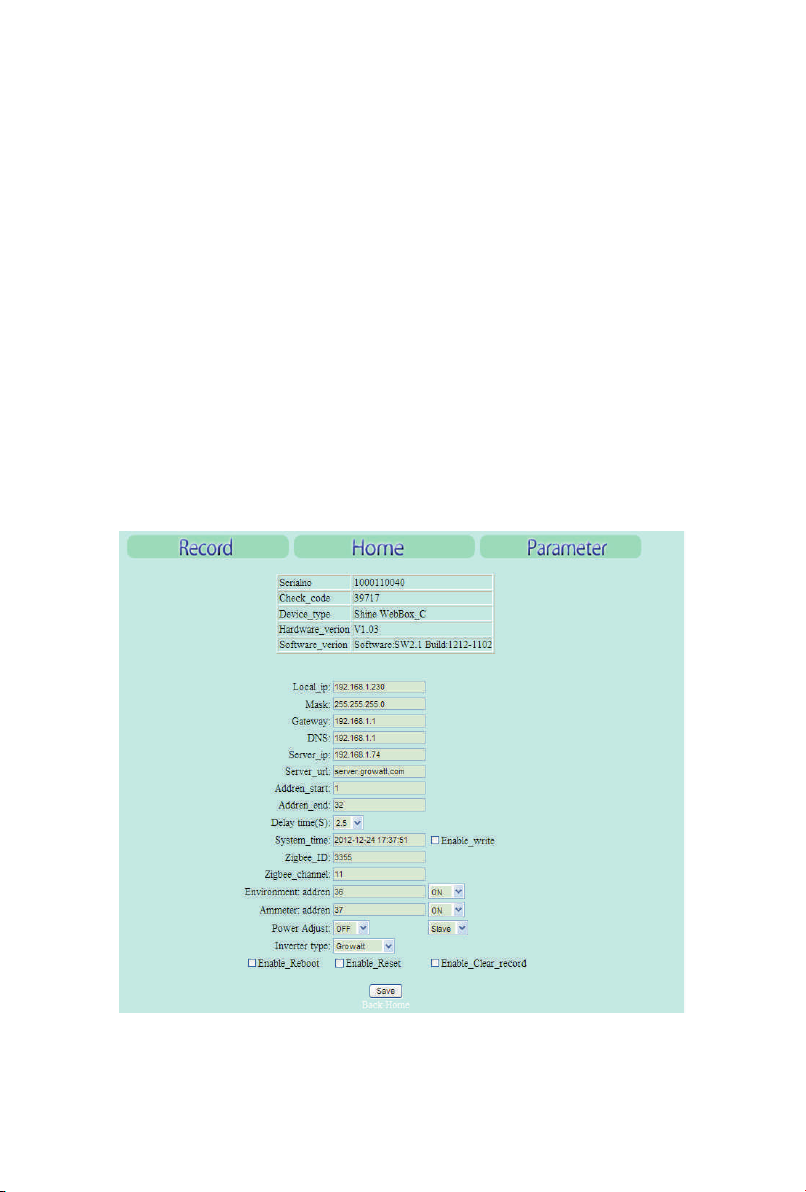
In ord er to adopt the ZigB ee wirel ess communication metho d, the ZigB ee ID and
Chan nel of the da ta lo gge r should be con fig ured fi rst . Start the web brow ser and
ente r 19 2.1 68. 1.2 30 i n th e ad dress bar, then you can set the ZigBee ID and Chann el
via th e int egr ate d ser ver o f the d ata l ogg er.
Onl y th e IP address of the data logger and the accessing PC a re in the same
Note :
netw ork segment, then i t is av ail abl e to get access in to th e int egr ate d server of the
data lo gge r. As to more det ail s, ple ase refe r t o t he use r m anu al of data logger e.g.
Shin e Webbox User Manual.
4
Page 7

1. S et ZigBee I D. In “parameter” fi eld , s ele ct “Zigbee_ID”, e nte r ZigBee ID wi thi n the
rang e bet wee n 100 0 and 9 999 .
2. Set Zig Bee channel. In “parameter” fi eld , se lec t “Zigbee_channel”, ente r the
ZigB ee ch ann el wi thi n the r ang e bet wee n 11 an d 25.
3. If the par ame ter s of da ta l ogg er about the Z igB ee c onf igu rat ion hav e been
modi fie d, th e par ame ter s of th e Zig Bee M odu le ha ve to b e als o mod ifi ed.
5
Page 8

4 Setting the ZigBee Module
1. Copy th e folder “V 53E Set up” from the CD to personal computer. Dou ble click
“V53 E Set up” → “ Sup por t” “ZCo nfi gureV53E.exe”.
2. Con nec t the ZigBee Mo dul e with PC vi a the configuration Box . Zig Bee Module
corresponds t o t he side of Co nfi gur ati on Box pr int ed with “Module”, a nd the RS232
port c orresponds to another side of Configuration Box printed with “RS-232”.
3. Ope rat e the “ ZCo nfi gureV53E.exe”, as following figure.
→
6
Page 9

4. Right click “My computer” → cho ose “Ma nag e” “Dev ice Manager”
→ →
“Por ts (C OM & LP T)” .
COM Por t
5. Cho ose t he sa me “C OM po rt” w ith d evi ce ma nag er.
6. Sin gle -cl ick “ con nec t”. I f the i ndi cat or li ght t urns t o green , the c onn ect ion s tat e is OK .
7
Page 10

7. S ele ct Zig bee Ra dio Ch ann el. The range of cha nne l i s 1 1-2 5. The Radio Channel of
ZigB ee M odu le s hou d be set as the same value of “Z igb ee_ cha nne l” c onf igu red in
the da ta lo gge r.
8
Page 11

8. Set PAN ID. The “PAN ID” of Zig Bee Mo dul e s hou ld be same as th e “Zigbee_ID”
conf igu red i n the d ata l ogg er. I f not , the connection wo uld f ail . Ent er tw o values in
the i npu t box o f PAN ID (e.g. 33 5 5). Single-click “S ETT ING ”, t hen click “RE AD” . If it
work s, th e suc ces s dia log b ox wi ll po p up. I f not , ple ase s et ag ain .
9
Page 12

9. Af ter setting, cli ck on “ Mod ule Restart”, an d then cli ck on “ con nec t”. If PAN ID is
stil l the p re-set value, the configuration is OK. If not, please set again.
Note : If you hav e alrea dy set 6 ZigBee Modules, one of the 6 Modules should be
powe r-on, and then you ca n set a not her 6 Z igB ee Mo dul es.
(2)
(1)
10
Page 13

5 Installation of ZigBee Module
1. Plu g the Z igB ee Mo dul e to in ver ter v ia Rs 232 .
The RS 232 p ort o f Growatt inverter has two specifications.
RS-232
RS-232
(1)
(2)
If th e RS232 po rt is comp lia nt with th e specification (1) , please turn on the DIP
swit ch, then pl ug the Z igBee Mo dul e to the i nve rte r direct ly vi a the RS 232 a nd lock
screw.
If the R S23 2 port is c omp lia nt with the sp eci fic ati on (2 ), please pry ope n the rubber
plug in t he wat erp ro of cushion, th en plug the ZigBee Mod ule to t he inverter an d lock
screw.
11
Page 14
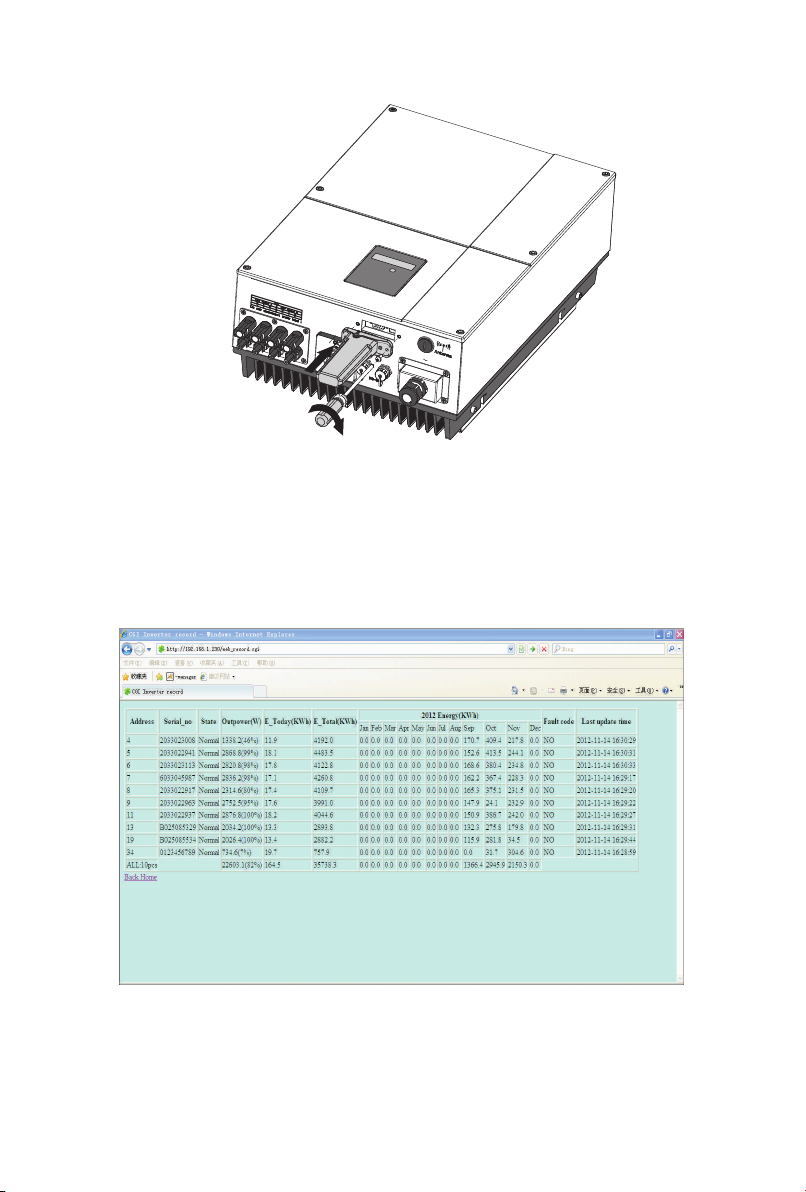
2. O pen th e “ Rec ord” int erf ace of th e d ata lo gge r. If the inverter c orresponding to
the Zi gBe e Mod ule h as sh own i n the l ist , the i nst all ati on is O K.
12
Page 15

6 FAQ
1. When set PAN ID, if the dialog box displays “Se tti ng New PAN ID Faile d”, the
sett ing fa ils . Please cl ick on “Module Re sta rt” → “Connect”, and th en re set PAN ID
(refer to chapter4, step 3-7).
2. Whe n re ad PAN ID, if the va lue b ox displays “FF FE”, the s ett ing fails. P lea se click
on “ Mod ule Restart” → “Connect”, and th en re set PAN I D (re fer to c hap ter 4, ste p 3-
7).A s an alterna tiv e me tho d, y ou c oul d ch ang e th e va lue of t he PAN ID and channel,
then reset the data logger and ZigBee Module.
3. As to the sa me one inver ter, either wirel ess meth od or wired method could be
chos en as a m oni tor ing s che me. I f not , the d ata l ogg er co uld n’t search i nve rte rs we ll.
13
Page 16

7 Technical Data
Comm uni cat ion
Inverte r
Protocol
Communi cat ion r ang e
Elec tri cal D ata
Voltage
Powe r con sum pti on
Oper ati ng Co ndi tio ns
Ambi ent t emp era ture
Humidit y
Degree of pro tec tio n
Gene ral D ata
RS 232
Modb us RTU
300m ( wit hou t obs tac le)
8V-15V DC
<0.5 W
- 20-6 0℃
5% --9 5%
IP65
Leng th* W idt h*d ept h
Net Weight
135* 79* 29m m
63g
14
Page 17

8 Contact
If you h ave t ech nic al problems concern ing o ur products, please contact Gro wat t.
Grow att N ew En erg y Technology Co., Ltd
Buildin g B, Ji ayu I ndu str ial Z one , #28 G uan ghu i Roa d, Lo ngt eng C omm uni ty,
Shiyan, B aoa n Dis tri ct, S hen zhe n, P.R.China.
+86 75 5 274 719 42
serv ice @gi nve rte r.c om
www.growatt.com
GR - UM - 01 1 - 01
15
 Loading...