

Page 1
Installation, Operation & Maintenance
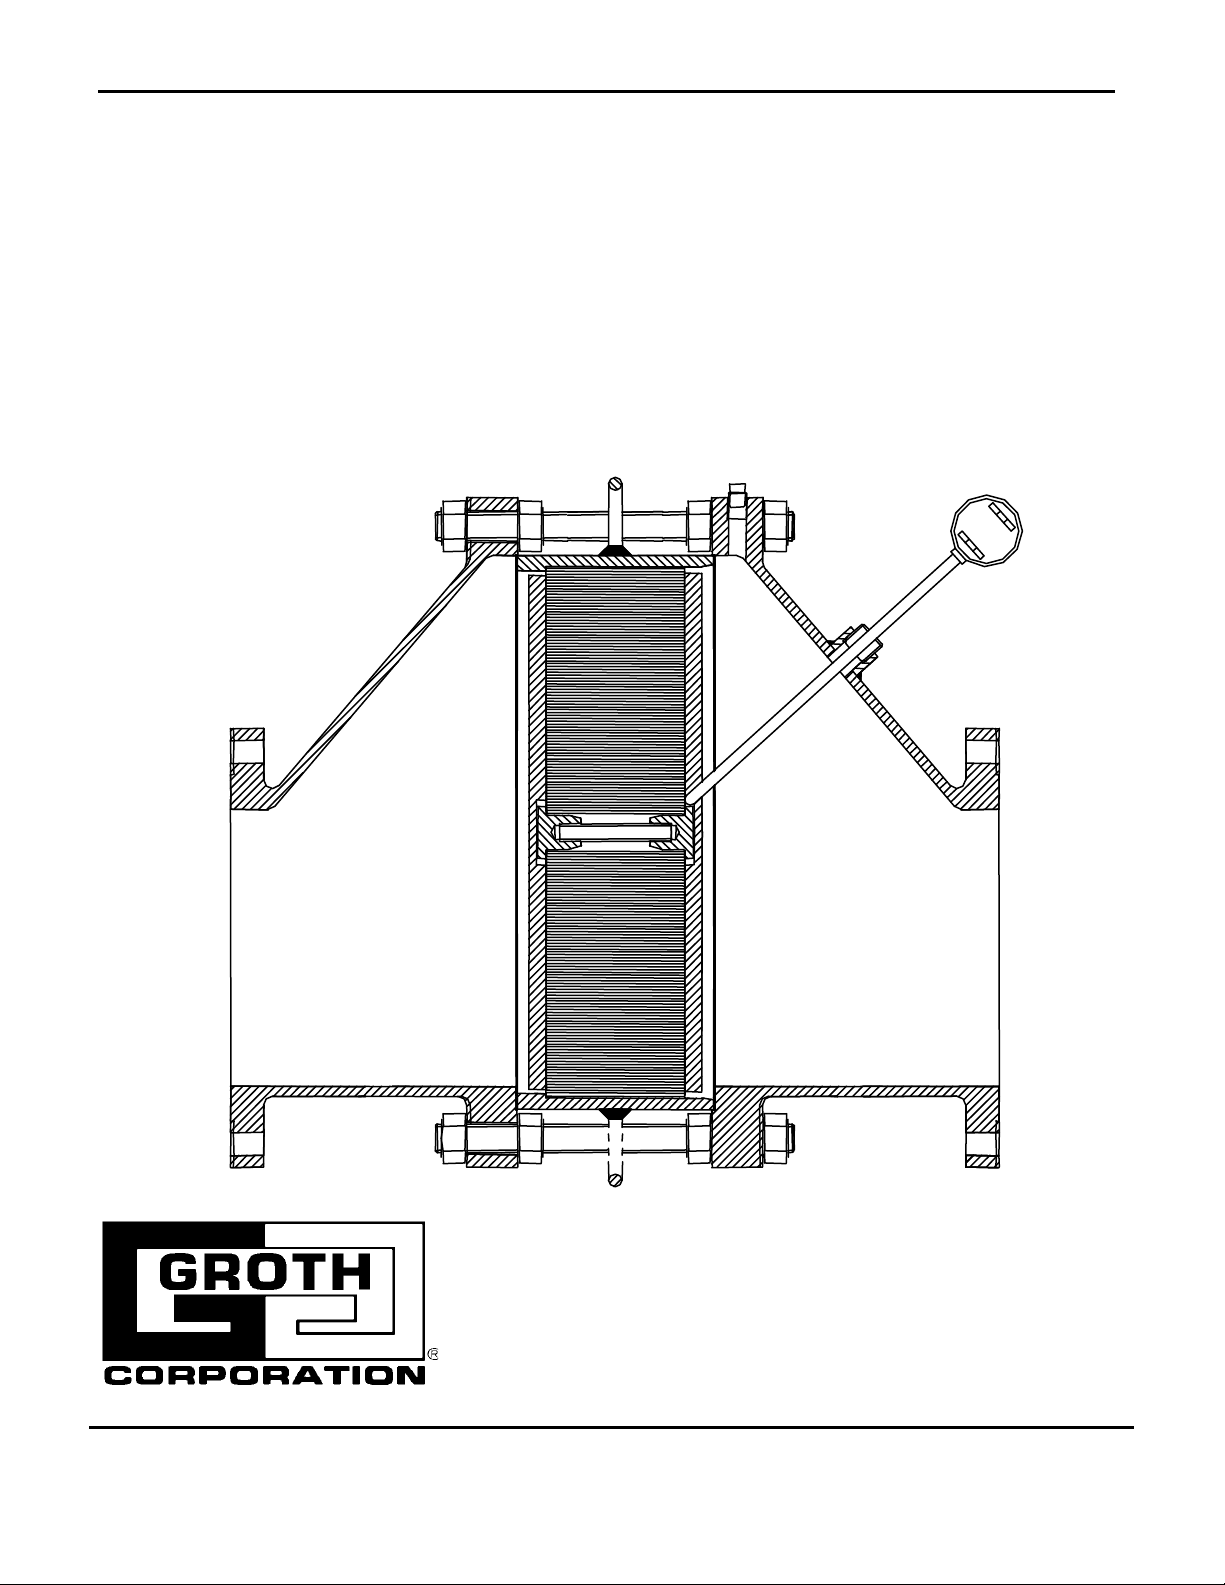
Model 7598
In Line Deflagration Flame Arrester
ATEX Certified
January 2, 2012
1
IOM-7598
Rev. A 12189
Ref. 97289
Page 2

Table of Contents
CERTIFICATION
Section Page
Introduction 2
Certification 2
Integrated temperature sensors 2
Design & Function 3
Installation 3
Maintenance 4
Model Identification 6
Product Limited Warranty 6
Tables
Bolt torque 4 & 5
MESG tables 6
Attachments
ATEX Declaration of Conformity
Cert. # IBExU12ATEX2017 X
Drawings SCH-7598-01, SCH-7598-
02, SCH-7598-03
INTRODUCTION
This manual is intended to provide
recommended procedures and practices for
installation, operation and maintenance of the
Groth Model 7598 in line deflagration flame
arrester. Any standard procedures and practices
developed for a specific plant or process should
supersede this manual. Although this manual
cannot cover all possible contingencies,
following these guidelines will provide safe,
reliable deflagration flame arrester service.
The arrester shall be treated as a safety device
and must be maintained by a knowledgeable
repair technician. Carefully read and understand
this manual before installing or servicing this
product.
For information not contained in this manual,
please contact:
Groth Corporation
13650 North Promenade Blvd.
Stafford, TX 77477
281-295 6800
281-295-6999 Fax
Groth Model 7598 in line deflagration flame
arresters are manufactured in compliance with
the ATEX Directive 94/4/EC, as confirmed by
Certificate IBExU12ATEX2017 X. This
certification covers the following sizes, materials
and limits for use.
Sizes included are all those shown on drawings
SCH-7598-01, SCH-7598-02, and SCH-7598-
03. Materials included are all materials that
satisfy the strength and pressure ratings
specified on these drawings.
These arresters are suitable for in line
deflagrations and short time burning. Run up
length from source of ignition is:
Connection
Size
Run Up
Length/Diameter
pTB / p
(mm)
2”
(50mm)
3”
(80mm)
4”
(100mm)
6”
(100mm)
8”
(100mm)
10”
(100mm)
12”
(100mm)
50 15.7 PSIA
(1.08 Bar)
20 15.7 PSIA
(1.08 Bar)
10 15.7 PSIA
(1.08 Bar)
10 15.7 PSIA
(1.08 Bar)
10 15.7 PSIA
(1.08 Bar)
10 15.7 PSIA
(1.08 Bar)
10 15.7 PSIA
(1.08 Bar)
Explosion Gas Group
MESG of vapor
IIA1
≥ 0.045” [1.14 mm]
mixture
Operating
–4oF to 140oF [-20oC to 60oC]
Temperature
O
2
Page 3

Maximum Allowable Burn Time
*Temperature
Sensor
Emergency
Function
Connection Size Burn Time Trigger Time
2”-12”
5 Minutes 2.5 Minutes
(50-300mm)
*
Each temperature sensor with respect to connection size
has a trigger emergency function within half of the burn
time.
Must be installed with integrated temperature
sensor(s), Groth P/N 93219005 or equal.
INTEGRATED TEMPERATURE SENSORS
Flame arresters for short time burning must
be fitted with one or more integrated
temperature sensors, taking into account the
intended orientation of the flame arrester.
These arresters may be used in systems and
situations where the flow of the flammable
mixture can be stopped within one minute.
Groth model 7598 flame arresters were
tested with one Groth integrated temperature
sensors, P/N 93219005, installed on the
ignition side. All arresters are manufactured
with a minimum of one thermowell that
contacts the face of the element. Multiple
thermowells may be on one or both faces as
specified by the purchaser. Groth
temperature sensors may also be installed
as specified.
If the purchaser installs an integrated
temperature sensor, it must be an ATEX
approved devise, installed in the Groth
thermowell such that the sensor contacts the
bottom of the thermowell.
DESIGN AND FUNCTION
Groth's in line deflagration flame arresters are
designed to prevent flame propagation in gas
piping systems that contain flammable
gas/vapor mixtures. The arrester must prevent
flame passage under certain specified
conditions while permitting free flow of
gas/vapor through the system. Thus it protects
vulnerable equipment or components of the
system from damage due to explosive pressures
caused by gas/vapor ignition in another part of
the system. The deflagration flame arrester
must be used under only those operating
conditions for which it was designed and tested.
The flame arresters consist of two main
components: the arrester bases and the flame
element housing assembly. The bases serve as
the connecting interface to the piping system.
The housing retains and supports the flame
element. Both components are essential in
stopping the passage of the flame.
The flame element is comprised of small parallel
passageways aligned so that an approaching
flame front is slowed down and then quenched
before it can propagate to the protected side of
the device. All Groth flame elements utilize spiral
wound, crimped ribbon constructed of corrosion
resistant materials, to ensure the best flame
quenching performance with minimum pressure
drop. The element is supported by rigid beams,
securely welded into the housing to withstand
the pressures of an in line deflagration.
The bases must also withstand the detonation
pressures while conveying the burning vapors
and flame front to the element. Depending on
the design of the system in which it is used, the
arrester bases can include optional ports for
thermocouples or pressure monitoring devices.
See “INTEGRATED TEMPERATURE SENSORS”
These devices can activate warning or shutdown
systems if abnormal conditions are detected.
Both bases may be equipped with large
diameter inspection/clean-out ports for in-line
maintenance of the element, or element removal
may be required for inspection/maintenance.
INSTALLATION
Operating Conditions:
Based on the testing conditions, this series of
In line deflagration flame arrester may be
installed in piping systems where:
1. The MESG of the vapor constituent(s) is
greater than or equal to 0.045" (1.14 mm).
2. System operating pressure is less than or
equal to 15.7 PSIA (1.08 Bar).
3. Normal operating temperature is between
o
F (-20o C) and 140o F (60o C).
-4
4. The piping system in which the deflagration
arrester is to be installed must not exceed
the arrester flange size.
3
Page 4

5. Center the gasket within the bolt circle.
WARNING
The 7598 in line deflagration flame arrester
may NOT be effective in stopping flame
propagation in systems which contain
vapors with an MESG less than 0.045" [1.14
mm] or when any of the operating conditions
are exceeded.
All Groth in line deflagration flame arresters are
bi-directional and can be used in vertical or
horizontal piping systems.
WARNING
The flame arrester housings or adjacent
piping may have various pipe taps for
pressure sensing, temperature sensing,
condensate drainage, etc. Never connect
such taps to a common line or system as
this could provide a flame bypass around the
flame arrester element.
This series of flame arresters all have 150#
ANSI flanges. Please follow the torque
guidelines listed in Table 1 for flange make-up
torque.
WARNING
The lifting eyes on the element housing are
to be used for handling the housing only
during inspection and mainte-nance. DO
NOT use these eyes to lift the entire flame
arrester assembly.
6. Set the arrester between its mating flanges
or nozzle. Position the lifting handles and
jacking nuts to facilitate future removal of the
flame arrester housing. Position the drain
and instrument ports to provide proper
access and function. (See Maintenance
Instructions). Install the studs and tighten
nuts hand tight.
• Note: When installing model 7598 in a
horizontal pipeline, use the lowest 1” ports to
drain condensed vapors from the housing.
Note previous warning when connecting the
drain piping.
Table 1
PIPE FLANGE STUD TORQUE CHART
Lb.Ft. [Nm]
Note
When transporting the arrester, support it
with the flanges in the horizontal position.
This position provides the maximum support
for the flame element winding. Lift the
assembly with the [2] lifting eyes attached to
the bases if applicable.
The following guidelines should be observed at
installation:
1. Remove any flange protectors and discard
all packing material.
2. Inspect the gasket seating surface of the
mating flanges. It must be clean, flat, free of
scratches, corrosion and tool marks.
3. Inspect the gasket; make sure that the
material is suitable for the application.
4. Lubricate all studs and nuts with an
appropriate thread lubricant. If the arrester
will see high temperature service or stainless
steel fasteners are used, select an anti-seize
compound such as moly-disulfide.
Size
(mm)
2”
(50mm)
3”
(80mm)
4”
(100mm)
6”
(100mm)
8”
(100mm)
10”
(100mm)
12”
(100mm)
Torque
Flat face Raised face
60 [82] 60 [82]
60 [82] 60 [82]
60 [82] 60 [82]
105 [143] 105 [143]
105 [143] 105 [143]
140 [190] 170 [231]
140 [190] 170 [231]
4
Page 5

(Torque is an average value based on a nitrile
binder synthetic gasket, 1/32" thick and lubricated
threads).
7. Torque all fasteners to half the value listed in
Table 1 in a staggered, alternating pattern to
provide an evenly compressed gasket joint.
8. Make up the final torque and check that no
further nut rotation occurs at the specified
torque value.
WARNING
After installation, all connections must be
inspected for vapor leakage. This may be
accomplished by static test, gas detector, or
"bubble" test using Snoop or similar liquid.
MAINTENANCE
For maximum operating efficiency the element
of a flame arrester must be inspected and
maintained at regular intervals. Frequency of
inspection should be based on the experience
gained in each application. Inspection of wetted
components is recommended at least once per
year or any time that one of the following
conditions occur:
attachment to the housing handles, or lifting
eyes, and proceed as follows.
WARNING
The lifting eyes on the element housing are
to be used for handling the housing only
during inspection and mainte-nance. DO
NOT use these eyes to lift the entire flame
arrester assembly.
2. Loosen the hex nuts and remove only those
studs or tie rods necessary to withdraw the
housing.
• Excessive pressure drop is encountered at a
known flow rate.
• A flame front is detected.
Maintenance is accomplished by removing the
element assembly for inspection and cleaning or
replacement.
CAUTION
The connecting pipeline must be free of all
hazardous or flammable vapors before
inspection procedures begin. Before
disassembling arrester consult Material
Safety Data Sheets (MSDS) for all products
that the arrester was exposed to in service.
The components should be cleaned
according to MSDS procedure. Take
appropriate safety precautions regarding eye
protection, skin contact & respiration.
The element cannot be removed in-line with
the integrated thermowell in place. Remove
the well completely by backing-out the
threaded connection in the housing. The well
must be re-installed in the same
housing
with an appropriate thread sealant/lubricant.
1. When removing the element housing for
maintenance, support the weight by
3. On the remaining studs, loosen the holding
nuts and use the spreader nuts to separate
the base halves from the housing. Use
spacer blocks or spreader tools, if
necessary, to safely secure the base halves
so the housing is free for removal.
CAUTION
In a horizontal line, the flame bank assembly
should be supported before removing the
studs. Use structures and equipment
suitable for supporting the components
weight. The weight is noted on the drawing
attached to this manual.
4. Remove the housing assembly for
inspection. The flame element and
supporting grids shall be visually inspected
for damage or corrosion build-up from both
sides. If the flame element appears to be
damaged, it should be replaced immediately
with a new one.
5. Verify that the element openings are not
obstructed by viewing a light source through
the element passages. If the flame element
is dirty it can be cleaned by one of the
following methods:
•
Compressed air.
5
Page 6

High pressure steam or water purge.
•
•
Solvent wash followed by compressed air.
WARNING:
Never try to clean the element by inserting a
sharp tool or probe into the orifices. Any
damage to the integrity of these passages
can render the flame arrester ineffective.
6. Inspect the sealing gasket for damage and
replace if necessary.
7. Reassemble the housing, bases and
gaskets. The counterbores will position the
housing on the base centerline. Insert the
studs and torque all fasteners to half the
value listed in Table 2 in a staggered,
alternating pattern to provide an evenly
compressed gasket joint.
8. Lubricate all studs and nuts with an
appropriate thread lubricant. If the arrester
will see high temperature service or stainless
steel fasteners are used, select an anti-seize
compound such as moly-disulfide.
9. Make up the final torque and check that no
further nut rotation occurs at the specified
torque value. The torque values are based on
original gaskets supplied by Groth
Corporation.
Note:
When replacing a temperature sensor, make
sure that the tip of the sensor makes firm
contact with the end of the integrated
thermowell.
Chemical Compound MESG*
(mm)
acetone 1.02 0.040
acetonitrile 1.50 0.059
ammonia 3.17 0.125
amyl acetate 0.99 0.039
butane 0.98 0.039
butyl acetate 1.02 0.040
butyl alcohol 0.94 0.037
carbon monoxide 0.94 0.037
cyclohexane 0.94 0.037
decane 1.02 0.040
ethane 0.91 0.036
ethyl acetate 0.99 0.039
ethyl nitrite 0.96 0.038
heptane 0.91 0.036
hexane 0.93 0.037
isobutyl alcohol 0.96 0.038
MESG
(Inches)
Table 2
HOUSING STUD TORQUE CHART
Lb.Ft. [Nm]
SIZE
(mm)
2”
TORQUE
7598
40 [54]
(50mm)
3”
40 [54]
(80mm)
4”
40 [54]
(100mm)
6”
105 [143]
(100mm)
8”
105 [143]
(100mm)
10”
220 [300]
(100mm)
12”
220 [300]
(100mm)
The table below is a partial list of vapors for which the MESG
has been measured and found to be greater than or equal to
0.045" [1.14 mm]. If your system contains a gas not listed in
the table, please consult the factory.
Chemical Compound MESG*
(mm)
isooctane 1.04 0.041
isopentane 0.98 0.039
isopropyl alcohol 0.99 0.039
methane 1.14 0.045
methyl acetate 0.99 0.039
methyl alcohol 0.92 0.036
methyl ethyl ketone 0.92 0.036
methyl isobutyl ketone 0.98 0.039
octane 0.94 0.037
pentane 0.93 0.037
propane 0.92 0.036
propyl acetate 1.04 0.041
propylene 0.91 0.036
vinyl acetate 0.94 0.037
vinyl chloride 0.99 0.039
MESG
(Inches)
6
Page 7

*Corrected MESG (mm), 100KpA, 20°C
MODEL NUMBER IDENTIFICATION
MODEL#
NOMINAL
SIZE
MATERIAL
7598
02”
Thru
12”
Flame Element W inding
Body Material
3 = Carbon Steel
5 = 316 SS
Z = Special
NOTES Include model number when ordering.
For special options, consult factory
OPTIONS
O = No Options
A=ATEX Integrated T/C
Z = Special Option
O=No Steam Jacket
J=Steam Jacket
F = 150# A.N.S.I. Flange
EXAMPLE: 7598 - 02 - 35 - FOA
Indicates a 2” Model 7598, Carbon Steel Body, 316 SS Flame Element, ANSI 150# Flanged Outlet, and ATEX Integrated thermocouple
PRODUCT LIMITED WARRANTY
A. Seller warrants that products which are manufactured by Seller, are
manufactured in accordance with published specifications and free
from defects in materials and/or workmanship for a period of (12)
twelve months. Seller, at its option, will repair or replace any
products returned intact to the factory, transportation charges
prepaid, which Seller, upon inspection, shall determine to be
defective in material and/or workmanship. The foregoing shall
constitute the sole remedy for any breach of Seller's warranty.
B. THERE ARE NO UNDERSTANDINGS, AGREEMENTS,
REPRESENTATIONS, OR WARRANTIES, EXPRESS OR
IMPLIED, (INCLUDING MERCHANTABILITY OR FITNESS FOR
A PARTICULAR PURPOSE REGARDING PRODUCTS ) UNLESS
SPECIFIED IN THE SALES CONTRACT. THIS CONTRACT
STATES THE ENTIRE OBLIGATION OF SELLER.
Seller makes no warranties, either express or implied, except as
provided herein, including without limitation thereof, warranties as
to marketability, merchantability, for a particular purpose or use, or
against infringement of any patent of products. In no event shall
Seller be liable for any direct, incidental or consequential damages of
any nature, or losses or expenses resulting from any defective new
product or the use of any such product, including any damages for
loss of time, inconvenience, or loss of use of any such product.
C. The original Manufacturer shall be solely responsible for the design,
development, supply, production, and performance of its products
hereunder, and the protection of its trade name or names, if any. It
assumes no responsibility, for products modified or changed in any
way by its agent or customer. Any such modifications or changes to
products sold by Seller hereunder shall make the product limited
warranty null and void.
D. The Manufacturer shall be under no obligation to manufacture, sell,
or supply, or to continue to manufacture, sell or supply any of the
Products.
1
 Loading...