

Groove Tubes Soul-o Series 75, Soul-O 75, Soul-O 150 Operating Manual
9 - There is no particle board in any part of our cabinetry, only
solid core American plywood.
Of course these features and construction details cost more, but
you can really hear the difference!
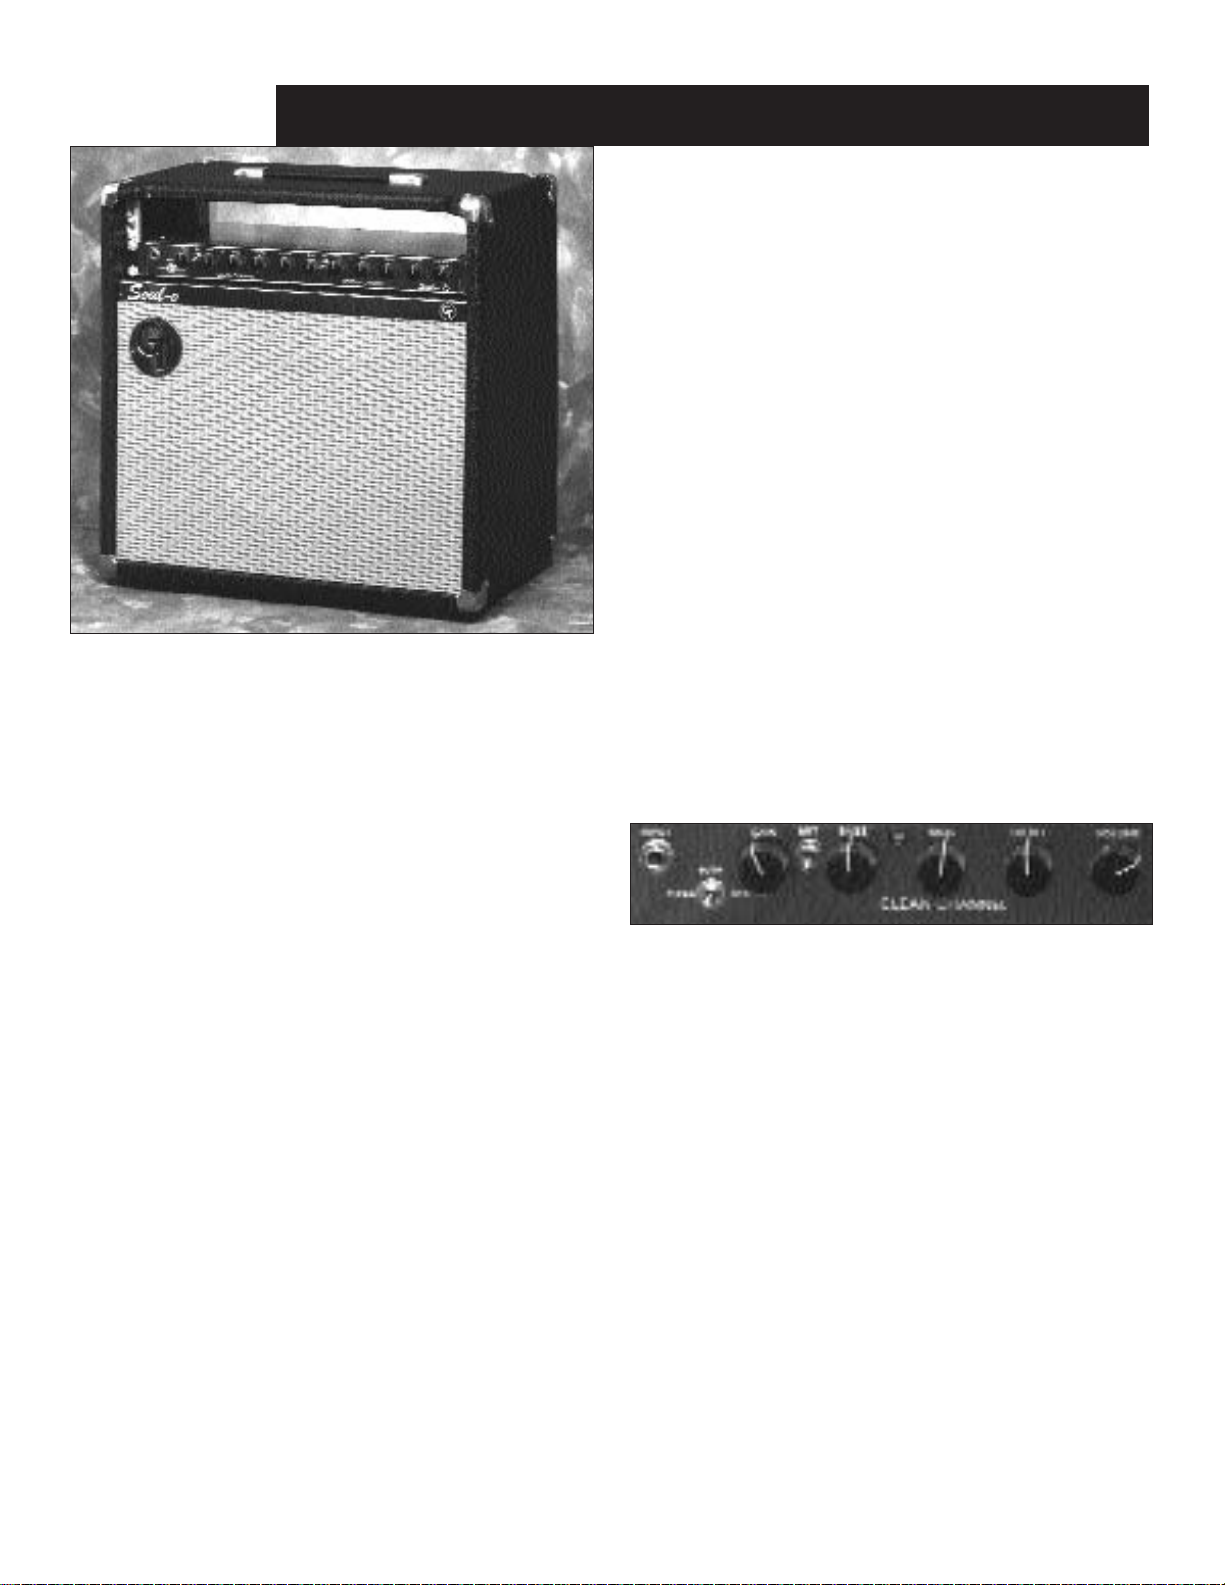
The Front Panel Features...
The Preamp Stage
The Soul-o Series preamp stage has 5 GT12AX7 dual triodes, each
performing multiple functions in the circuitry. The two channels
are designed with entirely different purposes and therefore have
vastly different gain structures and voicing. You may switch
between Clean and Scream, or combine them as Both for more
really interesting possibilities. These can be switched from the
front panel or by the optional footswitch, in which case the front
panel switch must be in the center, or Both, position. It is also
possible to adapt the footswitch jack to work with most remote
rackswitching devices.
The Clean Channel has the basic 5 controls you’ve likely seen
before: Gain; Bass; Middle; Treble; and Volume plus a Brite switch
for that real “cutting edge” sound. You may want to turn the Brite
switch off if you’ve got a Telecaster. The Clean channel is not
designed to produce heavy distortion, hence it’s name. However,
an increase of Gain and decrease of Volume will produce a gradually fatter, warmer tone while the opposite will produce the brightest sound and most dynamics or headroom.
The design of the tone controls on this channel are passive, as
used on older style amps. Active designed tone controls, most
common in newer amps, have a separate gain section for each
tone band, in effect they act like a series of effects loops which
“suck tone”...so we don’t use them. Our tone controls are more
interactive with your style of playing and are simply more musical.
To get the most out of passive tone controls, start by listening to
the channel with all tone controls at the 12 o’clock position. Then,
if you want more bass, either: 1) crank up the Bass control; or 2)
lower the Treble control, raising the gain to compensate the volume loss. Passive controls are interactive, so turning any one of
them fully on, or off, diminishes the effect of the others and alters
the gain structure. Experiment with this advice in mind.
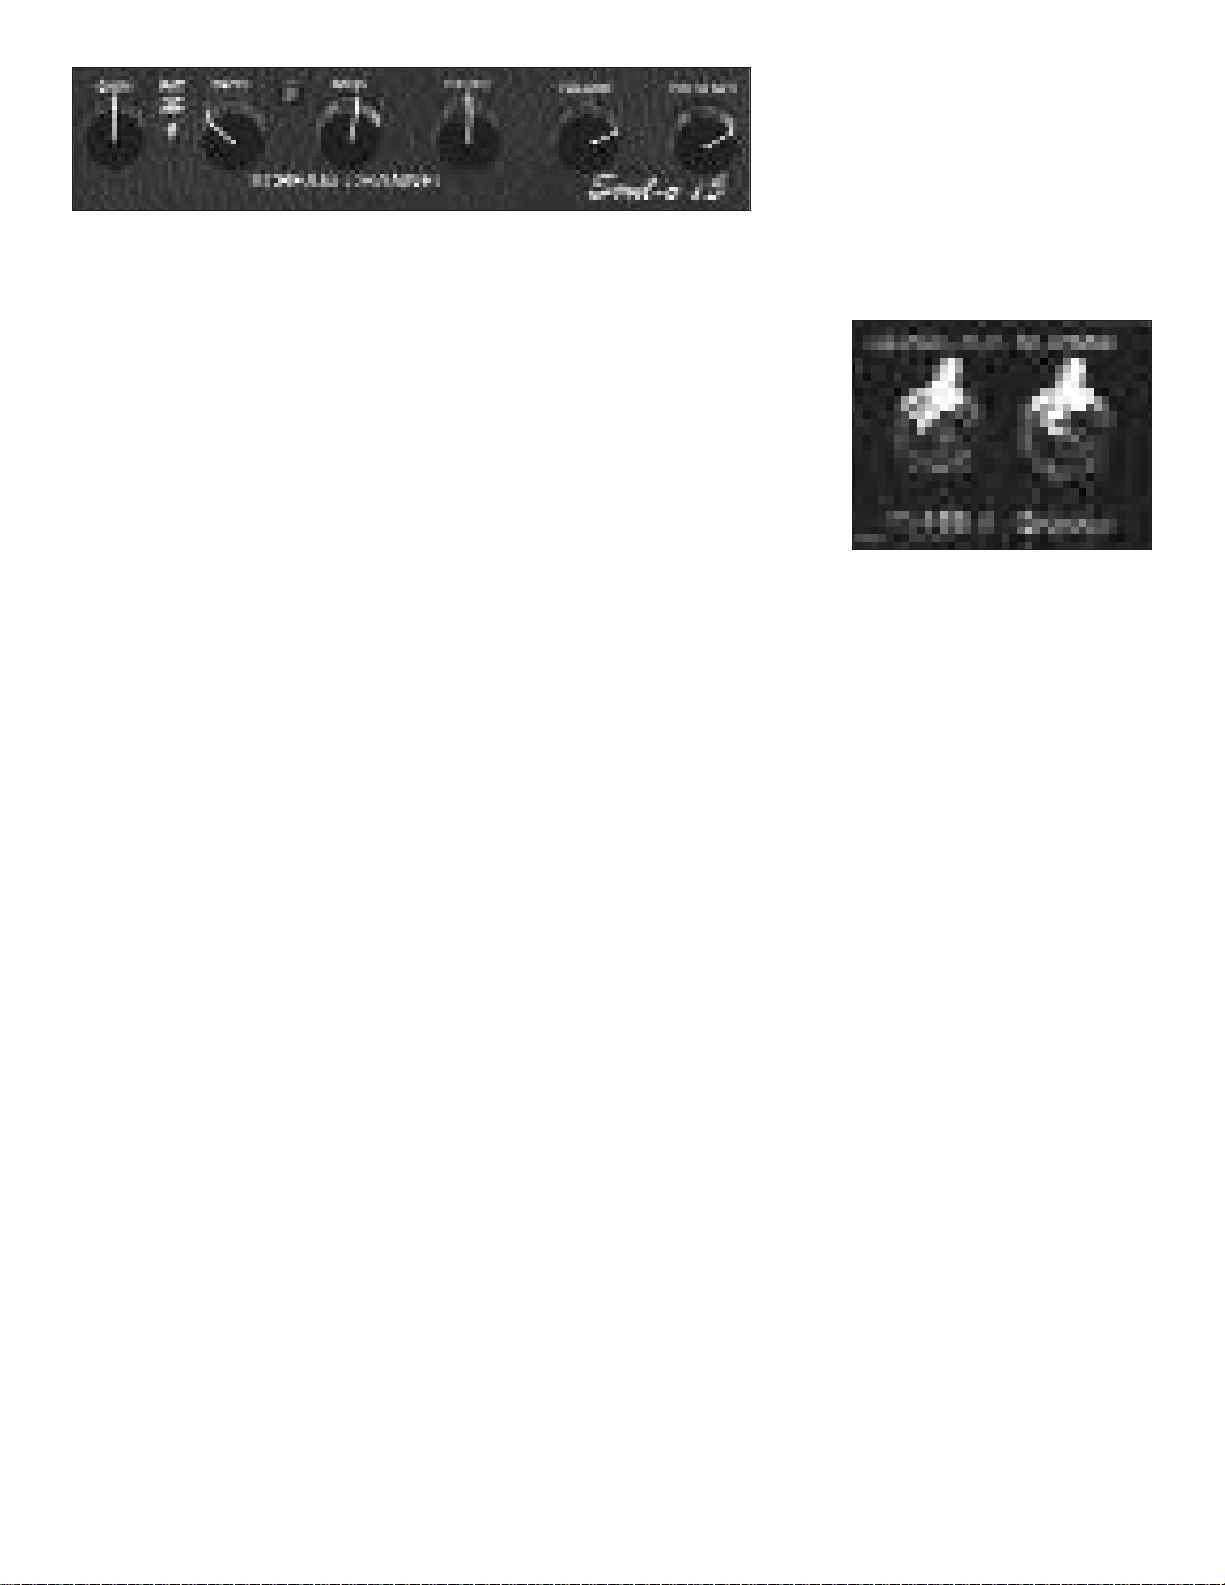
The Scream Channel
The Scream Channel also has the same basic 5 controls plus a Fat
switch, which does just what is says. However, since this channel
is designed to produce a wide range of distortion tones from Blues
to Metal...the Gain and Volume ratio are everything! If you want
more distortion, raise the Gain and lower the Volume. This channels tone controls are also passive, but of a different design than
the other channel. This tone circuit is called a cathode follower
type and changes it’s tone depending on how hard you pick the
string of your guitar. Notice as you push the note harder with your
Congratulations, you’ve just purchase what we believe is the best
amp on the planet! We’d like to welcome you to the growing list
of artists who share our mutual lust for tone. Now, we’d like to
better acquaint you with your Soul-o amp new amp and show you
how to get the most out of this incredible hand built tube amplifier.
Some of our unique construction details:
1 - All components are hand soldered. There are no quick disconnects, wire nuts, or dipped connections and over 120 hand
soldered connections on the tubes sockets alone
2 - All transformers are custom designed and made exclusively for
Groove Tubes.
3 - GT amps are designed to use your choice of 6L6, 5881,
European E34Ls or KT88s power tubes. Choose from a total of
13 different tubes which are currently available from our GT catalog. Customized your S75 for tone and power from 35 RMS watts
to 95 RMS watts, and the S150 from 80 RMS watts to over 190
RMS watts!
4 - The entire amp chassis for the combo package is shock mounted on rubber isolators to reduce adverse interactive vibrations and
microphonics at higher playing levels.
5 - The critical V1 preamp tube is also shock mounted on a special rubber isolator to reduce adverse interactive vibrations and
microphonics at higher playing levels.
7 - We use only double sided, double thick PC boards with double
thick traces and no PC mounted sockets. Instead we use chassis
mount type sockets bolted and hand wired to the PCB. This is the
best of both worlds; PCB and point to point construction.
8 - There are more than 28 hours of hand labor in each Soul-o
Series amp. Each amp is custom to built to order!
SOUL-O SERIES 75/150 OPERATING MANUAL
AC30 used Class A circuitry as did early Tweed
Fenders. More modern Fenders and Marshalls
used the power tubes in a Class A/B circuit
design. Frankly, we liked both designs and
invented a way to switch between them. In addition, we developed a special output transformer
designed to work with many different types of
power tubes. The combination of these unique power section
designs give the player ultimate flexibility in customizing the tone,
power, and response of his power stage.
The Power Amp Stage
All Soul-o Series stages
are designed to use
many types of power
tubes, up to 13 different
types that are currently
available from our
Groove Tubes catalog at
the time of this writing
(and more are coming in
the near future!) This allows you to “customize” your amp for the style of
music you’re playing, and also to dramatically change the power, tone or
response of your amp when the urge hits. Also, our unique output
design allows the tubes to be used in three basically different circuit
designs which can be manually selected on the rear of your control panel:
1) Class A/B, commonly referred to as Push/Pull, where the
power tubes work in an alternating system which provides maximum power and more dynamic range. This design is common to
almost all newer Fender or Marshall type amps and is favored by
modern amp designers because it produces maximum power
from the output tubes....more bang for the buck!
2) Class A Normal which emulates early Fender amp designs (pre
1954) where the power tubes work in unison and so lose about 30%
of possible output power and produce more compression. Another
trait of this Class A design is that the tubes draw full current at all
times and so run hotter (Class A/B draws current only on demand;
no signal from guitar, no power draw and so the tubes run cooler).
3) Class A Gnarly a slightly less efficient form of Class A which
produces about 10% less than the Class A Normal design. This
circuitry emulates the early Vox AC30 amp tone and is even
greasier sounding and more compressed.
Switching between the circuit designs
Located on the rear panel, the the left switch selects “Class A/B in
the up position and Class A in the down position. The right switch
selects between Class A “Normal” and Class A “Gnarly” and is
active only when the first switch is in the Class A position. The
amp does not necessarily need to be put into “standby” mode
before switching between output tube designs, but it is highly recommended to avoid a loud popping sound in the speakers.
NOTE: Power tubes react in various degrees to these different
circuitry designs. The most dramatic differences between Class
A and Class A/B seem to occur with the 6L6 type tubes, and less
so with the EL34 type tubes.
playing, the tone will brighten up, while softer playing will produce
a rounder fatter tone...that is by design and will give you a truly
touch sensitive channel that will reflect your personality...indulge
yourself and have some fun! Remember, as with all passive type
controls, start with them in the 12 0’clock position and season to
taste from there...don’t just crank them all up and wonder why the
channel sounds mushy!
CAUTION: The Scream channel uses passive tone control circuitry for
the most musicality and also has tremendous available gain because
we do not know if your guitar would have low or high output pickups.
Therefore, we wanted to provide enough gain so that even a very low
output pickup can achieve excellent overdrive distortion and sustain.
However with stronger pickups, and with the Gain or Treble controls
at higher levels, it could be possible to induce self-occilation in the
Scream channel, or make it scream all by itself. If this should occur,
simple lower the gain and/or Treble control to acceptable levels.
Using Both Channels
Another unique feature of this amp is that Both channels can be
used at the same time. Simply select the Both position on the
front panel (and/or the Both position on the optional footswitch)
and Clean with Scream can now be balanced using their separate
Volume controls. I have found that the most useful gig setting is
to simply find my optimum Clean; channel setting, then find my
best Scream channel setting and when I switch into Both, the
sound is perfect for the “second” lead tone or a great third tone
with my guitar volume backed slightly down. It’s a great feeling
playing with the fat, compressed Scream channel coupled with the
edge and full voice of the Clean channel underneath...it’s a great tone!
Note, when using the footswitch: to get back to the alternating
Scream/Clean mode, you must de-select the Both position from
the footswitch. Once the Both position is turned on, it must be
turned off!
The Presence Control
This control is interactive with the power stage, and when you
increase it’s level you are adding more high frequency back into
the feedback loop of the power tube stage. Increasing Presence
will increase the interactive gain and provide more touch and push
in the amp. Normally, I use the same settings for the tone controls and adjust the Presence for the gig I’m playing. More
Presence for an acoustically “dead” room, and less for the “more
lively” rooms. Also, perhaps you might want to use less on a single coil guitar and more on a humbucker type.
The Rear Panel Features...
The most unique rear panel feature are the switches that select the
circuitry for using the power tubes. You may select between Class
A/B, Class A Normal, and Class A Gnarly. We developed this
design from 18 years of experience with the many vintage amps
from the GT collection. Some great sounding amps like the Vox
 Loading...