

Groov GROOV-AT1 Quick Start Manual
Form 2063-140602—June 2014 © 2014 Opto 22. All rights reserved. Printed in the United States.
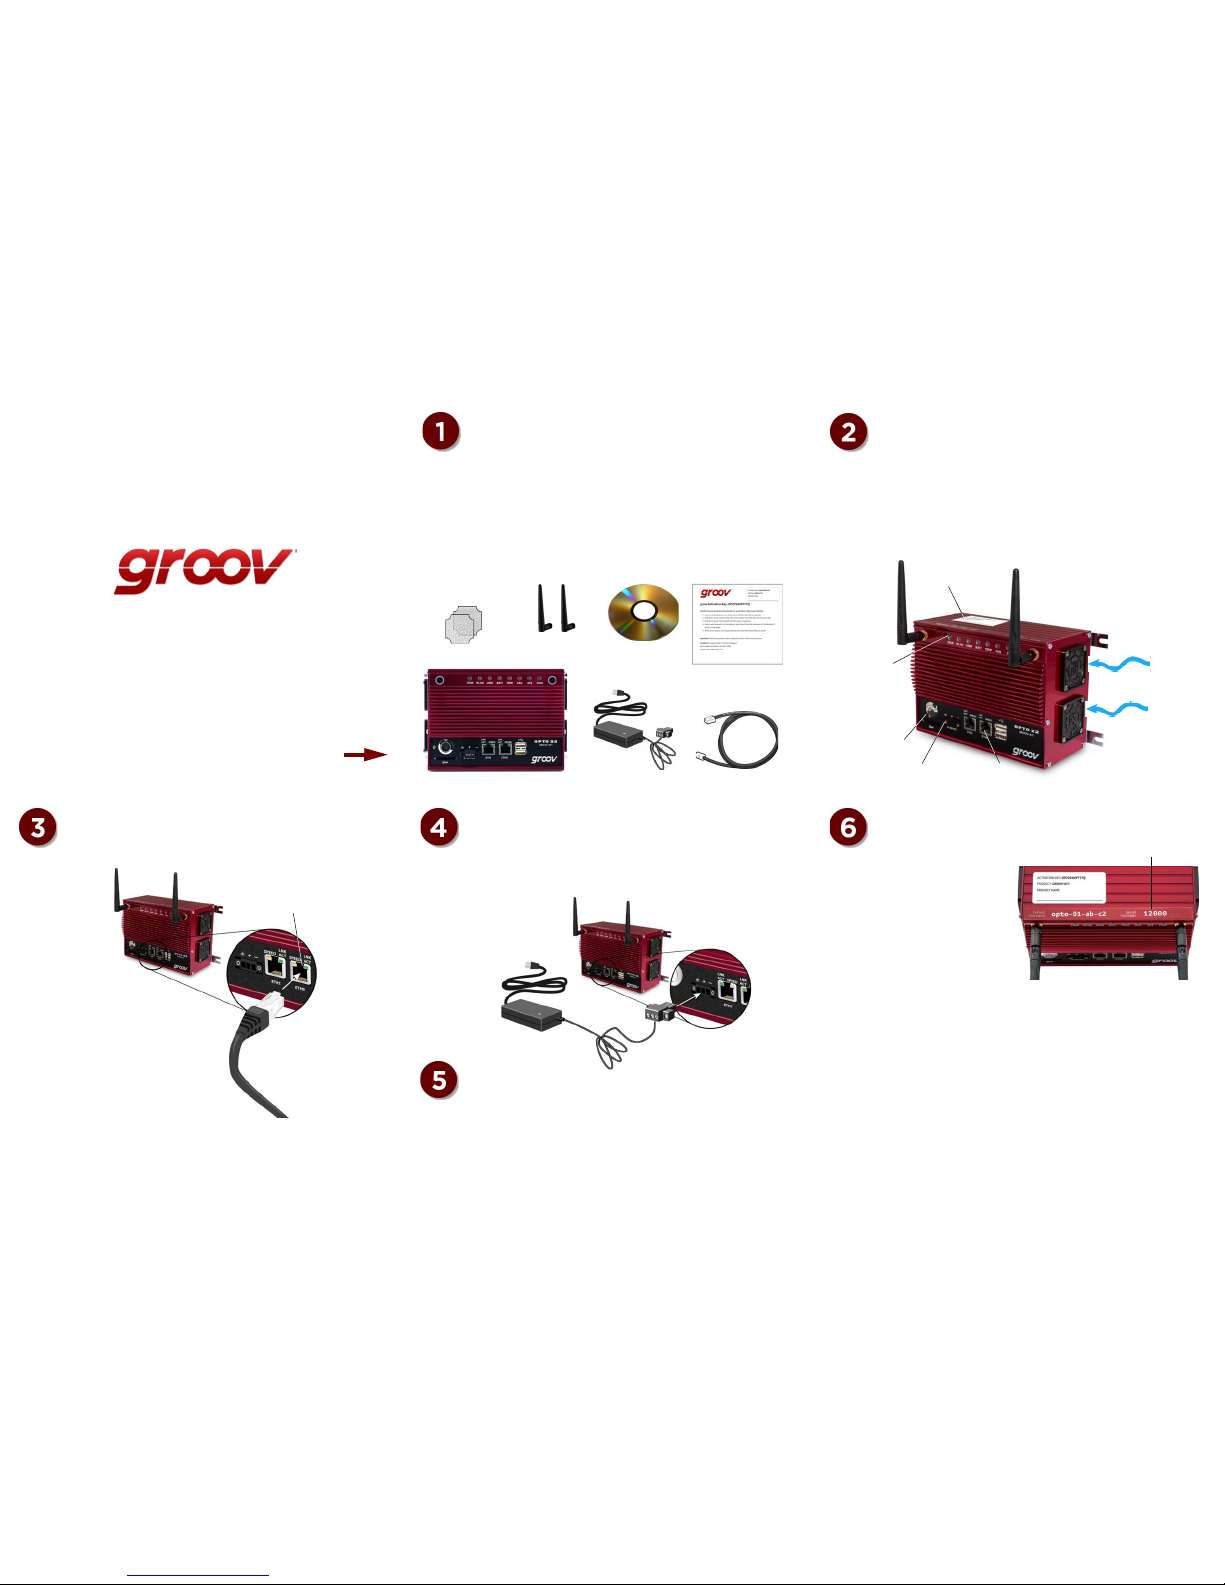
Connect the power supply
Plug the small connector on the power supply into the power terminal on the
bottom of the
groov Box
, and tighten the screws. Plug the other end into a
standard 120 or 240 VAC outlet.
Get Started
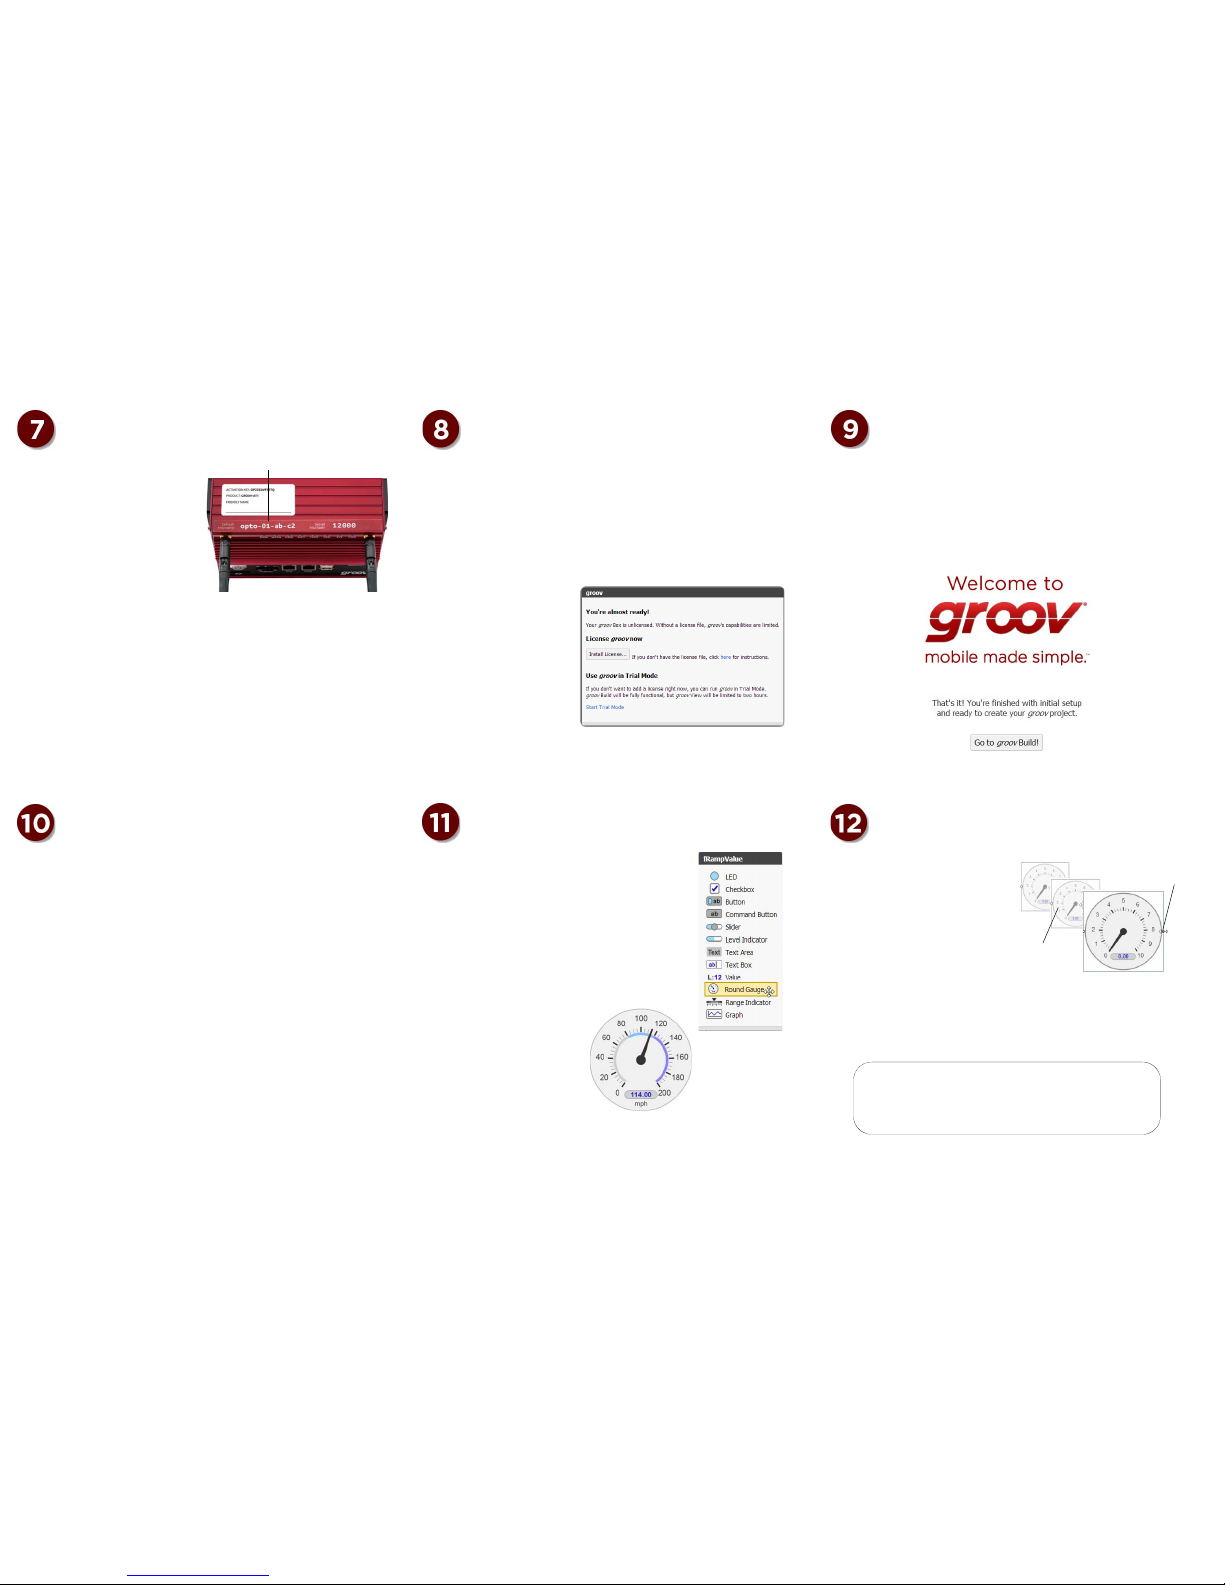
Activate the groov Box and get the
license file
a.
Open a web browser (Firefox or
Chrome recommended) and go to
activate.groov.com
.
b.
Log in using your email address and
your My.Opto22 password.
You may have set up your free
My.Opto22 account when you
purchased your
groov
Box. If you don’t
have a My.Opto22 account, enter your
email address and other information,
and the account will be created.
c.
Follow the on-screen instructions to activate your
groov
Box and download the
license file.
When asked to enter the serial number, you’ll find it on the label on the top of
the device.
Connect to the network
Quick Start
for GROOV-AT1
Open
Unpack the groov Box
You need:
•
A computer with a modern web browser on the same network you’ll use for the
groov
Box. We recommend Chrome, Firefox, or Internet Explorer 10.
•
One of the following, on the same network as your computer. The network
should have DHCP & DNS.
– An OPC UA-compatible tag server communicating with virtually any
automation system or equipment
– A PAC S-series, PAC R-series, or SoftPAC controller with firmware R9.2a or
newer, running a strategy developed in Opto 22’s PAC Control
Serial number
Turn on the groov Box
Briefly press and release the On/Off button. Wait until the SYS LED has stopped
blinking and is solid green. Also, take a look at the LNK ACT light for ETH0. If the
cable is properly connected, the LNK ACT light should be on or blinking.
In the box...
Ethernet cable
CD
groov Box (GROOV-AT1)
Antennas
(attach before use)
Spare fan filters
Power supply
Activation key
certificate
Connect ETH0 to your
computer’s network.
If you have a separate control network,
see the
groov Box User’s Guide.
LNK ACT light
For detailed information on setting up your
network, and setting up communications
over the Internet, see form 1796, the
Guide
to Networking Opto 22 Products.
To set up the groov Box, you’ll use the
groov
Box components shown below.
Peel the label from the Activation Key Certificate and affix it to the top of the
groov
Box.
When deciding where to place the
groov
Box, make sure there is room around the
front, top, and sides of the
groov
Box to allow air to flow freely around the device.
You need to be able to see the information on the bottom.
On/Off button
LEDs
ETH0
Airflow
Power terminal
Affix the Activation
Key label here.
Form 2063-140602—June 2014 © 2014 Opto 22. All rights reserved. Printed in the United States.
Create a groov Admin account and
install your license
Create a groov Build account
Get a tag database Build your operator interface
a.
Click Add Page on the left side under Pages.
b.
Type a new name for the page, then click OK.
c.
With the Tags tab selected in Gadget Palette, click the
plus sign to expand the list of tags.
d.
Choose a tag that changes its value frequently.
e.
In the pop-up dialog box, double-click a Round Gauge.
f.
In the upper right corner, configure the Round Gauge
properties.
To add a zone, click the Add Zone button. Choose the Min
Value, Max Value, and Units that make sense for your
variable.
g.
Select File > Save All Changes
and Switch to
groov
View.
h.
You should now see the Round
Gauge running in View. The
needle shows the tag’s current
value.
You can add a tag database from an Opto 22 controller or from another
manufacturer’s system or device communicating with an OPC UA-compatible
tag server. For more information, see form 2027, the
groov User’s Guide
and
the documentation provided for your device and tag server.
Follow these steps to add tags from another manufacturer’s device
:
a.
In Build, select Configure > Devices and Tags.
b.
Click Add OPC-UA Server, and enter the Name of the OPC-UA server.
c.
For the Server URL, using the following format, enter the IP address or
hostname of the computer where the OPC-UA server is installed, and
enter the port. You can also enter the path of the OPC server endpoint.
d.
Click Add Server, then close the open dialog boxes.
The controller’s static tags are now available for you to browse and use.
Follow these steps to add tags from an Opto 22 controller:
a.
In Build, select Configure > Devices and Tags.
b.
Click Add Opto 22 Controller.
c.
Enter the IP address of a PAC S, PAC R, or SoftPAC controller running a
strategy you would like to use.
d.
Click Browse to locate the .
idb.txt
file for your strategy.
The .idb.txt file resides in the strategy’s directory. It’s created when the
strategy is compiled.
e.
Highlight the idb.txt file, click Open, and then click Import.
f.
Close the Configure Devices and Tags dialog box. The imported strategy’s
tags are now available to use.
Adjust the handheld layout
Open groov
a.
In your browser, enter https:// and
your
groov
Box’s hostname as the
URL. For example, if the hostname is
opto-00-d2-dc, you type
https://
opto-00-d2-dc
b.
Accept the security warning.
For Chrome
: Click “Proceed anyway.”
For Firefox
:
– Expand “I Understand the Risks.”
– Click Add Exception to open the
Add Security Exception dialog
box.
– Select “Permanently store this exception.”
– Click Confirm Security Exception.
For Internet Explorer
: Click “Continue to this website (not recommended).”
The
Welcome to groov
window opens in your web browser.
c.
Click Next.
NOTE: If the
Welcome to groov
window does not open, your network configuration is
probably unique. Please see the groov Box User’s Guide.
a.
Click the gear symbol in the
upper-right corner of View, and
select Switch to
groov
Build.
b.
Add several more tags and
gadgets to your project, and
arrange them in the Desktop &
Tablet view.
c.
Click the Handheld tab at the top
of the work area. You’ll notice
that the gadgets are arranged
differently in the Handheld view,
but they contain exactly the same gadgets, tags, and properties.
d.
Drag each gadget into position, and resize it as necessary for the Handheld view.
Switch to the Desktop & Tablet layout. You’ll notice that arranging the gadgets in
the Handheld layout does not affect the Desktop & Tablet layout.
A Build account allows the user to create and edit a project in
groov
Build.
a.
When prompted, enter a new username and password. Enter the password
again to confirm.
b.
Click Create
groov
Build Account.
c.
Click Go to
groov
Build.
groov
Build opens in your browser.
If you have any trouble opening
groov
, see Troubleshooting in
form 2027
, the
groov User’s Guide
.
Follow the on-screen instructions to create a username and password for
groov
Admin. The Admin account is for administrative tasks such as setting the
network connections and updating the
groov
Box.
CAUTION
: Write down your Username and Password, and keep them in a safe
place. You will need this information each time you log in. If you lose your login
information, you will have to reset the groov Box to factory defaults which will
erase your project. There is no password recovery option.
Make sure to install your license file. Without an installed license,
groov
will only
work for two hours.
a.
When prompted, click Install
License.
b.
Browse to the license file,
then click Open.
Your license is now installed.
Hostname
Drag into position
Resize
To get updates at any time, go to
manage.groov.com
. For update
instructions, see the
groov Box User’s Guide
on the
groov
Box CD.
Backing up your project
: As you work on your project, make sure
to back up frequently in
groov
Build. For more information, see the
groov User’s Guide
.
 Loading...