

Page 1
Vertical Garden Bed Pre-Assembled
1
2
3
5
6
7
4
1
32” x 45” Assembly Instruction
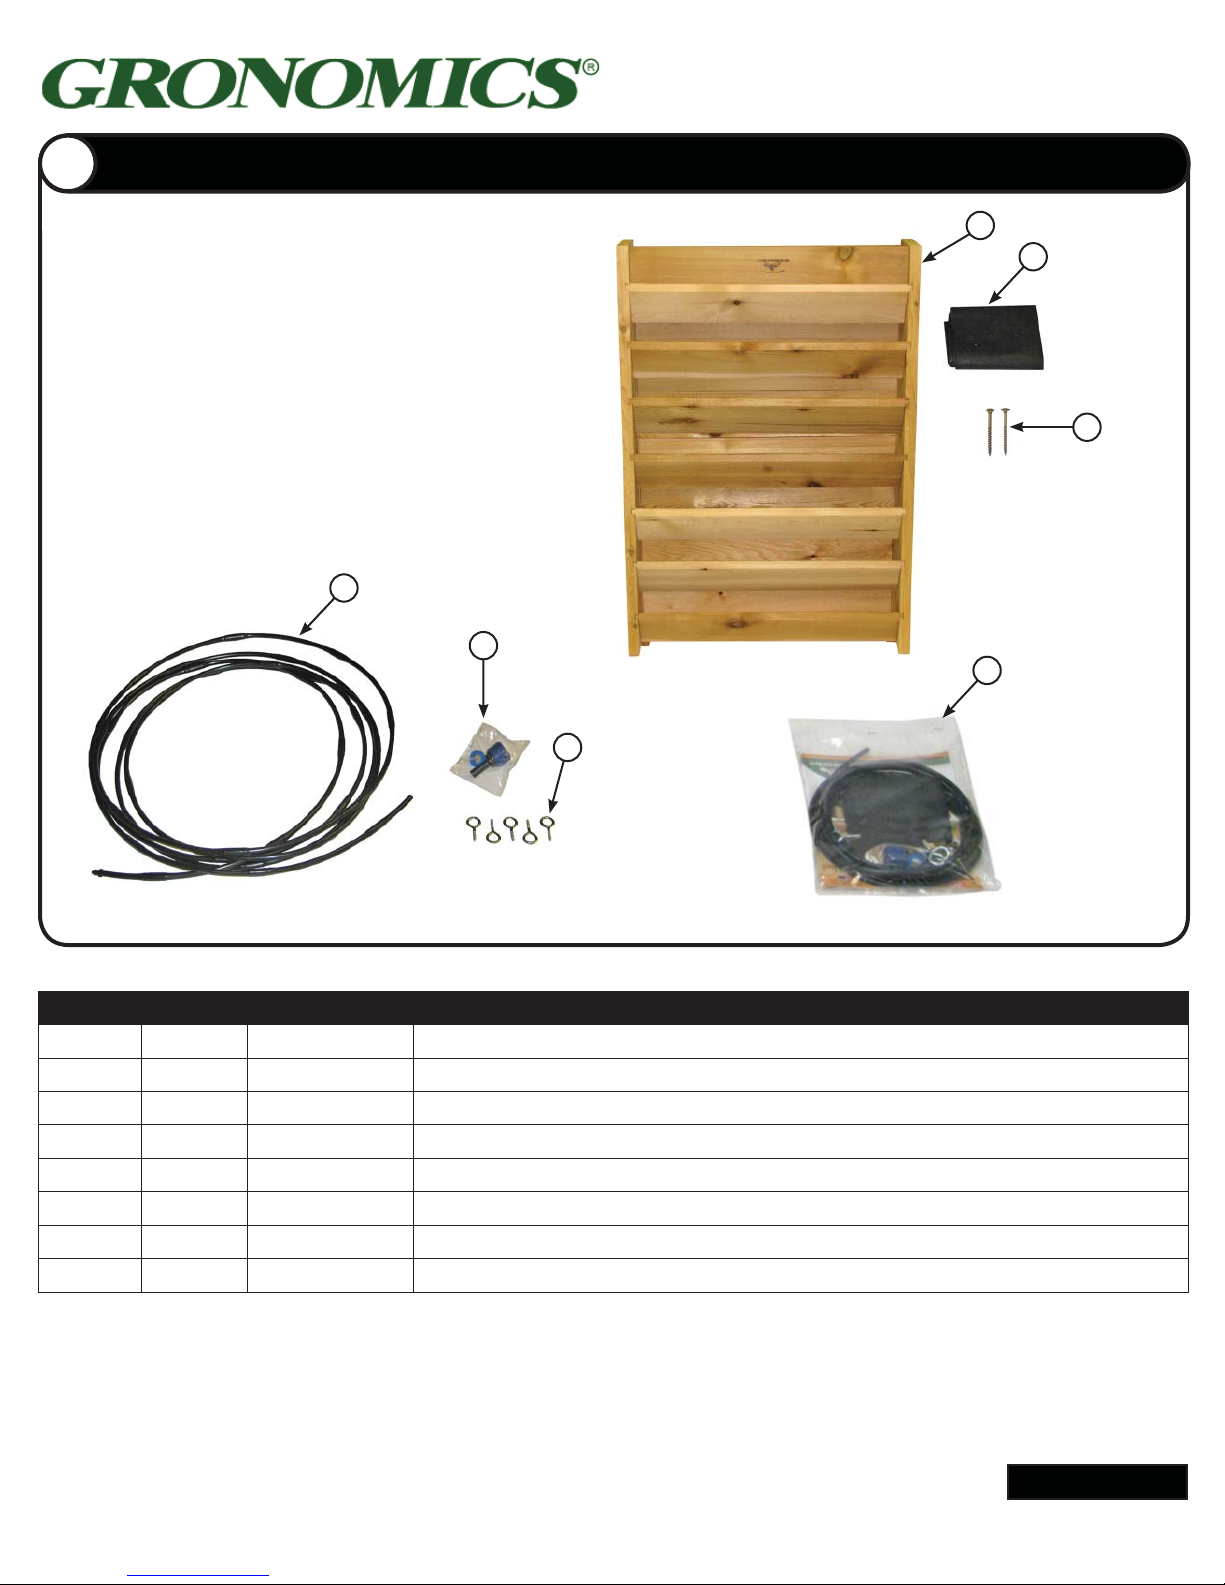
Parts Identifi cation
Using the parts list, locate and count the individual
pieces and verify that you have received the correct
number of pieces.
Check all the pieces for damage. If any pieces
are damaged or missing, contact Gronomics at
1-855-299-6727.
NOTE:Ground preparation is optional,
however we recommend leveling area under
frame of product, or place product directly on
a flat level surface before filling with soil.
Item #: VG 32-45
Parts List
ITEM QTY. PART # DESCRIPTION
1 1 VG32-45 Vertical Garden Bed 32”W x 45”H x 9”D
2 1 FL3610 Fabric Liner 36” x 10-1/4”
3 2
RSS10-234ZY
4 1 GBDIK
5 1
6 1
7 5
SCEY6Z
Screw, RSS GRK 10 x 2-3/4”
Garden Bed Irrigation Kit (Contains Items 5 - 7)
Irrigation Tubing 16’
Hose Connector
Eyelet Screws
Packaged & Inspected by:________________________________________Date:___________________
Product Care and Maintenance - Western Red Cedar will turn a weathered grey if left unfinished. Although no finish is required
for cedar when used outdoors, a natural oil finish applied regularly will help maintain the beauty and minimize cracking and drying. It is
recommended to use Gronomics Garden Bed Oil (Item # GBO-1Q), a non-toxic, food safe finish that is very easy to apply.Apply Oil when air
and windtemperaturesarebetween50-90degrees. Avoid applying in direct sunlight.
Continued
www.gronomics.com East Bethel, MN USA 763-753-7374
Page 2
Angled Front Shelf Board Removal
2
3
7
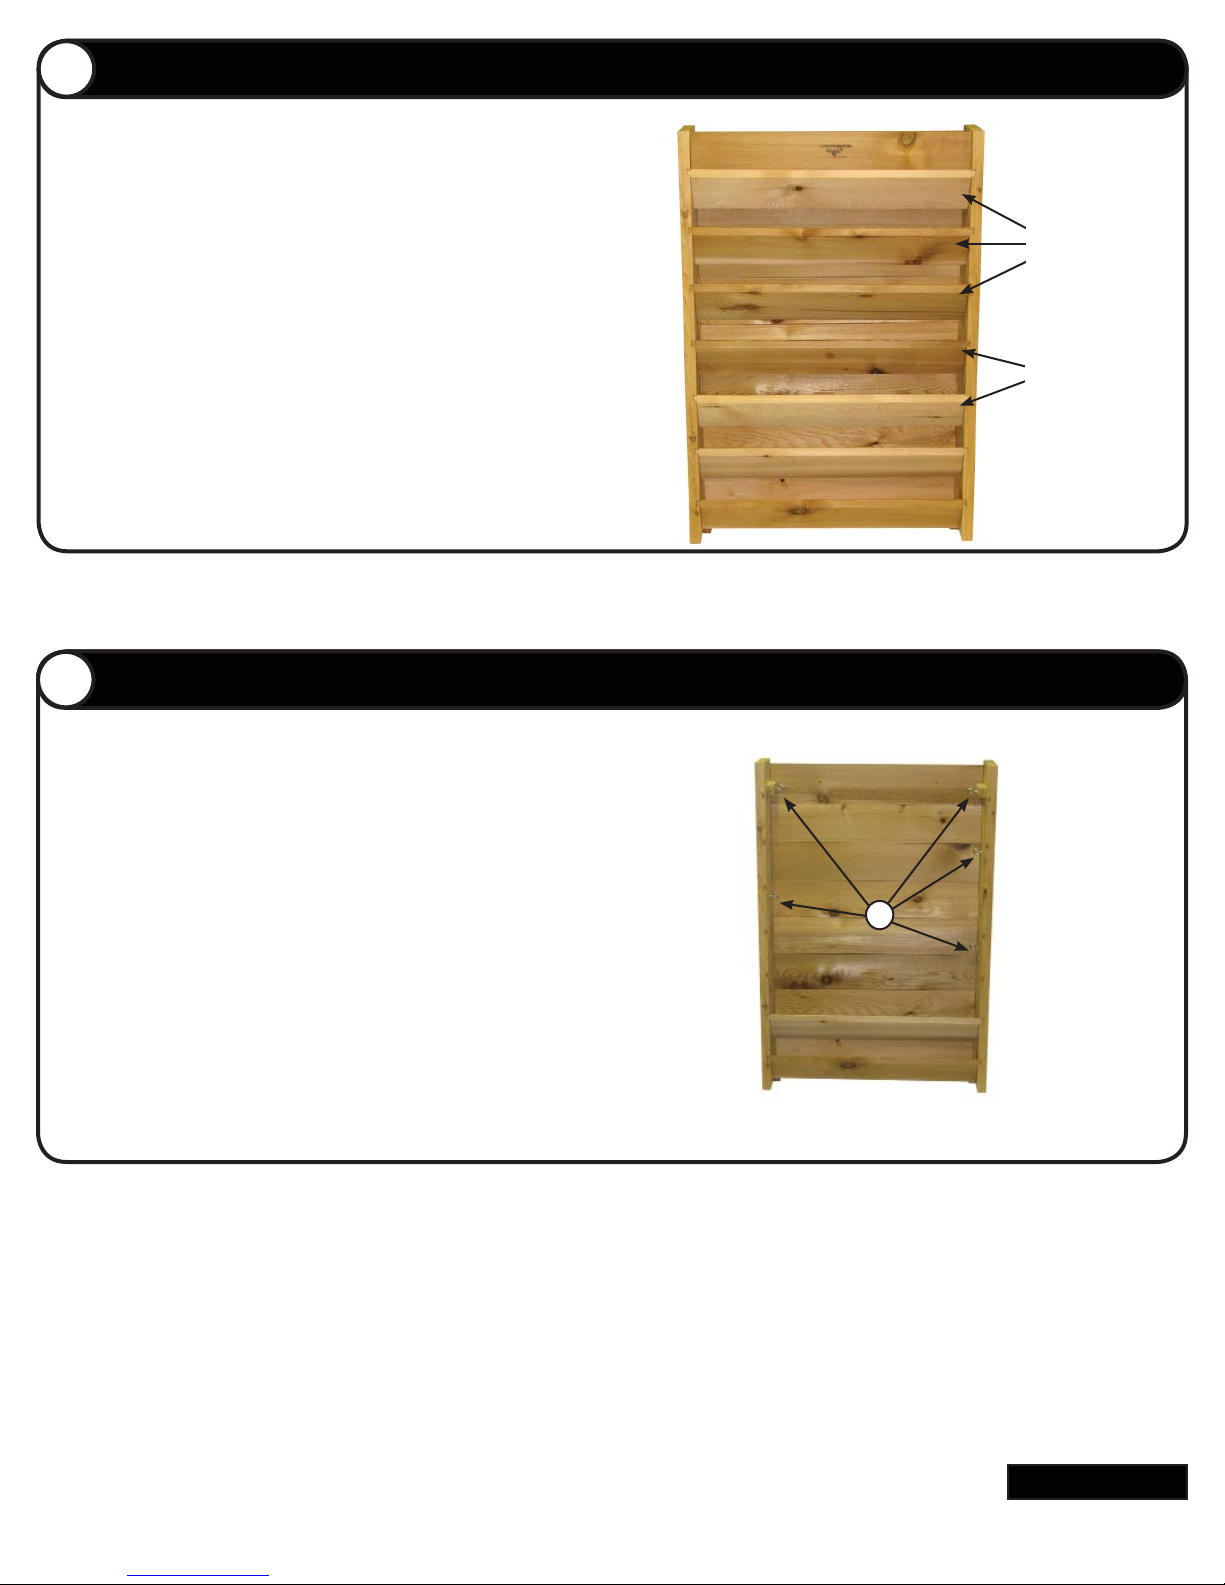
Remove the fi ve angled front shelf boards.
Remove Angled
Shelf Boards
Remove Angled
Shelf Boards
Position Logo Upside Down
Irrigation Kit Assembly
NOTE: The irrigation tubing will be routed
through the left side panel hole.
LEFT SIDE PANEL ROUTING- Locate and
install fi ve eye bolts (Item 7) into the side rails.
Install the eye bolts into the pre-drilled holes in
the side panels marked with a Black “X”. (Left
side panel (Black “X”) routing shown).
Continued
www.gronomics.com East Bethel, MN USA 763-753-7374
Page 3
Irrigation Kit Assembly Continued
4
5
2
5
5
6
6
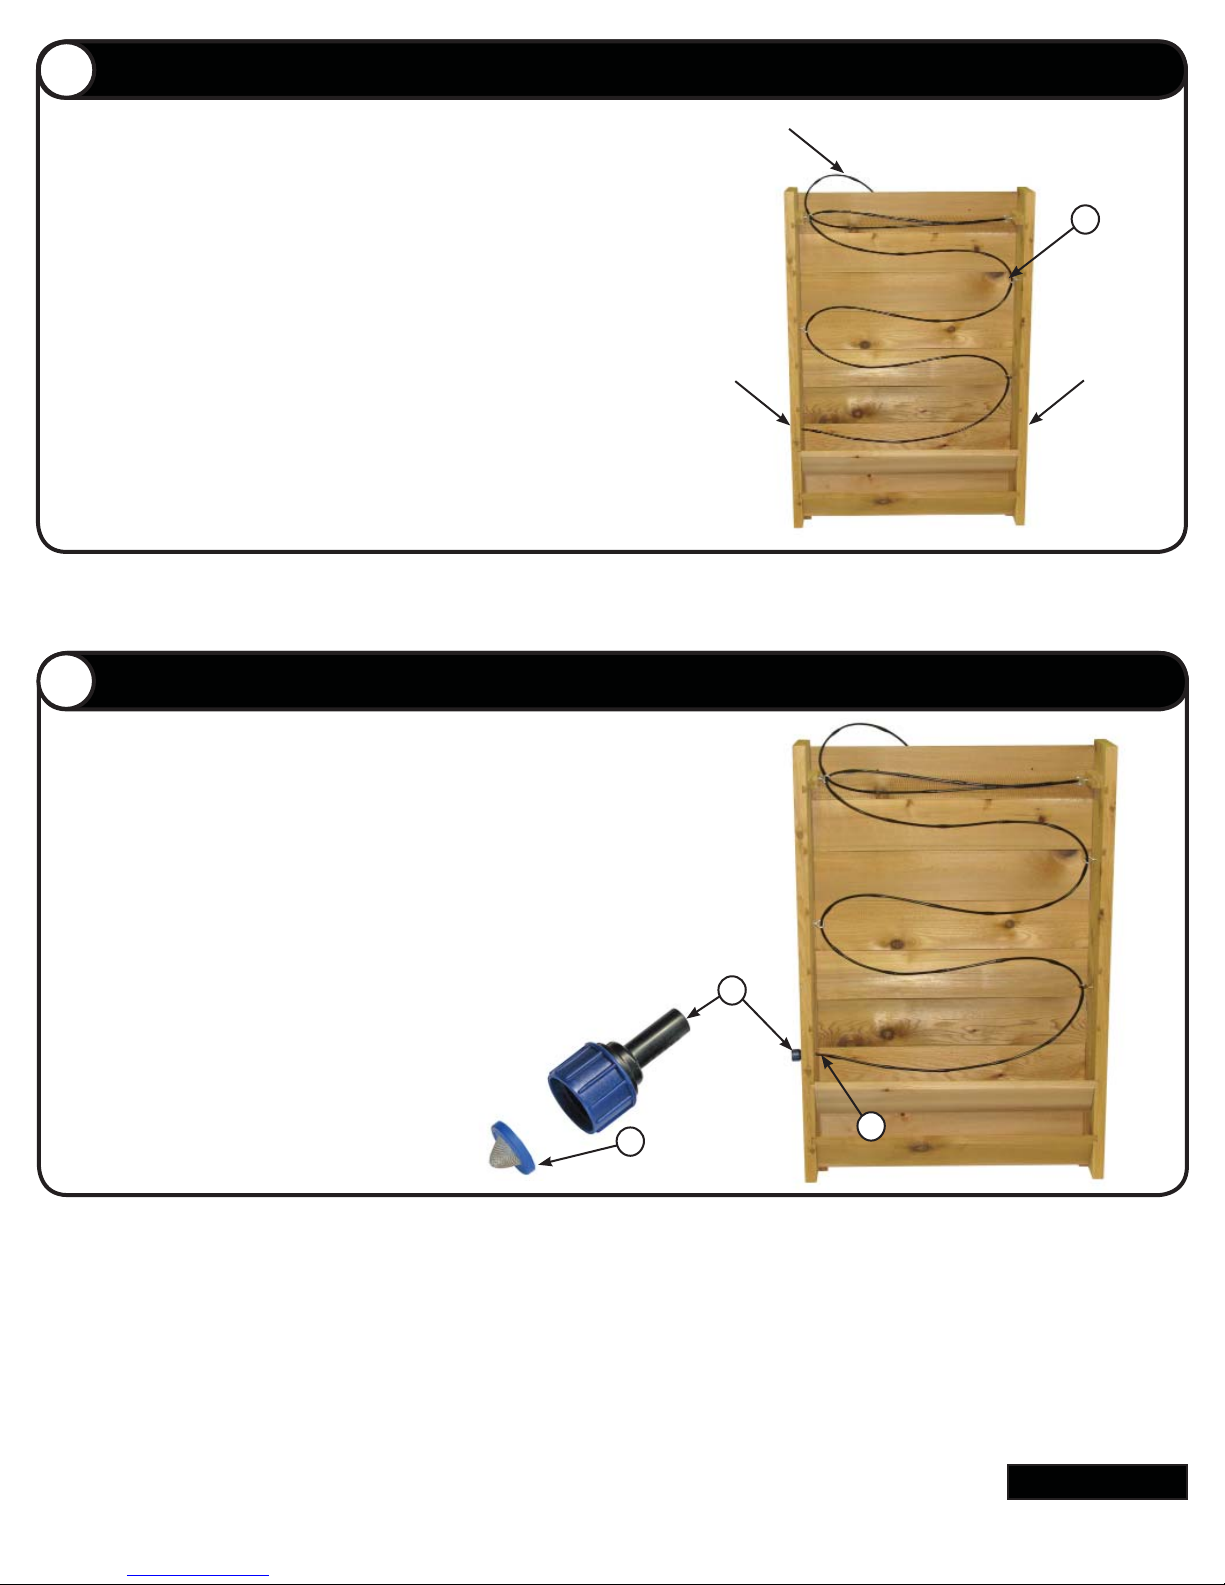
NOTE: Left side panel routing shown.
Locate the irrigation tubing (Item 5). Route the
irrigation tubing (end with plug) through the hole of
the left panel and weave the irrigation tubing through
the eye bolts (bottom to top).
Irrigation Kit Assembly Continued
Irrigation Tubing
End With Plug
Left Side
Panel
Hole
Locate the hose connector and screen
(Item 6). Install the screen inside the hose
connector (screen facing out).
NOTE: Install the hose connector in the left
side panel. (Left side panel routing shown).
Install the irrigation tubing (Item 3) onto the
hose connector and install the hose connector
into the side panel.
Continued
www.gronomics.com East Bethel, MN USA 763-753-7374
Page 4
Position Logo Upside Down
6
7
Irrigation Kit Assembly Continued
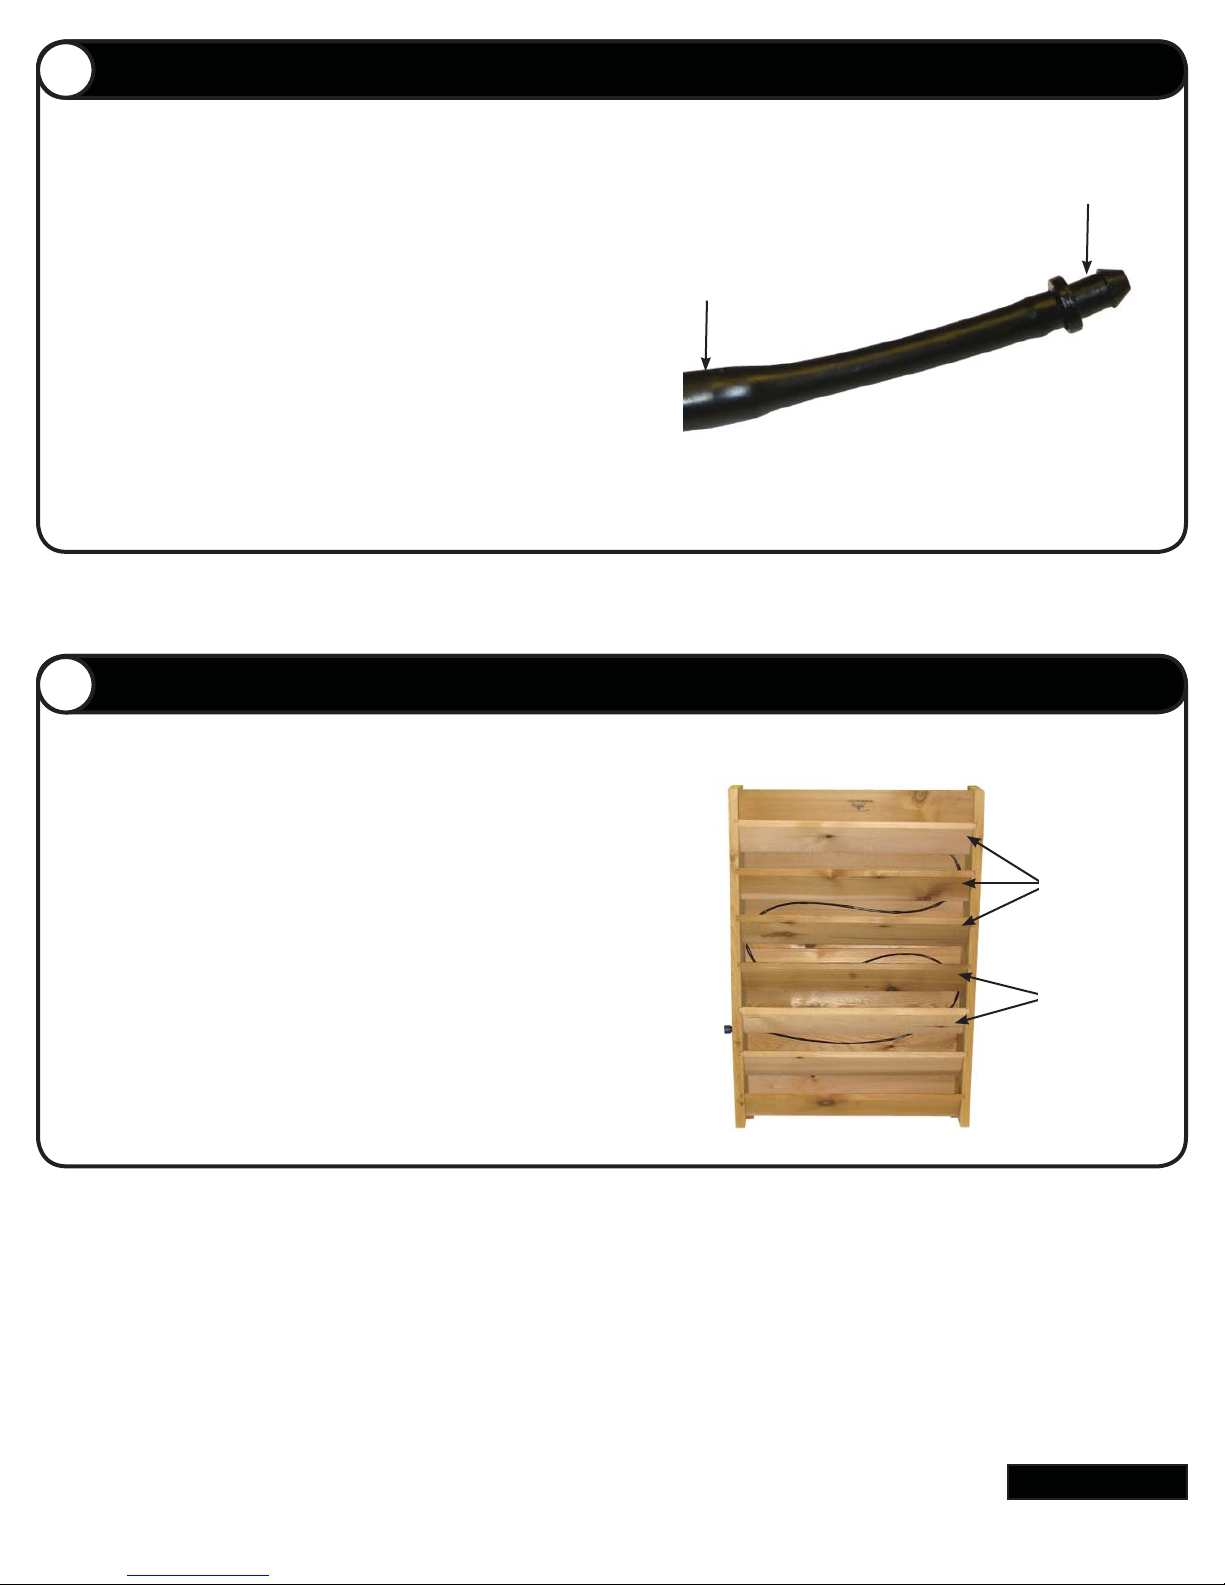
Remove the plug from the end of the irrigation tubing.
Cut the tubing to the desired length. Re-install the
plug into the end of the irrigation tubing.
NOTE: If the irrigation tubing needs to be cut shorter,
always cut the hose in front of or behind the drip
section (enlarged section) of the irrigation tubing.
Plug
Drip Section
Angled Front Shelf Installation
Install the fi ve angled front shelf boards into the side panel
slots with the beveled edge (front edge) facing you.
Install Angled
Shelf Boards
Install Angled
Shelf Boards
Continued
www.gronomics.com East Bethel, MN USA 763-753-7374
Page 5
Position Logo Upside Down
3
8
9
2
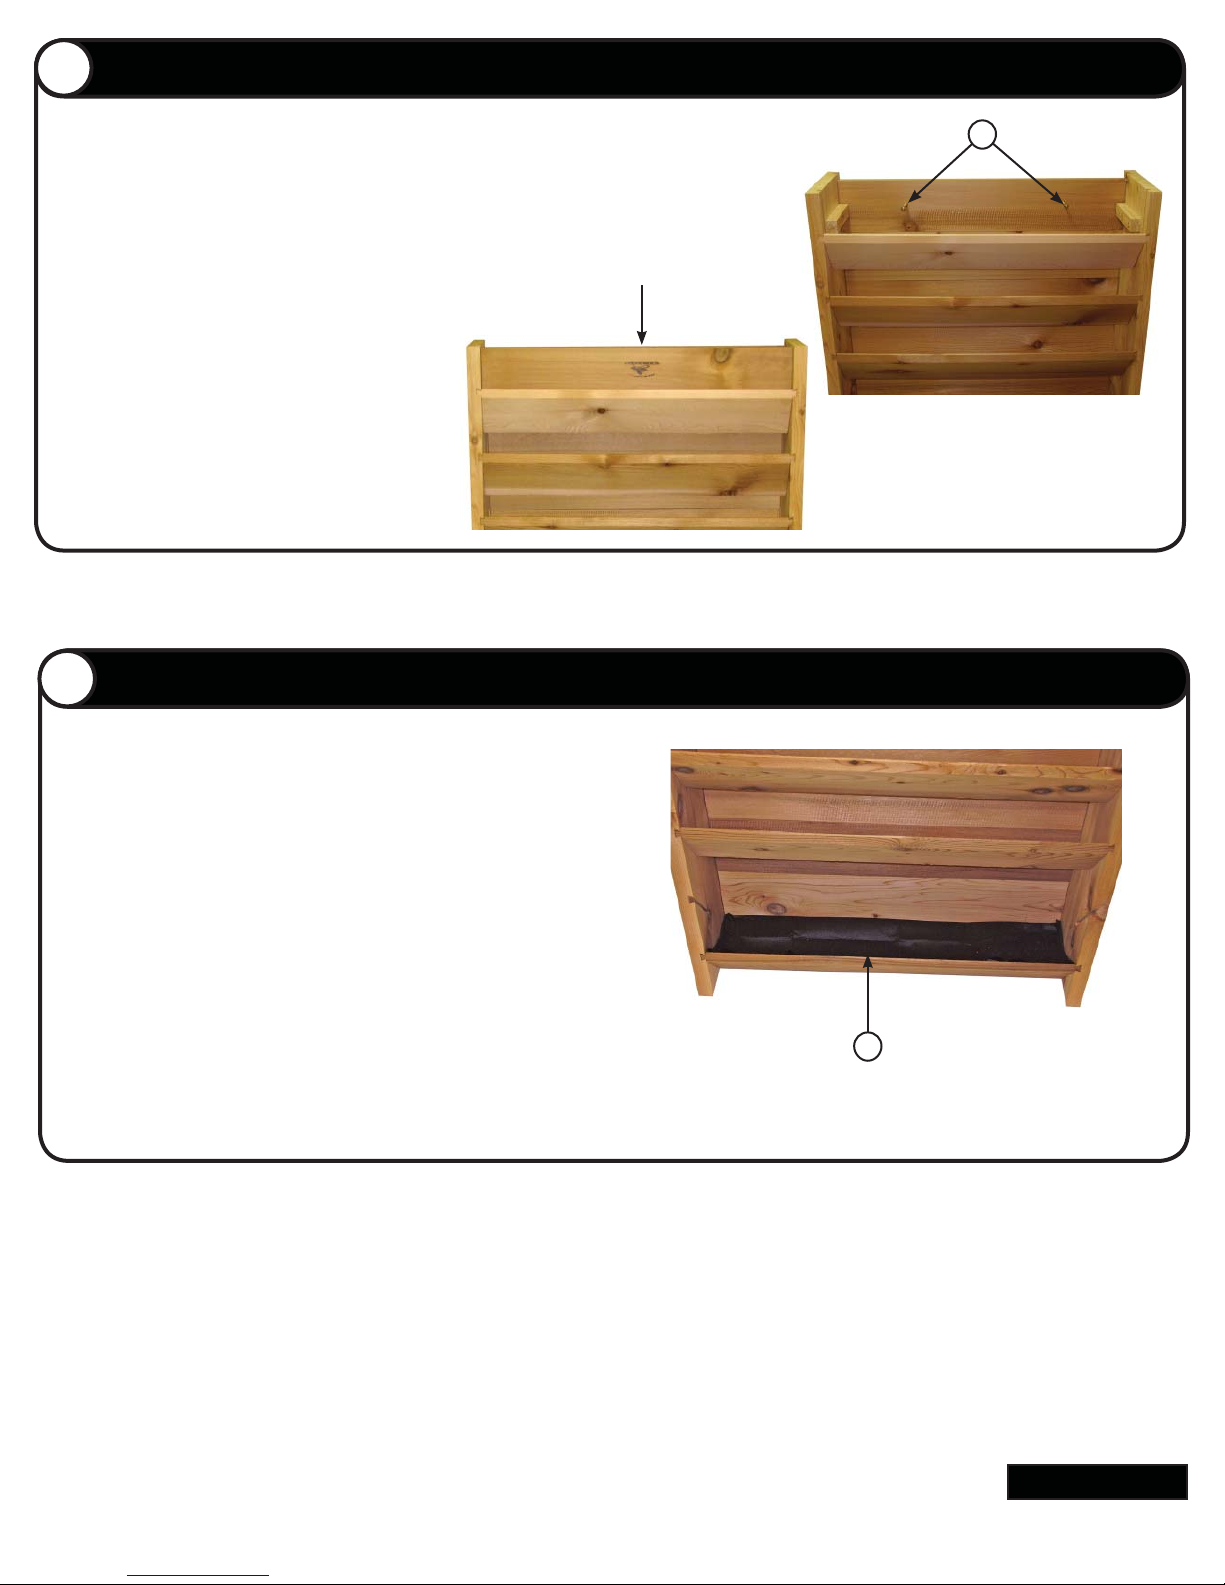
Stabilizing The Garden Bed
NOTE: The angled front shelf board with
logo may need to be removed to access
screws while fastening the vertical garden
to the structure.
NOTE: The garden bed is not intended for
hanging on a wall or struture.
Locate and install the two screws (Item 3)
into the pre-drilled holes of the top back
board. Fasten the vertical garden to a
stable structure.
Position Logo Upside Down
Fabric Liner
Angled Front Shelf
Boards w/Logo
Locate the piece of fabric liner (Item 2).
Place the fabric in the bottom of the vertical
garden.
NOTE: Bottom angled front shelf board has
been removed for picture clarity.
Continued
www.gronomics.com East Bethel, MN USA 763-753-7374
Page 6
Position Logo Upside Down
10
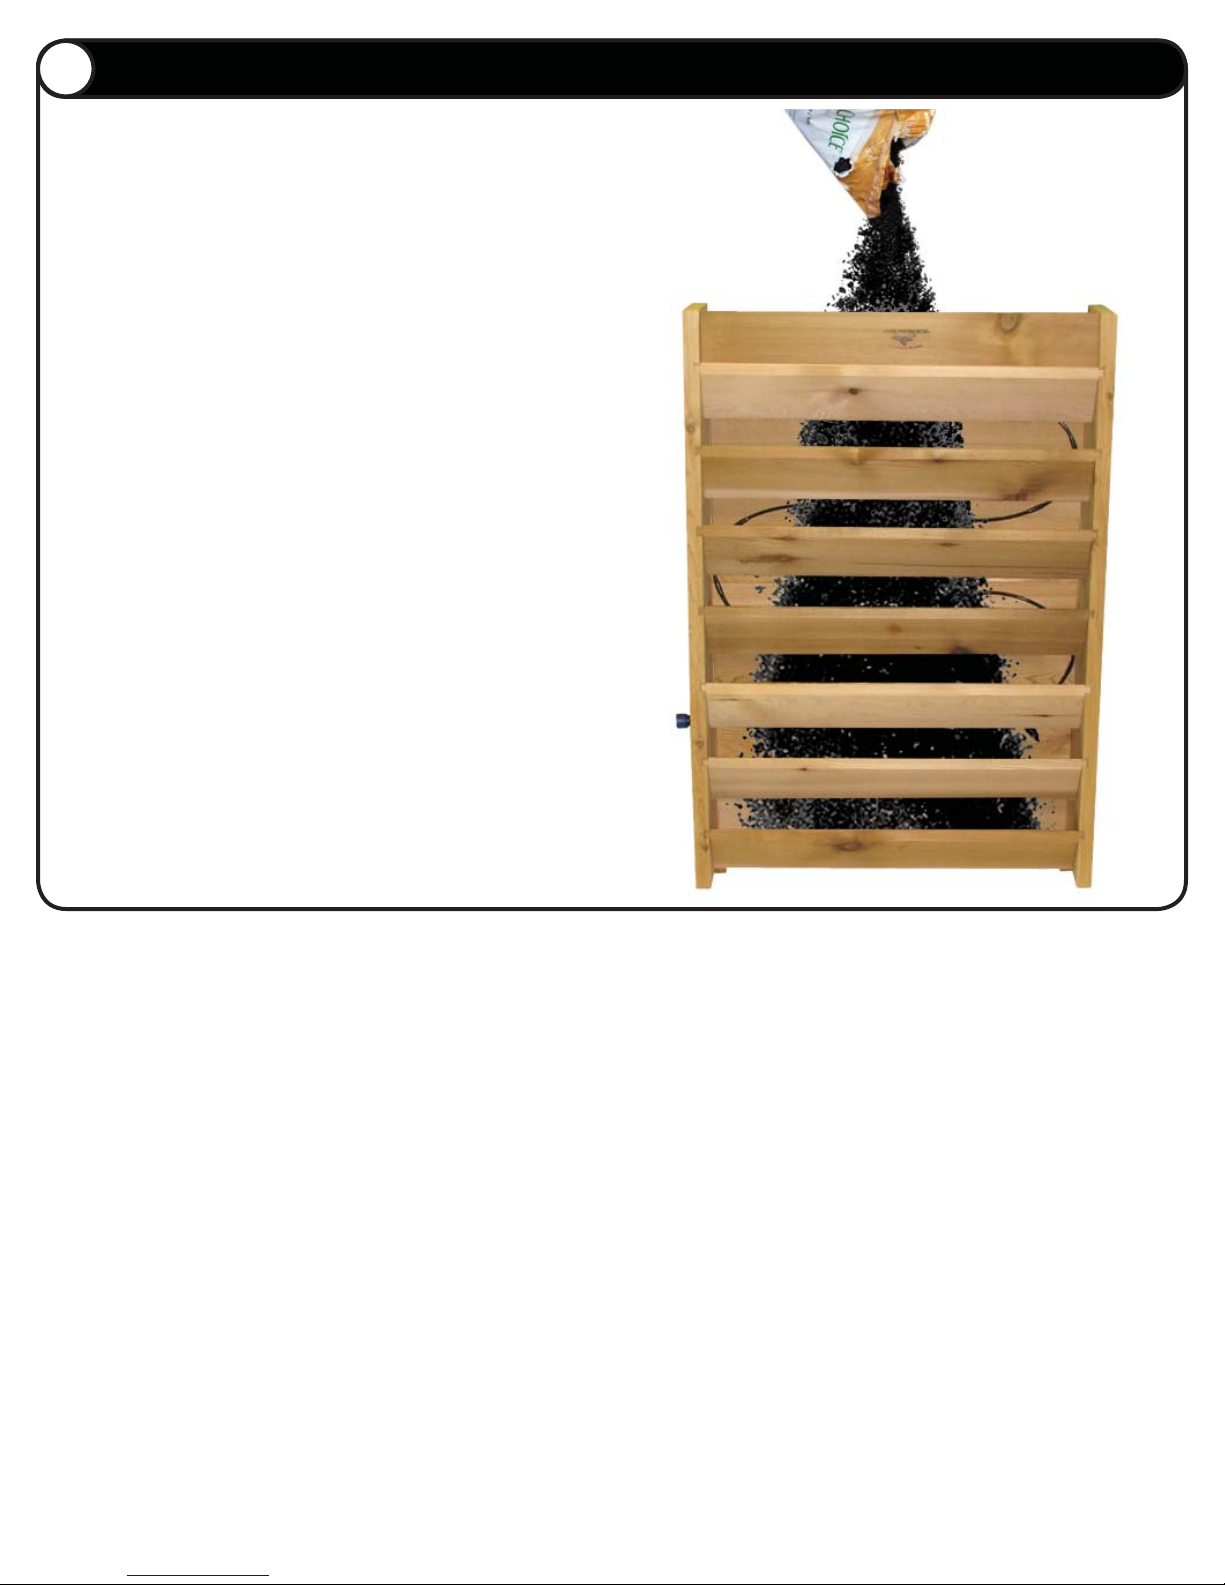
Planting Bedding
10
NOTE: Before adding the plant bedding, verify that
the vertical garden is securely fastened to a stable
structure. Verify that all back rails and shelf rails are
completely installed.
CAUTION: When fi lling the vertical garden with plant
bedding, support the irrigation tubing while fi lling.
This will help prevent damage to the irrigation tubing.
Slowly place the plant bedding into the top of
the vertical garden. Add plant bedding until it is
approximately one inch below the top back and shelf
rails.
www.gronomics.com East Bethel, MN USA 763-753-7374
 Loading...