

Page 1
Tracker User Guide
Page 2
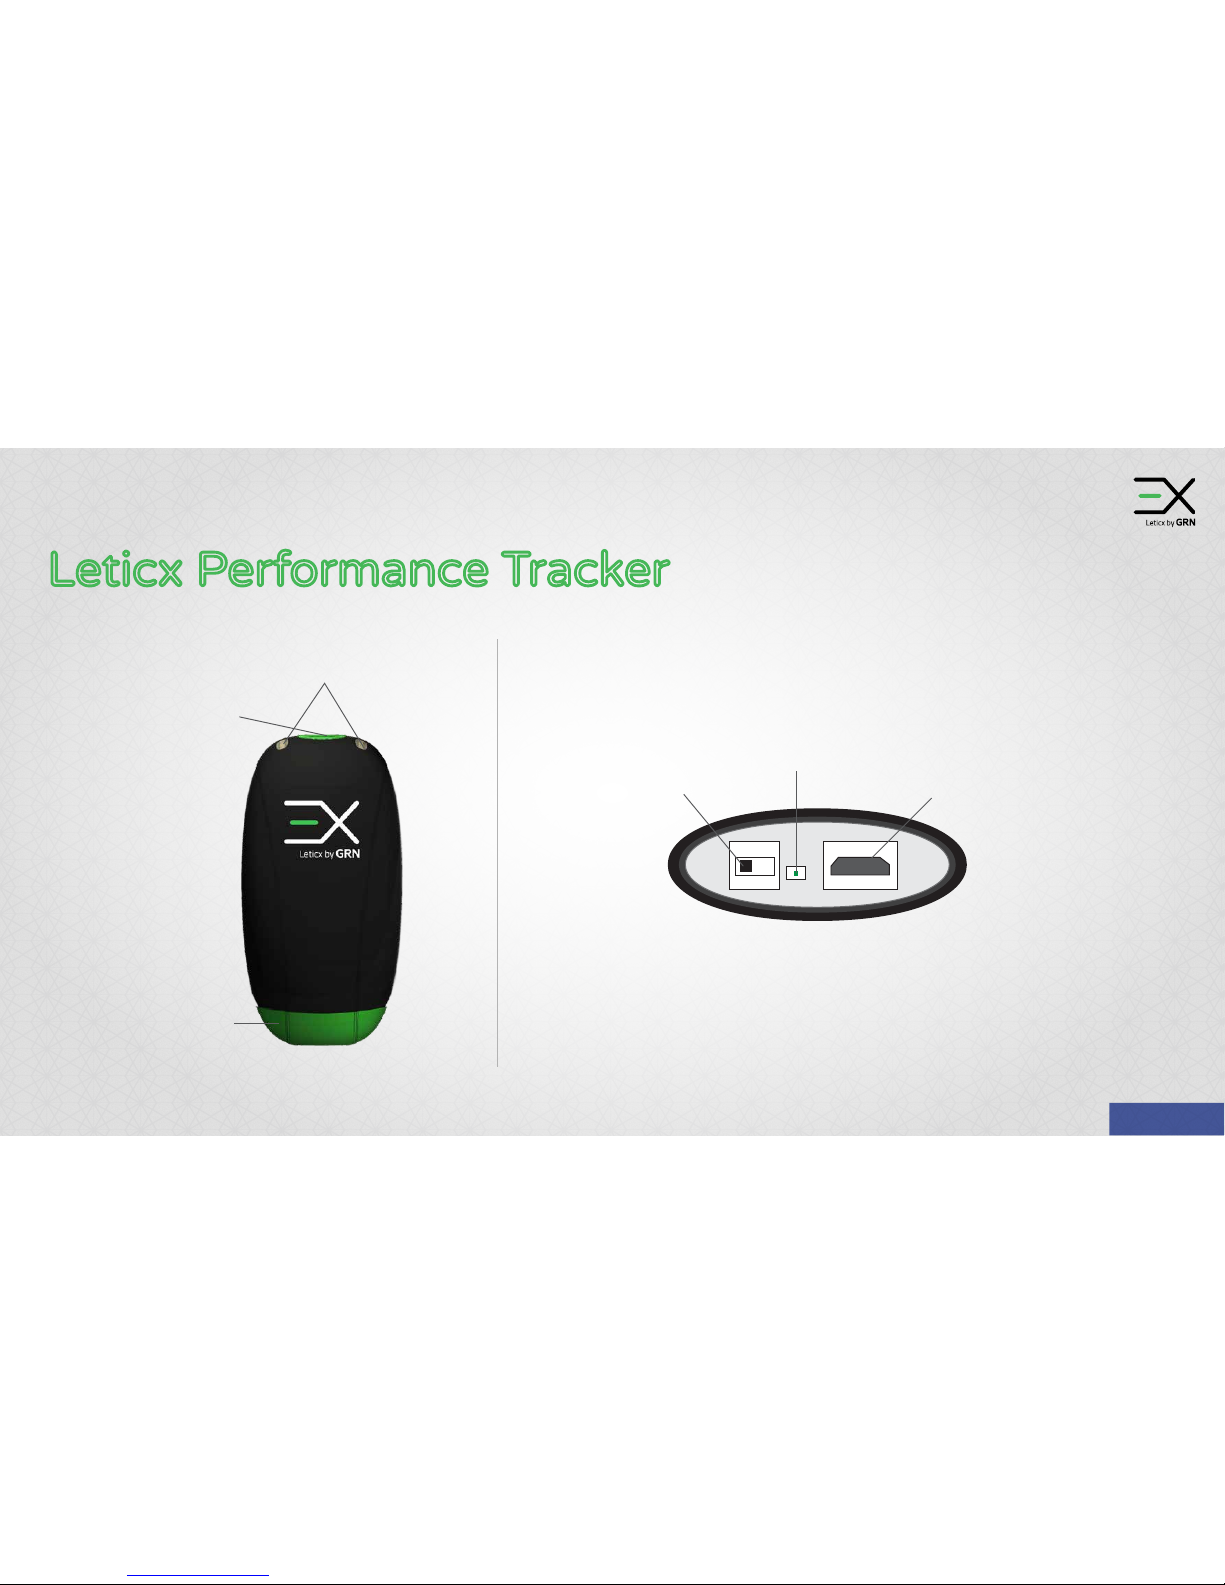
Leticx Performance Tracker
Power Button
Tracking Mode /
Hibernation Mode
Master Switch
Power/ Reset
USB Connector
Connects Tracker
to USB Hub
LED Light Guides
Tracking & Hibernation Modes
LED Light
Green – Power On
Red – Recharge/ Connected
End Cap
Cover
Bottom view
Protection cap off
Hardware
Page 3
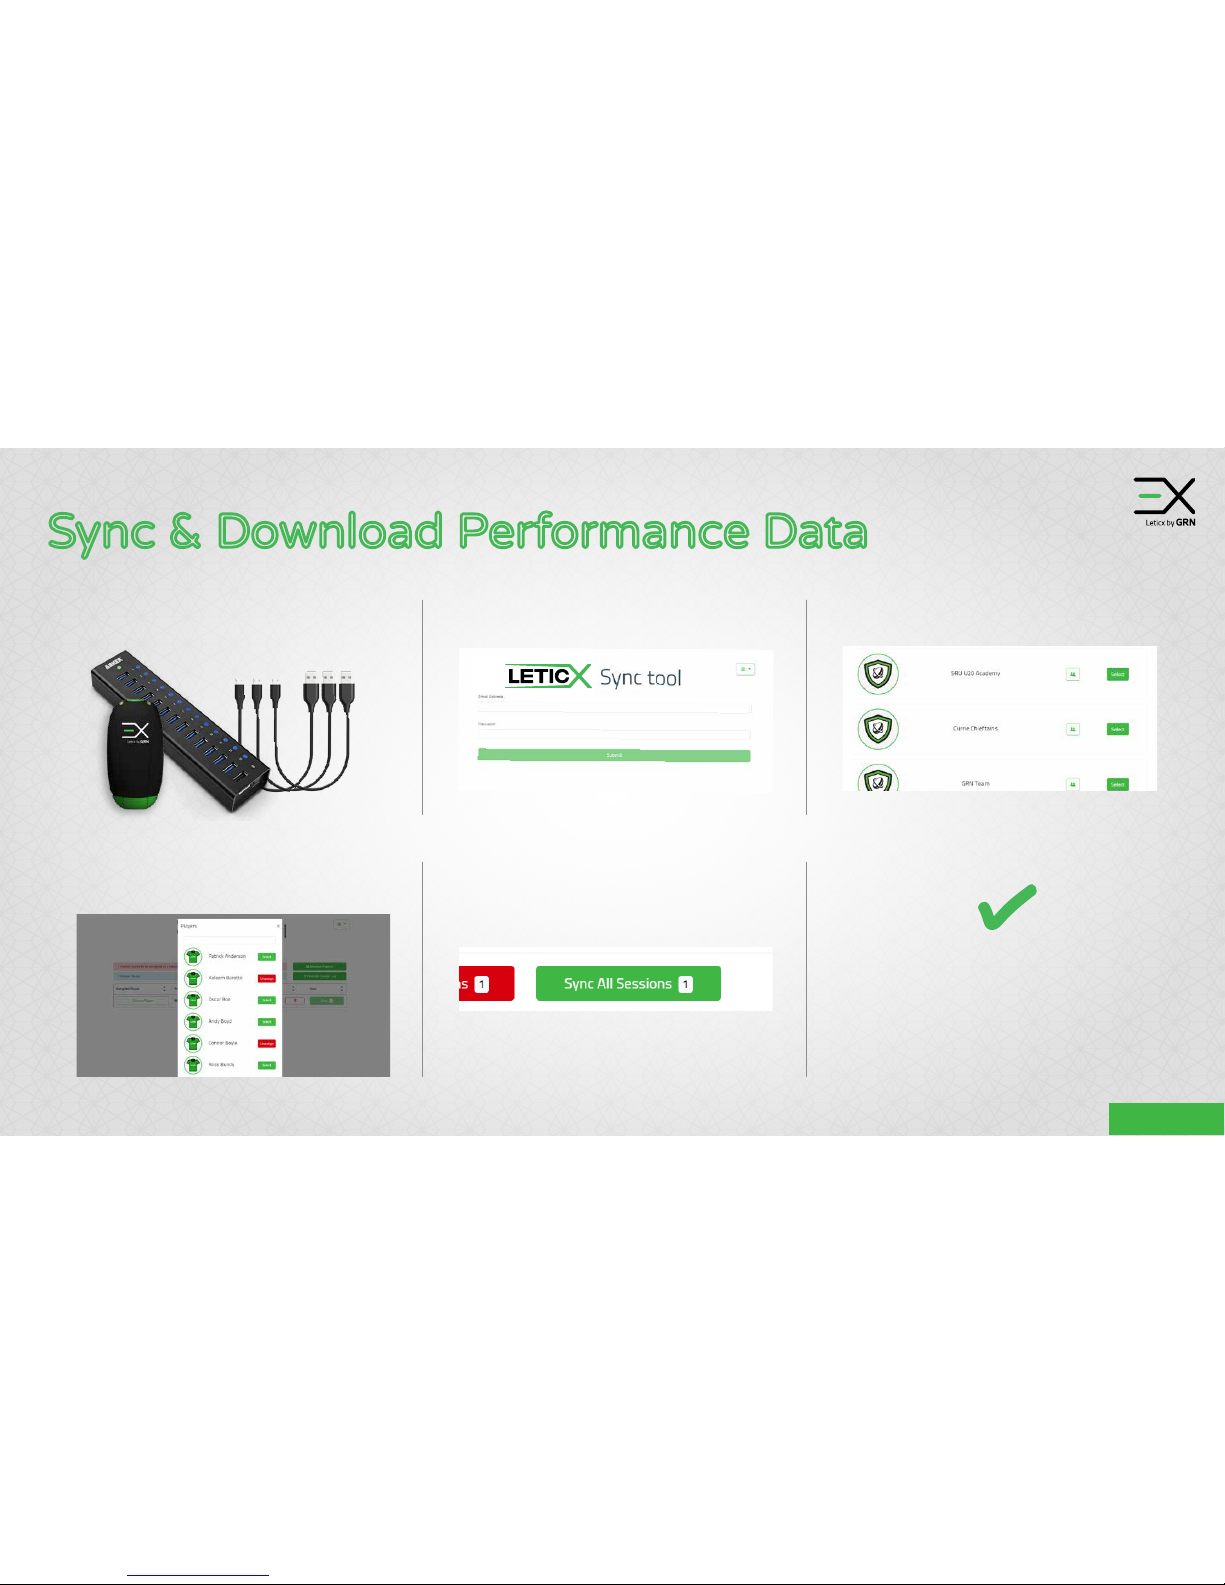
Sync & Download Performance Data
1. Plug your Leticx One devices into
your USB hub.
2. Open the Sync Tool* and login. 3. Select your team
4. Assign each tracker to a player.
Your GPS data is now ready to
be processed and analysed on
your Leticx platform
5. Click Sync or Sync all
sessions to upload
Continue on the next page
Software
*Leticx desktop app for Windows/OS.
If we haven’t send it, please contact us so we do.
mailto:hola@globalrugbynetwork.com
Page 4
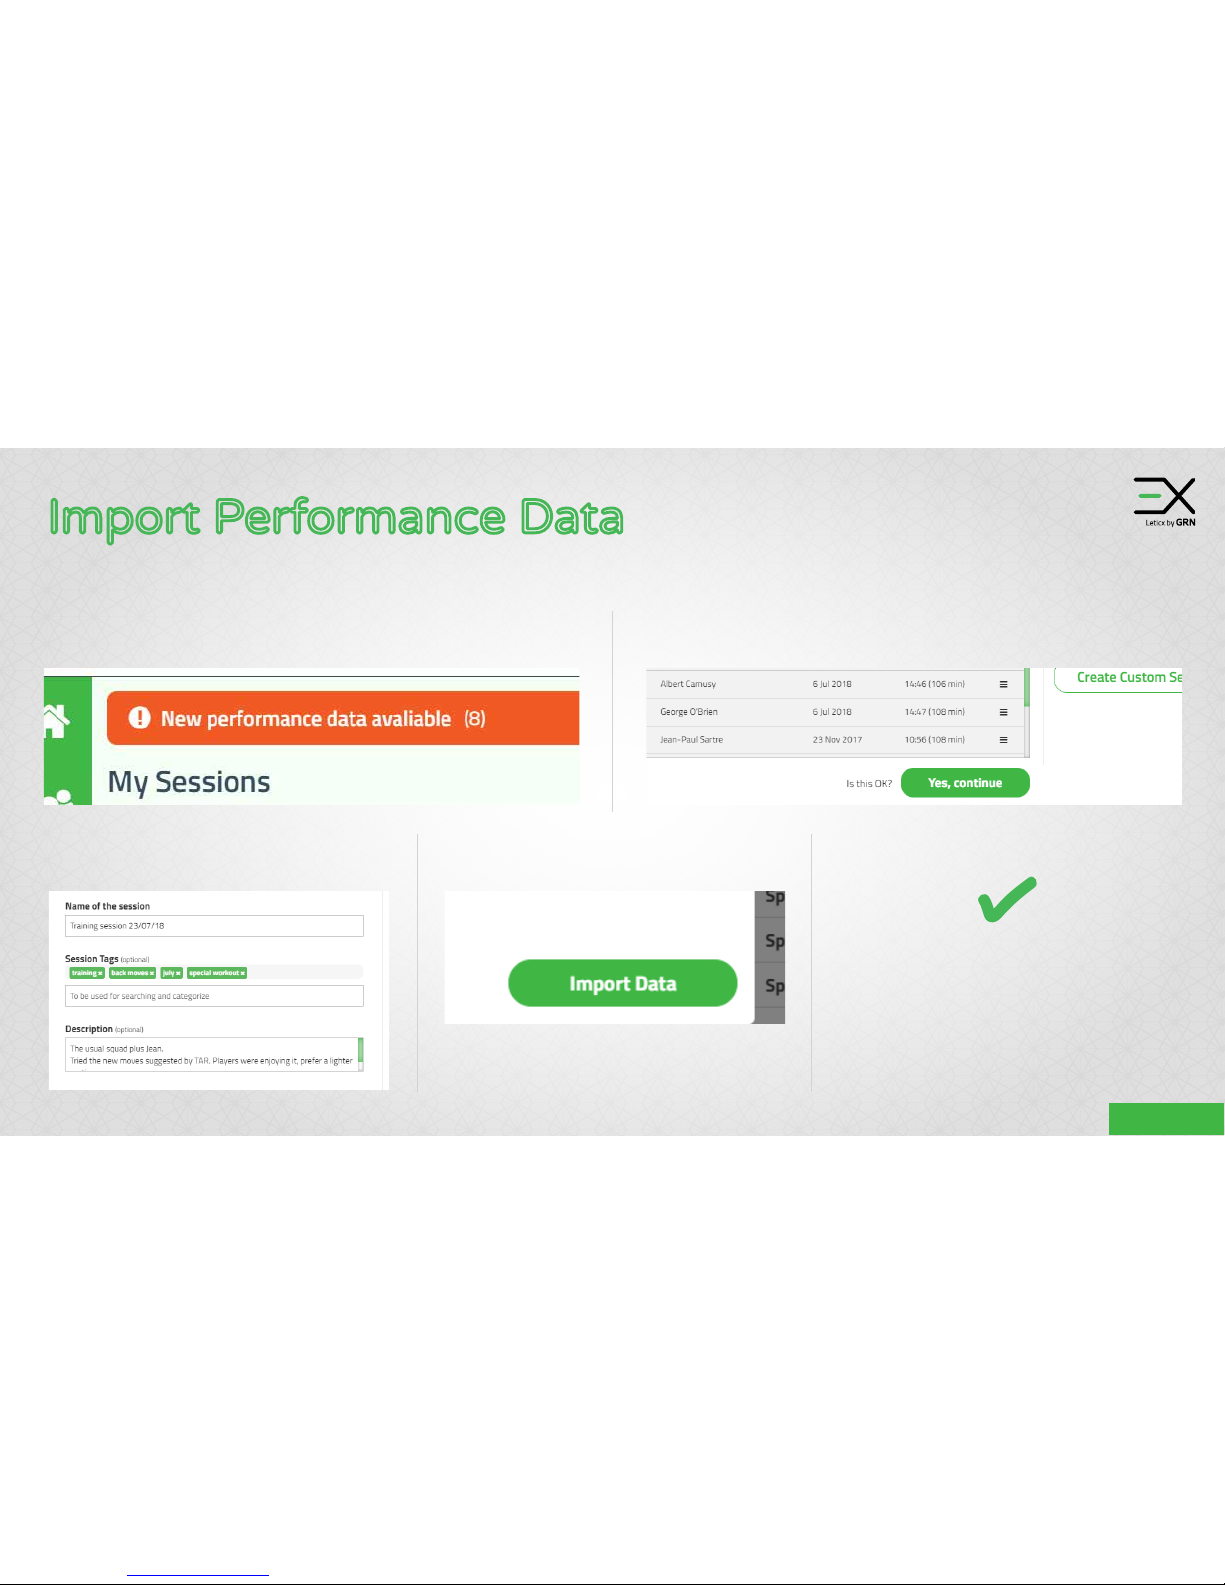
Import Performance Data
1/2
1. Go to your Performance module. You’ll see a
notification regarding new data. Click on it.
2. Review the devices and click “Yes, continue”, or, if
needed, create a custom session (next page).
3. Set name, tags and description for
your session
4. Select a player to split times*
and click “Import Data”
*Pick a player tracked throughout the whole session.
You will use them as a reference to split all player sessions.
After syncing the trackers, log into your Leticx account to import data on the platform
Your data is now imported.
Next step is to split the session
in parts (halves, warmup, etc)
Continue on the next page
Software
Page 5
Import Performance Data
2/2
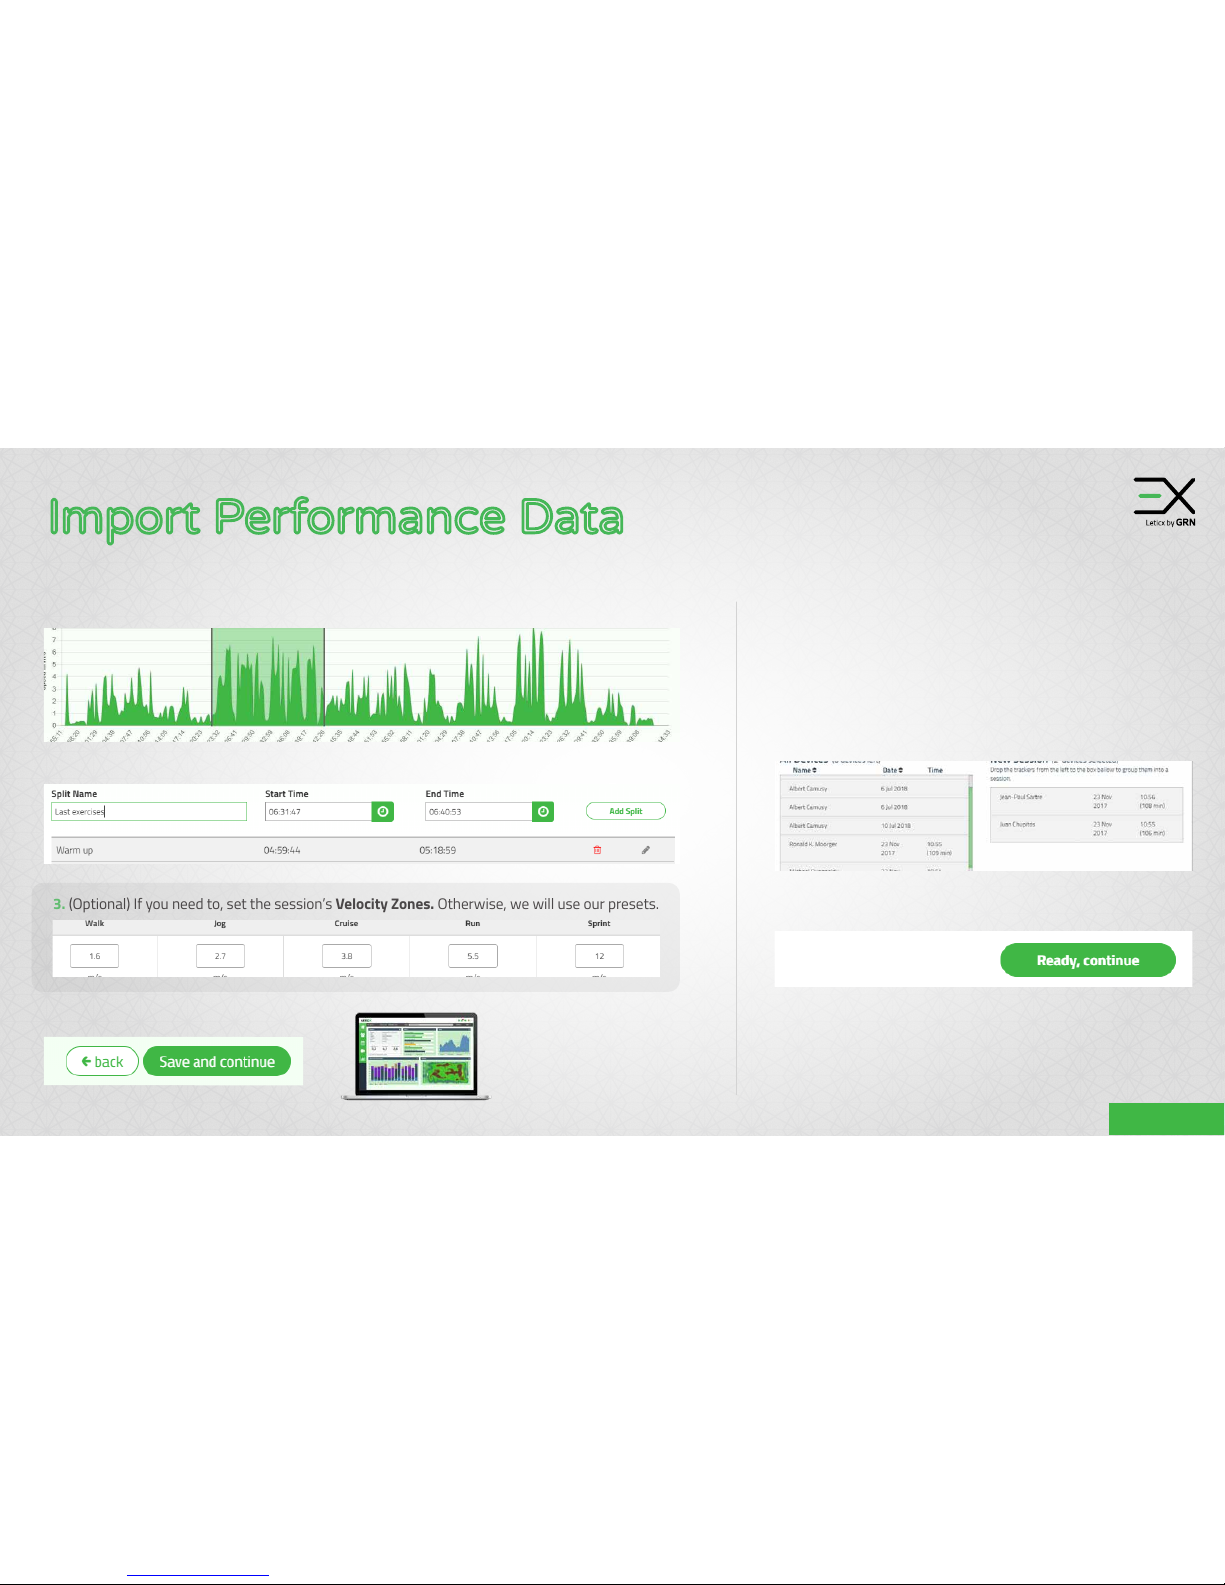
1. Create a split - click and drag over the timeline
1. Drag and drop the trackers you want in the same
session from the left box to the right one.
2. Add a name, revise times and click “Add Split”. Repeat as required.
4. Click “Save and Continue”
All done!
It can take a few minutes to
process the data. Please be patient.
Once you’ve imported the performance data, you need to create the session splits.
(cont.) Create a custom session
If you don’t want to add all the trackers on the same session,
you must separate them before adding.
3. (Optional) If you need to, set the session’s Velocity Zones. Otherwise, we will use our presets.
2. Click “Ready, continue”
Go to Step 3 Page 4 and repeat
until done.
Software
Page 6
Tracker Mode overview
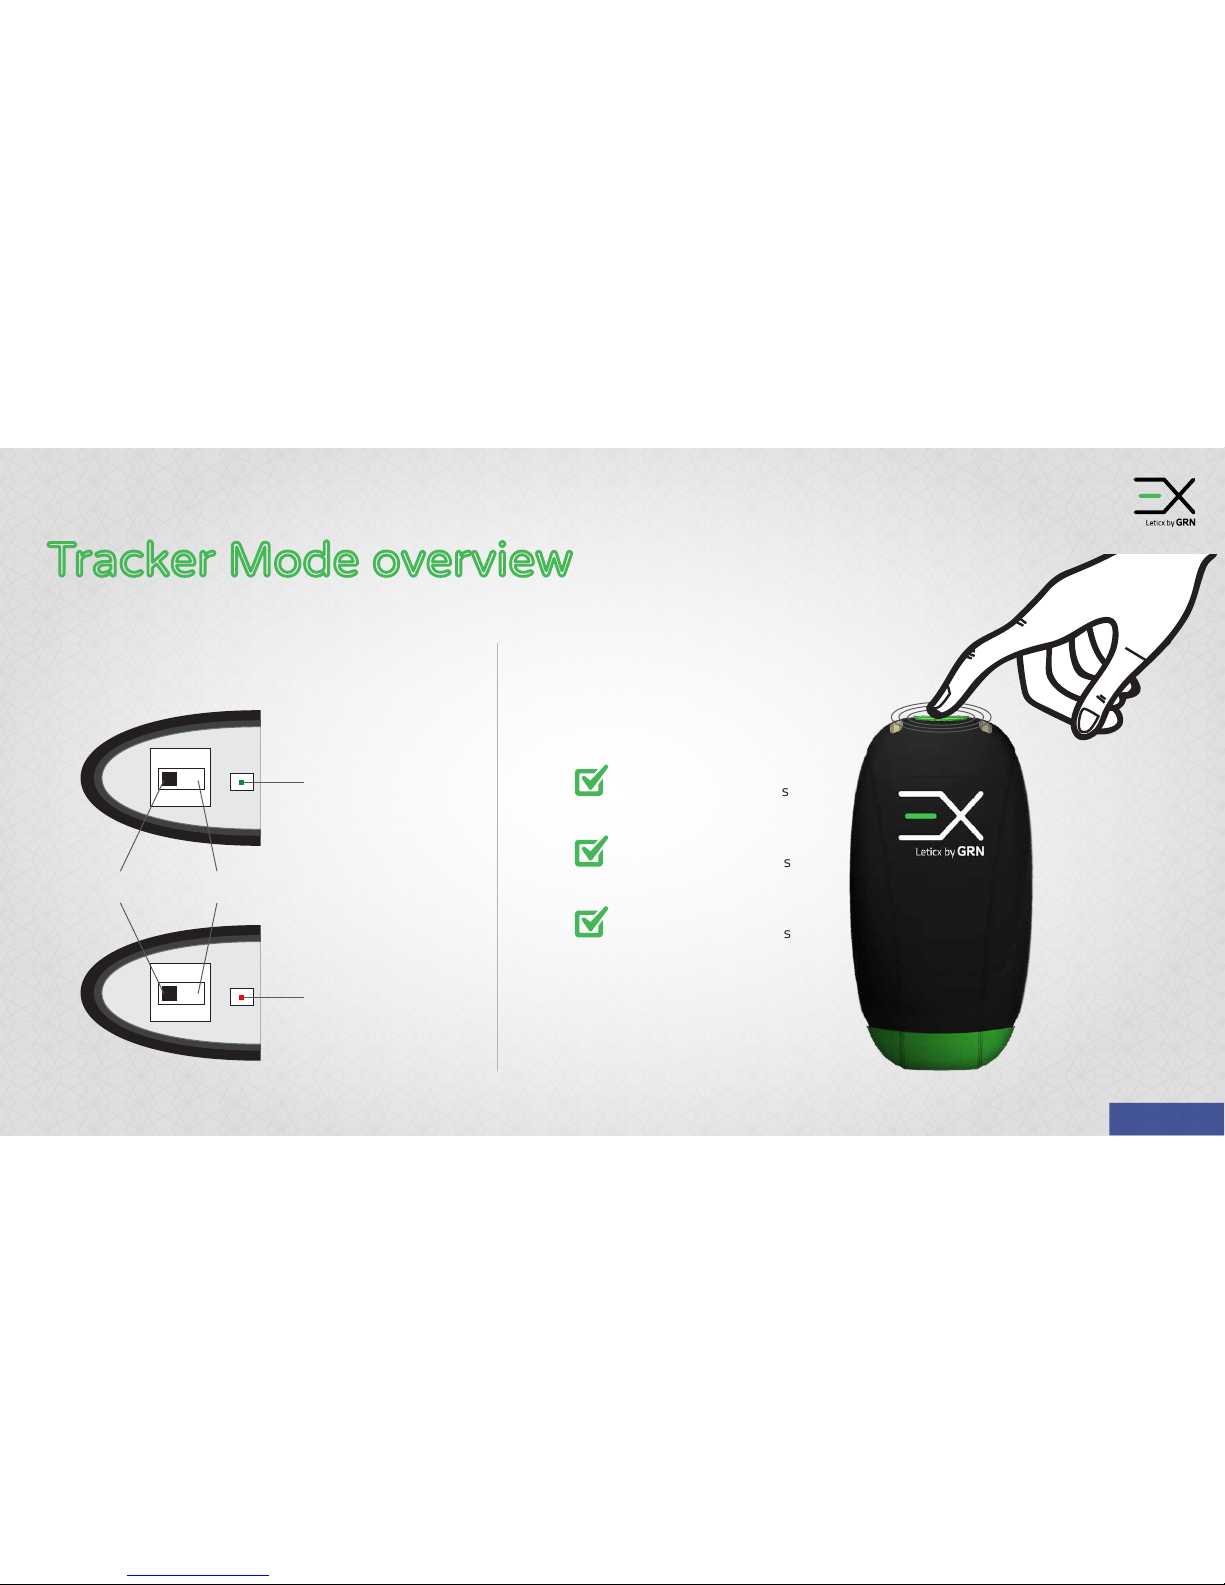
Green LED Light
Power ON
Fully Charged
Tracking Mode ON
Press & hold for 3 seconds
Tracking Mode OFF
Press & Hold for 3 seconds
Hibernation Mode
Press & Hold for 5 seconds
Tracking/ Hibernation ModePower/ Lights
Red LED Light
Recharging
Connected to USB Hub
Power ON
Power OFF
Hardware
Page 7
LED Light Guide
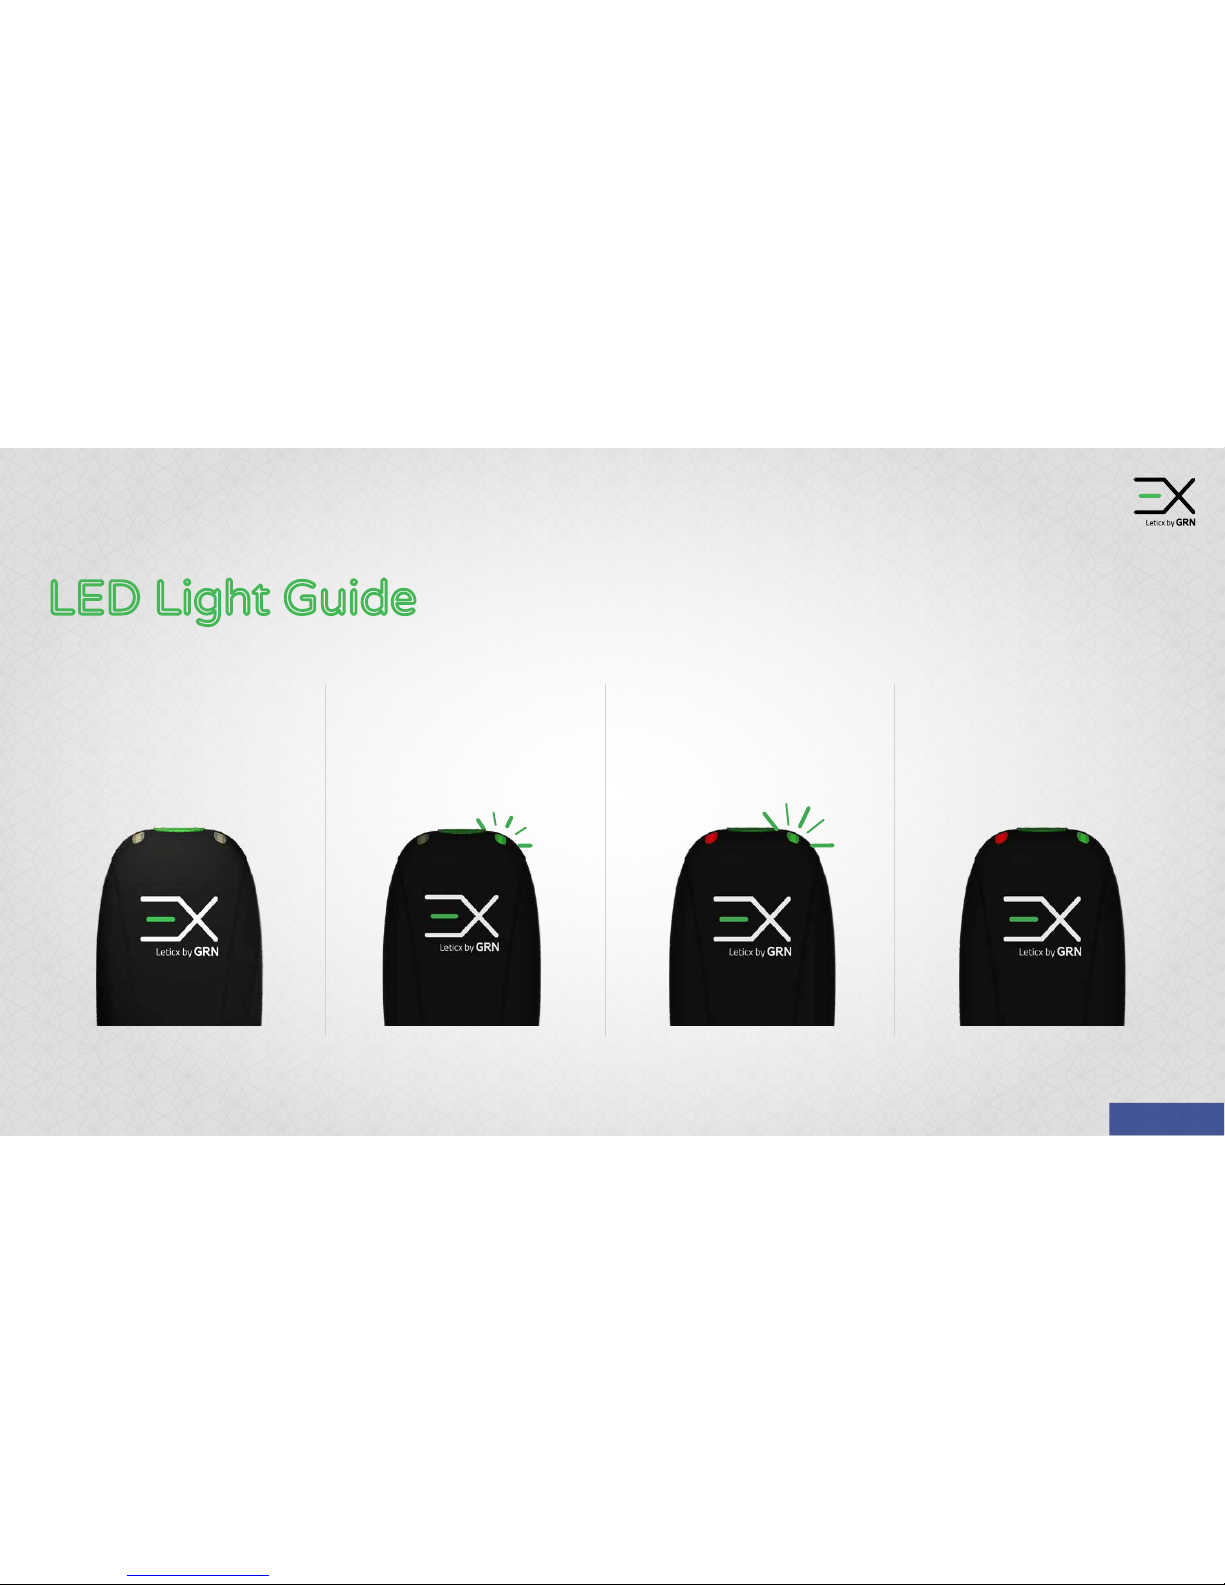
No Lights Showing
- Power Switch OFF
- No Data
Solid Red
& Green Lights
- GPS Fix found
- Data collection in progress
Solid Red
& Green Lights
- GPS Fix found
- Data collection in progress
Green Light Flashing
- Power Switch ON
- No Data collection
Solid Red Light
& Flashing Green Light
- Tracking Mode ON (Red)
- Searching for GPS Fix (Flashing Green)
Hardware
Fig 1 Fig 2 Fig 3 Fig 4
Page 8
Tracker Scanner App
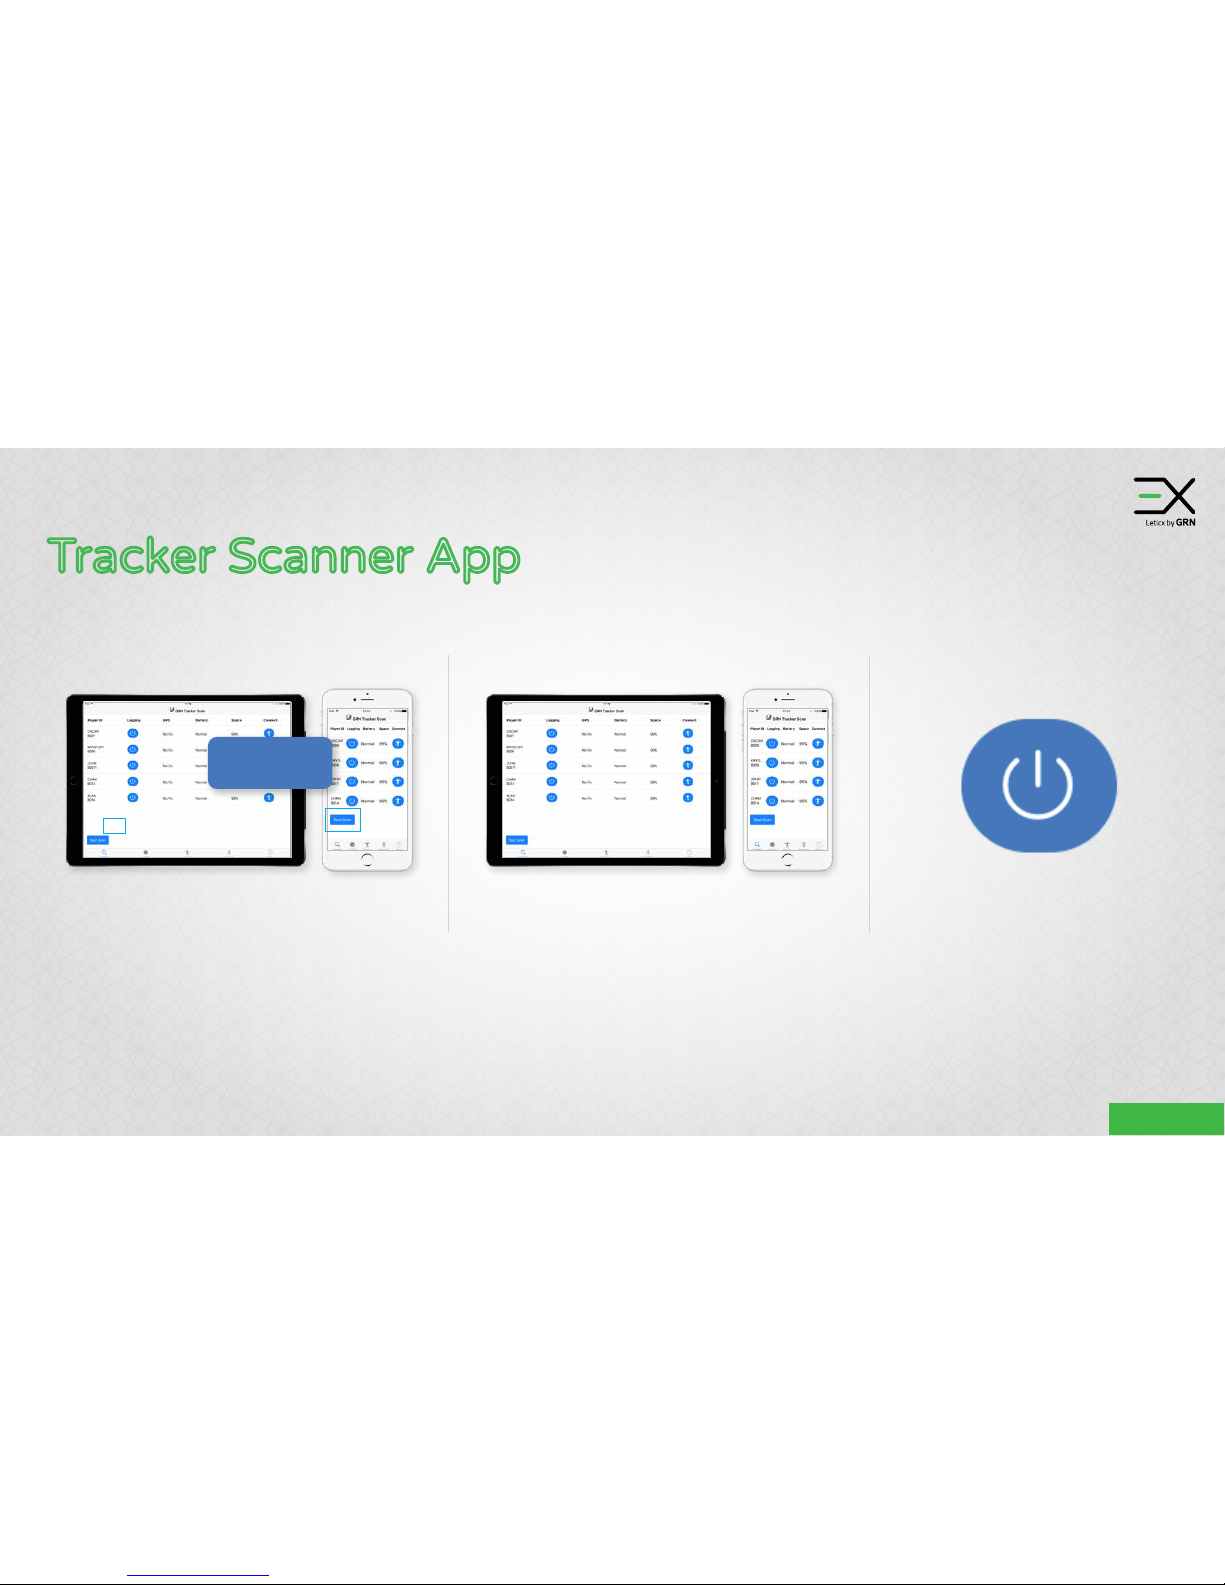
1. Open the app and click the
“Start Scan” button.
2. Make sure it is detecting all the
devices around.
3. Turn the devices on and off by clicking
the button next to each device.
Start Scan
Software
The trackers needs to be switched on and green light flashing (as shown in Fig 2 Page 7).
This option is preferred to manually switching on and off the devices via the top button'
Our Tracker control app for Android/IOS. You need a download link, if we haven’t sent it, please contact us.
mailto:hola@globalrugbynetwork.com
Page 9
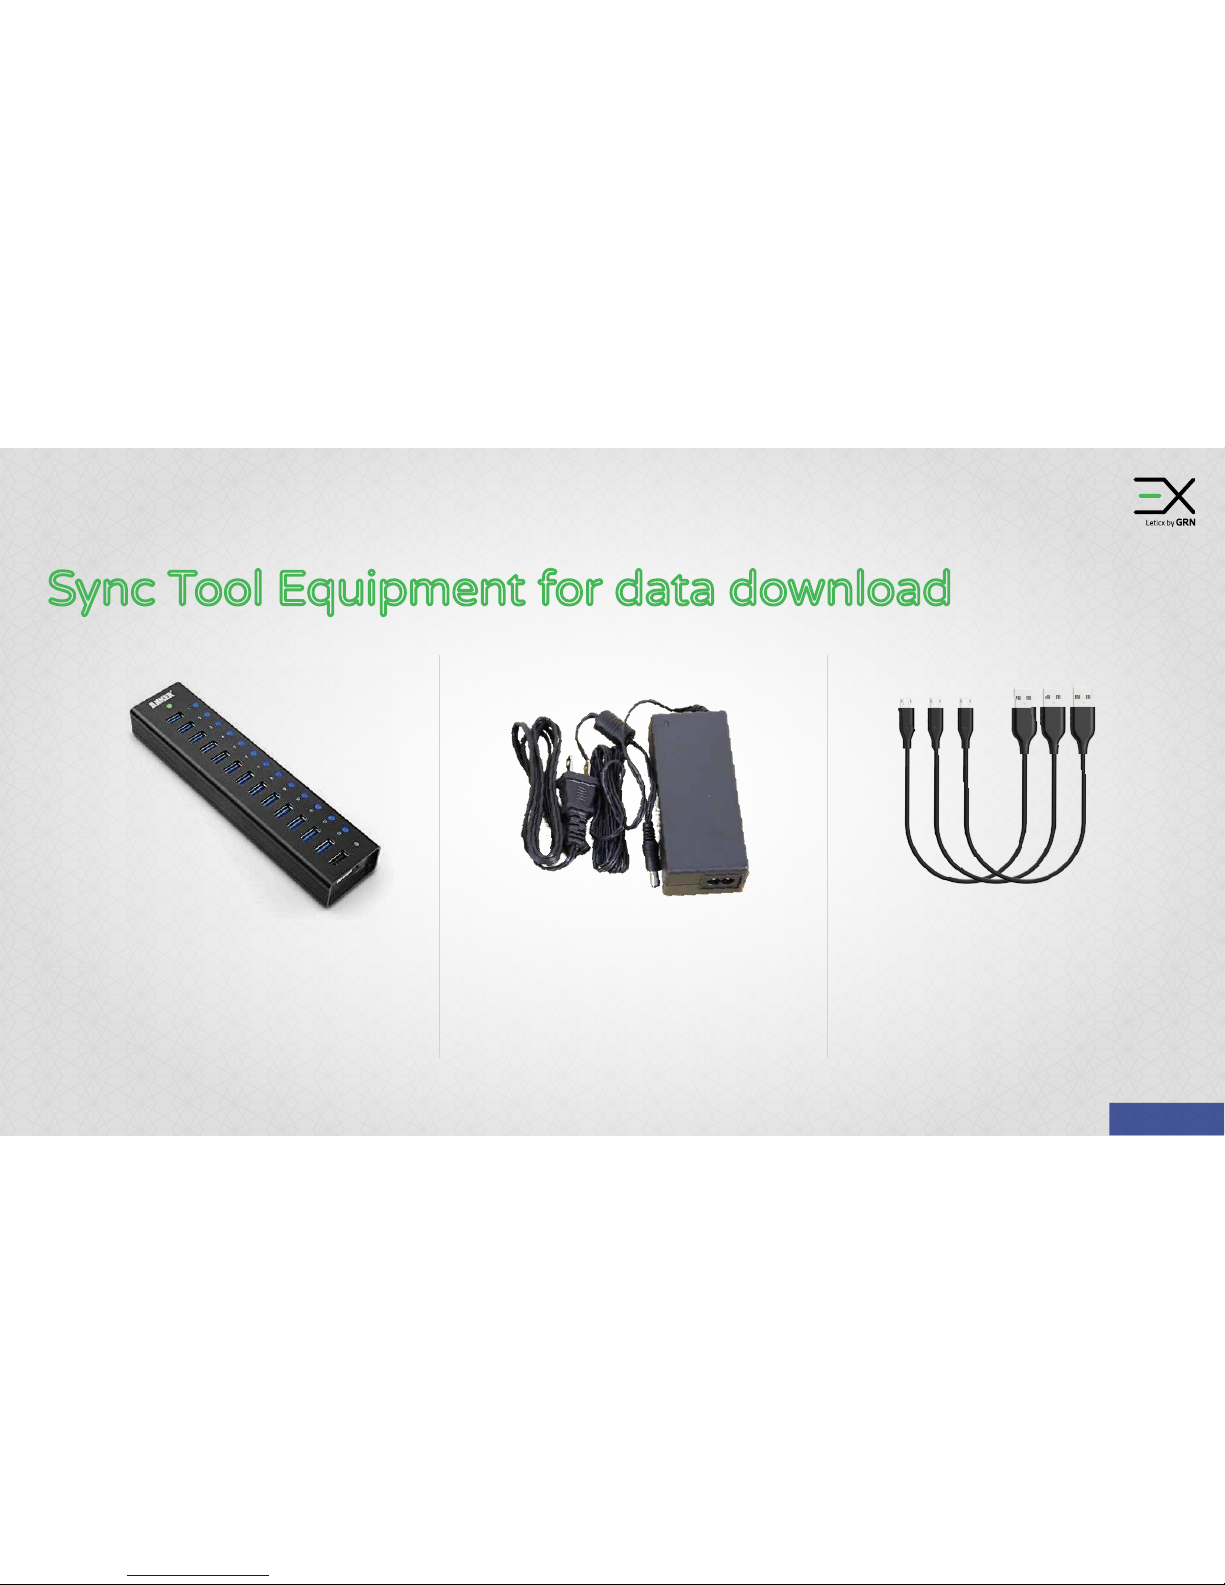
Sync Tool Equipment for data download
Connects Trackers to Laptop
ready for ‘Sync Tool App’
Power connection for USB
Hub to mains socket
Connects Trackers to USB Hub
USB Hub
Hub connector
Short USB 3.0 cables
Hardware
 Loading...