

Grizzly T27948 Instructions Manual
MODEL T27948
2-DOOR TOOL CABINET
INSTRUCTIONS
For questions or help with this product contact Tech Support at (570) 546-9663 or techsupport@grizzly.com
Introduction
The Model T27948 2-Door Tool Cabinet requires
some assembly. Follow the instructions below for
assembly, operation, and maintenance.
Figure 1. Model T27948.
Inventory Qty
• Tool Cabinet with Shelves ........................... 1
• Cabinet Feet ................................................ 4
• Keys ............................................................. 2
Assembly
The Model T27948 comes with four adjustable
feet for leveling the cabinet.
To install feet:
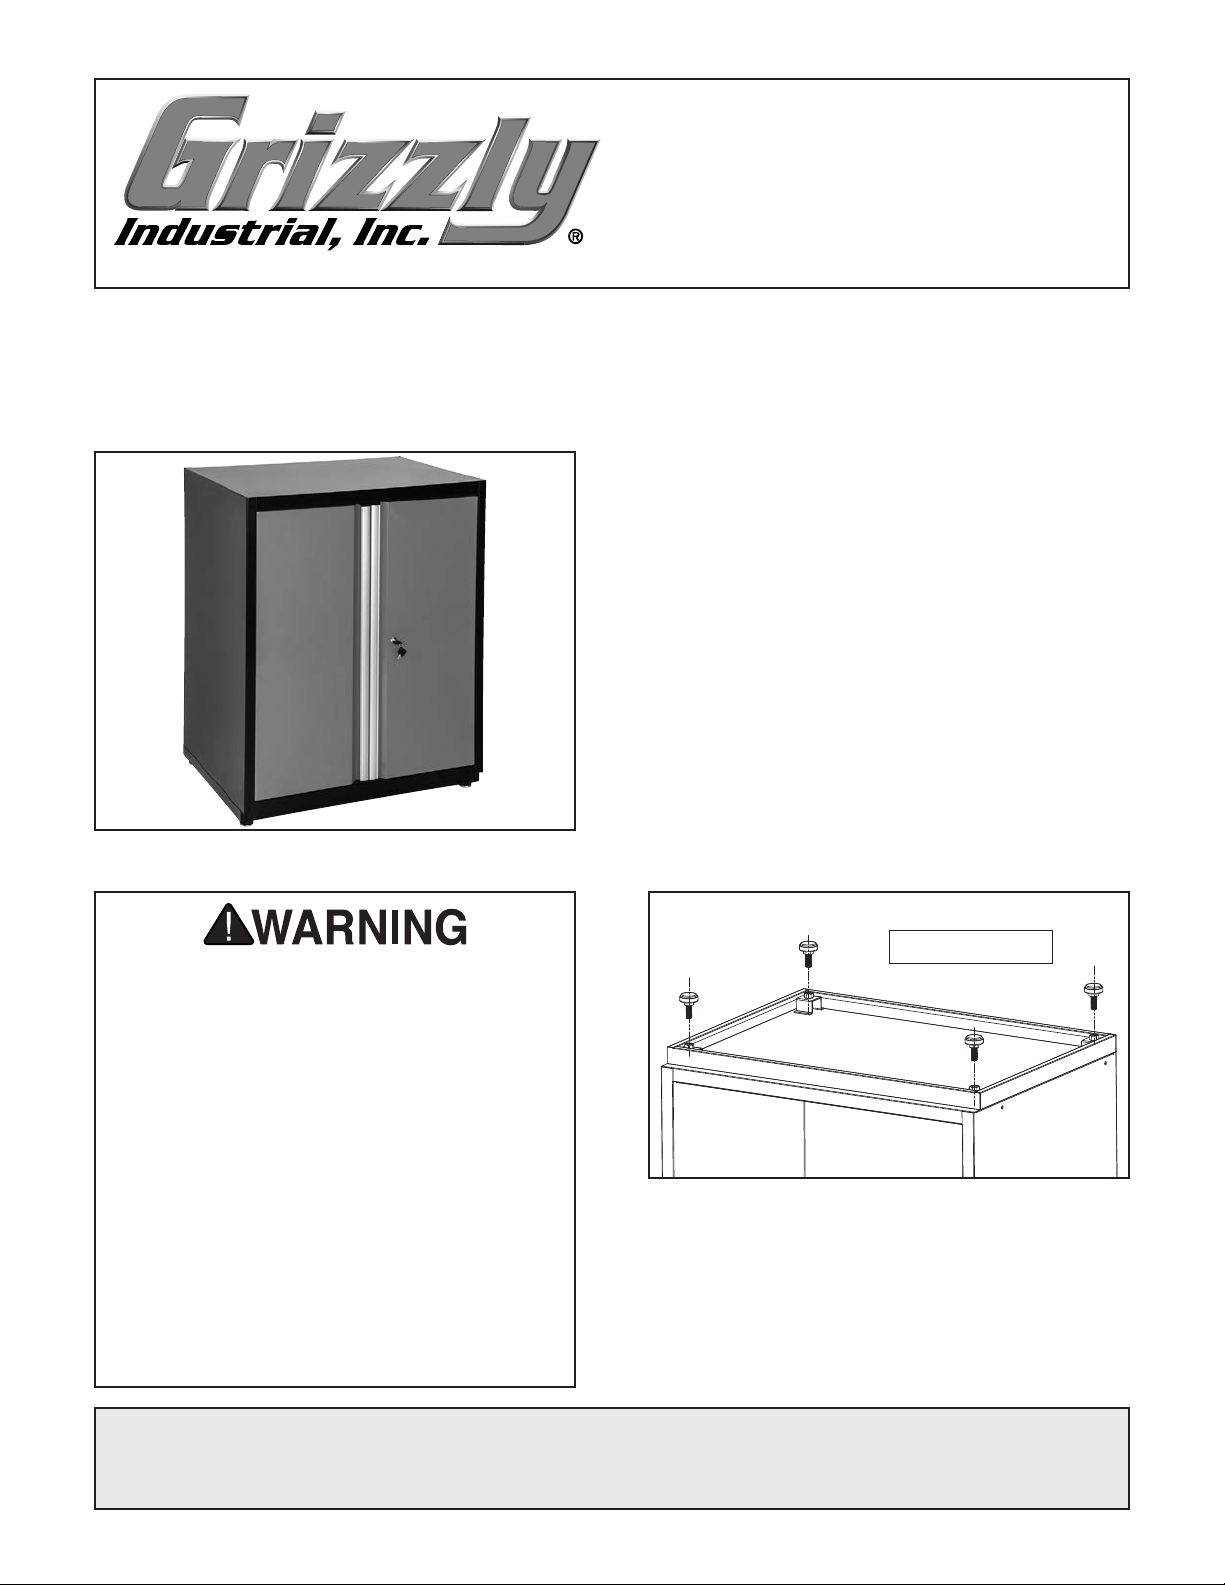
1. With help from another person, lay cabinet
upside down on floor (see Figure 2).
Note: We recommend sweeping the floor
clean and laying down a piece of cardboard
or a blanket to prevent scratching the finish
during this step.
2. Install one adjustable foot in each corner (see
Figure 2).
• To reduce risk of crushing injuries from
tool cabinet tipping over on you:
— Do not stand on cabinet.
— Only move or transport cabinet with all
doors closed and locked.
— Push cabinet only (do not pull it) when
moving.
• Do not exceed weight capacities:
— Max individual shelf weight limit
is 325 lbs.
— Max total tool cabinet weight limit
(including contents) is 650 lbs.
• To prevent accidental tipping, ensure
adjustable feet are down and cabinet
body is level.
• Do not allow children to have unsupervised
access to cabinet.
COPYRIGHT © MARCH, 2017 BY GRIZZLY INDUSTRIAL, INC., REVISED JULY, 2017 (MN)
NO PORTION OF THIS MANUAL MAY BE REPRODUCED IN ANY SHAPE
OR FORM WITHOUT THE WRITTEN APPROVAL OF GRIZZLY INDUSTRIAL, INC.
(FOR MODELS MFD. SINCE 10.16) #JH18539 PRINTED IN CHINA
Adjustable Feet
Figure 2. Location of adjustable feet.
3. To prevent tipping or rocking, level the cabi-
net body by rotating the cabinet feet up or
down as needed.
V1.0 7.17
Adjusting Doors
Each 90° soft-close door hinge is riveted in place.
However, the doors may be adjusted inward or
outward, and left or right, as needed.
To adjust doors:
Installing Shelf Supports
Each shelf comes with four shelf supports, which
fit into the channel brackets inside the cabinet
(see Figure 5), making the height of each shelf
adjustable. (Shelf supports must be mounted
evenly to function properly.)
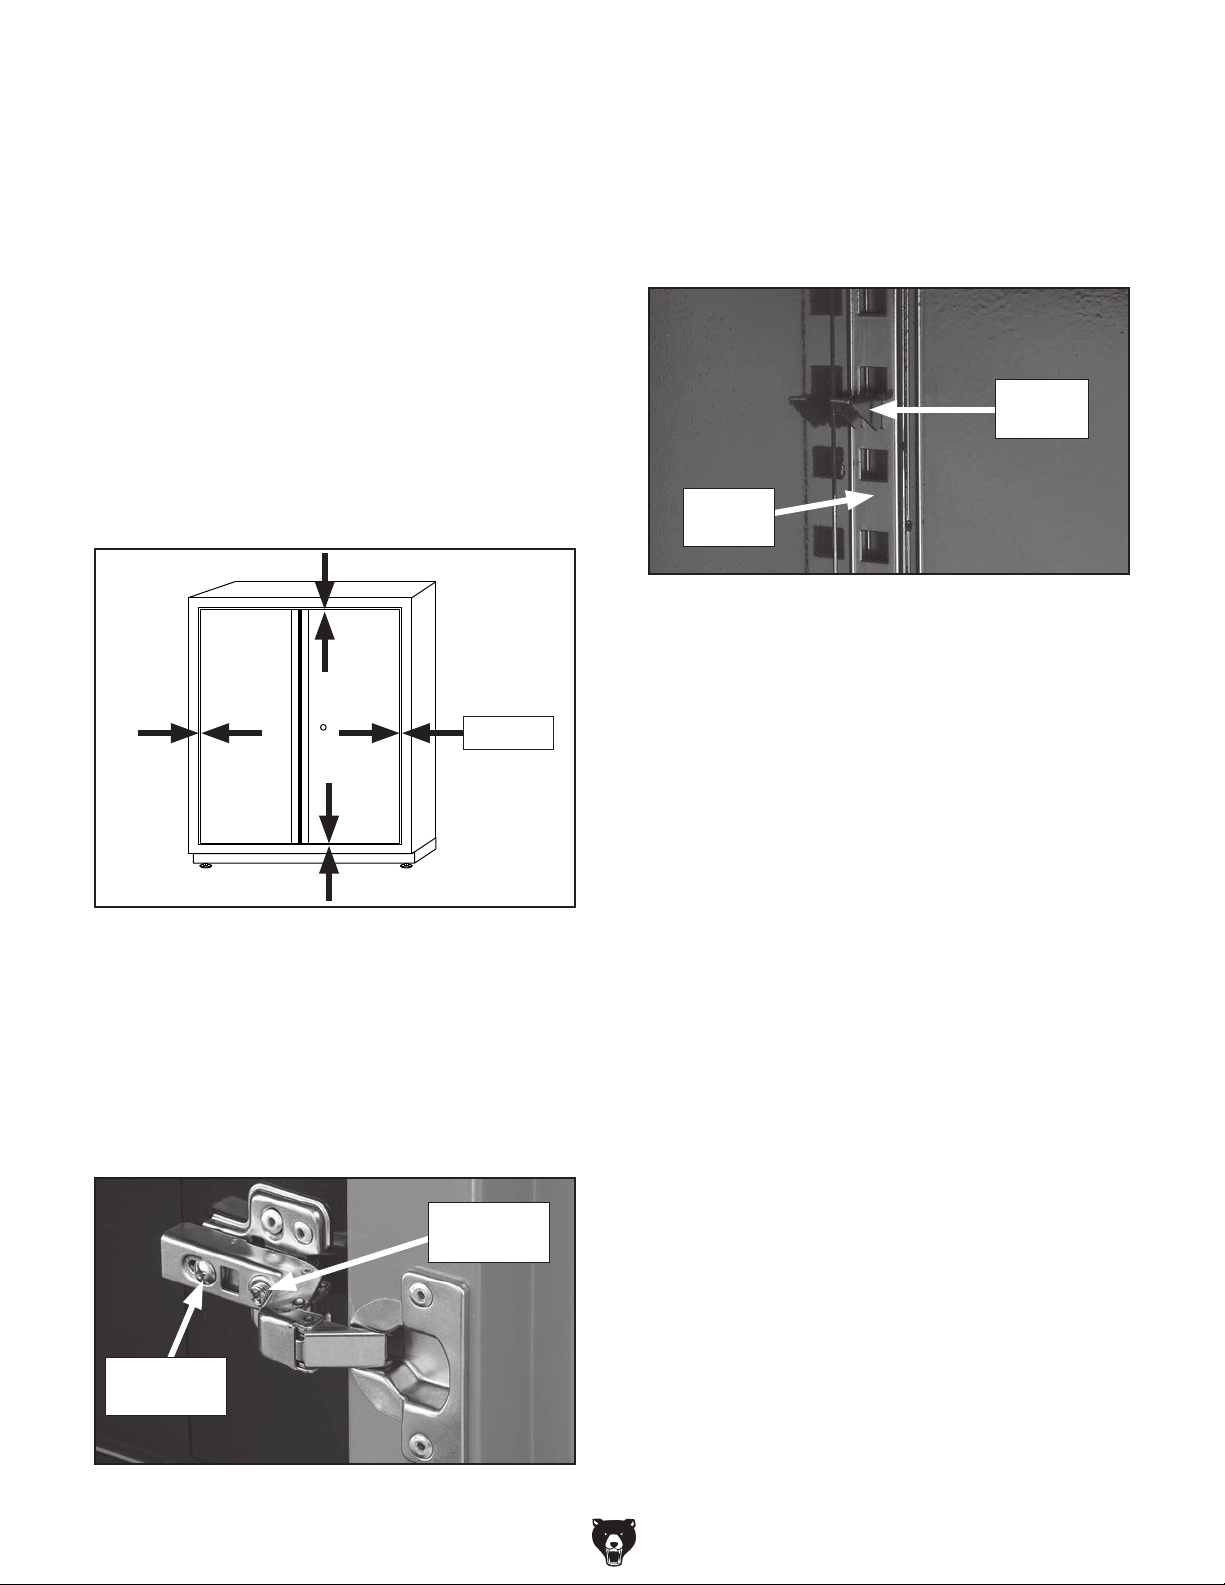
1. Close door and visually confirm gap spacing
1
around door edge is
⁄8" all the way around
(see Figure 3).
— If door spacing is equal, no adjustments
are needed.
— If door spacing is not equal, proceed to
Step 2.
1
⁄8" Gap
Shelf
Support
Channel
Bracket
Figure 5. Shelf support and channel bracket.
Maintenance
• Use a soft, clean cloth and soapy water (use
regular dish soap) to remove grease, dirt, or
oil. Do not use solvents or flammable cleaning liquids.
• Use graphite to lubricate lock annually.
Figure 3. Checking door gap spacing.
2. Adjust door hinges using screws shown in
Figure 4.
1
Note: Only small adjustments, such as
1
⁄4 turn at a time, are required to move
or
⁄8
door position. Check spacing after each
adjustment.
Right/Left
Adjustment
In/Out
Adjustment
Figure 4. Hinge adjustments.
-2-
T27948 Tool Cabinet (Mfd. 10/16)
 Loading...