

Grizzly T27338 Owner's Manual

COPYRIGHT © AUGUST, 2016 BY GRIZZLY INDUSTRIAL, INC.
WARNING: NO PORTION OF THIS MANUAL MAY BE REPRODUCED IN ANY SHAPE
OR FORM WITHOUT THE WRITTEN APPROVAL OF GRIZZLY INDUSTRIAL, INC.
#BL18231 PRINTED IN CHINA
MODEL T27338
3-IN-1 FLOORING NAILER
OWNER'S MANUAL
(For models manufactured since 01/15)
This manual provides critical safety instructions on the proper setup,
operation, maintenance, and service of this machine/tool. Save this
document, refer to it often, and use it to instruct other operators.
Failure to read, understand and follow the instructions in this manual
may result in fire or serious personal injury—including amputation,
electrocution, or death.
The owner of this machine/tool is solely responsible for its safe use.
This responsibility includes but is not limited to proper installation in
a safe environment, personnel training and usage authorization,
proper inspection and maintenance, manual availability and comprehension, application of safety devices, cutting/sanding/grinding tool
integrity, and the usage of personal protective equipment.
The manufacturer will not be held liable for injury or property damage
from negligence, improper training, machine modifications or misuse.
Some dust created by power sanding, sawing, grinding, drilling, and
other construction activities contains chemicals known to the State
of California to cause cancer, birth defects or other reproductive
harm. Some examples of these chemicals are:
• Lead from lead-based paints.
• Crystalline silica from bricks, cement and other masonry products.
• Arsenic and chromium from chemically-treated lumber.
Your risk from these exposures varies, depending on how often you
do this type of work. To reduce your exposure to these chemicals:
Work in a well ventilated area, and work with approved safety equipment, such as those dust masks that are specially designed to filter
out microscopic particles.
Model T27338 (Mfd. Since 01/15) -1-
SECTION 1: SAFETY
Safety Instructions for Pneumatic Tools
KEEP ALL SAFETY DEVICES IN PLACE
and in working order.
REMOVE ADJUSTING KEYS AND
WRENCHES. Form habit of checking to
see that keys and adjusting wrenches are
removed from tool before operation.
KEEP WORK AREA CLEAN. Cluttered
areas and benches invite accidents.
DO NOT USE IN DANGEROUS
ENVIRONMENT. Do not use pneumatic
tools in damp or wet locations, or where
any flammable or noxious fumes may
exist. Keep work area well lighted.
KEEP CHILDREN AND VISITORS
AWAY. All children and visitors should be
kept at a safe distance from work area.
MAKE WORKSHOP CHILD PROOF by
locking the shop and shutting off air
valves.
DO NOT FORCE TOOL. It will do the job
better and safer at the rate for which it was
designed.
USE THE RIGHT TOOL. Do not force tool
or attachment to do a job for which it was
not designed.
DO NOT USE UNDER INFLUENCE OF
DRUGS OR ALCOHOL.
For Your Own Safety Read Instruction Manual
Before Operating This Equipment
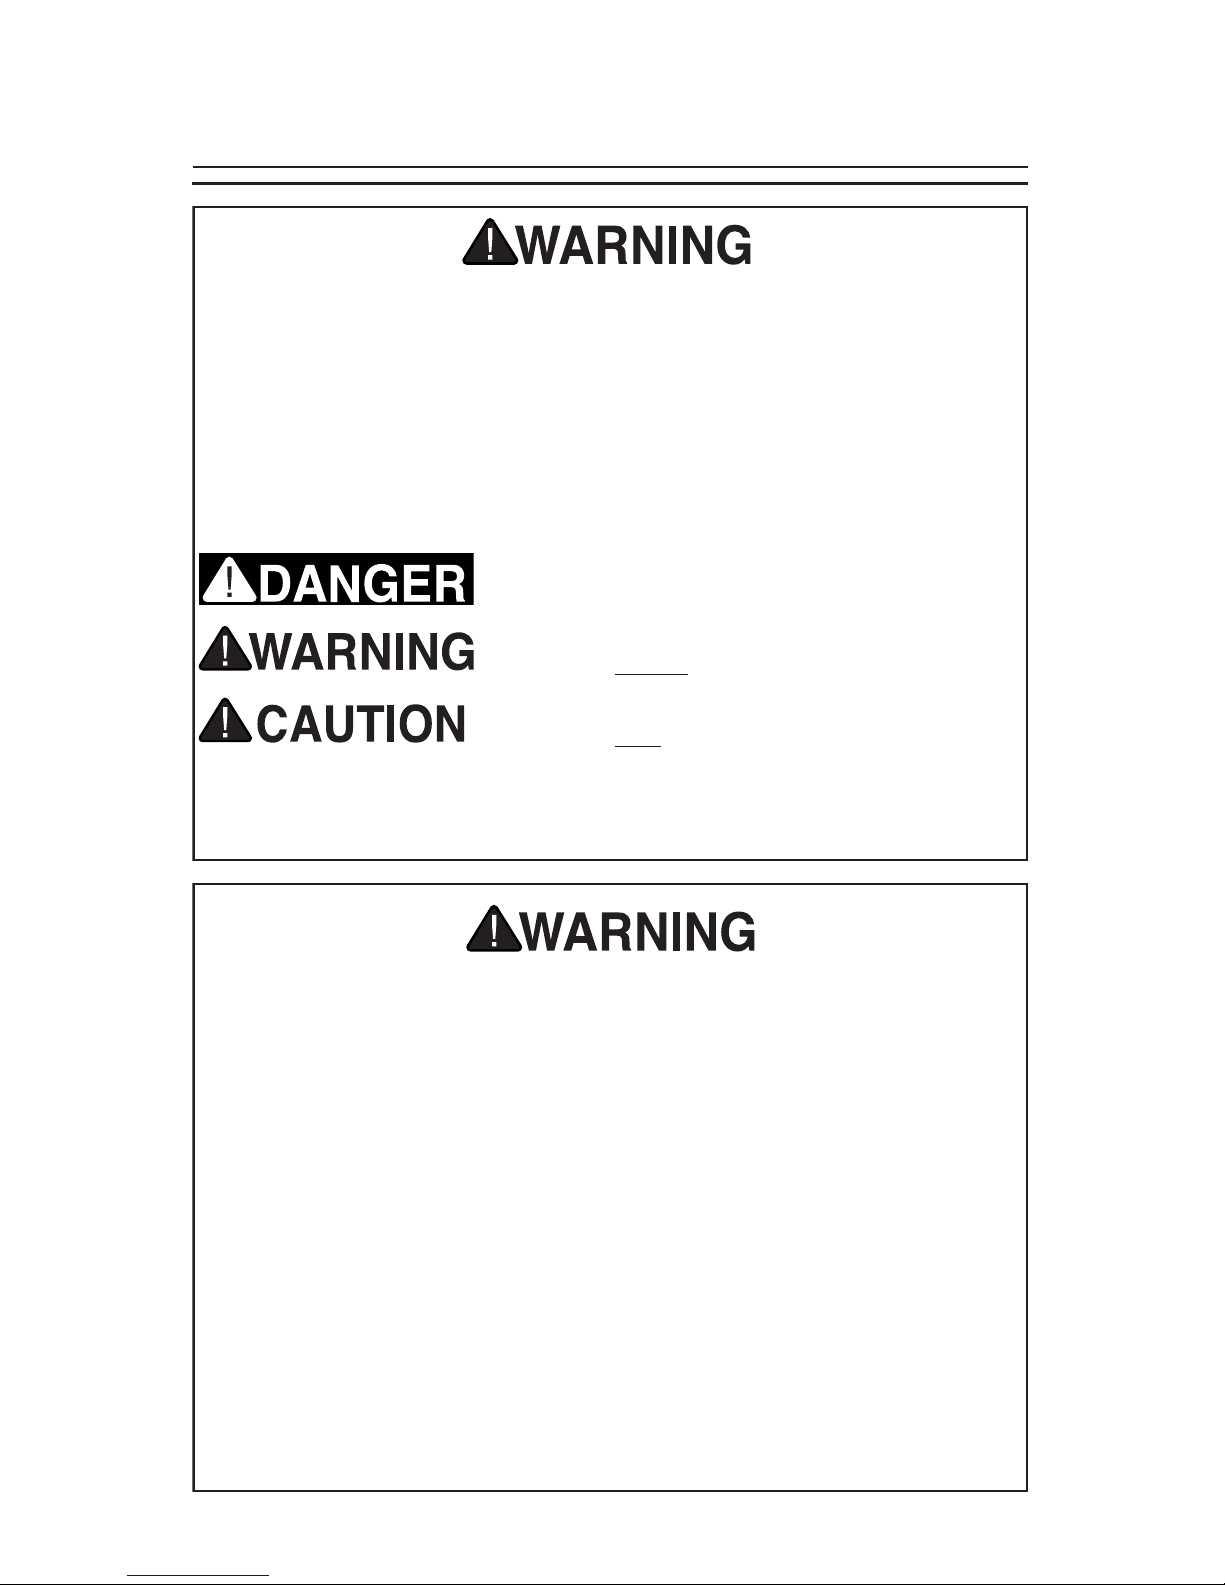
The purpose of safety symbols is to attract your attention to possible hazardous conditions. This manual uses a series of symbols and signal words which
are intended to convey the level of importance of the safety messages. The
progression of symbols is described below. Remember that safety messages by
themselves do not eliminate danger and are not a substitute for proper accident
prevention measures.
Indicates an imminent hazardous situation which, if
not avoided, WILL result in death or serious injury.
Indicates a potentially hazardous situation which, if
not avoided, COULD result in death or serious injury.
Indicates a potentially hazardous situation which, if
not avoided, MAY result in minor or moderate injury.
It may also be used to alert against unsafe practices.
This symbol is used to alert the user to useful information about proper operation of the equipment.
NOTICE
Model T27338 (Mfd. Since 01/15)-2-
USE PROPER AIR HOSE for the tool.
Make sure your air hose is in good condition and is long enough to reach your work
area without stretching.
WEAR PROPER APPAREL. Do not wear
loose clothing, gloves, neckties, rings,
bracelets, or other jewelry which may get
caught in moving parts. Non-slip footwear
is recommended. Wear a protective hair
covering to contain long hair.
ALWAYS USE SAFETY GLASSES. Also
use a face or dust mask if operation is
dusty. Everyday eyeglasses only have
impact resistant lenses, they are NOT
safety glasses.
WEAR APPROVED HEARING
PROTECTION. Air escaping from pneu-
matic tools can exceed safe exposure
limits and may cause hearing damage
with prolonged exposure.
AWKWARD POSITIONS. Keep proper
footing and balance at all times when
operating tool. Do not overreach! Avoid
awkward hand positions that make workpiece control difficult or increase the risk
of accidental injury.
REDUCE THE RISK OF
UNINTENTIONAL FIRING. Do not carry
tool with hand on trigger and always disconnect from air when not in use.
CHECK FOR DAMAGED PARTS.
Regularly inspect tool for any condition that may affect safe operation.
Immediately repair or replace damaged or
mis-adjusted parts before operating tool.
DISCONNECT TOOLS before servicing, changing accessories, or moving to
another location.
USE RECOMMENDED ACCESSORIES.
Consult this owner’s manual or the manufacturer for recommended accessories.
Using improper accessories will increase
the risk of serious injury.
NEVER LEAVE UNATTENDED TOOL
CONNECTED TO AIR. Disconnect the
air hose and do not leave tool until it is
relieved of any built up pressure.
NEVER ALLOW UNTRAINED
USERS TO USE THIS TOOL WHILE
UNSUPERVISED.
IF YOU ARE UNSURE OF THE
INTENDED OPERATION, STOP USING
TOOL. Seek formal training or research
books or magazines that specialize in
pneumatic tools.
BE AWARE OF HOSE LOCATION WHEN
USING PNEUMATIC TOOLS. Hoses can
easily become a tripping hazard when laid
across the floor or spread out in a disorganized fashion.
SECURE WORK. When required, use
clamps or vises to secure workpiece. A
secured workpiece protects hands and
frees both of them to operate the tool.
MAINTAIN TOOLS WITH CARE. Keep
tools lubricated and clean for best and
safest performance. Follow instructions
for lubricating and changing accessories.
Safety Instructions for Pneumatic Tools
Model T27338 (Mfd. Since 01/15) -3-
Additional Safety for Flooring Nailers
HAND AND FOOT INJURIES. Do not
place your hands or feet near or under
the nail point of entry. A nail/staple can
deflect and tear through the surface of the
workpiece, puncturing your hand or foot.
COMPRESSED AIR RATING. Do not
connect the nailer to compressed air that
exceeds 115 PSI.
ACTUATING MECHANISM. Be careful
not to bump actuating mechanism when
carrying or holding tool while connected
to air. If bumped, the tool may accidentally
shoot in dangerous direction.
SAFE HANDLING. Never point nailer at
others! Carry nailer only by handle, never
by any other part. Do not carry nailer by
air hose.
HOSE USAGE. Make sure your air hose
is designed for tool in use, is in good condition, and is long enough to reach your
work area without stretching. However, an
overly long air hose in the work area may
be a tripping hazard.
OPERATING QUESTIONS. If you are not
sure about intended operation, stop using
nailer. Seek formal training, or research
books or magazines that specialize in
pneumatic tools.
NAILING. Avoid driving one nail/staple on
top of another. The nail/staple may deflect
and cause injury.
AIR SOURCE. Disconnect air source
before installing nails/staples, clearing
jam, moving to another work area, performing maintenance, or when tool is
not in use. A nailer connected to air may
fire accidentally, causing serious personal
injury. DO NOT use check valve or any
other fitting that allows air to remain in
the tool.
COMBUSTIBLE GASES. Never connect
nailer to pressurized oxygen or other combustible gases as a power source. Only
use regulated compressed air.
CLEANING. Never use gasoline or other
flammable liquids to clean nailer; vapors
in nailer will ignite by a spark and cause
it to explode.
TOOL SERVICE. If nailer is leaking air,
damaged, or not working correctly, DO
NOT use before repairing.
HAMMER SAFETY. DO NOT use hammer
with damaged handle or loose head. Make
sure nobody is standing close enough to
be hit when you swing hammer.
No list of safety guidelines can be
complete. Every shop environment
is different. Always consider safety first, as it applies to your individual working conditions. Use this
and other tools with caution and
respect. Failure to do so could result
in serious personal injury, damage to
equipment, or poor work results.
Model T27338 (Mfd. Since 01/15)-4-
SECTION 2: INTRODUCTION
Manual Accuracy Contact Info
We stand behind our tools. If you have any
service questions, parts requests or general questions about the product, please
call or write us at the location listed below.
Grizzly Technical Support
1815 W. Battlefield
Springfield, MO 65807
Phone: (570) 546-9663
Email: techsupport@grizzly.com
We want your feedback on this manual.
What did you like about it? Where could it
be improved? Please take a few minutes to
give us feedback.
Grizzly Industrial, Inc.
C/O Technical Documentation Manager
P.O. Box 2069
Bellingham, WA 98227-2069
Email: manuals@grizzly.com
We are proud to offer this document with
your new tool! We've made every effort to
be exact with the instructions, specifications, drawings, and photographs of the
tool we used when writing this manual.
However, sometimes we still make an
occasional mistake.
Also, owing to our policy of continuous
improvement, your tool may not exactly
match the manual. If you find this to be
the case, and the difference between
the manual and tool leaves you in doubt,
immediately call our technical support for
updates or clarification.
For your convenience, we post all available documentation on our website at
www.grizzly.com. Any updates to this document will be reflected on our website as
soon as complete.
Weight ......................................................................................................................11.2 lbs.
Length x Width x Height ................................................................................20 x 3
1
⁄2 x 23 in.
Operating Pressure ............................................................................................. 70–115 PSI
Magazine Capacity ................................................................ 100 Cleat Nails or 120 Staples
Fastener Length ........................................................................................................11⁄2–2 in.
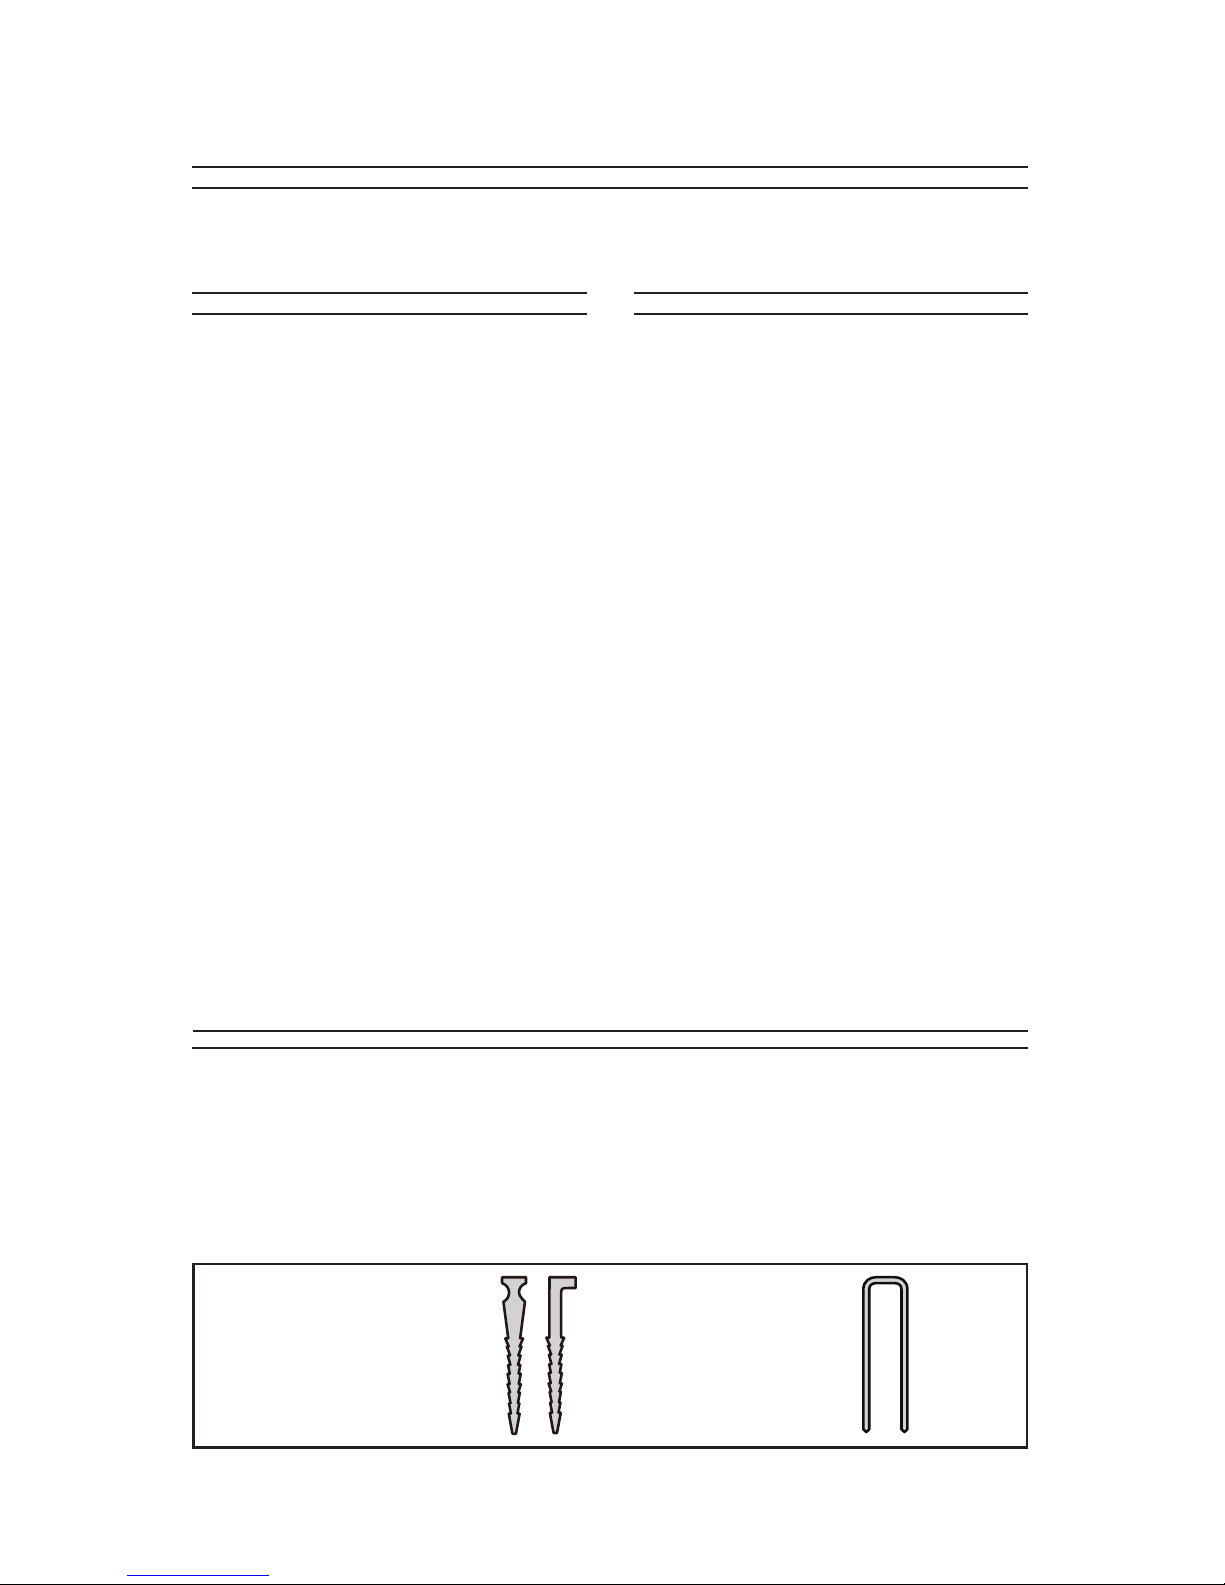
Fastener Size ....16-Ga. T-Cleat Nails, 16-Ga. L-Cleat Nails, 15.5 Ga. 1⁄2 in. Crown Staples
Specifications
16 Ga.
L- or T-Cleat Nail
1
1
/2"–2" Long
(100 Pc. Capacity)
15.5 Ga.
1
/2" Crown Staple
1
1
/2"–2" Long
(120 Pc. Capacity)
Model T27338 (Mfd. Since 01/15) -5-
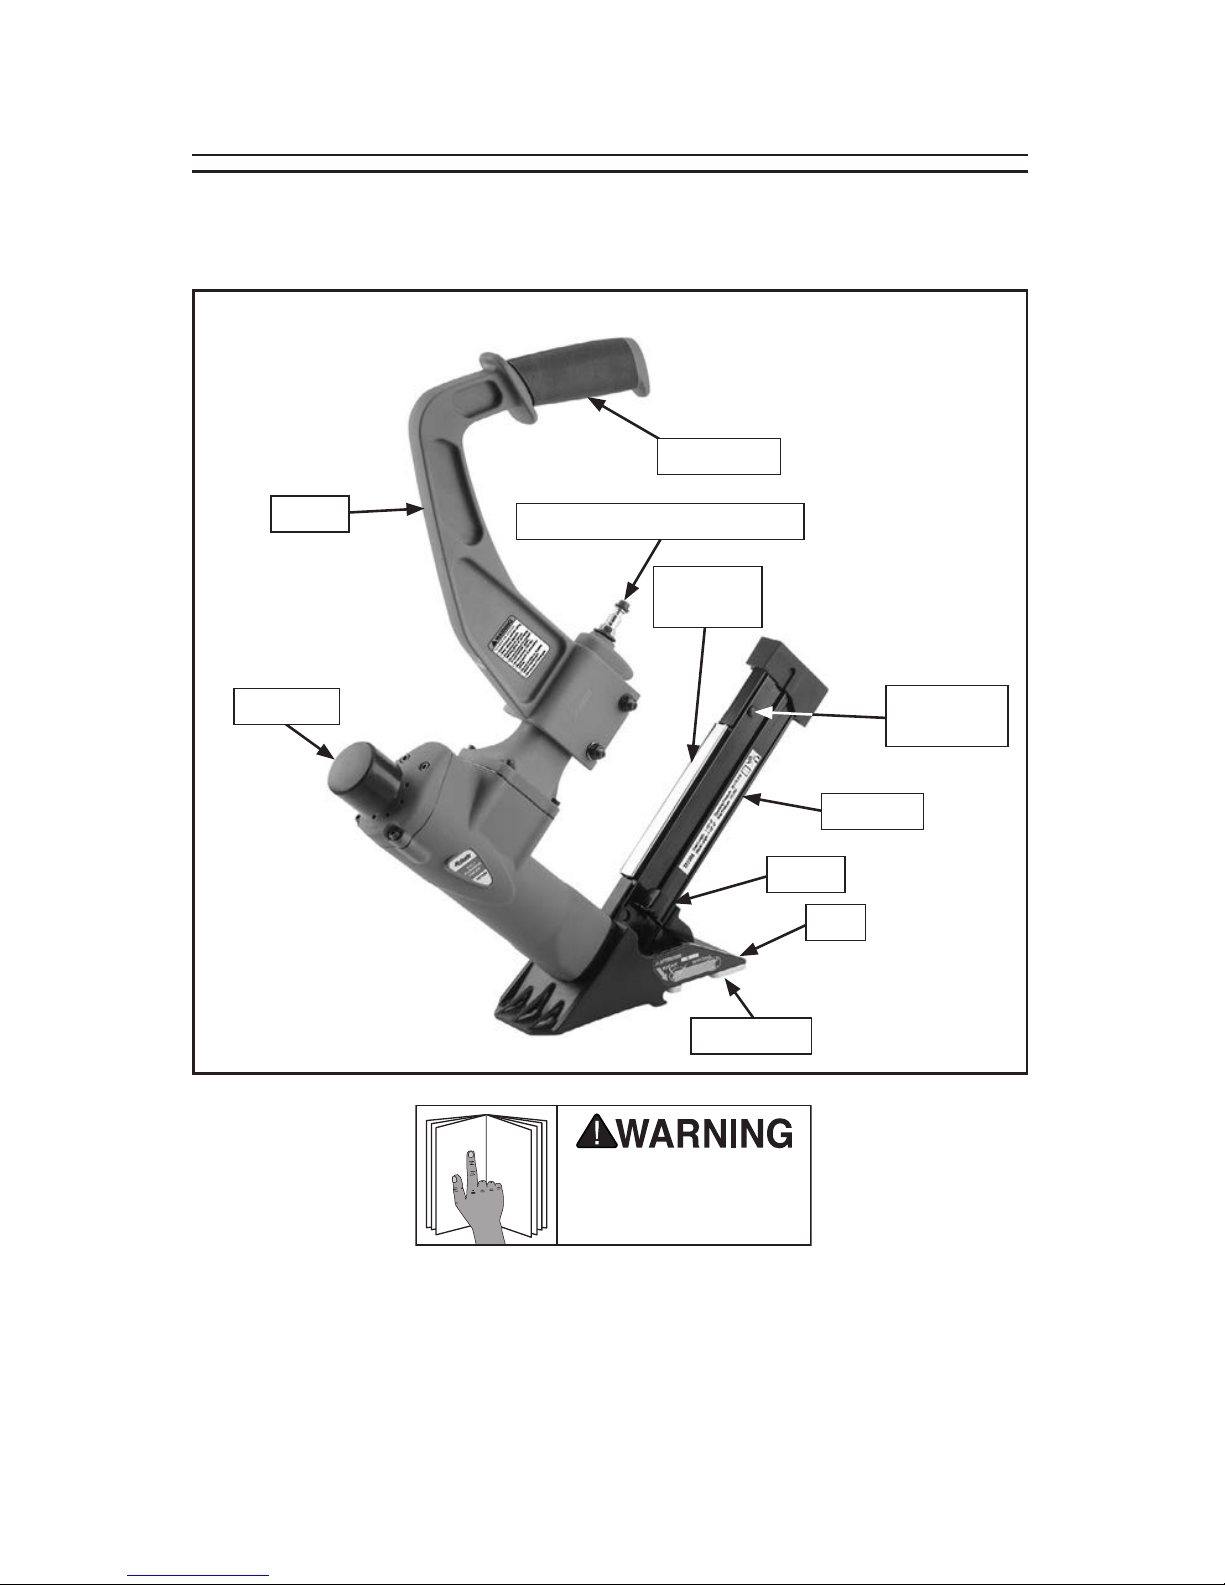
Identification
To reduce your risk of
serious injury, read this
entire manual BEFORE
using tool.
Become familiar with the names and locations of the controls and features shown below to
better understand the instructions in this manual.
Handle
Handle Grip
Air Inlet/Quick-Connect Fitting
Magazine
Cover
Magazine
Pusher
Base
Guide Plate
Head Cap
Magazine
Lock Button
Model T27338 (Mfd. Since 01/15)-6-
SECTION 3: SETUP
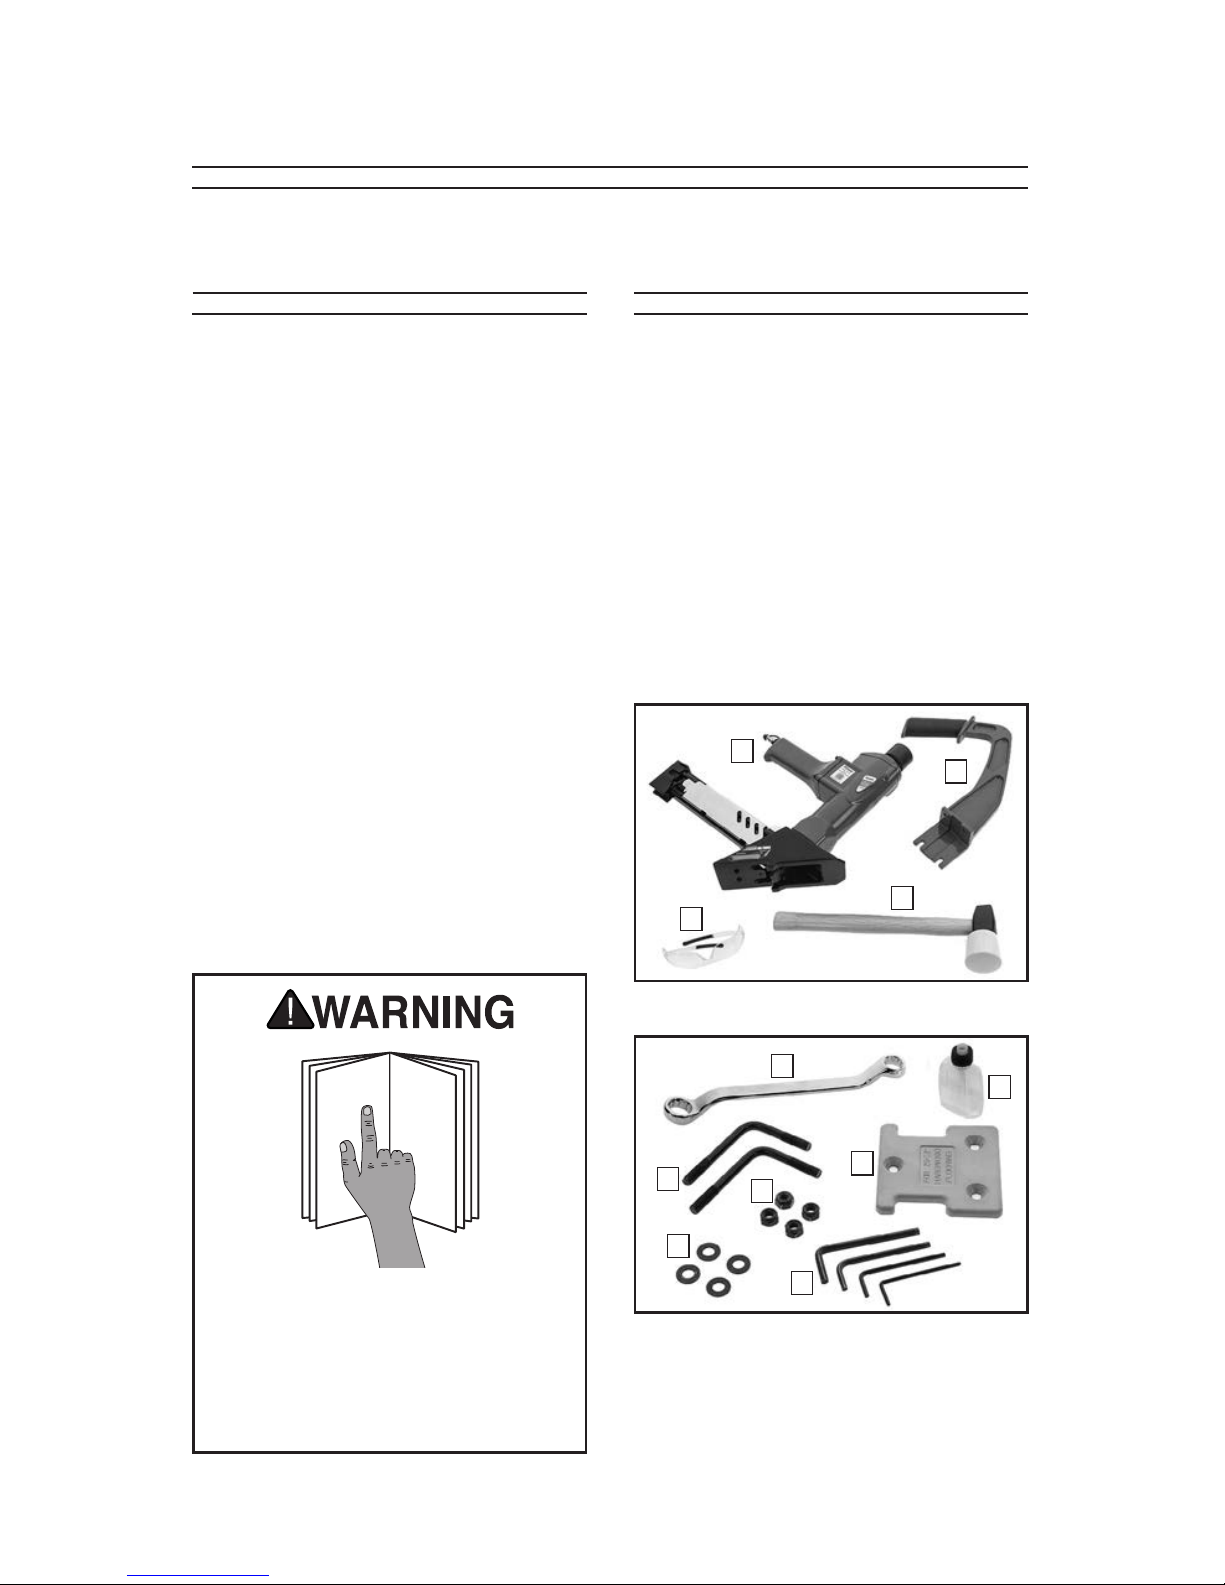
Unpacking Inventory
Model T27338 Inventory (Figures 1-2)
A. Flooring Nailer Body .......................... 1
B. Arm .................................................... 1
C. Safety Glasses ................................... 1
D. Hammer ............................................. 1
E. Closed-End Wrench 13/16mm ........... 1
F. Bottle for Oil ....................................... 1
G. L-Bolts M8-1.25 .................................. 2
H. Lock Nuts M8-1.25 ............................. 4
I. Guide Plate for 1⁄2" Hardwood Floors . 1
J. Flat Washers 8mm ............................. 4
K. Hex Wrenches 2.5, 3, 4, 5mm .....1 Ea.
Figure 1. Model T27338 inventory.
B
C
D
A
Figure 2. Model T27338 additional
inventory.
E
G
I
H
J
K
F
Your tool was carefully packaged for
safe transportation. Remove the packaging materials from around your tool and
inspect it. If you discover the tool is damaged, please immediately call Customer
Service at (570) 546-9663 for advice.
Save the containers and all packing materials for possible inspection by the carrier or its agent. Otherwise, filing a freight
claim can be difficult.
When you are completely satisfied with
the condition of your shipment, inventory
the contents.
If any non-proprietary parts are missing
(e.g., a nut or a washer), we will gladly
replace them; or for the sake of expediency, replacements can be obtained at
your local hardware store.
This tool presents serious injury
hazards to untrained users. Read
through this entire manual to
become familiar with the controls
and operations before starting the
tool!
Model T27338 (Mfd. Since 01/15) -7-
Compressed Air
System
The Model T27338 is designed to be operated at 70-115 PSI using clean, dry, regulated, compressed air. DO NOT exceed
the 115 PSI maximum operating pressure for your model. Before using, regu-
late the air pressure on your air compressor to 70 psi.
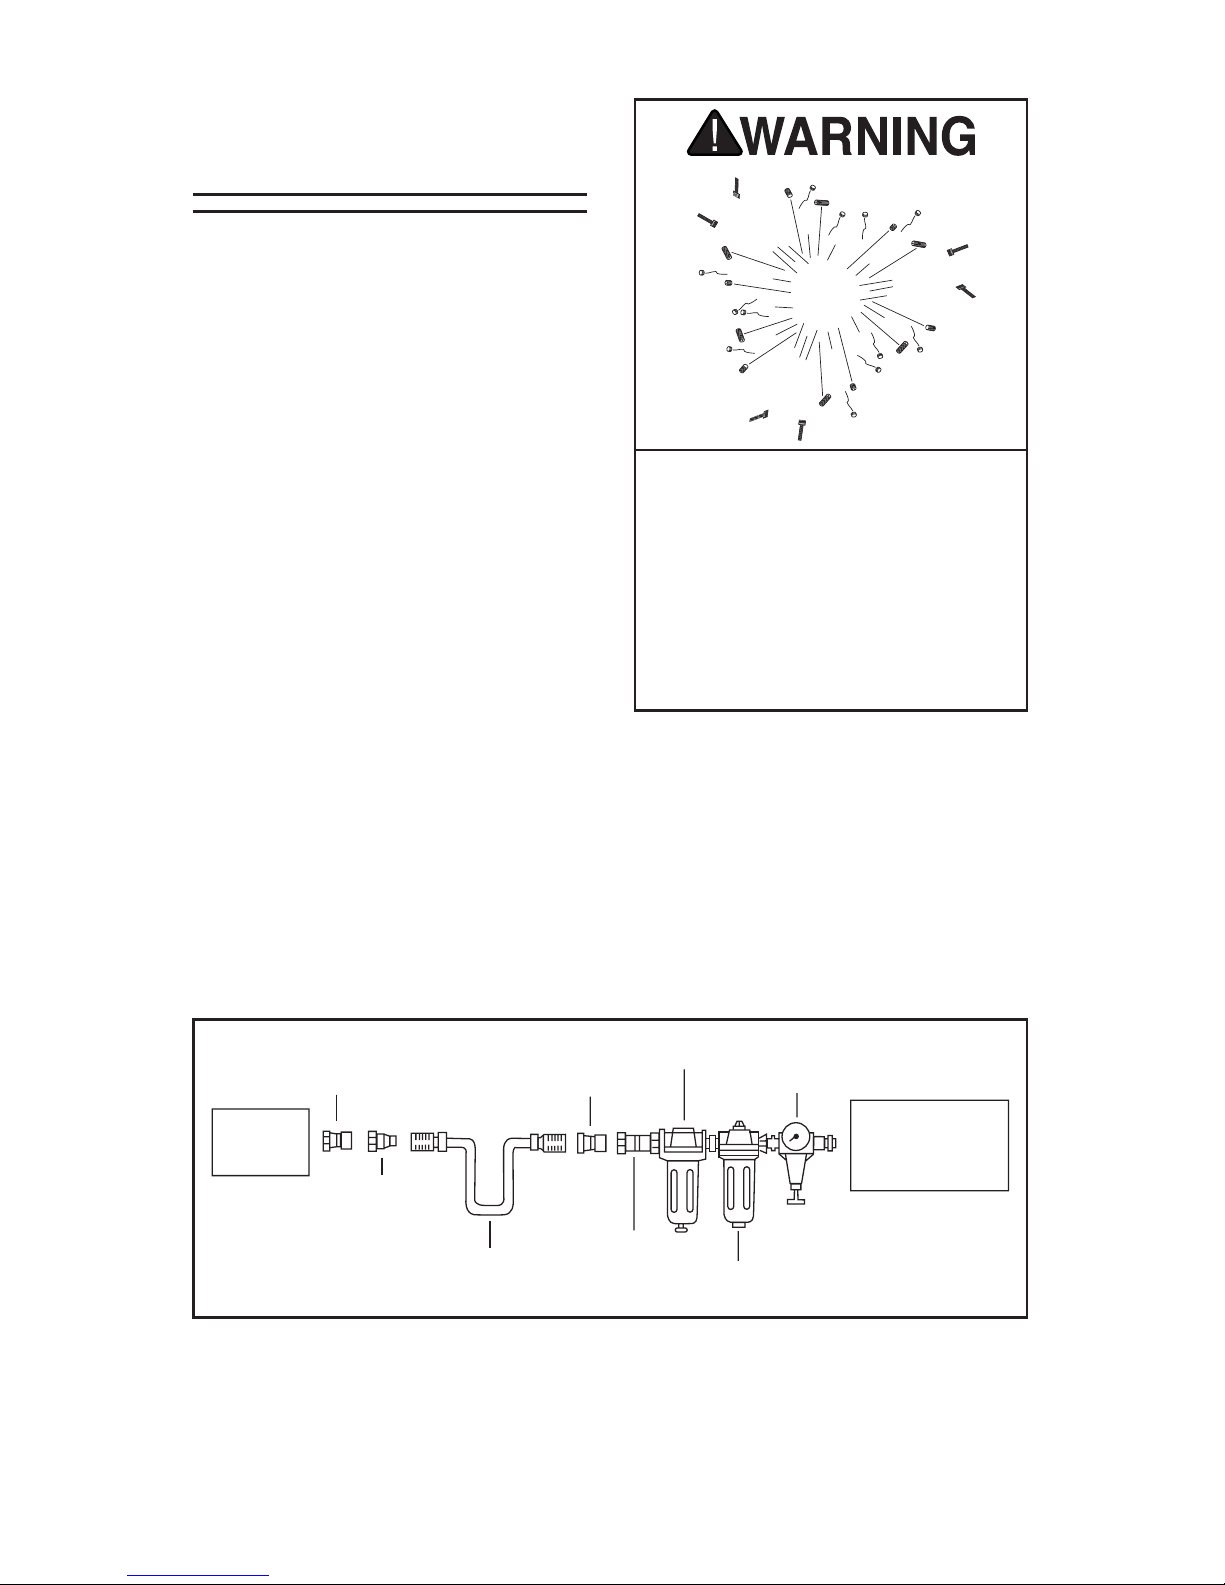
An in-line filter/lubricator/regulator unit,
depicted in Figure 3, can be installed and
should be located as close to the nailer as
possible.
The filter/lubricator/regulator unit will
protect your tool from damaging water
build-up, allow you to adjust and maintain
constant air pressure to your tool, and
save you the inconvenience of having to
manually lubricate your tool every time
you use it.
Check the current Grizzly catalog for availability of this unit. If you plan on installing a filter/lubricator/regulator unit in your
compressed air system, always follow the
connection instructions that come with
the unit.
Quick
Connector
Quick
Coupler
Air Hose
Quick
Coupler
Quick
Connector
Lubricator
Filter
Regulator
Air
Compressor
Your
Tool
Figure 3. Typical filter/lubricator/regulator installation order.
Exceeding maximum permissible
operating pressure may cause nailer
to explode, blowing metal fragments
in all directions. To protect yourself
and bystanders from serious personal
injury, DO NOT allow your air compressor to exceed the recommended pressure when connected to this
nailer!
 Loading...