

Page 1
T10002 & T10003 Shelf Units
-1-
MODEL T10002 & T10003
SHELF UNITS
INSTRUCTION SHEET
T10003 Parts List
COPYRIGHT © SEPTEMBER, 2 007 BY GRIZZLY INDUSTRIAL, INC.
WARNING: NO POR TION OF THIS MANUAL M AY BE REPRODUCED IN ANY SHAPE
OR FORM WIT HOUT THE WRITTEN APPROVAL OF GRIZZLY INDUSTRIAL, INC.
#TJ10001 PRINTED IN CHINA
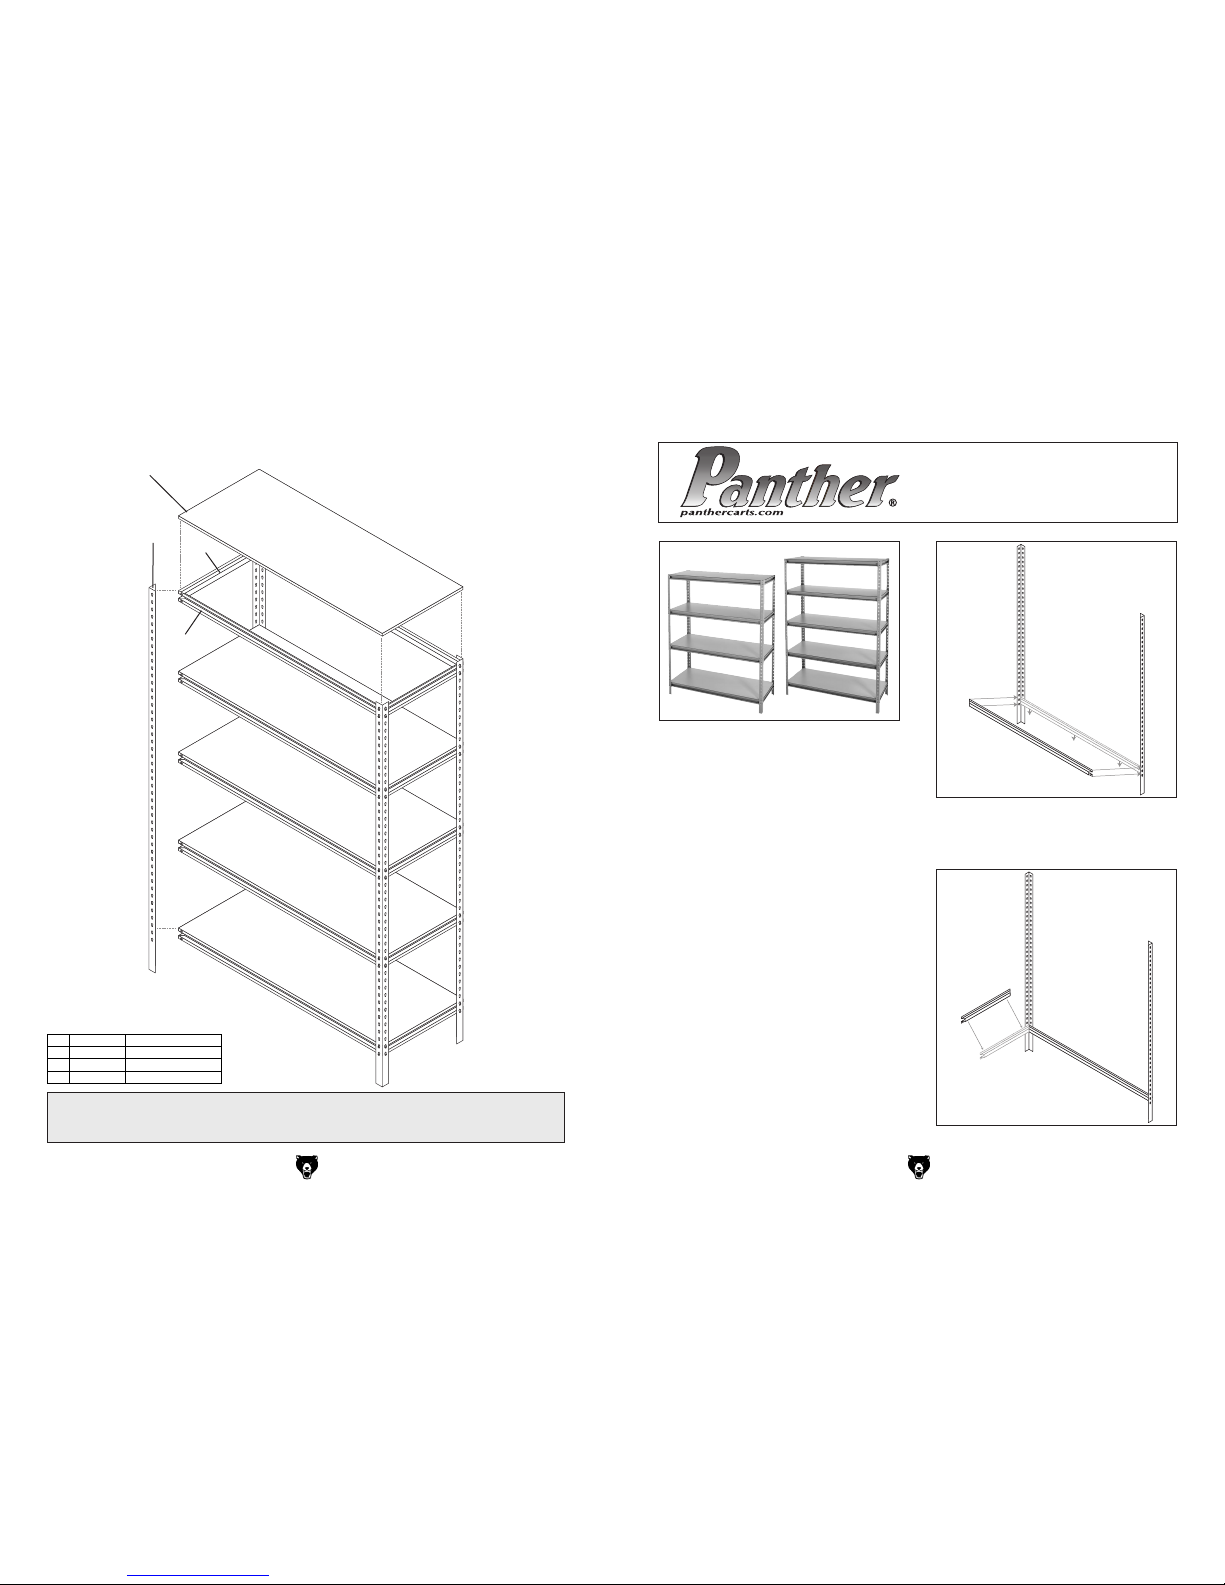
Figure 1. T10002 4 Shelf Unit & T10003 5 Shelf Unit.
T10002 Specifications
Overall Size ................... 481⁄2"W x 191⁄2"D x 60"T
Shelf Size .......................................48"W x 19"D
Number of Shelves ............................................ 4
T10003 Specifications
Overall Size ................... 481⁄2"W x 191⁄2"D x 70"T
Shelf Size .......................................48"W x 19"D
Number of Shelves ............................................ 4
Inventory Qty: T1002 T1003
A. 48" Shelf Support ................... 8 10
B. 19" Shelf Support .................... 8 10
C. Vertical Rail ............................. 4 4
D. Shelf ........................................ 4 5
Assembly
After unpacking your shelving unit, inventory the
parts. You will need a large bench or open floor
area to assemble the shelves.
1. Begin by attaching a 48" shelf support to
the bottom of two vertical rails as shown in
Figure 2. This is done by inserting the two Tshaped circular pins, at both ends of all shelf
supports, into the keyhole shaped slots on
the rails and sliding them down into place.
Figure 2. Attaching long shelf support.
Figure 3. Attaching short shelf support.
2.
Next, attach a 19" shelf support to the adjacent
slots on the rail as shown in Figure 3.
1
2
3
4
T10003 Parts List
REF PART # DESCRIPTION
1 PT10002001 SHELF 48" X 19"
2 PT10003002 VERTICAL RAIL 70"
3 PT10002003 SHELF SUPPORT 19"
4 PT10002004 SHELF SUPPORT 48"
Page 2
-2-
T10002 & T10003 Shelf Units
T10002 & T10003 Shelf Units
-3-
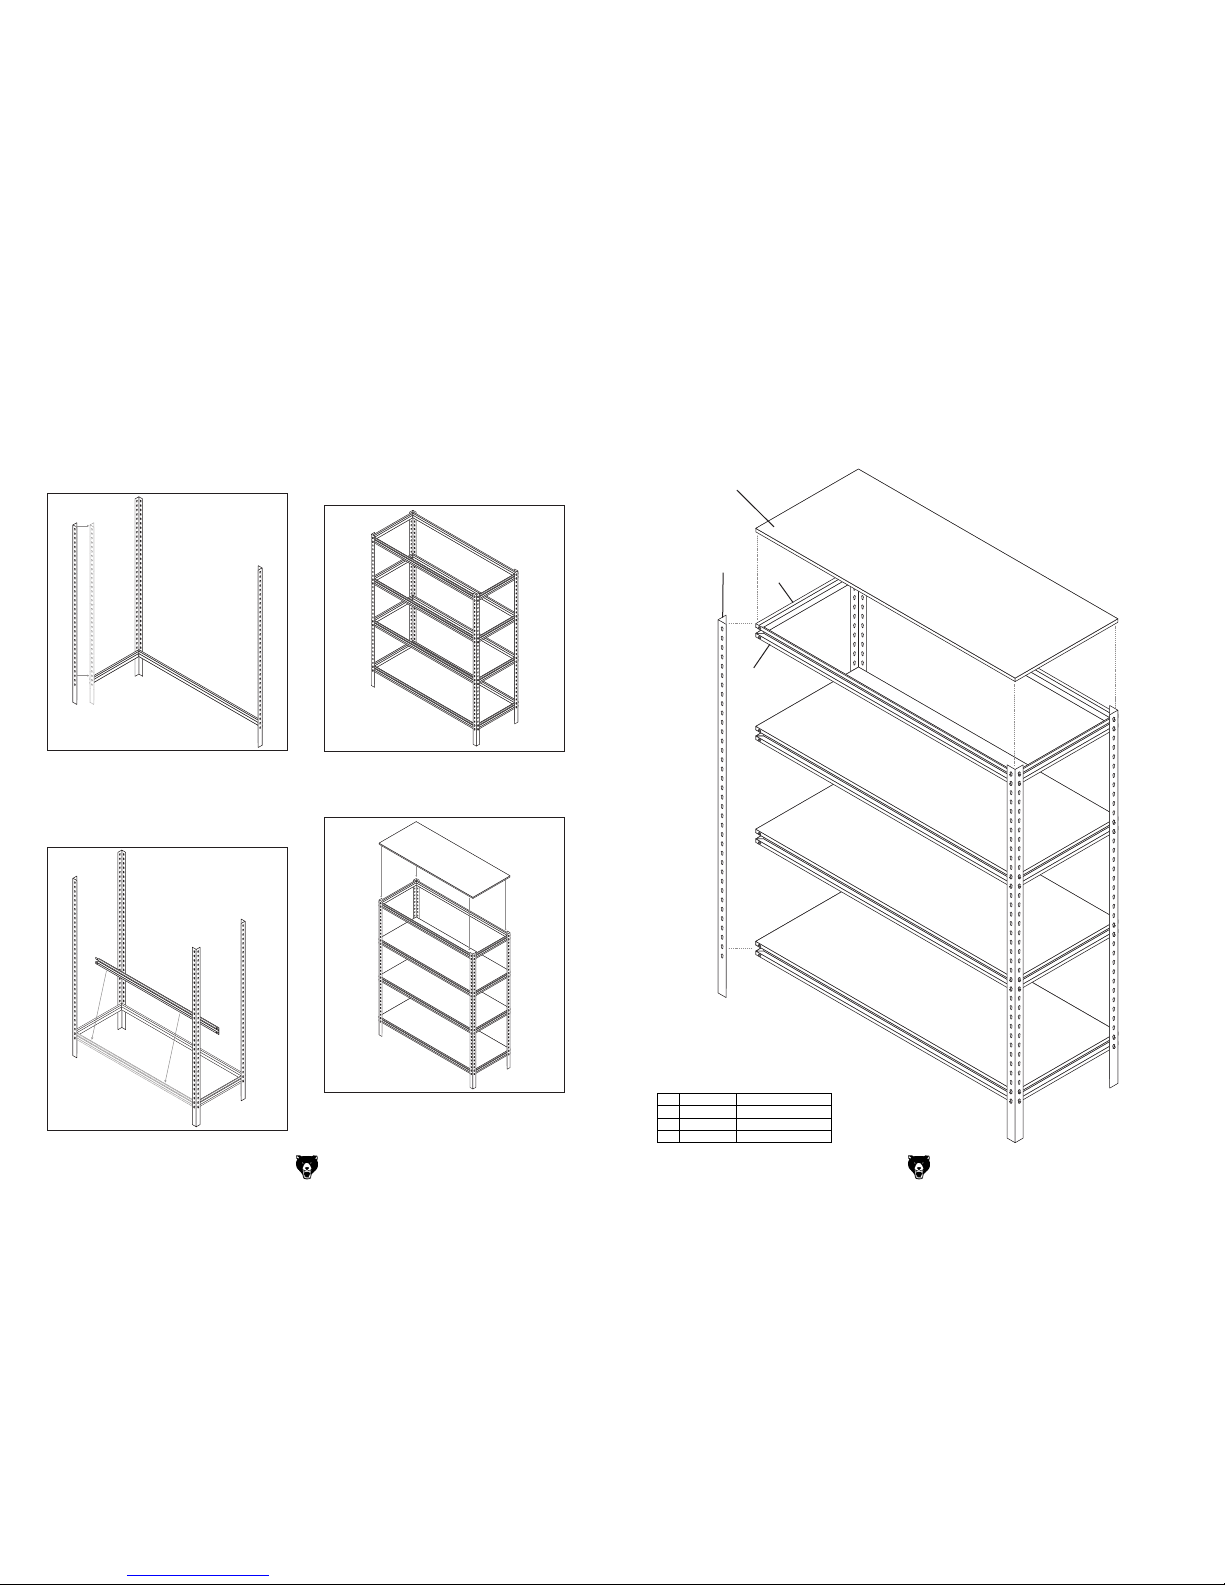
3. Now attach a third vertical rail to the opposite
side of the 19" shelf support installed in Step
2, as shown in Figure 4.
4. Repeat Steps 2 and 3 for the opposite side.
5. Attach a fourth 48" shelf support as shown in
Figure 5.
Figure 4. Attaching a third rail.
Figure 5. Attaching fourth shelf support.
Figure 6. Repeating steps 1-5.
6.
Repeat this process for the remaining shelf
supports, placing them at the desired height,
making sure that the shelf supports for a given
shelf are all at the same height (Figure 6).
Figure 7. Placing the shelves
T10002 Parts Breakdown
1
2
3
4
T10002 Parts List
If you need help with your new item, call our Tech
Support at: ( 570) 546-9663.
REF PART # DESCRIPTION
1 PT10002001 SHELF 48" X 19"
2 PT10002002 VERTICAL RAIL 60"
3 PT10002003 SHELF SUPPORT 19"
4 PT10002004 SHELF SUPPORT 48"
7. Finally, place the shelves on the shelf supports
from the bottom up as shown in Figure 7.
 Loading...