

Page 1
The Model H6161 (Figure 1) was carefully packed
when it left our warehouse. If you discover the
sealer is damaged after you have signed for deliv
ery, please immediately call Customer Service at
(570) 546-9663
Save the containers and all packing materials for
possible inspection by the carrier or its agent.
Otherwise, filing a freight claim can be difficult.
for advice.
Model H6161 14" Floor
Model Plastic Sealer
-
When you are completely satisfied with the condi
tion of your shipment, you should inventory the
contents.
INVENTORY
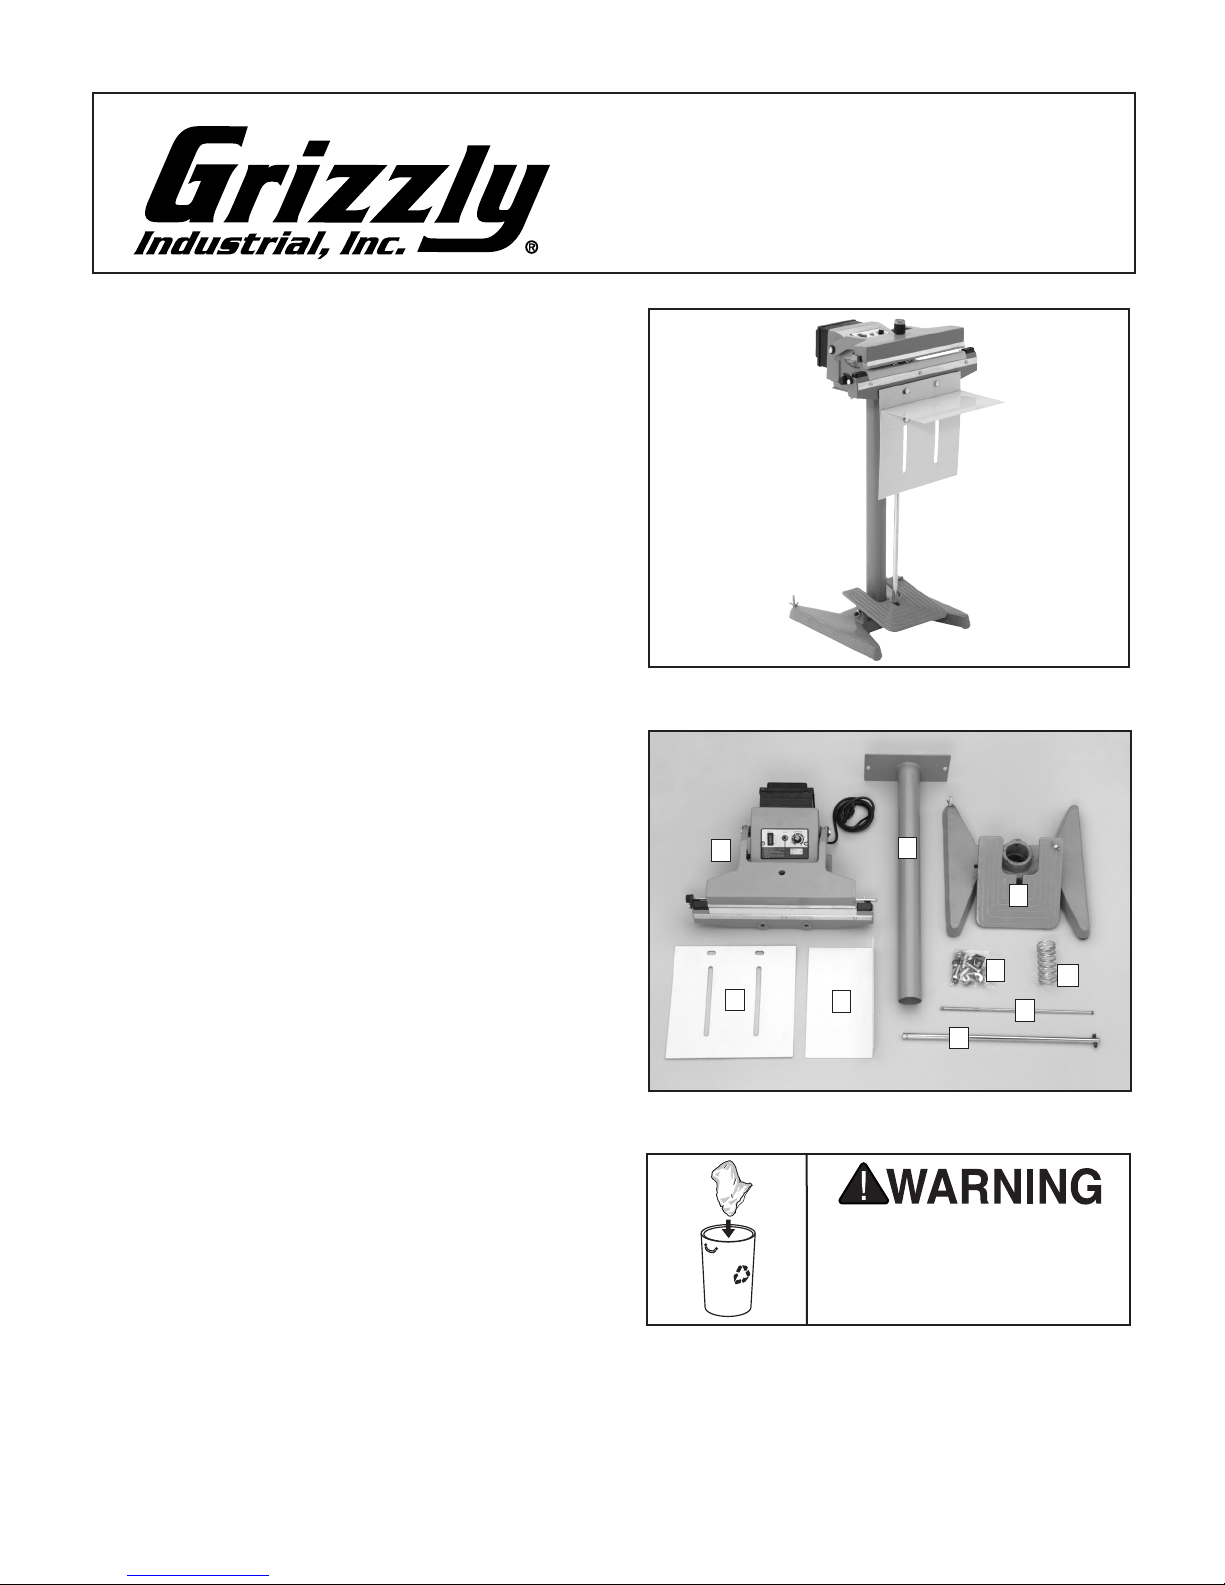
Figure 2 - Contents.
A. Base Frame ................................................ 1
B. Stand Tube ................................................. 1
C. Draw Shaft .................................................. 1
D. Draw Tube .................................................. 1
E. Shelf Adjustment Bracket ........................... 1
F. Shelf ...........................................................
G. Spring ......................................................... 1
H. Machine Head ............................................ 1
I. Bolt Bag ...................................................... 1
—Metal Draw Shaft Knob ...........................
—Phillips Head Screws M4-.7 x 8 ..............
—Open Nut ................................................
—Rubber Column .......................................
—Hex Bolts M10-1.5 x 40 ..........................
—Hex Bolts M10-1.5 x 30 ..........................
—Hex Nuts M10-1.5 ...................................
—Hex Nut M8-1.25 ....................................
—Lock Washers 10mm ..............................
—Flat Washers 10mm ...............................
1
1
2
1
1
2
5
6
1
6
6
-
Figure 1. Model H6161.
H
E
F
Figure 2.
Children may climb into
plastic bags and suffocate.
Promptly discard all plastic
bags.
B
D
Box contents.
A
I
G
C
Page 2
INSTRUCTIONS
The Model H6161 14" Floor Model Plastic Sealer
is ideal for high volume sealing of poly bags.
ASSEMBLY INSTRUCTIONS
1. Insert the stand tube into the base frame and
secure with an M10-1.5 x 30 hex bolt.
2. Secure the machine head to the stand tube
with M10-1.5 x 40 hex bolts, M10-1.5 hex
nuts, 10mm flat washers, and 10mm lock
washers.
3. Connect the draw tube and draw shaft togeth-
er with the open nut, M4-0.7 x 8 Phillips head
screws, and the M8-1.25 hex nut.
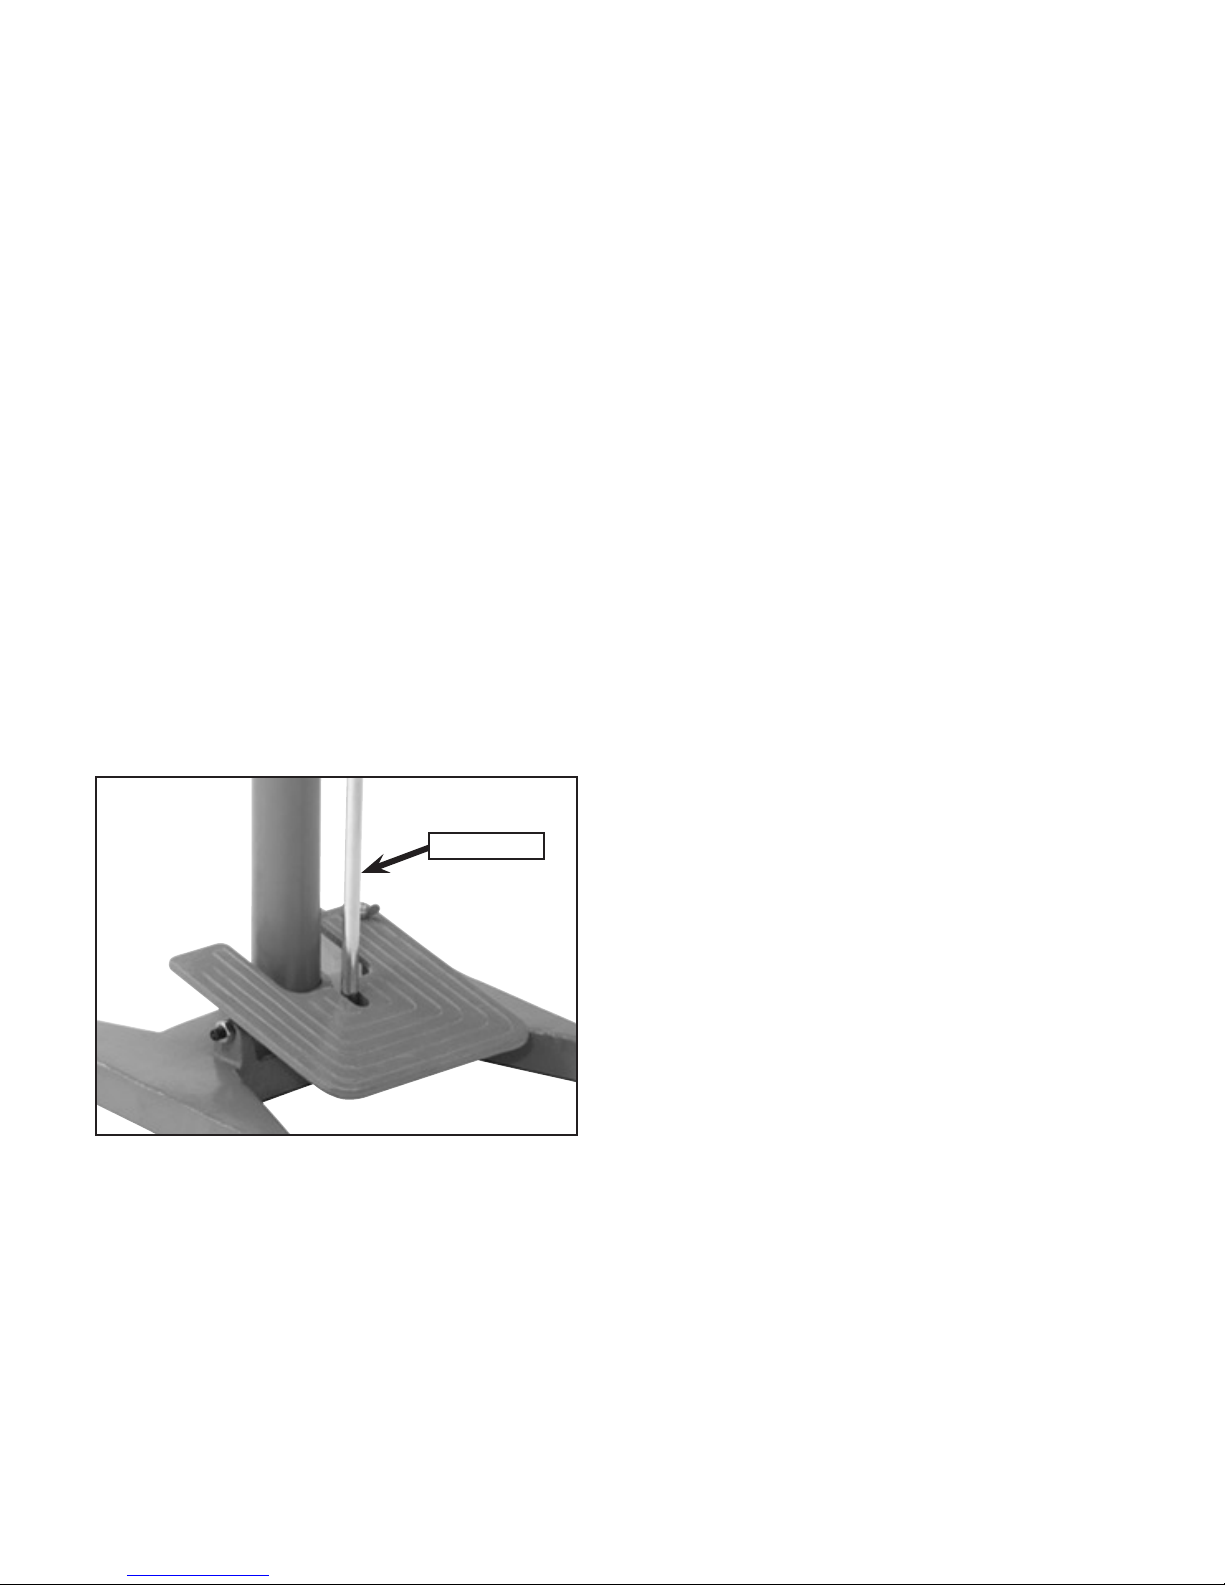
4. Insert the draw tube into the foot pedal
opening (Figure 3
head.
) and through the machine
8. Attach the front shelf to the front shelf adjust-
ment bracket with M10-1.5 x 30 hex bolts,
M10-1.5 hex nuts, 10mm flat washers, and
10mm lock washers.
OPERATION INSTRUCTIONS
1. Plug in the Model H6161.
2. Turn the power switch ON.
3. Set the timer at the lowest possible time set-
ting.
4. Insert a bag to be sealed and depress the
foot pedal (the sealing time is automatically
controlled by the timer
5. When the sealing light turns off, keep the foot
pedal depressed for two seconds to allow the
seal to cool, then release the foot petal.
).
Draw Tube
Figure 3. Properly inserted draw tube in the foot
pedal opening.
5. Place the spring over the draw shaft and
push the top of the machine head down
6. Fasten the rubber column and metal draw
shaft knob to the draw tube.
7. Fasten the shelf adjustment bracket to the
machine head with M10-1.5 x 30 hex bolts,
M10-1.5 hex nuts, 10mm flat washers, and
10mm lock washers.
.
6. Check the bag seal:
—If the bag is sealed firmly across the entire
span of the bag, the timer is set correctly
for that particular bag size.
—If the bag is not sealed firmly across the
entire span of the bag, set the timer to the
next setting and repeat steps 3-5.
Note—Timer setting will be different depending
on bag thickness. Also, If there is smoke or
burning smell when sealing, the time setting is
too long.
If you need additional help with this procedure,
call our service department at: (570) 546-9663.
a
 Loading...