

Page 1
THE BOSS™ G15 & G21 R
Necessary tools and parts:
•
Replacement Rubber Shroud (G15 = Item# BGP11) (G21 = Item# BGP12)
•
Flat Trim Removal Tool or similar (non-metal) tool.
Included with your G15 or G21 Orbital:
•
Tube of Silicone Grease • 6mm Allen Wrench • Spacer Washer (for optional modification)
NOTE: We DO NOT RECOMMEND using a flathead screwdriver or any other metal item to remove the rubber shroud.
If a metal tool is used there is a high chance you may damage parts of your orbital.
uBBER SHROud REplacEmEnT
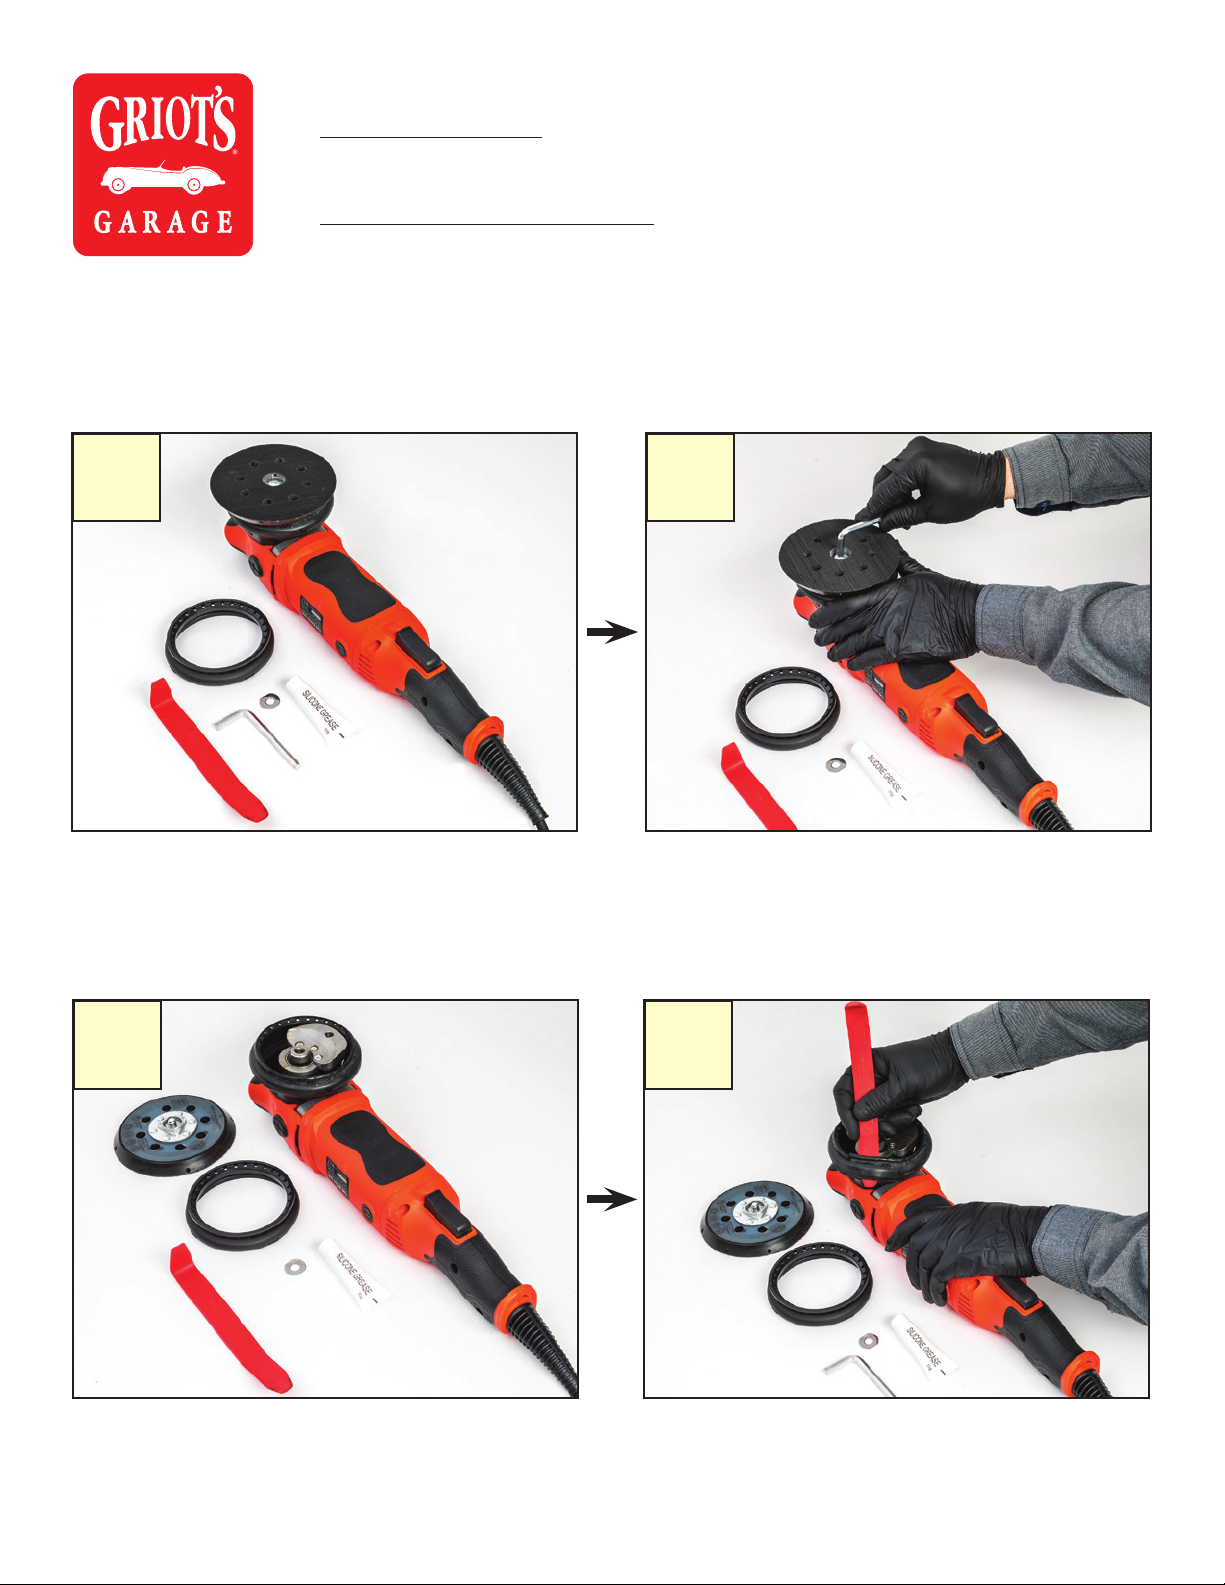
1.
Be sure the orbital is un-plugged. Gather the necessary
tools and contents of the shroud replacement kit.
2.
Using the 6mm Allen wrench, hold the backing plate with
one hand and unscrew the backing plate stud with the
wrench in a counter clockwise motion.
4.3.
Set the backing plate, stud, and lock washer to the side in a
safe place so they do not get lost.
www.griotsgarage.com • 800-345-5789
Using your hands, carefully pull the rubber shroud back
from the plastic housing and insert your trim removal tool
or pry tool here.
Page 2
THE BOSS™ O
RBiTal SHROud REplacEmEnT
(c
OnT'd
.)
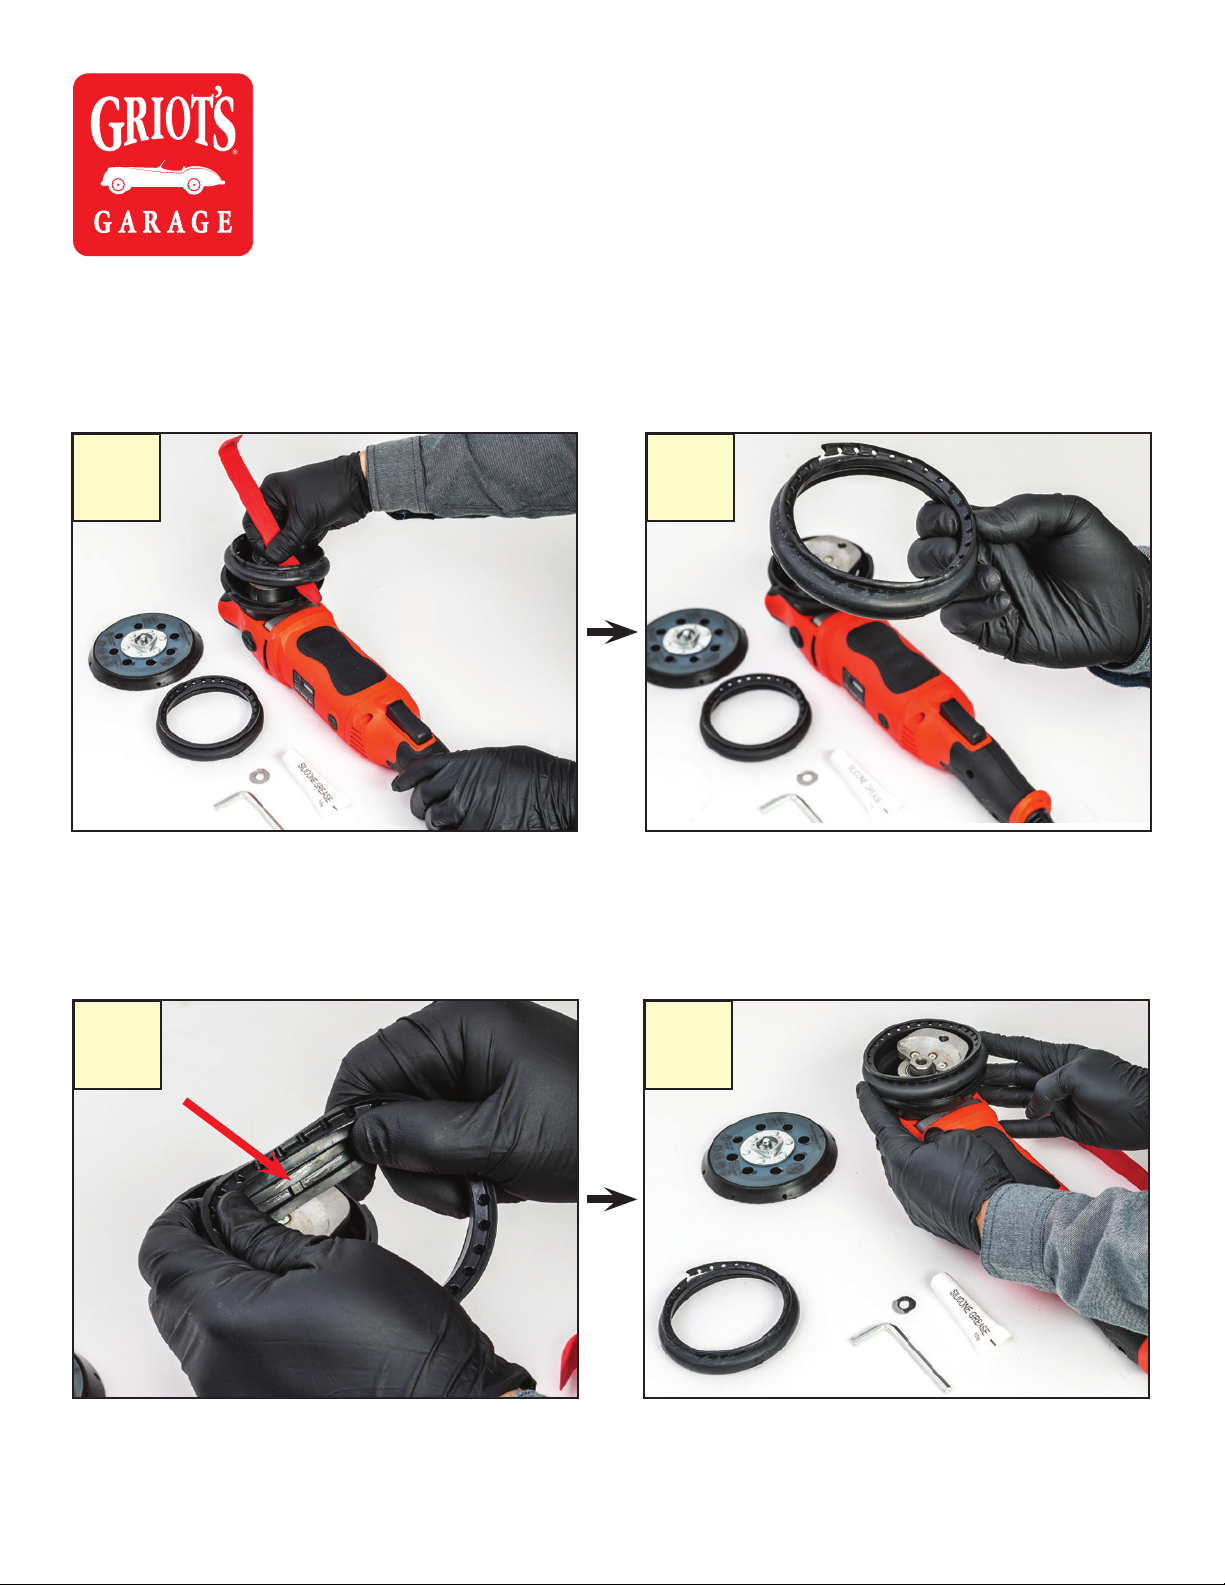
5.
With the trim removal tool placed between the rubber
shroud and plastic housing, carefully slide the trim tool
through the seam around the entire shroud, releasing it
from the housing.
6.
Inspect the old shroud for damage and discard.
8.7.
Once the old shroud is removed take the new rubber
shroud and locate the tabs around the inside of the shroud.
www.griotsgarage.com • 800-345-5789
Line one tab up with one of the notches in the plastic
housing on the orbital.
Page 3
THE BOSS™ O
Optional: If you choose to add the washer modification, between steps 11 & 12 is when you install it. To do so, place a small dab of silicone
grease inside the backing plate hub to hold the washer in place, insert the washer into the hub and press flat. Proceed installing the backing
plate as normal. Pay attention to how the backing plate hub lines up with the tool hub, if the two are not mated correctly backing plate failure
may occur. Using the 6mm Allen Wrench torque the backing plate stud until it is hand tight and has fully compressed the lock washer.
RBiTal SHROud REplacEmEnT
(c
OnT'd
.)
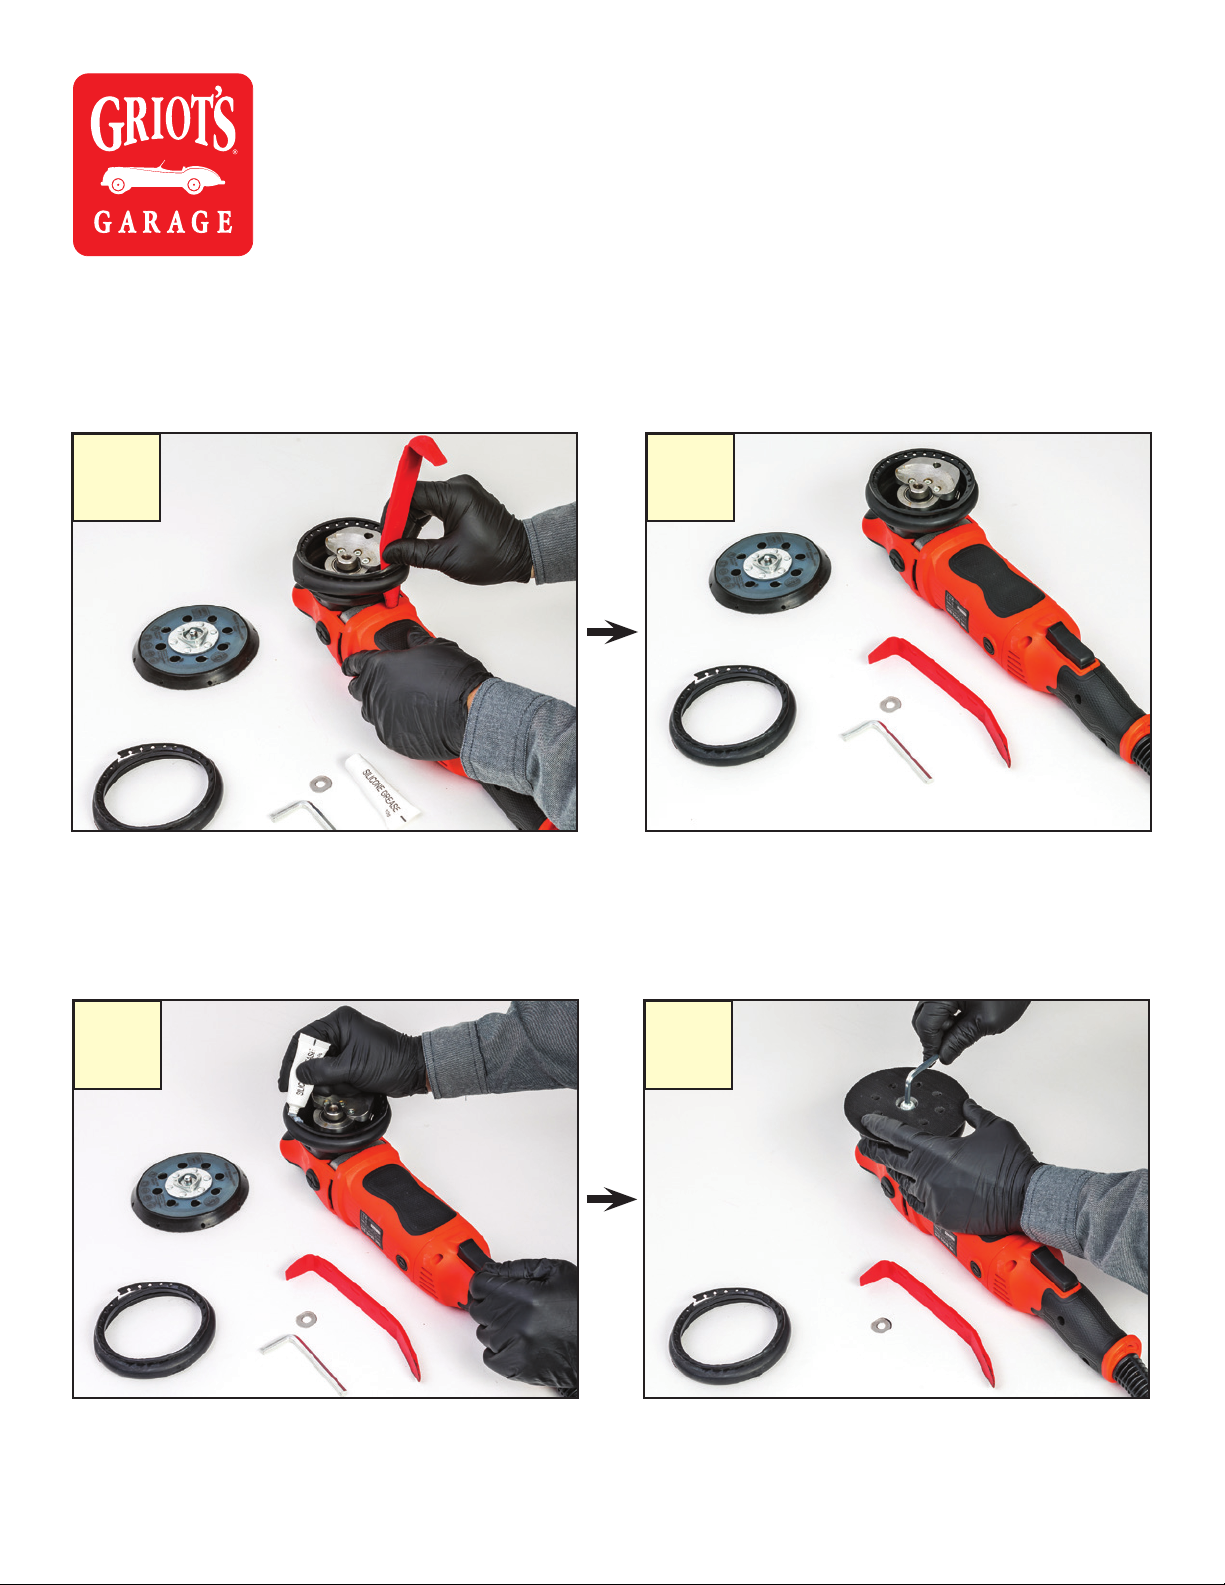
9.
With the tab and notches lined up, begin working the new
shroud onto the plastic housing. Once the shroud is about
half way on, use your trim tool to stretch the rubber shroud
securely around the entire plastic housing.
10.
Double check that everything is installed correctly.
12.11.
Run a thin bead of silicone grease along the rim of the
shroud that will contact the backing plate.
www.griotsgarage.com • 800-345-5789
Spread a thin layer of silicone grease over the top surface
of the backing plate (side opposite of the Velcro) and
re-install the backing plate onto the tool hub using the stud
and lock washer that you removed in step 2.
 Loading...