

Page 1

OUR BEST COMPLIMENTS
FOR CHOOSING GRIMAC QUALITY
Page 2

CE D ec la ra ti on o f Co nf or mi ty
We: Grimac s.r.l.
via Morazzo, 2 (angolo via Rigosa)
40069 - Zola Predosa (BO) ITALY
declare under our sole responsibility the following Coffee Machine
product and its derivatives, to which this declaration relates
Model:
TERRY TECH
is in conformity with the following standards:
CEI EN 50366 : 2004
CEI EN 60335 - 1 A55 : 1993
CEI EN 60335 - 2 - 15 : 1990
CEI EN 60335 - 1 A6 : 1989
and with the EEC directives:
LOW VOLTAGE DIRECTIVE 73/23
and successive amendments 93/68
DIRECTIVE EMC 89/336
Zola Predosa, 23
rd
December 2004 Company President
Ms
SILVIA GARDOSI
O P E R A T I N G I N S T R U C T I O N S
1 7
E N G L I S H
Page 3

1 8
In de x
0 - I N T R O D U C T I O N
pg.
0.1 - Foreword 19
0.2 - Symbols 19
0.3 - Basic safety warnings 20
0.4 - Protection covers 20
0.5 - Safety precautions to follow when repairing or servicing the coffee maker 21
0.6 - Practical tips for brewing a quality cup of coffee 21
1 - T E C H N I C A L D E T A I L S
1.1 - General information 22
1.2 - Receiving the coffee maker and unpacking 22
1.3 - Positioning and installation 22
1.4 - Technical specifications 23
1.5 - Guarantee 23
2 - G E N E R A L D E S C R I P T I O N
2.1 - General description 24
2.2 - Operating principles 24
3 - U S I N G T H E C O F F E E M A K E R
3.1 - Controls and control functions 25
3.2 - Operating instructions 25
4 - T R O U B L E S H O O T I N G A N D R E M E D I E S
4.1 - Malfunctions 26
4.2 - General checks 27
5 - M A I N T E N A N C E
5.1 - Cleaning 27
5.2 - Descaling instructions 28
5.3 - Changing coffee brewing time, temperature and language settings 29
6 - S P A R E P A R T S 30
Page 4
1 9
Ch ap te r 0 - In tr od uc ti on
0 . 1 - F O R E W O R D
These OPERATING INSTRUCTIONS are a guide to using and maintaining the GRIMAC
TERRY TECH pod coffee maker.
Before USING OR SERVICING the coffee maker, read this MANUAL carefully and
thoroughly.
This manual provides information, advice and precautions about how to use the TERRY
TECH pod coffee maker to ensure longevity and perfect performance in time. It is very
simple to use and brews a cup of excellent coffee in just a few seconds.
This coffee maker uses pods which contain a specific measure of ground roasted coffee
tampered to the right pressure and encapsulated in paper.
The pods are packed in a controlled atmosphere preventing moisture penetrating the
inside of the pod to make perfect coffee with excellent results.
Carefully follow all the information and guidelines provided in this manual to ensure machi
ne performance and to extend the service life of your coffee maker. As these Operating
Instructions are an integral part of the coffee maker they must be kept for its entire
service life.
If the coffee maker is sold or given to another user, it is of utmost importance
that these “Operating Instructions” are supplied together with the machine.
This symbol, crossed out wheelie bin, on products or on product packaging
indicates that the product, in all EU member States, must be disposed of and
treated as specific and separate waste.
This product must not be disposed of with your other household
waste.
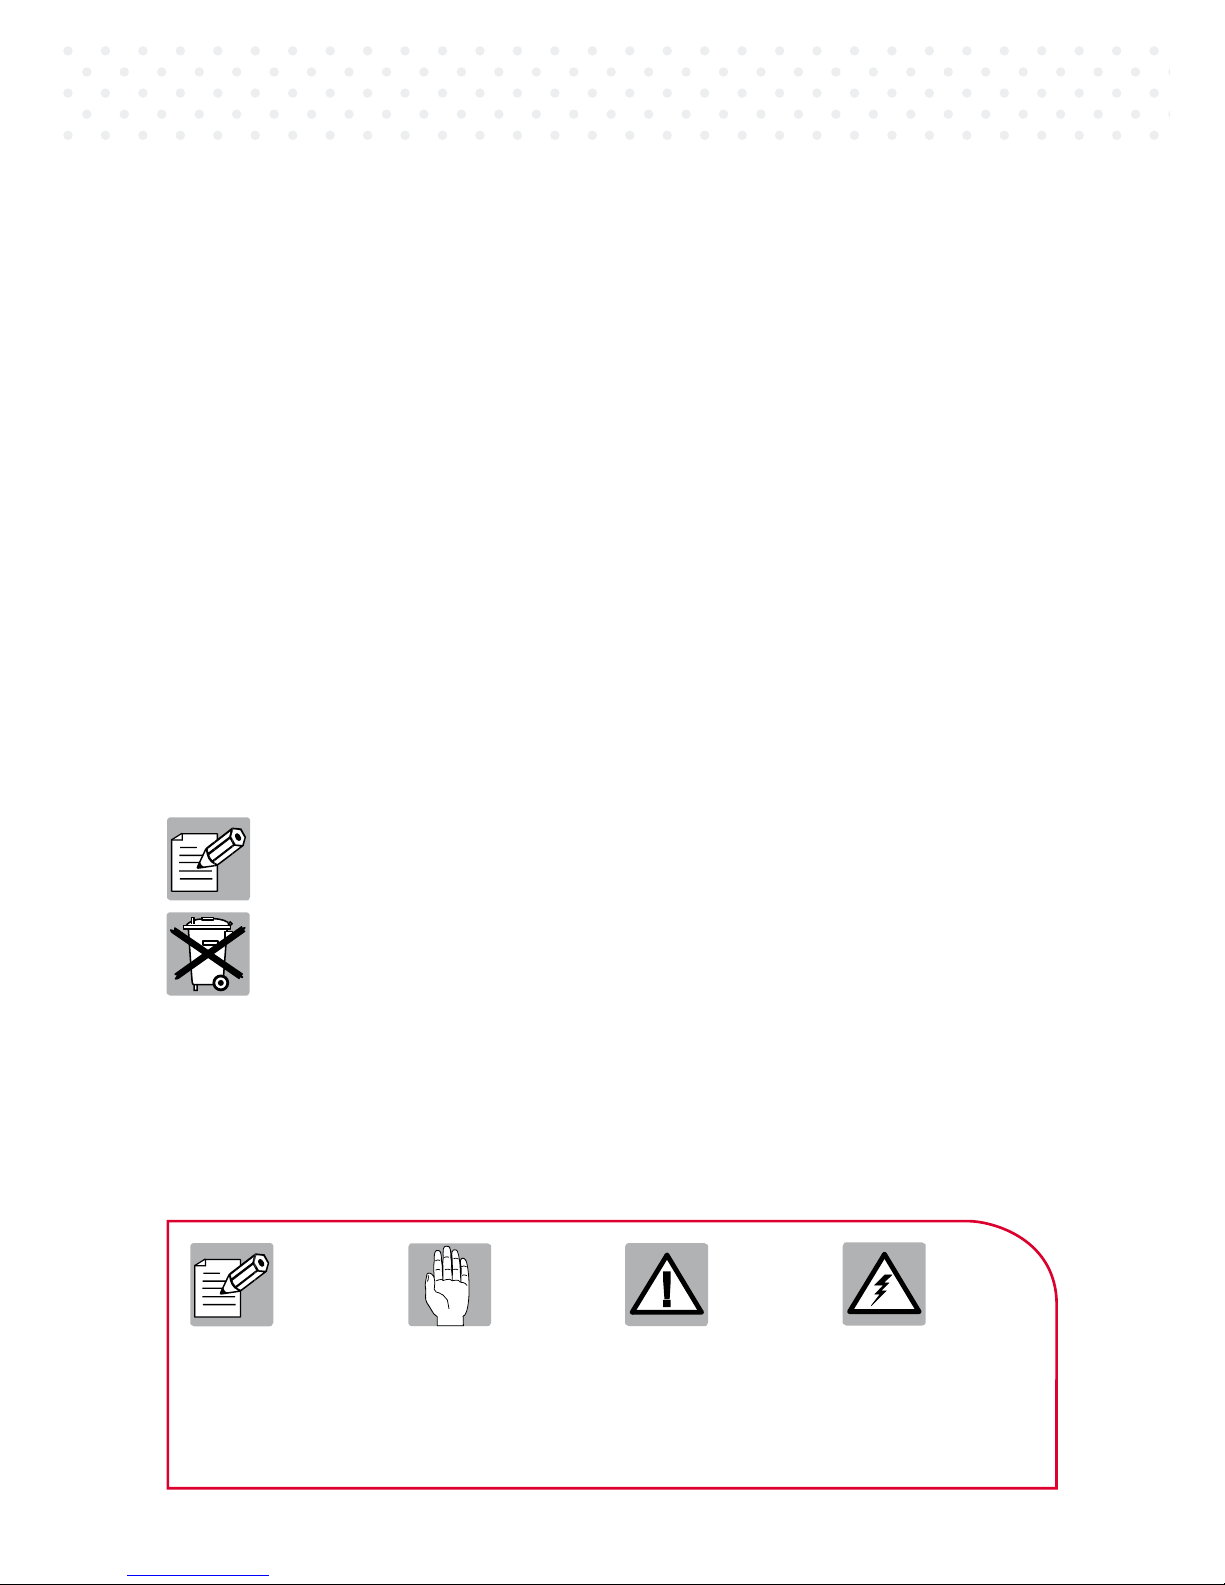
0 . 2 - S Y M B O L S
The below symbols are used to draw the reader’s attention to important information
regarding personal safety, machine safety and to specific operating conditions.
General operating
information.
General warning,
damage may caused
to things or to the
coffee maker.
WARNING !
Hazard to persons
or to the coffee
maker.
WARNING !
Hazard of electric
shock to persons or
electrical damage to
the coffee maker.
Page 5
2 0
0 . 3 - B A S I C S A F E T Y W A R N I N G S
• The TERRY TECH pod coffee maker is designed for the specific purpose described
herein and any other use or the use of other products which were not approved at the
time of purchase of this coffee maker, GRIMAC srl shall not be held responsible nor
liable for injury to persons, animals or damage to things caused by an incorrect or
improper use.
THE PREMISES WIRING SYSTEM MUST BE EARTHED.
• Never place hands, metal objects or other inside the coffee maker when
it is connected to the mains power supply.
• Always contact one of our service centres for repair or servicing work
which is not covered in this manual.
• Before performing any type of work on the coffee maker ALWAYS discon nect the plug at the mains socket-outlet.
• Check the power cable regularly. A worn or damaged cable creates a po tential hazard of electric shock (see Chapter 4.2).
• Before using the coffee maker become familiar with all its parts, controls
and technical specifications which are provided in these instructions.
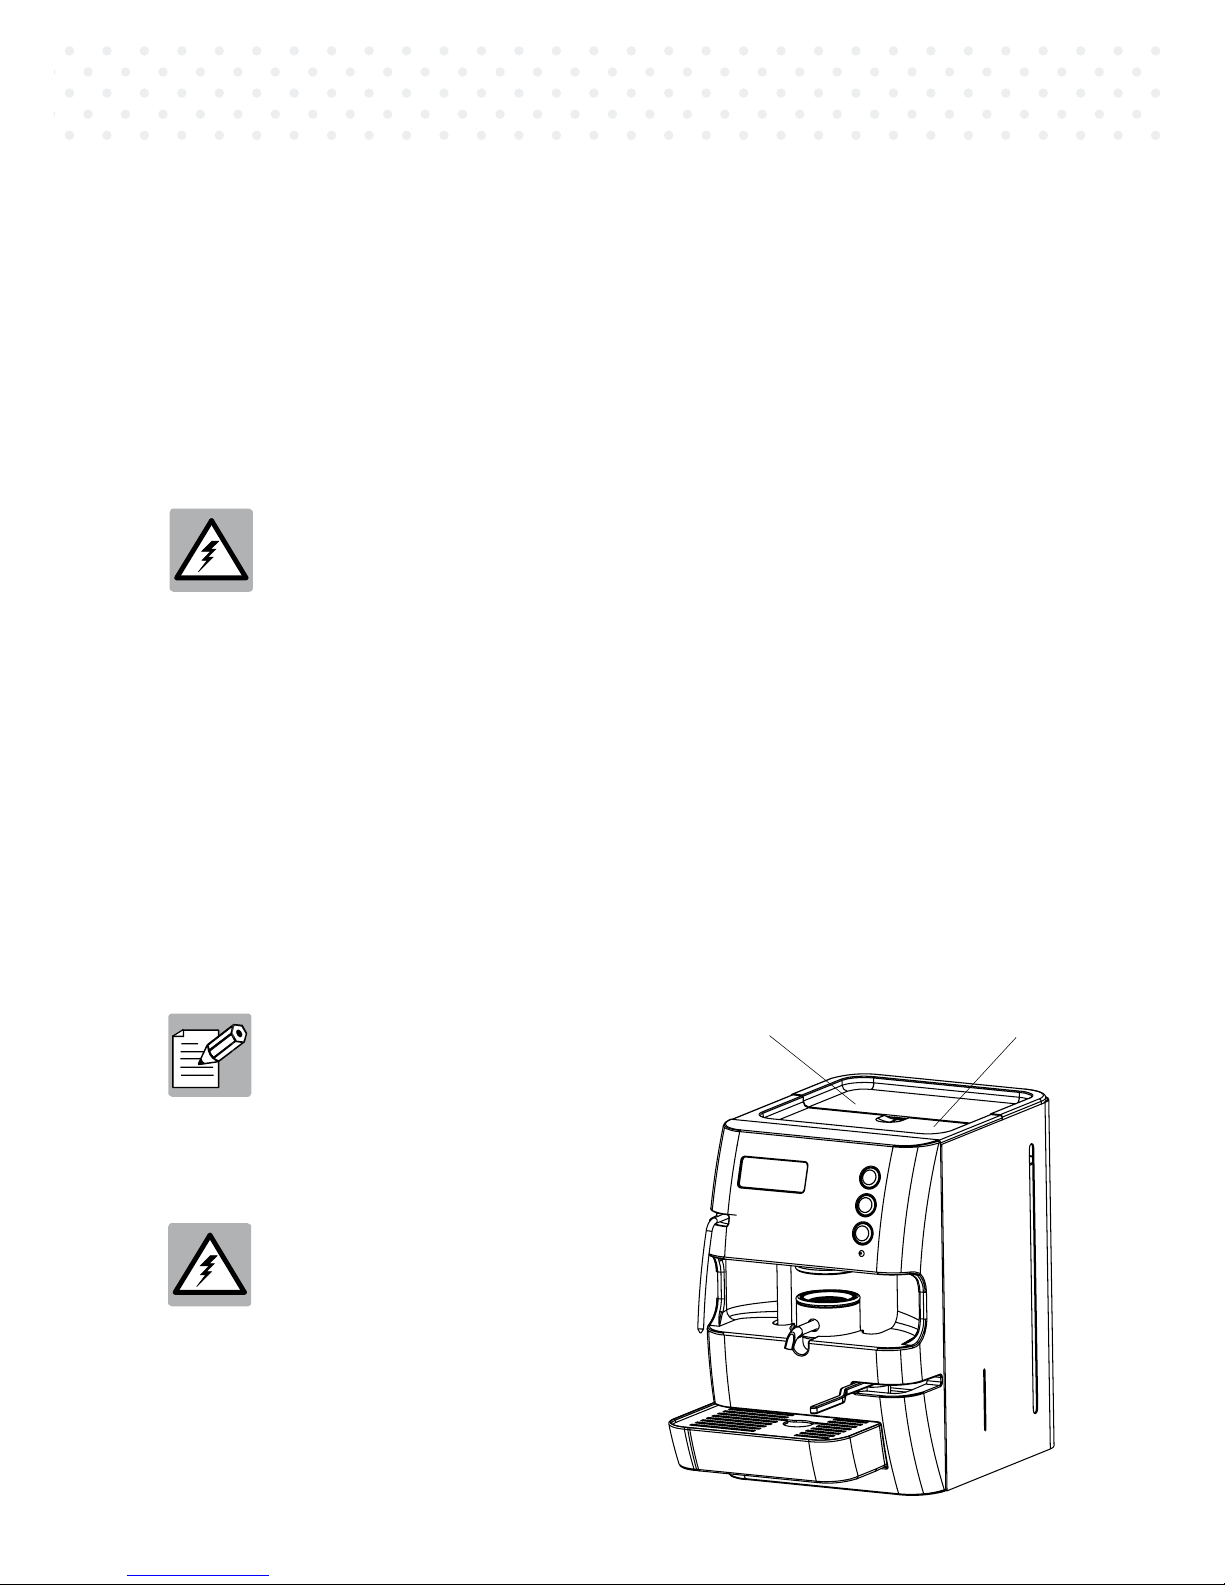
0 . 4 - P R O T E C T I O N C O V E R S
The TERRY TECH pod coffee maker has a number of protection covers and lids to prevent
the user from coming into direct contact with the various components and electrics.
A - Removable top lid: protects the
water tank compartment. As this lid
is for accessing the water tank when
refilling the coffee maker with water,
it is not secured in place by fixture
screws.
B - Fixed top protection cover:
ONLY specialised and authorised per
sonnel may remove this cover. This
cover is for accessing coffee maker
components and electrics.
A
B
Ch ap te r 0 - In tr od uc ti on
Page 6

2 1
Ch ap te r 0 - In tr od uc ti on
0 . 5 - S A F E T Y P R E C A U T I O N S T O F O L L O W W H E N
R E P A I R I N G O R S E R V I C I N G T H E C O F F E E M A K E R
• Switch off the coffee maker and disconnect the plug at the mains socket-outlet before
performing routine maintenance, repair work or cleaning.
• To extend the service life and performance of your coffee maker, parts must be repla
-
ced only with original spares and by qualified personnel.
• After performing any type of servicing or repair work, ensure that all parts are in proper
working order.
• Repair work to wiring must be performed only by qualified personnel and only after the
plug has been disconnected at the mains socket-outlet.
• Never use running water or pour water on the coffee maker when it is switched on or
when cleaning.
• Never use solvents, paint thinners, alcohol, etc to clean the coffee maker. To clean we
recommend you use a warm water and neutral detergent solution to prevent damaging
the external and internal parts of the coffee marker.
0 . 6 - P R A C T I C A L T I P S F O R B R E W I N G A Q U A L I T Y
C U P O F C O F F E E
The TERRY TECH coffee maker brews an excellent cup of coffee thanks to the simple
“pod” system (ground roasted coffee tampered to the right pressure and encapsulated in
paper). Although this pod system is very simple to use, the user must follow the instruc
tions provided in Chapter 3, Paragraph 3.2 and make sure that the pod sits evenly in the
pod holder.
Keep your coffee pods in a dry place away from heat sources and direct light.
The coffee pods are pre-portioned for one cup.
E N G L I S H
Page 7

2 2
1 . 1 - G E N E R A L I N F O R M A T I O N
All machine components and materials used in manufacturing this pod coffee marker all
conform to the new standards in force. The TERRY TECH pod coffee maker has been de
signed and developed with meticulous care above all to wiring, electrics and parts which
come into direct contact with the coffee.
1 . 2 - R E C E I V I N G T H E C O F F E E M A K E R A N D U N PA C K I N G
The TERRY TECH pod coffee maker is packed in a box to protect it from damage when
handling. To remove the coffee maker from its packaging, open the box and remove the
cardboard protection and with both hands grip the coffee maker at the bottom and gently
and slowly lift it out of the box.
Place the coffee maker on a flat surface or table before proceeding with installation.
Before using the coffee maker check for signs of damage or missing parts.
If you have any doubts, contact one of our service centres for further information.
The TERRY TECH pod coffee maker before dispatch is tested and packed ready for use
by GRIMAC s.r.l..
Any damage or other is the carrier’s sole responsibility.
Check the machine carefully upon receipt.
In the event of damage or faults, please contact and inform the retailer where
you purchased the coffee maker.
Before connecting to the mains power supply, check that the mains voltage
corresponds to the voltage provided in the technical specifications of the
coffee maker.
The premises wiring system must be earthed.
1 . 3 - P O S I T I O N I N G A N D I N S T A L L A T I O N
After having checked that there are no missing parts or damage, position the pod coffee
maker in its operating position. Make sure the surface is stable and that there is sufficient
room around the coffee maker to be able to use it correctly (moving pod holder lever,
filling up with water, inserting coffee pod etc.)
Place the coffee maker at a suitable height so that it is out of reach of children.
To prevent people from walking into or knocking over the coffee maker, do
not position it in a location where there is a lot of traffic or in narrow corridors
creating an obstacle.
Ch ap te r 1 - Tec hn ic al d et ai ls
Page 8

2 3
The coffee maker is sold pre-assembled and ready for use and does not require additional installation work.
Simply plug it into the mains socket-outlet.
Before using the coffee maker for the first time, rinse the water tank. To remove the tank disconnect the two tubes and remove from its compartment.
Rinse and then fill with water, replace and reconnect the two tubes previously
disconnected in their respective holes (fig. 6).
Nonetheless, we recommend that the coffee maker is installed by qualified
personnel.
1 . 4 - T E C H N I C A L S P E C I F I C A T I O N S
Supply voltage and absorbed power:
- 230 V, 400 W (Europe)
- 110 V, 400 W (USA)
Energy consumption: - less than 1 kW/h round-the-clock*
Measurements: H = Height = 315 mm
D = Depth = 350 mm
W = Width = 210 mm
Weight: 7.5 Kg
Tank capacity: 3 litres
1 Thermostat with manual reset: 145° C
2 electronic probes for temperature readings
* Energy consumption has been calculated on 20 cups of coffee with the coffee maker switched
on for 24 hours.
1 . 5 - G U A R A N T E E
The coffee maker is guaranteed for a period of 12 months from the date of purchase and
covers both electrical and mechanical components.
This guarantee is void if the product has been damaged by incorrect or improper use,
neglect or repairs by unauthorised personnel.
Furthermore, this guarantee does not cover damaged parts caused by insufficient or ne
glect of cleaning (refer to Chapter 5.1). All faulty parts considered and acknowledged by the
manufacturer as defective shall be replaced free of charge during the guarantee period.
All handling and carrier costs are at purchaser’s expense.
GRIMAC s.r.l. reserves the right to alter and modify its products at any time, and shall not be
held responsible nor liable for injury to persons or animals or damage to things caused by
neglect in observing the provisions provided in this manual.
Ch ap te r 1 - Tec hn ic al d et ai ls
E N G L I S H
Page 9

2 4
1
12
3
4
5
6
7
8
9
11
10
2
Ch ap te r 2 - Ge ne ra l de sc ri pt io n
2 . 1 - G E N E R A L D E S C R I P T I O N
The TERRY TECH pod coffee maker is supplied with the following parts:
1) removable tank lid
2) main ON/OFF switch
3) single serving button
4) double serving button
5) “hot water/steam” button (optional accessory)
6) “power/coffee” indicator light (for standard model only)
7) top and bottom pod holder
8) lever for opening and closing pod holder
9) drip tray with grille
10) snap-in socket for power cable
11) frothing arm hot water/steam (optional accessory)
12) display (only for mod. w/display feature)
2 . 2 - O P E R A T I N G P R I N C I P L E S
After having inserted the pod in the pod holder (refer to recommendations and tips provided in Chapter 3 at point 3.2) and closed the pod holder utilising the lever, the coffee
maker is now ready for brewing a cup of coffee. Hot water cycles through the top of the
pod holder and then through the pod and the coffee is dispensed through the spout into
the cup.
fig.1
Page 10

2 5
Ch ap te r 3 - Us in g th e co ffee maker
3 . 1 - C O N T R O L S A N D C O N T R O L F U N C T I O N S
• Main ON/OFF switch: switch to ”I“ to turn the coffee maker on and to ”¢“ to turn
it off.
• “Power/Coffee” indicator light: when on this light indicates the coffee maker is
powered:
- on/flashing indicates the heating element is heating to the right temperature;
- on/fixed indicates the coffee maker is at the correct temperature and ready for brewing
coffee.
• Display (only for models with display feature included): indicates that the coffee
maker is heating to the required temperature: ‘WAIT HEATING’, then utilising the chip
card it is possible to program temperature and language settings.
• Single and double serving buttons: when one of these two buttons is pres
-
sed the coffee maker dispenses coffee and stops automatically after a set time.
Brewing time for both single and double servings are default factory settings. It is
however possible to change brewing times depending on preference (for further
details refer to the paragraph “Changing coffee brewing time, temperature and
language settings”).
• “Hot water/Steam” button (optional accessory): when pressed this button dispen
-
ses steam or hot water (depending on coffee maker model) through the frothing arm
(pos. 11 fig. 1).
To stop dispensing press this button again.
N.B. when dispensing hot water or steam position the lever as illustrated in fig.1
this is to prevent the two halves of the pod holder - top and bottom - from closing
together.
WARNING: hot water and steam are dispensed at a high temperature.
Hazard of scalding.
• Lever: by moving this lever to the right the bottom half of the pod holder locks together
with the top half.
3 . 2 - O P E R A T I N G I N S T R U C T I O N S
• Switch ON/OFF power switch to pos. I (fig.1) and wait until the indicator light (n. 6
fig. 1) remains on without flashing.
• Lower the pod holder by pushing the lever to the left (n. 8 fig. 1).
E N G L I S H
Page 11

2 6
Ch ap te r 3 - Us in g th e co ffee maker
4 . 1 - M A L F U N C T I O N S
Malfunctions or leaks could be caused by:
- the plug is not connected to the mains power supply or the power cable is not connected
to the snap-in socket on the coffee maker;
- the main ON/OFF switch is in position
¢ off;
- there is no water in the tank;
- the pod holder filters are clogged;
- worn seal: check the seal on the top half of the pod holder and if worn or damaged
replace (fig. 7);
- if when dispensing hot water or steam (optional accessory) liquid pours out of the coffee
spout check the pod holder lever is pushed to the left as described at point 3.1.
We recommend that qualified and authorised personnel perform repair and servicing work
and only use GRIMAC original replacement parts. Should malfunctions persist, contact you
local GRIMAC authorised service centre.
WARNING! Before removing COVERS to access components, ALWAYS
disconnect the plug at the mains socket-outlet. Never touch components with hands, objects or tools if the coffee maker is still connected
to the mains power supply.
• Insert a coffee pod in the pod holder and make sure its sits evenly.
• Push the lever to the right to close pod holder (fig. 4).
• Place a cup under the brewing spout and press either the single or double serving but
-
ton to dispense coffee (fig. 4).
• Dispensing will stop automatically.
• Push the lever to the left to open the pod holder, remove and throw away the used pod
(fig. 3) and then close the pod holder by pushing the lever to the right.
• Turn off the machine after serving coffee if used occasionally.
Before using the coffee maker for normal use, it is recommended to
clean the internal components (heat exchanger - boiler -, piping and
pod holders). This is done by simply brewing a cup of coffee to flush
the system which is then “thrown away - do not drink”. The pod coffee
maker is now ready to make excellent espresso coffee.
Ch ap te r 4 - Tr ou bl es ho ot in g an d re me di es
Page 12

2 7
4 . 2 - G E N E R A L C H E C K S
POWER CABLE
(230V GG 3060 - 110V GG 3057)
Check the power cable regularly and replace if it is worn or damaged.
WATER TANK
Check water level occasionally utilising the inspection slot located on the left and top up if
necessary. To top up remove the metal tank lid and fill with water as illustrated in fig. 6.
Do not use the coffee maker without water in the tank.
Ch ap te r 4 - Tr ou bl es ho ot in g an d re me di es
Ch ap te r 5 - Ma in te na nc e
5 . 1 - C L E A N I N G
FILTER: If the coffee maker is used only occasionally, after having made the last cup of
coffee, wash the filter. To wash the filter push the lever to the right, without inserting a
coffee pod and press the coffee dispensing button for 2 to 3 seconds (fig. 4).
WARNING! the water is dispensed at an extremely high temperature.
Hazard of scalding!
This ensures that the filter remains cleaner for longer.
Nonetheless, it is good practice to clean the coffee maker thoroughly at regular intervals
with the filter removed. To remove filter with the help of screwdriver prise off the pod
holder (fig. 5).
If the filter is worn or damaged, replace it.
DRIP TRAY AND GRILLE: it is good practice to clean the drip tray and grille regularly.
Remove drip tray and grille and wash any traces of waste coffee.
Only use water to clean (fig. 1, ref. 9).
WATER TANK FILTER: the water tank is fitted with a filter to soften water and is connected to the water supply tube. Do not tamper or modify this filter in anyway.
E N G L I S H
Page 13

2 8
Ch ap te r 5 - Ma in te na nc e
- Approx. every 300 coffees, clean the filter by submersing it in a water and salt
solution (regeneration). Filter life depends on the hardness of the water.
- After approx. 10-12 months replace with a new filter.
EXTERNAL HOUSING: to keep external housing clean, use a sponge or cloth soaked
with a cleaning product - neutral detergent.
Do not use solvents, abrasive powders, or scouring pads to clean.
5 . 2 - D E S C A L I N G I N S T R U C T I O N S
To descale the TERRY TECH pod coffee maker proceed as follows:
• Disconnect the water softener filter from the silicone tube.
• Disconnect the silicone tube from the water tank.
• In a container/bowl dilute a sachet of Detercaf descale in half a litre of water and place
the tube in this solution.
• Proceed as if you were dispensing coffee several times.
• Once the descale solution finishes, fill the container/bowl with clean water.
• Run a few more cycles to flush out all traces of the descale solution.
• Make sure there are no traces of this descale solution in the coffee maker.
• Reconnect the tube to the water tank.
• Reconnect the water softener filter to the tube.
Depending on use and water hardness, we recommend you descale your coffee maker at regular intervals.
To regenerate the water softener filter located inside the tank, leave in a salt water solu
tion for 8 to 10 hours.
Before replacing the water softener filter always thoroughly rinse under running water.
Page 14

2 9
5 . 3 - C H A N G I N G C O F F E E B R E W I N G T I M E ,
T E M P E R A T U R E A N D L A N G U A G E S E T T I N G S
Standard model:
By following these simple steps, it is possible to modify single or double coffee brewing
times:
• Turn the coffee maker off at the main ON/OFF switch;
• Press the single serving button and turn on the coffee maker simultaneously (pos.
I);
• Keep the button pressed for approximately 5 seconds and then release;
• The power/coffee indicator light will flash for 4 seconds and then go out: the coffee
maker is in program mode (led off);
• Press the single serving button to start dispensing coffee and then press again to
stop at the desired brewing time (when repeating brewing, this new time is memori
-
sed);
• Proceed in exactly the same way to program double serving brewing times;
• Turn off the coffee maker and then turn on the coffee maker and use as normal.
N.B. Only change settings with the coffee maker in temperature.
Pod coffee maker with display feature:
You can choose the language of your
choice, temperature and brewing ti
-
mes:
• Insert the chip card in the purpose
slot (ask supplier) with the chip visible
as illustrated in fig. 2;
• The prompt “LINGUA ITALIANA” (lan
-
guage Italian) comes up on the di
splay, scroll the menu using buttons
1 and 2 (fig. 2) to change language
settings, choose language and utili
sing button 3 confirm choice;
• The prompt “COFFEE/WATER TEM
PERATURE” will now come up on
the display: it is possible to change
coffee/water (optional accessory)
temperature settings using buttons
1 and 2 to increase or decrease
settings. To confirm temperature
setting press button 3;
Ch ap te r 5 - Ma in te na nc e
1
2
3
fig. 2
E N G L I S H
Page 15

3 0
Ch ap te r 5 - Ma in te na nc e
• At this point the prompt “SINGLE SERVING TIME” will come up on the display: use
buttons 1 and 2 to modify settings and utilising button 3 confirm desired brewing time.
Repeat these steps for modifying brewing time settings for double serving and water;
• Once having modified and confirmed new settings, remove the chip card and use the
coffee maker as normal.
N.B. Only change settings with the coffee maker in temperature.
Only replace worn or damaged parts with ORIGINAL GRIMAC SPARE PARTS.
Spare parts can purchased from our service centres.
GRIMAC shall not be held responsible for malfunctions and failures in TERRY TECH pod
coffee makers if non-original replacement parts have been fitted.
All repair work must be preformed only by our authorised service centres.
Ch ap te r 6 - Sp ar e pa r ts
Page 16

3 1
3
5
4
6
4 5
7
6
7
9
7
E N G L I S H
 Loading...