

Page 1

7
GRILLCHEF
"Wagon BBQ"
Assembly and Operating Manual
General Safety Precautions
Preface
Please read this assembly and operation manual
carefully before you start using your high-quality
GRILLCHEF barbecue.
You will quickly notice the following:
The assembly and operation processes are simple and
straightforward.
Correct utilisation
The barbeque may only be used for preparing
suitable foods. All requirements of this assembly and
operation manual must be complied with.
For private use only!
Safe Operation of the Barbecue
Before using the barbecue for the rst time,
it should be heated with fuel (charcoal or
briquette) for approximately 30 minutes.
WARNING - risk of burning!
➱ To prevent the barbecue from tipping over, it must be placed on a stable and secure surface during
operation.
➱ CAUTION! This barbecue becomes very hot and should not be moved during operation!
➱ Wear oven gloves or use barbecue tongs when barbecuing.
➱ Allow the barbecue to cool down completely before cleaning it.
➱ CAUTION! Do not use any spirits or petrol to ignite or re-ignite the re!
➱ CAUTION! Only use relighters according to the European Standard for relighters (EN 1860-3)!
➱ Never use water to extinguish the charcoal.
WARNING - risk of suocation!
➱ Do not use indoors!
DANGER to children and pets!
➱ Never leave the hot barbecue unattended.
➱ CAUTION! Keep children and pets at a safe distance!
Page 2
8
GRILLCHEF
General Information for Successful
Assembly
Please read the assembly instructions carefully and
follow the safety precautions. Allow sucient time
for assembly. Before starting assembly, clear an area
measuring approximately two to three square metres.
Remove the set from the packaging! Lay out all parts
and any necessary tools so that they are within easy
reach.
Please note: Only tighten all of the screw
connections rmly when you have nished assembly.
Otherwise this can result in unwanted tension.
Parts List
A. Shelf Slat, short 3
B. Windbreak left 1
C. Windbreak, centre 1
D. Grill 1
E. F. Windbreak, right 1
G. Handle 1
H. Handle bracket, short 2
I. Standing leg 2
J. Shelf Slat, long 5
K. Supporting rods 2
L. Wheel 2
M. Axle 1
N. Wheel leg 2
O. Fire bowl 1
P. Locking device 2
Q. Shelf support, long 2
Preparing Assembly
Please use the following list and drawing to check
that all parts are present. Lay out all parts and any
necessary tools so that they are ready for assembly.
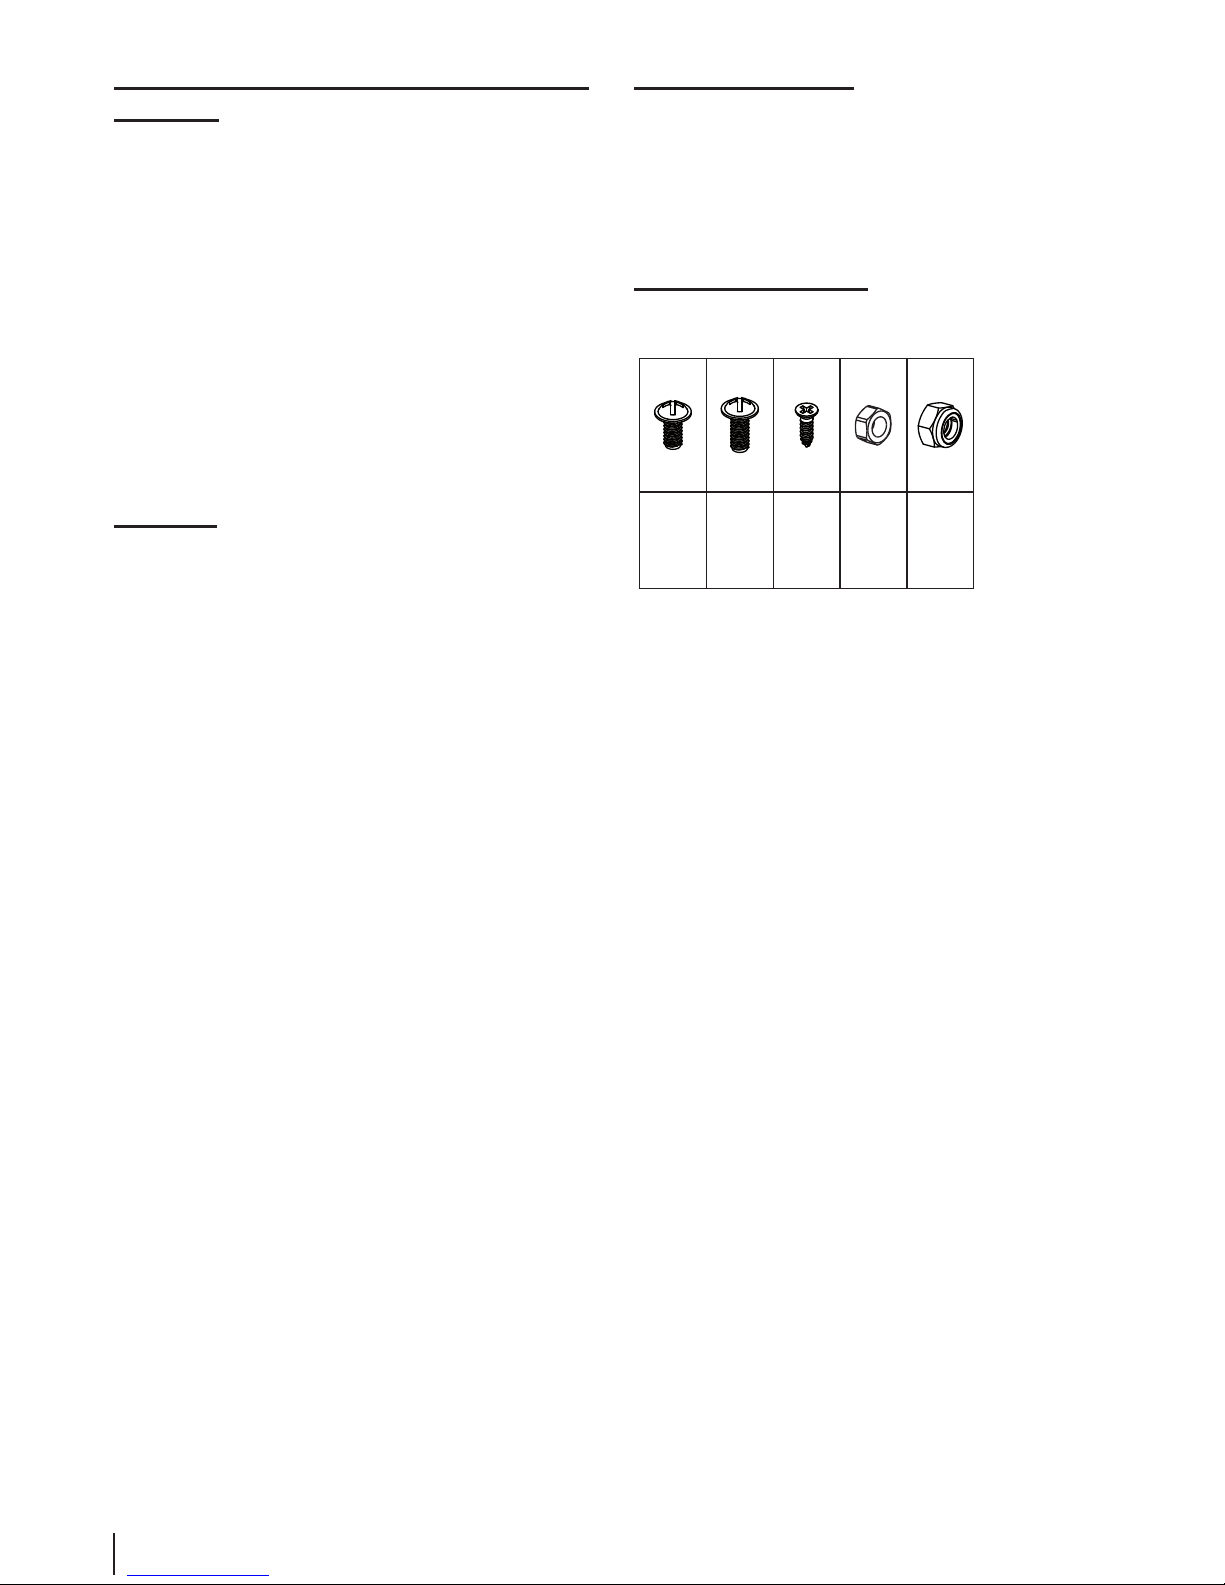
Connection Elements
(Pre-assembled connection elements are also included in the list!)
M5x10
31x
M5x12
16x
Ø4x122xM5
47x
M8
2x
Page 3

9
GRILLCHEF
Assembly procedure
During operation, the barbecue must be placed on a
stable and secure surface.
Do not use indoors or under roofs.
Only use safe lighting materials (such as LANDMANN
solid relighters).
The fuel container has a capacity of approximately
1.5 kg.
Before using the barbecue for the rst time, it should
be heated with fuel (charcoal or briquette) for
approximately 30 minutes.
Information for Safe Operation of the
Barbecue
CAUTION!
For your safety, the bolt heads should always
point outwards in order to prevent injury.
To prevent undesired material tension, rmly
tighten all screw connections only after
nishing assembly.
1. Lay down the re bowl (O) with the 5 holes of
the long side panel to the rear.
2. Connect the shelf supports (Q) to the wheel legs
(N) using bolts M5x10 and nuts M5. Please note
that only the lower hole should be used when
connecting the pieces.
3. Attach the wheel legs (N) with the assembled
shelf supports (Q) to the left of the re bowl (O)
using bolts M5x10 and nuts M5. When doing
this use the upper hole of the castor leg (N).
4. Secure the looking device (P) to the wheel legs
(N) using bolts M5x10 and nuts M5. Secure the
interlock (P) to the shelf supports (Q) using
bolts M5x10 and nuts M5.
5. Attach the handle brackets (H) and standing
legs (I) as described in points 2 & 3 to. Attach
the handle (G) between the handle brackets (H)
and tighten using Ø4x12 wood screws.
6. Set the cross sections (K), with the 5 holes
facing upwards, between the wheel legs (N)
and the legs (I). Secure these in place using
bolts M5x10 and nuts M5.
7. Place the ve shelf slats (J) on the cross sections
(K). Secure these in place using bolts M5x12
and nuts M5.
8. Assemble the shelf slats (A) for the shelf
brackets (Q) using bolts M5x12 and nuts M5.
9. Insert the axle (M) through the lower holes of
the wheel legs (N) and secure the wheels (L) in
place using lock nuts M8.
10. Attach the windbreak components (B, C
and F) using 2 x bolts M5x10 and nuts (only
upper sections). Then screw the windbreak
components (B, C and F) to the re bowl (O)
from the inside using bolts M5x10 and nuts M5.
11. Insert the cooking grill (D) into the windbreak
(B, C and F).
WARNING!
To prevent the barbecue from tipping over, it
must be placed on a stable and secure surface
during operation.
Page 4

10
GRILLCHEF
Lighting the Fuel
WARNING - risk of burning!
Using petrol or spirits for ignition can result in
uncontrollable heat due to deagration. You
should therefore only use harmless fuel, such
as relighters. During operation, the barbecue
must be placed on a stable and secure surface.
1. Use quality products from LANDMANN, such as
LANDMANN charcoal, LANDMANN briquettes
and LANDMANN solid relighters.
2. Stack some of the charcoal or briquettes in the
re bowl (O).
3. Ignite one or two solid relighters using a long
match. Place these relighters on top of the
layer of charcoal or briquettes.
4. Allow the solid relighters to burn for 2 to 4
minutes. Then ll the re bowl (O) slowly with
charcoal or briquettes.
5. Only start cooking when the fuel is coated with
a layer of ash! This indicates that the optimal
cooking temperature has been reached.
Distribute the fuel evenly in the re bowl (O)
using a suitable metal tool.
6. Insert the greased cooking grill and start
barbecuing.
Cleaning / Care
WARNING - risk of burning!
Allow the barbecue to cool down completely
before cleaning it. Never use water to quench
the hot barbecue. This could result in burns or
scalding.
Occasional cleaning is necessary to preserve the
beautiful appearance. Do not use any scouring agents.
1. A rinsing cloth and some water with standard
detergent is sucient for the normal cleaning
process.
2. For heavily soiled enamelled parts, use a standard
enamel cleaning agent (oven cleaner). Observe
the manufacturer's instructions for the cleaning
agent to be applied.
3. Clean the grill using some washing-up liquid
and a rust proof cleaning pad.
Environmental Protection & Disposal
Pay attention to cleanliness when using the barbecue
and dispose of waste in a clean and safe manner. As
a general rule, only dispose of waste in designated
metal or non-ammable containers.
Observe the local waste disposal regulations.
 Loading...