

Page 1
RoadTrip
QUICK START MANUAL
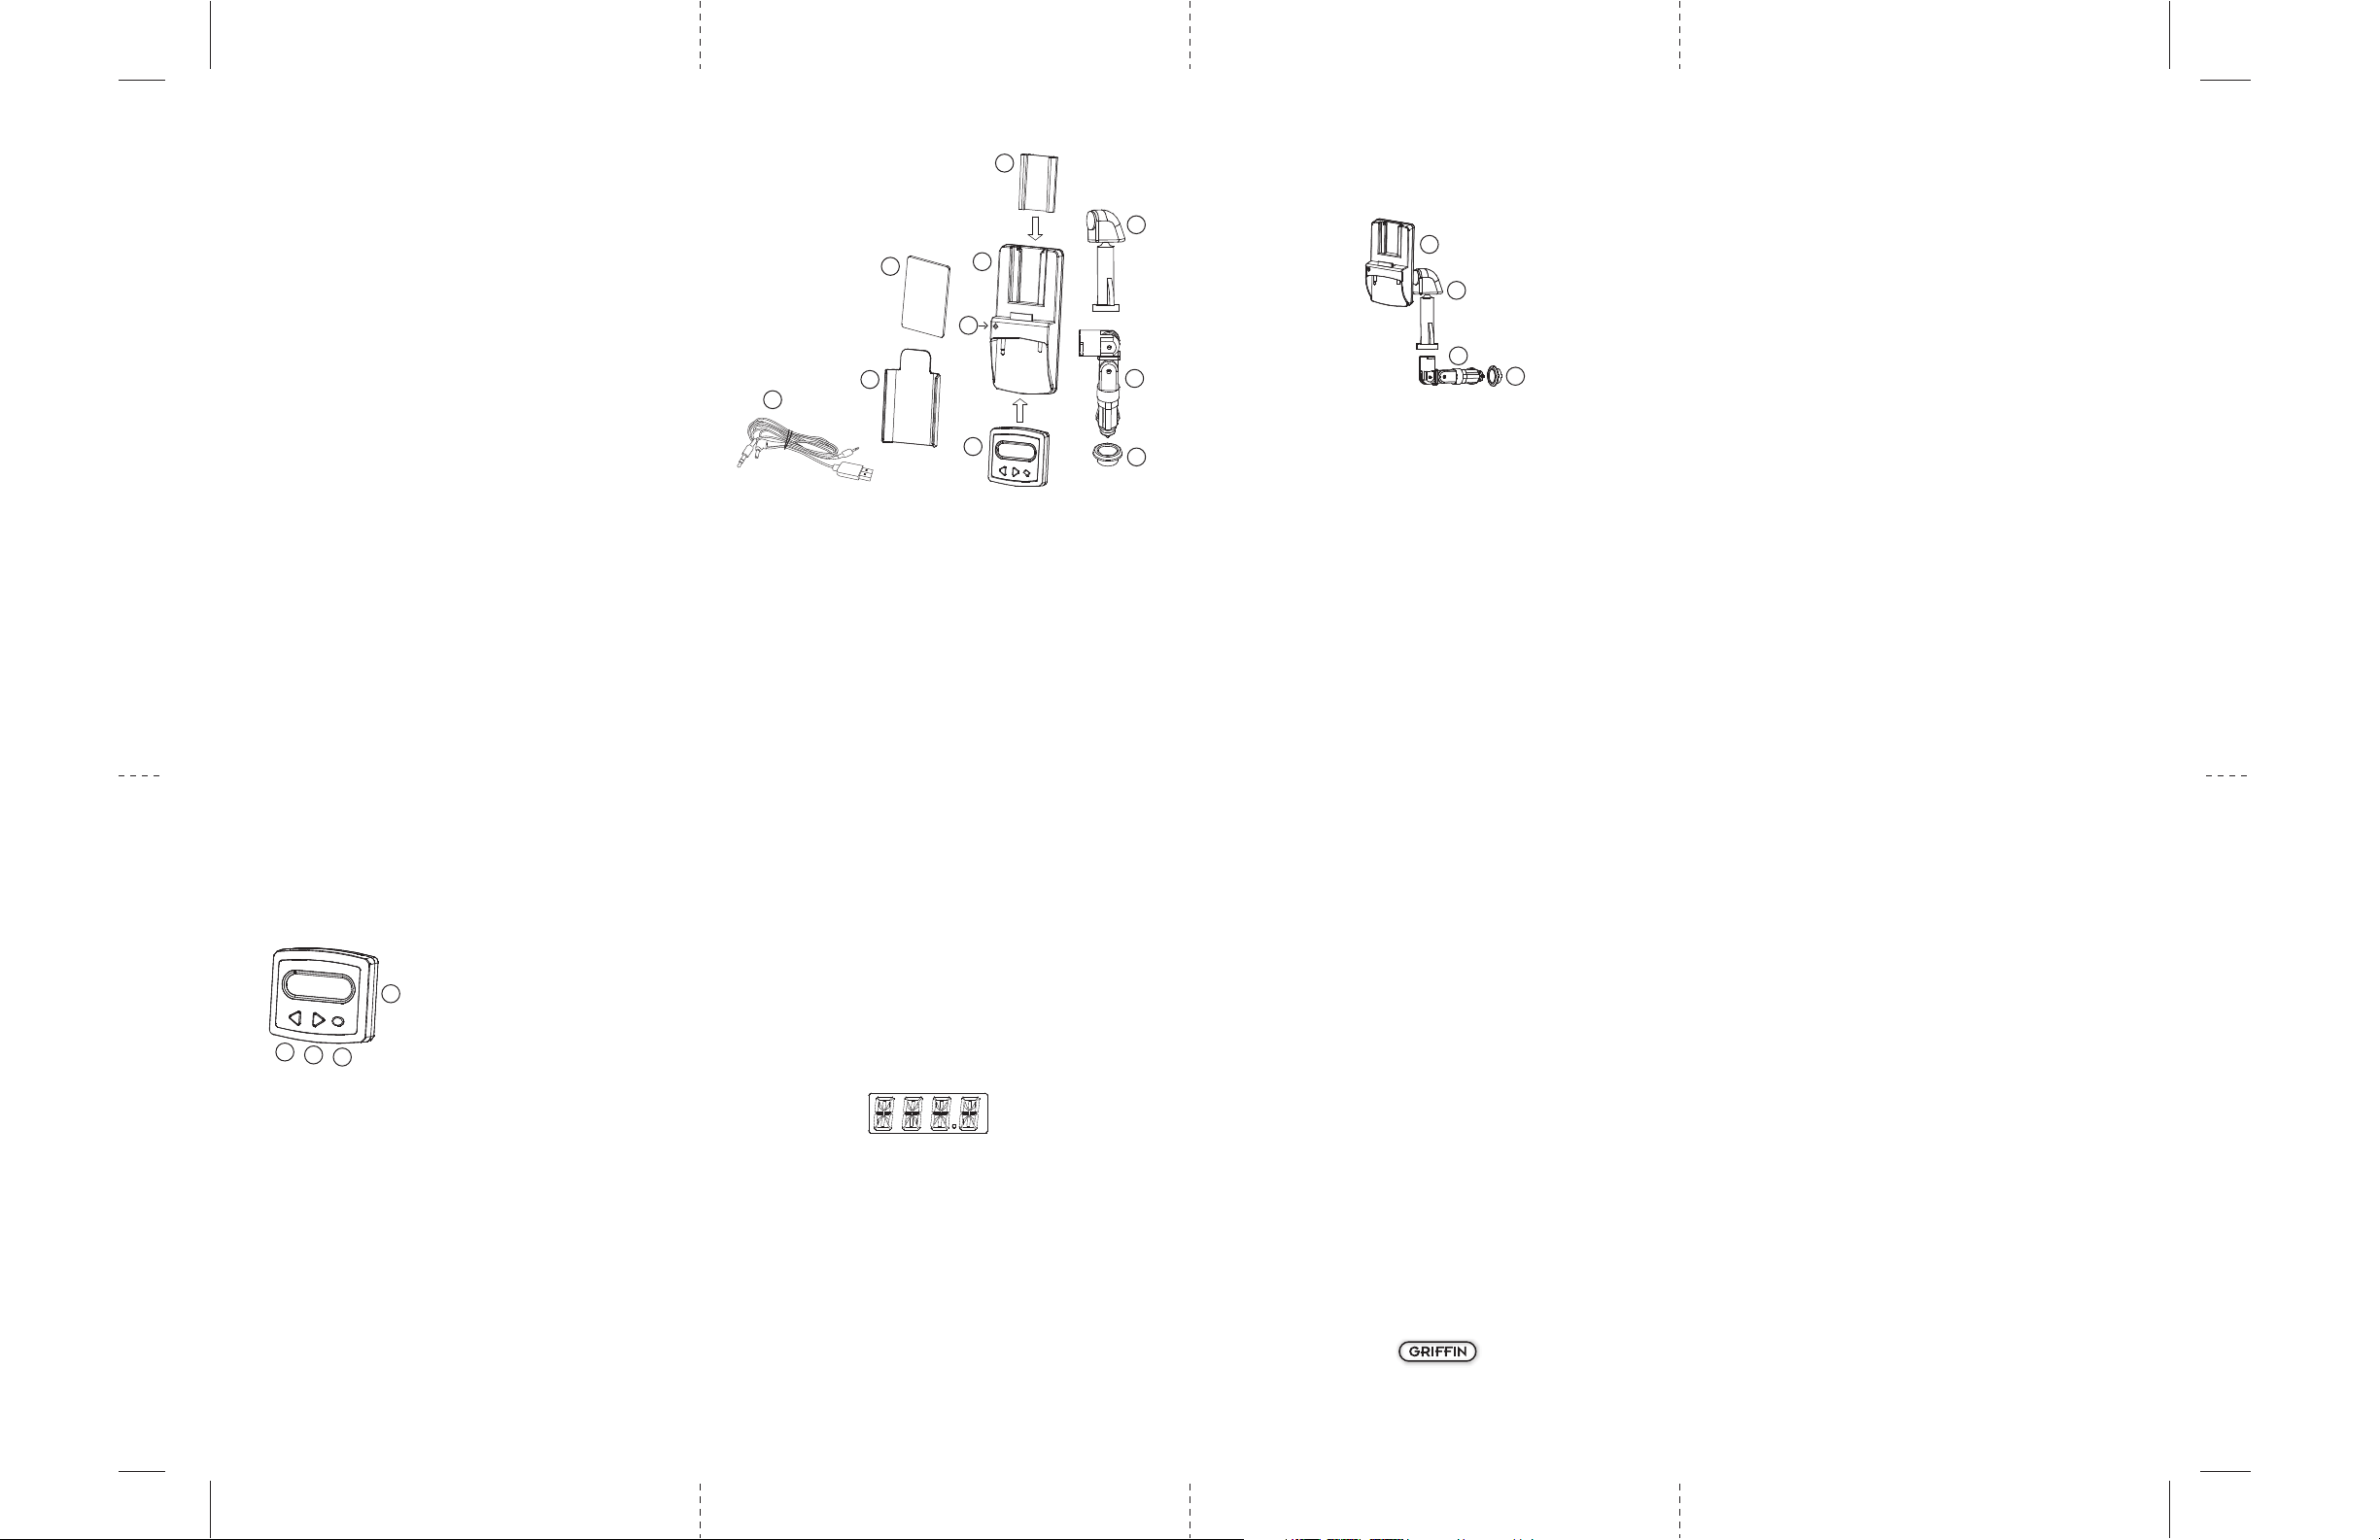
PACKAGE CONTENTS
1. Protection Pad
2. iPod holder / belt clip
3. Clip holder for iPod mini
4. RoadTrip body
5. FM Transmitter module
6. Power Plug
7. Sleeve adapter
8. Extension
9. LED
10. USB/Audio Cable
10
PREPARING THE IPOD (pieces 1, 2, 3, 4)
Full-size iPod - attach the included belt clip / holder (2) to the
iPod. The slender models (10, 15, 20 GB) may feel loose in the
holder. To make a snug fit, attach the Protection Pad (1) to the
inside of the iPod holder. Slide the belt clip into the RoadTrip
body (4). You will not need the clip holder (3).
iPod mini - attach the belt clip that came with your iPod mini.
The belt clip will slide into the clip holder (3). Next, slide the
1
2
3
4
9
5
clip holder in to the RoadTrip body (4).
POWER PLUG INSTALLATION (4, 6, 7)
Insert the power plug (6) into the RoadTrip body and gently
twist clockwise until it clicks into place.
8
4
8
6
6
For cases where there are clearance problems, use the included
extension (8). Insert the extension into the RoadTrip (4) by
7
gently twisting clockwise until it clicks into place. Then connect
the power plug (6) to the extension. Your RoadTrip is now ready
to use.
USING THE ASSEMBLED CHARGER
1. Plug the assembled unit into your vehicle’s cigarette
lighter/power outlet. The LED (9) will show green to
indicate connection to power.
2. Insert your iPod into the RoadTrip (see Preparing the iPod).
The LED will change to red when charging is in progress. When
the iPod battery is fully charged, the LED will change to green.
3. If your vehicle’s cigarette lighter/power outlet is
too large for the power plug connection, use the
included sleeve adapter (7).
4.Your iPod will now charge as long as
7
USING THE FM DIGITAL TRANSMITTER (first time use)
First, connect the FM Transmitter to the RoadTrip (4).
Press the Quick Key (c) on the FM Transmitter (5). The display
will show the letters OK for 3-5 seconds.
FM Digital Transmitter
d
a
b
c
1. The display will then show the pre-set radio frequency.
From now on, the display will show the last used frequency
when you connect it to power.
2. Insert your iPod into the RoadTrip (see Preparing the iPod).
3. Turn on your radio, reduce the volume to 10-20%, and tune
the radio to a frequency that’s not being used. The ideal
frequency will have nothing but static – no music or
talk – and it’s even better if the surrounding frequencies
are unused also.
4. Adjust the Transmitter to the same frequency you selected on
your radio. When the Transmitter and the radio are set to the
same frequency, the radio will mute and you won’t hear static.
a. Frequency Down
b. Frequency Up
c. Quick Key
d. Display
Tuning
To increase or decrease channels quickly, press the
Quick Key and either Frequency key.
Holding down either Frequency key slightly longer
will change the frequency faster.
5. Play a song on your iPod, and adjust the radio’s volume.
The Transmitter will memorize the last frequency you use,
and will be set to that frequency when you connect again.
To turn off the FM Transmitter
Press and hold the Quick Key for 2-3 seconds.
The display will show four dashes and then power off.
Though the FM Transmitter does not draw much
power, it should be turned off when not in use.
USING ROADTRIP AS A DESKTOP FM TRANSMITTER
RoadTrip can be used as a stand-alone transmitter for any
desktop or laptop computer. Use it to send music from your
laptop to your home stereo or even wireless FM headphones.
To use the RoadTrip with your computer simply disconnect the
FM Transmitter module (5) from the RoadTrip body (4).
Connect the USB/Audio cable (10) to the module and then to
the USB port and headphone jack on your computer. You can
then tune the RoadTrip to broadcast to any empty FM frequency
on your stereo - just as you would in the car.
TROUBLESHOOTING
If your RoadTrip stops functioning:
• Check to see if the fuse in the power plug is broken.
If it is, simply replace the fuse. They can be found
at your local electronics store.
• If the fuse is good, check the power source.
Griffin Technology Tech Support
support@griffintechnology.com
615-399-7000 (M-F 9-6 CST)
TECHNICAL SPECIFICATIONS
• Charges the iPod
• Compatible with 3rd generation iPod and iPod mini.
• Extension Power Plug available for easy reach in any car
• LCD Digital Display on FM Transmitter
• Input Voltage: DC+12V ~ +16V.
• Current: 2A (max)
• Output RF range: 88.1 MHz ~ 107.9 MHz.
• Radio Frequency Adjustment: 0.1MHz / Per step.
• Radio Frequency Response: 50 Hz ~ 15 KHz
© 2004 Griffin Technology
www.griffintechnology.com • Made in Tiawan
 Loading...