

Grifco eDrive 2.0 M123ED2, eDrive 2.0 M123EDN2 Installation Manual
eDrive +2.0 CONVERSION KIT INSTALLATION MANUAL
(Suits all Maestro models, MK1, MK2 & MK3)
Models: M123ED2 & M123EDN2
D-M-ACG/060 415041
PACKAGE CONTENTS
eDrive +2.0 MCB & manual
eDrive APE assembly (includes 1 x short screw, 2 x long
screw, 3 x spacer & 3 x fibre washer)
APE cable
Shaft adaptor assembly
M4 taptite
Grifco +2.0 label for controller
eDrive +2.0 label for limit enclosure
For accessory compatibility and set-up please refer to page
18-20 of the eDrive +2.0 manual (included in package)
INSTALLATION
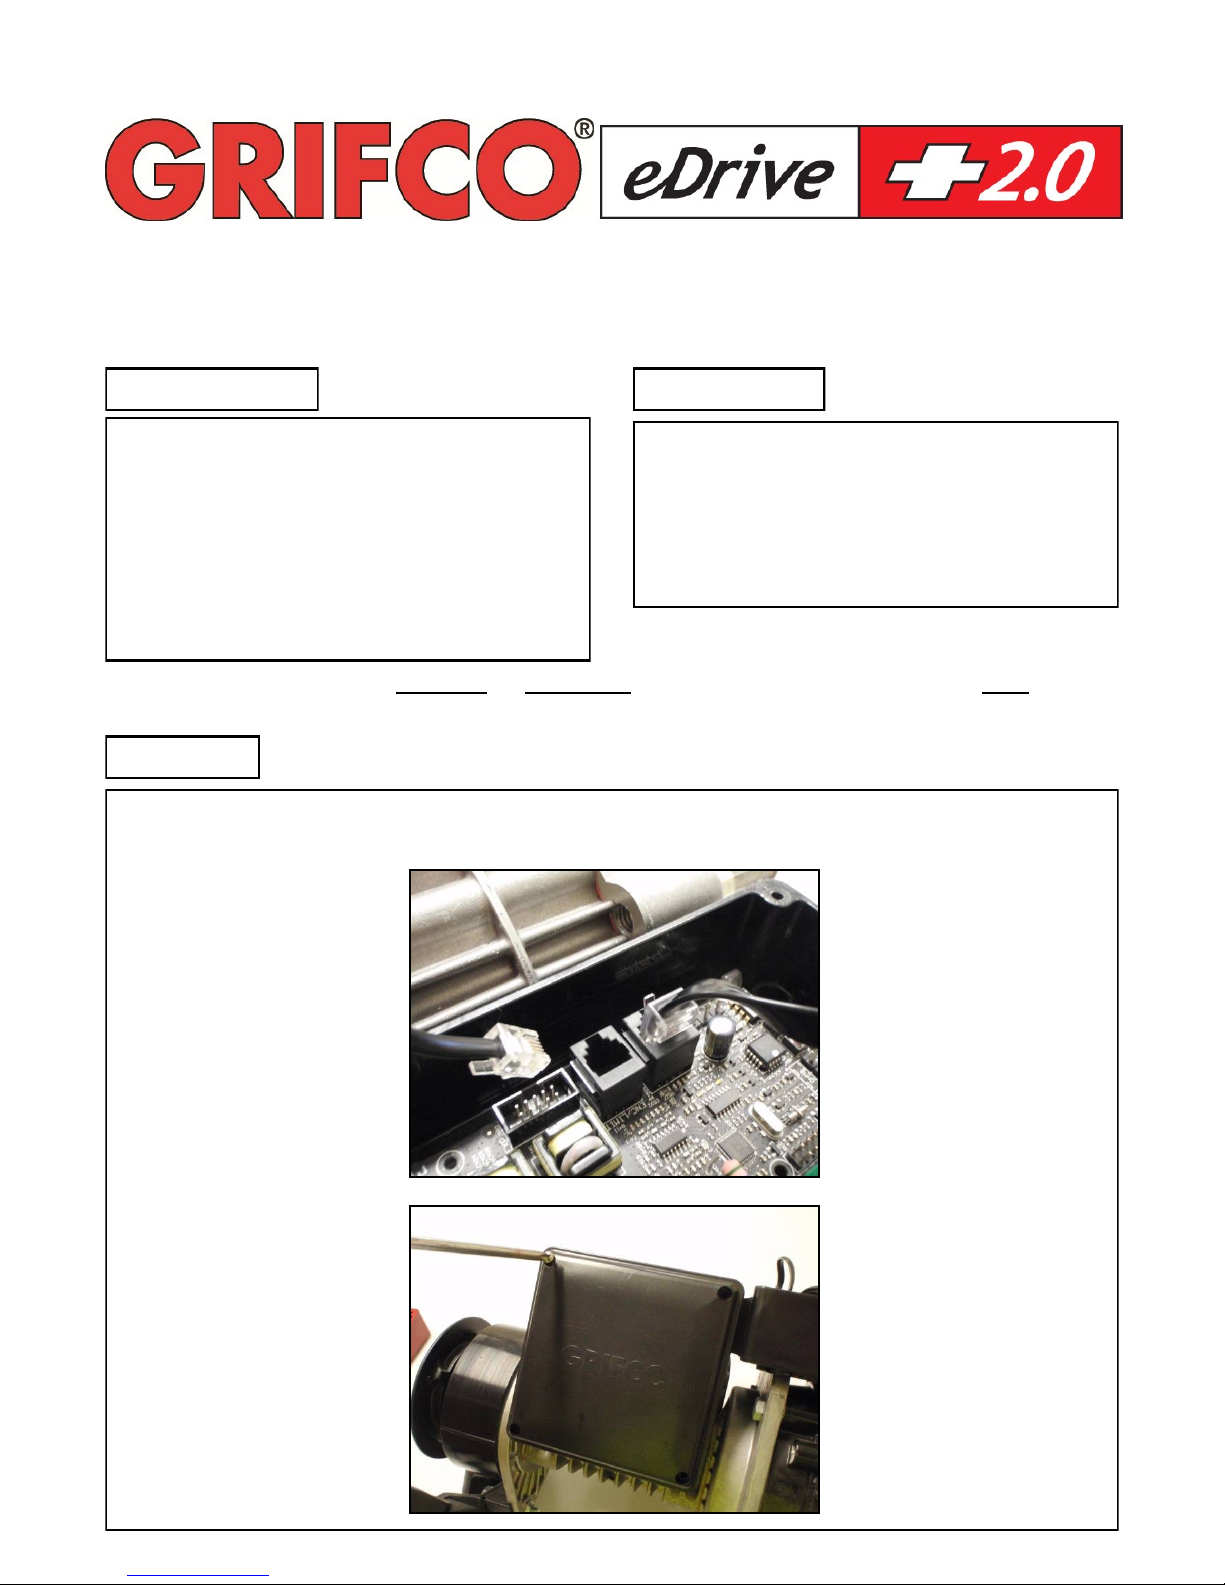
1. Power off.
2. Remove MCB cover & unplug OE cable.
3. Remove OE enclosure cover.
TOOLS REQUIRED
Medium Phillips head screw driver
Small flat blade screw driver
Cordless drill, with 1/4” hex socket
Pliers
2.0mm Allen key (included)
NOTE: IF INSTALLING M123ED2 OR M123EDN2 ON ADJUSTABLE CLUTCH MODEL AN ECC1
(ADDITIONAL KIT) IS REQUIRED.
2
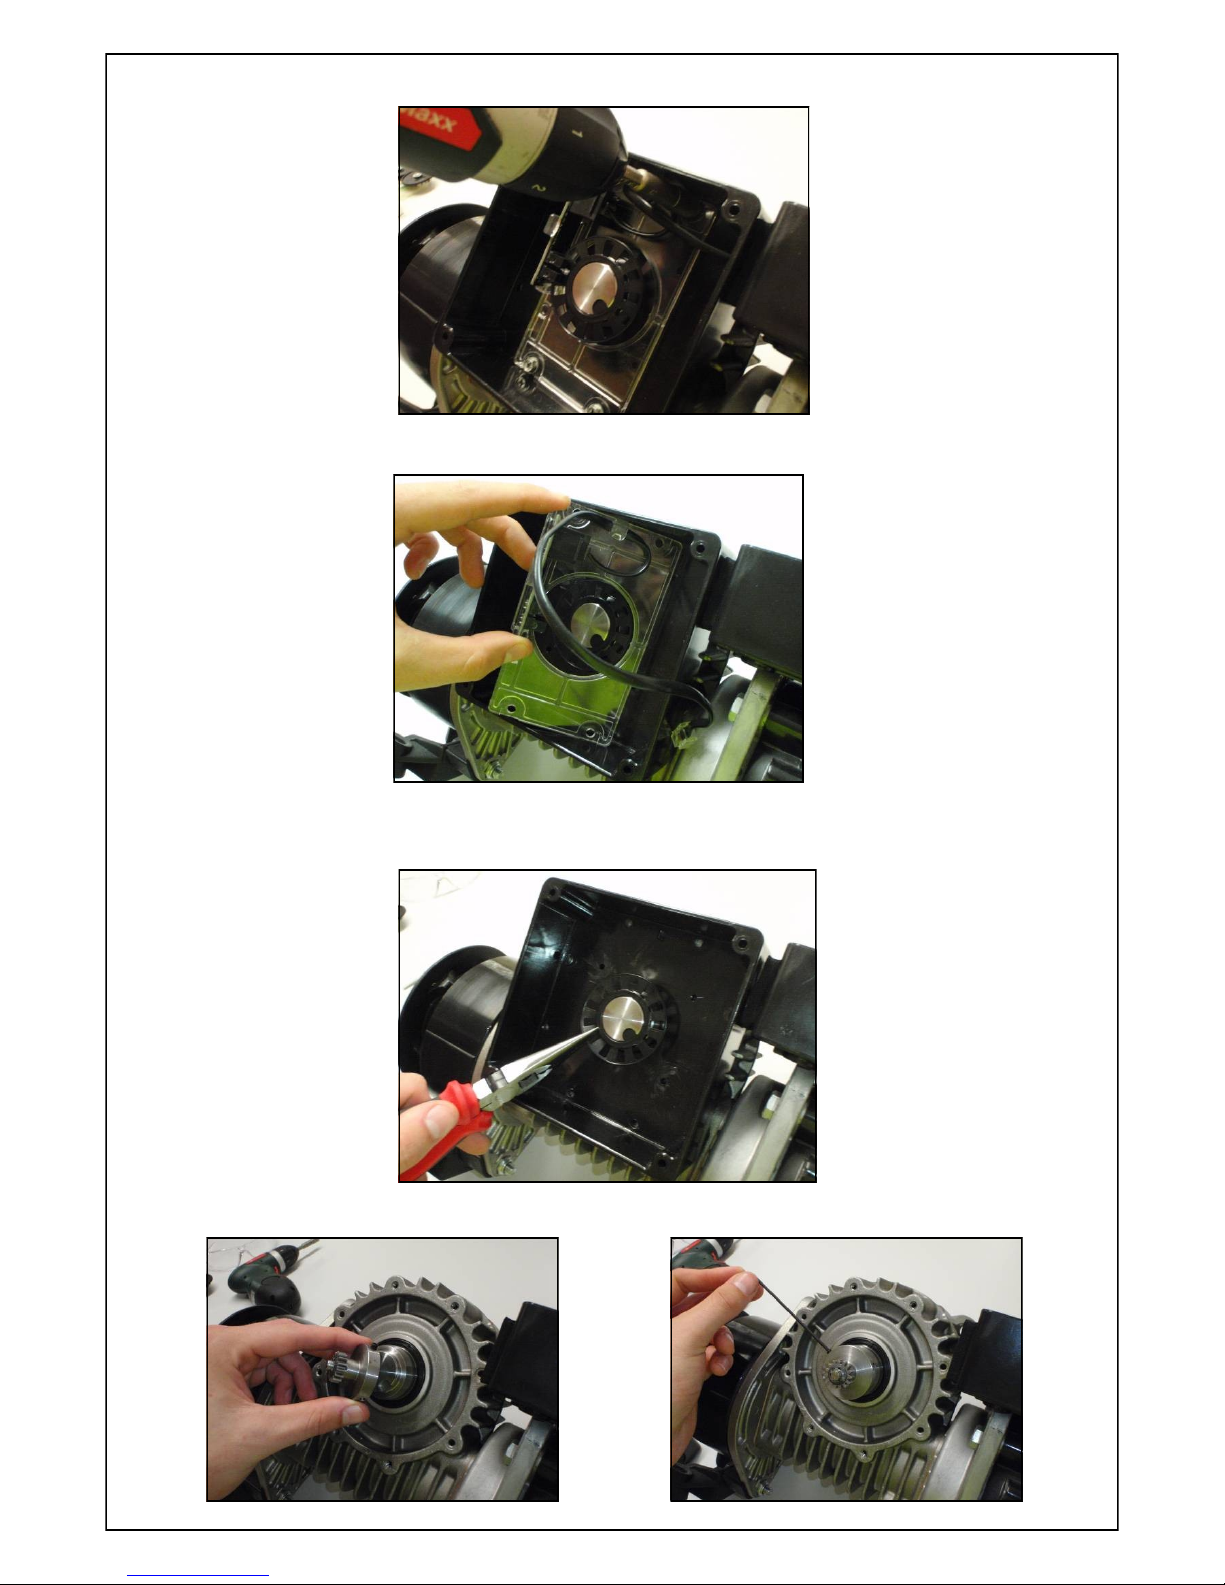
4. Remove 4 x mounting screws, use cordless drill & 1/4” drive bit if available. Two of these screws will be needed later on.
5. Remove OE assembly including cable (no longer needed).
6. Detach OE wheel (no longer needed), use pliers or small blade screwdriver. Remove the OE enclosure, observe correct
orientation of the enclosure for re-assembly.
7. Insert the shaft adapter and ensure it is hard against the shoulder. Tighten the three grub screws.
3
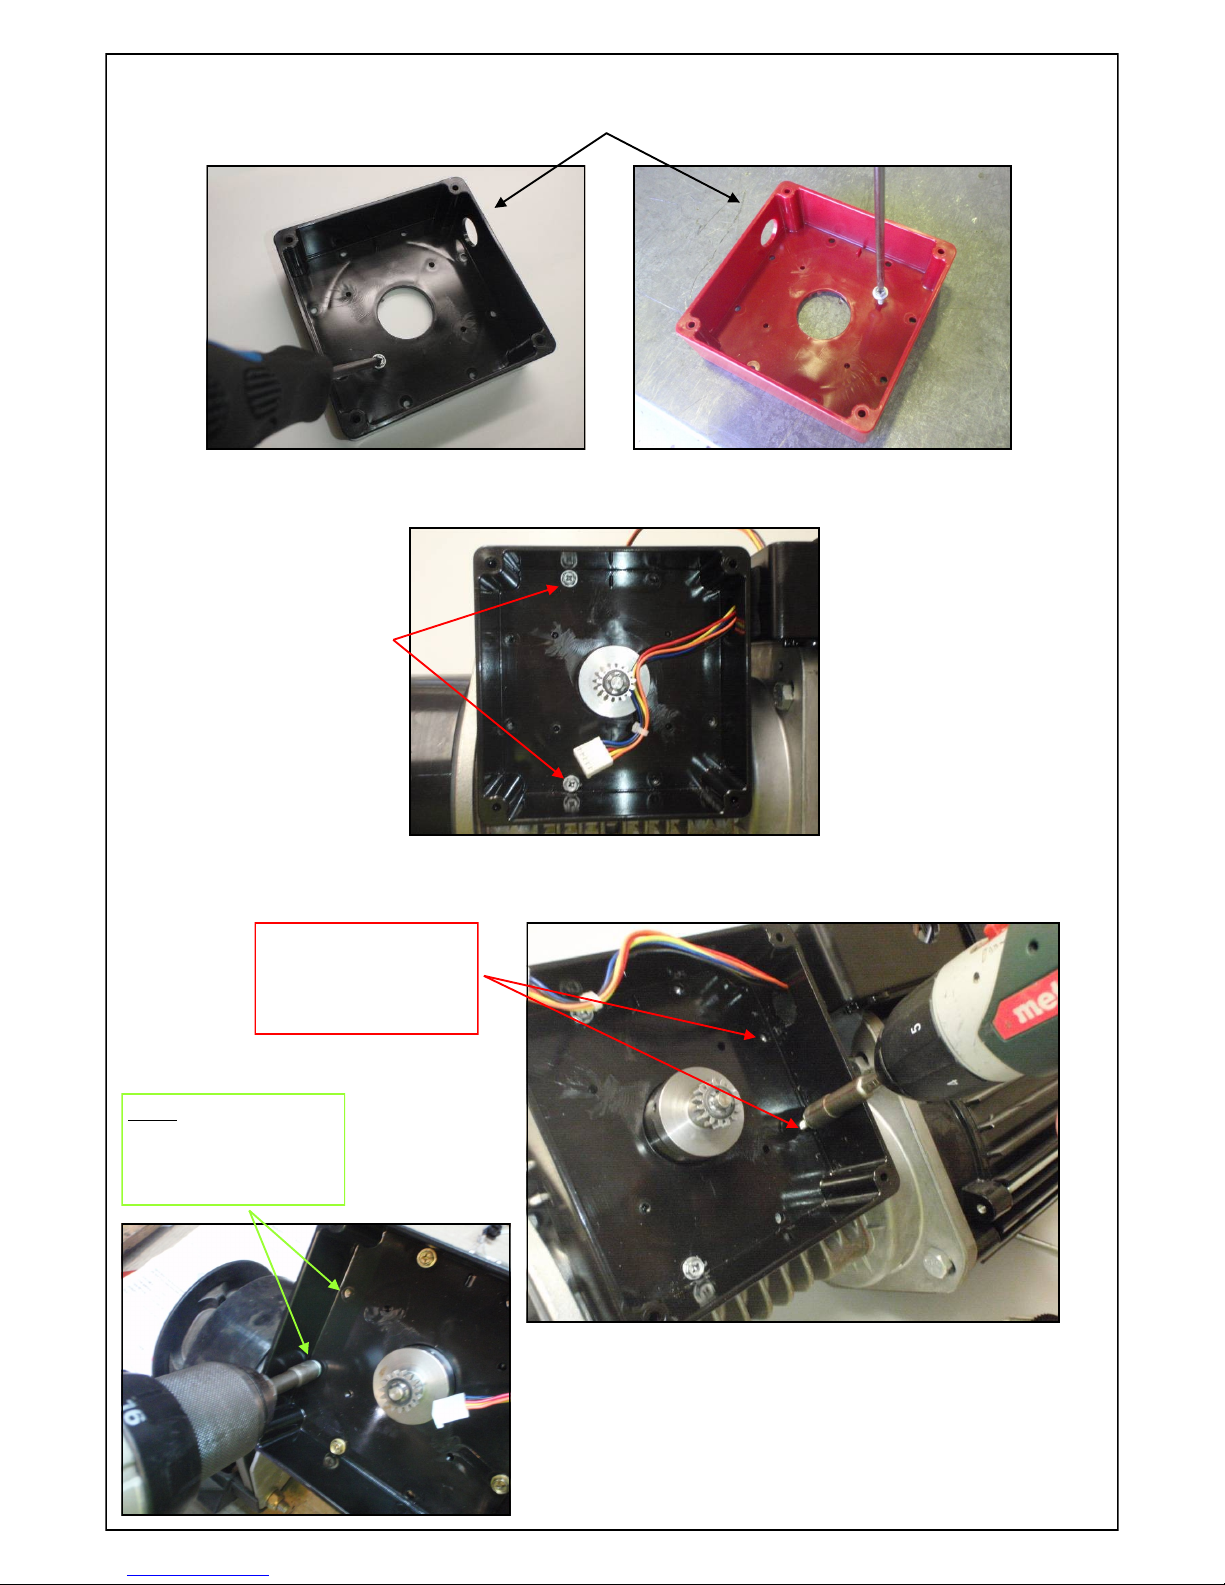
8. Use the provided M4 hex head taptite to drive in and out of the hole shown below, to form a thread. Use a Phillips head
style screwdriver.
9. Reinstall the enclosure, observe orientation as before. Insert two of the original screws as shown to assist enclosure
mounting. Install APE cable, (must pass through foam pad into MCB enclosure).
10. Use the provided M4 hex head taptites to drive in and out of the holes shown below. There should be a clearance of approx
1mm between the base of the enclosure and the hex head to ensure adequate thread depth has been achieved .
APE cable entry
2 x original screw
Standard Opener:
Holes requiring M4 thread
to be formed by screwing
taptite in and out.
Right hand enclosure Left hand enclosure
Clutch Model:
Holes requiring M4 thread
to be formed by screwing
taptite in and out.
NOTE: Ensure all excess debris is removed from the enclosure after
threading holes.
 Loading...