

Page 1
GC-ATC-810
USB-High Speed Serial Converter
User’s Manual
Overview
The GC-ATC-810 device provides a simple and easy way
to connect Universal Serial Bus (USB) and Serial port
interface. With the advantage of USB port, users have the
capability to utilize the peripheral with serial port interface
in an easy to use environment such as plug and play &
hot swap function. This adapter is designed for ideal
connections to Cellular Phone, Digital Camera, Modems
or ISDN terminal adapter with over 1Mbps data transfer
rate.
The USB-high Speed Serial Converter and software
drivers are capable of providing a no-firmware-change
feature that enable USB interface to be transparent to
serial port peripherals with minimum modifications.
Package Content
• Hardware: USB-High Speed Serial Converter
• Software: USB-High Speed Serial Converter
driver on CD-ROM
• User’s Manual
Product Features
• USB Specification Rev. 1.1,2.0 compliant
• Support the RS232 Serial interface
• Up to 460Kbps data transfer rate
• Support remote wake-up and power
management
LED indication
Red LED ----- Data Sending from USB port to RS-232
Serial Port side
Green LED ---- Data Receiving from RS-232 Serial port
side to USB port
System Requirements
• IBM PC 486DX4-100 MHz CPU or higher or
compatible system
• Available USB port
• CD-ROM drive
• Windows 98. Windows 2000 .Windows XP.Vista
or iMAG
Driver Installation
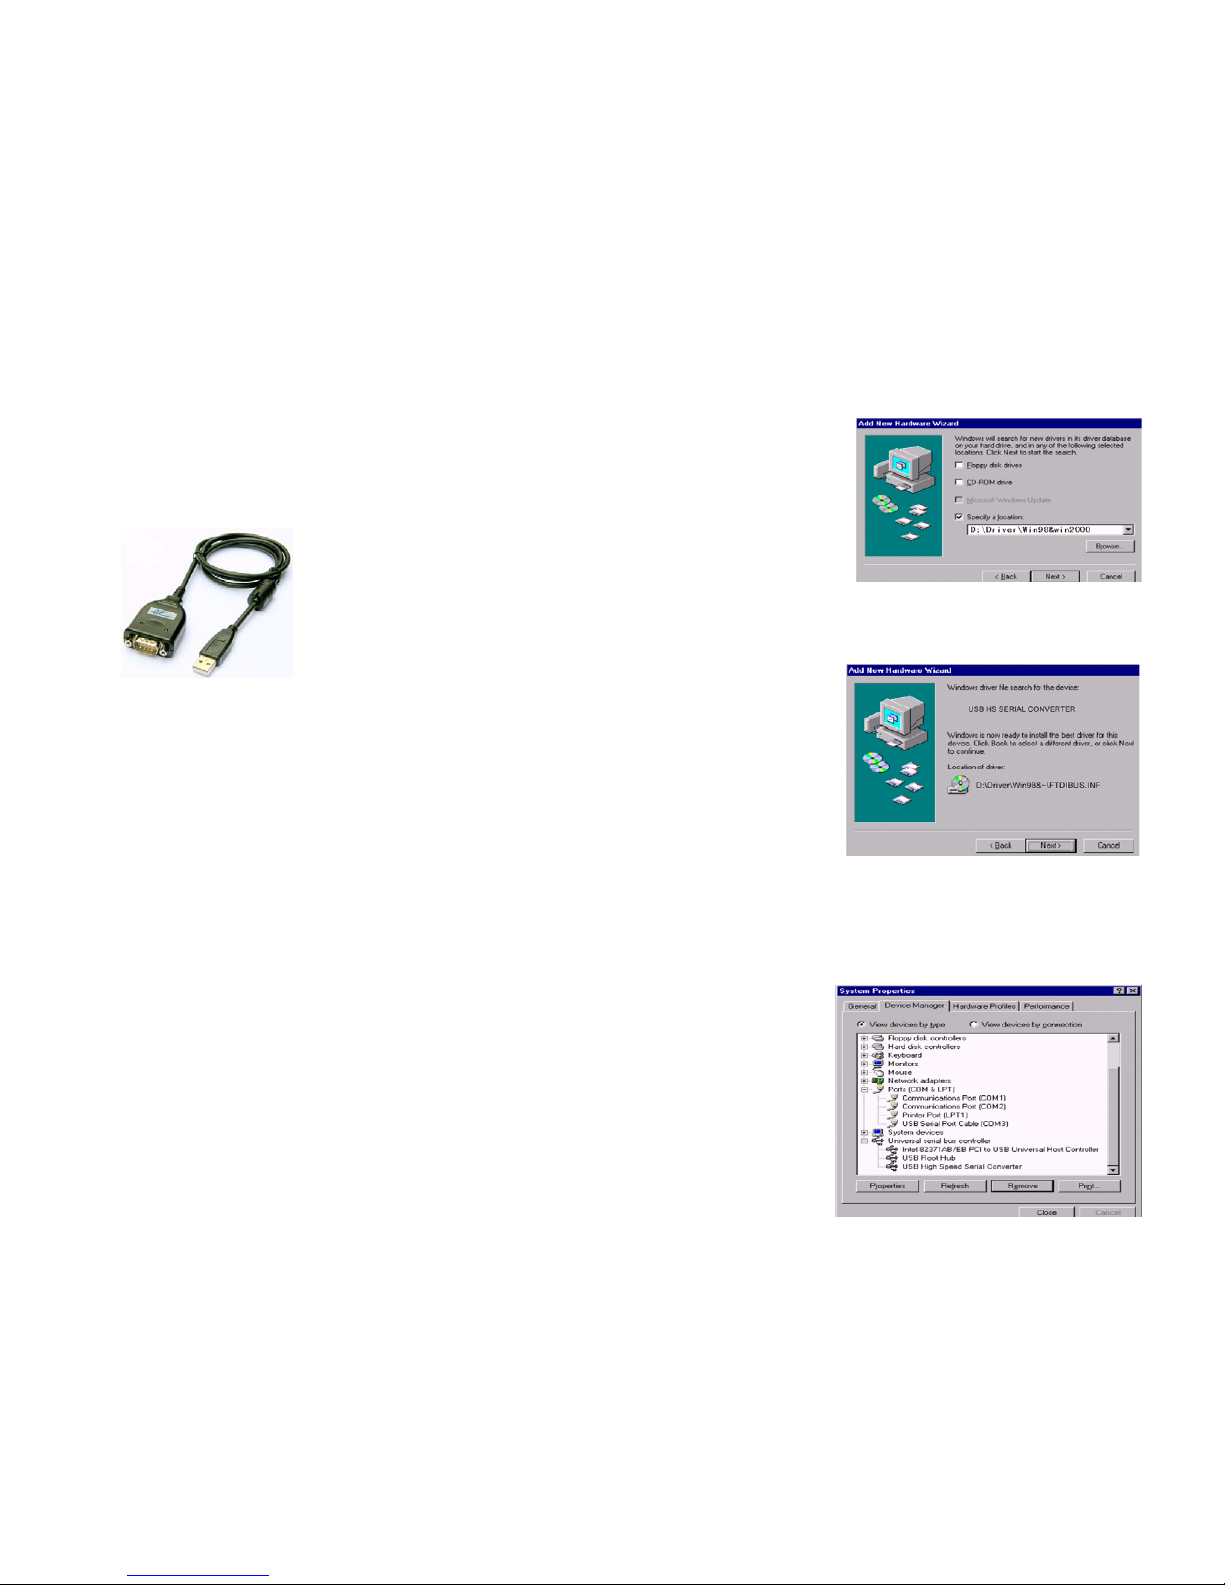
Follow the steps below to install driver of USB-High
Speed Serial Converter:
1. Power on your computer and make sure that the USB
port is enabled and working properly.
2. Plug in the USB-High Speed Serial Converter into the
USB port and run the Add New Hardware Wizard to
assist you in setting up the new device. Click Next to
continue.
3. Insert the USB-HS Serial Converter software driver
into the CD-ROM drive and click Next to continue.
For Windows 98, click Search for the best driver for
your device and click to search driver from the floppy
drive D:\DRIVER\Win98 &W i n200 0.
4. Windows will detect the driver (FTDIBUS.INF) and
shows the USB HS SERIAL CONVERTER. Click
Next to continue installation.
5. Click Next to continue and let Windows copy the
needed files to your hard disk.
6. When Windows finished installing the software
required for the new USB to Serial Cable, click Finish.
Page 2
Setting Up the RS232 Serial Device
Follow the steps below to connect your RS232 Serial
Device (ie: Modem) to the USB port of your PC:
1. Turn off your Modem. Plug the DB 9 (or DB 25)
connector of the USB-HS Serial Converter into your
Modem. Connect the other end of the USB-HS Serial
Converter to an USB type A to type B cable. Turn on
the Modem afterwards.
2. Turn on your computer and plug in the USB
connector of the USB-HS Serial Converter into the
USB port.
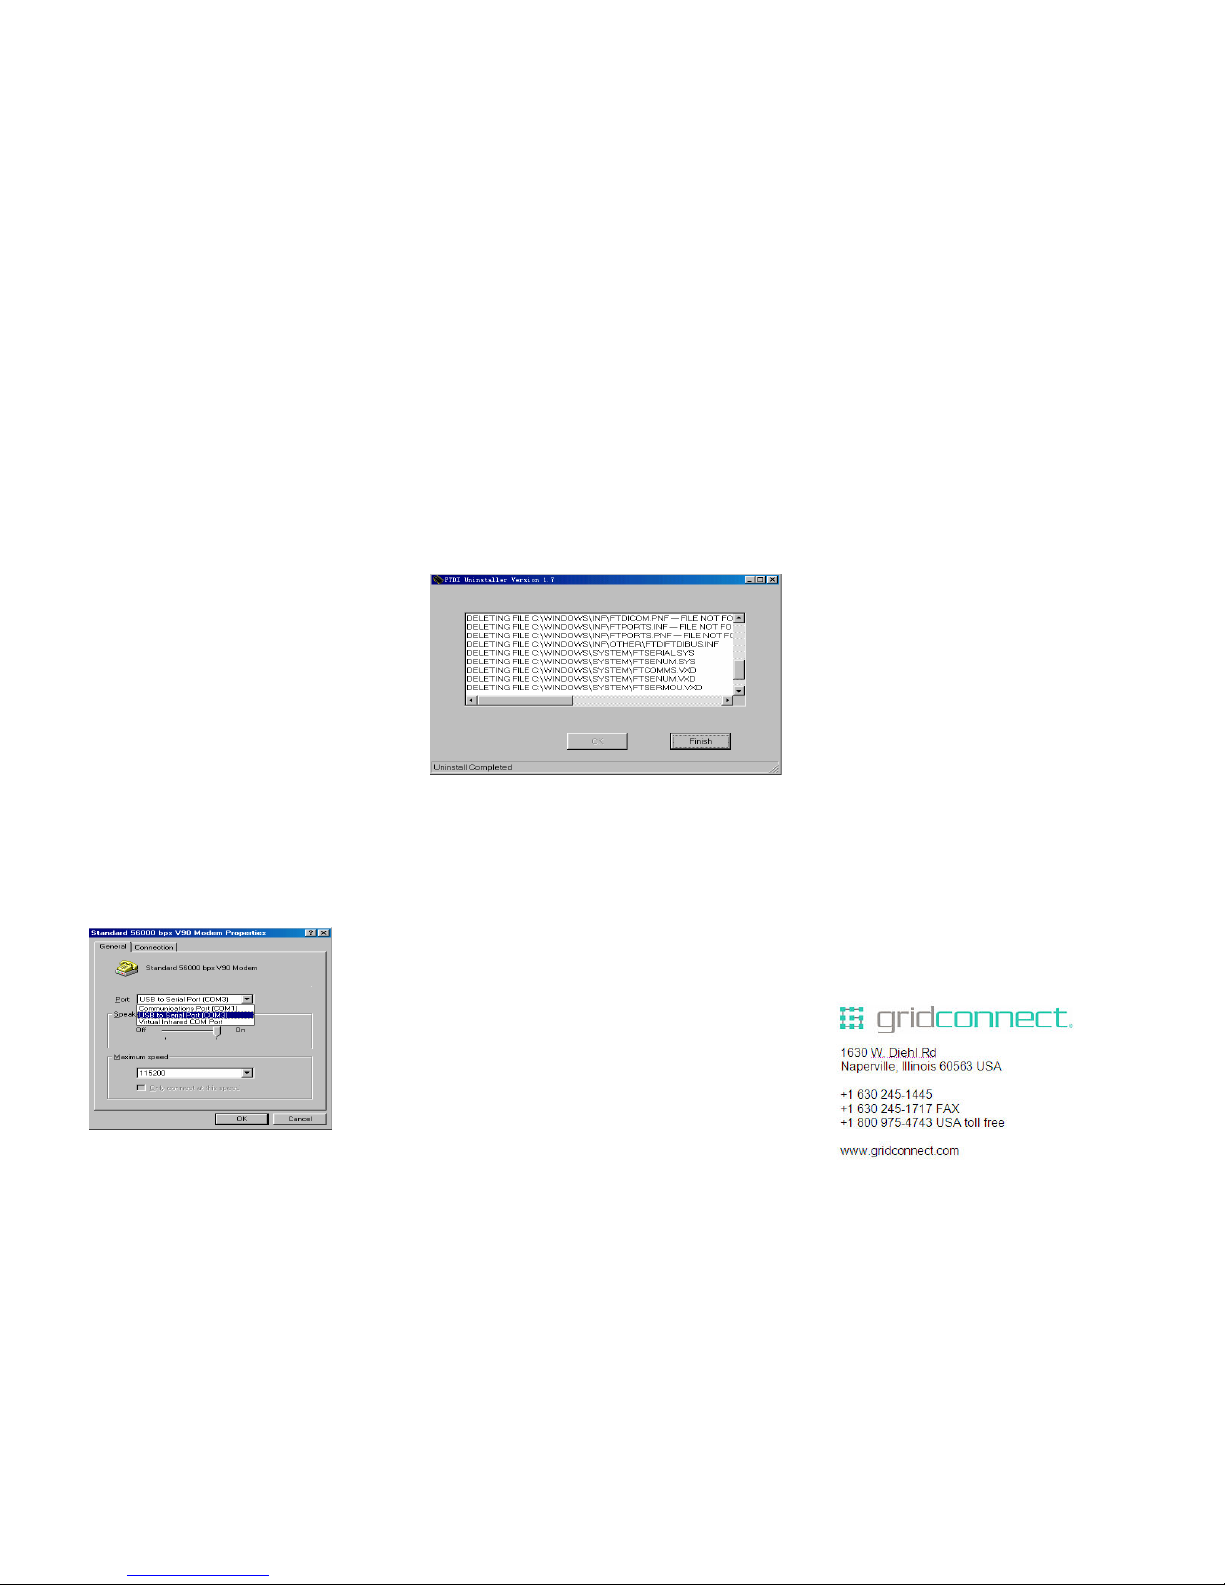
3. If you have already installed a Modem device before,
click Start, Settings, and Modems. Open Modems
Properties, select the Modem, and click Properties. In
General tab, please change the Port value to USB
Serial Port (COM3).
4. After finishing these processes, you can use USB to
Serial Bridge Cable to connect RS232 Serial 56K
FAX Modem and execute the Dial-up function to
connect Internet, and send the FAX with the FAX
software(ie: Microsoft FAX) properly.
Uninstalling the Driver Program
If you want to remove the USB-HS Serial Converter driver
program, you can uninstall it by following the steps below:
1. Unplug the USB-HS Serial Converter from your PC.
2. Run the D:\Driver\Win98&win2000\FTDIUNIN.EXE
program from the software CD-ROM, Click finish then
reboot the PC.
Disclaimer
Information in this document is subject to change without notice.
The manufacturer does not make any representations or
warranties (implied or otherwise) regarding the accuracy and
completeness of this docum ent and shal l in no event be liable for
any loss of profit or any other commercial damage, including but
not limited to special, incidental, consequential, or other
damages.
No part of this document may be reproduced or transmitted in
any form by any means, electronic or mechanical, including
photocopying, recording or information recording and retrieval
systems without the express written permission of the
manufacturer.
All brand names and product names used in this document are
trademarks, or registered trademarks of their respective holders.
FCC Statement
This device generates and uses radio frequency and may cause
interference to radio and television reception if not installed and
used properly. This has been tested and found to comply with the
limits of a Class B computing device in accordance with the
specifications in Part 15 of FCC Rules. These specifications are
designed to provide reasonable protection against such
interference in a residential installation. However, there is no
guarantee that interference will not occur in a particular
installation. If this device does cause harmful interference to radio
or television reception, which can be determined by plugging the
device in and out, the user can to try to correct the interference
by one or more of the following measures:
• Reorient or relocate the receiving antenna.
• Increase the separation between the device and receiver.
• Connect the computer into an outlet on a circuit different
from that to which the receiver is connected.
• Consult th e dea l er or an e xper ien ce d ra dio/ TV tec hni c ia n for
help.
Warranty
We warranty the equipment to be free from defects in material
and workmanship, under normal and proper use and in its
unmodified condition, for 3 year, starting on the date it is
delivered for use. Out of warranty equipment may be returned to
us. Return shipping charges will be billed to the customer. The
repaired unit will have a 90-day warranty.
 Loading...