

Page 1
I
nstallation Guide
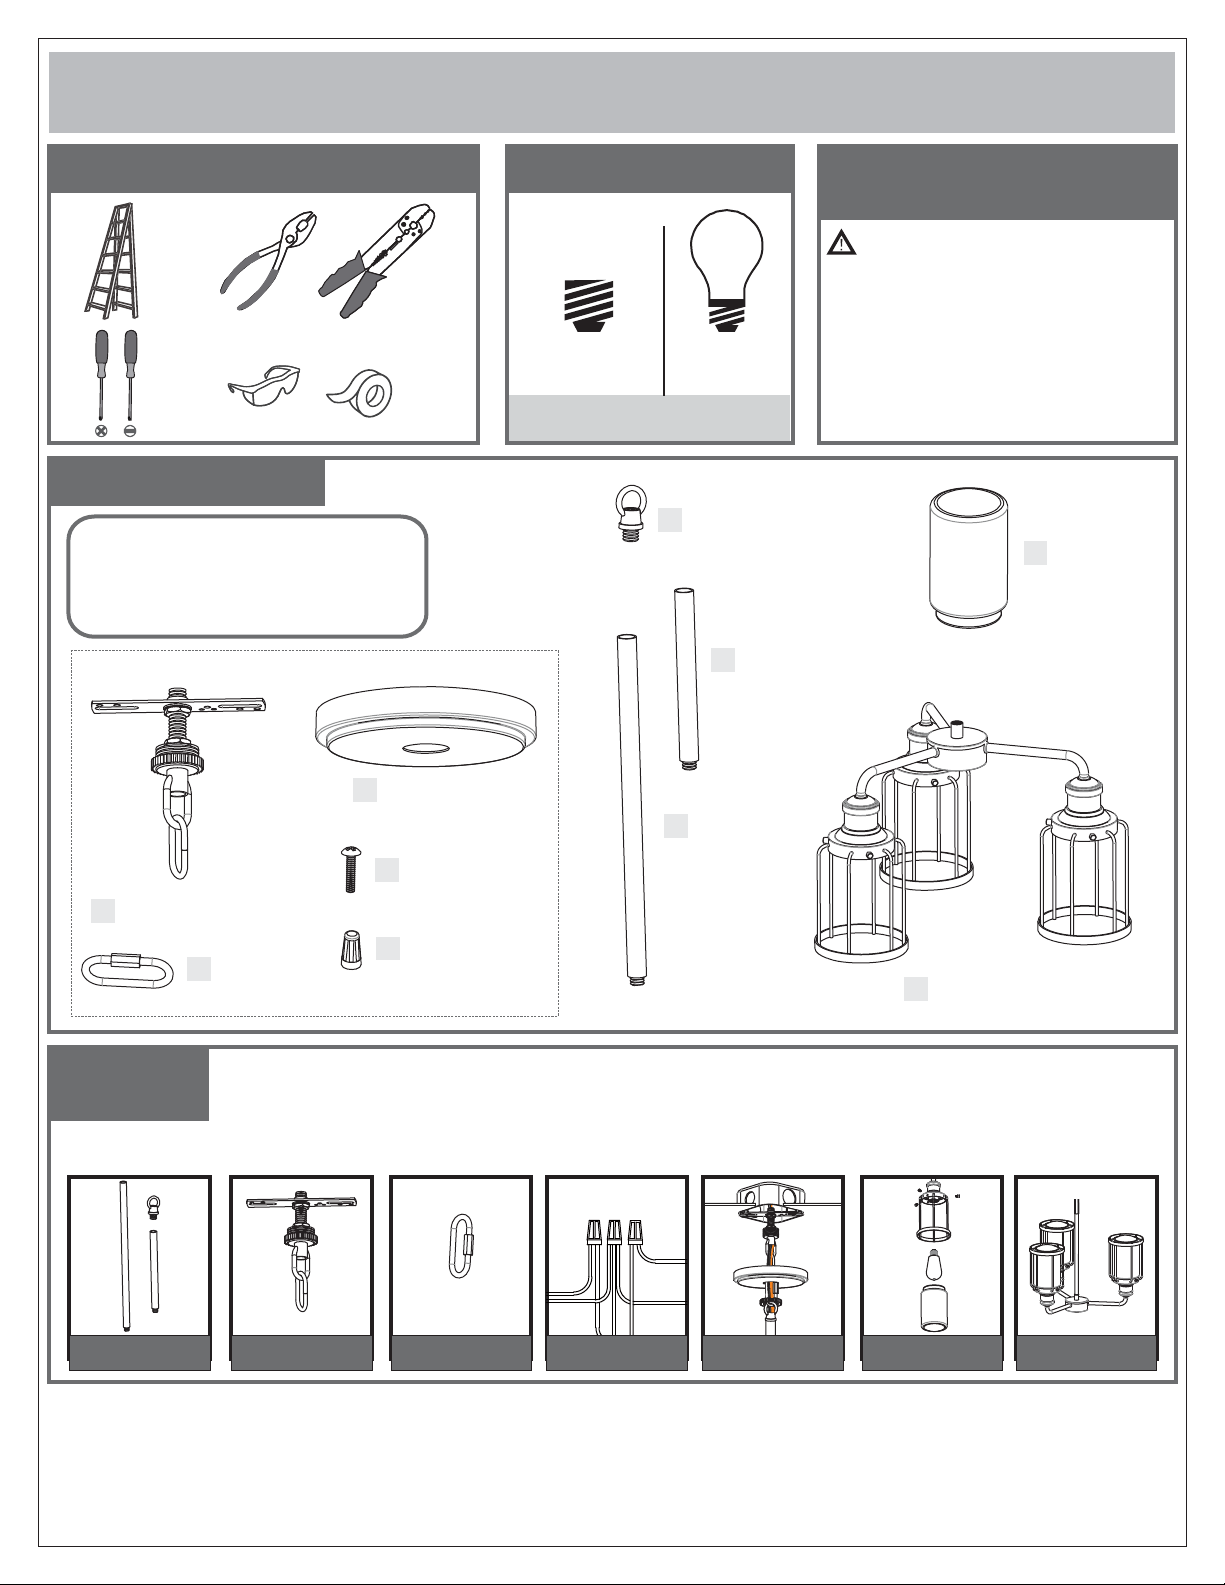
Package Contents
Preparation: Identify and inspect all parts
before beginning the installation.
Missing or damaged parts? Contact your
original place of purchase.
PARTS BAG
LightSourceToolsRequired
BULB BASE TYPE
Medium (E26)
3BULBSREQUIRED
BULBSNOTINCLUDED
100W
MAX
BULB SHAPE
TYPE A
Small Loop
F
x1
6”L Rod
G
x2
FixtureHeightAdjustable
17”to53”
Warnings and Cautions
Turn off the electricity at the circuit breaker
before installation. Consult a licensed
electrician if in doubt about installation.
Turn off power to the fixture and allow the
bulbs to cool before replacing.
Shade
I
x3
Ceiling Canopy
C
Crossbar Assembly
A
x1
B
Quick Link
x1
x1
Outlet Box Screw
D
x2
Wire Connector
E
x3
12”L Rod
H
x2
Table of
Contents
Rods &
Small Loop
STEP 1 STEP 2 STEP 3 STEP 5 STEP 6
Crossbar Assembly
Quick Link Ceiling Canopy
Wiring
STEP 4
Fixture Body
J
x1
Bulb&Shade
Reverse Cage
STEP 7
1of4
Page 2
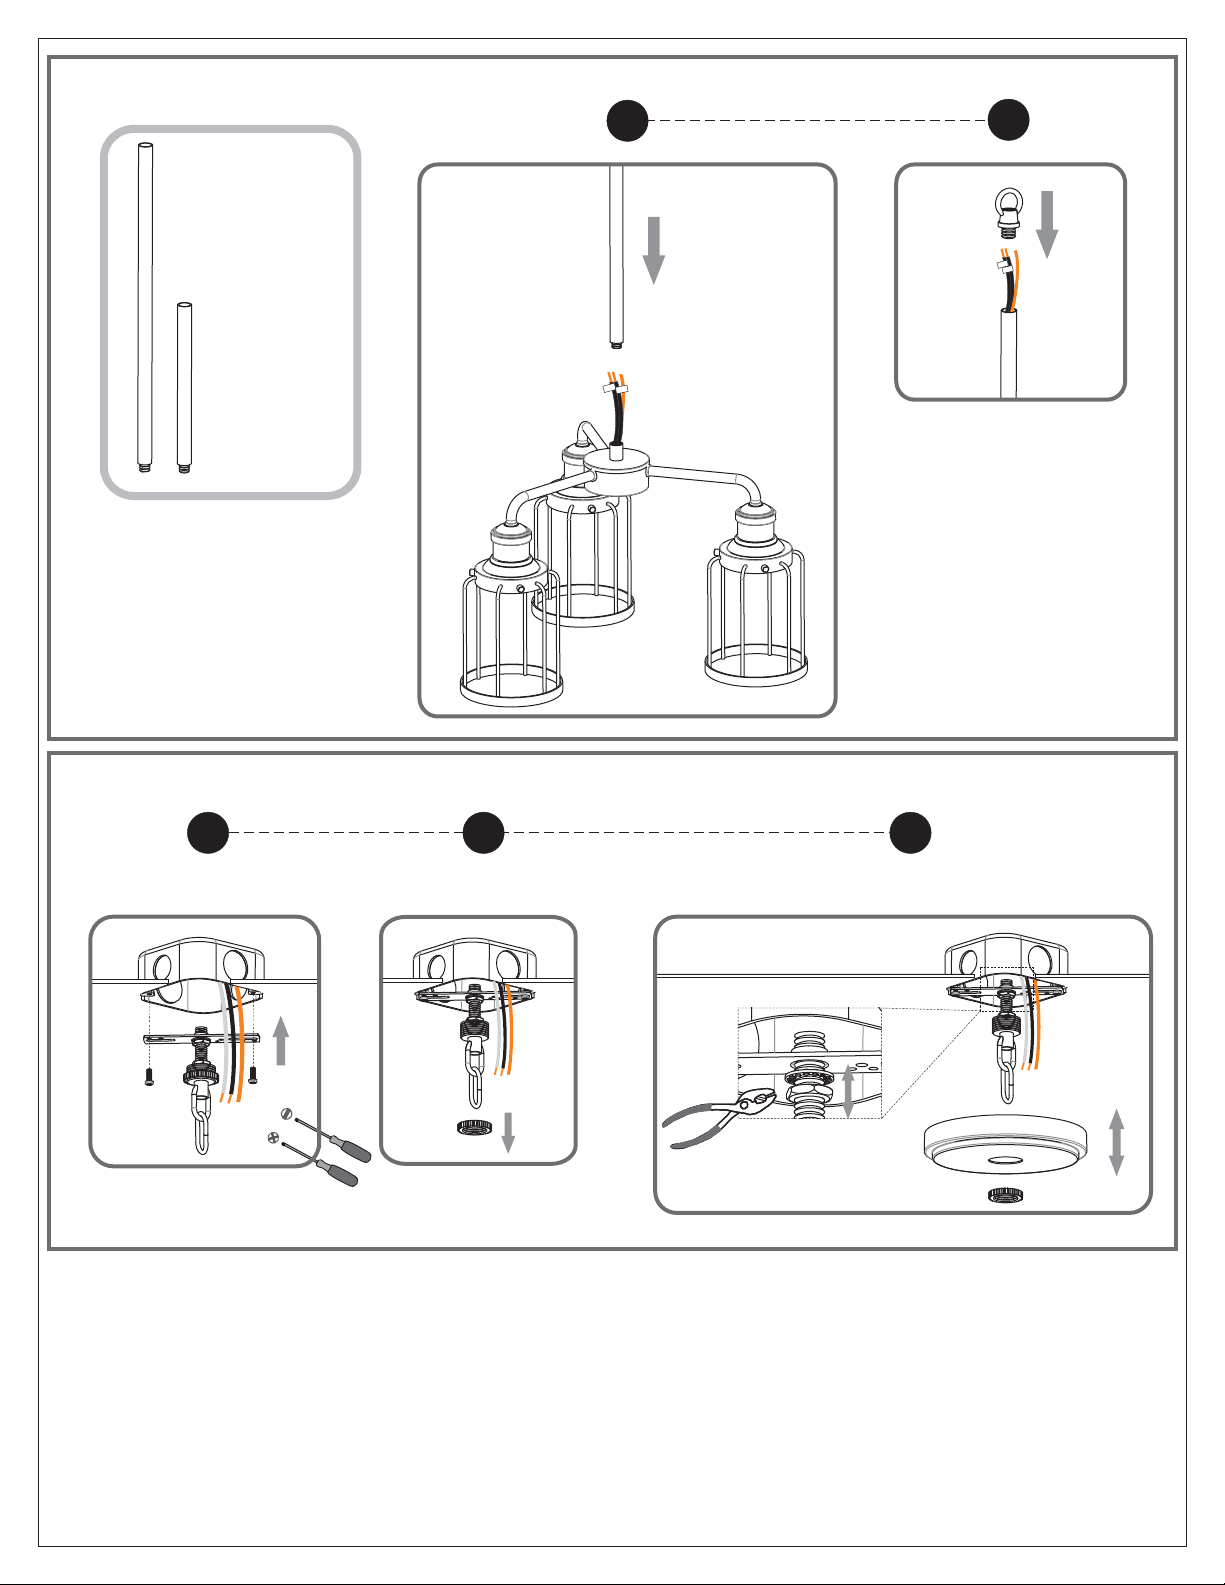
STEP 1
L
N
N
L
1 2
Optional Rods
8’ ceiling:
(1) 6”L + (1) 12”L rods
9’ ceiling:
(1) 6”L + (2) 12”L rods
10’ ceiling:
(2) 6”L + (2) 12”L rods
STEP 2
1 2
Install crossbar assembly
Step 1
3
Step2-3
Test fitting ceiling canopy to nipple
2of4
Page 3
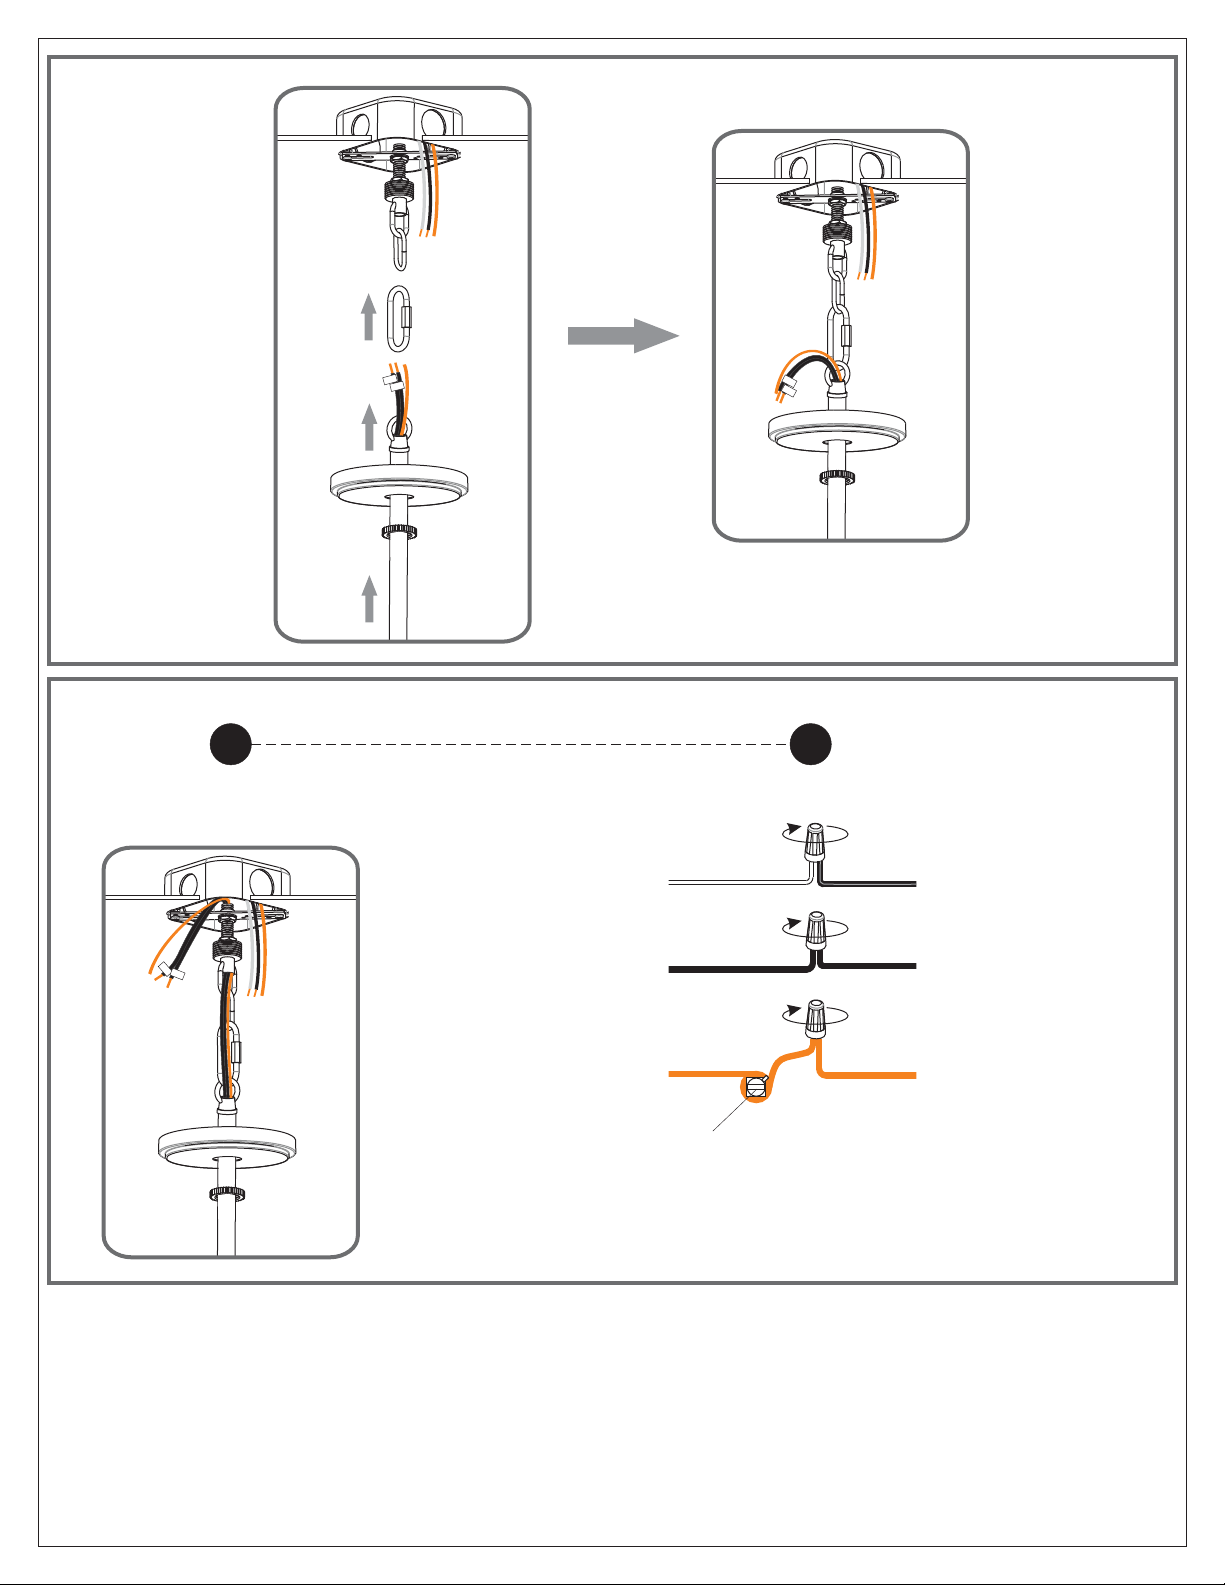
STEP 3
N
L
N
L
N
L
STEP 4
1 2
Step 1
Feed the fixture wires
through the loop
White wire (neutral)
from outlet box
Black or Red wire (hot)
from outlet box
Bare or Green ground wire
from outlet box
*Green Ground Screw
on crossbar optional
Supply wire from fixture
ribbed side or identified
with the Label “N”
supply wire from fixture
smooth side or identified
with the label “L”
Ground wire
from Fixture
3of4
Page 4
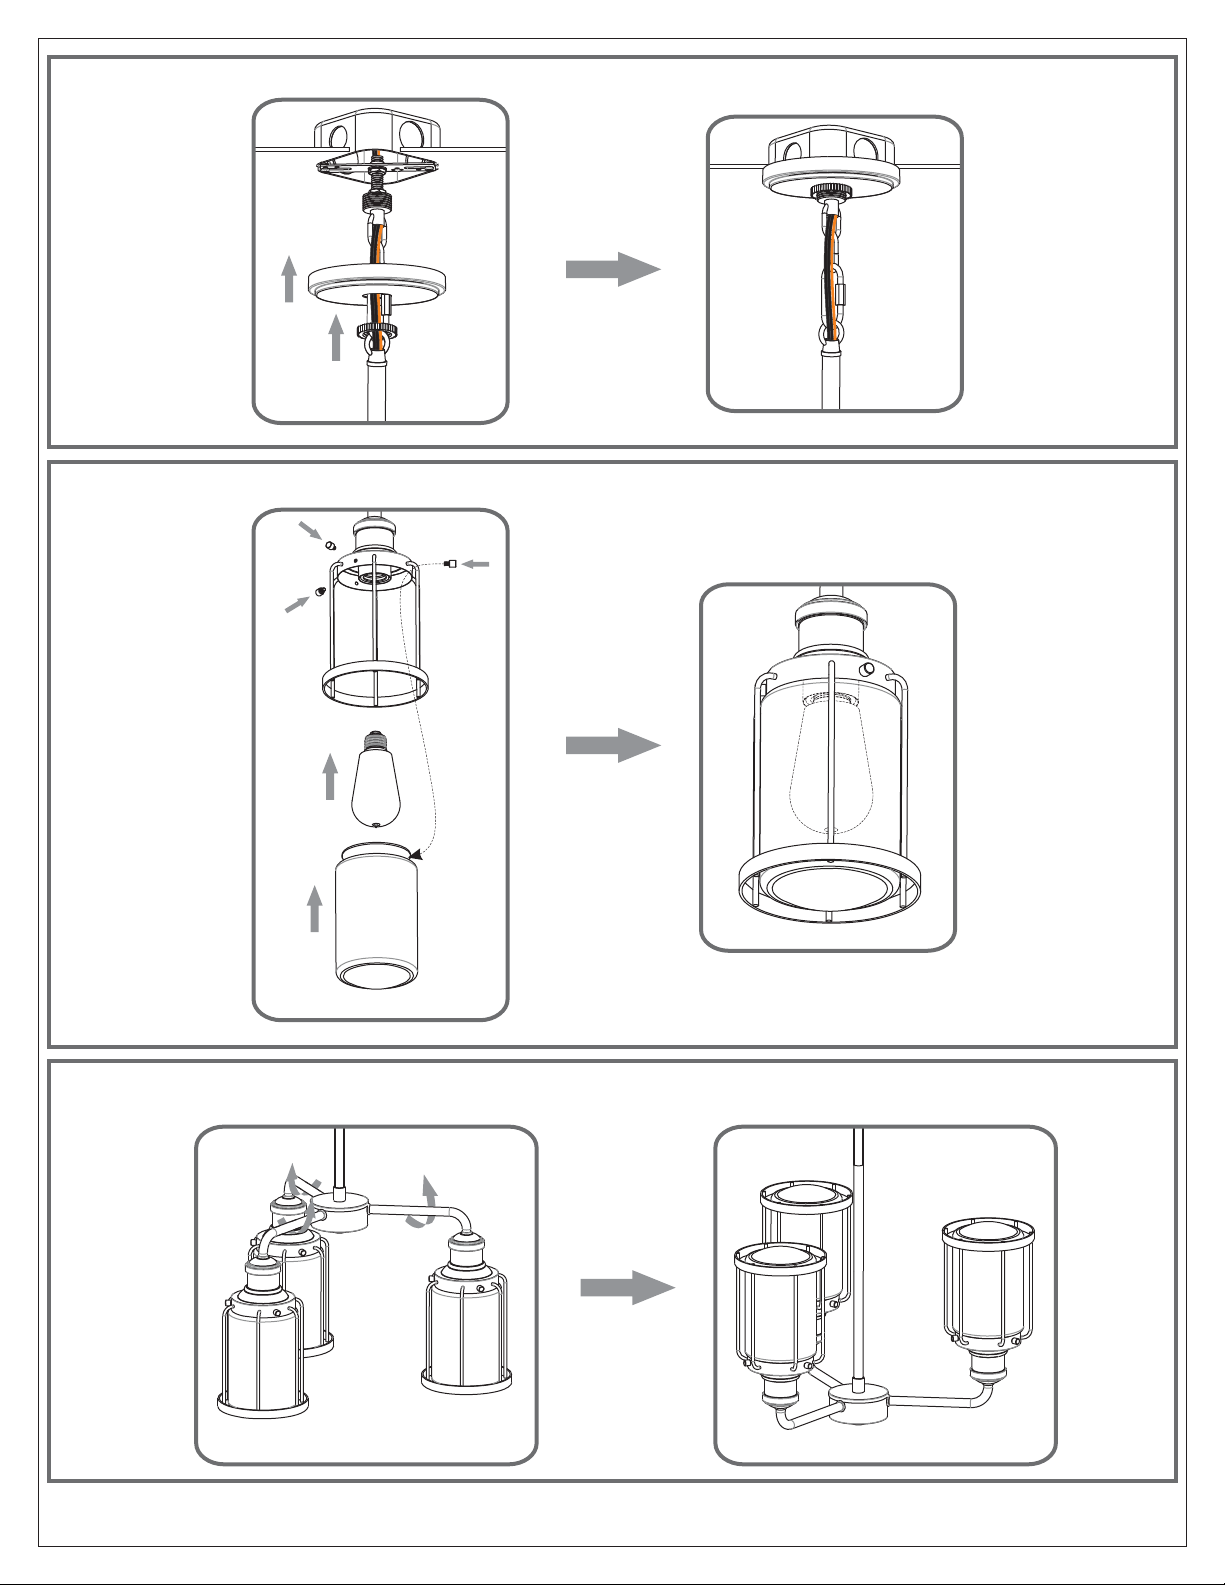
STEP 5
STEP 6
STEP 7
Optional: Reverse the cage to up by adjusting the arm.
4of4
 Loading...