

Page 1
WARRANTY
We strive to offer high-quality products, and we also try our
best to satisfy each and every customer that orders from us with
product or service as needed. We provide 30 days warranty
starting from the time you receive the item. Each customer must
provide a record of their order such as the order number, or
item receipt for any items that are out of the warranty period
you may also still receive replacement parts by purchasing them
with our company if they are available.
Are you having difficulty
with assembly? Missing parts?
Please send email with your order No to
For return, please check the return policy with
the retailer or market place you bought from.
Appreciate your purchasing from us.
Pop up your life by our furniture piece!
ITEM NO. OFM0163
NOTE:
This brochure contains IMPORTANT safty info. Please read
and keep for future reference.
Page 2
MAINTAINANCE
PARTS
AND WARNING
Keep furniture away from heat.
Do not clean furniture with harsh cleansers or
pol ish . D o not use det erg ent s, So lve nts,
abrasives, spray packs or leather cleaner. Use
non-color mild soap with warm water clean
spills(Mix 1:10 soap to water)
Do not place furniture under direct sunlight,
material will possibly fade over time.
Do not use on site dry Cleaning machine.
Children should not climb or jump on the
furniture.
Do not write on furniture without a padded
barrier to protect the surface.
Not for commercial use, For residential use
only.
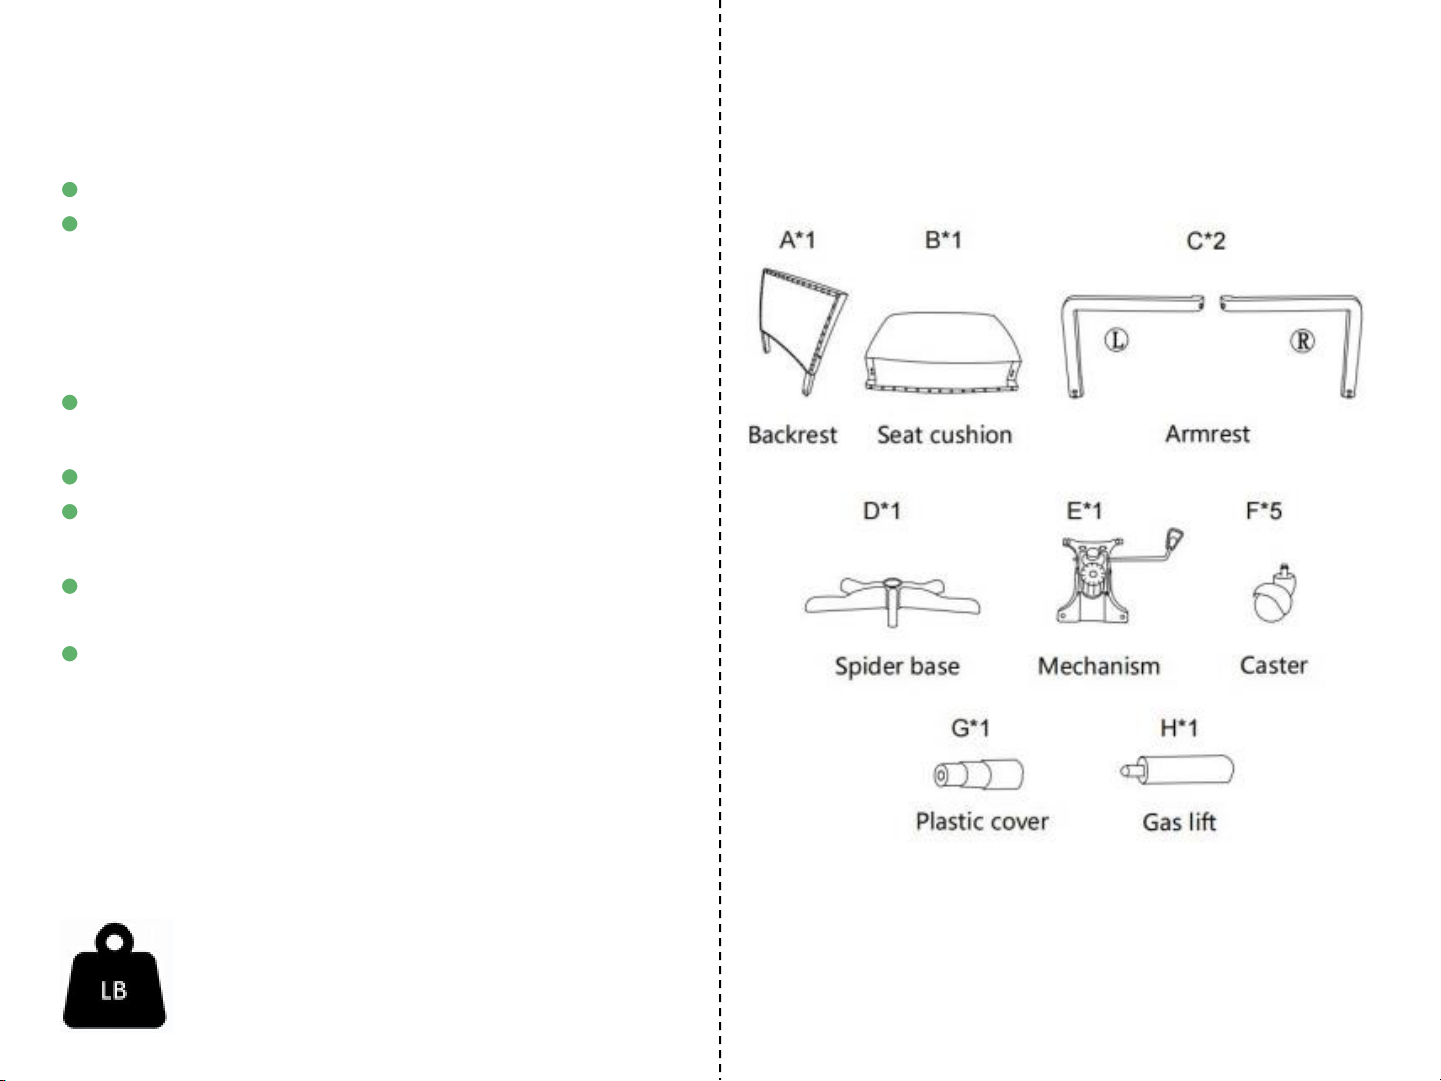
LIST
Weight Limitation
220LBS
Page 3
HARDWARE
ASSEMBLY
LIST
SPARE
INSTRUCTIONS
Be sure to check all packing material carefully for
small parts, which may have come loose inside the
carton during shipment.
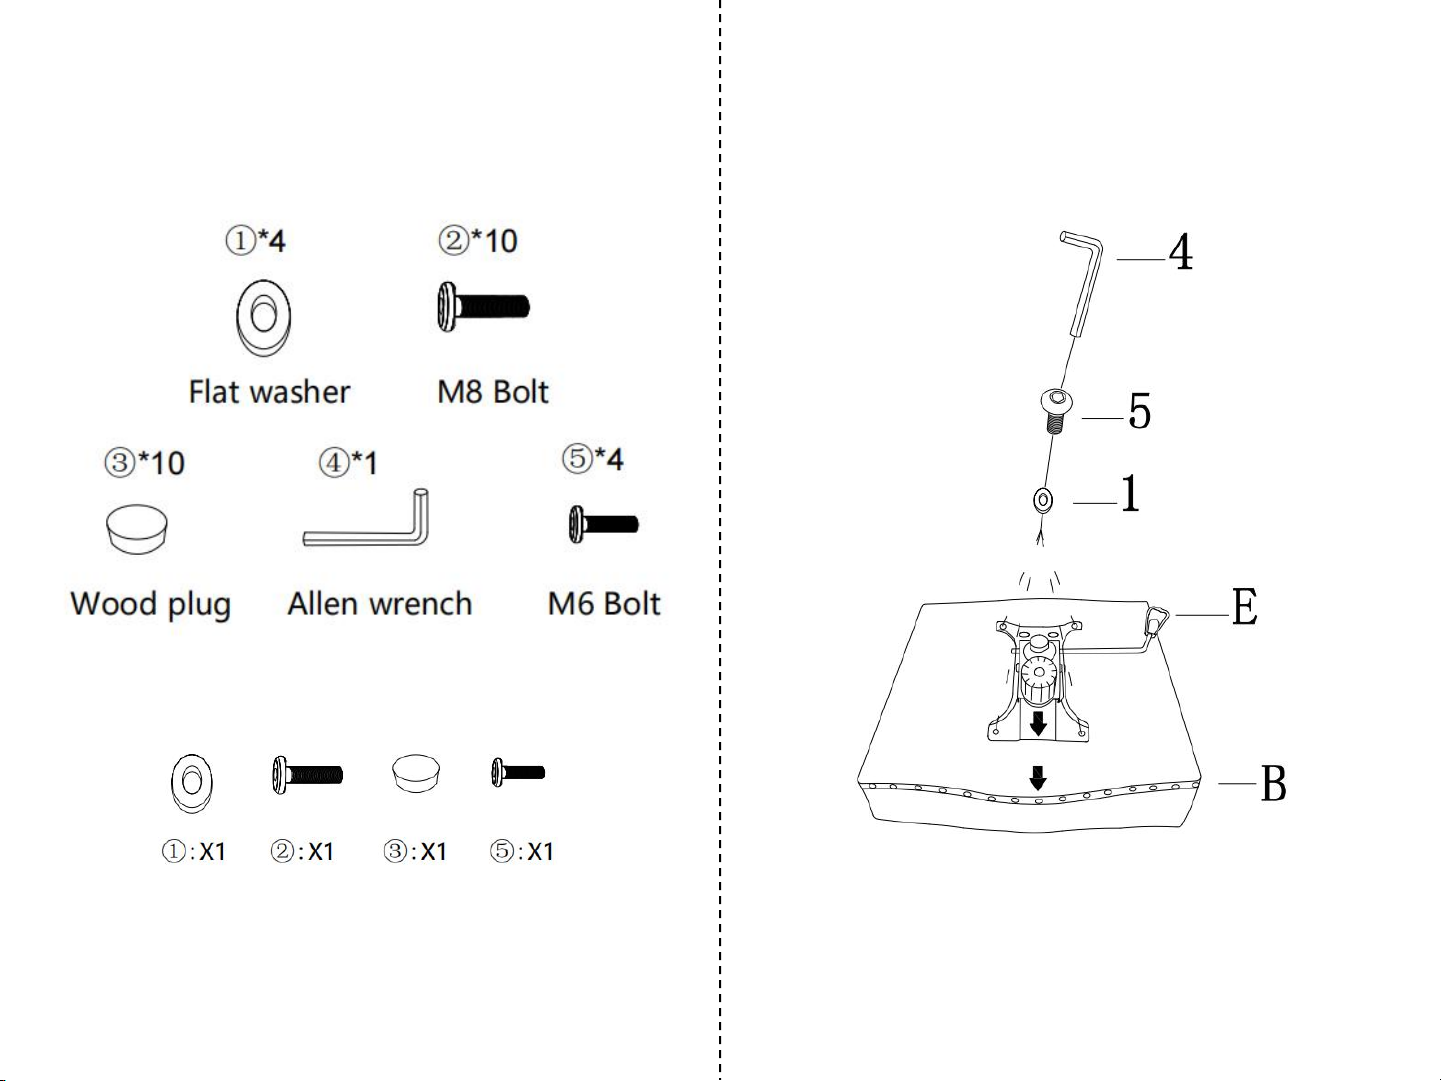
STEP 1:P lace cu shion B upside down on cl ean
padded surface. Use flat washer #1, bolt #5, allen key
#4 to attach mechanism E on bottom of the seat
cushion B. Make sure all holes aligned and arrow
facing front side then fasten all bolts to secure.
Page 4
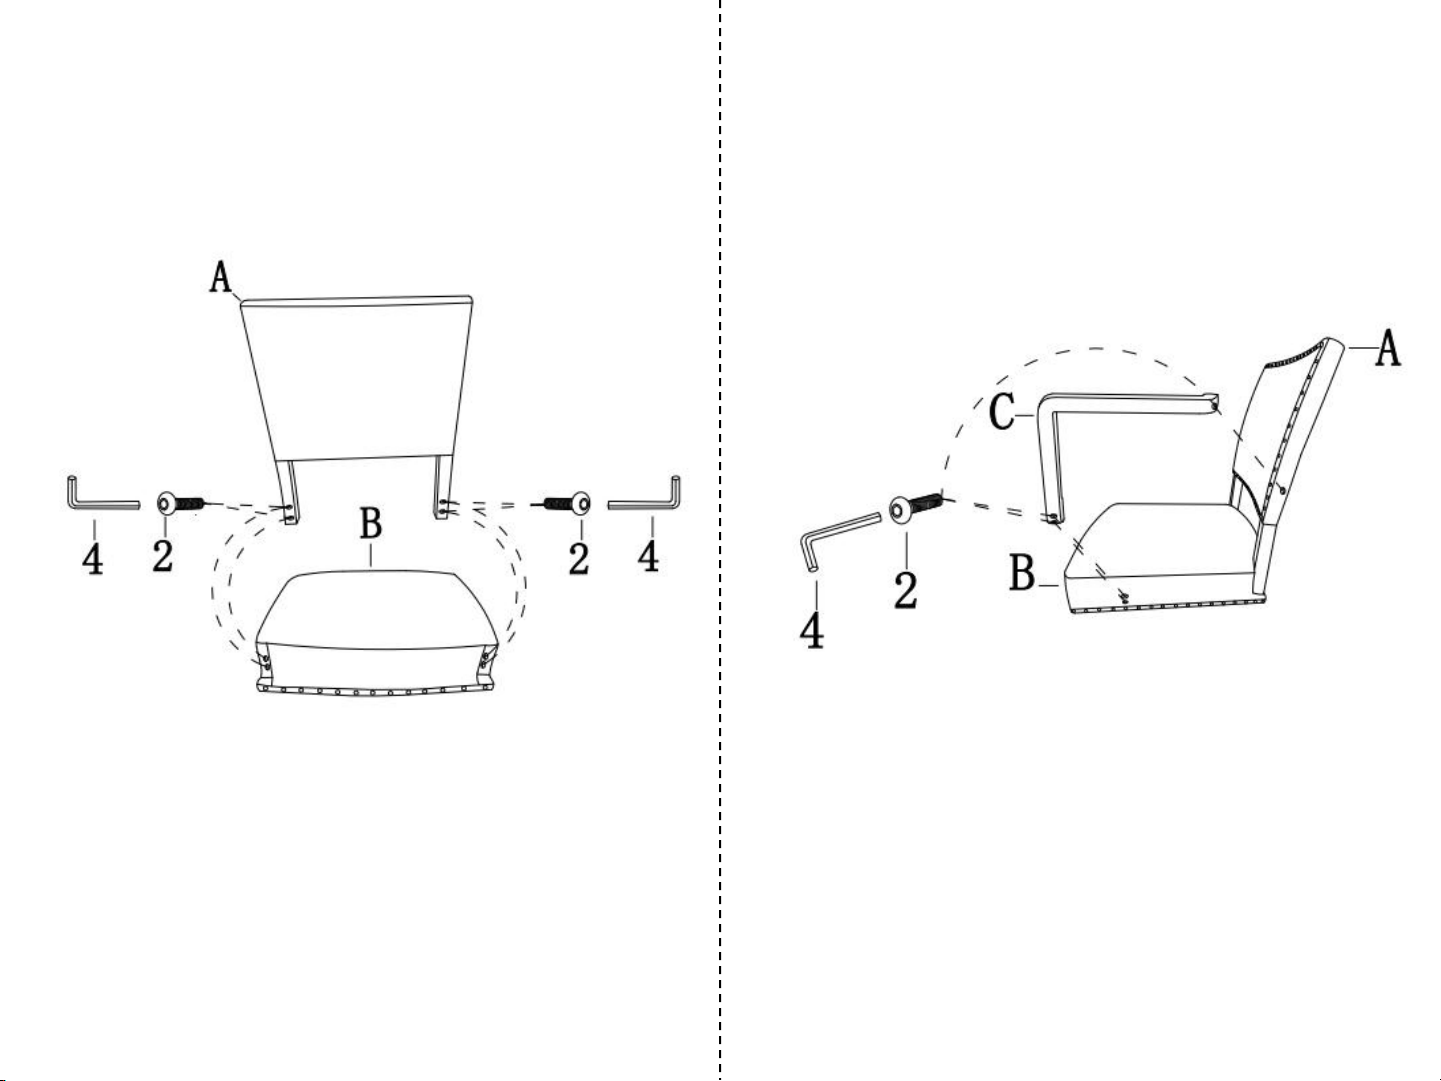
STEP 2:Carefully align screw holes and use bolt #2,
allen key #4 to connect backrest A with seat cushion
B, Please don’t fasten any bolt until next step.
STEP 3:Carefully align screw holes and use bolt #2,
allen key #4 to connect armrest C with backrest
A/seat cushion B, make sure all par ts connected
properly then fasten all bolts to secure.
Page 5
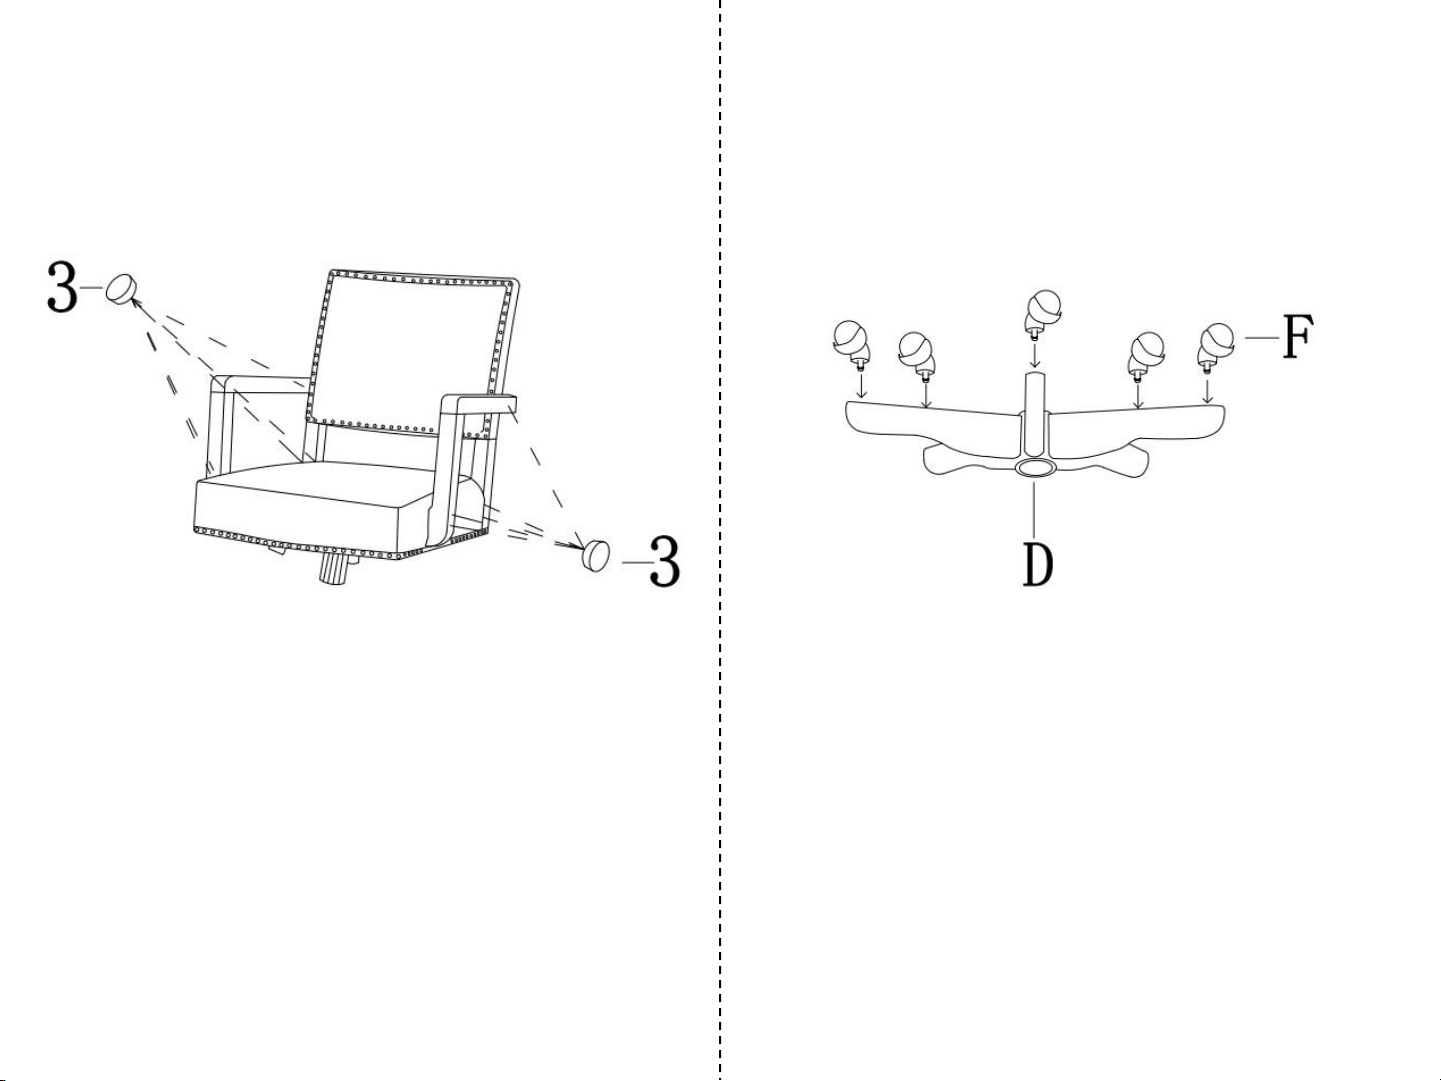
STEP 4:Insert wood plug #3 to cover the bolt holes.
STEP 5:Place spide base D upside down on clean
padded surface, insert casters F to each end of the
base arm.
Page 6
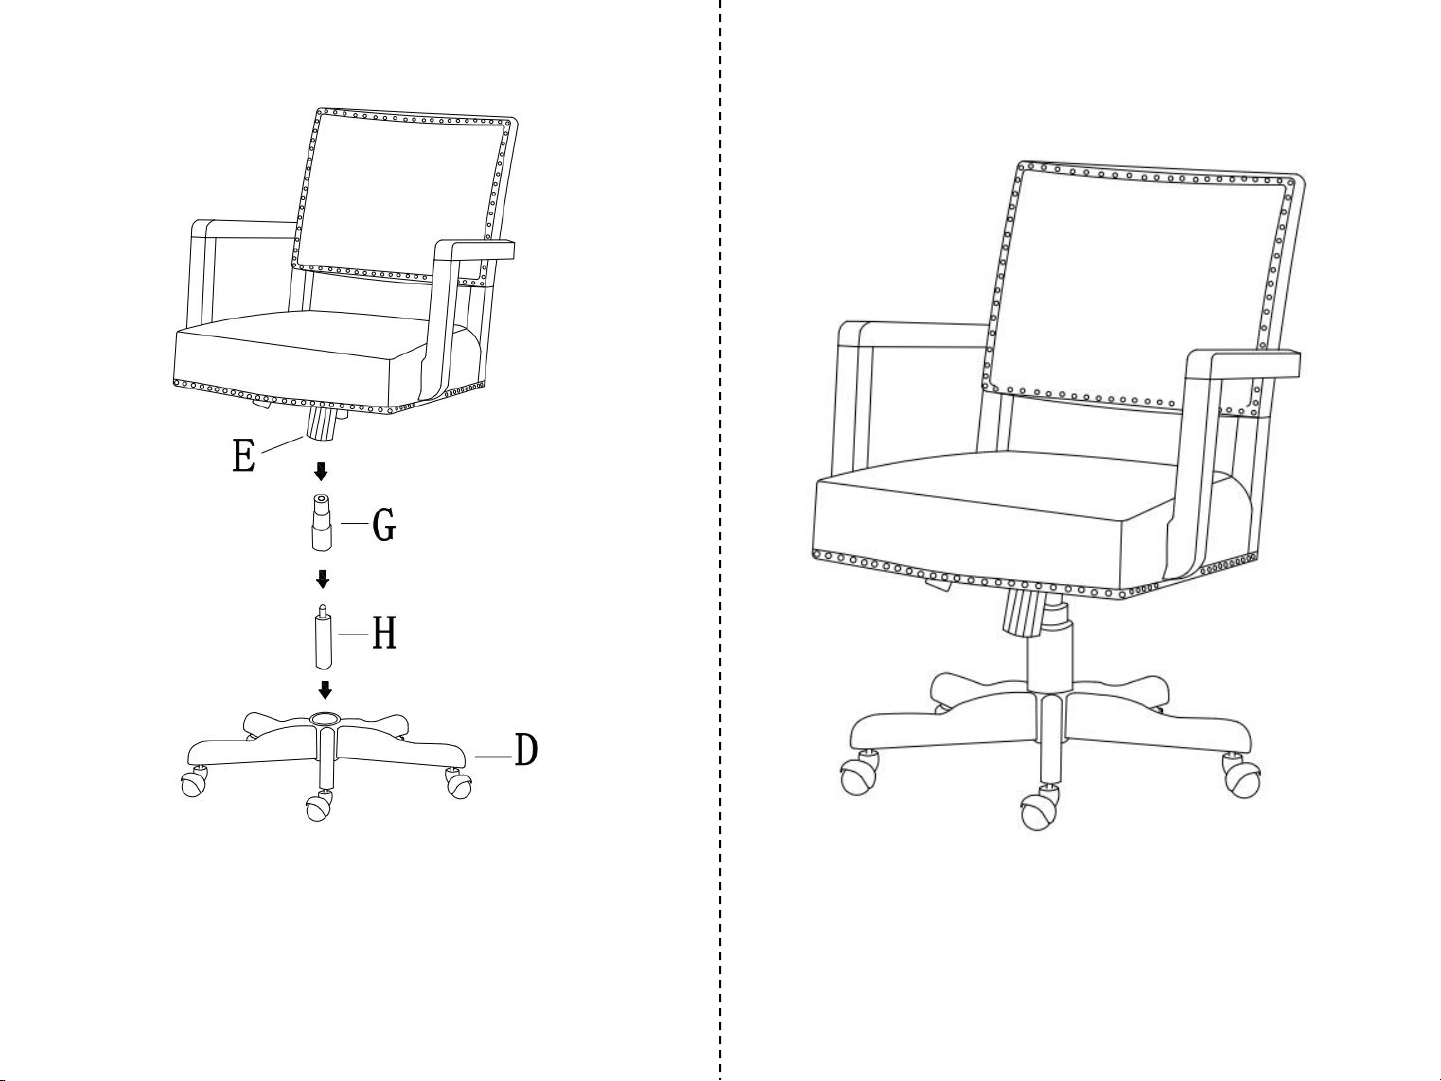
STEP 6: Insert gas lift H then place plastic cover G on
top of gas lift and place seat/back assembly on
above.
STEP 7:Assembly completed.
 Loading...