

Page 1
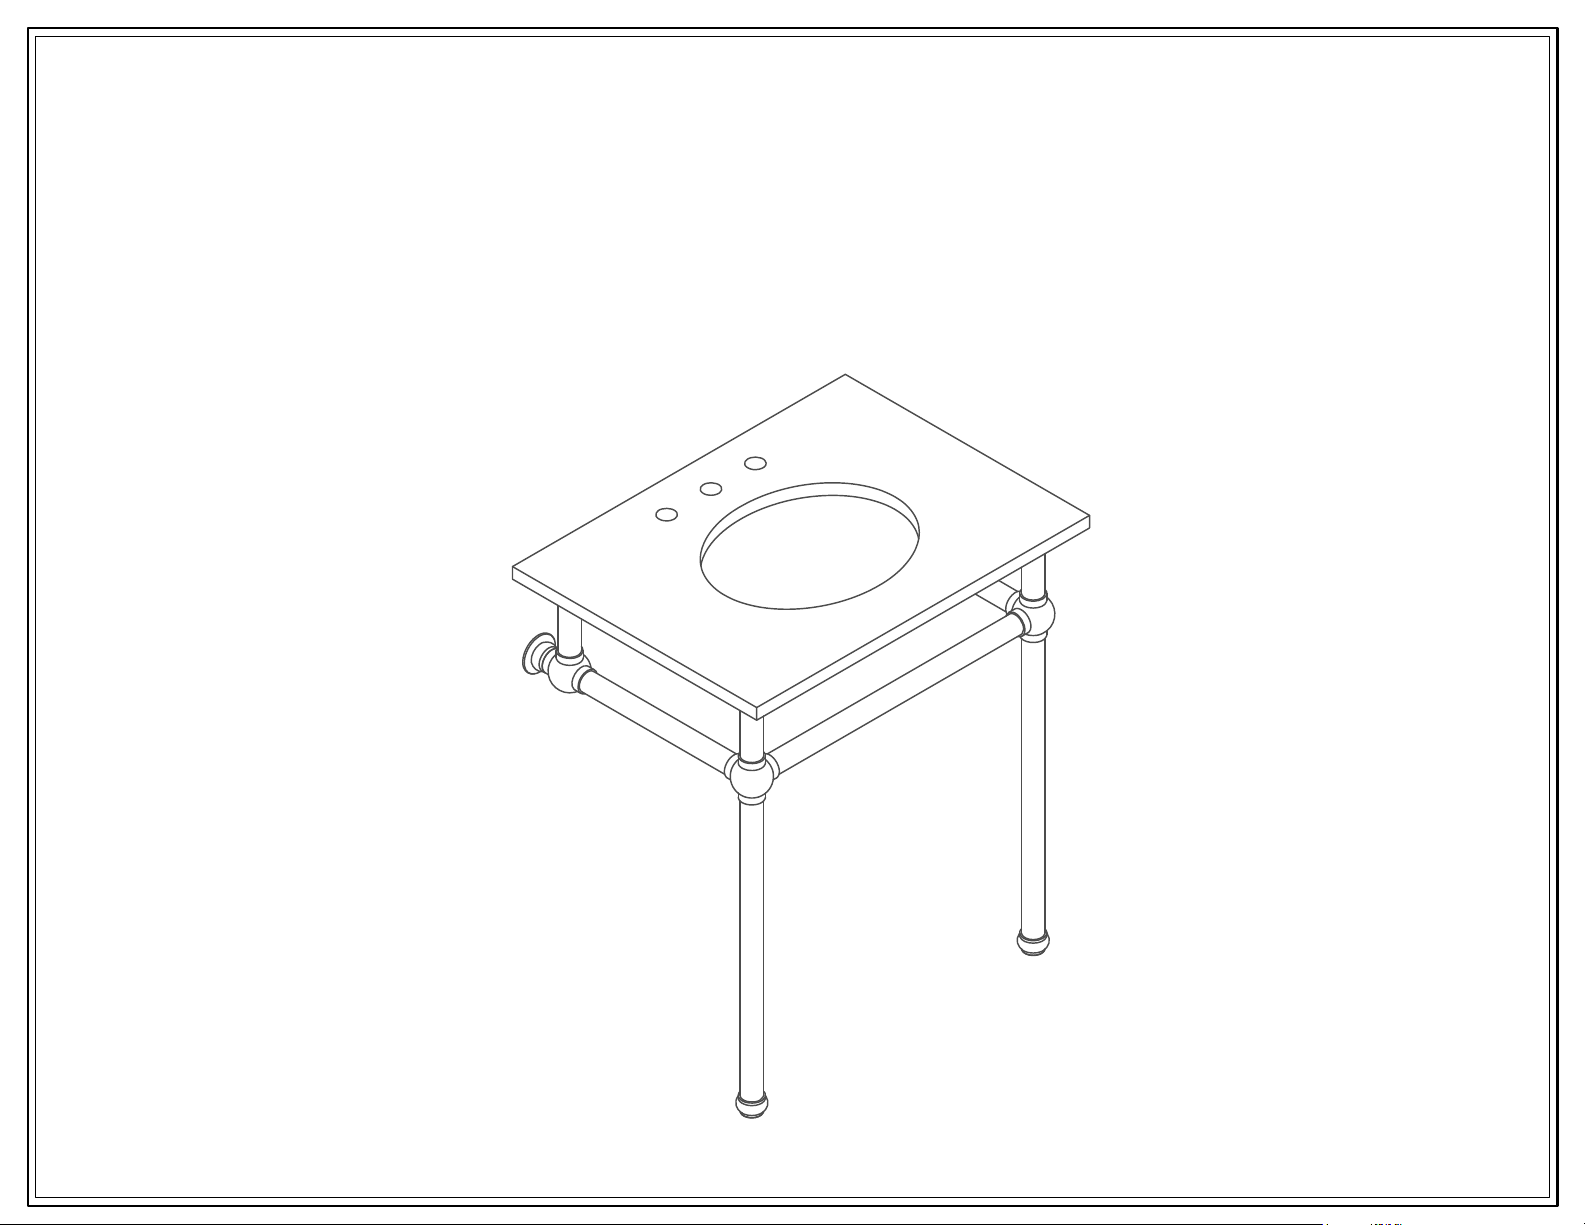
WASH STAND INSTALLATION GUIDE
Page 2
Recommended Tools:
- Drill - Level - Hammer
- Pencil - Silicone
- Phillips head screwdriver
- Safety Glasses
BEFORE YOU BEGIN ** IMPORTANT **
1) Professional installation by two-person crew is required for this fixture
2) Asse
3) We
4) Gently s
mble this fixture on a soft blanket is highly recommended
do recommend installing wood blocking inside your wall to add
support to your stand. You will need to use heavy duty anchors (such as steel or toggles)
if you choose not to install wood blocking
lide the joint onto support bar to avoid scratch
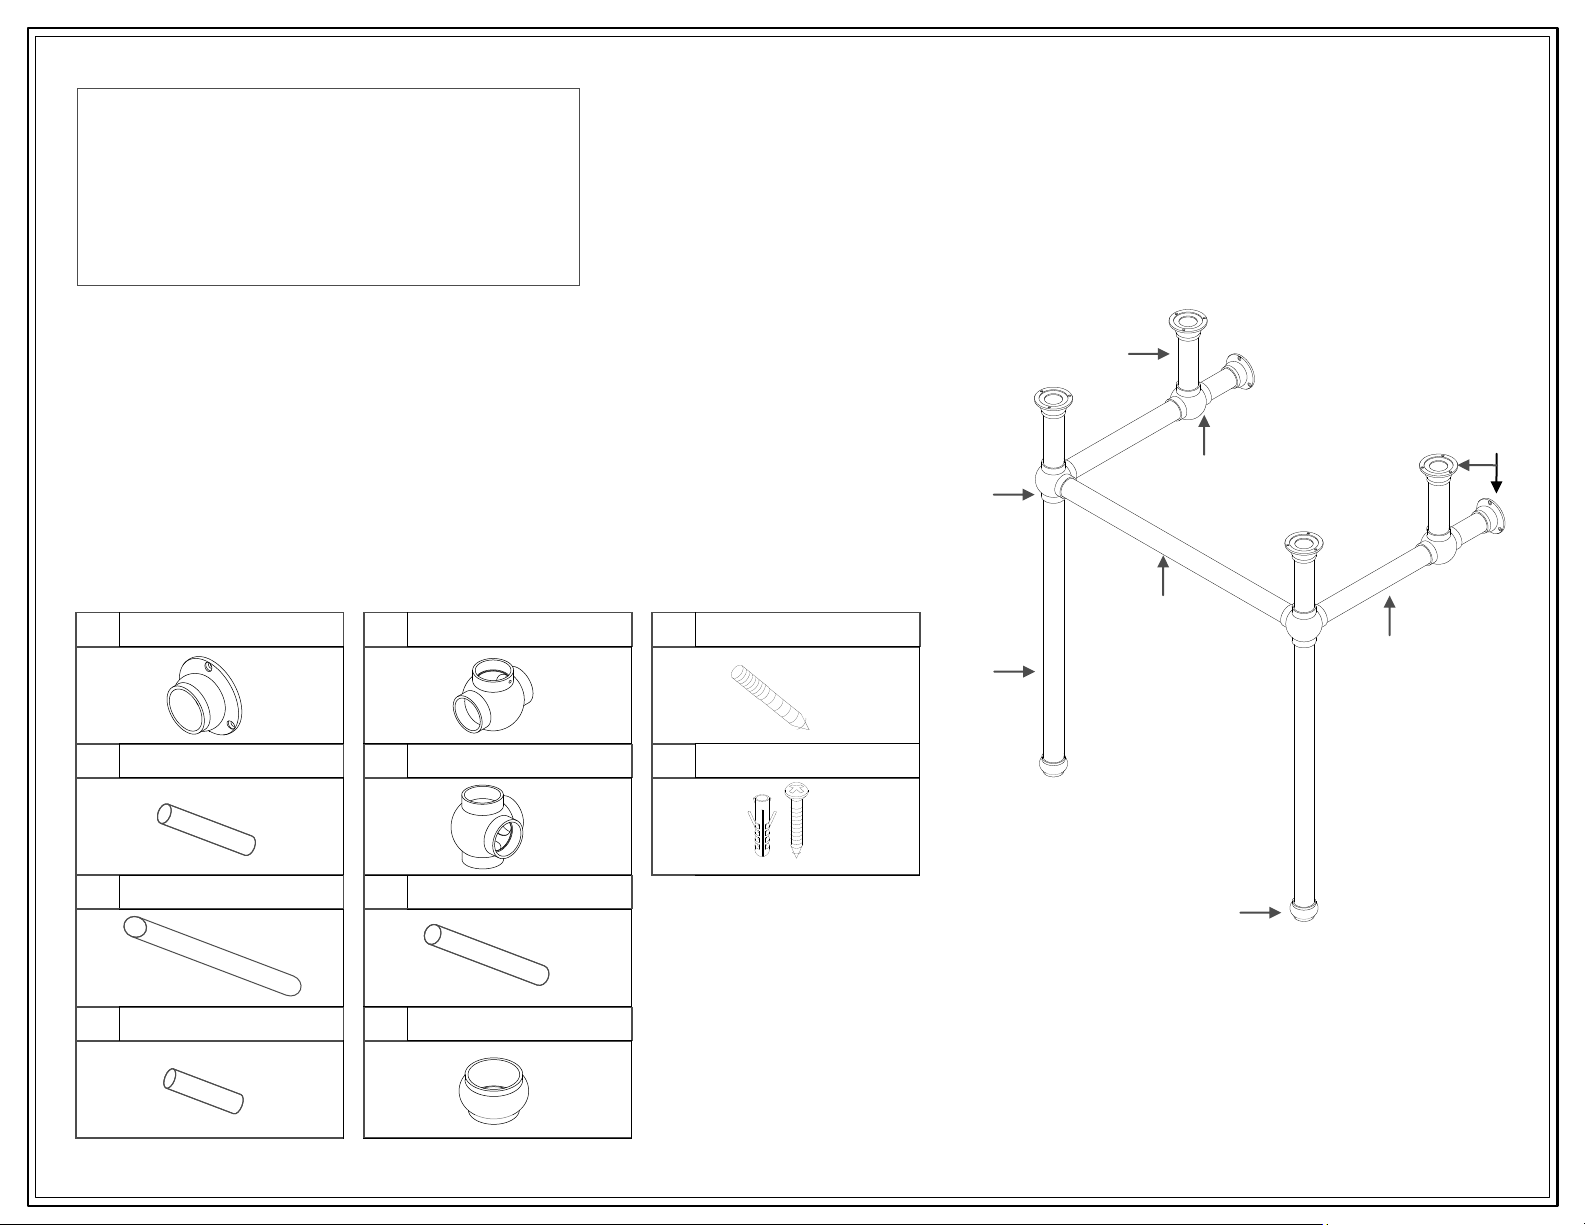
PARTS
(A) Escutcheon x 6 pcs (E) 3-Way Joint x 2 pcs (I) Floor Screw x 2 pcs
D
A
E
F
G
B
C
(B) Side Bar x 2 pcs (F) 4-Way Joint x 2 pcs (J) Screw & Anchor x 6 pcs
(C) Support Bar x 2 pcs (G) Front Bar x 1 pc
(D) Support Bar x 2 pcs (H) Foot Flange x 2 pcs
H
Page 3
INSTALLATION STEP
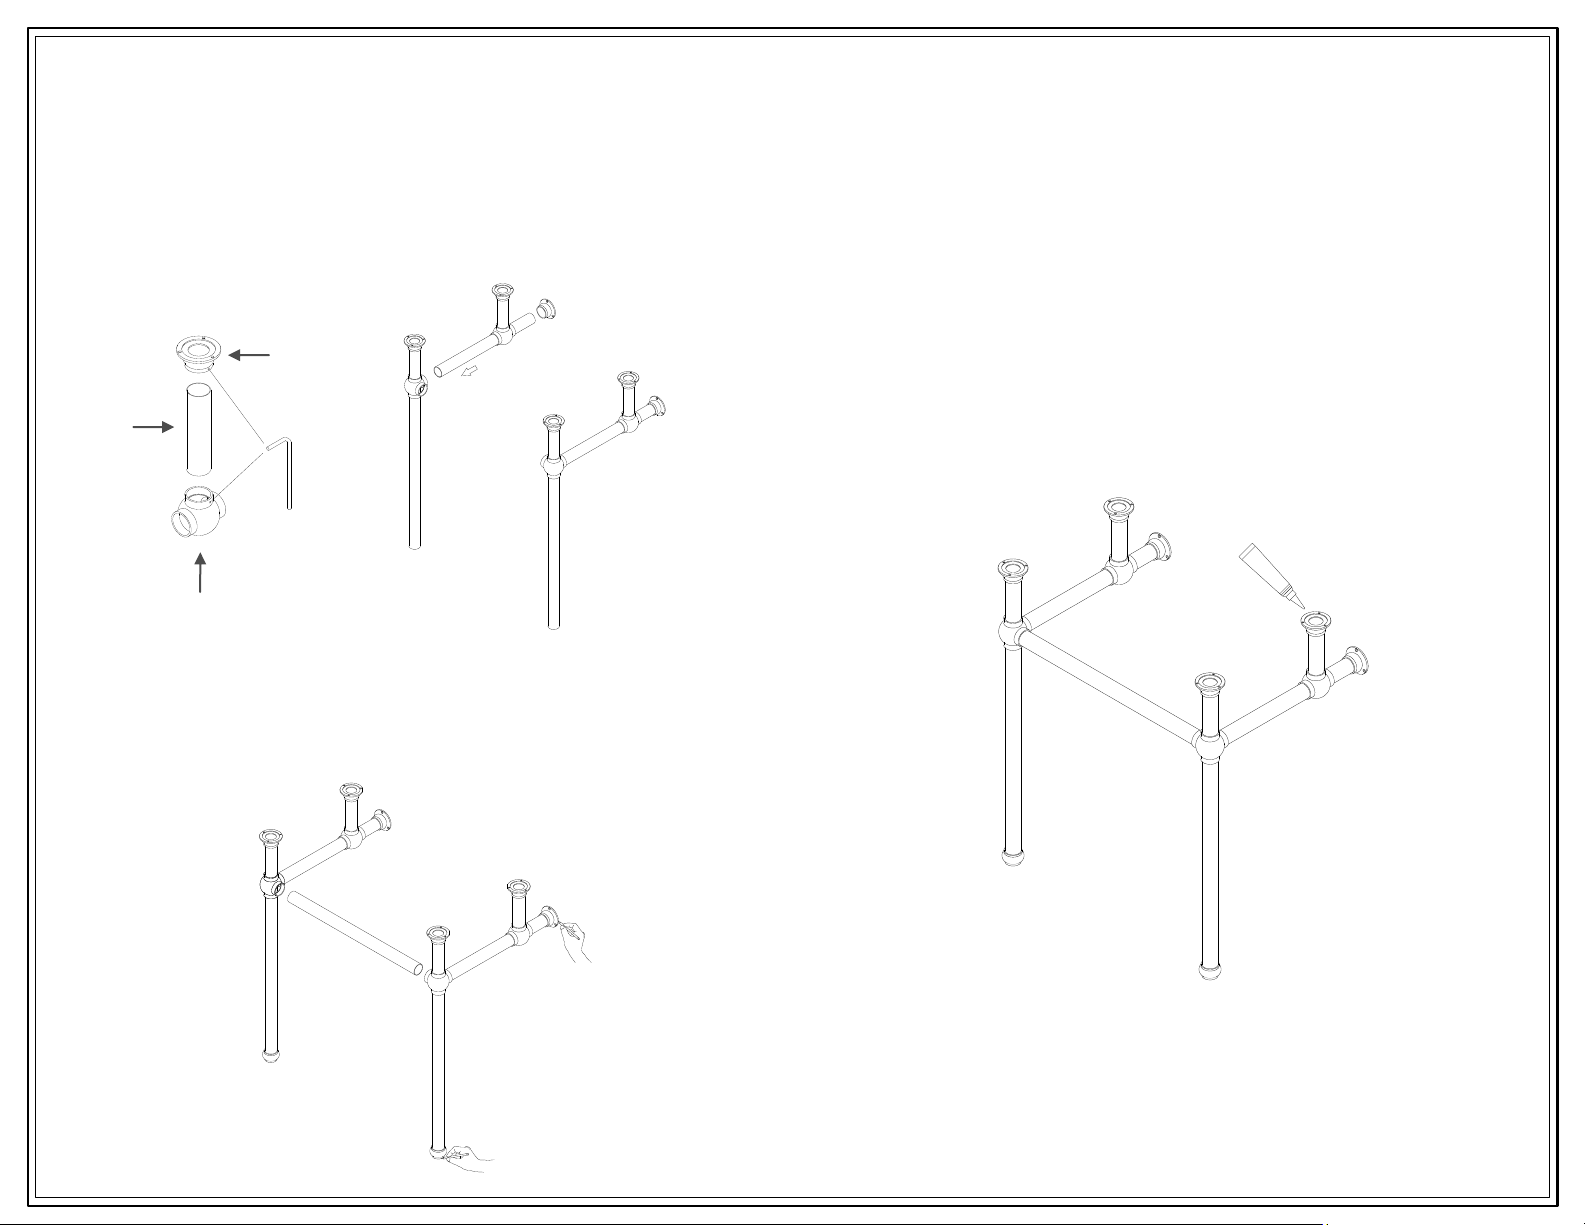
1) Assemble the back support as shown. Tighten set screw on the escutcheon
and 3-way joint.
2) Assemble support legs as shown. Use a level to ensure the top
escutcheons are straight. Tighten set screws on the 3-way joints, 4-way joints
and all escutcheons.
A
D
E
3) After assembling both sides support legs, attach front bar to join both sides
and tighten set screw.
4) With one person on either side of assembled stand, carefully position the
wash stand in desired locatio
escutcheon screw holes on wall as well as the perimeter of the location of
foot flanges on floor.
se a pencil mark position of wall
n. U
5) Thread the floor screws with foot flange and screw it into floor.
rill holes on wall for wall escutcheons and push anchors flush with wall
6) D
sert the support legs into foot flanges and fasten wash stand to wall wi
7) In
unting screws
mo
8) Apply a thin coat of silicone on the top flanges to secure the counter top to
stand.
(If
counter top nee
on escutcheons as necessary to stabilize.)
.
slight leveling adjustment, place attached sponge pads
d
th
Page 4
MARBLE TOP INSTALLATION
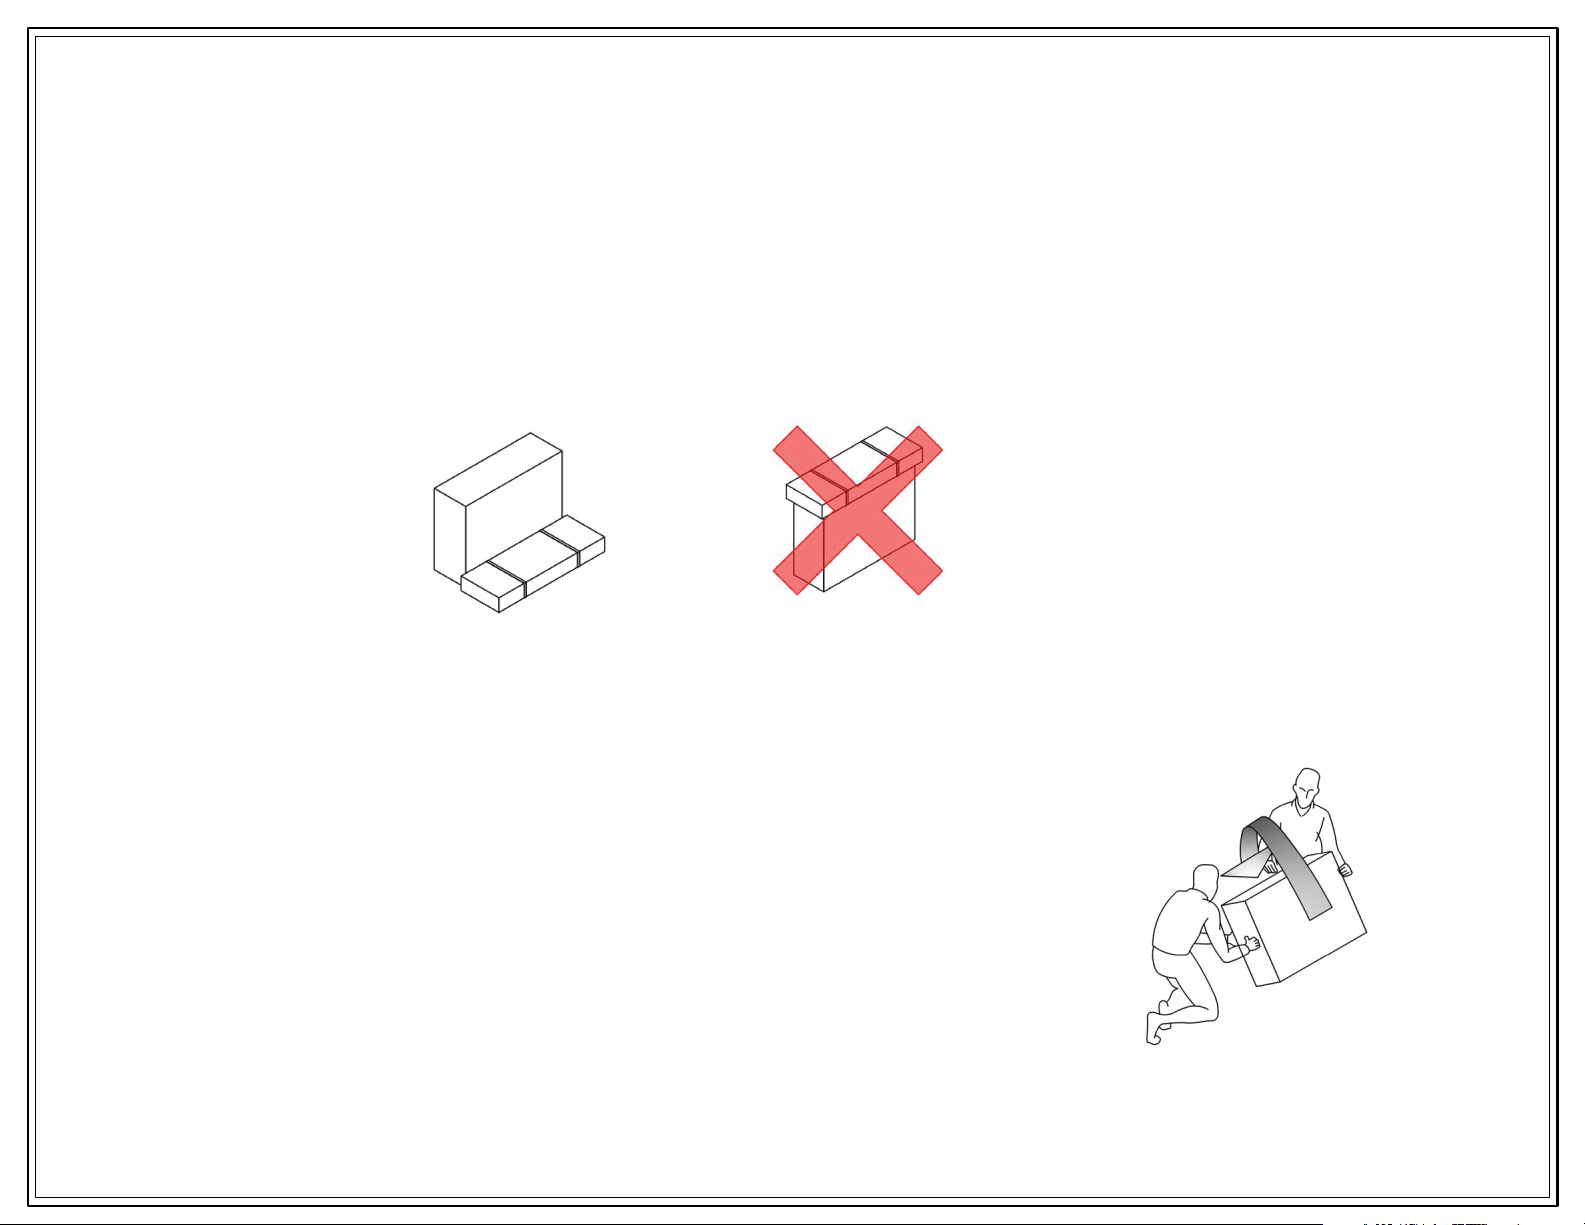
Storage:
1. Keep marble top in it’s box until installation
2: Store box vertically in a place safe from being hit or knocked over
3. Do not stack anything on top of the box
Opening Box:
1. Before unpacking please make sure you have installation requirement present:
> A professional two man crew
> Tools and materials required:
a. Flat, non-abrasive work surface, such as a soft blanket
b. Carpenter’s level
c. Sealant
2. Carefully, without allowing any free fall, rotate the box from vertical to at.
(This is the only time the box placed horizontally.)
Page 5
MARBLE TOP INSTALLATION
Installation:
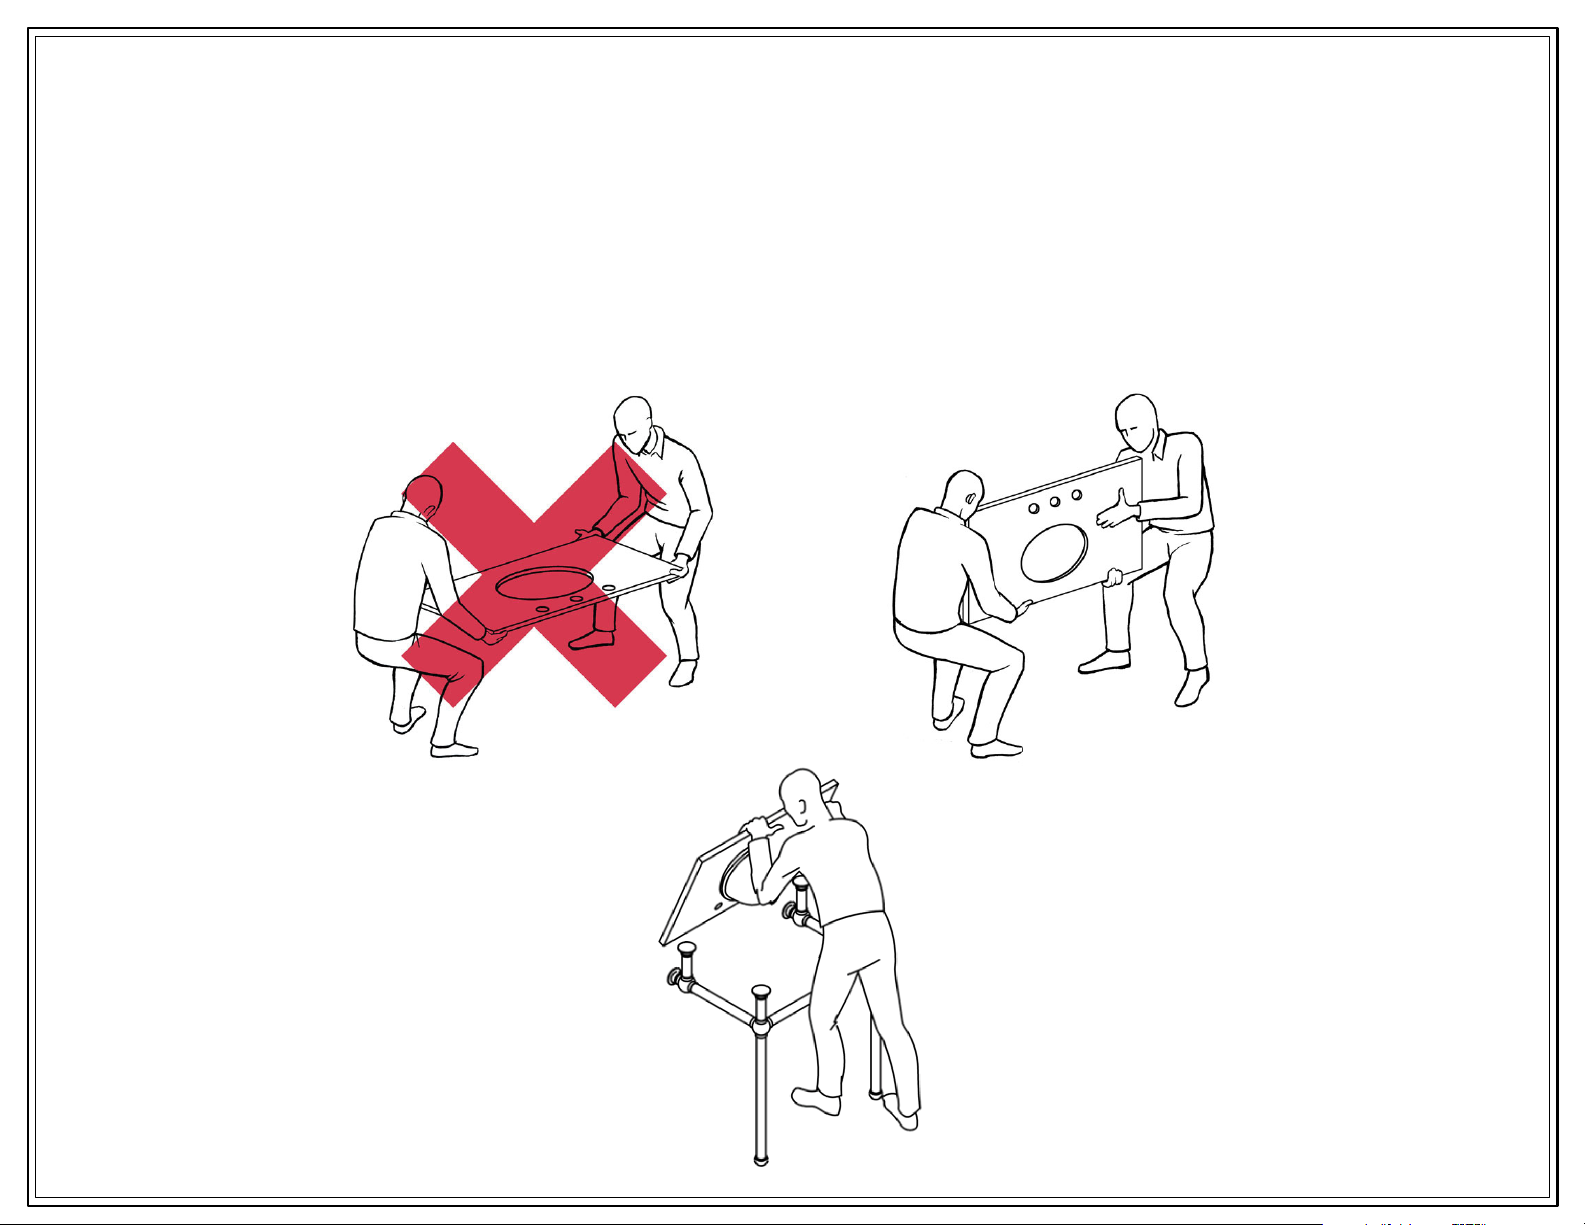
1. Always use a two man crew, a single person crew is much more likley to cause damage
2: Apply sealant to secure marble top on washstand
 Loading...