

Page 1
ASSEMBLY INSTRUCTION
1
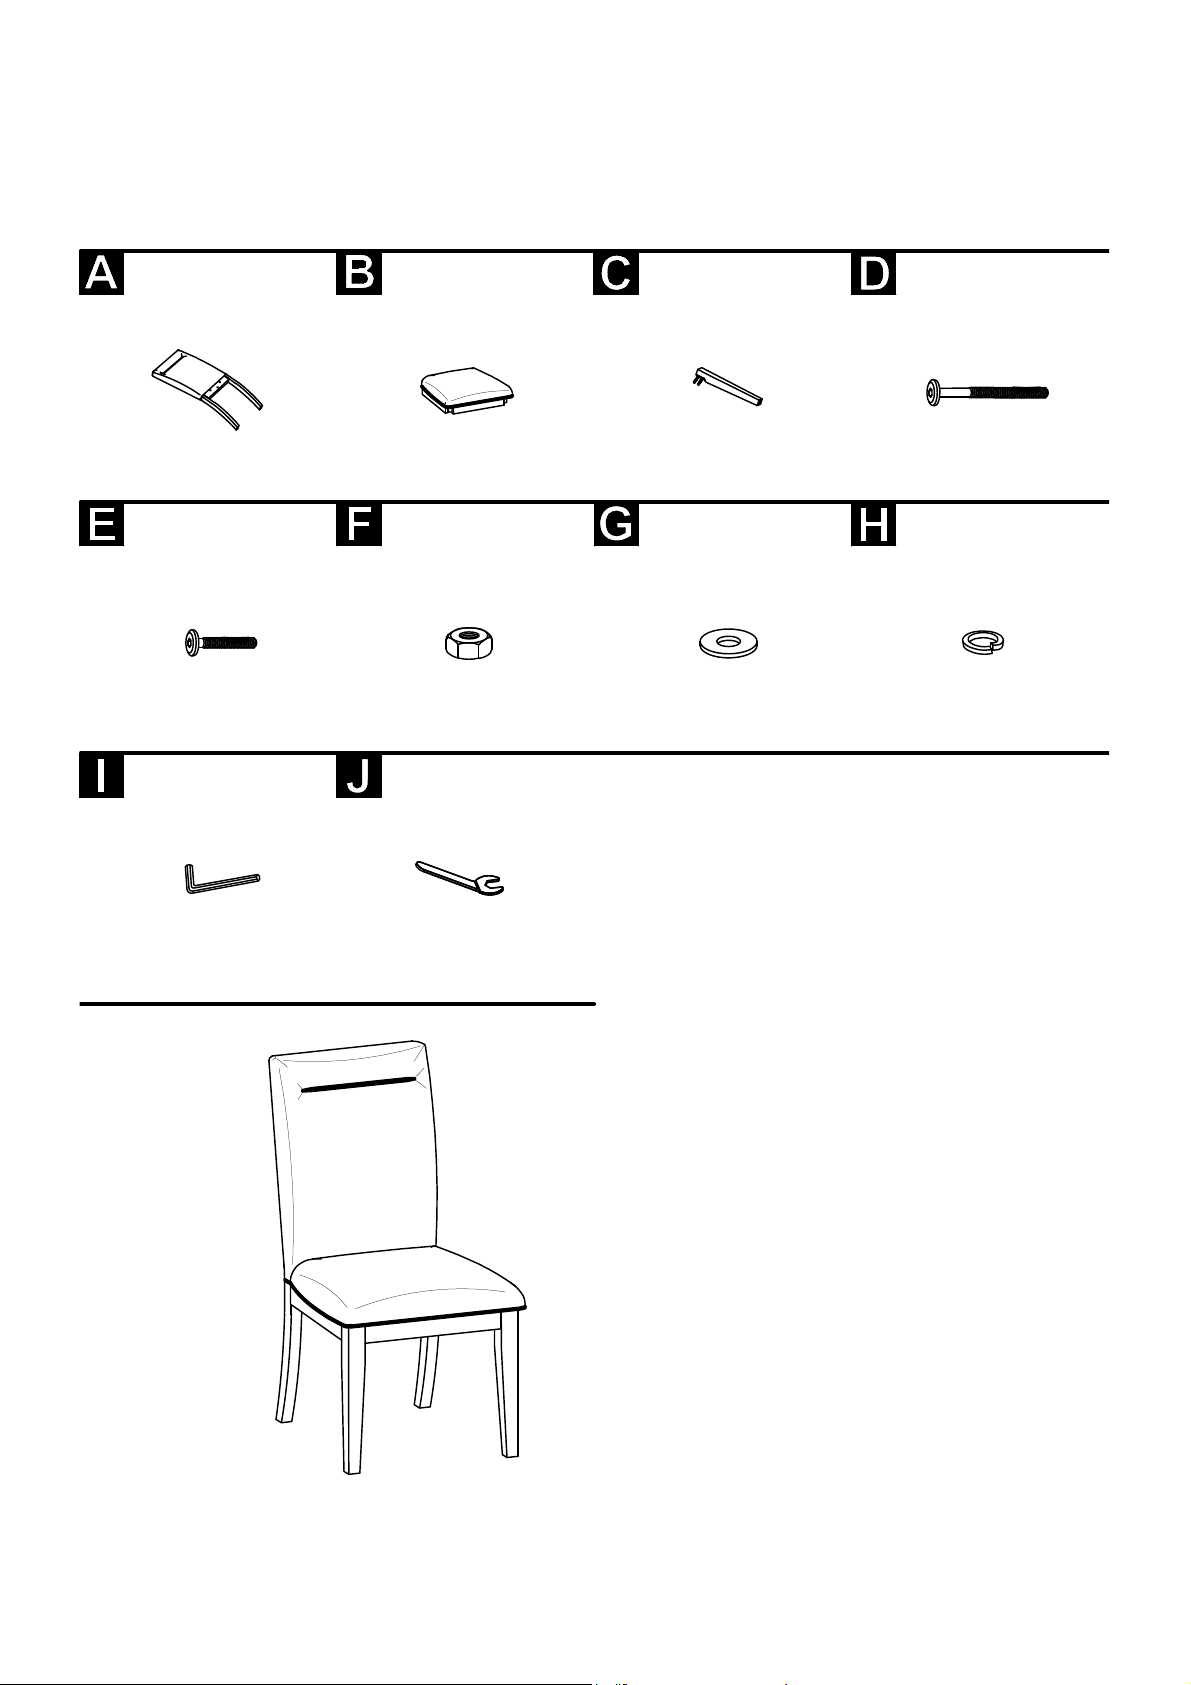
Chair Back Seat Cushion
Front Legs Bolts
Ø1/4''x75mm
Bolts
Ø1/4''x40mm
Hex Nut
Ø5/16''x12mm
Flat Washer
Ø5/16''x19mm
Lock Washer
Ø5/16''x13mm
3pcs
4pcs
11pcs 11pcs
1pc 1pc
1pc 1pc 2pcs 4pcs
Allen Key
4mm
Wrench
12mm
This page lists all the contents included in
the box. Please take the time to identify the
hardware as well as the individual
components to this product. As you unpack
and prepare for assembly, place the
contents on a carpeted or padded area to
protect them from damage.
DINING CHAIR
Page 2
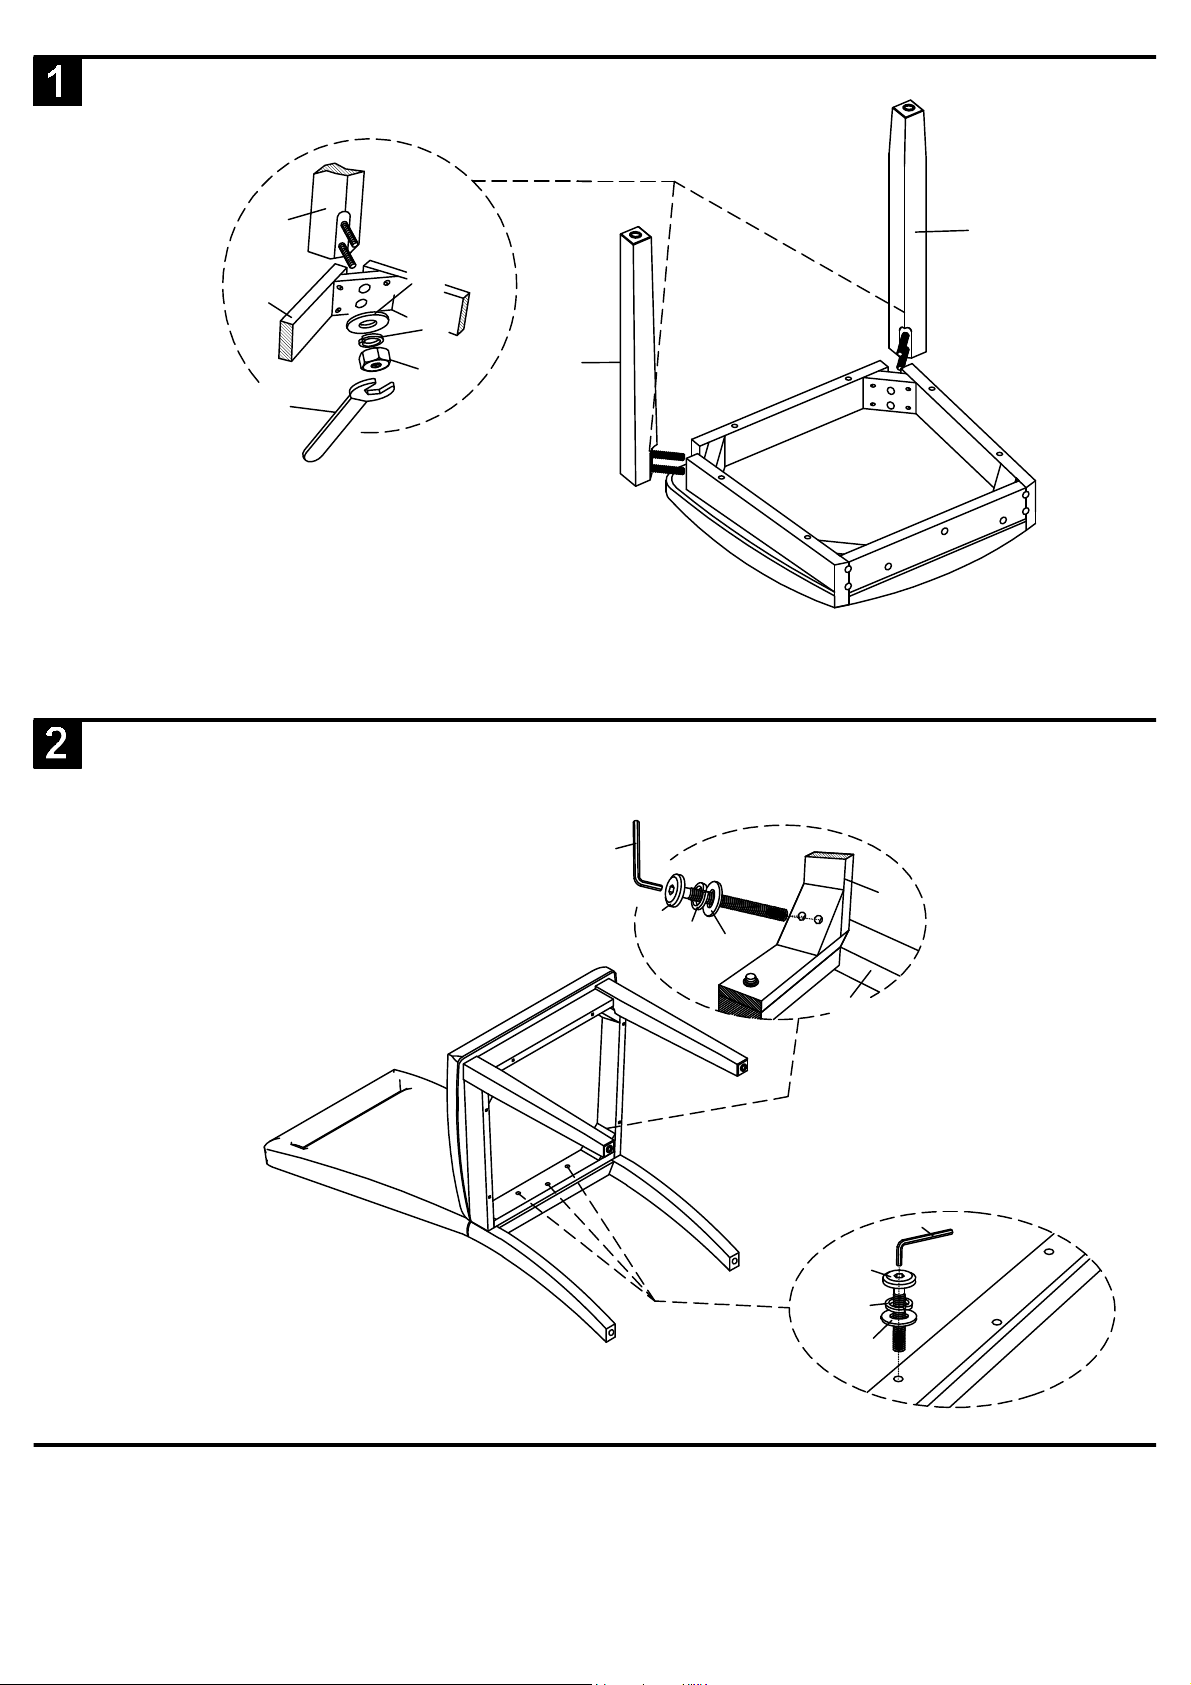
Attach the Front Leg (C) to Seat Cushion (B) using Flat Washer (G), Lock Washer (H) and Hex Nut
(F) by Wrench (J). Do not fully tighten.
Cleaning & Care
Treat surface with care. Surface is resistant to scratches but is not scratch resistant. Clean surface with a
dry or damp soft cloth. Do not use abrasive cleaners. Hardware may loosen over time. Periodically check
that all connections are tight.
2
Attach Seat Cushion (B) to Chair Back (A) by securing the Flat Washer (G), Lock Washer (H) and
Bolt (D) on corner. Flat Washer (G), Lock Washer (H) and Bolt (E) onto back rail and tighten with
Allen Key (I). Hand tighten only at this moment by using Allen Key (I).
Take the Wrench, and turn the bolts until the legs are secure.
DO NOT TIGHTEN COMPLETELY.
Stop when you feel you are adding force to tighten the bolt.
Stand chair up on an
even surface and
check that it is
Helpful Tip:
-Instead of applying
downward pressure
while reaching
under to tighten
bolts, have
someone sit in the
chair while you
tighten the bolts.
B
A
C
C
B
C
G
H
F
J
B
I
D
H
G
E
H
G
I
 Loading...