

GREMSY PIXY F User Manual

REVISION HISTORY
DATEREVISION DESCRIPTION
LEGEND
1.0 December 1, 2018
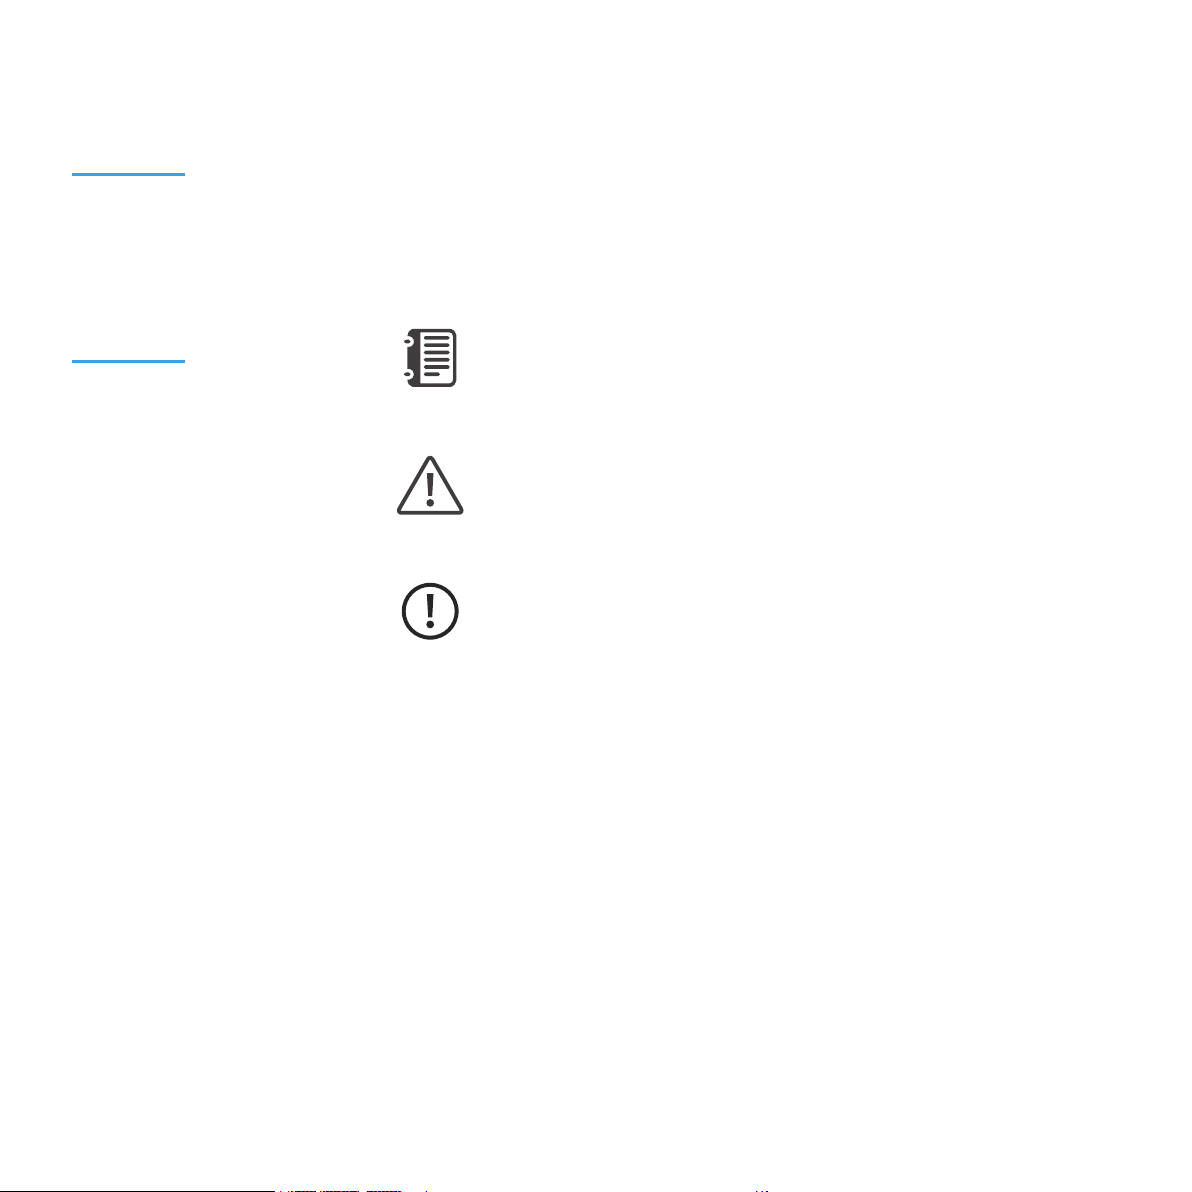
Notes are used to highlight special operating conditions or steps of a
procedure.
NOTE
Warnings are used to highlight procedures which, if not strictly
observed, may result in personal injury or loss of life.
WARNING
Tips.
TIPS
User Manual

CONTENTS
Revision History 2
Legend 2
GETTING STARTED 5
Introduction 6
Features 7
Hyper Quick Release With Intergrated HDMI
Plug & Play
Heated & Temperature Controlled IMU
High Performance Gimbal Controller
Clean Design - Internal Wiring
Built for Aerial Work
Specications 9
PIXY F I/O Connectors 10
Hyper Quick Release Connectors & Pinouts
Camera Interfaces
What’s In The Box 13
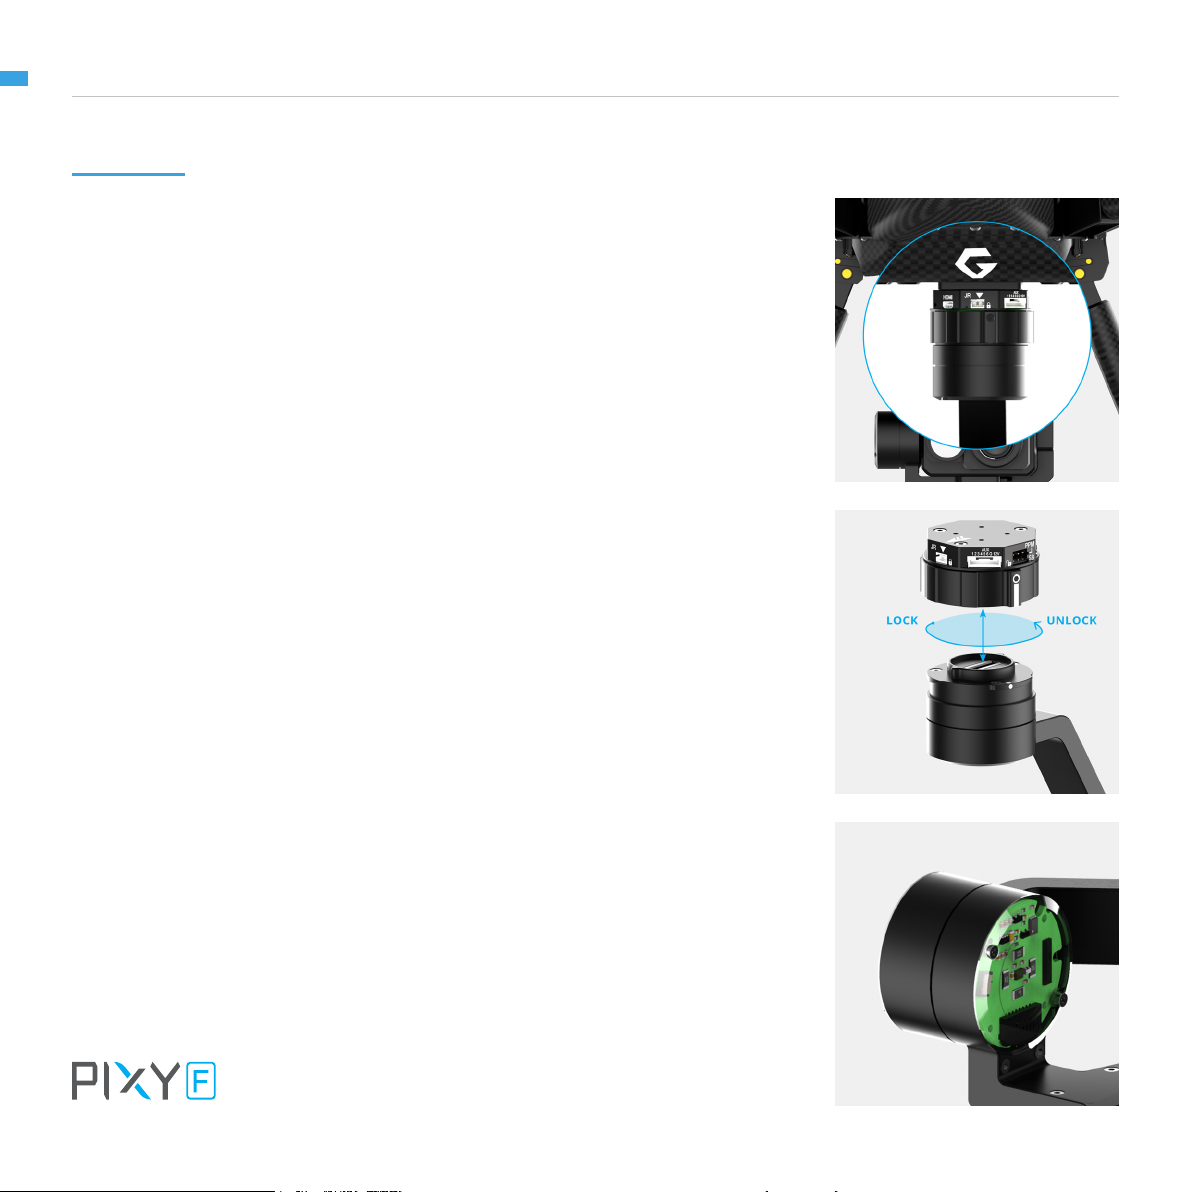
Hyper Quick Release 14
Mounting Hyper Quick Release
Connect
Disconnect
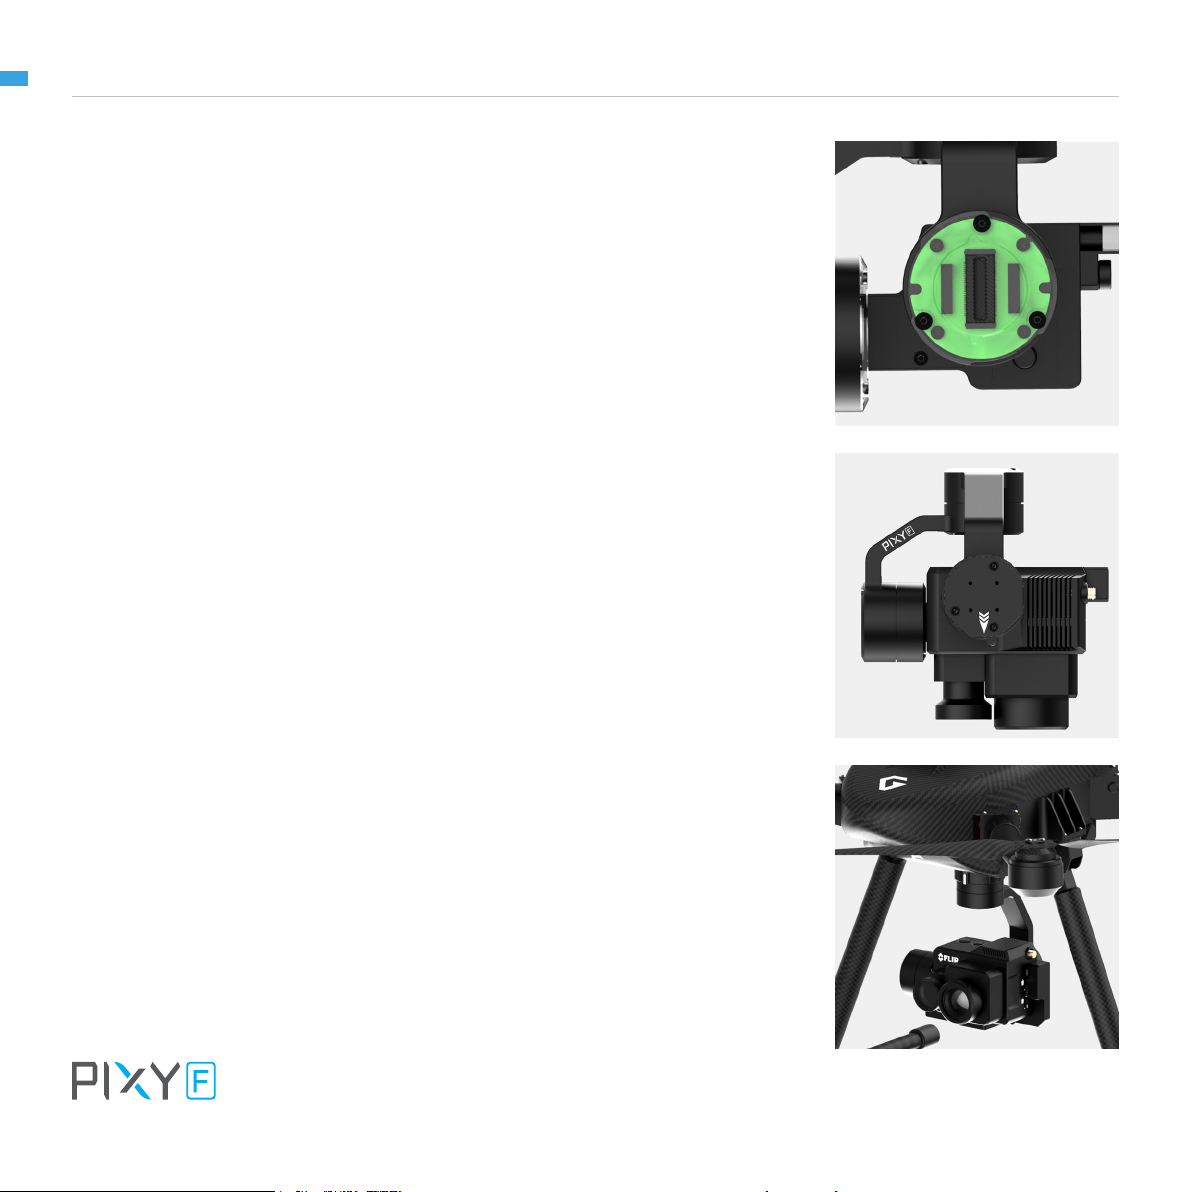
Mounting The Camera Flir Duo Pro R 17
Mounting The Camera
Powering Up The PIXY F 19
Step 1
Step 2
Step 3
Status LED Indicator 20
Operation Modes 21

PIXY F Has 2 Operation Modes
PIXY F Supports
Working Operation 22
Swithing Between Modes 23
INSTALLING SOFWARE 24
Steps To Connect 25
Follow Mode Settings 26
Speed
Smooth
Window
Tilt Lock
Rotation Limit
Up Limit
Down Limit
Window
IMU SENSOR 28
Gypro Calibration 29
Accelerometter Calibration 29
REMOTE CONTROL 30
SBUS/PPM Settings 31
Receiver Connection
Channel Setting
UPGRADING FIRMWARE 33
How To Upgrade 34
TROUBLESHOOTING 35

GETTING STARTED

GETTING STARTED
6
INTRODUCTION
PIXY F is a 3-axis gimbal in a PIXY line gimbal optimized for FLIR DUO PRO R in
terms of weight, small form factor. Moreover, PIXY F features ease of use and
Hyper quick release with integrated HDMI, a variety of I/O interfaces and ability to
start up in 2 seconds.
USER MANUAL
GETTING STARTED
FEATURES
7
HYPER QUICK RELEASE WITH INTERGRATED HDMI
PLUG & PLAY
New mechanical and electrical integration
quick release features high-speed
connectors allow for HDMI transmission and
other I/O interface. A variety of ports on QR
allow quickly interface with multiple devices
such as 3rd party ight controller, remote
control, auxiliary I/O.
No balancing nor tuning is required. Ability
to start up in 2 seconds enable the gimbal to
be ready in any time critical mission.
HEATED & TEMPERATURE CONTROLLED IMU
USER MANUAL
Heated and temperature controlled IMU
sensor allows reliable performance even in
extreme weather. Temperature is maintained
within 0.2 degrees Celsius accuracy.
GETTING STARTED
8
HIGH PERFORMANCE GIMBAL CONTROLLER
CLEAN DESIGN - INTERNAL WIRING
Advanced gimbal controller designed and
made by Gremsy based on a 32 bit high
performance ARM microprocessor providing
fast response and accurate calculation.
Sensor data and motors correction are
updated as fast as 2000 times per second to
enable incredibly smooth footage.
No exterior wires, more solid. This clean
design helps the PIXY F overcome wind
resistance with ease to bring out the best
video quality while staying agile.
BUILT FOR AERIAL WORK Light weight and small form factor, PIXY F
could be mounted to various ying platforms
and enable longer ight time.
USER MANUAL

GETTING STARTED
9
SPECIFICATIONS
Product Name
System Type
Weight
Camera
Construction
Input Voltage UBEC
Input Voltage Gimbal
Working Current
Connection
Pixy F
3-Axis Digital Gyro-Stabilized
0.81 lbs / 370 g
Flir Duo Pro R
All Aluminum
14 – 52V
12V / 5A
Static Current 400mA @12V
Dynamic Current 800mA @12V
Locked Motor Current Max 3.5A @12V
USB, CAN, UART
USER MANUAL
OS Platform Supported
Single Operator
Dual Operator
Pan Range
Tilt Range
Roll Range
Windows / Mac
Follow Mode / LB2
SBUS / Spektrum / PPM / LB2
+/- 320 degree
- 45 degree / +135 degree
- 45 degree / 90 degree
GETTING STARTED
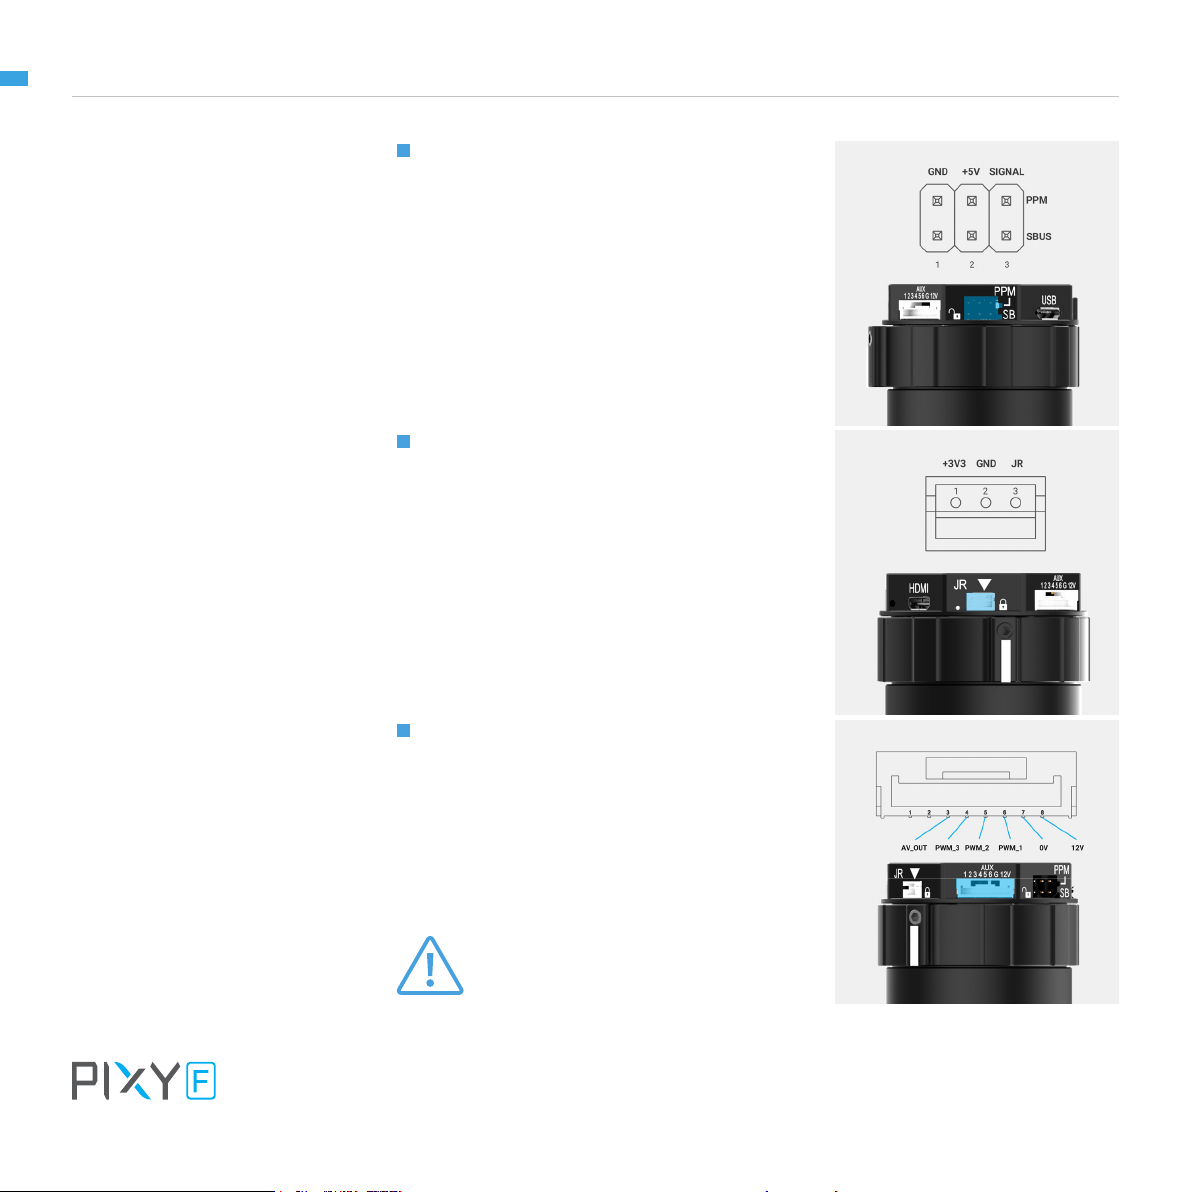
PIXY F I/O CONNECTORS
10
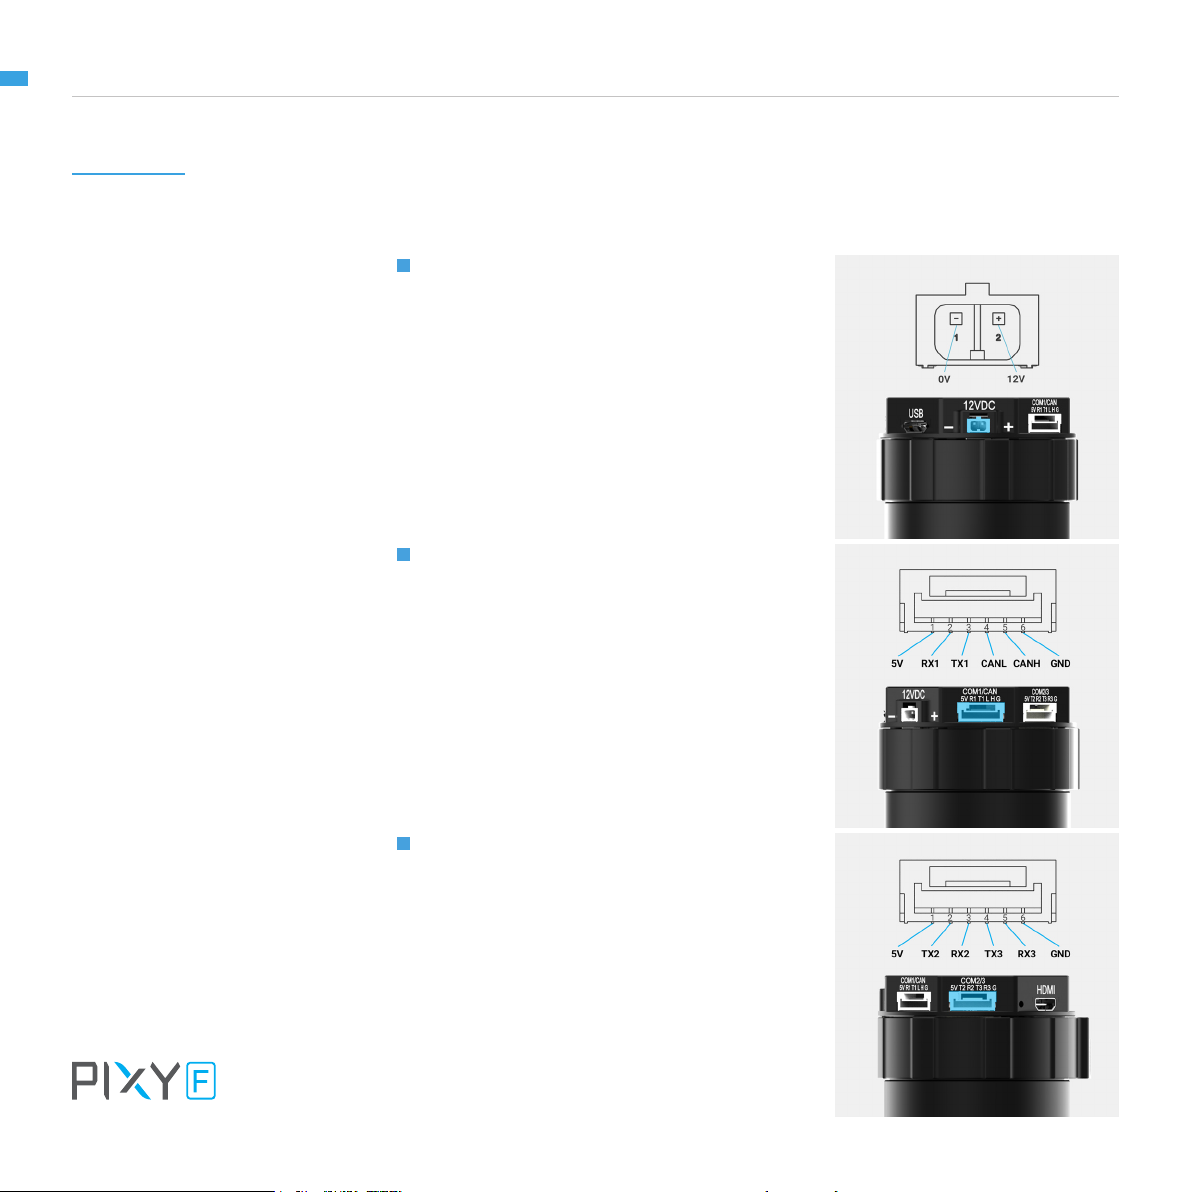
HYPER QUICK RELEASE CONNECTORS & PINOUTS
POWER: 12V input . Connect the stable
12V output from the provided UBEC to this
connector .
The UBEC allows 14V-52V input range and
output 12V/5A
Connector type: SM02B-SFKH-TF
COM1/CAN: COM1 is a serial protocol
(UART) port which is used to interface with
computer via USB. CAN is to interface with
DJI Flight controller.
Connector type: SM06B-GHS-TB(LF)(SN)
COM2/COM3: COM2/COM3 are serial
protocol (UART) port, these port are
internally connected to COM2/COM3 port on
the gimbal controller. COM2 is to interface
with Pixhawk via Mavlink protocol or other
modules that use serial protocol (UART).
COM3 is reserved for future use.
USER MANUAL
Connector type: SM06B-GHS-TB(LF)(SN)
GETTING STARTED
11
SBUS/PPM: To interface with SBUS/PPM
receiver. This port is internally connected to
SBUS/PPM port on the gimbal controller.
JR: Connect satellite receiver to the JR
port on the gimbal controller
Connector type: JST S3B-ZR
USER MANUAL
AUX: Provide 12V output (1A max) to
power camera and accessories .
S1, S2, S3, S4, S5, S6 (0.25A max) together
with 12V output are used for interfacing
with Flir Duo Pro R camera and internally
connected with 10 pin JST connector on the
camera side.
Do not apply power to AUX port
at pin 7 and 8, doing so may
WARNING
damage the electronics of the
gimbal
Connector type: GHR-08V-S
GETTING STARTED
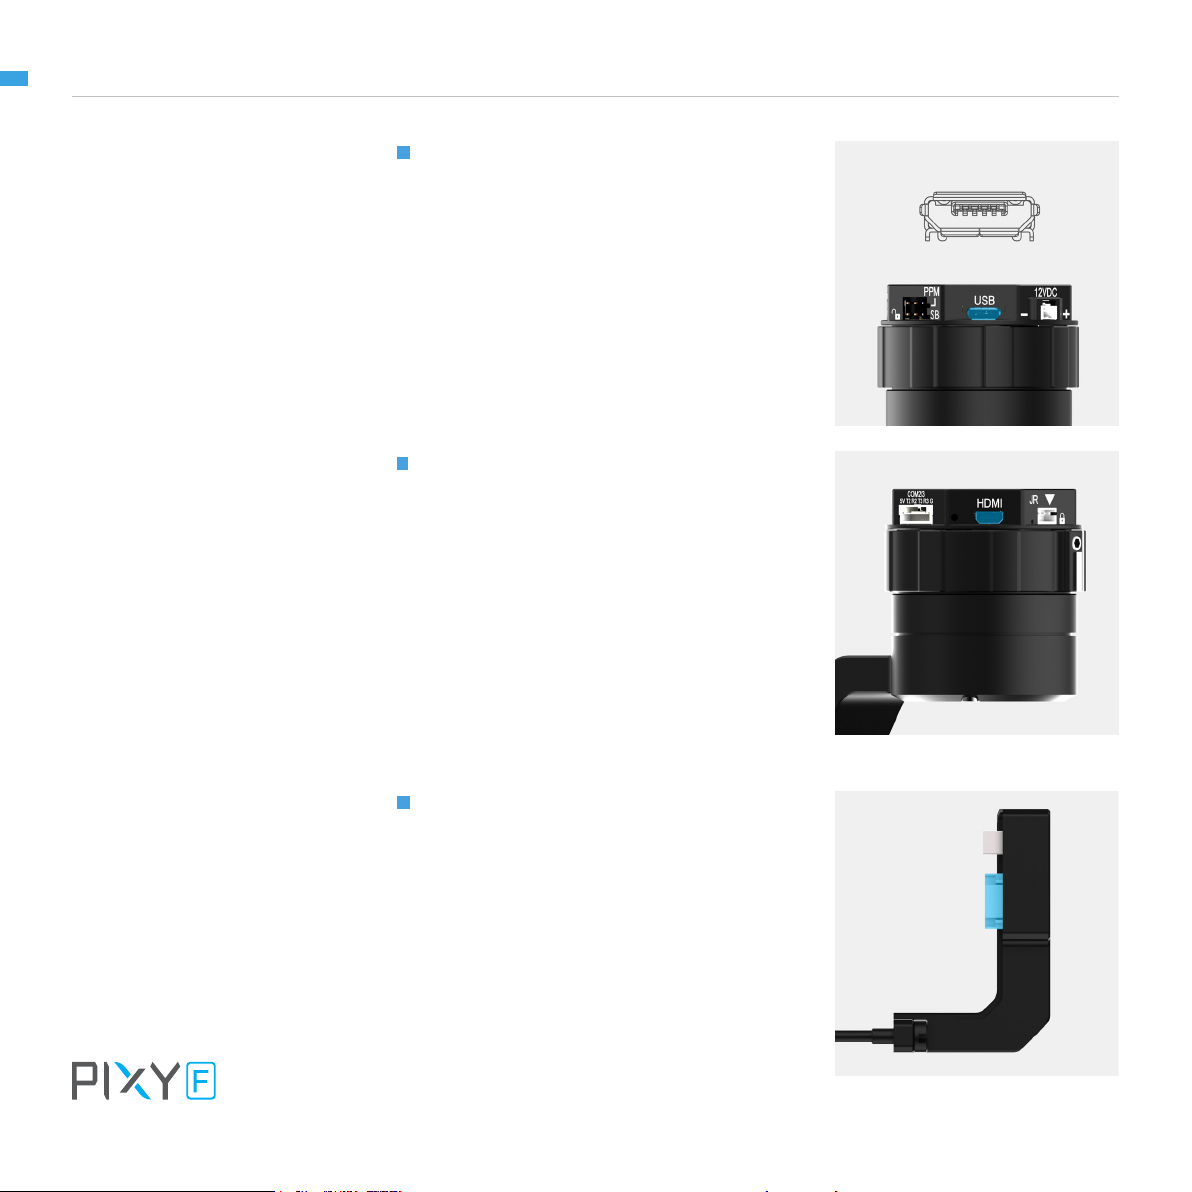
12
USB: To interface with computer or
upgrade rmware.
Connector type: Micro USB type B
HDMI: to output video from the camera
Connector type: HDMI micro
CAMERA INTERFACES Accessory cable: This cable allows
camera interfacing which is internally
connected to AUX port on the QR.
Connector type: JST GHR-10V-S
USER MANUAL
 Loading...