

Page 1
LED WALL PACK LIGHT INSTRUCTION
Application:
Available in tunnel (except for motor vehicle tunnel), workshop,
warehouse, factory, house, building exterior, etc.
Cautions:
1. Can not use the electric generator to test the LED lamp.
2. Please abide by related country, regional and local law and
regulations when install this fixture.
3. Please turn off the power before installation or maintenance.
4. Proper earth grounding is required to ensure safety.
Notice:
1. To avoid possibility of electrical shock or fire, the installation
personnel must have professional electric knowledge.
2. Please wear gloves to avoid injury before installation.
3. If any smoke or spark of the wire happened, please turn off the
power immediately and notify relevant personnel.
Attention:
1. Please check if there is any damage during shipping.
If so, please contact manufacturer timely.
2. Please read the installation instruction carefully to check whether
all the accessories are complete. After confirmation, then install the
fixture according to installation steps.
Wiring Diagram:
Notice:
All 3 installation methods meet UL requirement. The first
installation method meets DLC requirement if fixtures are
installed wihtout adjusting viewing angle. The second and third
installation methods do not meet DLC requirement.
This product is available with photocell. Installations remain the
same with or without it.
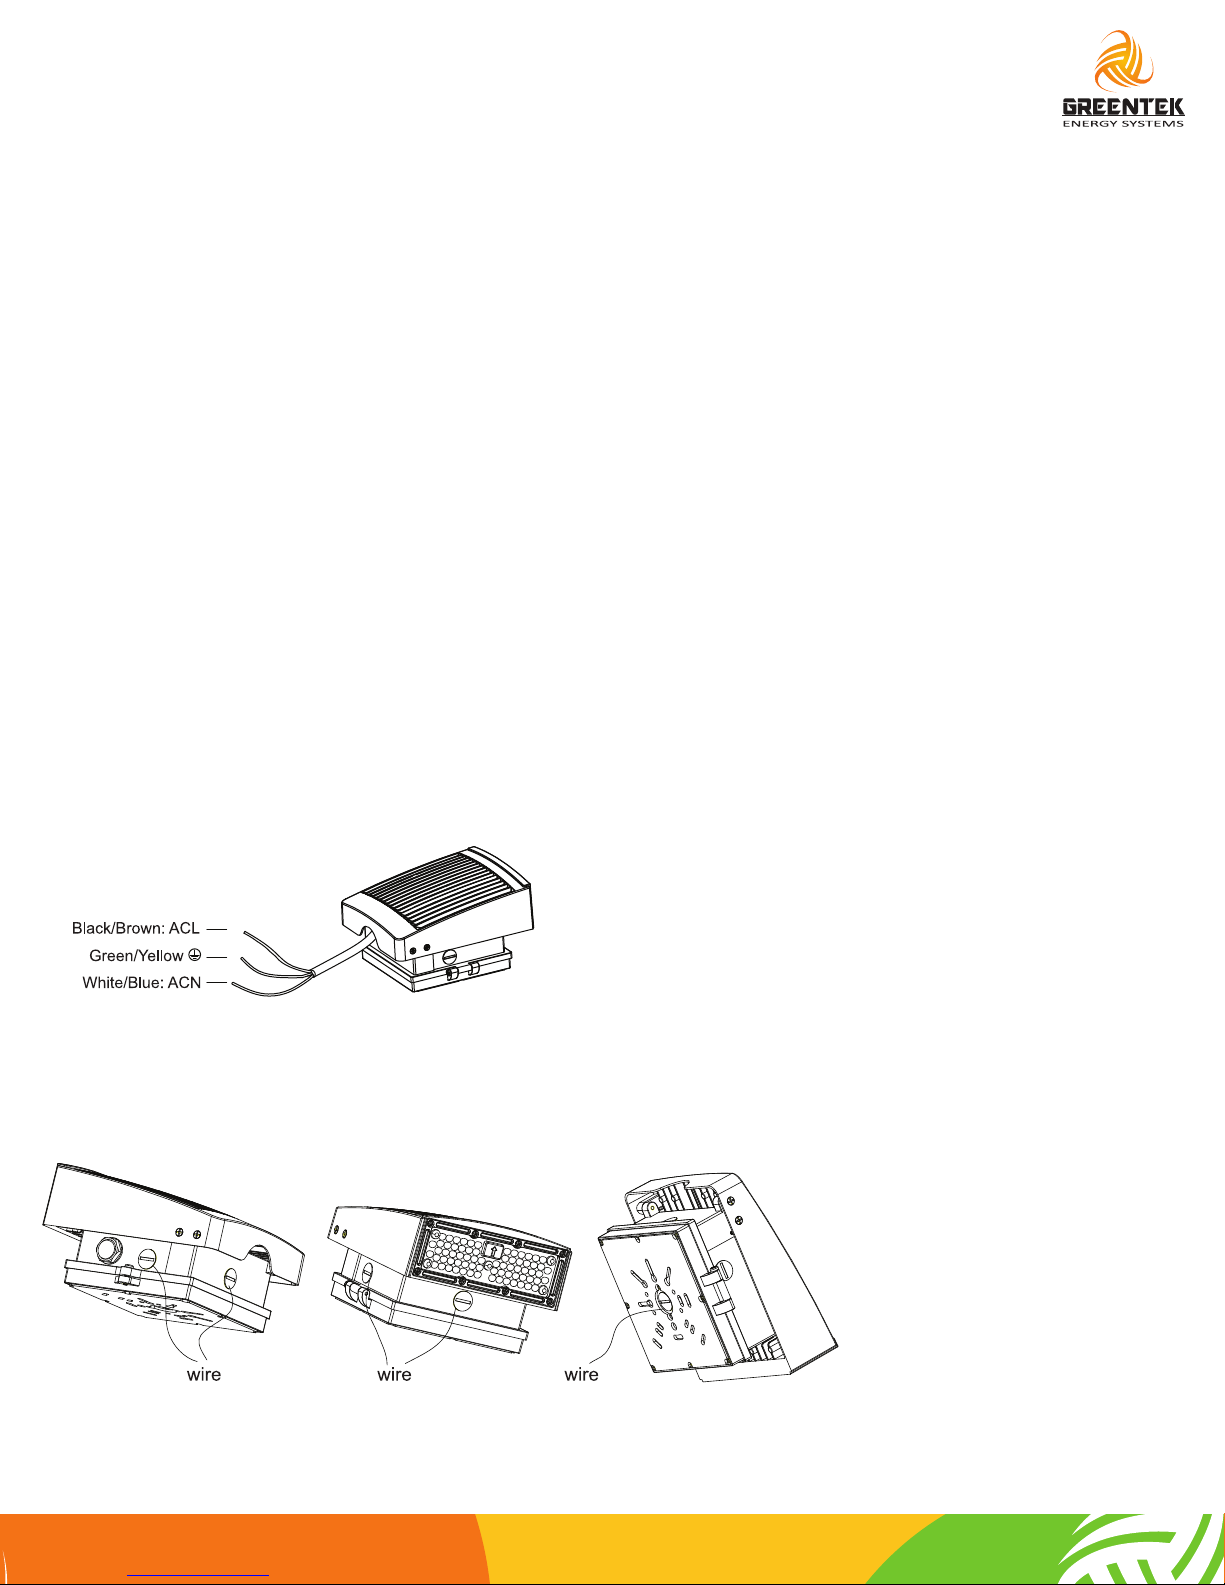
Standard wire
L/live wire: Black\Brown
N/null wire: White\Blue
Ground wire: Green\Yellow-green
Warning/Arertissement:
MIN 75ºC SUPPLY CONDUCTOR
THIS PRODUCT MUST BE INSTALLED IN ACCORDANCE
WITH THE APPLICABLE INSTALLATION CODE BY A
PERSON FAMILIAR WITH THE CONSTRUCTION AND
OPERATION OF THE PRODUCT AND THE HAZARDS
INVOLVED
LES FILS D’ALIMENTATION 75ºC MIN
CE PRODUIT DOIT ÊTRE INSTALLÉ SELON LE CODE
D’INSTALLATION PERTINENT, PAR UNE PERSONNE QUI
CONNAÎBIEN LE PRODUIT ET SON FONCTIONNEMENT
AINSI QUE LES RISQUES INHÉRENTS.
5 different outlets are available for driver wire, see below picture.
GreentekEnergySystems.com
Page 2
The installation of the product can be used when it is
marked with “ ”.
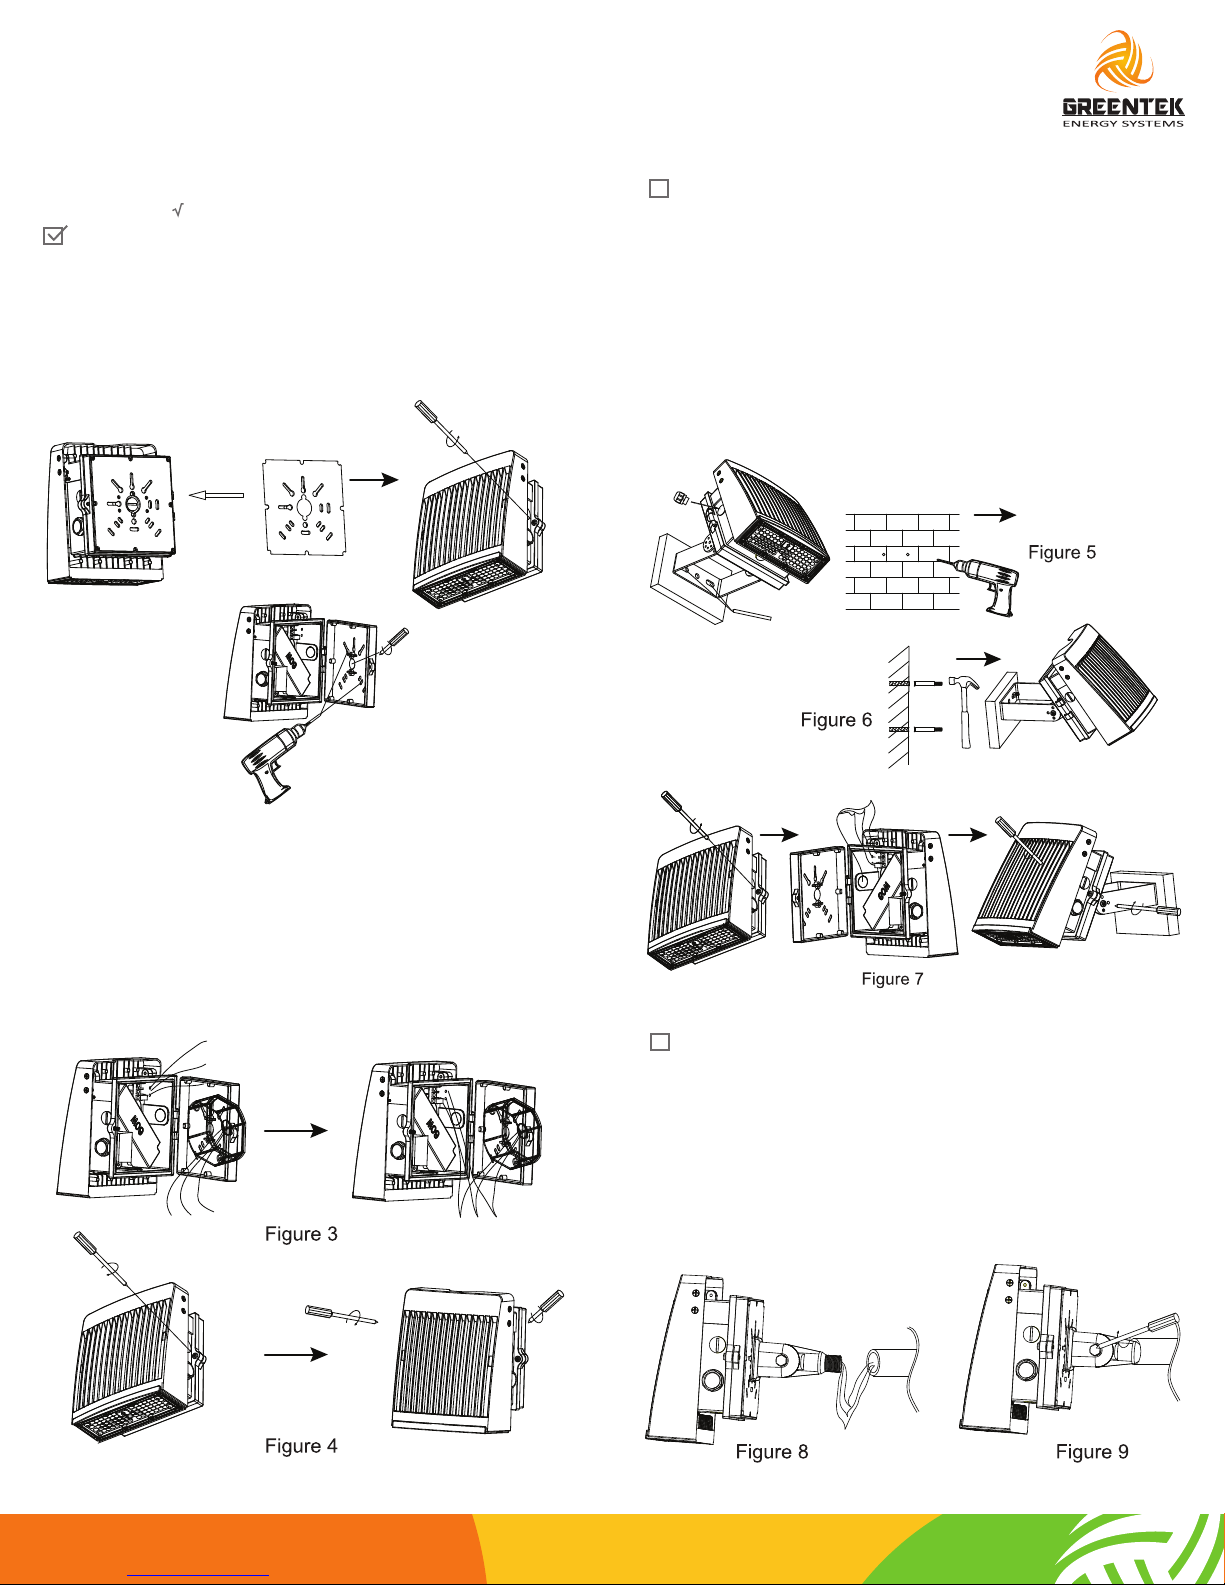
Installation I: Wiring from the bottom of the luminare
1. Attahed EVA pad on the back of wall pack. Loosen the screws
on the back cover of led fixture with screwdriver. (See Figure 1)
2. Drill holes on the back ocover corresponding to the wiring
holes on junction box. Unscrew the plug. (See Figure 2)
Installation II:
1. Put the bracket on the wall, draw a point with a pencil or hard
project through the bracket hole, Install the water joint on the
wiring hole. (See Figure 5)
2. Drill holes on the points and driven into expansion screws.
Fix the bracket on to the wall with nuts, flat washers and spring
washers. (See Figure 6)
3. Loosen the screws on the back cover and connect wires with
insulation measures. Then tighten the screws. Loosen screws on
the bracket and adjust the wall pack into required angle.
Tighten screws again. (See Figure 7)
3. Pull mains power line through the back cover into fixture, fix
the wall pack onto the junction box with screws. Connect wires
with insulation measures. (See Figure 3)
4. Tighten the screws on the back cover with a screwdriver. Well
installed when the led fixutre can be adjusted to 15º, 30º, or 45º
after screws be loosen. (See Figure 4)
Installation III:
1. Take out the fixture, connect the output wire of the fixture to
mains and make good protection on the wiring connection.
(See Figure 8)
2. Put the wires into threaded rod, then screw the fixture in the
threaded rod. (See Figure 9)
3. Loosen the fix screw of the fixture bracket, adjust viewing
angle, tighten the screw then finish installation. (See Figure 9)
GreentekEnergySystems.com
 Loading...