

Page 1

Rotary Crusher
GT 135 + 155
Operator’s Manual – 2 edition October 2015
Important Note
The information contained in this manual is correct at the time of publication.
However, in the course of constant development, changes in specification are
Inevitable. Should you find the information given in this book different to the
Machine it relates to please contact the “After Sales Department” for advice
Please ensure that this manual is handed to the operator before using the
machine for the first time. The operator must fully understand the contents
of this manual before using this machine.
(If the machine is resold the Manual must be given to the new owner.)
1
GT 135-155
Page 2

Important
The purchaser should ensure that this manual is handed to the operator
before using the machine for the first time and should be satisfied that the
operator fully understands the contents of this manual before being allowed to
proceed. If the machine is resold the Operators Manual must be given to the
new owner.
Fill in the details below, you will find it useful to refer to when ordering spare
part.
Serial No.
Date of Delivery
Dealer’s address
Telephone No.
2
GT 135-155
Page 3

Merkurvej 25, DK-6000 Kolding, Denmark
EU Declaration of Conformity
Adapted EEC directive
EG Guideline 2006/42/EF, 89/392/EEC & 98/37/EC
We, GreenTec A/S, Merkurvej 25, 6000 Kolding, hereby declare that in terms of
its design, method of construction and our execution thereof, the item of
machinery described below complies with the basic health and safety
regulations of the respective EU Directives.
Product: GreenTec GT 135-155
Product code: 99952135
Serial no: 5837235
Type: Rotary Crusher
The EC Declaration only applies if the machine stated above is used in
accordance with the operating instructions.
on behalf of
Date: 26.10.2014 Signature:________ _________________________
John Christensen Sales Director
3
GT 135-155
Page 4

Content
Safety………………………………...……………………………………………….5
Recommendation…………...……………………………………………………….6
Introduction………...………………………………………………………….……..8
Attaching to the Armsystem …...…..…..…………………………………………..8
Setting up & adjustment……………...……………………………………………. 9
Machine protection…………………………………………………………………. 9
Operation / Transportation………………………………………………………..10
Servicing & Maintenance
Safety first…………...……………………………………………………………...11
Torque settings……………………………………………………………………..12
Start up / Daily or Every 8 hours / Year or 150 hours …...…………………….12
Regularly……………………...………………………………………………….…13
Blades………………...……………………………………………………….…….13
Skids…………………………………………………………………………………13
Storage…………………………………………………………………...…………14
GreenTec warranty……….……...………………………………………………..15
4
GT 135-155
Page 5

Safety
3
Warning
Danger – flying objects
keep safe distance from
the machine as long as
the engine is running.
Warning
Stay clear of mower blade
as long as engine is
running.
Warning
Stay clear of swinging
area of implements.
Warning
Shut off engine and remove
key before performing
maintenance or repair work.
Warning
Check all nuts are tight
every 8 hours.
Warning
Carefully read operator’s
manual before handling this
machine. Observe
instructions and safety rules
when operating.
5
GT 135-155
Page 6

Recommendations
Beware of the following Potential Dangers associated with the use of
this machine:
Becoming trapped when hitching or unhitching
Getting caught on rotating power take off (PTO)
Being hit or caught by any moving part, e.g. Blades and drive shaft.
Being hit by flying debris or machine parts due to machine damage
Accidents due to collision with other machines, or debris left on road
Beware of free-swinging blades over centering and falling.
ALWAYS:
Ensure the operator has read this handbook and has been trained to use the
machine.
Ensure all safety guards are in place and all tractor windows closed.
Impact resistant shielding to the tractor is recommended
Before leaving the tractor cab always ensures that the machine is firmly on
the ground, no weight is on the tractor’s hydraulics and the rotor has stopped
spinning.
Check that all guards are properly fitted and there are no damaged or loose
parts. Particular attention should be given to the blades to ensure they are not
damaged, cracked or missing
Inspect work area for wire, steel posts, large stones and other dangerous
materials and remove before starting work.
Ensure that all warning labels are always visible and that they are not
damaged, defaced or missing..
Wear ear defenders if operating without a quiet cab or with the cab windows
open
Ensure tractor guards are fitted correctly and are undamaged
Work at a safe speed, taking into account terrain, passing vehicles and
obstacles
Ensure that the tractor meets the minimum weight recommendations of the
machine manufacturer and that ballast is used if necessary
Check that machine fittings and couplings are in good condition
Follow the manufacturer’s instructions for attachment and removal of machine
from the tractor
Ensure blades are of the type recommended by the manufacturer, are
securely fitted and are undamaged
Disengage the machine, stop the engine and remove the key before leaving
the tractor cab for any reason
Clean up any debris left at the work site.
Ensure that when you remove the machine from the tractor it is secured in a
safe position.
6
GT 135-155
Page 7

NEVER:
Never operate the machine with other people present, as it is possible for
debris, including stones, to be discharged from the front and rear.
Never operate the machine until you have read and understood this
Handbook and are familiar with the controls.
Never use a machine that is poorly maintained or has guards that are
damaged or missing
Never allow an inexperienced person to operate the machine without
supervision.
Never use or fit a machine onto a tractor if it doesn’t meet the
manufacturer’s specification.
Never allow children to play on or around the machine at any time.
Never attempt any maintenance or adjustment without first disengaging
the PTO, lowering to the ground, stopping the tractor engine and applying
the tractor parking brake.
Never leave the cab without removing the ignition key.
Never operate the tractor or any controls from any position other than
from the driving seat.
Never stop the engine with the PTO engaged.
Never operate with blades missing.
Never operate PTO above recommended speed, 540 R.P.M.
Never operate with wire around the rotor. Stop immediately.
Never attempt to use the machine for any purpose other than that it was
designed for.
Never transport with the PTO engaged.
Never enter the working area of the machine (risk of injury!).
7
GT 135-155
Page 8
Introduction
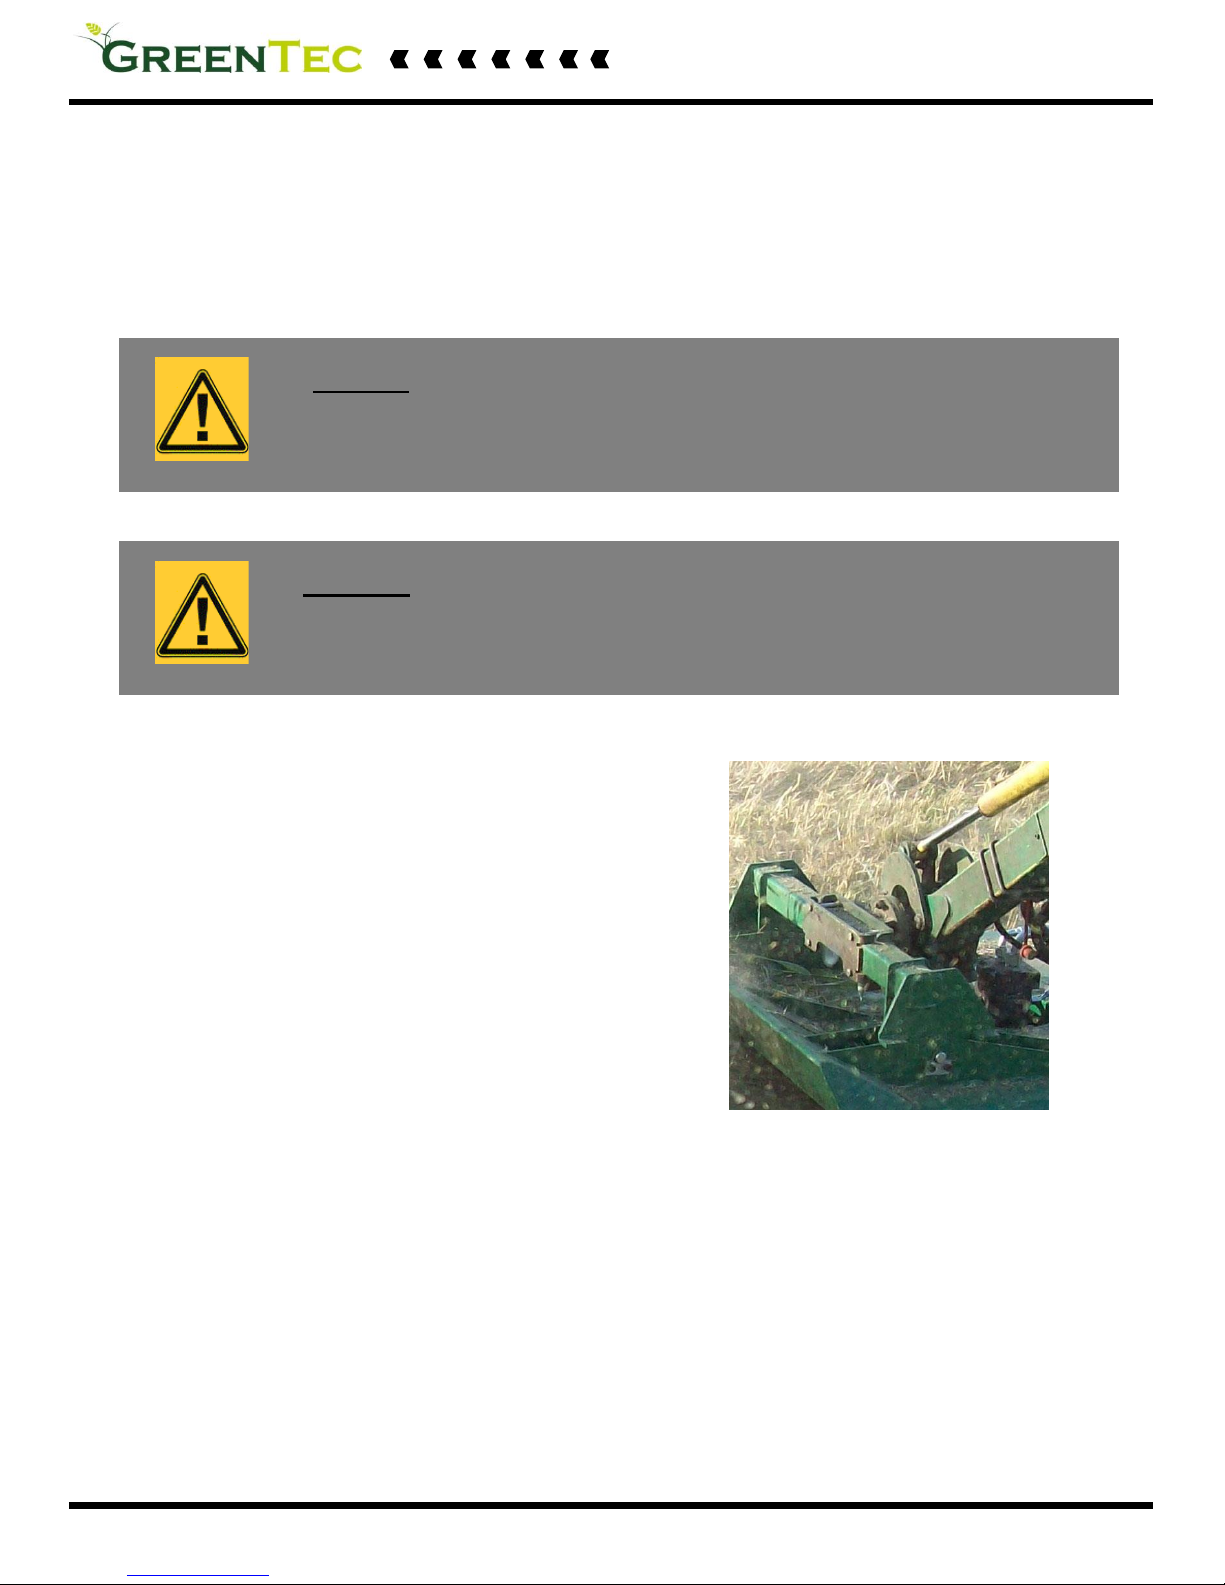
The GreenTec Crusher is a very robust high capacity Rotary Crusher that is easy to
operate and maintain. To ensure trouble-free operation this manual should be
carefully studied.
Attaching to an Armsystem
Fit the machine to the tractor in the standard way,
ensuring the correct match of linkage (category 2
linkage pins). Check that the top link is in good order
and threads are well lubricated. Use stabilizers to
take any free movement out of the lower link arms.
Before fitting the machine to the tractor linkage you
should ensure there is sufficient front weight to
ensure the front wheels are always in contact with
the ground. This is most important for safe transport
and stability when turning on slopes.
Before fitting the PTO for the first time it may be necessary to adjust the length.
There should be maximum engagement of the sliding tubes without bottoming at the
shortest operation position. To check, first connect the mower to the tractor.
Pull the PTO shaft apart and connect to the tractor PTO output shaft and the gearbox
input shaft. Hold the half shafts next to each other in the shortest working position. If
necessary shorten the inner and outer guard tubes equally.
Shorten the inner and outer sliding profiles by the same length as the guard tubes.
File all sharp edges and remove burrs. Grease sliding profiles.
Important
On delivery of your machine check that the Dealer has completed the P.D.I. form, ensure
the warranty registration form is completed and returned.
Safety first
Do not start the machine until you fully understand the operation and safety precaution
requirements. Always ensure the operator is proficient with the operation of this type of
machine.
8
GT 135-155
Page 9

Setting up and adjustment
Height
Cutting height adjustment is achieved by your operating system, when you work whit
the machine.
Machine Protection
There is a flotation system in the
connection between the GT 135-155 and
the armsystem, and also a skid on each
site of the head
Important
If the machine has been laid up for any length of time, there is a risk of
Finally, re-tighten the tension spring bolts to their original length, taking great care not
to over-tighten.
If in any doubt, consult GreenTec Service Department or your local GreenTec dealer
for further advice.
9
GT 135-155
Page 10

Operation
Engage the PTO only when the tractor engine is at low revs to prevent shock
damage to the machine. Slowly increase the engine revs to achieve the standard
PTO speed.
If at any time serious vibration occurs, stop the engine immediately and check
that no blades are missing - following all safety precautions. The cause must be
found and rectified immediately or other components may be affected.
When in work, lower the machine to the ground carrying its weight on the skids,
allowing the machine to follow the contours of the ground and ensuring there is
sufficient slack in the mounting bracket. Select a sensible forward speed bearing in
mind the density of growth, the terrain, and the available horsepower, taking extra
care when turning, particularly on slopes.
When turning, it is not necessary to lift the machine off the ground but instead allow
sufficient room to turn in a large radius. The machine only needs to be raised when
turning in a tight corner or reversing over dense undergrowth, or when operating on
the front linkage.
Quality of finish is determined by the forward speed, i.e. a slow speed will produce a
high quality of cut, whereas faster forward speeds are used when high output is first
priority.
Transportation
Please observe Public Highway Regulations concerning the towing of implements,
and securely attach a registration and lighting board.
Take care to slow when travelling over rough ground and avoid bouncing the
machine on linkage, causing unnecessary strain.
10
GT 135-155
Page 11

Service & Maintenance
Safety first
Never leave the tractor seat without first disengaging the PTO and stopping
the engine.
Ensure all rotating parts have stopped turning.
Never attempt any repairs, maintenance, service or any other checks with the
machine carried on the tractor hydraulics.
Always fully lower to the ground, or securely prop the machine on substantial
servicing stands.
Always replace all guards and retaining chains after servicing/maintenance is
completed.
Important
Never carry out any servicing or maintenance work without first disengaging the PTO
and stopping the tractor engine.
It is imperative that the following checks are carried out in order not to invalidate your
warranty. These are carried out before the first operation, after the first hour, then
after 4 hours. The checks are:
Hydr. Motor bolts.
Blade bolts are fully tightened, in particular the castle headed nut on the blade
rotor.
Retaining bolts on the drive shaft.
It is your responsibility to maintain the machine to ensure a long reliable working life.
Warning
Never carry out any servicing or maintenance work without first disengaging the PTO and
stopping the tractor engine.
11
GT 135-155
Page 12
Service & Maintenance Cont’d
Torque Settings
The Torque figures given below are recommended maximum settings only.
Size:
Tensile strength:
Description:
Torque setting:
Nm.
M16
8.8
Motor bolts
280
M24
8.8
Blade bolts
950
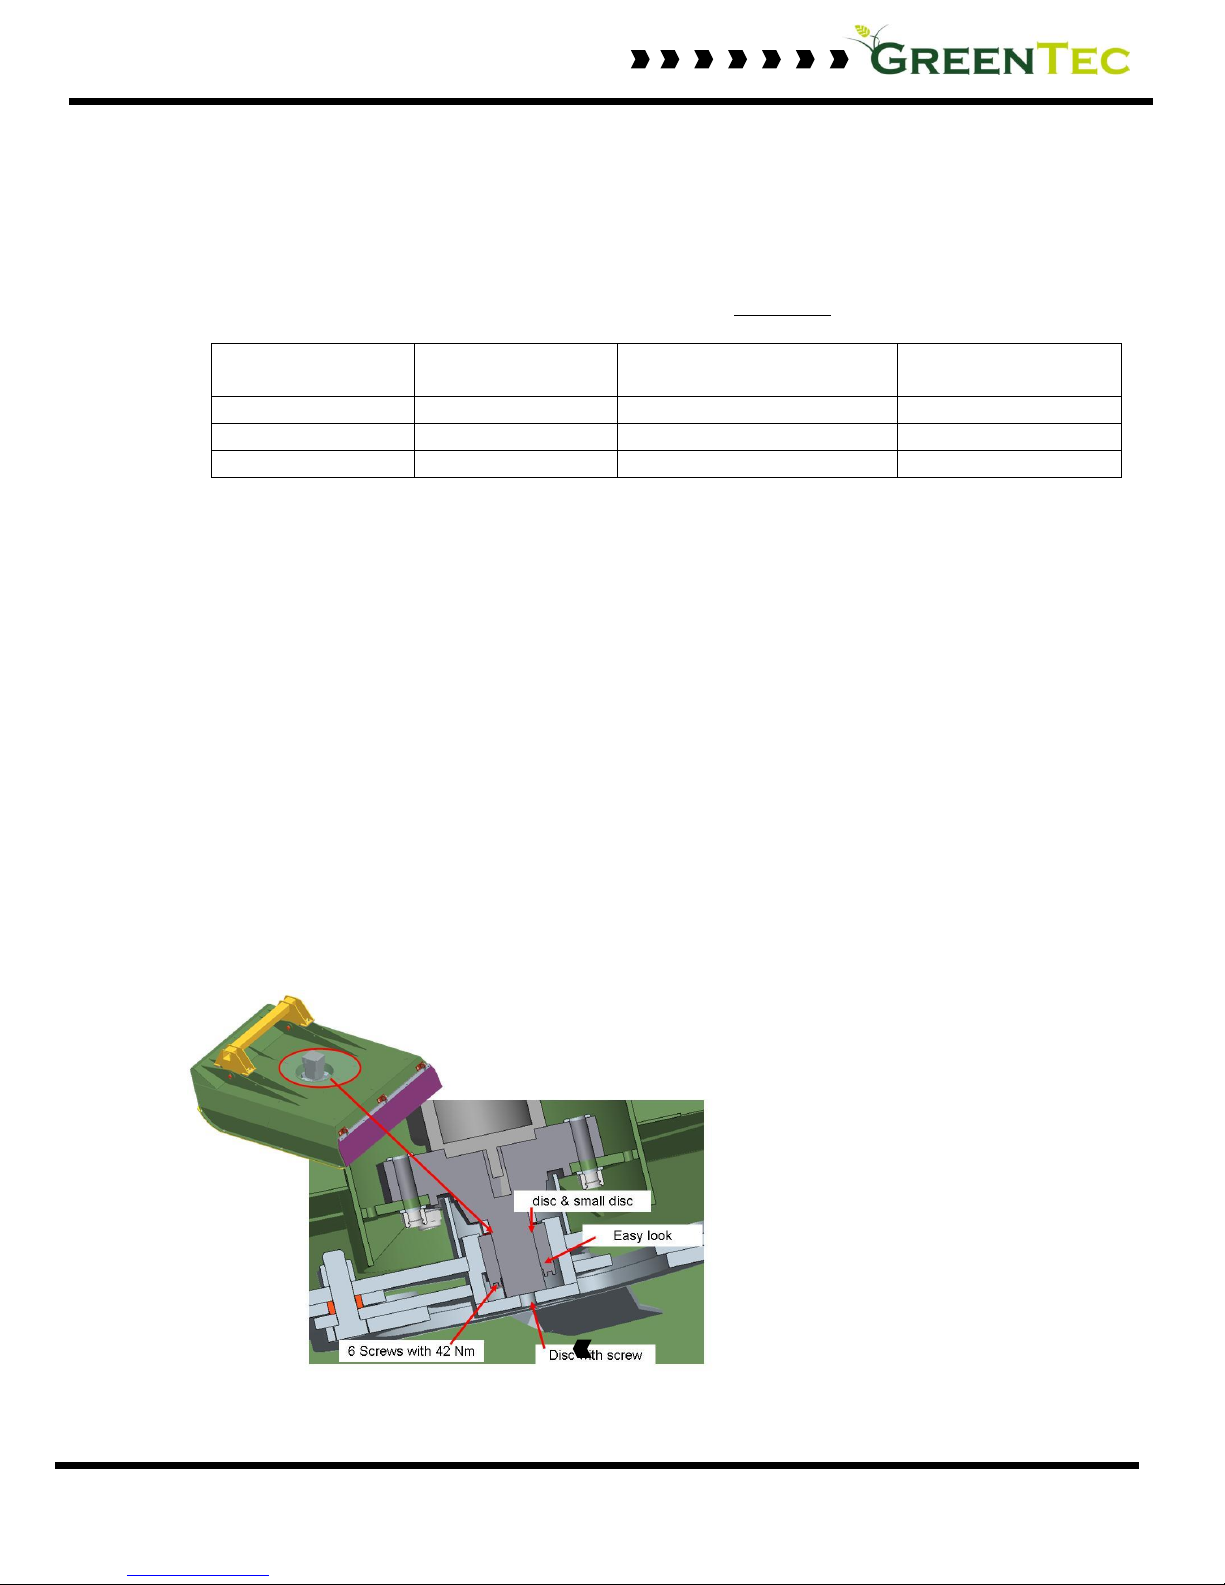
Blade Carrier
42
Delivery & Start up
Retighten motor bolts and the Easy look after 2 hours work.
Daily / Every 8 hours
Check condition of blades and blade bushes and ensure all retaining bolts are
fully tight.
Check Hydraulic Motor
Year / Every 100 hours
Take the motor of and grease the bearing and control the splint on the
motor and the bearing.
Control of Axel on the Head
12
GT 135-155
Page 13

Service & Maintenance Cont’d
Regularly
Check there is no wrapping of string, plastic, grass or other debris between
rotor boss and blades.
Inspect motor seals for leaks.
Regularly check the rotor and fully tighten the nut.
Regularly check the rubber protection.
It is most important that all Hydraulic motor and blade bolts are regularly
checked to be very tight. When the machine is new there will be a
‘bedding in’ period where very frequent checking is important.
Blades or chains
The blades can be re-sharpened by grinding the cutting edges and care must be
taken that the blades are of the same weight and length after grinding. Do not over
heat when grinding, as this will affect the hardness of the blades.
All the blades are free swinging and swivel on hardened steel bushes, which are
easily replaced. When replacing blades, it is important that blades are replaced in
sets, in order to retain balance of the rotor. Bushes must be replaced when new
blades are to be fitted.
If the blades are showing any signs of severe wear, damage or cracking, they must
be replaced immediately. Never attempt to weld the blades, this will make them very
brittle thus extremely dangerous. Do not take risks with the cutting blades - if in
doubt, replace.
Skids
When operating on abrasive soils, particularly in stubbles and similar conditions with
thin ground cover, excessive skid wear may be expected. To provide extra
protection and to prolong life of the skids, special hard facing rods are available.
If working in wet and muddy conditions, ensure that debris is not allowed to build up
on the deck.
Caution!
When carrying out maintenance work on or near the blades be careful of free-swinging
blades over-centring and falling. It is recommended that protective headgear, gloves and
goggles are worn.
13
GT 135-155
Page 14

Service & Maintenance Cont’d
Storage
Before storing away, thoroughly wash the machine, removing all traces of grass and
dirt. Great care must be taken when washing with high-pressure hoses, do not hold
the water jet close to the paintwork.
Do not use steam cleaners and be sure to remove all detergents to avoid any
discolouring or damage to paint. Grease all grease points until fresh grease shows.
Store PTO shaft and drive belts in a dry place
Remember, the GreenTec machine is designed to withstand the most
rigorous conditions as bush and up to 60 mm thickness, and with a
little care and attention will give many years of trouble free service. In
order not to invalidate the warranty and to avoid problems use only
genuine parts
14
GT 135-155
Page 15

GreenTec Warranty
GreenTec warrants that the GreenTec machine indicated on the Warranty Registration Form
will be free from defective materials and manufacturing defects for 12 months following the
date of sale. This Warranty does not affect your statutory rights; it is merely an addition.
Please contact you GreenTec vendor or GreenTec's Service Department if you encounter
problems within 12 months of the date of sale. During said period, any and all parts found to
be defective will be replaced or repaired, at the discretion of GreenTec, by the vendor or by
one of GreenTec's service technicians.
1. Complete and return the Warranty Registration Form (provided green sheet) within 7
days of the date of sale.
2. This Warranty does not cover damage resulting from wear and tear, intentional damage,
negligence, misuse, sub-normal working conditions, use in competitions, failure to follow
instructions from GreenTec (oral or written including any and all instructions and
recommendations mentioned in this User Manual) and changes to or repairs on the
machine without the approval of GreenTec.
3. The machine must be maintained according to the User Manual. The service notes must
be up to date and made available to the vendor in case of service, repair or claims under
the Warranty.
4. This Warranty does not cover claims regarding worn parts such as knives, flails, finish,
tires, belts, hydraulic hoses, bearings, bushings or lifting hooks, top links or ball-ends
unless it is a matter of manufacturing or material defects. Furthermore, this Warranty
does not cover the expenses for standard service items such as oil or grease.
5. This Warranty does not cover costs or losses resulting from the machine being
inoperative due to repairs or parts replacement under the Warranty.
6. This Warranty cannot be expanded to cover parts, materials or equipment that are not
manufactured by GreenTec unless the manufacturer in question has provided GreenTec
with a warranty covering such parts, materials or equipment. Claims for damages will be
considered only for original GreenTec replacement parts.
7. Any and all parts replaced under the Warranty will be the property of GreenTec and must
be returned to GreenTec should GreenTec so demand. No one will have the right to
dispose of such parts until after a claim for damages has been accepted and processed
by GreenTec.
8. Under this Warranty, GreenTec is not responsible for repairs that were performed without
the written consent from GreenTec or without GreenTec having had the opportunity to
examine the machine that is the object of the claim. Consequently, the written consent
from GreenTec must be obtained prior to the performance of repairs or replacement of
parts. Using parts that are not manufactured by GreenTec will void this Warranty.
Dismounting components without permission from GreenTec will void this Warranty.
9. All claims for damages must be forwarded to GreenTec using GreenTec's Compensation
Claim Form within 30 days of the performance of the work under the Warranty.
Using the machine requires familiarity with and acceptance of these instructions
and the limitations described in this Manual
Using the machine implies the knowledge and acceptance of these instructions and
the limitations contained in this Manual
15
GT 135-155
 Loading...