

Page 1
Green Star Corona LED Roadway/Area Luminaire
BEFORE YOU BEGIN
Read these instructions completely and carefully.
Save these instructions for future use.
WARNING
Risk of electrical shock. Disconnect power before
servicing or installing luminaire.
WARNING
Risk of injury or damage. Luminaire will fail if not installed
properly. Follow installation instructions.
WARNING
Installation Instructions
Important Notice
These instructions are not intended to cover all details or variations in the
products, nor do these instructions provide for every possible contingency
concerning the installation, operations, or maintenance of the luminaires.
Should additional information be required, contact your Green Star Customer
Support Center at 877-877-1711.
The contents of this manual shall not become a part of or modify any prior or
existing agreement, commitment or relationship. The sales contract contains
the entire obligation of Green Star Products Inc. Green Star Products Inc.
standard limited warranty is the sole warranty obligation of Green Star
Products Inc. and any statements contained herein do not create new
warranties or modify the existing warranty.
Any electrical or mechanical modications to the luminaire without the prior
written consent of Green Star Products Inc. may void all warranties or other
safety certications. Unauthorized modications may also result in safety
hazards or damage to the luminaire. Misuse of the luminaire could result in
injury and equipment damage. In no event will Green Star Products Inc. be
responsible or liable for direct, indirect, special or consequential damage or
injury that may result from the misuse of the luminaire.
Risk of injury. Wear safety glasses and gloves during
installation and servicing.
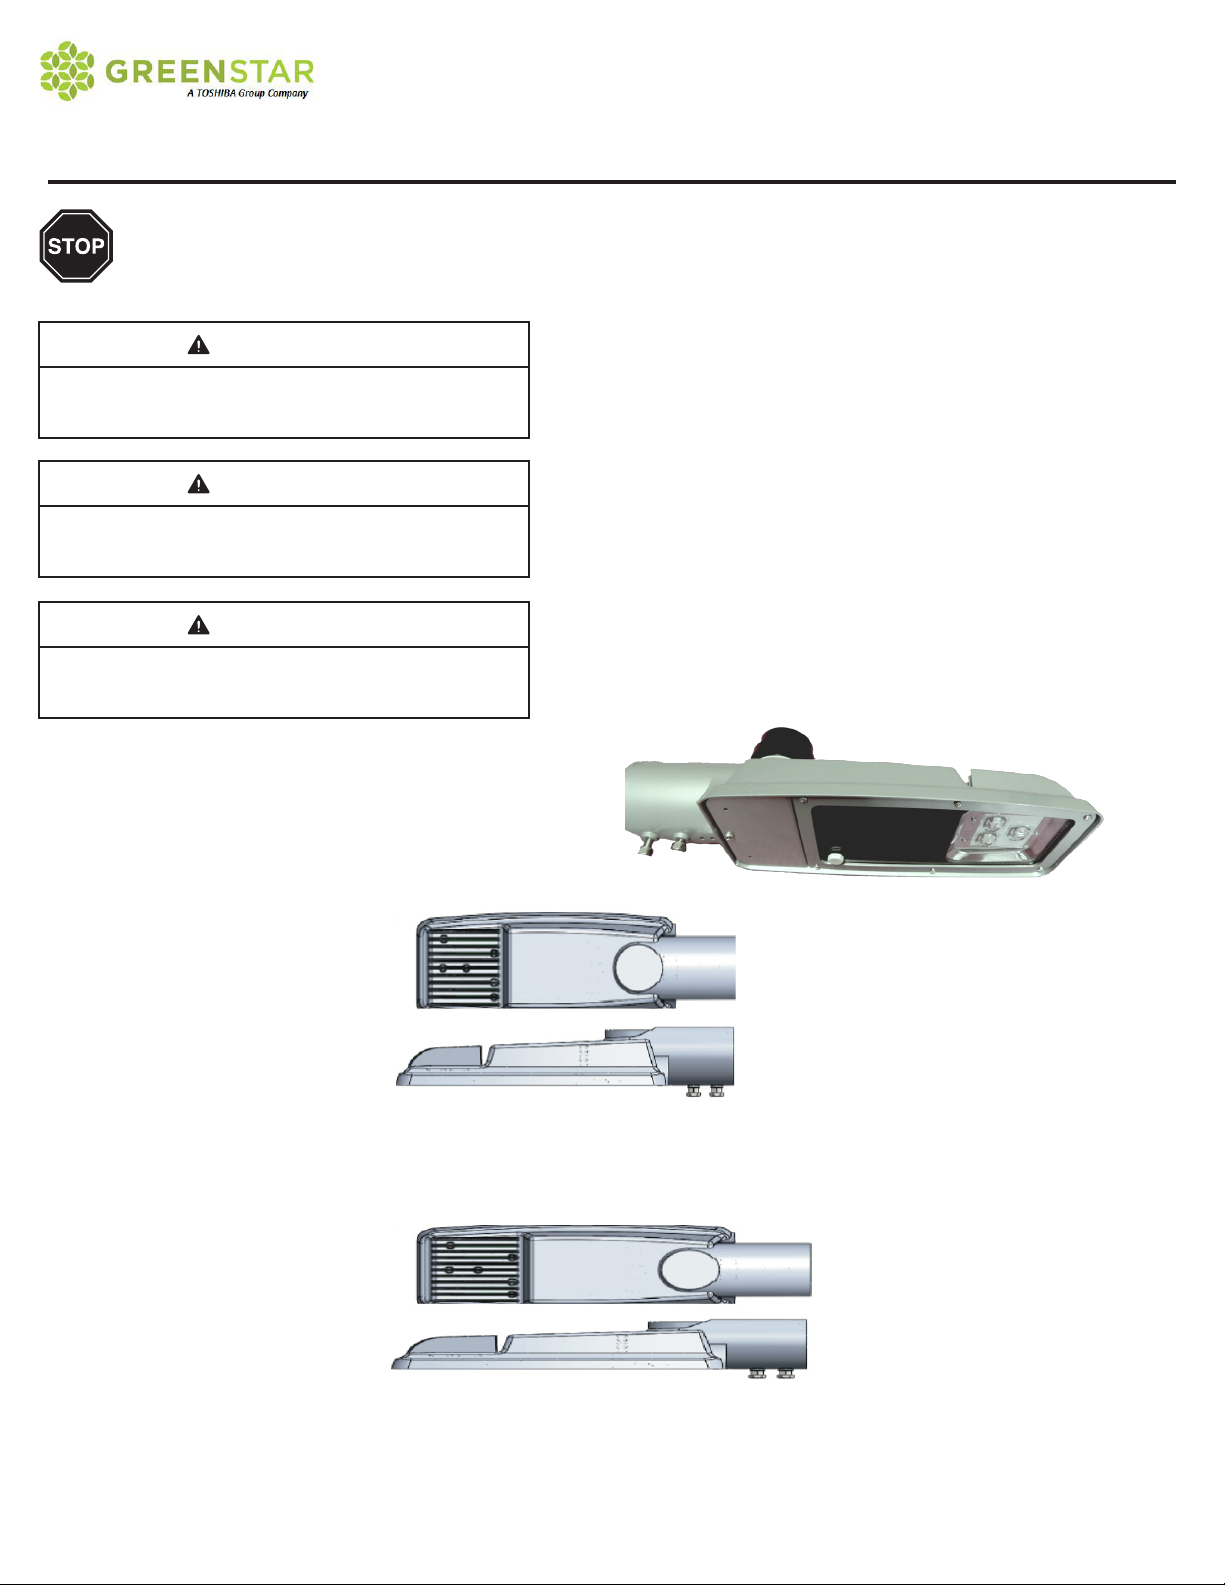
CN2/ CN3
Specications:
Weight: 6.7 lbs (3kg)
Length: 453mm (17.9”)
Width: 152.5mm (6”)
Height: 86.7mm (3.4”)
CN4/ CN6
Specications:
Weight: 10lbs (4.5kg)
Length: 641mm (25.23”)
Width: 162mm (6.49”)
Height: 108mm (4.25”)
Green Star Products Inc. • greenstarled.com • 6900 Alamo Downs Pkwy. Ste 120 • San Antonio, TX 78238 • 210-370-9640 • [email protected]
Page 2
Installation Instructions
Updated 8/7/2014
Inspection
● The packaging has been designed to protect the luminaire from damage during transit.
Inspect luminaire for damage before installation.
Handling
● Never lift or handle the luminaire by holding it by its photocell. Lift it by its body.
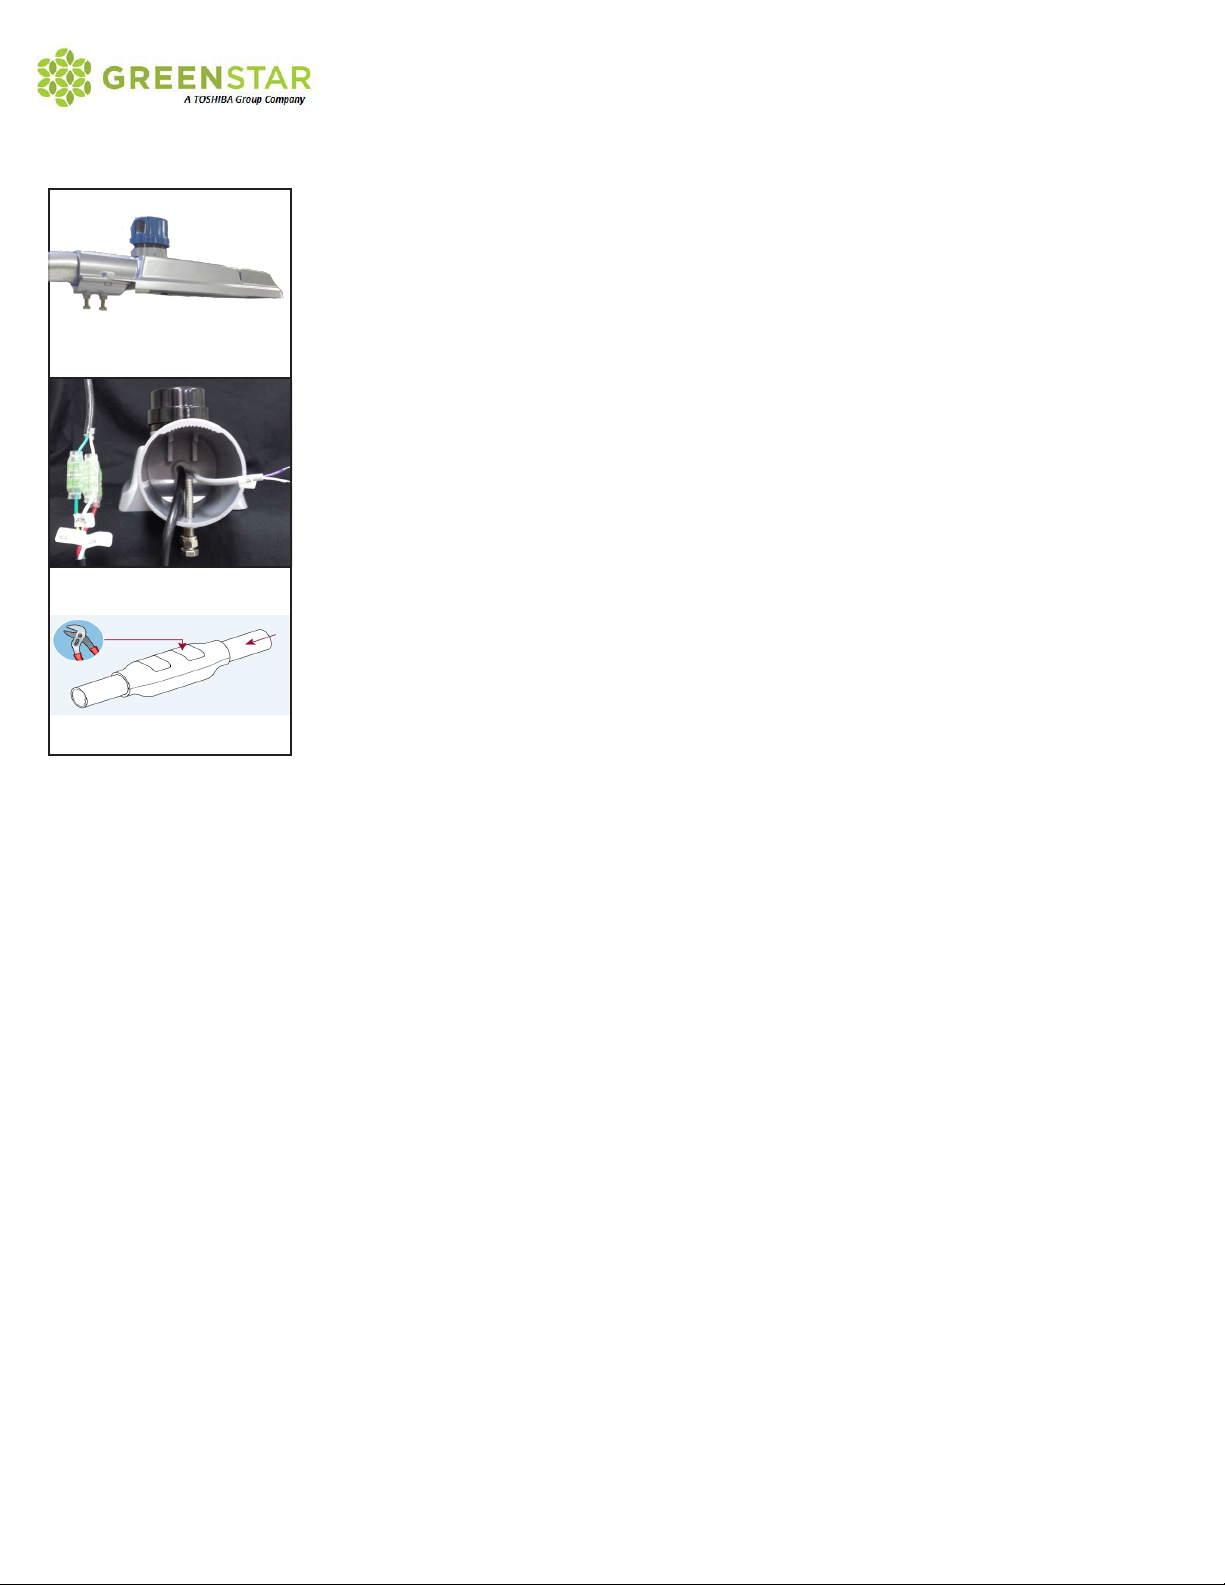
Figure a
Figure b
Figure c
Mounting the Luminaire on a Round Tenon Arm
● The luminaire mounts to round tenon arms with 1.5” to 2.5” outside diameters.
● Loosen (do not remove) the tter bolts.
● Lift the luminaire into position in front of the tenon arm such that the tenon arm enters
through the opening at the rear of the luminaire and between the tter bolts and the
luminaire housing. (see gure b)
● Make electrical connections (see below)
● Insert the tenon arm into the luminaire’s back and up to its steps.
● CN2/3 has steps at 0º and +5º tilt that may be used for leveling. CN4/6 counts on a -5º
step as well
● With the luminaire properly positioned, initially tighten the tter bolts to approximately 6-8
foot pounds. Use an alternating pattern of bolt tightening to ensure secure seating of the
tter bolts onto the tenon.
● Check the luminaire position for the correct degree of front-to-back tilt, and to make sure
the side- to-side position of the luminaire is level. After nal adjustments are made, tighten
the tter bolts to 14-16 foot pounds again using an alternating pattern. Do not over-tighten.
Wiring
● NOTE: Make sure that all electrical connections are in accordance with the National
Electrical Code (NEC) and any applicable local code requirements.
● NOTE: Check the rated input voltage on the luminaire product label, and verify that the
supply voltage meets the product requirements.
● Wiring connections are made on the Tyco CoolSplice connectors which are already in
place and ready to accept AC wires of up to 12 AWG (see gure b and c)
● Tyco CoolSplice connectors are UL listed, IP66 rated, KEMA approved, gel-lled and
sealed, and very easy and simple to use.
● To use Tyco connectors insert the inbound AC cable (without stripping) into the connector
and press hard on the button that captures it, use plyers for better results. Connect wire
leads as follows:
o CONNECT WHITE (common) supply wire to white luminaire wire.
o CONNECT BLACK (hot) supply wire to black luminaire wire.
o CONNECT GREEN (ground) supply wire to green luminaire wire.
● If dimming controls are to be used connect control wires accordingly (purple is 0-10v
signal, grey is ground).
● When making electrical connections, make sure that under no circumstances should the
ground wire be connected to a supply or power wire. This will cause the luminaire to fail,
and the luminaire will not be covered under warranty.
● Test luminaire by installing a shorting cap or photocell in the photocell receptacle.
Maintenance
● Depending on environmental conditions, it may be necessary to clean the lens cover in
order to maintain a high-efciency. (Use solvent-free cleaners.)
Storage
● Prior to installation, the luminaire should be placed in a covered, dry storage. The storage
location should not exceed the normal operating temperature of the luminaire.
Green Star Products Inc. • greenstarled.com • 6900 Alamo Downs Pkwy. Ste 120 • San Antonio, TX 78238 • 210-370-9640 • [email protected]
 Loading...