

GreenSpeed GT3 User Manual

f o l d i n g t r i k e m a n u a l

Pedal
(optional
cleated)
Cranks
Kingpin Assemblies
clamp
Steering Rods
Boom
Cross Members
Spokes
Rim
Tube Valve
Tire
Chain
Front Derailleur
Front Hub
Bar End
Gear Shifters
Brake
Lever
Seat
Tail Light and Flag Mounts
Crank
Extension
Rear Derailleur
Quick Release Nut
Quick Release Skewer
Dyanmo mount
Cluster or Rear Cogs
Fender stay
Chain Stay
Seat Stay
Guide Pulley
Bracket
Quick
Release
Nut
Guide
Pulley
Quick
Release
Lever
Pin
Guide
Pulley
Thru-bolt
Clamp
Screws
Spacer
Front Derailleur Post
Front Light Tag
Accessory
clamp
(optional)
Mirror Mount
or
Accessory post
(optional)
GrabHandle
(optional)
Mirror
(optional)
Chainrings
Chain Guide Tubes
Pulley (fig 3)
fig 2
fig 1
fig 3
Hinge (fig 2)
“T”-piece
Tail Light Mount
(inc with Rack)
Rack
(optional)
Rear
Fender
(optional on
x-series)
pin
elastomer
(inside)
2
trike anatomy

Congratulations on your purchase of a Greenspeed folding
trike. We believe that you have purchased the finest recumbent
tricycle available in the world today. It is also our belief that
the present level of motorised transport on this small planet is
not sustainable, in environmental and social terms. Thus your
Greenspeed has been designed for everyday use, whether it be
shopping, commuting, rehabilitation, touring the world or just
exercising and having fun! With care, it should last a lifetime.
Included in this manual are instructions on how to assemble,
maintain and get the most from your folding trike.
2
3
4
5
6
7
8
a s s e m b l y
The major feature of these trikes is the fold. By removing one
capscrew, with a 6mm key, the seat can be removed.
Then releasing the quick release lever on the frame hinge
allows the rear wheel and frame to be folded over the front,
halving the size of the trike, and allowing it fit into most car
boots (trunks) and other small spaces. To fit into even smaller
spaces, the wheels are easily removed.
Another feature of this trike is the 16" wheels, which make
it more compact than trikes with 20" wheels, and the special
Scorcher tyres give it outstanding performance with a very
smooth ride.
The famous Greenspeed cross over steering now has NSR
geometry, which allows straight line, one handed braking,
and gives a very small turning circle, making it a delight to
ride. A number of accessories are available from GS dealers.
welcome to the family
9
10
11
12
13
14
w h a t ’s n e x t ?
3
tricycle anatomy
design
tools
frame
fitting your wheels
~ drum
~ disc
~ disc with hollow axles
fitting disc brake calipers
removing hollow axle
wheels
adjusting your handle bars
fitting your seat
fitting your crank
extension
adjusting for your leg
length
check derailluer cables
fitting your chain
joining your chain with
split links
adjusting your brakes
~ drum brakes
~ disc brakes
adjusting your gears
~ front derailleur
~ rear derailleur
alighnment of your
steering
design
1819chain
steering
tyre presure
warranty
community
resources
m a i n t e n a n c er i d i n g
15
16
17
17
steering
gears
1st ride, stamina
pedals
negotiating doorways
regular folding
tyre repair
tools to have while riding
Q&A’s
t r o u b l e s h o o t i n g
contents

Your trike’s main feature is its ability to be folded / assembled
with the minimum of tools / effort. Here are the tools required
to build your trike, but there after the quick fold will only require
the 6mm Allen key.
(drum brake
only)
(hollow axle
hubs only)
fig 1
The frame is now ready to unfold. Start by holding the back
section and lifting it away from the frame and straightening the
frame out. Note the pin needs
to be slid to the left to allow
the frame to unfold all the way
(fig 2a). Once it has been
unfolded all the way, you rotate
the Quick Release downward so
the keyway is lined up, push it
through, pull the quick release
twowards the back of the frame
(fig 2b). Once the quick release
in it’s slot you can tighten it up
(fig 2c).
Important. If you are unfamiliar with a quick release
mechanism, PLEASE get a Greenspeed Dealer or bike mechanic
show you the finer points of safe use. The quick release on
the frame is slightly different to a wheel quick release in that
it requires a 10mm wrench to add tightness to it should the
adjustment loosen off with time/wear. Please keep it tight
enough that you can release/tighten with moderate hand effort.
fig 2
a
b c
Assembly of your folding trike is as follows. If you are
assembling from a boxed state, you start by unpacking it all
carefully. Once all the packaging has been removed, the fun bit
begins.
tools
assembly
4
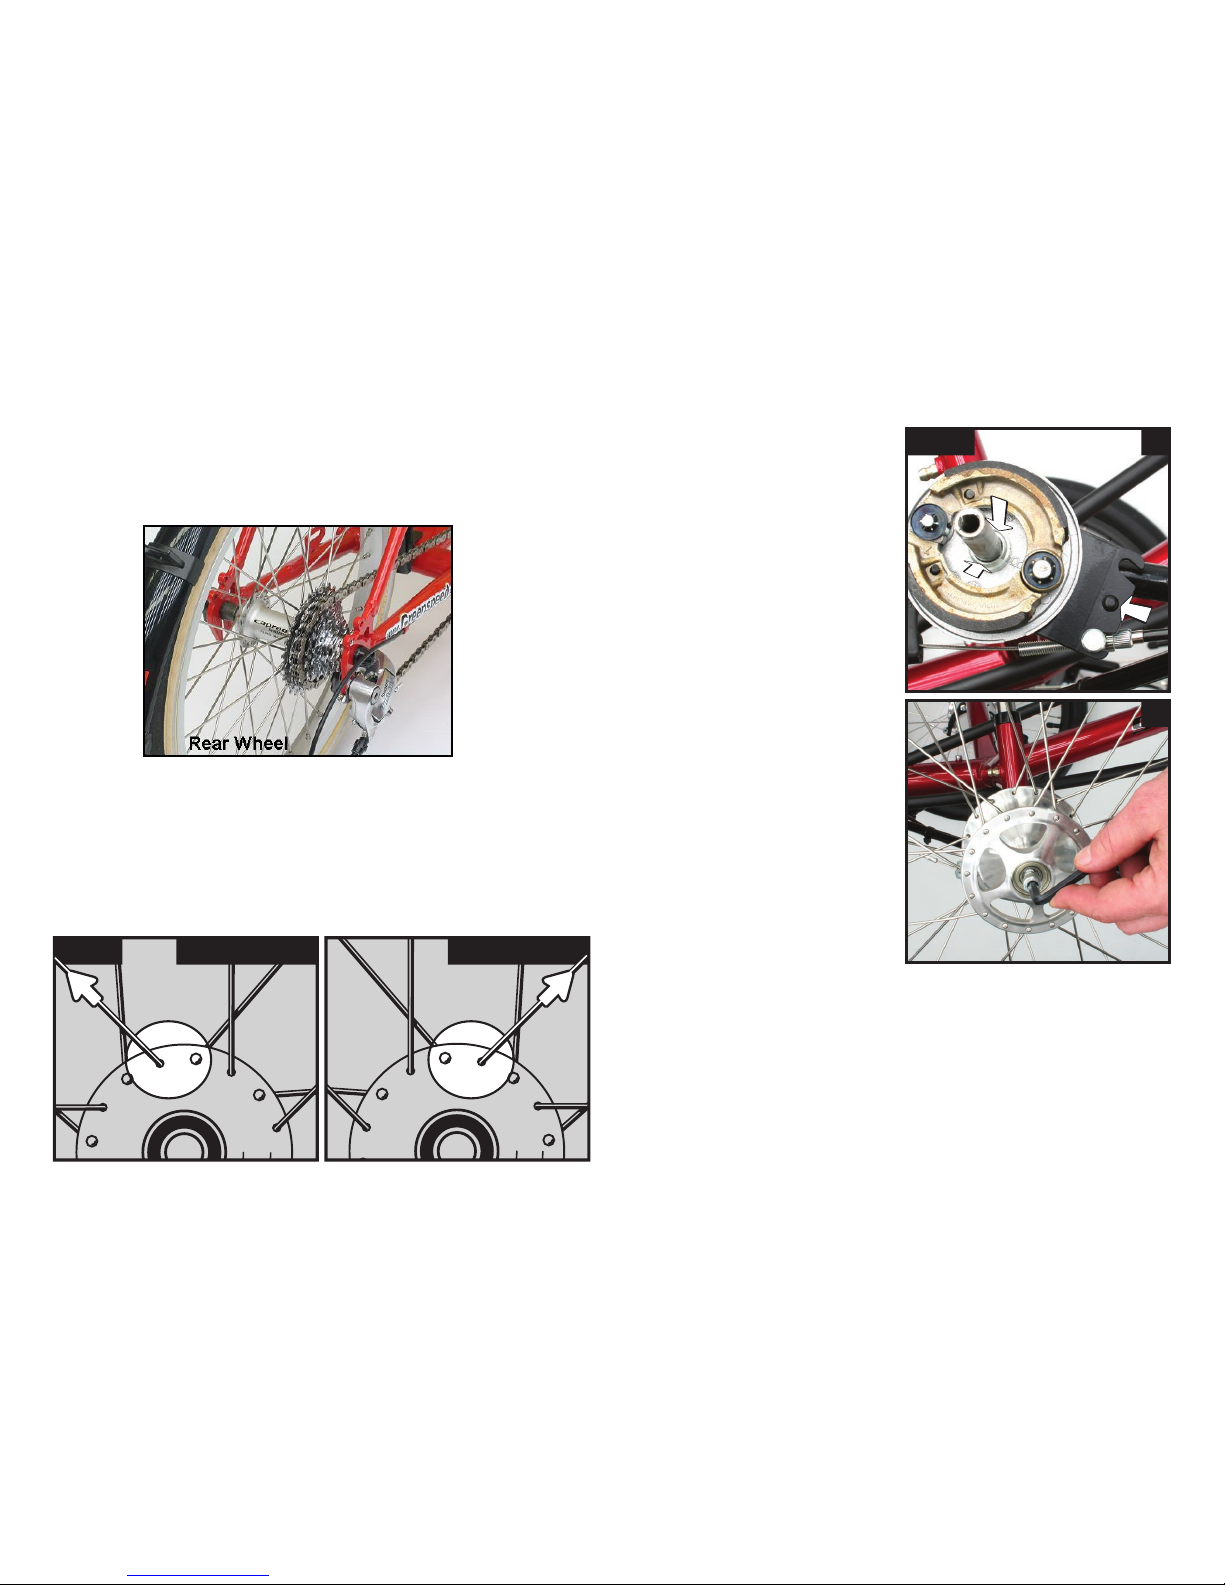
Next you install your wheels. Put the rear wheel in first and
tighten up the quick release. The cogs go on the right hand side of
the trike. That is, as if you are seated in the trike ;-)
fig 3 left wheel right wheel
Outside spoke points to the left Outside spoke points to the right
fitting your wheels
Now install the front wheels. Fig 3a and 3b, shows that there are
left and right wheels. They can be identified by looking at the top
of the hub and following the top outside spoke (that is the spoke
with its head on the inside). When this spoke goes to the right,
it is the right wheel, and vice versa! Be sure to try and install
them this way in the future, as this will prolong spoke life.
fig 4 a
b
~ drum brakes
The brake assembly backing
plate should be checked that
it is sitting hard against the
axle and that the retaining pin
is engaged (fig.4a).
Now is also a good time to
hook up brake cable (fig 16).
~ disc brakes
Disc brake wheels slide straight onto the axle the same way drum
brake hubs do and the screw at the end holds them in place.
The exception however is our hollow alloy axle disc brake set up.
Hollow alloy axles use a different method where by the alloy axle
goes through the hub and then into the kingpin assembly.
Use the provided short cap
screw to hold the wheel on
(fig.4b). Some models are
also provided with a shaped
hub cap washer.
Do the same on the other side.
5
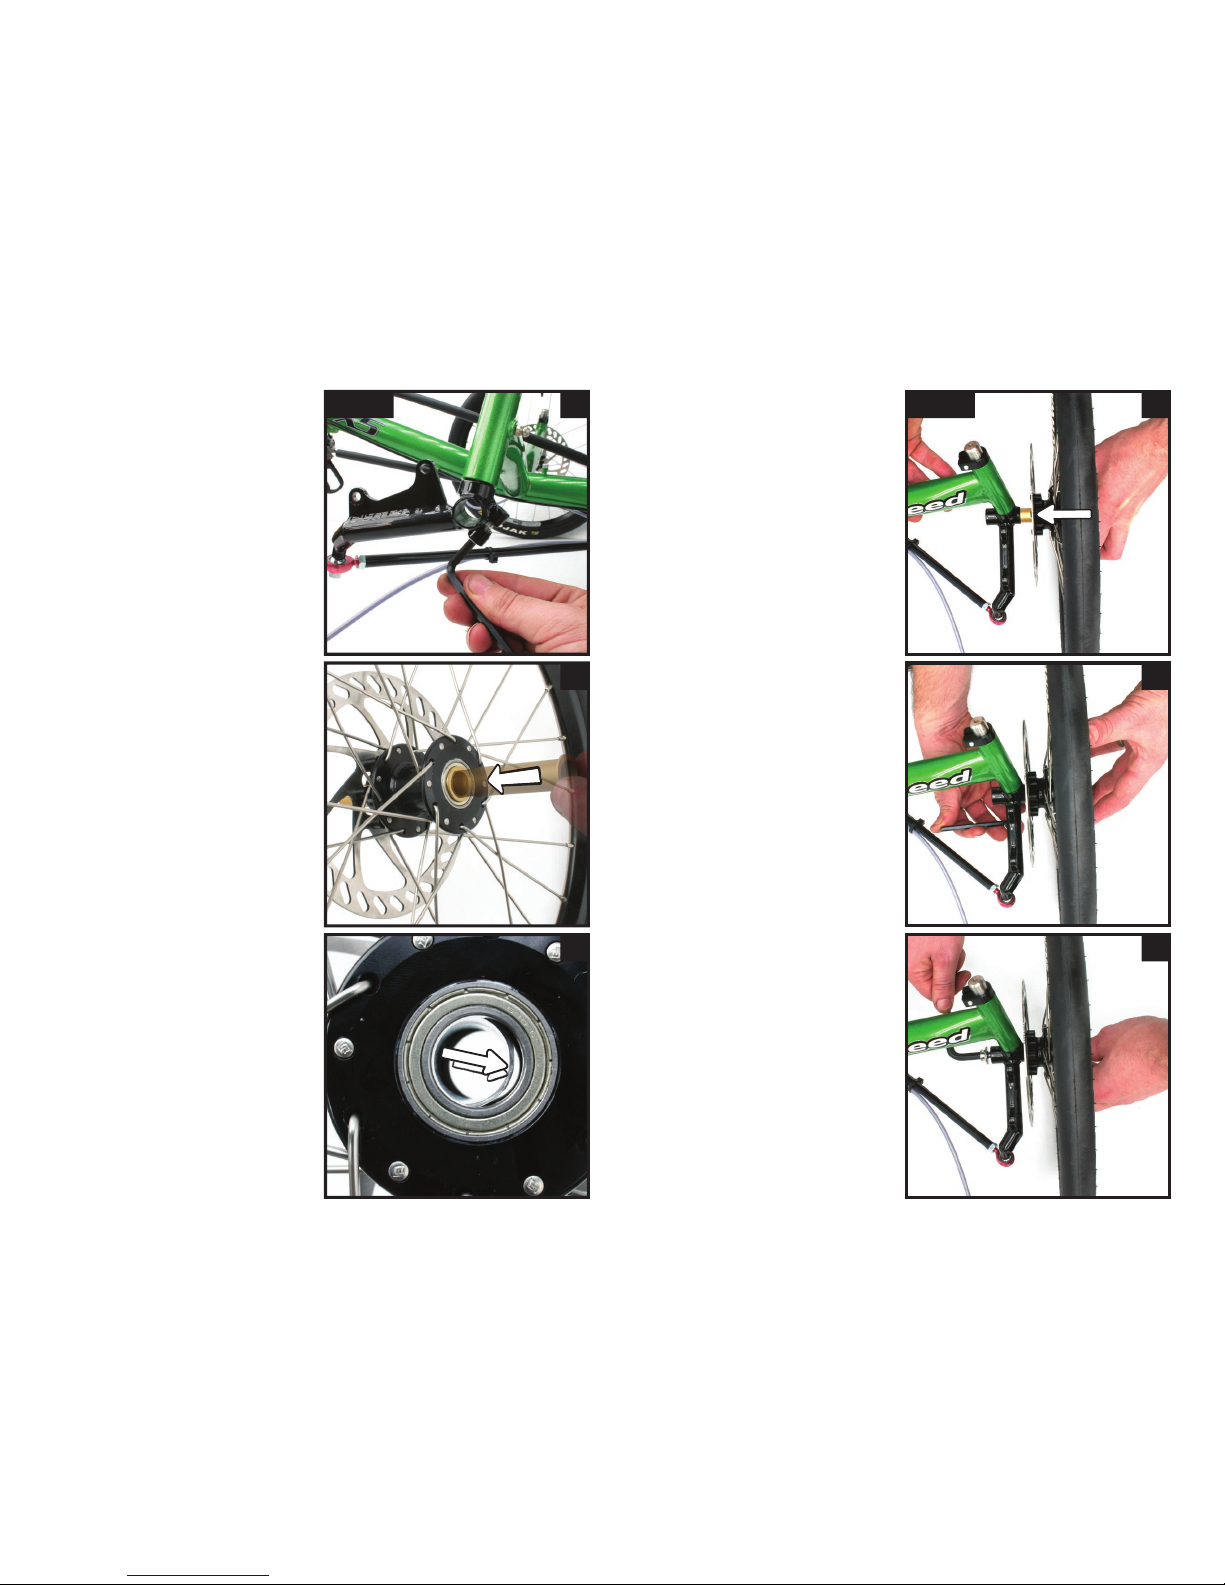
fig 5
First make sure the
kingpin pinch clamp is
undone (fig 5a) so the
axle can be inserted (it’s
a good idea to either
remove this screw or nip
it up when transporting
your trike so as not have it
rattle loose!).
a
b
c
Insert the axle from the
outside of the hub
(fig 5b).
Some times the crush
tube inside the hub may
be misaligned (fig 5c), use
the axle to realighn it.
~ disc brakes with
hollow axles
Place the axle into the kingpin
assembly (fig 5d). The axle
should be a neat fit but
NO hammering should be
required!
fig 5
d
e
f
Once the axle is installed,
cinch up the clamp screw (fig
5e) tighter than finger tight,
but not tensioned right up
(this is to help prevent the axle
rotating whilst performing the
next step).
Insert the axle preload bolt
(fig 5f) and snug it up (6Nm).
Finish tightening up the pinch
clamp (12Nm) and you’re
done! Well one completed….
other side to go!
6
 Loading...