

Green Humidifier Gh3200 Owner's Manual
BestairPro GH-3200 Installation Instructions
Attention Installer: Read Complete Safety and Installation Instructions Before Starting.
Introduction
The BestairPro GH-3200 is the most efficient flo-thru
whole house humidifier you could have chosen to install.
It uses 75% less water that other comparable flo-thru
models on the market today.
Installation Instructions
1. It is recommended that the GH-3200 be installed on
the return air plenum. However, if this is not accessible,
the warm air plenum can be used. Select a spot on the
plenum that allows for easy access when service or
maintenance is required.
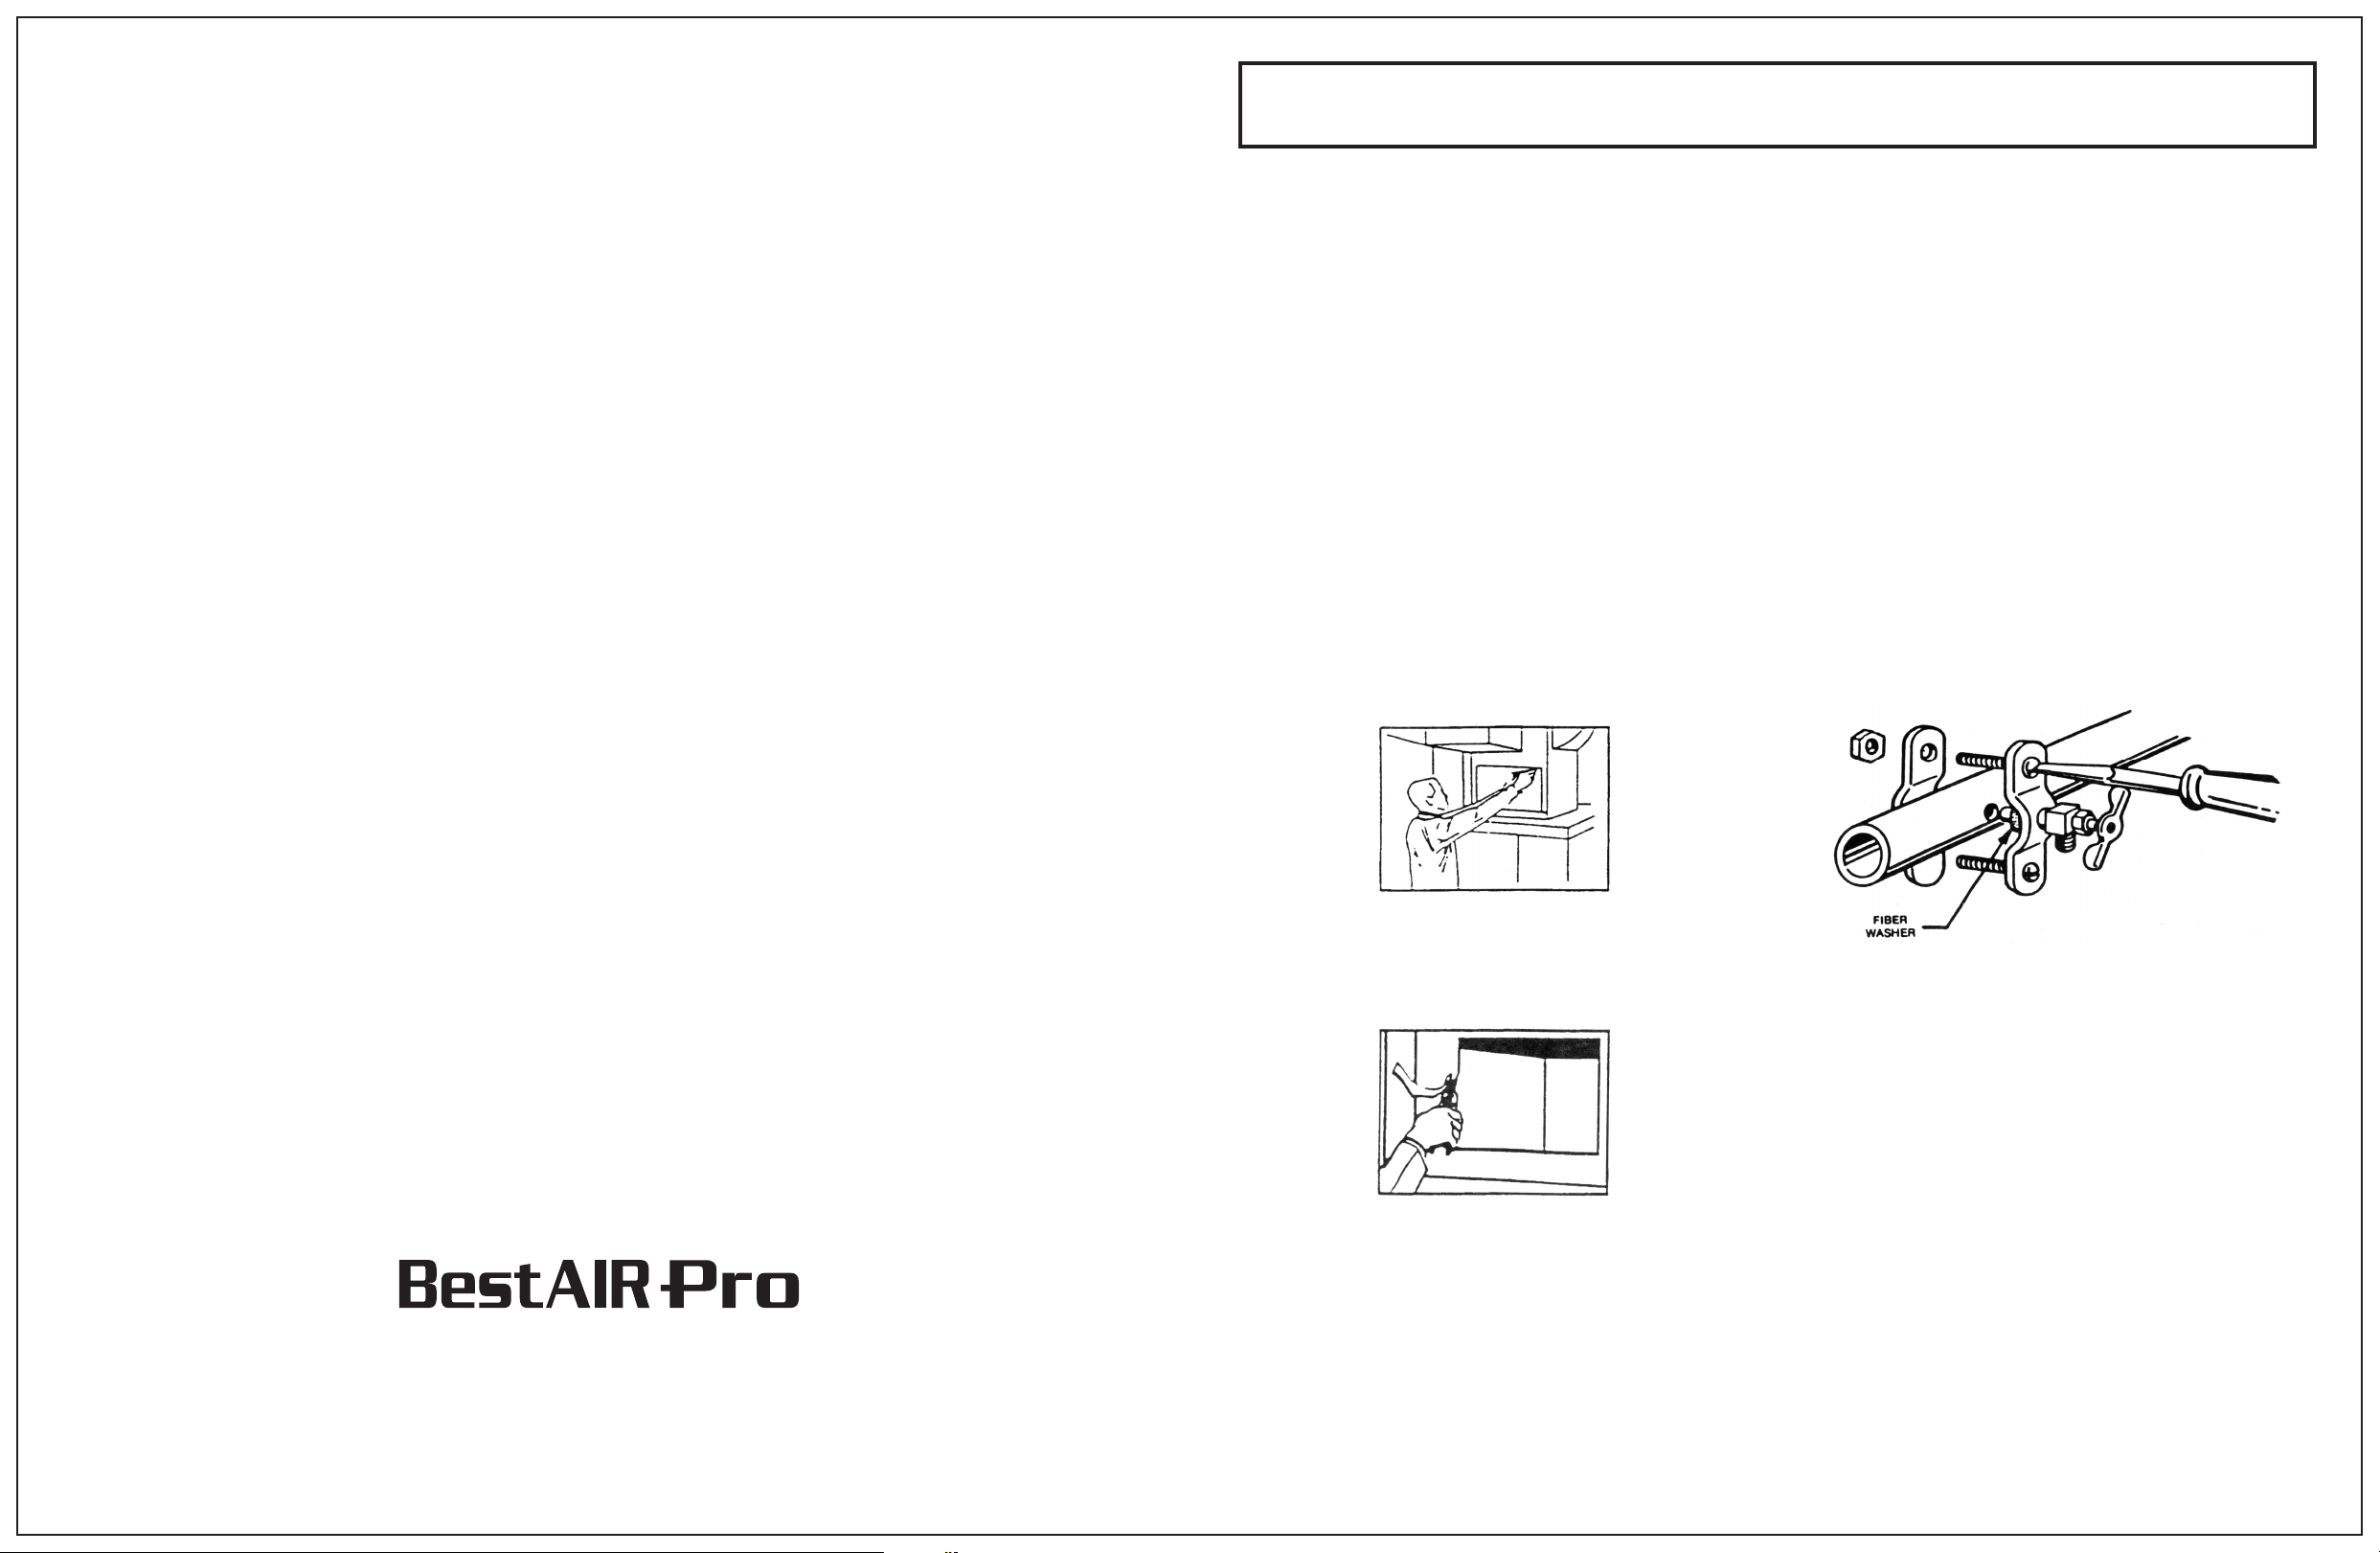
2. Draw a level line for the template on the furnace
plenum. Make sure the bottom of the template is at
least 3 inches above the furnace jacket for the water
supply line and drain hose. Place mounting template in
position, making sure it is level.
6. The GH-3200 is designed with a reversible side cover
plate for the by-pass opening. Carefully select the location for the by-pass connection, and install a snap-in
collar. Secure side cover plate on opposite opening
with nut and bolt provided.
7. Re-install distribution tray. Lift the front on the distribution tray, slide evaporator pad into position, then
lower distribution tray on top of the evaporator pad.
Sculptured bottom of evaporator pad should fit into pan
liner.
8. Select the nearest water pipe, to install the water line
to the humidifier. Tap into the water supply line with the
self-tapping saddle valve furnished. The saddle valve
must be completely open or closed. Connect an appropriate length of ¼” plastic-poly tubing and connect it
from the saddle valve to the inlet side of the solenoid. A
hard water line is preferred.
281 Keyes Ave • Hampshire, IL 60140
(847)683-7990
Fax (847)683-7301
Website • www.bestairpro.com
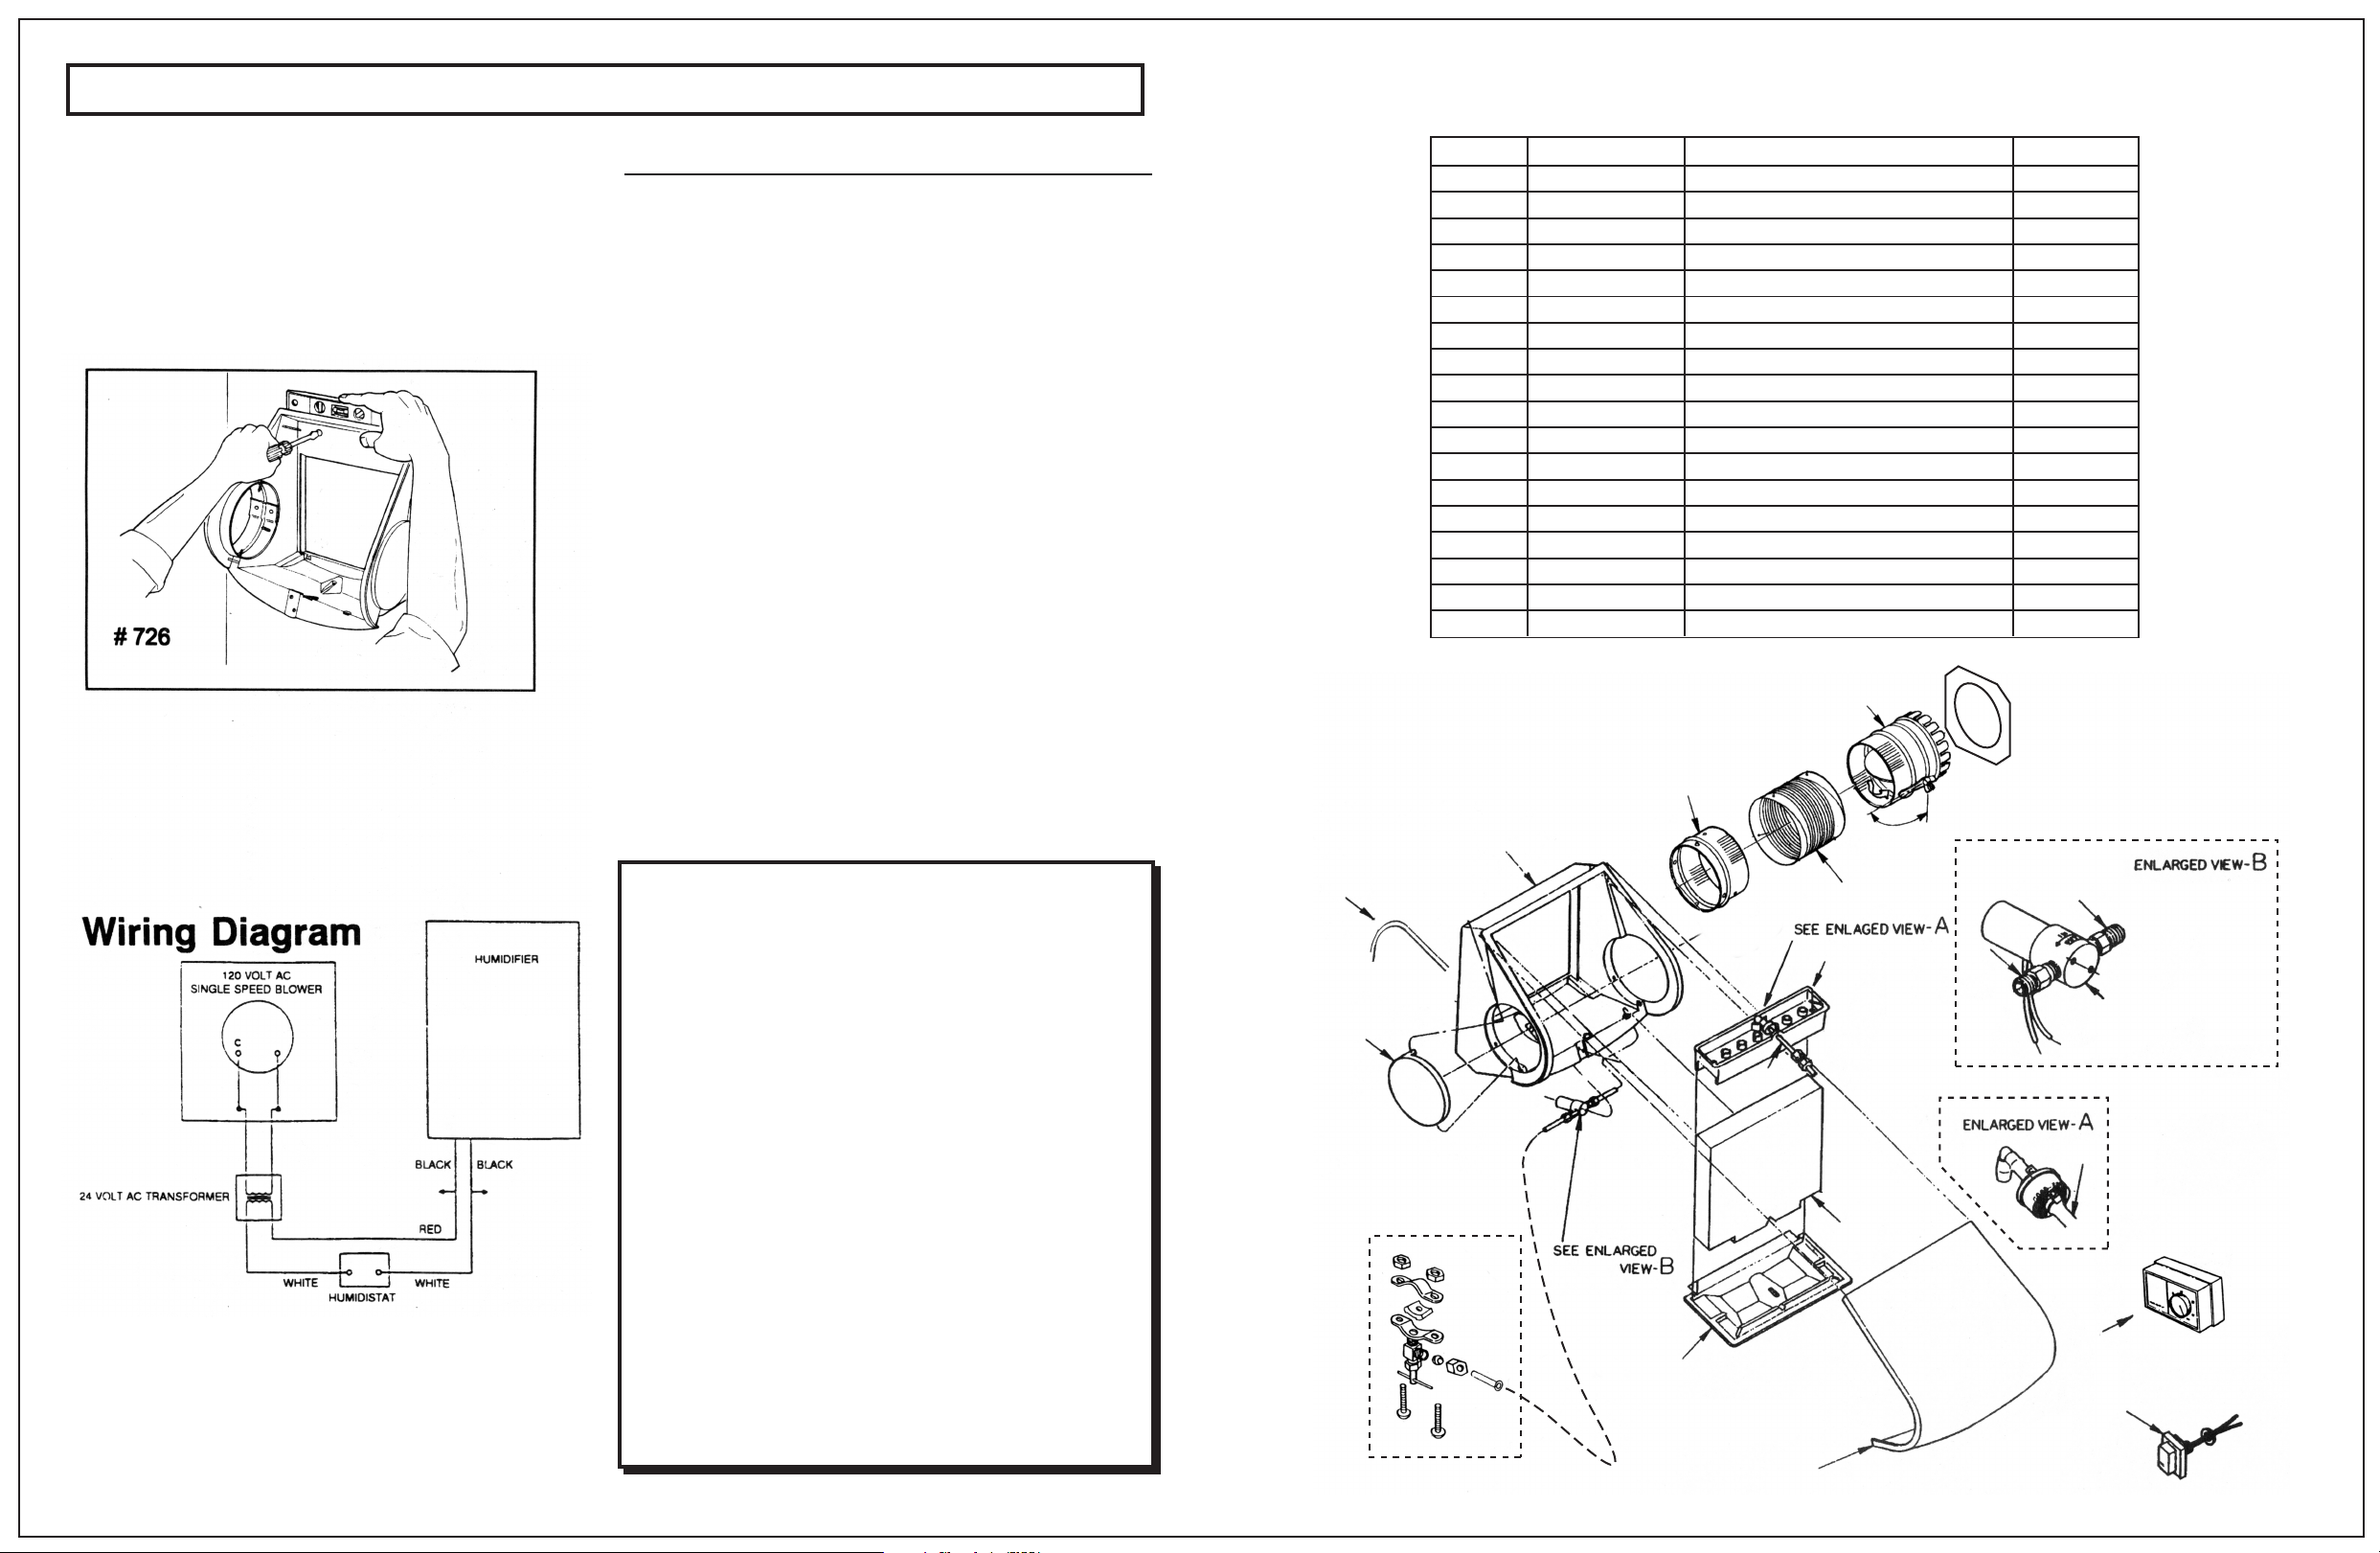
3. Drill the four (4) mounting hole locations. They are
marked with a +. Cut the inside opening of the mounting
template, leaving the outside lines visible. Be careful to
avoid injury from sharp edges.
4. Remove the top cover of the GH-3200 and set aside.
Lift front of distribution tray and remove evaporator pad
first, then remove distribution tray.
TM
5. Carefully place the GH-3200 cabinet into the opening
in the plenum. Insert the 4 mounting screws into the
holes and tighten the cabinet to the plenum.
Make the by-pass connection using the necessary hard
pipe and elbows or flex duct.
P/N 546-GH
9. Install the humidistat per instructions provided with
the humidistat. The general rules for the installation of
thermostats also apply to the humidifier.
10. Wiring – 24 volts. All wiring must comply with local
codes and ordinances. Shut off the furnace power and
locate the blower motor junction box. Mount the 24 volt
transformer on the box and tap the primary 120 volt
leads to the motor wires. Wire the solenoid in series
with the 24 volt terminals on the transformer and
humidistat. See the wiring diagram below.
11. Attach ½ inch I.D. PVC pipe or plastic tubing from
the GH-3200 drain at the bottom of the cabinet to the
nearest floor drain. Make sure the drain pipe is draining
properly and has continuous slope with no traps. PVC
is recommended, however, ½ inch I.D. plastic hose can
be used as long as there is proper slope with no traps.
Use of copper tube voids warranty
Page Two BestairPro GH-3200 Installation Instructions
GH-3200 REPAIR PARTS LIST
12. Check operation. Open saddle valve and turn on
furnace. Turn up the humidistat to engage the GH-
3200. Allow the unit to operate until water is observed
running from the drain hose. Check for any water leaks.
If all functions are operating properly, reset humidistat
to recommended level. Place owner’s manual near
humidistat for owner.
Maintenance Instructions for GH-3200
Danger – To Avoid Hazard of Electrical Shock or Burn, Turn Off
Power Supply to Your GH-3200 Before Servicing.
The cleaner your GH-3200, the more efficiently it humidifies.
1. Shut off power and water supply.
2. Remove front cover
3. Lift front of distribution tray and remove evaporation
pad. Pad should be changed every 10-20 weeks depending on water condition. (To reassemble, install distribution
tray first, then while lifting the front of the distribution tray
install bottom of evaporator pad, then push the pad back
into position. Lower distribution tray on top of the evaporator pad.
4. All parts (except electrical components and pad) of the
GH-3200 can be washed in a 50% solution of water and
vinegar. However, it is recommended that you purchase
and replace the pan liner and evaporator pad every 10 to
20 weeks.
5. Wipe any loose sediment from the cabinet with your
50% solution. Make sure the drain hole and hoses are
free of sediment and particles.
Item # Part # Description Qty/Unit
1 801-T Main Case 1
2 701 Starting Collar - 6 In. dia. 1
3 806-T Distribution Tray Assembly 1
4 823 Evaporative Pad 1
5 804 Pan Liner 1
6 708 Drip Valve Replacement Kit 1
7 826 Solenoid Valve 1
8 834 Male Adaptor - Brass 2
9 136 Saddle Valve Kit 1
10 802-T Side Cover 1
11 800-T Cover 1
12 157 Humidistat Assembly 1
13 156 Transformer 1
14 715-10 1/2” Drain Hose - 10ft. 1
15 704 1/4” O.D. Water Line - 20ft. 1
16 254-5 Flex Duct - 5ft. Extended 1
17 702 Damper Assembly 1
18 703 Collar Plate for damper 1
17
NOTE: CHANGE EVAPORATOR PAD AT THE
BEGINNING OF EACH SEASON. SHUT OFF
WATER AND AIR FLOW AT THE END OF
HEATING SEASON.
Annual Summer Shutdown
When its time to turn off your GH-3200 for the summer,
turn your humidistat to the off setting. It is recommended
that you also complete the above 5 easy maintenance
steps at this time.
Warning!
1. 120 volts may cause serious injury from electrical shock.
Disconnect electrical power to the furnace before starting installation.
2. Sharp edges may cause serious injury from cuts. Use care
when making plenum openings and handling duct work.
3. Hot water temperatures in excess of 125 degrees F. may cause
serious injury from burns. Make sure water supply is shut off
before connecting the water supply.
Caution!
1. Do not install unit where freezing temperature could occur.
2. Do not install unit on the furnace jacket.
3. Do not install unit on a plenum face where the blanked off ends
of the cooling coil restrict air movement through the humidifier.
4. Do. Not set humidity higher than recommended. Condensation
dame may result.
5. Do not connect the GH-3200 power cord to multi-speed
furnace blower motors other than 120 VAC.
6. Do not set humidity up to recommended levels if there is
condensation on the inside windows of any unheated living
space. Condensation damage may result.
7. Do not install unit on the supply plenum where static pressure
exceeds 0.4” W.C.
8. Do not install the unit where water pressure exceeds 65 psi.
Leakage may result. Follow codes in effect concerning pressure
reduction.
14
10
1
15
2
16
3
8
8
7
6
4
9
12
5
13
11
 Loading...