

greenhouse sensation Hydropod 20, Hydropod 40 Instructions Manual
Vent
Any Questions? Contact our Gardening Angels
We are here to help you get the best from your plants, so if you have any
questions about your Greenhouse Sensation product or the plants you
are growing, contact one of our Gardening Angels.
Call: 0845 602 3774
Email: info@GreenhouseSensation.co.uk
‘Like’ Us
For hints, tips and offers search
‘Greenhouse Sensation’ and click ‘Like’
1137•HP0114
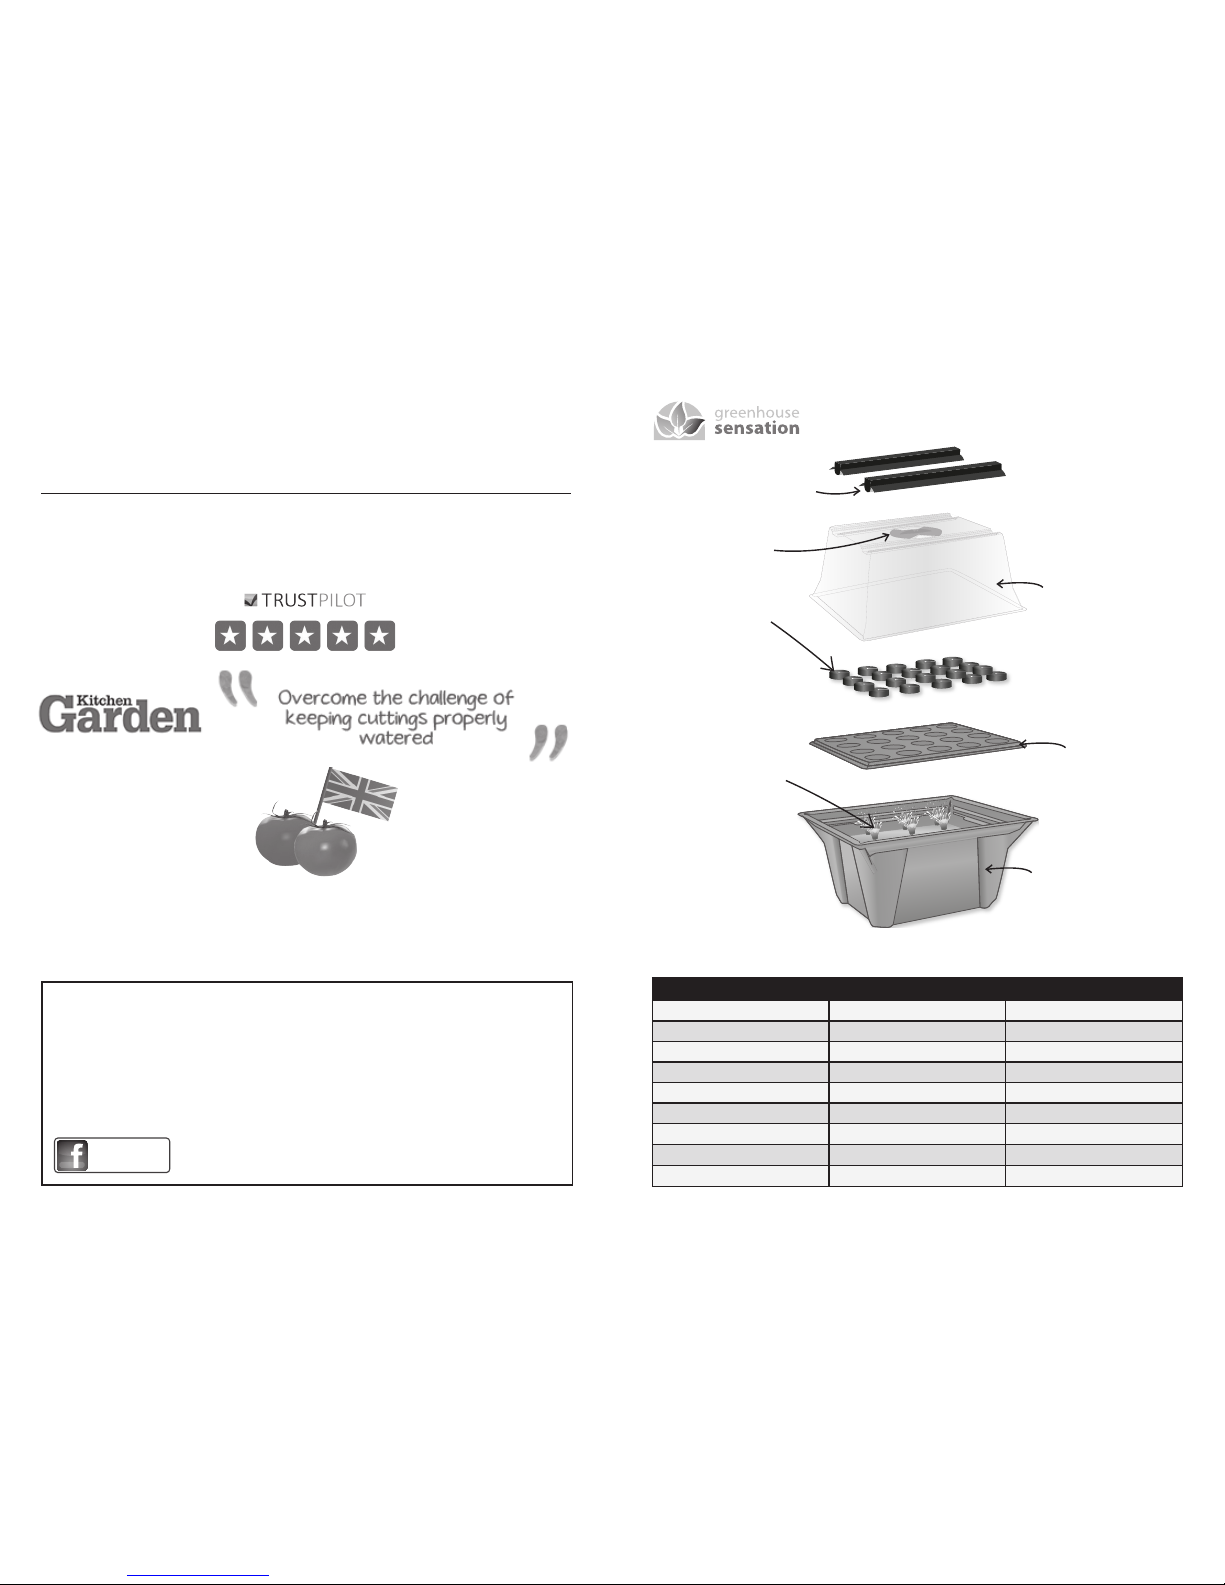
Instructions
Foam discs
Sprayers
Reservoir
Lid
Cuttings
Tray
Hydropod
With Lights
Contents
Hydropod 20 Hydropod 40
Reservoir 1 1
Lid 1 1
Cuttings Tray 1 1
Pump 1 1
Foam Disks 20 40
Sprayer 1 1
Heater 1 1
Propagation Light 2x 30cm Lights 2x 45cm Lights
Instruction Manual 1 1
Made in England
Thank you for supporting independent
British manufacturing
“Award Winning Products made in England
and 5 star rated service.”
Propagation Lights
Guarantee
Your Hydropod is guaranteed for 1 year. If you ordered from
Greenhouse Sensation you will receive an extended warranty
so that your product is guaranteed for 2 years.
Top tips!
LIGHT
Cuttings should not be placed in direct
sunlight, although you can use the
Hydropod with propagation lights.
HEAT
A consistent temperature is required.
The optimum temperature required by
cuttings is 18-22oC. You need to place
your Hydropod Propagator somewhere
that maintains this temperature, or use the
optional heater in the reservoir.
Welcome to Greenhouse Sensation and thank you
for ordering your Hydropod.!
The Hydropod Propagator gives you fast results
• The mist provides the plants with constant access to water. This means that the roots
grow faster and stronger because they have access to everything they need. It also
reduces the risk of root rot or drying out.
• Roots are visible so root growth can be checked without disturbing the plants.
• Large vents give greater control over temperature and humidity.
• Includes 2x grow lights which sit in specially designed groves in the lid keeping them
at the correct distance from the plants. The light spectrum creates healthy growth,
preventing legginess.
• If you want to share your results with us and fellow Greenhouse Sensation growers visit
our website and Facebook page to post your photos, comments or questions. We love
to hear how your plants are getting on. www.GreenhouseSensation.co.uk
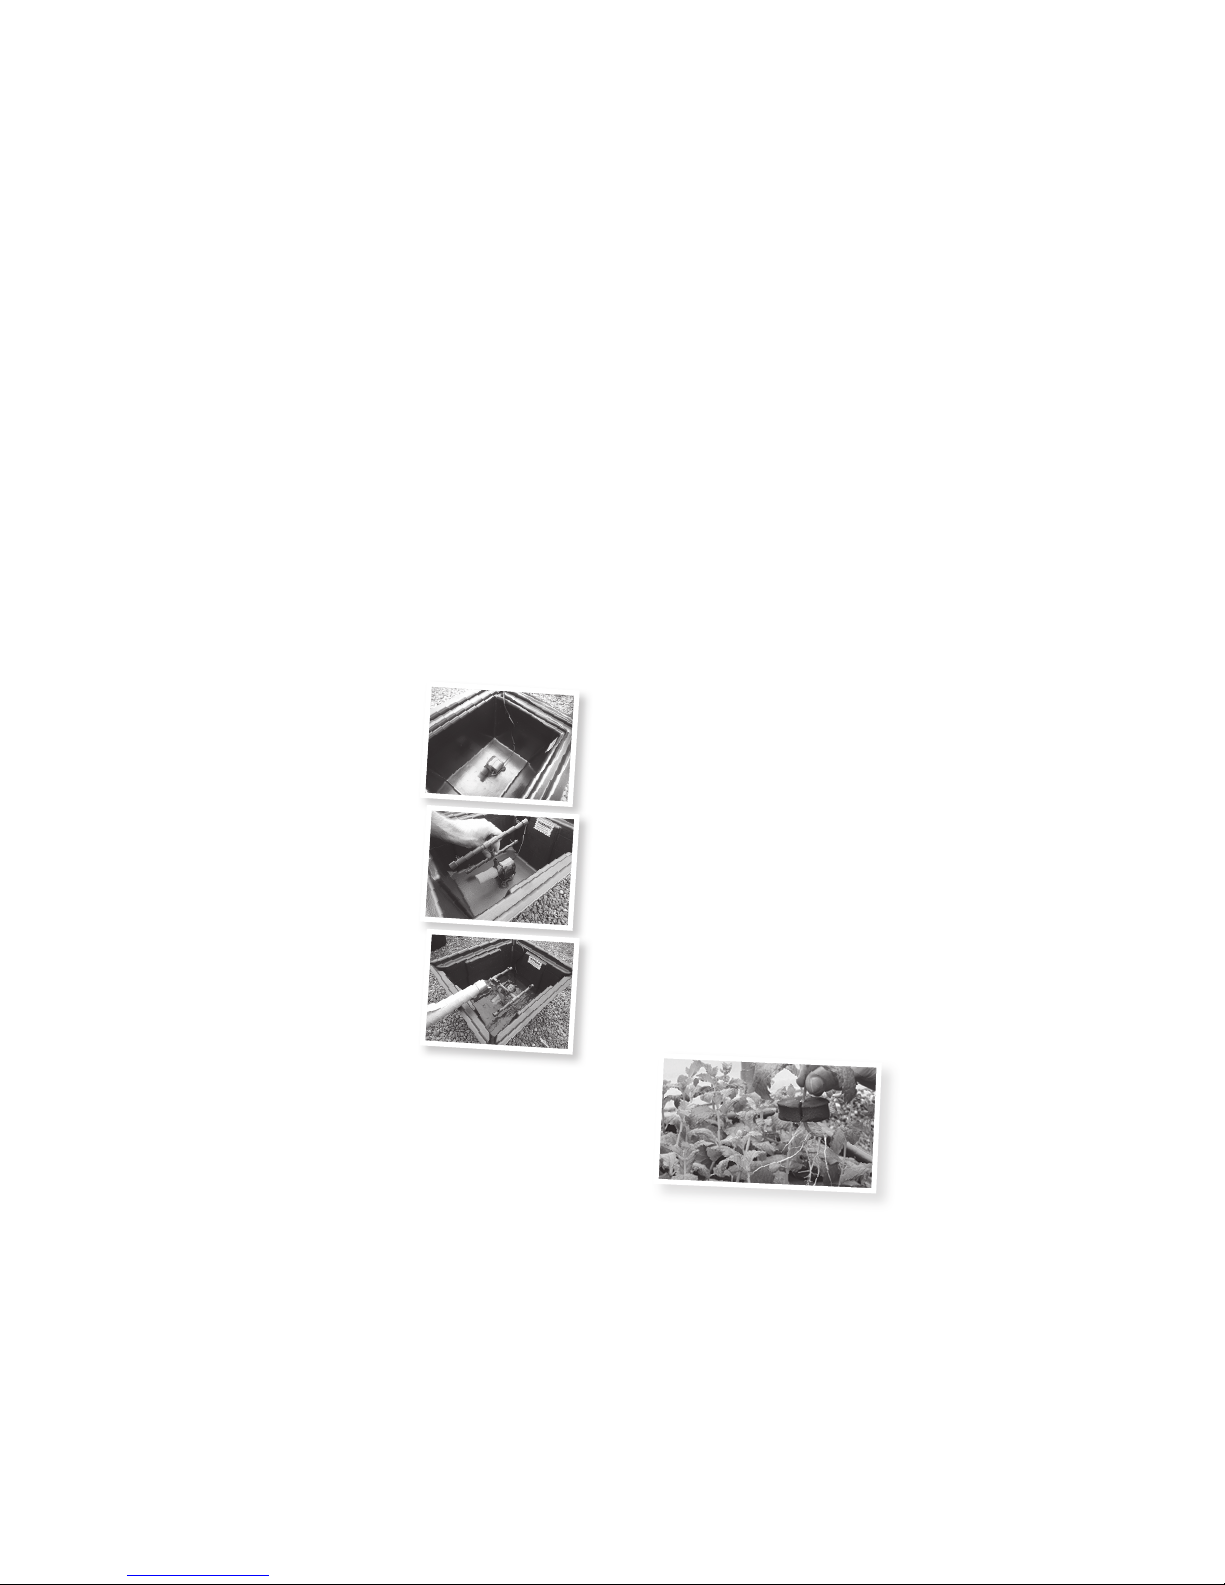
Assembly instructions
• Place the reservoir on a level surface.
• Push the bottom of the stand onto the pump and attach
the three suction pads. Then push the sponge lter onto
the end of the pump. Rest the lead in the groove on the
edge of the reservoir.
• Insert the adaptor on the spray assembly onto the pump
outlet. This is a tight t to improve stability when in use.
Push the pump onto the bottom of the reservoir using
the suckers.
• Push the heater onto the bottom of the reservoir using
the suckers provided. Use the additional instructions
for operating the heater.
• Ensure the spray bars are level. Fill the reservoir with water
to the level of the spray bars. Briey test by plugging the
pump in. Either use luke warm water or cold water from
the tap which has been left to reach room temperature.
• Place the cuttings tray in position.
• Please refer to the manufacturer’s instructions
for propagation lights set up.
Propagation instructions for cuttings
• Slide the cutting into the sponge disc using the slit to avoid damaging
the cutting. At least 2cm of the stem should show below the sponge.
• Place the sponge disc on top of the lip of the cuttings tray.
• Put the propagator lid in place. Switch the propagator on and run continuously.
Top tips for taking cuttings
• The day before taking your cuttings, water the plant thoroughly.
• Take cuttings in the morning when they are full of water.
• Take a stem and bend it. If the stem breaks with a snapping sound, it is in the softwood
stage and ready to be taken as a cutting. If the stem is still too green, it will bend but not
break. If the stem is too woody it won’t bend at all.
• For best results cuttings should have a small piece of older wood on the base to reduce
the possibility of rotting.
• Always choose healthy, pest free and non-owering shoots for your cuttings.
• Take the cuttings with clean sharp secateurs. Cut straight and cleanly directly under
a node (the bump where the leaf emerges).
• The cuttings should be 5-10cm long.
• Remove all but one or two pairs of leaves at the tip. If the remaining leaves are very
large cut them in half to reduce the amount of water the cutting will lose through
transpiration.
• Place the cuttings in a clean plastic bag to minimise water-loss during the time between
taking the cuttings and placing them in the propagator
• Place the Hydropod in a bright place but not in direct sunlight, covering with
horticultural eece will help to diffuse strong sunlight
When are my plants ready?
Your plants can be transplanted when
they have abundant white roots visible.
See image.
Lights Set Up
• Open your lights and remove the lm from the reectors.
• Prise the dust cap off one of the lights (at the output end).
• Position each light in the grooves of the propagators lid and centre on your
Hydropod Propagator.
• Connect the power cord with the plug and on/off switch to the input end of the light from
which you previously removed the dust cap. Do not plug into the power socket at this time.
• Take the connecting cable. Click one end of the connecting cable into the Input
of one light and click the other end of the cable into the output of the other light.
• The lights can now be plugged into a power socket and switched on.
 Loading...