

Page 1
ACACIA
Instruction Guide
Page 2
Introduction:
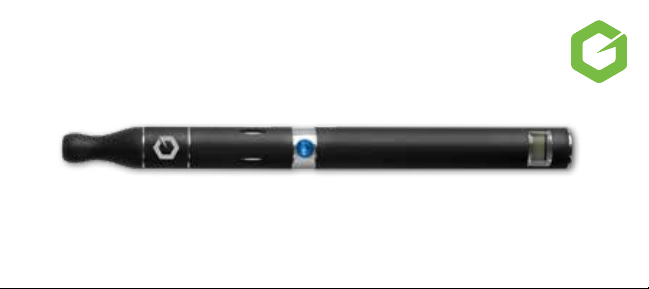
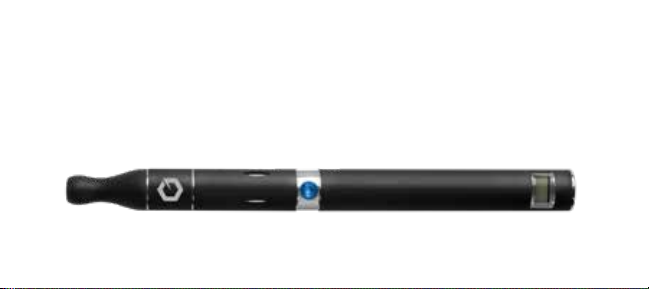
We invite you to get to know t he new Acacia, the world’s smallest p ortable dr y herb and wax
vaporizer. Using the m ost advanced te chnology available, we have d eveloped the ult imate herb
and wax vaporize r.
No need for butan e or a lighter with the A cacia advanced vaping sy stem. Simply fill your Acacia,
and you are r eady to vape in style.
Page 3

GENERAL FUNCTION:
Congratulations on purchasing the smalles t, greatest por table vaporizer that t his
generation has ever seen! Created w ith advanced tec hnology and ex pertise, Ac acia is a
vaporizer like no ot her. Acacia heats an d vaporizes your h erbs and wax to achi eve the greatest result s.
Easy and discreet to use, it works in all envir onments, including a windy day on your b oat, a rainy
aerno on at the park, on top of a mountain, or just sitting on your couch! Aer a s hort 2-hour charge,
your devi ce is ready to use. Simply fill yo ur device’s ceramic heating chamber wit h tobacco, press the
power button, and a shor t inhale is all you nee d to start enjoy ing your Acacia.
Contents: 1 - Battery
1 - Mouthpiece 1 - Cleaning Brush 1 - Packing Tool
1 - Wall Adapter 1 - USB Charger
1 - Chamber Connector
1 - Ceramic Heating Chamber
1 - Spring1 - Mesh Filter 1 - Ceramic Filter
Page 4
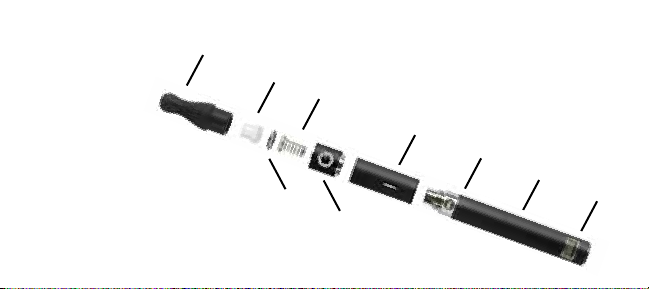
Device Anatomy
1 - Mouthpiece
1. Mouthpiece
2. Ceramic Filter
3. Mesh Filter
4. Spring
5. Chamber Connector
6. Ceramic Heating Chamber
7. Power Button
8. Rechargeable Battery
9. LED Display
2 - Ceramic Filter
3 -Mesh Filter
5 - Chamber Connector
4 - Spring
6 - Ceramic Heating
Chamber
7 - Power Button
8 - Battery
9 - LED
Display
Page 5

Preparing the Unit
Charge your device for 2 hours.
The light will turn green when the battery is fully charged.
1. Remove the chamber connector from the heating chamber.
2. Use the packing tool to gently pack the chamber with
herb or wax material, but do not over-pack.
(When using wax do not pack the wax)
3. Screw the chamber connector onto the heating chamber.
With your device connected, you are now ready to vape!
2
1 & 3
Page 6

Charging the Unit
USB charger: Connects directly to any USB port.
Wall adapter: Works in conjunction with the USB port.
1. We recommend charging your device for at least
6 hours during the first charge. This will condition the battery for its future uses.
2. When the LED display is blank, the device needs to be charged. Charge for approximately 2 hours.
The LED will display while charging. When full, remove battery from charger.
Wall Adapter USB Charger
LED Display
Fully Charged
Activating the Unit
1. With your device ready for use, press the power button to activate the heating element. Continuing to
press the power button, put the mouthpiece into your mouth, and inhale lightly. Enjoy your experience!
2. Your device will automatically shut o aer 9 seconds of continuously depressing the power button.
Wait 3 seconds before activating again.
Page 7

Cleaning and Maintaining the Unit
When using the device for an extended period of time, the filter may get clogged and dirty,
causing a diicult draw or less vapor being released through the mouthpiece.
To clean the heating chamber:
1. Disconnect from the battery.
2. Use the brush tool to gently clean the walls of the heating chamber.
3. Do not touch the heating element at the bottom of the chamber.
To clean the ceramic filter:
1. Insert a paper clip or pin into the holes.
2. Push all the way through to ensure clear airway. Wipe clean with a cloth.
To clean the mouthpiece:
1. Wipe the inside of the mouthpiece with a cotton swab.
2. Wipe the mouthpiece with a damp paper towel.
2
Page 8

Removing the Spring and Filter from the Unit
1. Remove mouthpiece from the chamber connector.
2. Unscrew the chamber connector from the heating chamber.
3. Turn the chamber connector upside down; the mesh filter should fall out easily.
Use the spoon end of the packing tool to remove filter if necessary.
4. To remove the spring from the chamber connector, hold the top of the spring.
Twist counter-clockwise and quickly pull it through the smaller opening of the
chamber connector.
5. Device parts are very delicate. If they are stretched beyond their original size,
they should be replaced.
Page 9

Replacing the Spring and Filter
1. Place the spring, smaller end first, into the chamber connector. Gently pull
through from the other side until it is securely in place.
2. Place the filter inside the chamber with the mesh filter tool.
3. Use the packing tool to press the filter in firmly and evenly.
4. Screw the chamber connector to the heating chamber.
5. Insert the ceramic filter to the mouthpiece.
6. Connect the mouthpiece to the chamber connector. Make sure the mouthpiece is
pushed all the way down into the chamber connector. If the mouthpiece doesn’t go
all the way down, then the mesh filter is not laying flat and needs to be readjusted.
Page 10

Tips
• For best results do not over pack the heating chamber. This will ensure easy airflow passage for
even heating.
• Remember to press the power button for at least 2 seconds before inhaling to activate the
heating element.
• Between uses, wait 3 seconds before reactivating the device.
• In the event that vapor isn’t being released, use the packing tool to gently rotate the tobacco
within the chamber.
• For best results, break the tobacco up by hand or grind them. Be sure to remove all stems and/or
seeds before filling the heating chamber.
Page 11

Warnings:
• Do not fill the device with any stems, seeds or liquids. Doing so will cause damage to the
device and void the warranty.
• Let metal spring cool down at least 1 minute aer use before touching it.
• Do not drop the device.
• Do not put the device into water or any other liquid.
• Do not put any foreign objects into the device.
SAFETY AND DISCLAIMERS:
Please read the following safety recommendations before using this device, and keep this user manual in a safe place for further reference. Do
not allow children, women who are pregnant or breast feeding, and people with life-threatening illnesses to use this device. The manufacturer
is not responsible for any damage or personal injury caused by inappropriate, incorrect or irresponsible use of the device. This vaporizer is not a
medical device and is not intended to diagnose, cure, treat, or prevent any diseases or other conditions. If you have any health problems, consult
your doctor before using. This device is not intended to administer medicinal or illegal products of any kind, and doing so voids the warranty. Any
illegal use of this device could subject the user to severe fines, penalties, and/or imprisonment under the laws of your jurisdiction.
Page 12

Acacia #702263 #702264
Manufactured for
and distributed by
WARNING:
This prod uct is intend ed for use by per sons of legal a ge or older. Not inte nded for childr en, women who a re pregnant or b reast feedi ng, or
perso ns at risk of hear t disease, hi gh blood pres sure, diabet es, or taking m edicine for de pression o r asthma. This p roduct is no t a smoking
cessat ion product a nd has not been t ested as such . Nicotine is ad dictive and ha bit forming , and it is very t oxic by inhalati on, in contact
with the sk in, or if swallo wed. Nicotine c an increase yo ur heart rate a nd blood pre ssure and caus e dizzines s, nausea, an d stomach pain.
Inhalati on of this produ ct may aggrav ate existin g respirator y condition s. Ingesti on of the non-v aporized con centrated in gredient s in the
chamber c an be poisono us.
CA Proposition 65 WARNING:
This prod uct contain s a chemical kno wn to the State of C alifornia to ca use birth de fects or ot her reprodu ctive harm.
*The U.S . Food and Drug A dministrati on has not deter mined that any tob acco product pr esents less r isk compared to any o ther tobacco pro duct.
For tobacco pr oduct consume rs concerned ab out the health e ects from to bacco product us e, the best thi ng to do is quit.
Moorpark, CA 93021
 Loading...