

Page 1
Document 479288
Energy Recovery Filter System
®
Installation, Operation and Maintenance Manual
Please read and save these instructions for future reference. Read carefully before attempting to assemble, install,
operate or maintain the product described. Protect yourself and others by observing all safety information. Failure
to comply with instructions could result in personal injury and/or property damage!
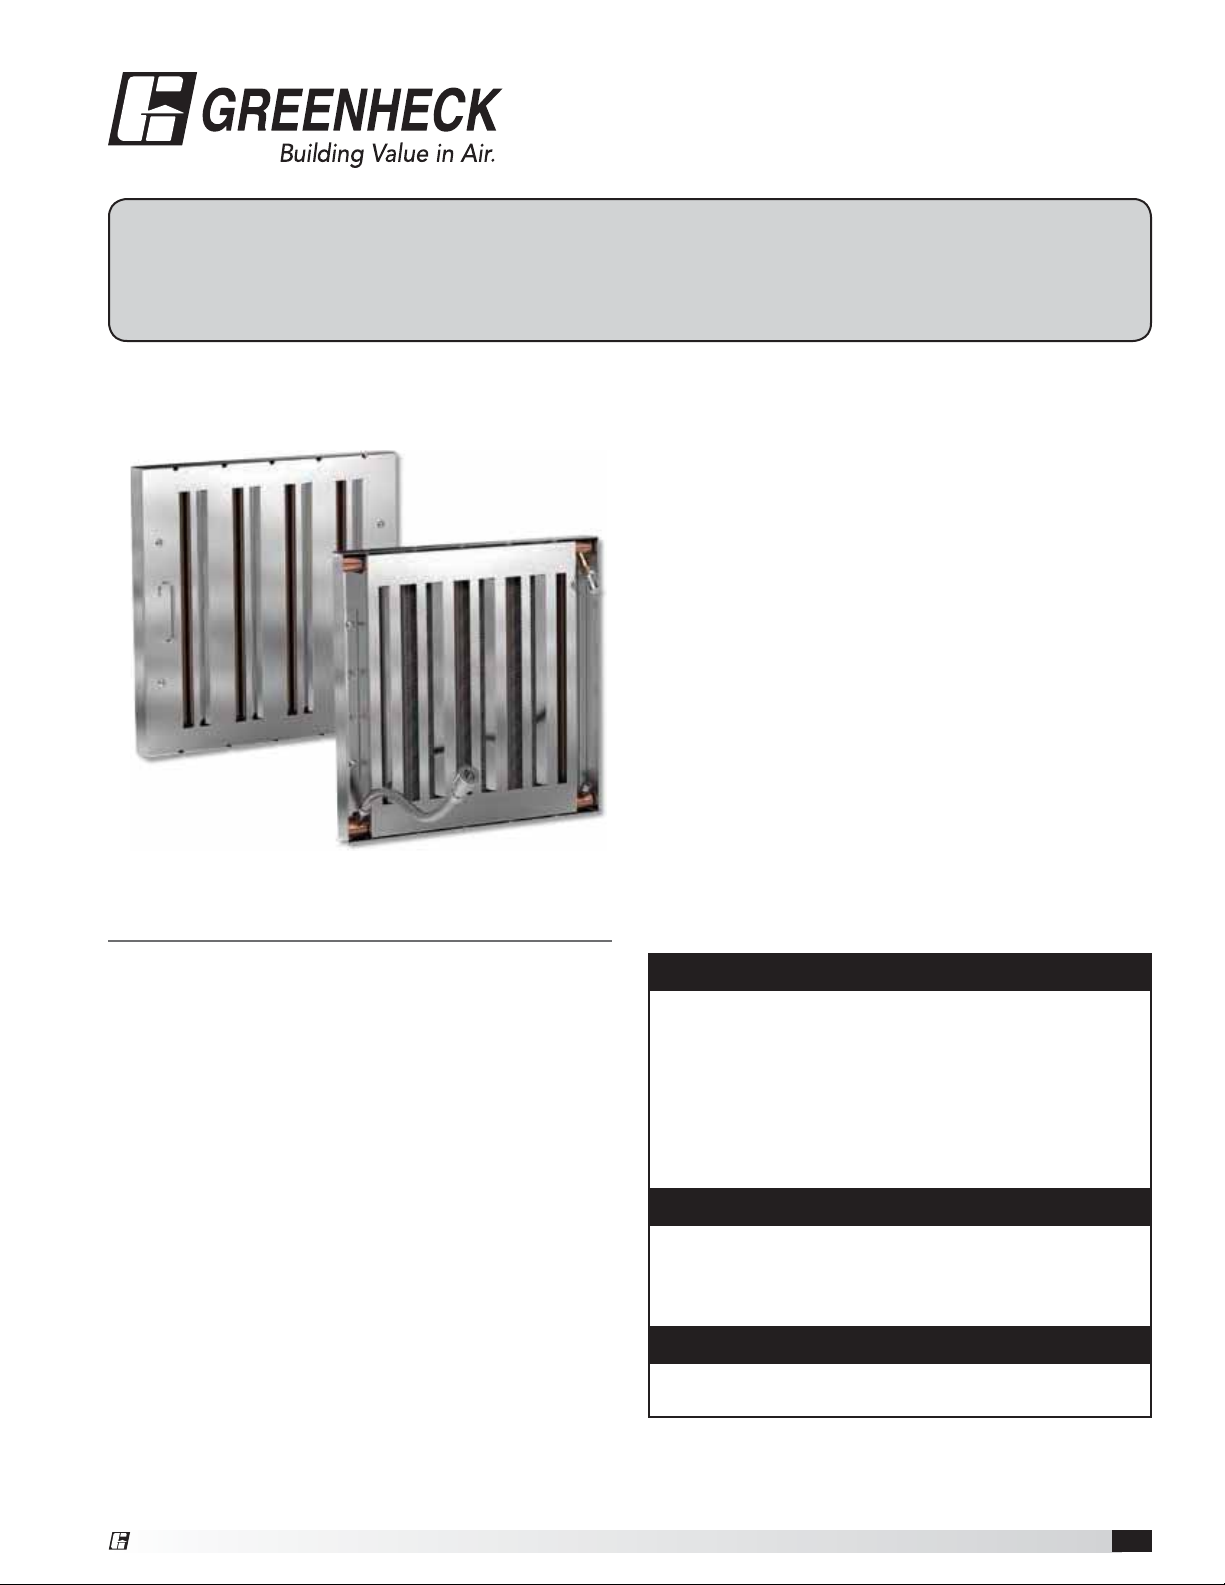
Energy Recovery Filter System
General Description
Description and Purpose
The energy recovery filter system is an arrangement of
high efficiency grease filters with heat recovery coils to
be mounted in a commercial kitchen hood and piped
back to an existing water heater. While the smoke
and effluent generated off the commercial cooking
appliances will naturally be filtered, the heat generated
by the cooking process will be used to preheat water
being supplied to the water heater, thus reducing
operating expenses and the need for larger and more
expensive hot water heaters.
WARNING
Electrical shock hazard. Product contains electrically
activated components. This can cause equipment
damage, personal injury, or death. Service must only
be performed by personnel that are knowledgeable
in the operation of the equipment being controlled.
Read the installation, operation, and maintenance
instructions thoroughly before installing or servicing
this equipment.
DANGER
Always disconnect power before working on or
near the control panel provided. Lock and tag the
disconnect switch or breaker to prevent accidental
power up.
CAUTION
All field installation of electrical equipment must be
done to meet all NEC and electrical codes.
Energy Recovery Filter System 1
Page 2

Table of Contents
Installation
Receiving, Unpacking, Handling, Storage .........2
Installation
Components and Installing Control Cabinet ......2
System Installation ..........................3
Plumbing and Electrical Requirements ..........4
Control Cabinet Layout ......................4
Operation ...................................5
Maintenance ................................5
Balancing and Testing Methods .................6
Troubleshooting ..............................7
Replacement Parts ...........................7
Codes and Standards .........................7
Our Commitment .............................8
Receiving - Upon receiving the product, check to make
sure all items are accounted for by referencing the bill
of lading to ensure all items were received. Inspect
each crate for shipping damage before accepting
delivery. Notify the carrier if any damage is noticed.
The carrier will make notification on the delivery
receipt acknowledging any damage to the product.
All damage should be noted on all of the copies of the
bill of lading which is countersigned by the delivering
carrier. A Carrier Inspection Report must be filled out
by the carrier upon arrival and reported to the Traffic
Department. If damaged upon arrival, file a claim
with the carrier. Any physical damage to the unit after
acceptance is not the responsibility of the manufacturer.
Unpacking - Verify that all of the required parts and
the correct quantity of each item have been received.
If any items are missing, report shortages to your local
representative to arrange for obtaining missing parts.
Sometimes it is not possible that all items for the unit
be shipped together due to availability of transportation
and truck space. Confirmation of shipment(s) must be
limited only to items on the bill of lading.
Handling - Make sure the equipment does not suffer
any heavy vibration or knocks. Handle in such a manner
as to keep from scratching or chipping any coating.
Damaged finish may reduce the ability of unit to resist
corrosion.
Storage - Products are protected against damage
during shipment. If the product must be stored prior
to installation, it must be protected from dirt and
moisture. Indoor storage is highly recommended. For
outdoor storage, cover the control package with a tarp
to keep it clean, dry. The user assumes responsibility
of the equipment and accessories while in storage. The
manufacturer will not be responsible for damage during
storage. These suggestions are provided solely as a
convenience to the user.
NOTE
All installation must follow local plumbing and
electrical codes.
Components
Components included with the energy recovery filtration
system.
Quantity Description
Two size options:
• 20 inch high x 20 inch wide (50.8 x 50.8 cm) or
Varies
• 16 inch high x 20 inch wide (40.64 x 50.8 cm)
Special energy recovery filters with quick
couplers and hoses attached
2 3/8 inch (0.95 cm) UL Listed hood penetration seal
1 18 inch (45.72 cm) stainless steel hose
1 24 inch (60.96 cm) stainless steel hose
24 inch high x 36 inch wide x 14 inch deep
1
(60.96 x 91.44 x 35.56 cm) control cabinet
1 Male disconnect
1 Female disconnect
1 Filter spacer
Installing Control Cabinet
The cabinet should be mounted to a
secure surface through the holes
around the back perimeter
of the cabinet. Use
at least six (6)
mounting holes
evenly spaced
around the back
perimeter of the
cabinet. If the
pre-drilled holes
do not work,
drill additional
holes around
the perimeter for
mounting. The
cabinet will weigh approximately 85 pounds (38.56 kg).
NOTE
It is the responsibility of the installer to ensure studs
or other structural members should be the point of
fastening when attaching this cabinet to a wall.
NOTE
Improper storage which results in damage to the unit
will void the warranty.
Energy Recovery Filter System2
Page 3
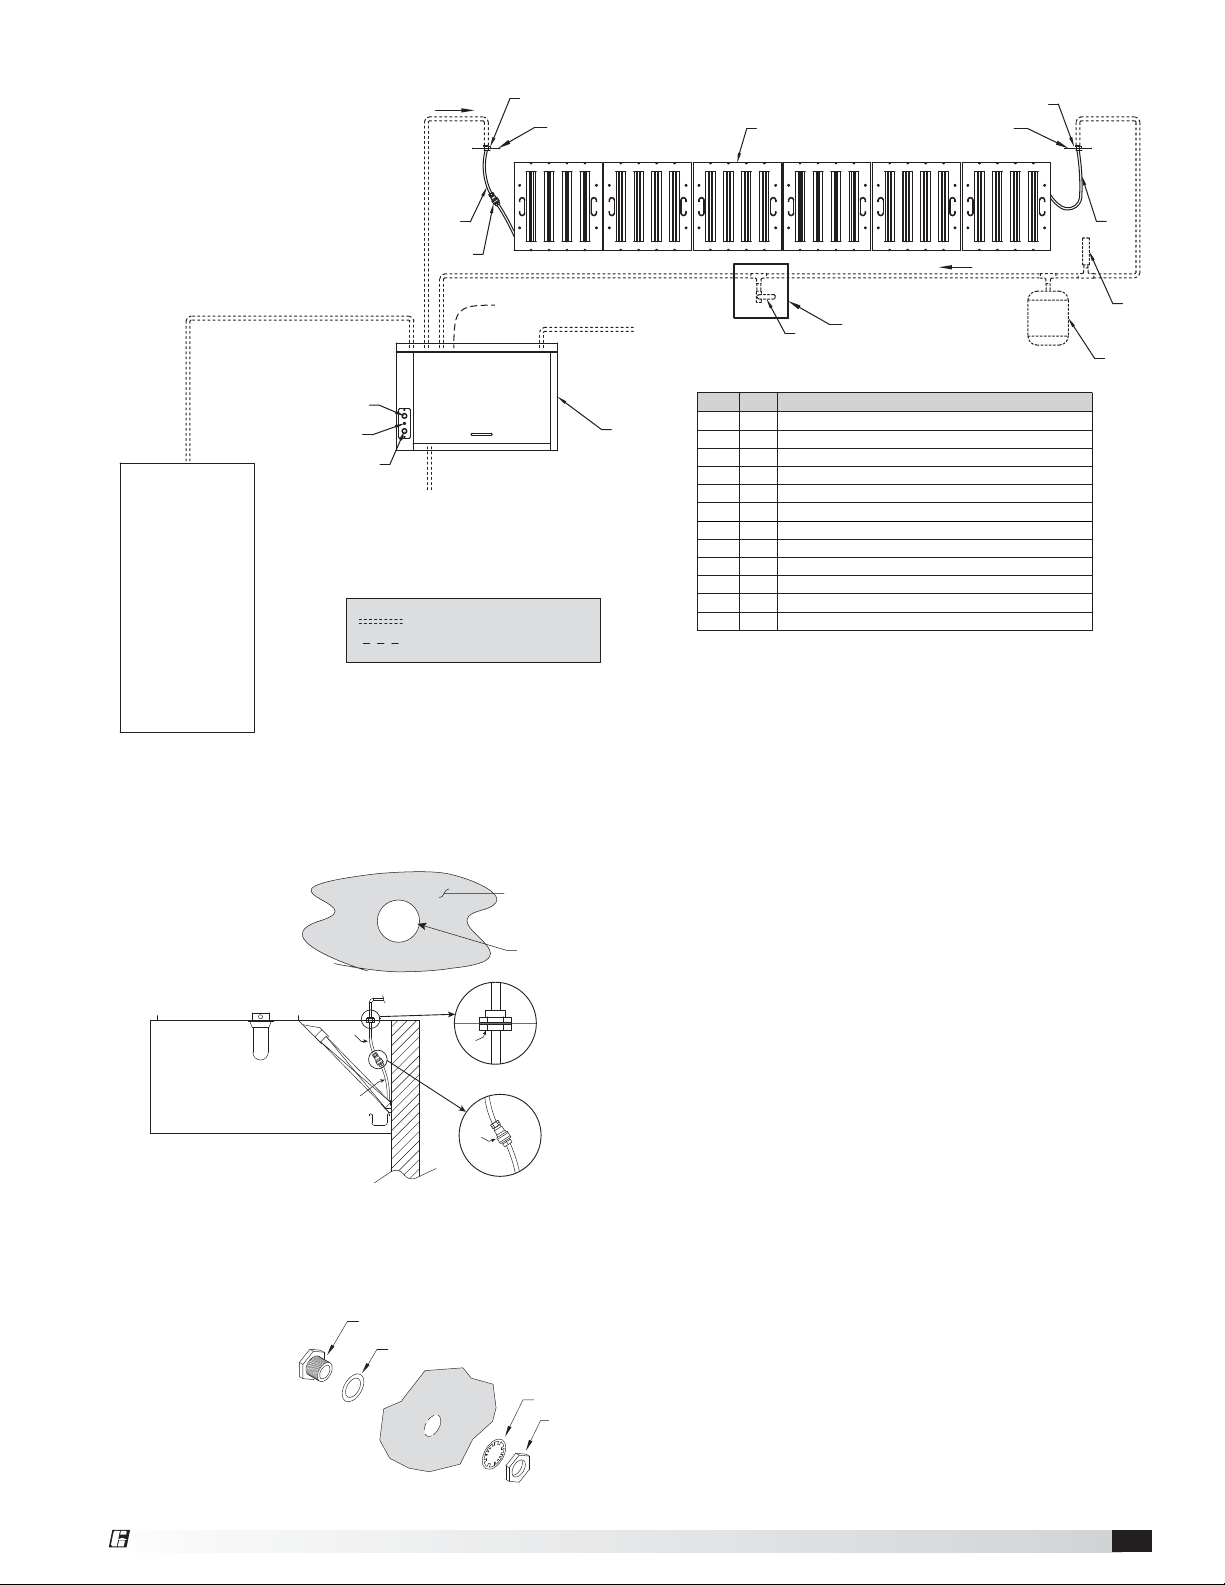
System Installation
FLOW
*6
*HOOD PENETRATION
5
Quantity of filters varies based on hood size
*HOOD PENETRATION
*6
7
TO FILTERS
8
1 INCH FNPT CONNECTION
WATER
HEATER
TO WATER HEATER
3/4 INCH FNPT CONNECTION
4
2
3
TO DRAIN
3/4 INCH FNPT CONNECTION
PIPING PROVIDED BY OTHERS
ELECTRICAL PROVIDED BY OTHERS
ELECT.
120 VAC 15 AMP
FROM BREAKER
3/4 INCH FNPT CONNECTION
1. Remove the existing filter(s) from commercial kitchen
hood for retrofit or from the shipping container for a
new installation.
2. Drill two 1
1
⁄8-inch holes in the hood top, side or back
above the filter
rack, one close
to the left and
one close to the
right side of the
Hood Surface
1-1/8 inch
(2.86 cm)
diameter hole
hood.
7
9
6
8
3. Install a hood penetration seal (item 6) in the hood
top above the filter rack. To do this, disassemble the
compression seal and insert the seal into the hole
from the inside of the hood making sure the gasket is
placed on the
fitting before
inserting it
into the hole.
Install the lock
washer and
nut and tighten
INTERIOR
OF HOOD
3/8 inch UL Listed Hood Penetration Seal
PN 451167
Gasket
Hood
Lock Washer
Nut
securely as
shown.
EXTERIOR OF HOOD
FROM FILTERS
FROM WATER
SUPPLY LINE
1 INCH FNPT CONNECTION
1
MUST BE IN ACCESSIBLE
LOCATION FOR TESTING
12
ITEM QTY DESCRIPTION
1 1 Control Cabinet
2 1 No Flow Status Light
3 1 Pushbutton Switch, System ON/OFF
4 1 Pushbutton Switch, Pressure Release
5 Varies Filter Assembly (quantity varies based on hood size)
*6 2 3/8-inch FNPT Hood Penetration Seal, (1
7 1 18 inch Stainless Steel Hose
8 1 3/8-inch Quick Disconnect
9 1 24-inch Stainless Steel Hose
10 1 Thermal Expansion Tank (provided by others)
11 1 Water Hammer Arrestor (provided by others)
12 1 1/4 Turn Ball Valve to Test Flow Rate (provided by others)
*TOP, SIDE, OR BACK OF HOOD. TO BE COMPLETED IN FIELD BY OTHERS.
DO NOT OBSTRUCT FIRE SYSTEM PIPING.
FLOW
1
/8 inch hole)
4. Attach the 18 inch stainless steel hose (item 7) to
the left-most hood penetration seal, and the 24 inch
stainless steel hose (item 9) to the right-most hood
penetration seal.
5. Attach the extra female coupler to the 18 inch hose
(item 7) on left end of the hood, and the male coupler
to the 24 inch hose (item 9) on the right end of the
hood.
6. Install new filters in hood from left to right. Hook
up the quick-connect couplers between the filter
assemblies.
7. If applicable, install adjustable filter spacers to fill in
the gap(s) on the hood ends.
8. Install all other plumbing, as shown on this drawing.
Please refer to plumbing requirements section on
page 4 for more information.
9. Make all of the electrical connections. Please refer to
electrical requirements section on page 4 for more
information.
9
11
10
Energy Recovery Filter System 3
Page 4

Plumbing Requirements
1. Connect the main water supply connection to the
1-inch FNPT connection labeled “FROM WATER
SUPPLY”.
NOTE
The water supply line must be pressurized to 40 PSI
minimum.
Control Cabinet Layout
Pressure
Relief
Connection
(to a drain)
System
Pressure
Release
Electrical
Controls
Flow Switch
Flow Switch
Circulation
Circulation
Pump
Pump
2. Provide the piping from the water heater to the
1-inch FNPT connection labeled “TO WATER
HEATER”.
3. Provide the piping from the left-most hood
penetration seal on hood to the 3/4-inch FNPT
connection labeled “TO FILTERS”.
4. Provide piping from the right-most hood penetration
seal on the hood to the 3/4-inch FNPT connection
labeled “FROM FILTERS”. In line within this pipe
run, provide a water hammer arrestor (provided
by others), a thermal expansion tank (provided by
others), and a 3/4-inch turn ball valve to test the flow
rate (provided by others). This ball valve needs to be
in an accessible location for testing.
5. Provide piping to an external drain from the 3/4-inch
FNPT connection labeled “TO DRAIN”.
Electrical Requirements
Located in a NEMA-3R box in the center of the control
cabinet is the electrical connection cabinet. Both the
pump and pressure release solenoid valve will be wired
to the electrical connections cabinet from the factory.
L1
H1
CONTROL INPUT: 120 VAC, 15 AMPS FROM BREAKER
N
N1
No Flow
Light
Pump
ON/OFF
TO
WATER HEATER
TO DRAIN
SHUT OFF
VALVE
Throttle Valve
TO FILTERS
FROM FILTERS
Shut Off Valve
Shut Off Valve
SHUT OFF VALVE
WARNING
Leave the pump running during cold weather
conditions to prevent freezing during cold
temperatures.
Pump Switch
FI-A
BK 21
BK
BK
Pressure Release
PR-A
BK
FI-B
R1
1411
R1
2421
Flow Switch
PR-B
21
P1H
NCC
A1R1A2
Pump
P1
BK WH
P1N
LT1
PS
No Flow - Red Light
LT2
FS
A1R2A2
Pressure Release Solenoid Valve
SV
BK WH
R2 - On
Delay
C
SL2SL1
SVNSVH
WH
NC
WH
WH
WH
Connect 120 VAC power from a 15 amp breaker to
terminals H1 and N1.
L1
H1
CONTROL INPUT: 120 VAC, 15 AMPS FROM BREAKER
N
N1
Energy Recovery Filter System4
Page 5

Operation
Start-Up Procedure
1. Turn on the fan for the kitchen hood.
2. Turn on the cooking equipment.
3. When the equipment reaches operating temperature,
push the green ON/OFF button on the control
cabinet to turn the system on.
4. Adjust the “Throttle Valve” to maximize overall
energy savings.
• Start with the valve half open.
• Monitor the “Inlet” temperature gauge on control
cabinet and adjust the “Throttle Valve” to maximize
the “Outlet” temperature.
• Do not completely close “Throttle Valve”, make
sure valve is at least one-quarter open.
• To maximize savings, the “Throttle Valve” must be
set during peak cooking conditions.
5. Turn the cooking equipment off.
6. Push the green ON/OFF button on the control
cabinet to turn the system off.
7. Turn the fan off for the kitchen hood.
NOTE
Do not completely close the “Throttle Valve” when the
system is operational.
Sequence of Operation
1. During cooking operations, turn on the fan for the
kitchen hood.
2. Push the green ON/OFF button on the control
cabinet to turn on the energy recovery filter system.
NOTE: If flow is not detected, the red light will
illuminate and the circulation pump will shut down.
If this occurs, stop the system and verify filters are
properly connected and all valves are open.
3. After cooking operations, push the green ON/OFF
button on the control cabinet to turn off the energy
recovery filter system.
4. Turn off the fan for kitchen hood.
Maintenance
Cleaning filters
Filters should be cleaned a minimum of once a week
depending on the cooking equipment, cooking
frequency, food type and quantity. When servicing or
cleaning the filters, turn the pump power off (green
button on control cabinet should not be lit). Close the
ball valve in the cabinet that supplies the water to the
filters. Then press the ‘Pressure Release’ button on the
control cabinet for about 5-10 seconds.
NOTE
Do not wash coil with a high pressure washer, as it will
damage the fins.
Do not take filter apart and clean it unless you are
a trained service technician. This is to prevent the
coated aluminum fins from being damaged.
When washing assembled filters in a dishwasher, it is
recommended to use Ecolab® Solid Metal Pro®
When serviced by untrained personnel:
1. Remove filter spacer from the hood.
2. Disconnect the quick connect couplers between the
filter assemblies.
3. Remove the filters from hood.
4. Place the filters, assembled, into a deep sink or
dishwasher and wash thoroughly.
5. Place the filters back into hood.
6. Hookup the quick couplers between the filters and
to the connections on the hood.
7. Insert the filter spacer.
If normal cleaning techniques are not adequately
cleaning the filters, then a trained service
technician should be requested to service as
follows:
1. Remove the filter spacer from the hood.
2. Disconnect the quick connect couplers between
filter assemblies.
3. Remove the filters from hood.
4. Position the filter on its back, face up, and unscrew
the four truss head machine screws from filter face.
5. Turn the filter over so it lies on its face.
6. Remove the filter back from assembly.
7. Remove the coil section from assembly.
8. Wash all three parts (front, back, and coil) in a sink
with mild detergent.
9. After all the parts are clean, lay the filter front face
down, and place the coil into the filter front. Make
sure the hose connection is on the bottom of the
filter.
10. Place the filter back over the top of the coil.
11. Turn the filter over so the face is now visible and
replace the four machine screws.
12. Place the filter assembly back into the hood.
13. Hookup quick couplers between the filters and to
the connections in the hood.
14. Insert filter spacer.
Truss Head
Machine
Screws
Filter Front
Coil
WARNING
Make sure the “Pressure Release” button is pressed
before disconnecting anything. If system is not purged
properly, water spillage can occur, which can cause
hot water burns.
Connection
Bottom of Filter
Hose
Quick
Connect
Energy Recovery Filter System 5
Filter
Back
Page 6

Balancing and Testing Methods
Shortridge Method
With all the filters in place, determine the total hood
exhaust volume with a Shortridge meter as follows:
1. All of the cooking equipment should be on. If the
hood has internal short circuit make-up air, it should
be turned off.
2. Measure velocities
• Set up the Shortridge meter.
• For 20 in. (500 mm) wide filters, position the
grid as shown in Fig. A and B. Average the two
measurements.
• Take velocity readings for each filter.
3. Calculate each filter’s volumetric flow rate as follows:
Calculate each filter’s average velocity by summing
the velocity readings and dividing by the number of
readings for each filter.
Multiply the average velocity by the conversion
factor to obtain the volumetric flow rate for each
filter.
4. Calculate the hood’s total volumetric flow rate by
summing the volumetric flow rate of each individual
filter in the hood as calculated in Step 3.
Place standoff spacers against
face of outlet or inlet grill,
filter, coil, etc.
Maintain 1½ inch
(38.1 mm) margin
Swivel bracket
Tubing connectors
Extension rods
Pushbutton handle and plug
Handle bracket
Captive knob screws
Edge of outlet/inlet
active face area
Maintain 1½ inch
(38.1 mm) margin
Tubing harness
Pressure input ports
External read jack
Neckstrap
NOTE
For best accuracy, multiply the velocity of each filter
by its conversion factor and sum the flow rates.
Averaging the velocity measured for all filters may
cause error.
Nominal Filter Size (H x L) Imperial
Inches Millimeters
20 x 20 500 x 500 3.0 .279
16 x 20 400 x 500 2.0 .185
Example: Measured velocities for a 20 x 20 filter = 185 and 189 ft/min.
Average Velocity =
(Imperial)
(Metric)
Flow rate for one filter =
(Imperial)
(Metric)
Sum of Velocity Readings
Number of Readings
185 + 189
=
3383 + 3456
=
2
2
Conversion
Factor
= 187.0 ft/min.
= 3420 m/hr
Average
x
Velocity
= 3.0 x 187.0 ft/min. = 561.0 cfm
= .279 x 3420 m/hr = 954 m3/hr
Fig. A
Fig. B
Conversion
Factor
17.25 in.
17.25 in.
(2978.15 mm)
(2978.15 mm)
Metric
Conversion
Factor
14 in.
14 in.
(355.6 mm)
(355.6 mm)
2.75 in.
2.75 in.
(69.85 mm)
(69.85 mm)
6 in.
6 in.
(152.4 mm)
(152.4 mm)
10 in.
10 in.
(254 mm)
(254 mm)
10 in.
10 in.
(254 mm)
(254 mm)
Total hood flow rate = (Filter 1 Flow Rate) + … + (Filter x Flow Rate)
(Imperial)
(Metric)
Energy Recovery Filter System6
= 561.0 + 555.2 + 534.6 + 539.9 = 2190.7 cfm
= 954 + 944 + 909 + 918 = 3725 m3/hr
Page 7

Troubleshooting
Replacement Parts
Pump does not run.
• Confirm the fans are running and the pump switch
has been pressed to activate the pump.
• Check voltage on terminals H1 and N1 in the
electrical panel to confirm that there is 120 VAC.
• Check voltage on terminals P1H and P1N and
confirm that there is 120 VAC.
• Inspect motor for disconnected wires.
• Motor may be faulty or failing, service motor.
Hot water heater inlet temperature is not hot
enough.
• Confirm that the panel is running during cooking
operations/fan operation.
• Confirm appliances are running.
• Close off the throttle valve to help force more water
through the filters.
WARNING
Do not close the throttle valve completely, as there
may not be enough water supplied to the water
heater.
Pressure release button will not purge water to
drain.
• Confirm the ball valve that supplies water to the
filters is closed.
• While holding the button, check the voltage
between SVH and SVN to confirm 120 VAC.
• The pressure release solenoid valve may be faulty or
failing, service solenoid valve.
Part Number Description
Filter Part Numbers
475863 Core Heat Exchanger
476407 18 inch (45.72 cm) Stainless Steel Hose
476411 Relief Valve
476409 Female Coupler
476410 Male Coupler
Cabinet Part Numbers
459010 Temperature/Pressure Gauge
381050 Solenoid Valve
381049 Coil for Solenoid Valve
476329 Pump
System Parts
476408 24 inch (60.96 cm) Stainless Steel Hose
451167
476409 Female Coupler
476410 Male Coupler
(shipped loose)
3/8 inch (0.95 cm) UL Listed Hood
Penetration Seal
Codes and Standards Compliance
• UL 1046
• NSF/ANSI Standard 2 – Food Equipment
No flow light is on.
• Confirm ball valves are open.
• Check quick connect fittings to ensure they are
properly installed and connected to allow flow.
• Check for frozen or broken water lines.
Energy Recovery Filter System 7
Page 8

Our Commitment
As a result of our commitment to continuous improvement, Greenheck reserves the right to change specifications
without notice.
Specific Greenheck product warranties are located on greenheck.com within the product area tabs and in the
Library under Warranties.
AMCA Publication 410-96, Safety Practices for Users and Installers of Industrial and Commercial Fans, provides additional safety
information. This publication can be obtained from AMCA International, Inc. at www.amca.org.
®
Phone: 715.359.6171 • Fax: 715.355.2399 • Parts: 800.355.5354 • E-mail: gfcinfo@greenheck.com • Website: www.greenheck.com
479288 • Energy Recovery Filter System, Rev. 1, July 2014 Copyright 2014 © Greenheck Fan Corporation8
 Loading...