

Green Gear Cycling Bike Friday pakIT User Manual
Using Your Bike Friday®
Green Gear Cycling, Inc.
3364 W 11th Ave. Eugene, OR 97402
800-777-0258 USA & Canada
+1-541-687-0487 Int’l • +1-541-687-0403 Fax
www.bikefriday.com • info@bikefriday.com
version 3/4/14
www.bikefriday.com800-777-0258 • +1-541-687-0487
1

Table of Contents
The story behind pakiT 4
The growth of pakiT 5
Anatomy of a Bike Friday pakit 6
Anatomy of a Bike Friday pakiT: Closeup 7
A Word on Safety / Your Tools 8
Congratulations / If You Need Help 9
Unpacking your pakiT 10
Assembly: Connect Frame 11
Remove Fork / Frame Spreaders 11
Install Rear Wheel 11
Install Front Wheel Quick Release 12
Easy Pack Mast 12
Using a Quick Release 13-14
Assembly: Reconnect Linear Pull / V-Brake 15
Adding Brake Cable Slack 16
Stem Safety Check 16
Mount the Stem Riser 17
Double Check Steering 17
Install Pedals 18
Double Check Your Bike Friday 19
Adjusting your pakiT: Frame Size 20
Saddle Height 20
Handlebar Height 21-22
Quill Stem Handlebars 22
Main Frame: Archer Technique 23-24
Main Frame: Gravity Technique 24-25
Main Frame: Two-Person Technique 25-26
Adjusting Headset 26-29
Packing in TravelCase: 30
Remove Accessories 30
Remove Pedals 30
Separate Main Frame 30
Remove Seatmast / Seatpost 31
Open Front and Rear Brake 31
Remove Front Wheel 32
Remove Rear Wheel 32
Install Fork Spreader 32
2
www.bikefriday.com 800-777-0258 • +1-541-687-0487

Table of Contents
Install Rear Wheel Dropout Spreader 32
Handlebars 33
Placing pakiT into TravelCase 34-36
Accessories: Travel Trailer Parts and Assembly 37-39
Dual Drive Hub Information 40
Bike Friday Service Overhauls 40
Bike Friday Service 41
More Maintenance Tips and Information 42-44
Airport and Travel Tips 45
Warranty Information 46-47
www.bikefriday.com800-777-0258 • +1-541-687-0487
3

The story behind pakiT
A Bike Friday pakiT on tour
in Europe.
A note from Bike Friday Co-Founder Alan Scholz:
Thank you for purchasing our Bike Friday PakiT. Your bike is
an example of the wonderful empowering relationships we
have with our customers.
Why we created the pakiT
More and more people are living busy lives in the city, stuck
inside buildings, trains, buses, cars and airplanes for 95% of
each day. We wanted to build a bike that clearly ts a busy
city lifestyle, while offering people more joy and health
with a super-convenient design that allows a bike to always
be with them wherever they are.
We believe people are happier and healthier when they
are free to roam under their own power, and do it daily.
The right bike is what makes this possible. For 21st century
city life, the bike needs to easily travel, be compact, light
enough to carry, sized to t the rider, and have a high quality ride. The pakiT, equipped with all of these traits, will
truly liberate a busy person in the urban jungle.
I hope you enjoy your ride,
Alan Scholz
4
www.bikefriday.com 800-777-0258 • +1-541-687-0487

The growth of pakiT
We have found the limitations of most folding bikes are:
• Heavy - Hard to take up stairs, into buildings, onto public transit.
• Have Greasy Chains - Hard to keep nice clothes clean.
• Come in Only 1 Size - Doesn’t t most people well for
regular riding.
• Few Gear Options - Hard to ride on hills or at a fast
pace.
• Proprietary Components - Makes customizing impossible
or costly.
The pakiT bike is a breakthrough that addresses
each of these areas:
• Light - Easily carried with a single arm, or in the backpack.
• Belt Driven - Grease free, maintenance free, lasts longer than a chain.
• Come in Multiple Sizes - Fits a wide range of riders from
54” to 76”.
• Many Gear Options - Great for whatever style of riding
you prefer!
• Standard Industry Components - Easy to upgrade & customize.
www.bikefriday.com800-777-0258 • +1-541-687-0487
5
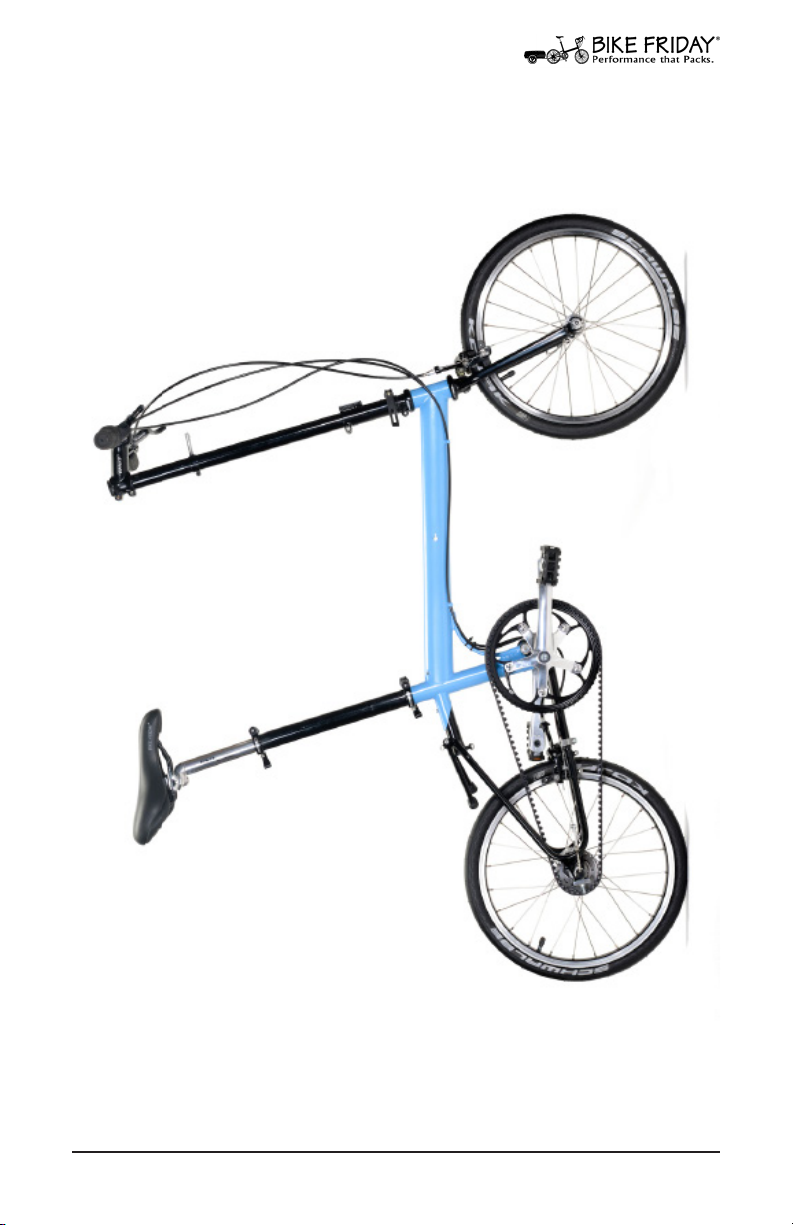
Anatomy of a pakiT
6
www.bikefriday.com 800-777-0258 • +1-541-687-0487
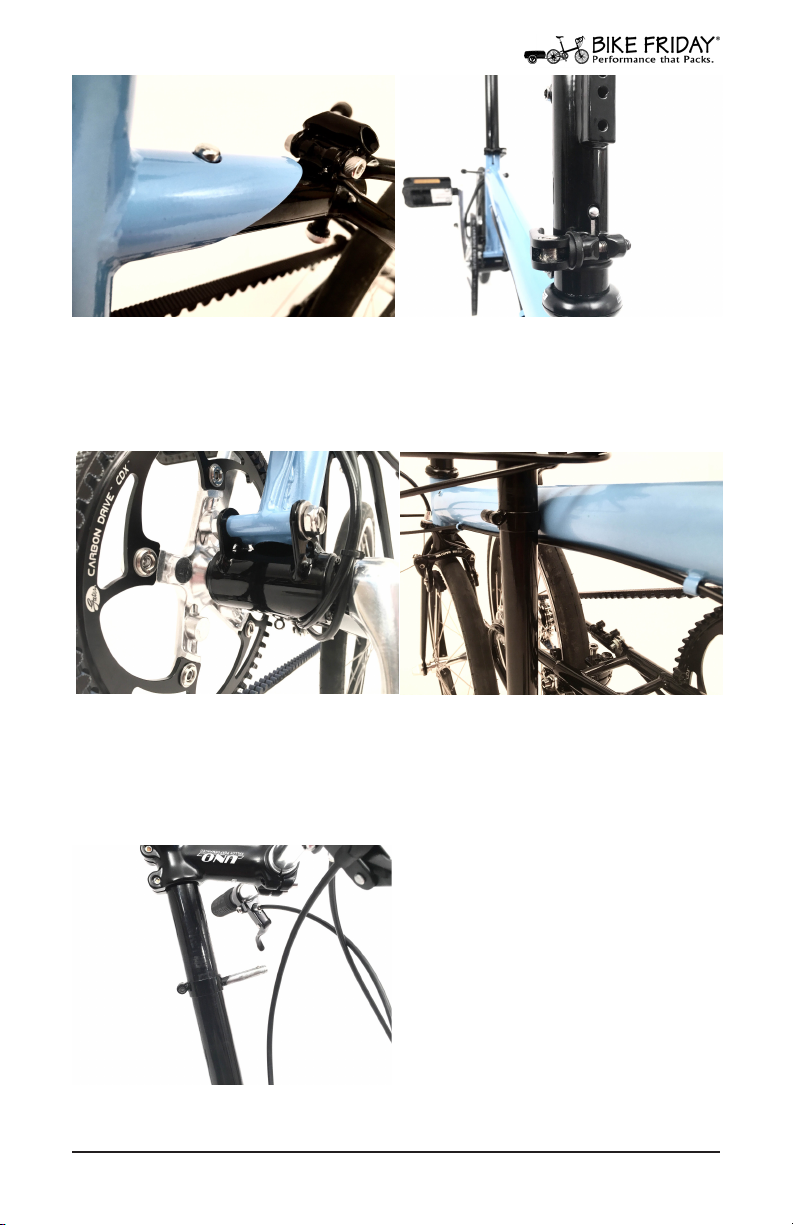
Anatomy of a pakiT: Closeups
www.bikefriday.com800-777-0258 • +1-541-687-0487
7

Welcome to the Community
Congratulations!
You have just purchased the nest travel bicycle available
today. Your bike has been carefully designed and constructed for your personal travel needs. All of our bikes are
manufactured in our Eugene, Oregon factory by real
cyclists who care about our customers and our products.
Please take your time reviewing this manual before you
assemble your new Bike Friday. You will nd your new
bicycle to be simple and reliable anywhere you go!
If You Need Help . . .
If you need technical assistance with any Green Gear®
Cycling product, or are unclear on the proper operation of
your Bike Friday, please call us and a Service Technician
will help you get back on the road. Our toll-free number in
the US and Canada is 800-777-0258; international is +1-541687-0487. Normal business hours are 8:30 a.m. to 5:30 p.m.
Monday through Friday, and 9 a.m. to 4 p.m. Saturdays,
Pacic Time. You can also email service questions to
service@bikefriday.com.
Because we understand the needs of world travelers, we
offer 24-hour technical support in emergencies. If necessary,
please call our regular number and our answering service
can forward you to a Service Technician on call.
Extra Accessories
We also sell an extensive line of bicycle and travel
accessories. Whether you are riding the local back roads
or venturing into foreign lands we have the gear you need.
Call us for information on spare tires, tubes, replacement
parts, fenders, racks, bags, or other items to complete your
Travel System. You can purchase these products from our
online store: www.store.bikefriday.com
More Information
To check out our products, nd other useful information,
discover Bike Friday events and Yak with other Bike Friday
owners on the bulletin board, go to our main website at:
www.bikefriday.com
Blue skies and happy trails from Green Gear Cycling
8
www.bikefriday.com 800-777-0258 • +1-541-687-0487
A Word on Safety
Bicycles are a lot of fun, but improper use can result in
harm. Please, always ride safely!
• Always wear a helmet.
• Follow the rules of the road, and be courteous.
• Use front and rear lights after dark.
• Dress appropriately for the weather, the season, and
lighting conditions. Be seen!
• Always carry a spare tube, patch kit, pump and a tool
kit.
• Keep your bicycle in good shape.
• Check your tire pressure before every ride.
• Make sure all quick releases are secure.
• Have your bicycle routinely serviced for trouble-free
travels.
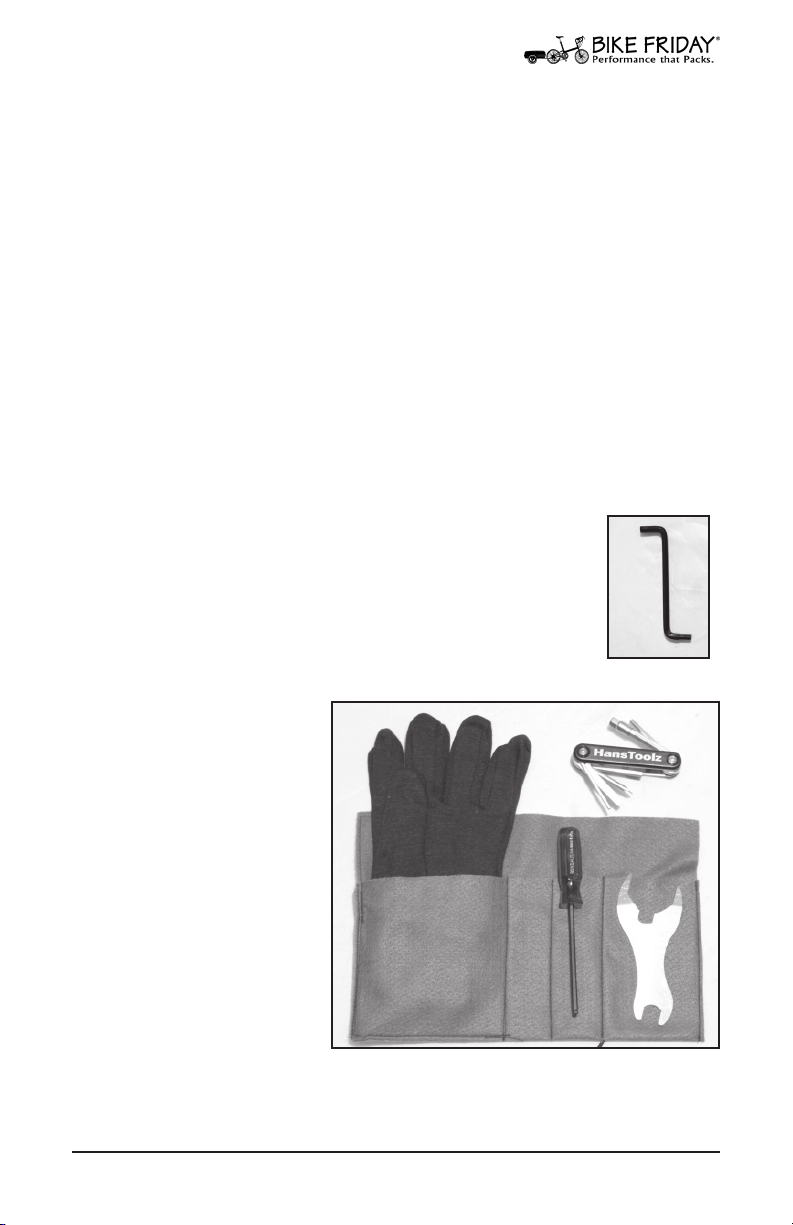
Your Tools
All Bike Friday bicycles are delivered with a combination 5/6mm S-wrench [right] that is attached
to your water bottle cage. This wrench should
get your new bike on the road (along with your
own pedal wrench). Leave it in your bottle cage
so that you always have it handy.
All bikes ordered with
a TravelCase™ suitcase
also come with a tool
pouch [right]. In the
tool pouch you will nd
some cotton gloves to
keep your hands clean,
a folding tool set, and
a 4mm ball-end driver.
We also sell more
extensive tool kits for
home repair work. We
encourage you to learn
how to work on your
own bike. If you are not
familiar with bicycle maintenance, consider taking a local
class. It will improve your condence and self-sufciency as
you venture across the globe.
www.bikefriday.com800-777-0258 • +1-541-687-0487
9
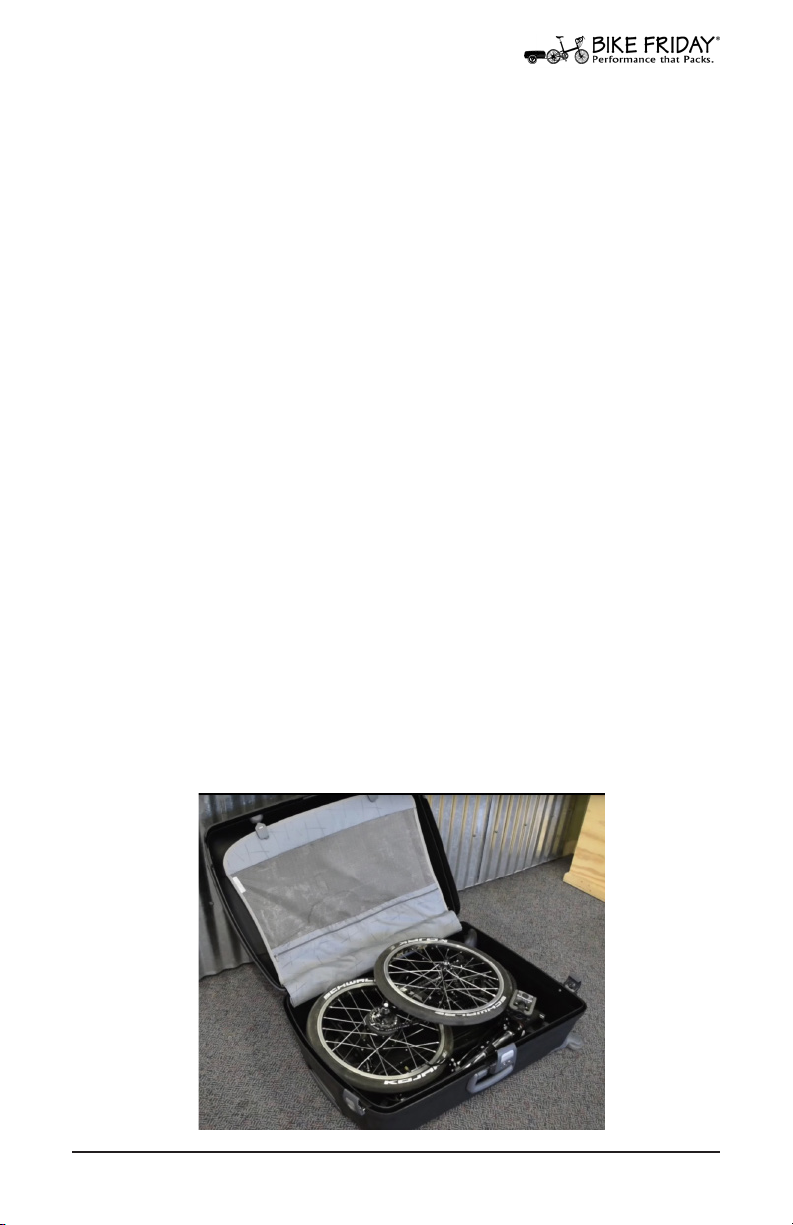
Unpacking your pakiT
Unpacking Your PakiT From a Box or TravelCase
Opening your box or TravelCase may present an intimidating sight, particularly if you ordered many accessories.
Do not worry; we work hard to keep our products as
simple as possible. We recommend nding a quiet area
and some room to spread out.
This manual will address the fundamentals of packing,
assembly and adjusting techniques. However, because
your bicycle was built for you, you might discover that
your bike was packed at the factory slightly different than
the one in this manual.
You do not, however, have to repack your bike in exactly
the same fashion as this manual suggests. You may nd a
better way of stowing your accessories and we encourage
you to experiment.
Your PakiT should only require minimal assembly. It will
take approximately 15-45 minutes and require a basic
level of technical skill.
You will need a 5/6mm hex wrench (included), a 15mm
open wrench (or pedal wrench) and a pair of scissors (or
better yet wire cutters, snips or diagonal cutters) to cut
zip ties.
Take care not to damage the frame while cutting zip ties.
[Note: Depending on the components you have purchased
with your Bike Friday, your specic model may require
other tools for adjustments.]
Temp pic!
10
www.bikefriday.com 800-777-0258 • +1-541-687-0487
Assembling your pakiT
Open the box or TravelCase and remove the bike from the
container. Remove the bubble wrap or felt covers and lay
the disassembled bike out on front of you.
Connect Front and Rear Frame Sections
With a hand holding the front and rear sections respectively, insert the front (male) section into the rear
(female) section of the main frame. Ensure that the snap
/ spring button slips into one of the 4 holes.
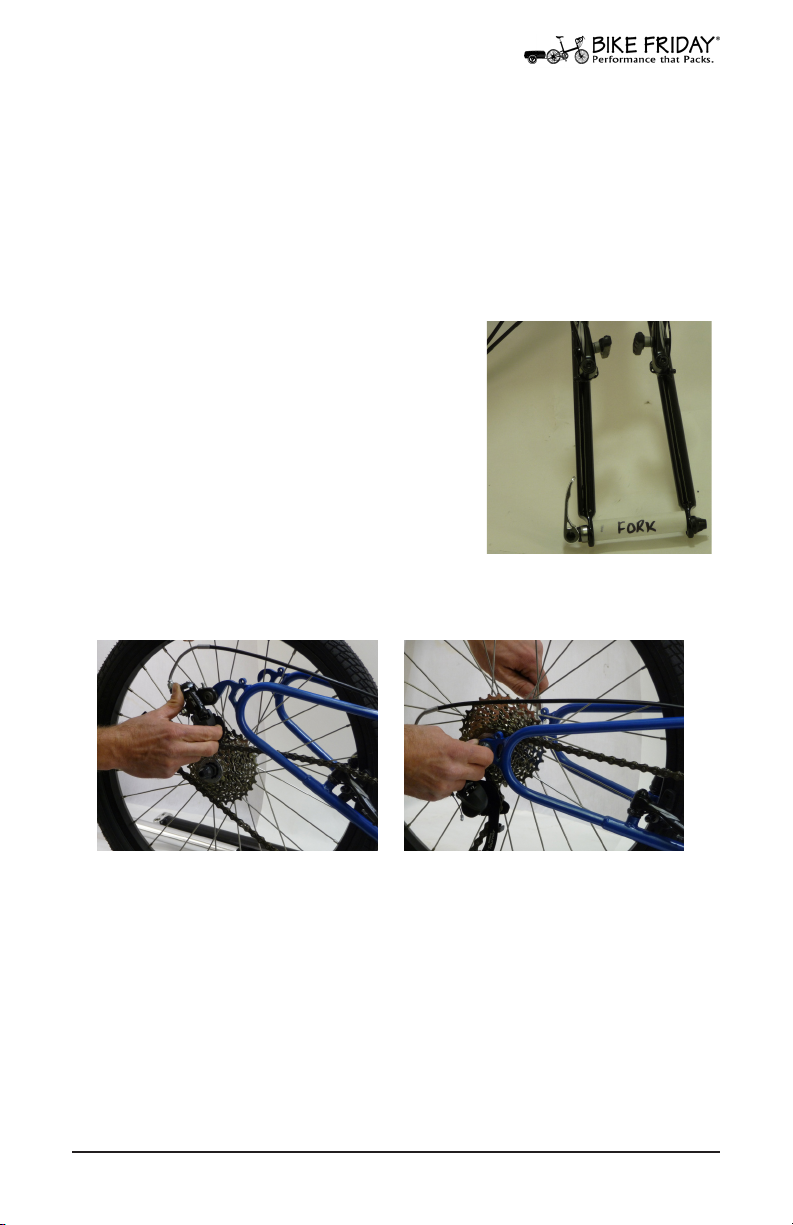
Remove Fork/Frame Spreaders
The PVC tubing in between your
fork legs and rear dropouts are
intended to help prevent damage
when traveling. They are held in
place with wheel quick release
skewers. Open the quick release,
unthread the knurled nut, and
put the spreaders in the tool
pouch for future use.
Fig. 1 Fork speader.
Fig. 2 Grasp Derailleur body. Fig. 3 Fasten quick release.
Install the Rear Wheel
Release (spread open) the rear brake and make sure you
are in the highest gear (largest #) on the right side (rear)
shifter. [SEE PAGE 12 FOR BRAKE RELEASE OPERATION] To
install the rear wheel, grasp the derailleur body and pivot
it backward to make it easier to insert the wheel into the
dropouts. When putting the rear wheel into the dropout,
align the chain with the smallest cog of the cassette.
Fasten the rear quick release skewer (or rear axle bolts on
a Dual Drive hub).
www.bikefriday.com800-777-0258 • +1-541-687-0487
11
Assembling your pakiT
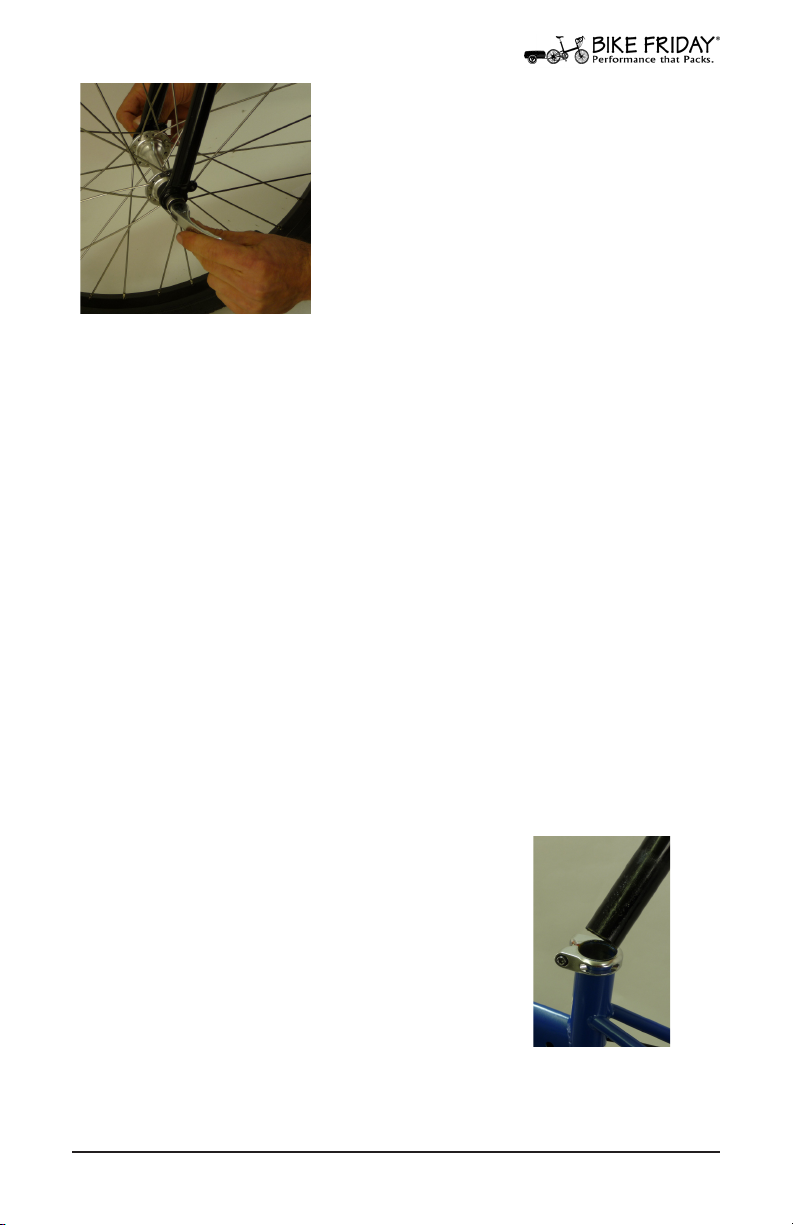
Install Front Wheel QR
Open the front brake release,
then position the front wheel
making certain that the wheel
axle is fully seated in the front
dropouts.
Now install the quick release
from the fork spreader on the
front wheel. Make certain that
Fig. 4 Front Wheel QR.
Mechanic’s Tip: If you are ever unsure of the proper
direction of the front tire, looking down at the tire,
the tread should be oriented so that it is pointing forward. Often the tread is in a arrow-ish pattern and this
makes it easy to point it in the forward direction. The
quick release levers, front and back are to be placed on
the non-drive side of the bicycle.
there is one spring per side of
the hub axle and that the small
end of the spring is pointing
toward the center of the hub.
Loosely thread on the knurled
nut for now.
Easy Pack Mast
The PakiT bicycle models have a seatmast that telescopes out of the lower
seat tube. Install the seatmast into the
seat tube. Note the minimum insertion
mark etched at 4” from the bottom on
the mast. This is the minimum amount
of the mast that must be inserted (overlapped) in the frame. Tighten the bolt
on the seatmast clamping collar.
12
www.bikefriday.com 800-777-0258 • +1-541-687-0487
Fig. 5 Insert
seatmast.

Using a Quick Release
Using Those Nifty Quick Releases
On a cold and snowy day in the 1927 Gran Premio della
Vittoria, a tired and numb Tullio Campagnolo struggled
with the frozen wing nuts on his rear wheel while trying to
change gears. In a moment of frustration and inspiration
Campagnolo envisioned the modern quick release. The
bicycle world was transformed.
The quick release is one of those simple but great inventions
that really makes life better. However, if used incorrectly,
you can potentially endanger yourself. Although a reliable
and safe product, some people have been injured because
they didn’t know how to properly use this elegant device.
Your Bike Friday PakiT has several of them. If you are not
familiar with their operation, PLEASE study these directions
carefully. If you are still unclear on their operation, call us or
contact your favorite local bike shop before you ride!
Quick Release Operation
A quick release is a simple cam with a lever that swings
through an arc that is square to the axle. As the lever moves,
the cam clamps the wheel to the frame, or secures the frame
joint. It is not a wing nut to be rotated around the axle.
The tension on the quick release is controlled by how tight
the knurled nut on the other end is set. Only wheel quick
releases have the small cone-shaped springs. Note that the
small ends of the springs face toward the center of the hub.
Quick Release Maintenance
We recommend adding a few drops of light oil to the lever
where it enters the cap several times per year. This will
keep your quick release working smoothly for years.
(Loose)
Knurled Nut
(adjust tightness here)
Springs
Open
Cam
Close
www.bikefriday.com800-777-0258 • +1-541-687-0487
(Starts getting
tight here)
QR Lever
(Stiff)
13
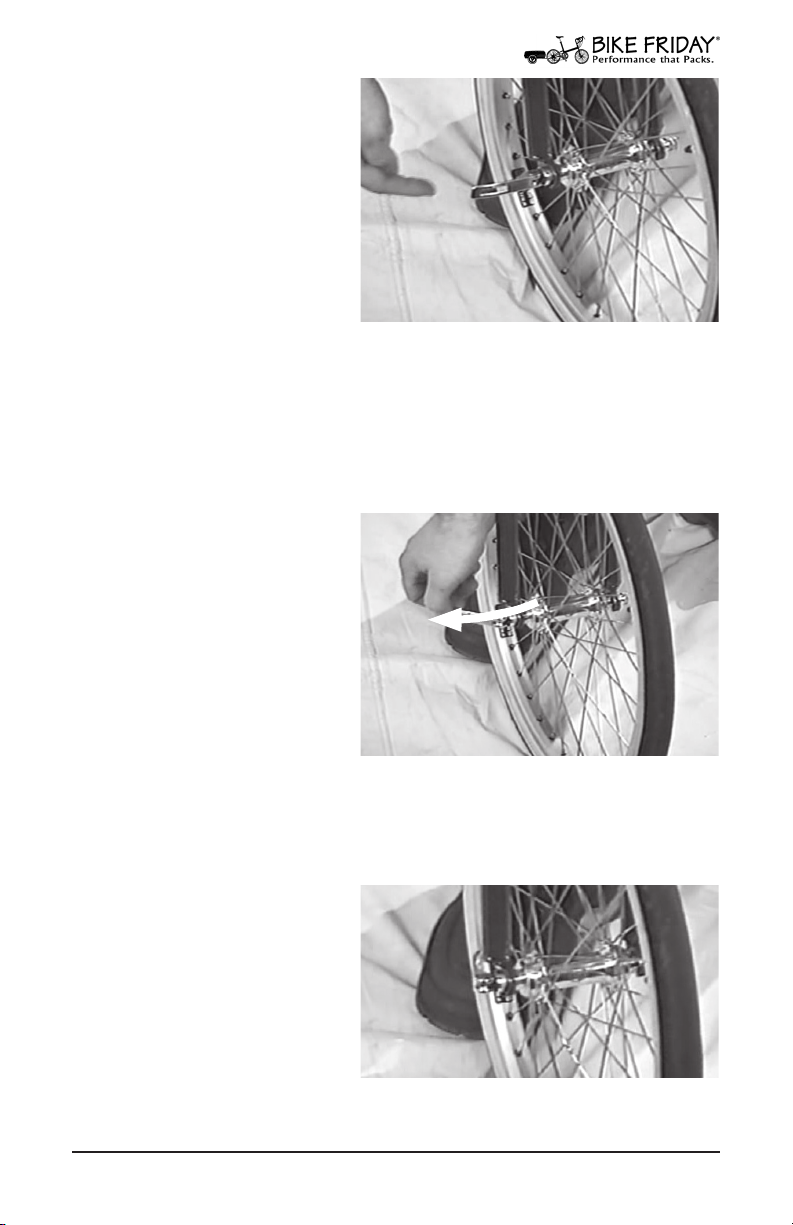
Using a Quick Release
Adjust Knurled Nut
With the wheel installed
and the axle properly
seated in the frame (or
the frame joint closed),
position the quick release
lever so that it is in line
with the axle. Then turn
the knurled nut on the
other side clockwise until
it is snug. When the quick
release is properly adjusted, you should be able to freely
swing the quick release lever for the rst half of its arc, at
which point the lever should offer resistance.
Continue Closing QR
Using the palm of your
hand press the quick
release lever through the
rest of its arc until the
lever is closed and parallel
to the wheel. You should
feel very rm resistance
when the quick release
is properly adjusted (the
lever may even leave a
light imprint in the palm of your hand).
Fig. 6 Quick release operation.
Fig. 7 Setting quick release tightness.
Double-Check!
Ideally, the quick release
lever should be facing
the rear, or upward.
Levers that are facing
forward can catch on any
number of things and be
accidentally opened.
14
www.bikefriday.com 800-777-0258 • +1-541-687-0487
Fig. 8 Closed QR points toward rear.
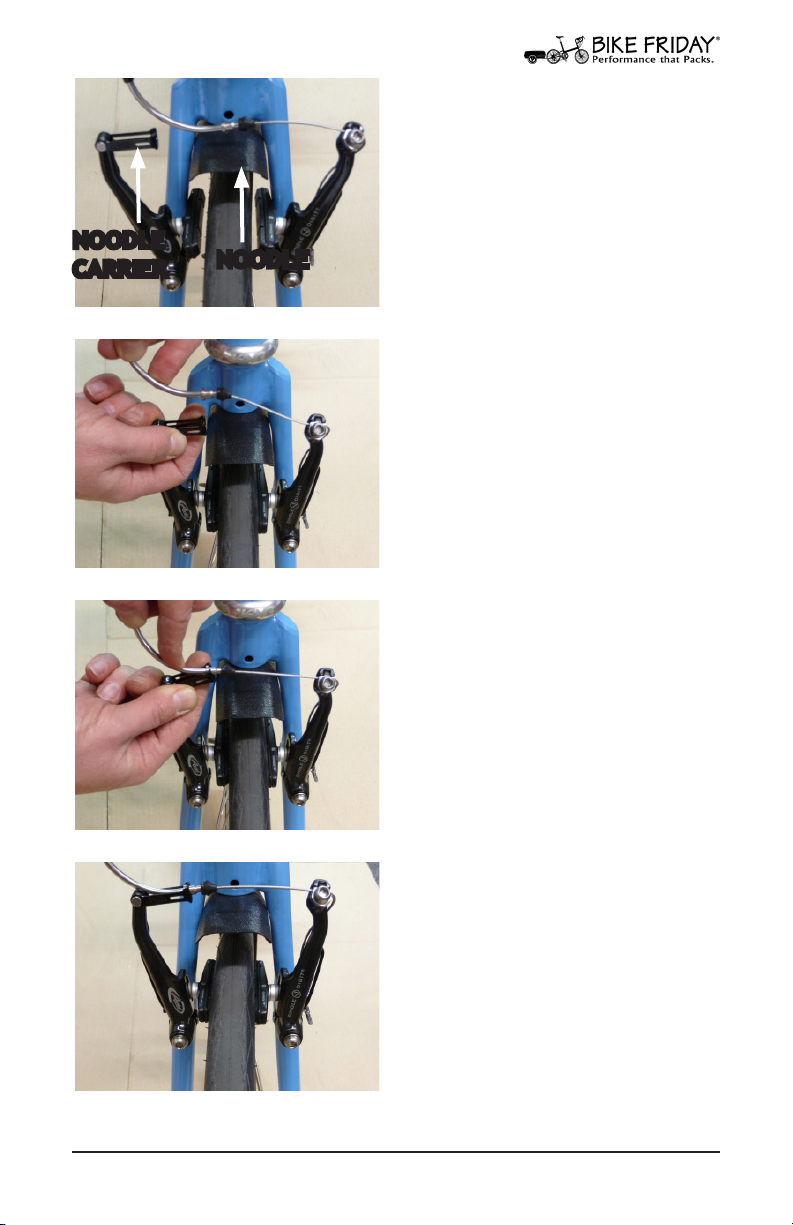
Assembling your pakiT
NOODLE
CARRIER
Fig. 9 V-brake open.
Fig. 10 Grab the noodle carrier.
NOODLE
Reconnect Linear Pull
Brakes / V-Brakes
To close the V-brake to the
riding position, while facing the brake, with your
left hand (index nger and
thumb), grab the noodle
carrier and with your right
hand grab the noodle and
slip the noodle tip into the
slot on the noodle carrier.
If you cannot get enough
“slack” to put the noodle
tip into the noodle holder,
then the brake cable may
need to be loosened a
bit. See the next step for
instructions to add some
slack to the cable. Repeat
this procedure on the rear
brake.
Fig. 11 Slip noodle into slot.
Fig. 12 V-brake closed.
Mechanic’s Tip: Sometimes
the cable housing can come
unseated either where it
enters the noodle or where
the housing enters the
brake lever barrel adjuster.
If the housing is unseated,
it will not be possible
insert the noodle tip into
the noodle holder. In fact,
it will make the process
quite frustrating; make
sure the housing is properly
seated at both ends.
www.bikefriday.com800-777-0258 • +1-541-687-0487
15
 Loading...