

Page 1
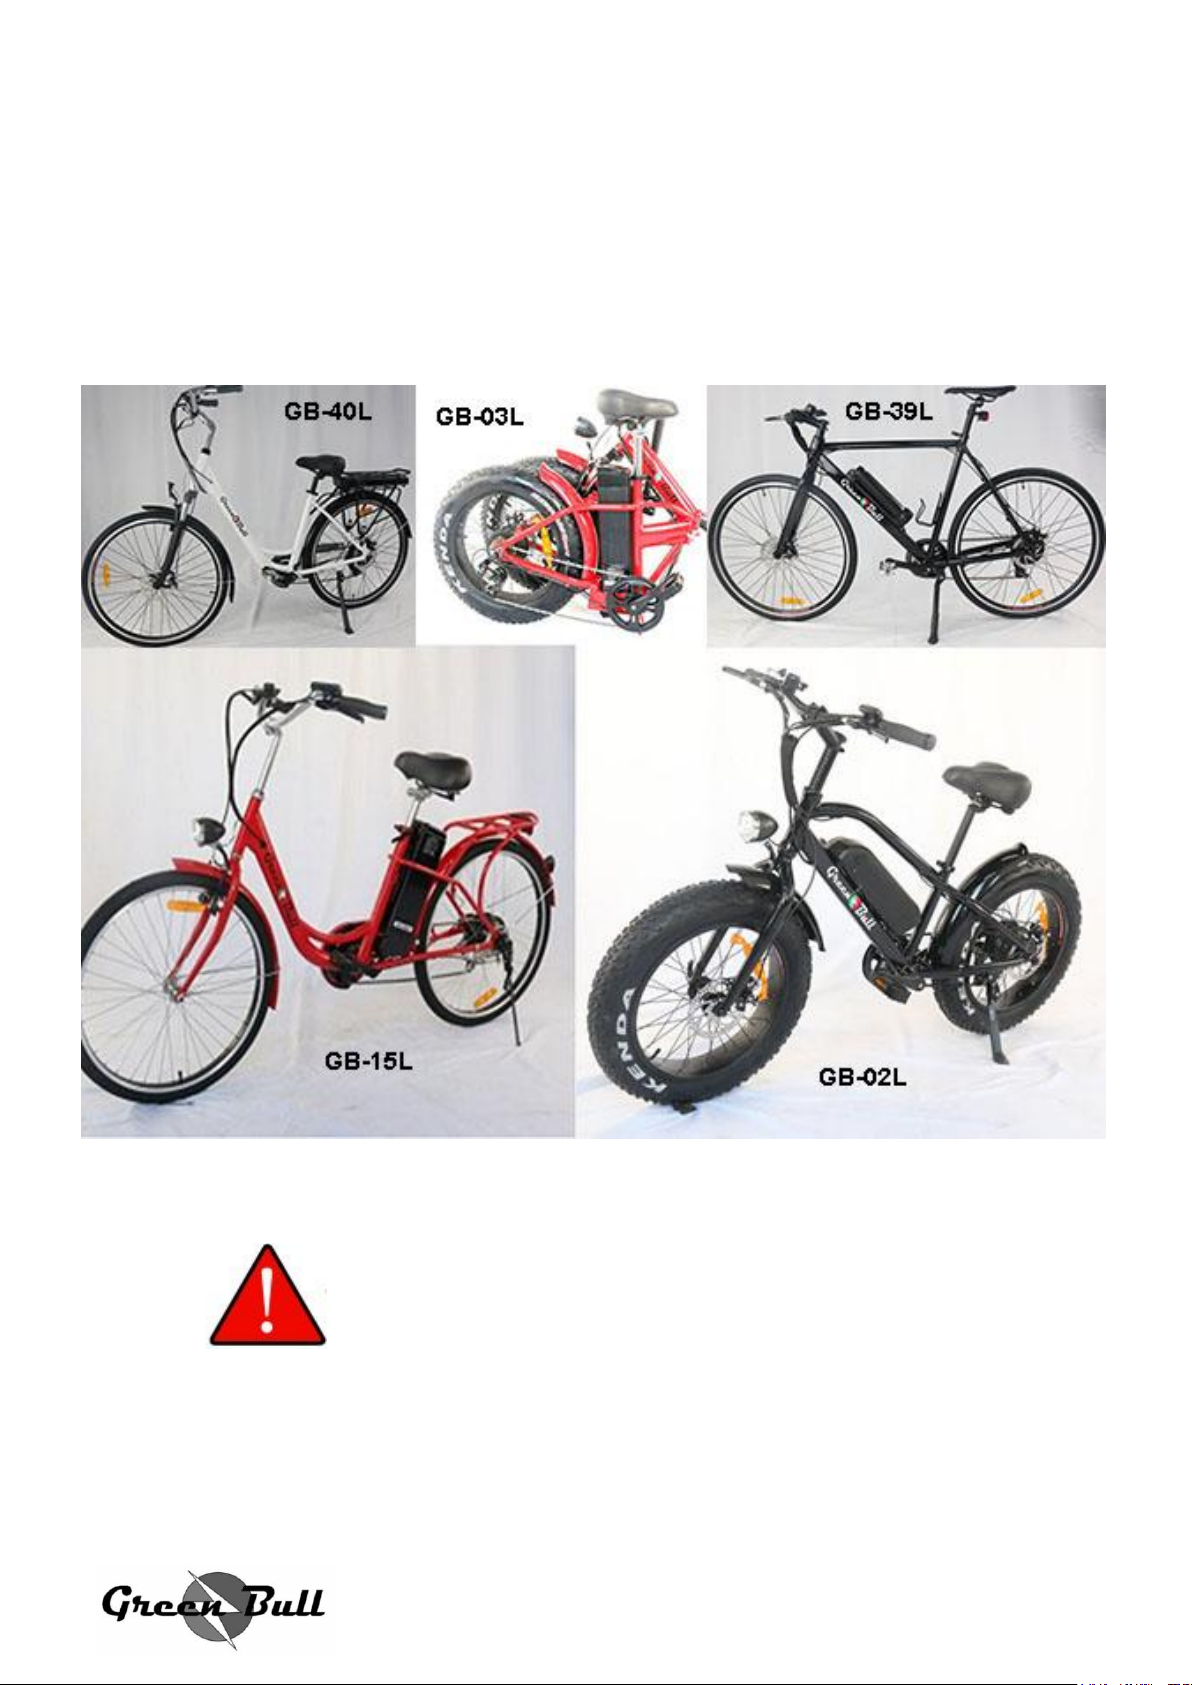
USER MANUAL
POWER ASSISTED BICYCLES
WARNING: You are the only person responsible for your
personal safety. Don’t operate or ride any Power Assisted Bicycle unless
you are already a competent bicycle rider. The bike can quickly reach high
speed ,caution must be exercised when operating the bike. Carefully read the
following information(even if you are an experienced rider),wear a helmet and
safety equipment, and obey all the provincial and federal motor vehicles laws.
1
Page 2

Table of Contents
Assembly Instructions ……………………………………………………..…1-8
Assemble Stem & front wheel
Assemble pedals,Front light
Assemble seat& Tire Pressure
Charging
Derailleur System ……………………………………………………………........9
Brake System…………………………………………………………........…......10
How to operate the e-bike ………………………………………………….......10
Assembly Instructions
Box Contents:
1x Bike Frame with Rear Wheel Attached.
1x Front Wheel
1x Stem& Handlebar
1x Pedals(Left & Right)
1x Lithium Battery 36V10AH
2x Battery Keys
1x 110-240Volts 50-60Hz Smart Charger
1x Seat
1x Front LED light
1x Tool Kits: 5x Hex Wrenches (2mm,3mm,4mm,5mm,6mm)
3x Wrenches, double sided (8mm 10mm,13mm 15mm, 14mm 17mm)
1x Screwdriver, double sided (star & slot configuration)
1x Shimano Gear Data Sheets
1x Controller Manual
1x LCD display Manual
1x Imperial Owner’s Manual
2
Page 3
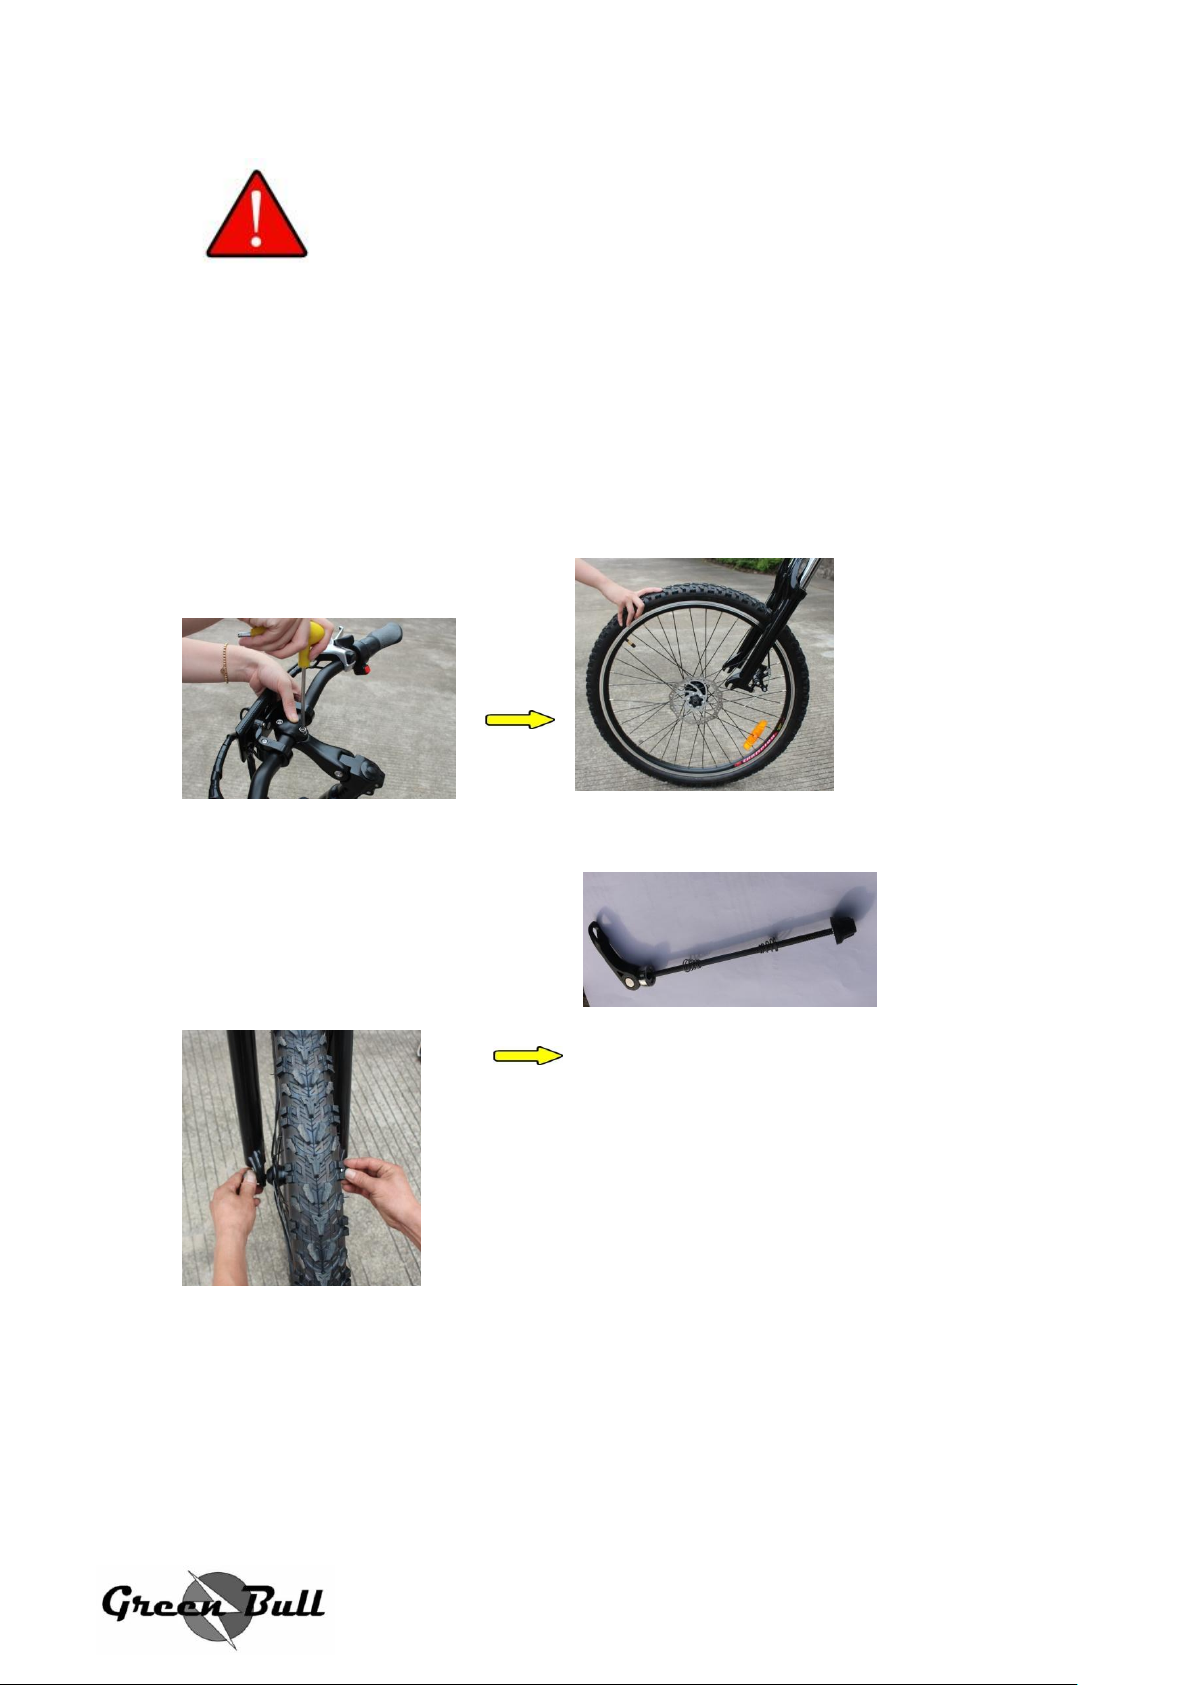
Axle
WARNING: Please keep the keys to your electric bicycle in a
safe place Each set of keys are unique to your particular electric bicycle and
we do not keep a copy of your key on file.
Assemble the Bike: Stem & Handlebars, Front wheel
Tools required( received in your Tool Kits)
1x Tool Kits: 5x Hex Wrenches (2mm,3mm,4mm,5mm,6mm)
3x Wrenches, double sided (8mm 10mm,13mm 15mm, 14mm 17mm)
1x Screwdriver, double sided (star & slot configuration)
3
Page 4
Step:
1. Tighten the stem,
2. Insert front tire
3. Use the Axle to fixed the front wheel
4. Tighten the screw on one side on Axle
5. Tighten the Quick remove button on other side on Axle
6. Front wheel finished
Assemble the Bike: Pedals ,Front light ,Seat & Tire Pressure
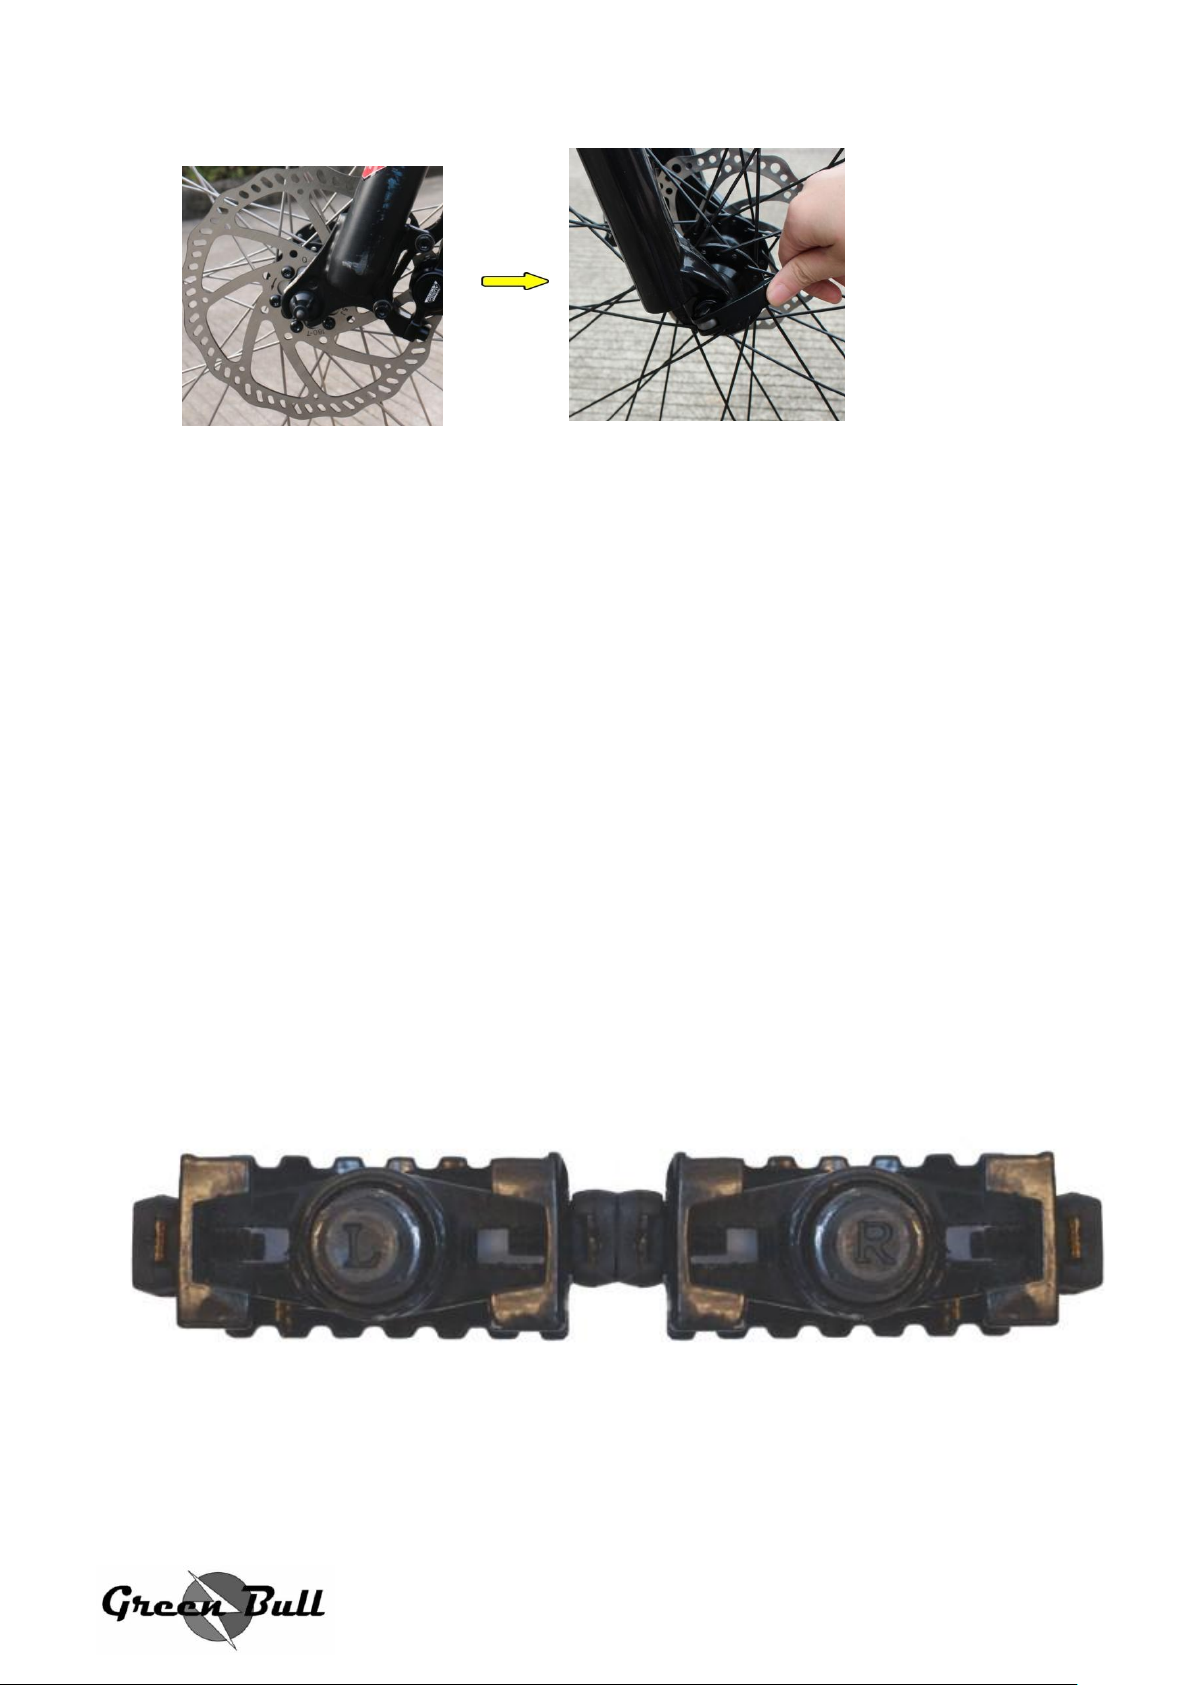
1. Pedals
Note: “L” and “R” (“L”=left & “R”=right ) is stamped on the threaded ends of the
pedals. The pedals have opposite thread directions and must go on a specific
side of the bike. Left and right side of the bike is determined by sitting on the
seat.
The Left Pedal has a reverse , non-standard thread and must be turned
counter clockwise to be screwed in.
4
Page 5
The Right Pedal has a standard thread and must be turned clockwise to be
threaded in.
Apply some grease to the pedal threads before attaching. Install the Right
Pedal to the Chain Sprocket side of the bike and the Left Pedal to the opposite
side (same side as the battery key).
Start the pedal threads into the crank arm threads, by hand ,at least 4
complete 360°turn to ensure the pedals are not cross-treaded. Incorrect
installation of the pedals is not covered under warranty. Complete by securely
tightening with a 15mm wrench.
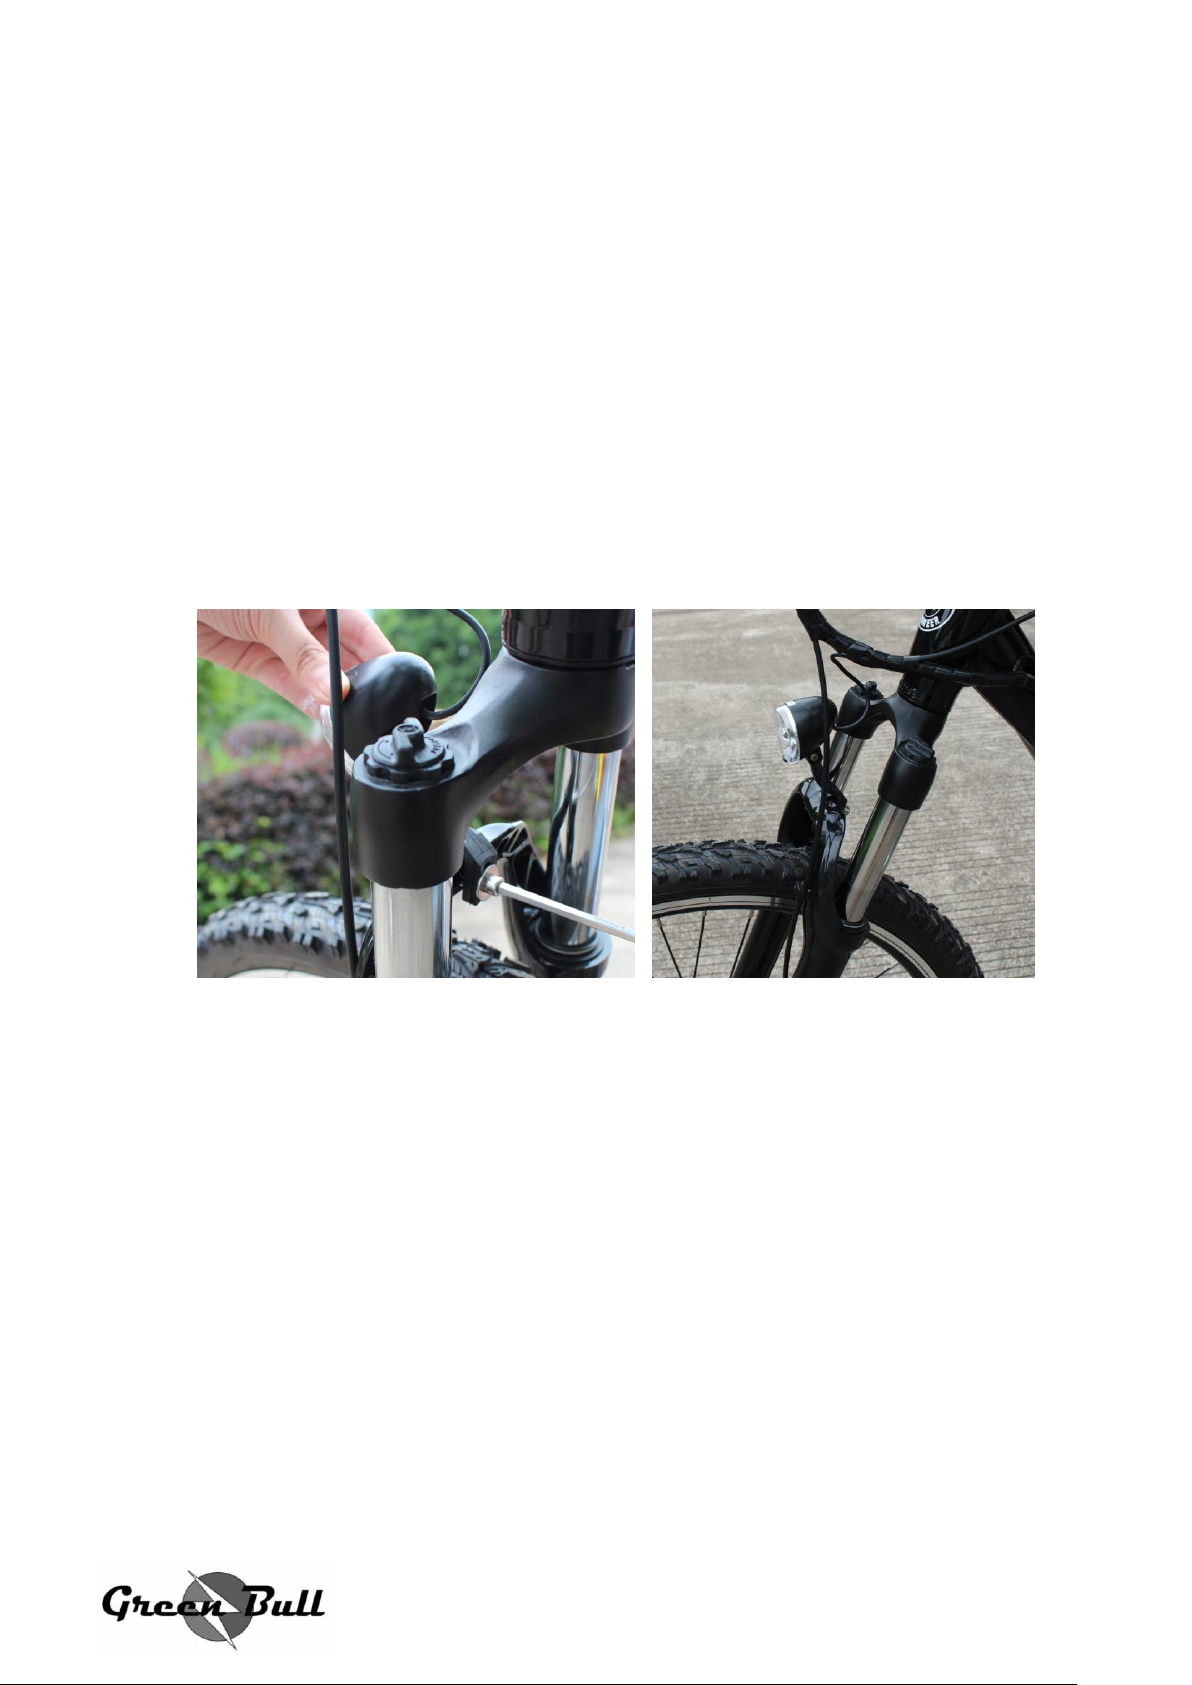
2. Front light
Step:
1.Put the LED light on front of electric bike
2. Tighten the screw make LED light stable on frame
3. Connect the LED light with controller
4.Front LED light finish
5
Page 6
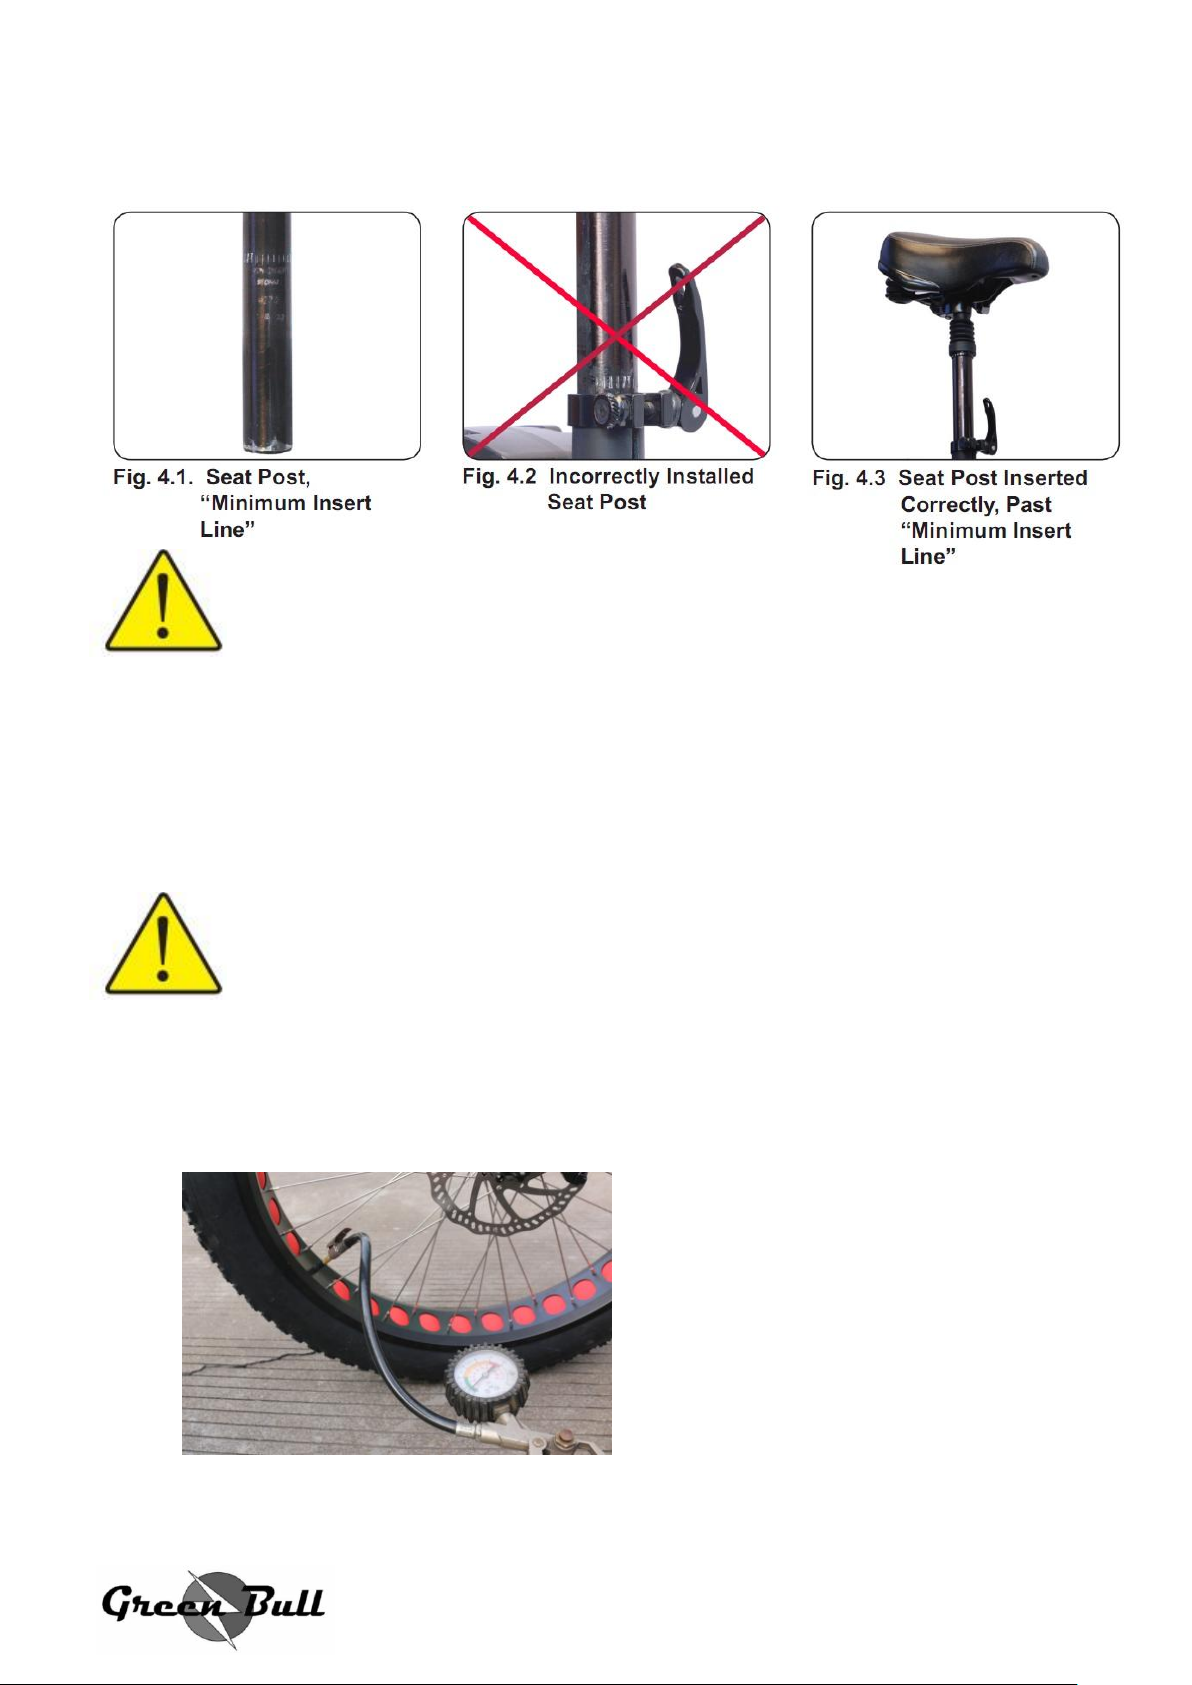
3. Seat Installation
CAUTION: Less than 1/2 a turn on the adjusting nut can make the
difference between safe clamping force and unsafe clamping force.
A poorly adjusted seat can result in personal injury or death.
4. Tire Pressure
CAUTION: The tires have not been filled with air to the correct
capacity for shipping purposes.
Using a hand pump, fill the tires with air to the rating on the sidewall. We
recommend a hand pump to avoid over inflating the tires, which can easily
happen when using a high pressure air line at a gas station or automotive tire
store.
6
Page 7
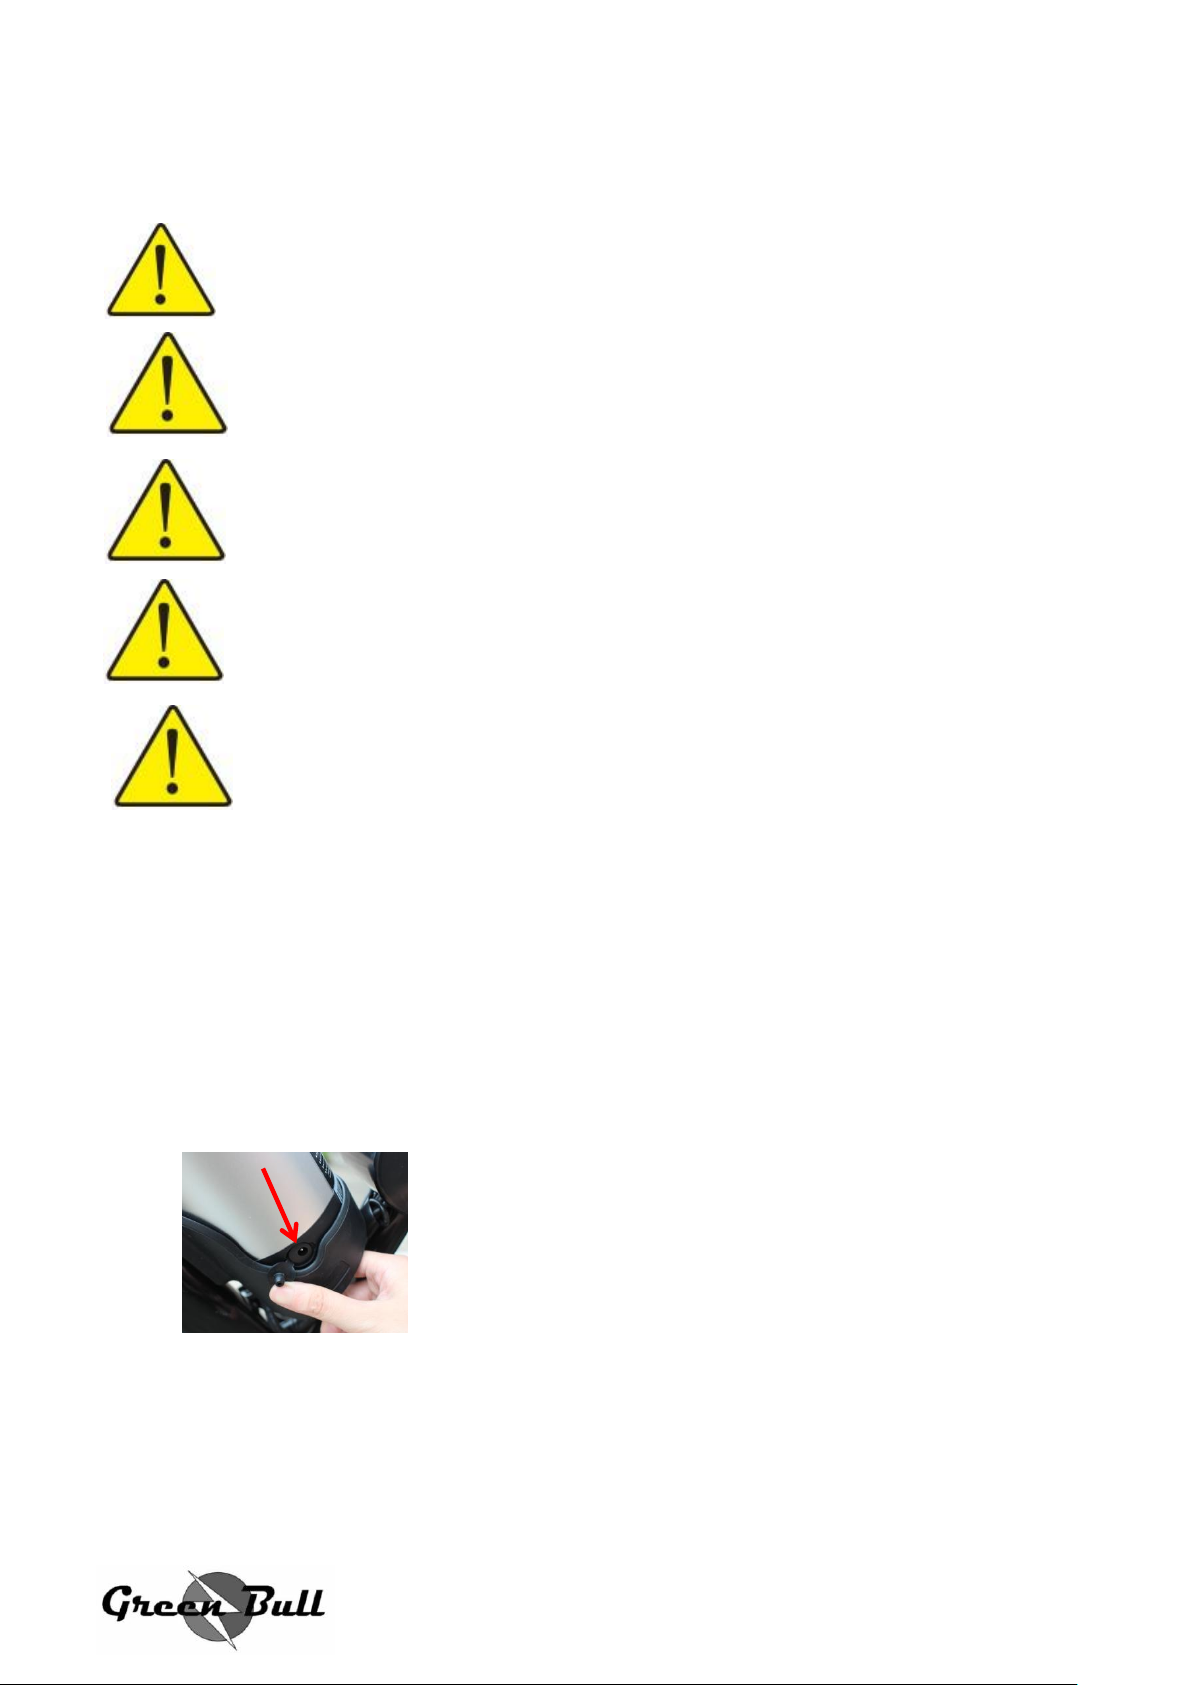
Charging :
CAUTION: Fully charge the battery before the first use! Failure to do
this can result in decreased battery performance for the life of the bike
and avoid your battery warranty.
CAUTION: Do not attempt to open or repair your battery or charger. If
you need another battery or charger contact your dealer
CAUTION: Do not touch the battery sockets or blades with your hands,
any metal object or other material that conducts electricity.
CAUTION: Never put the battery or charger in reach of children.
CAUTION: Do not use any charger except the one that came with
your FAT TIRE electric bicycle.
Charging Method 1 :
(Charging port in the bottom of battery box)
Step: 1. Connect your e-bike battery and charger 2. connect to wall
3.charging
7
Page 8
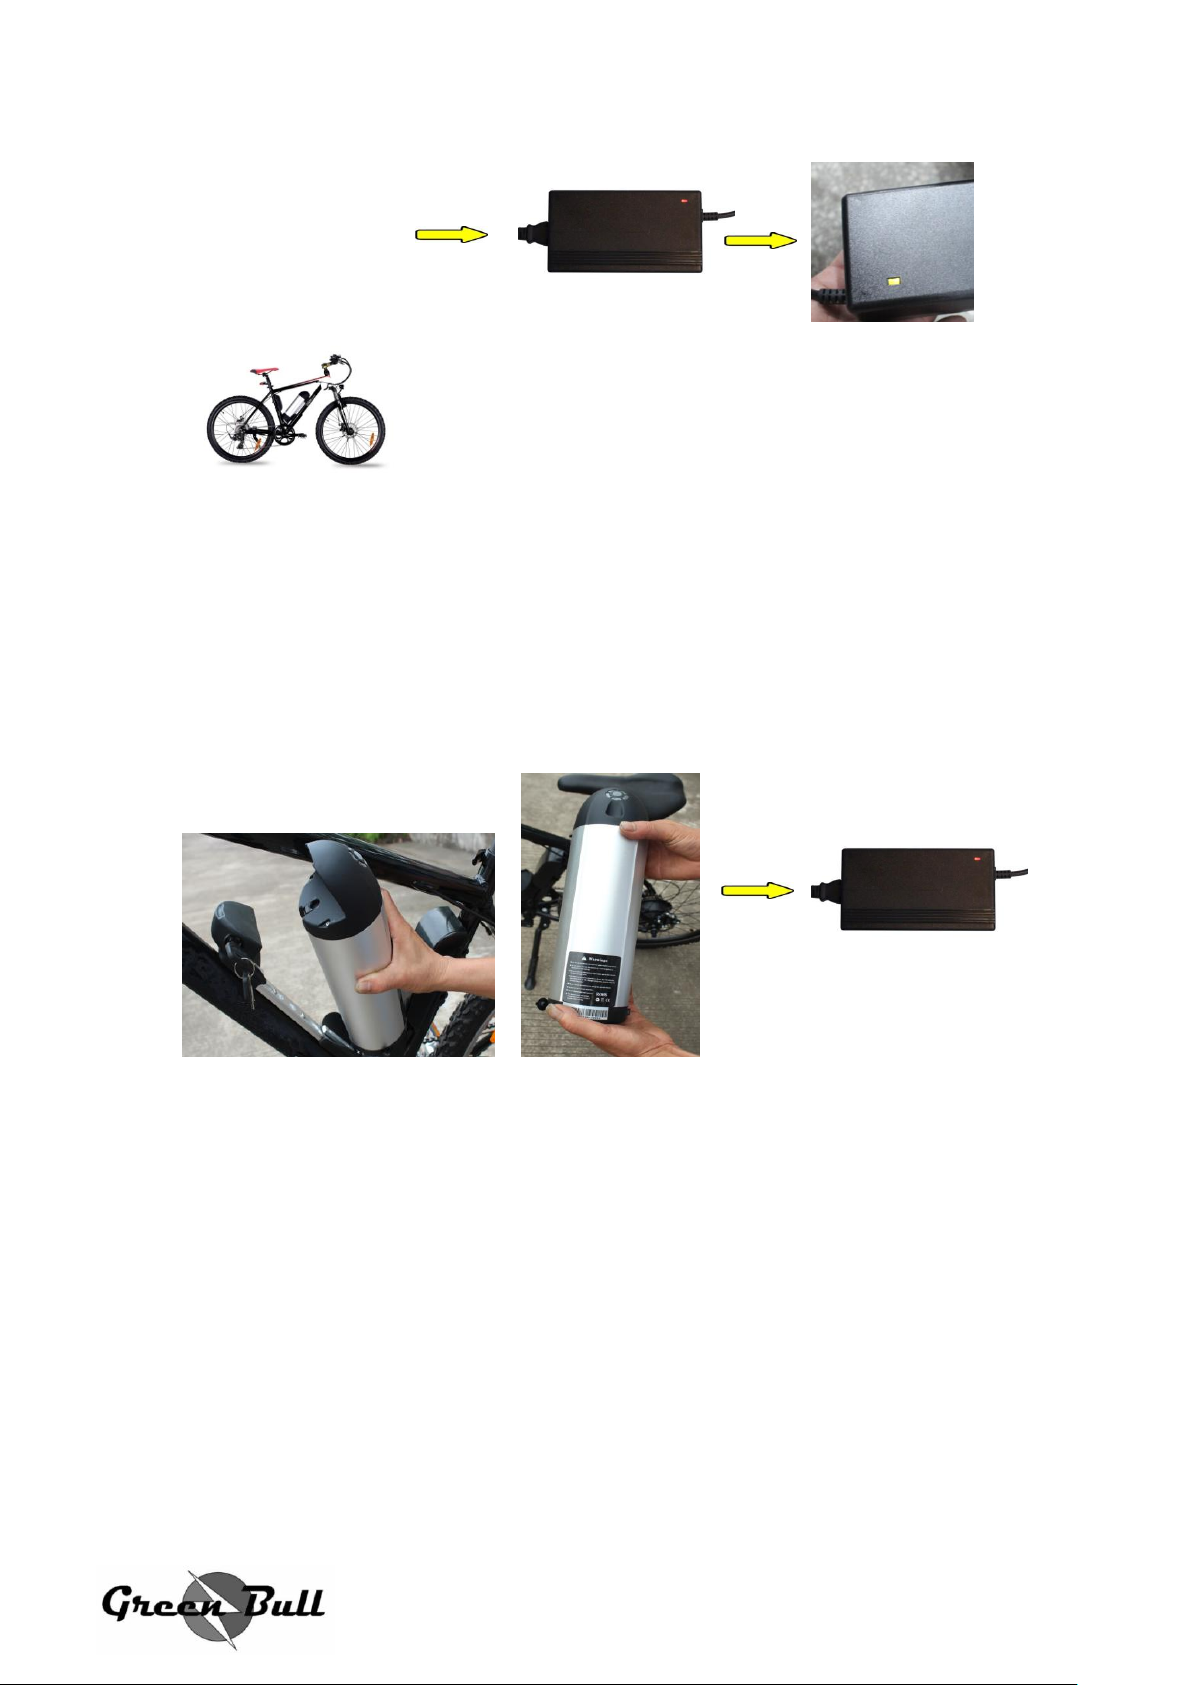
Charging Method 2:
Step:1.Take off the battery in your e-bike frame.2 Connect the battery with
charger 3. Connect charger to wall 4. Charging .
Take off the battery --turn the key and pull the battery together .
Charger light : RED light --In Charging
GREEN light--Power Full
8
Page 9
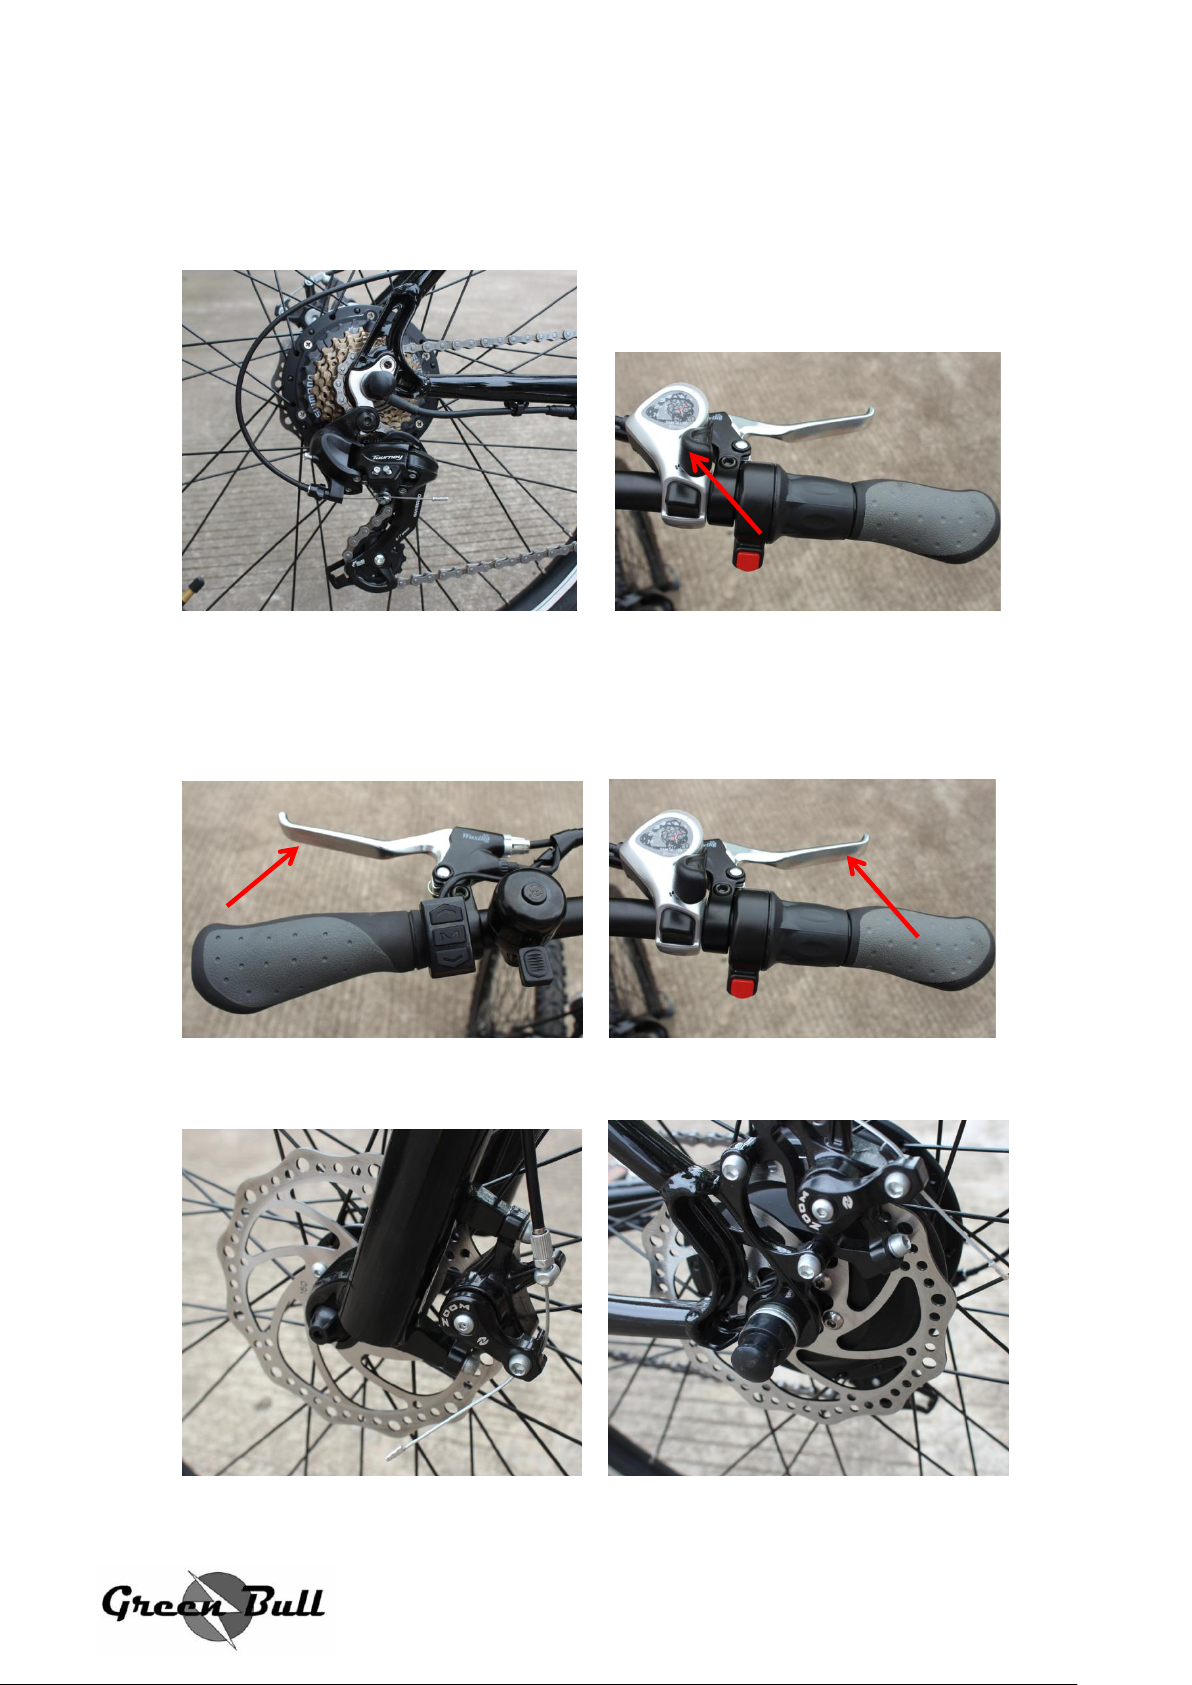
Derailler system :
7 gears SHIMANO,
Bake system:
L&R Brake lever:
F&R Disc brake:
9
Page 10
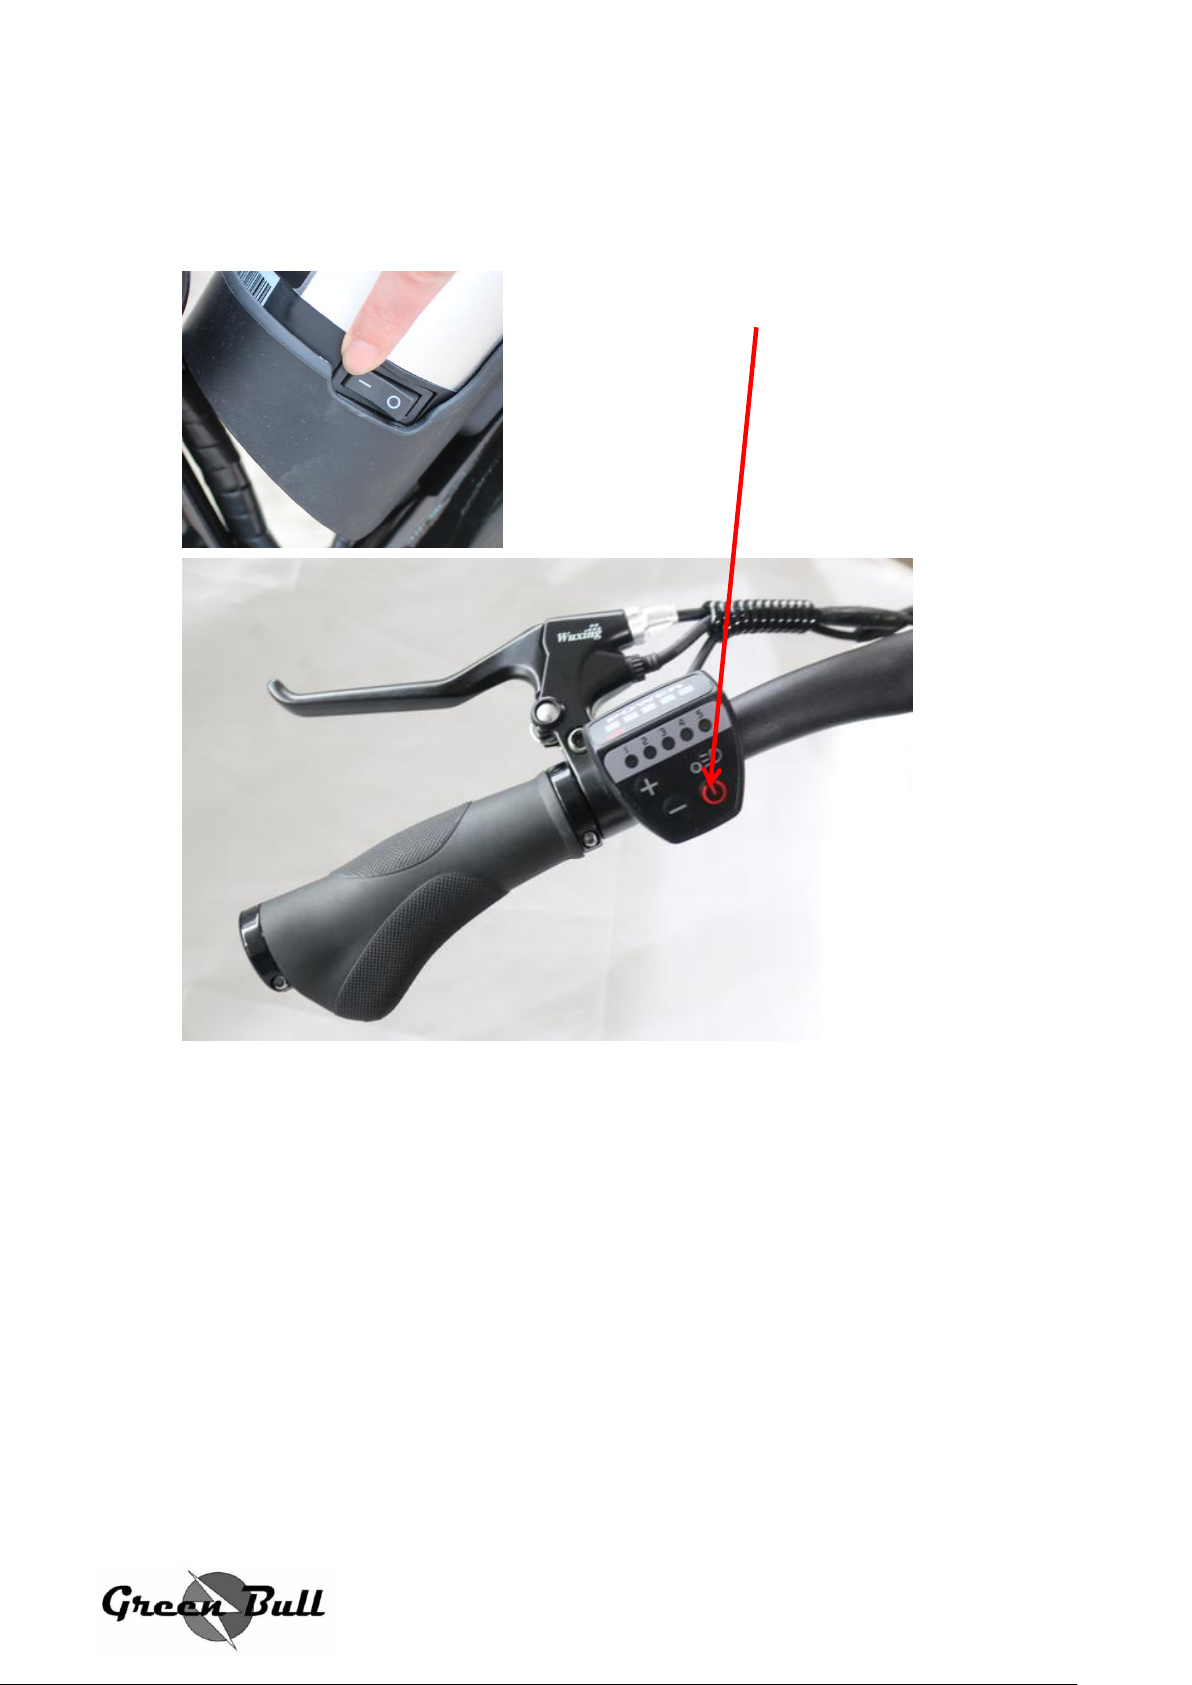
How to operate the e-bike?
Step:
1.Turn on switch on the bottom of battery case,
2.Turn LED display on. Long press “M”bottom near left handlebar.
3. Hold grips, like riding normal bike ,keep pedaling, the motor start keep
working.
10
Page 11

 Loading...