

GreenBull GB-40L, GB-39L, GB-03L, GB-15L, GB-02L User Manual

USER MANUAL
POWER ASSISTED BICYCLES
WARNING: You are the only person responsible for your
personal safety. Don’t operate or ride any Power Assisted Bicycle unless
you are already a competent bicycle rider. The bike can quickly reach high
speed ,caution must be exercised when operating the bike. Carefully read the
following information(even if you are an experienced rider),wear a helmet and
safety equipment, and obey all the provincial and federal motor vehicles laws.
1

Table of Contents
Assembly Instructions ……………………………………………………..…1-8
Assemble Stem & front wheel
Assemble pedals,Front light
Assemble seat& Tire Pressure
Charging
Derailleur System ……………………………………………………………........9
Brake System…………………………………………………………........…......10
How to operate the e-bike ………………………………………………….......10
Assembly Instructions
Box Contents:
1x Bike Frame with Rear Wheel Attached.
1x Front Wheel
1x Stem& Handlebar
1x Pedals(Left & Right)
1x Lithium Battery 36V10AH
2x Battery Keys
1x 110-240Volts 50-60Hz Smart Charger
1x Seat
1x Front LED light
1x Tool Kits: 5x Hex Wrenches (2mm,3mm,4mm,5mm,6mm)
3x Wrenches, double sided (8mm 10mm,13mm 15mm, 14mm 17mm)
1x Screwdriver, double sided (star & slot configuration)
1x Shimano Gear Data Sheets
1x Controller Manual
1x LCD display Manual
1x Imperial Owner’s Manual
2
Axle
WARNING: Please keep the keys to your electric bicycle in a
safe place Each set of keys are unique to your particular electric bicycle and
we do not keep a copy of your key on file.
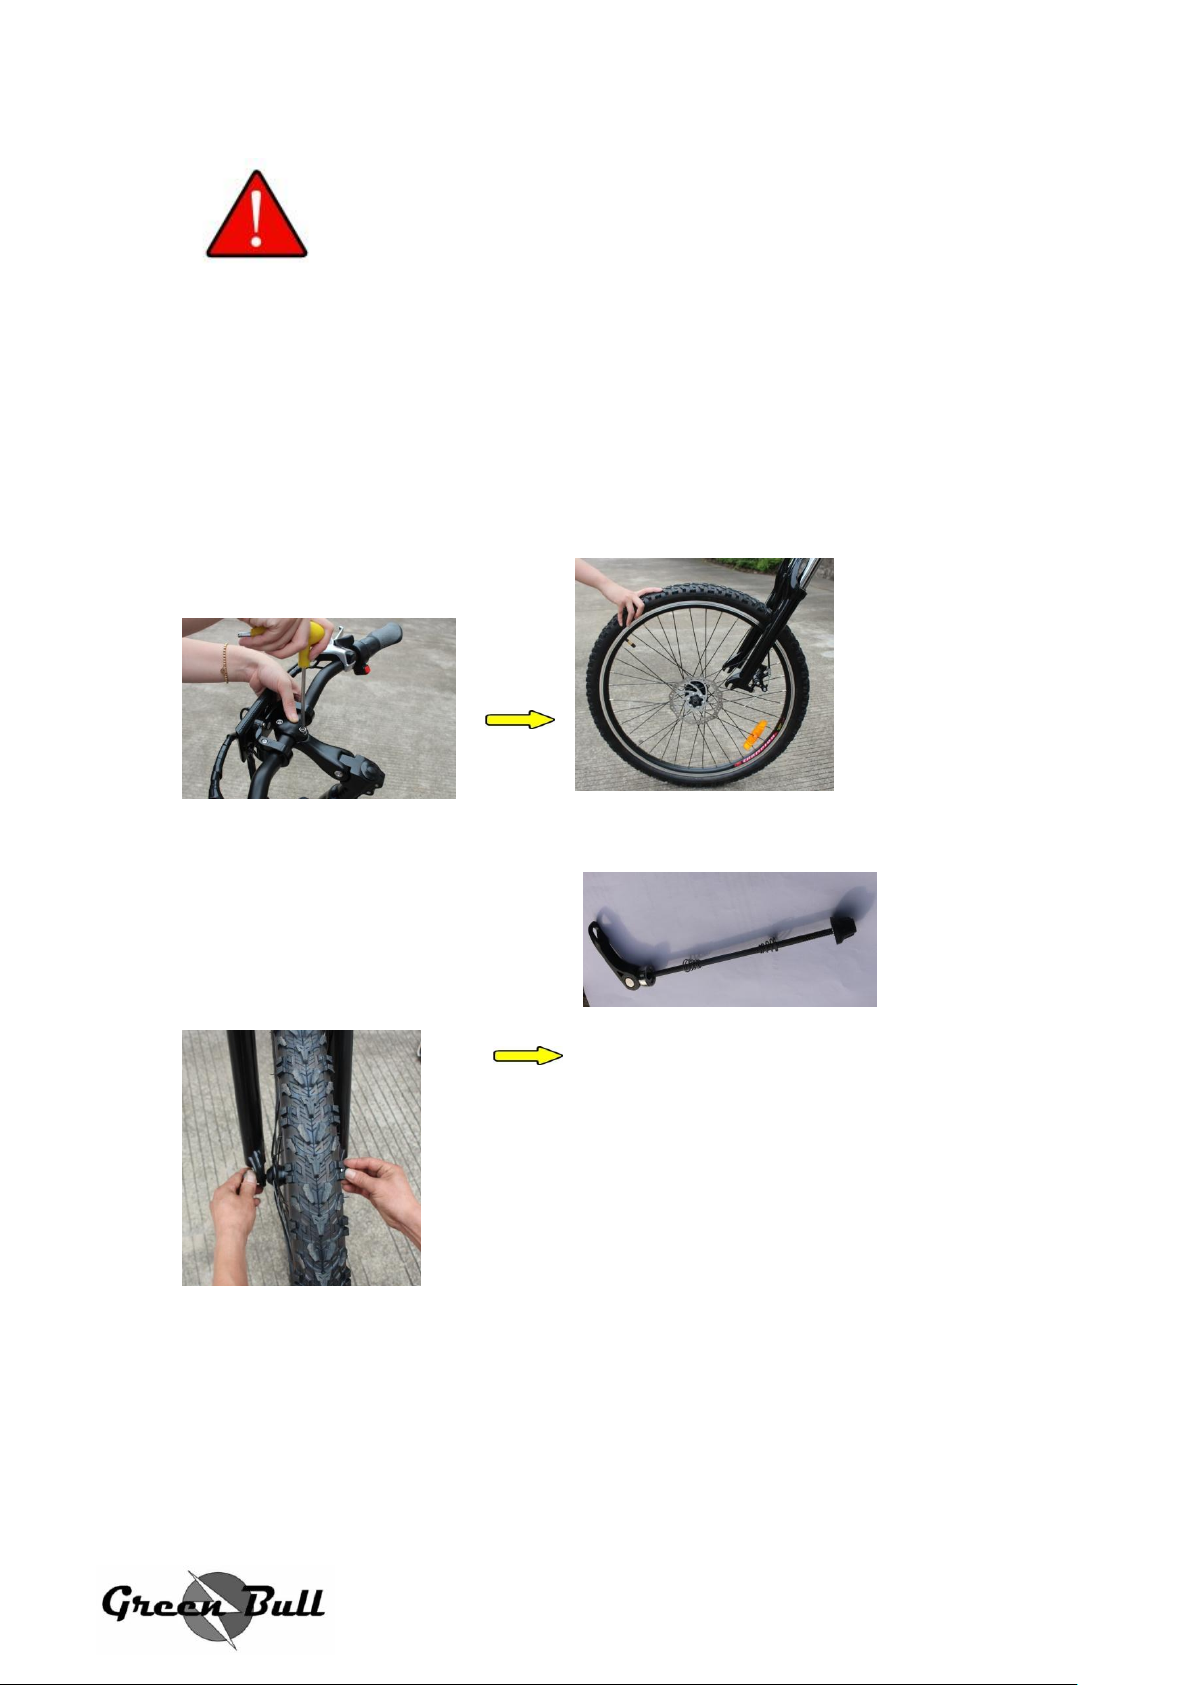
Assemble the Bike: Stem & Handlebars, Front wheel
Tools required( received in your Tool Kits)
1x Tool Kits: 5x Hex Wrenches (2mm,3mm,4mm,5mm,6mm)
3x Wrenches, double sided (8mm 10mm,13mm 15mm, 14mm 17mm)
1x Screwdriver, double sided (star & slot configuration)
3
Step:
1. Tighten the stem,
2. Insert front tire
3. Use the Axle to fixed the front wheel
4. Tighten the screw on one side on Axle
5. Tighten the Quick remove button on other side on Axle
6. Front wheel finished
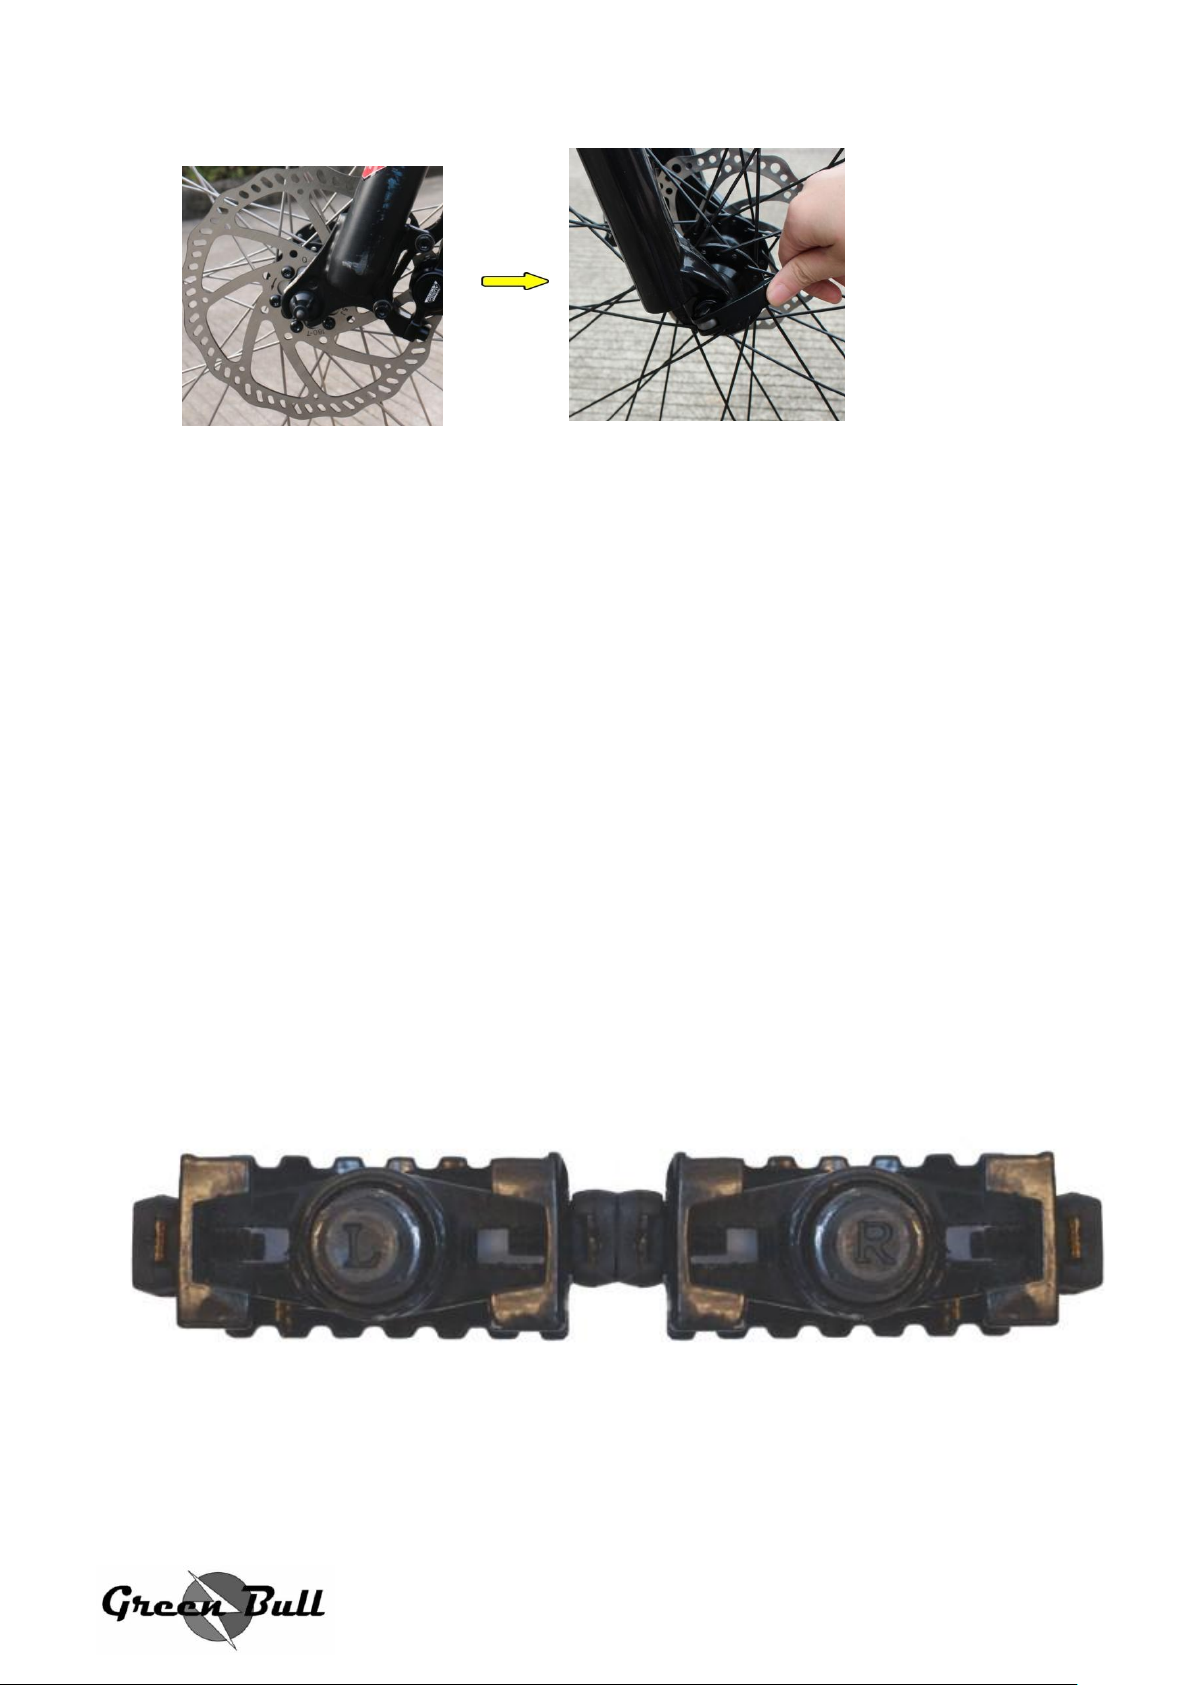
Assemble the Bike: Pedals ,Front light ,Seat & Tire Pressure
1. Pedals
Note: “L” and “R” (“L”=left & “R”=right ) is stamped on the threaded ends of the
pedals. The pedals have opposite thread directions and must go on a specific
side of the bike. Left and right side of the bike is determined by sitting on the
seat.
The Left Pedal has a reverse , non-standard thread and must be turned
counter clockwise to be screwed in.
4
 Loading...